Canadian Salmon Pie

Salmon pie is a variation on a classic Canadian Christmas meat pie from Quebec called a ‘tourtiere’. Fundamentally, tourtiere is a pie that contains meat and spices baked in a flaky crust. The meat is generally diced or ground, including any or all of pork, veal, beef or wild game. No matter what the meats used, or the presence or absence of potato, bold seasoning is the rule for all varieties. The four original spices used in the classic tourtiere are cinnamon, cloves, allspice and nutmeg. Like so many of these recipes that have been ‘handed down’ over generations, each family alters it to suit their taste. 

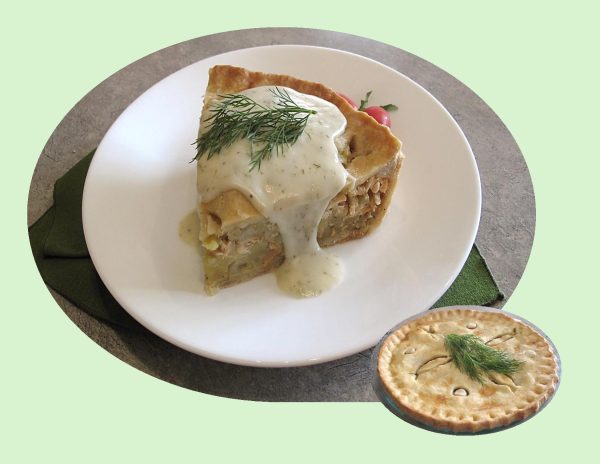
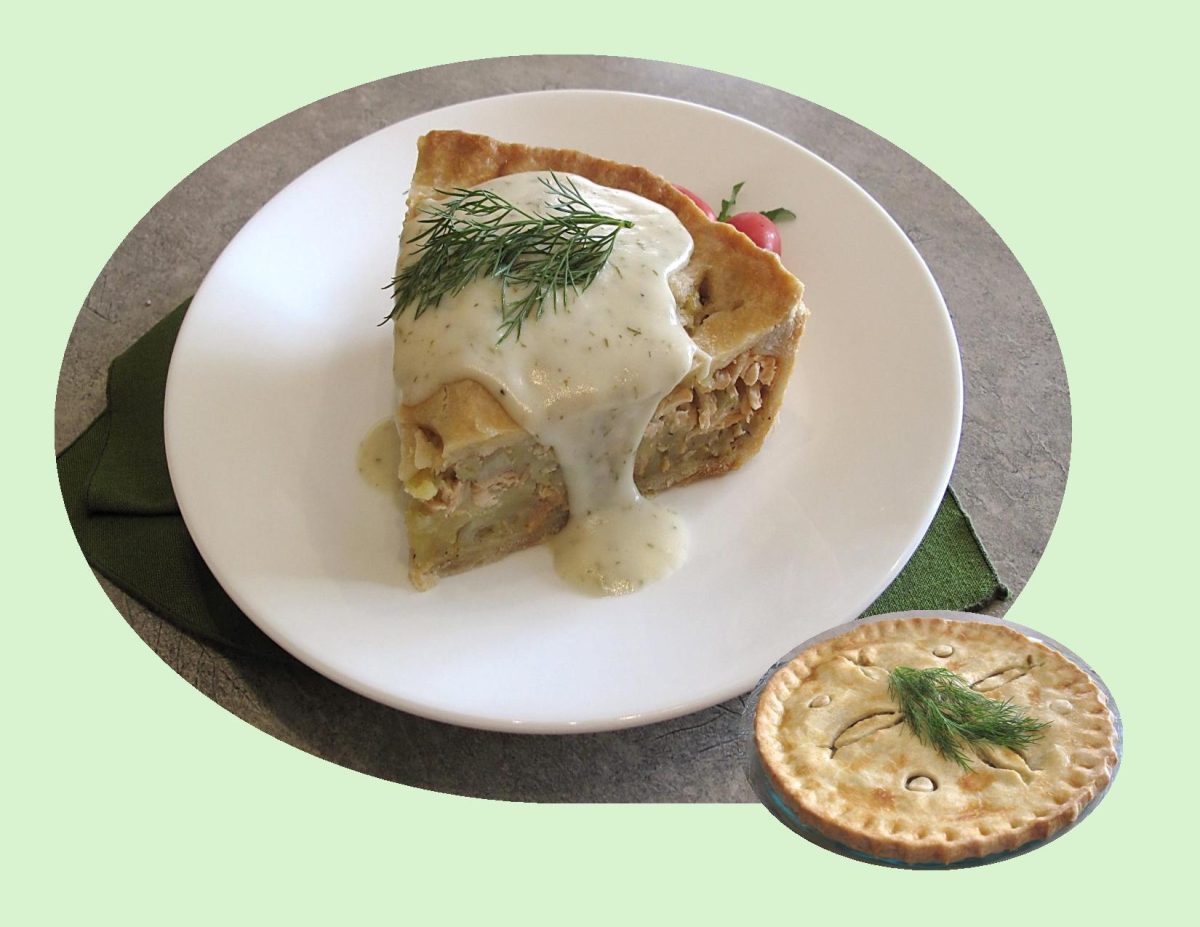
The salmon pie version takes the same meat pie concept, but uses flaked, cooked salmon that is seasoned and mixed with mashed potatoes.

I thought it would be nice to have some salmon pie before we get into all that Christmas turkey. The lemon dill sauce is such a nice condiment to go with it.
Print Recipe
Canadian Salmon Pie
Votes: 1
Rating: 5
You:
Rate this recipe!
Cuisine American
Servings
Ingredients
Pastry
Salmon Filling
Lemon Dill Béchamel Sauce
Cuisine American
Servings
Ingredients
Pastry
Salmon Filling
Lemon Dill Béchamel Sauce
Votes: 1
Rating: 5
You:
Rate this recipe!
Instructions
Pastry
  1. In a large bowl, combine flour & salt. Cut in butter until mixture is an even crumbly texture. Add cold water a Tbsp at a time & mix until dough comes together. Shape the dough into a disc, wrap & chill in the refrigerator. While pastry is chilling prepare filling.
Salmon Filling
  1. Wash & peel potatoes. Cut into chunks & boil in a medium size pot of water until tender, about 12 minutes. Drain, mash & set aside.
  2. Melt butter in a large skillet over medium heat. Add the onions & sauté until they are softened, about 5 minutes. Add 1/2 cup water, thyme & Old Bay seasoning to skillet.
  3. Season the salmon fillet with salt & pepper & place it into the skillet skin side down. Spoon liquid & onions over salmon, cover the skillet & cook until the salmon is opaque, about 5 minutes. Turn off the heat & let salmon cool slightly.
  4. Remove the skin & break salmon into pieces. Add the salmon, onions & poaching liquid to the mashed potatoes & mix to combine. Taste & adjust salt & pepper if needed. While the salmon pie is baking, make the dill béchamel sauce.
Lemon Dill Béchamel Sauce
  1. Melt the butter in a small saucepan over medium heat. Add flour & whisk until smooth. Gradually add milk, stirring constantly. When sauce begins to thicken, add the lemon juice, dill and salt & pepper to taste. Simmer for 2 minutes. Keep warm until ready to serve.
Serving
  1. Remove pie from oven & let it cool for at least 10 minutes before serving. Cut pie into wedges & drizzle with lemon dill sauce. Serve warm.

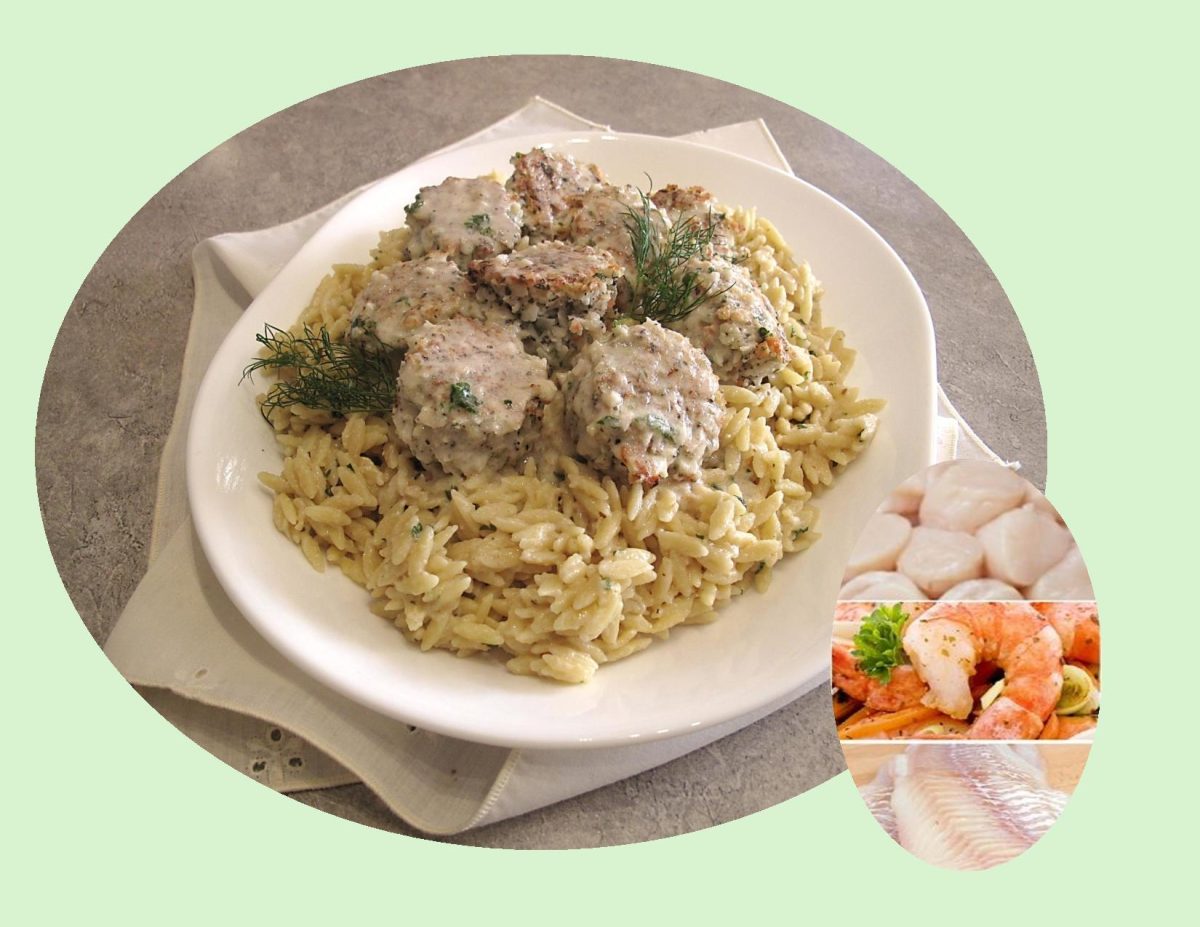
Seafood Meatballs w/ Orzo

Meatballs have become a beloved culinary delight in various cuisines around the world. The concept of combining ground meat with other ingredients to form compact balls can be traced back to ancient civilizations.

While commonly associated with Italian cuisine, the origin of meatballs is a tale that stretches across time and cultures.

Sweden has made its mark on the global meatball scene with its distinctive version, known as köttbullar. Swedish meatballs gained international recognition, thanks in part to the association with the popular furniture retailer, IKEA.

The Middle East boasts its own variation of meatballs, known as kofta. Kofta has a long history in the region and can be found in various Middle Eastern and Mediterranean countries, including Turkey, Lebanon, Egypt, and others.

Meatballs have traveled the world, adapting and evolving to suit different tastes and ingredients.

Asian cuisines have their own variations of meatballs. In Thailand, fish balls are popular street food made from a paste of minced fish, mixed with herbs, spices, and sometimes starch to achieve a firm texture. They are usually served in soups, stir-fries, or on skewers with dipping sauces.

As immigrants from various countries arrived in North America, they brought with them their culinary traditions, including their beloved meatball recipes.

In recent years, the popularity of global cuisine has further fueled the creativity and innovation around meatballs in North America. Food trucks and trendy restaurants offer inventive variations, such as fusion meatballs with a blend of different cultural flavors or vegetarian and vegan alternatives made with plant-based ingredients like lentils, mushrooms, or chickpeas.

Today, meatballs in North America can be found in a variety of forms and flavors, reflecting the country’s multicultural heritage.

Whether enjoyed in a tomato-based sauce with pasta, in a creamy gravy with lingonberry sauce, or alongside aromatic rice and fragrant spices, meatballs continue to satisfy appetites. The enduring popularity of meatballs is a testament to their versatility and the universal appeal of a simple, comforting dish.

Print Recipe
Seafood Meatballs w/ Orzo
Votes: 1
Rating: 5
You:
Rate this recipe!
Servings
MEATBALLS
Votes: 1
Rating: 5
You:
Rate this recipe!
Instructions
Orzo
  1. Bring 2 1/2 cups vegetable broth to a boil & cook orzo until tender. Drain excess vegetable broth from orzo & reserve. Set orzo & reserved water aside.
Sauce
  1. In a saucepan over medium heat, melt butter & add the garlic. Cook 3-4 minutes while stirring. Whish in remaining sauce ingredients. Simmer 4-5 minutes, stirring until sauce slightly thickens. Remove from heat.
Seafood Meatballs
  1. In a small bowl, mix the eggs & lemon juice. Place all meatball ingredients (except the olive oil) in the bowl of a food processor & pulse until combined.
  2. In a large saucepan, heat olive oil over medium-low heat. Scope seafood mixture (makes 20 balls) into saucepan. Using a large spoon, continuously turn the meatballs until all sides obtain a golden brown color. Place meatballs on a plate lined with paper towel.
Serving
  1. On a large platter, place orzo & top with seafood meatballs. Drizzle sauce over all. Place in the microwave for a couple of minutes just to ensure everything is hot for serving.

Pork & Apple Bedfordshire Clanger w/ Cheddar-Sage Pastry

The Bedfordshire Clanger is a very unique and little-known meat pie recipe from England, specifically (not surprisingly) from the county of Bedfordshire, a small, low-lying and predominantly agricultural county nestled in the east of England.

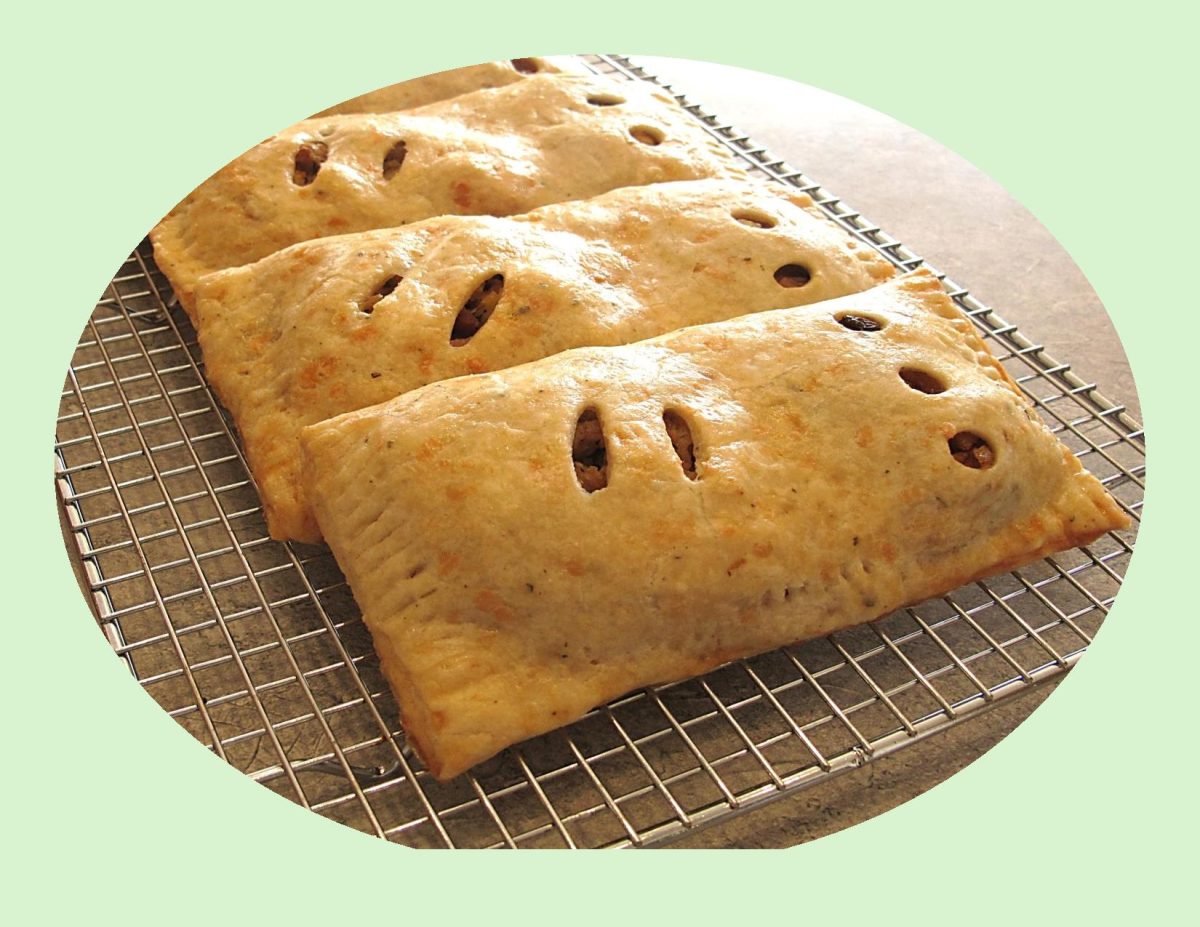
In centuries past many of the working husbands of the area used to toil in the fields there. Their wives, knowing their husbands would need lots of protein and carbohydrate sustenance, came up with the brilliant idea of a doubled, loaf-shaped pie. One end contained a savory filling that used the famed pork of the area while the other end was filled with stewed apples (made from the famed local apples) as dessert. So, the two fillings didn’t combine, there was a ‘pastry wall’ in between blocking any flavors from mixing. A ‘secret code’ denoted which end was meat and which was dessert: two knife slits on one end of the pastry top means meat, three small holes on the other shows the sweet. This was brilliant, an entire meal for the hard-working man – handheld, portable and delicious

I guess you could say, the Bedfordshire clanger is not only a tasty treat but also a piece of culinary history that has stood the test of time!

Print Recipe
Pork & Apple Bedfordshire Clanger w/ Cheddar-Sage Pastry
Votes: 1
Rating: 5
You:
Rate this recipe!
Servings
CLANGERS
Votes: 1
Rating: 5
You:
Rate this recipe!
Instructions
Pastry
  1. In a medium bowl, whisk together the flour, sage & salt. Sprinkle the butter cubes over the flour mixture & use your fingers to work them in. Alternately you could use a pastry cutter to do this.
  2. When the mixture resembles cornmeal with pea-sized bits of butter remaining, stir in cheese with a fork until evenly distributed. Sprinkle 6 Tbsp ice water over mixture & stir with a fork until dough begins to come together. If needed, add an additional Tbsp or two of ice water.
  3. Turn the dough out onto a lightly floured surface & knead for about three times. Gather the dough into a disk & wrap in plastic wrap. refrigerate for at least 30 minutes or overnight.
Pork Filling
  1. Bake potato in microwave, peel & cut into small cubes. Set aside.
  2. Heat oil in a skillet & sauté celery, onion, garlic & bacon together on medium heat until veggies are soft & bacon is cooked. Add ground pork, breaking it up well. Stir in dried herbs & spices. Cover & simmer for about 10 minutes.
  3. Remove from heat & stir in cooked potato & cheese. Set aside to cool.
Apple Filling
  1. In a small saucepan, combine butter, water, cinnamon & brown sugar. Bring to a simmer then add diced apples, raisins, lemon zest & juice. Gently simmer for 5 minutes. Remove from heat & allow to cool.
Assembly/Baking
  1. Divide pastry into 5 equal pieces. On a lightly floured surface (or dry wax paper) roll out each piece of pastry into 7 x 7 1/2-inches. The excess trimmed from the sides will be used for little pastry ‘walls’ dividing the sweet & savory fillings. Roll the excess into a 3-inch length.
  2. From the top of each piece, LIGHTLY make a line across your pastry 4-inches from outside edge. This will help to place your fillings properly.
  3. On the 3-inch wide section of the pastry, place savory filling to cover 2/3 of the area. Place one of the rolled strips after that then place sweet filling on the remaining 1/3 to complete the 'clanger'. The little rolled piece of pastry divides the savory & sweet filling.
  4. On the sweet side make 3 holes for vents & on the savory side make 2 slashes. This is the 'code' to let the person eating the clanger which was savory or sweet.
  5. Preheat oven to 350 F.
  6. Brush the edges of each pastry with egg wash. Lift the pastry from the opposite side over the fillings & seal the edges with a fork.
  7. Brush clangers with remaining egg wash & bake for about 30-35 minutes or until golden.

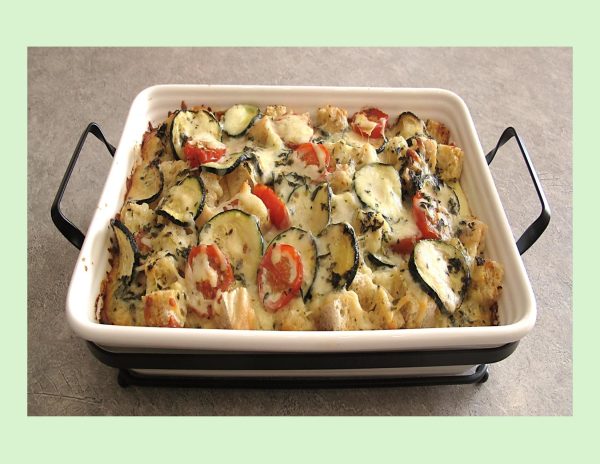
Tomato Zucchini Strata

CELEBRATING LABOR DAY!

It’s hard to believe Labor Day weekend is here already! In our part of the world, it signals the last of those coveted summer days. Celebrated in Canada as a national statuary holiday weekend. Labor Day weekend gives us an opportunity to enjoy family & friends before summer is officially over.

Part of Canada’s appeal is its four seasons: Winter, Spring, Summer & Fall. We are entering the season of the fall harvest and the leaves on the trees begin their transformation to stunning shades of orange, red and yellow.

When I was giving thought to food for this day, a nice seasonal vegetable strata came to mind. For most families there’s ‘places to be and things to see’ on this day so why not start it with a breakfast dish that can be prepared the day before and baked in the morning.

Unlike quiche and frittata, strata originated in North America. The first known recipe, the cheese strata, dates back to 1902 and contains bread, white sauce and cheese.

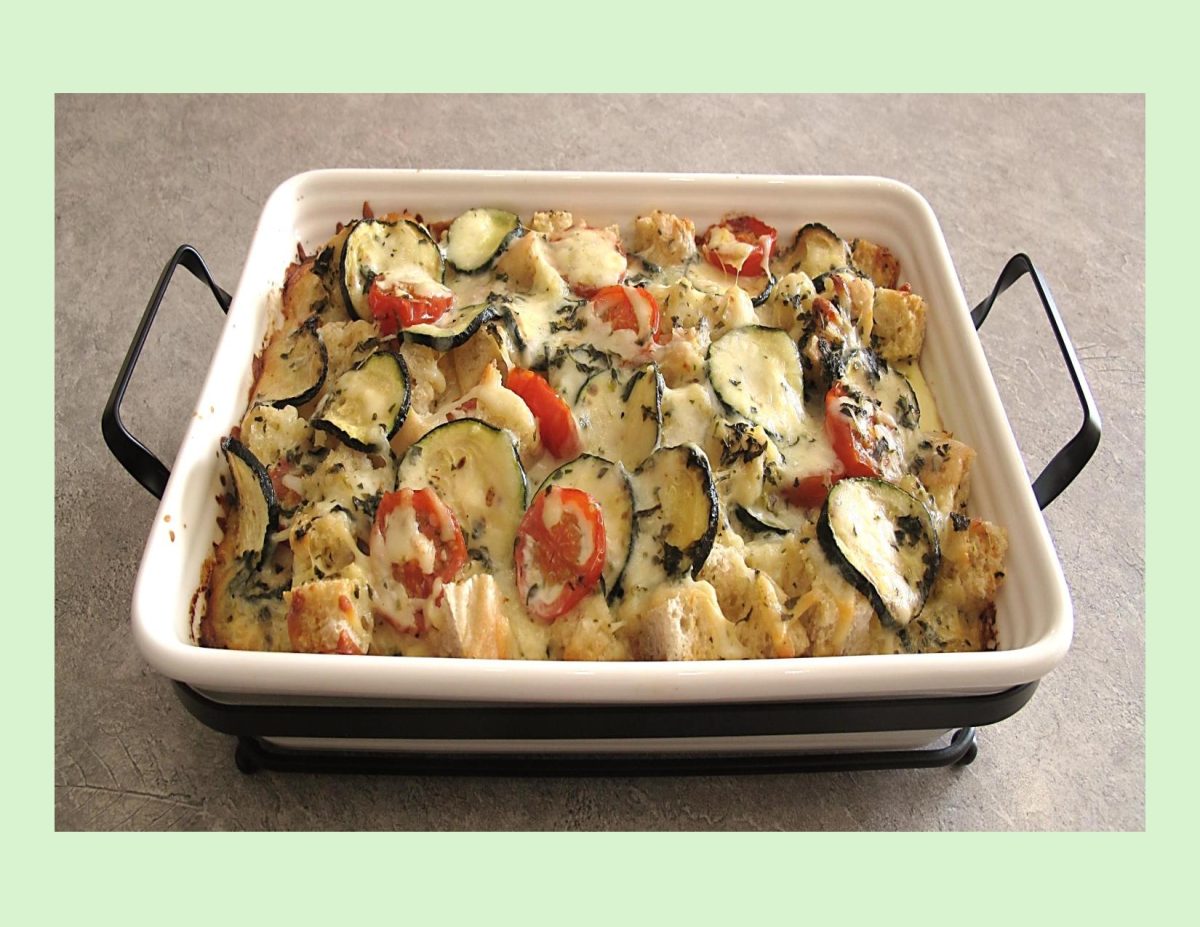
A strata is usually a savory egg-bread casserole that’s baked in the oven or microwaved. Strata’s can be made with a variety of fillings including meats, cheese, vegetables or fruits. Usually, the bread and fillings are layered in a casserole dish with the egg mixture poured over top.  The dish can be prepared the night before (or at least 2 hours before cooking) to allow time for the bread to soak up some of the egg mixture. What you’re left with is a fluffy, bread-pudding-like meal that’s completely customizable using your favorite ingredients.

Hopefully this strata will be a good choice for your family on this holiday.

Print Recipe
Tomato Zucchini Strata
Votes: 1
Rating: 5
You:
Rate this recipe!
Course Brunch
Cuisine American
Servings
Course Brunch
Cuisine American
Servings
Votes: 1
Rating: 5
You:
Rate this recipe!
Instructions
  1. In an extra-large skillet, melt butter over low heat. Add tomatoes & zucchini. Cook for 5 to 7 minutes, stirring occasionally, or until tomatoes begin to lose their firm round shape; remove from heat.
  2. Place half of the bread cubes in a greased 2-quart baking dish. Top with half of the zucchini mixture & half of the cheese. Repeat layers with remaining bread cubes, zucchini mixture & cheese.
  3. In a large bowl, whisk together eggs, milk, parsley, basil, chives, garlic salt & pepper. Carefully pour egg mixture evenly over bread mixture in dish. Using the back of a spoon, gently press down on layers. Cover and chill at least 2 hours or up to 24 hours.
  4. Preheat oven to 325 F.
  5. Remove casserole from fridge. Bake for 60 minutes or until puffed, golden & set. Let stand for 10 minutes before serving.

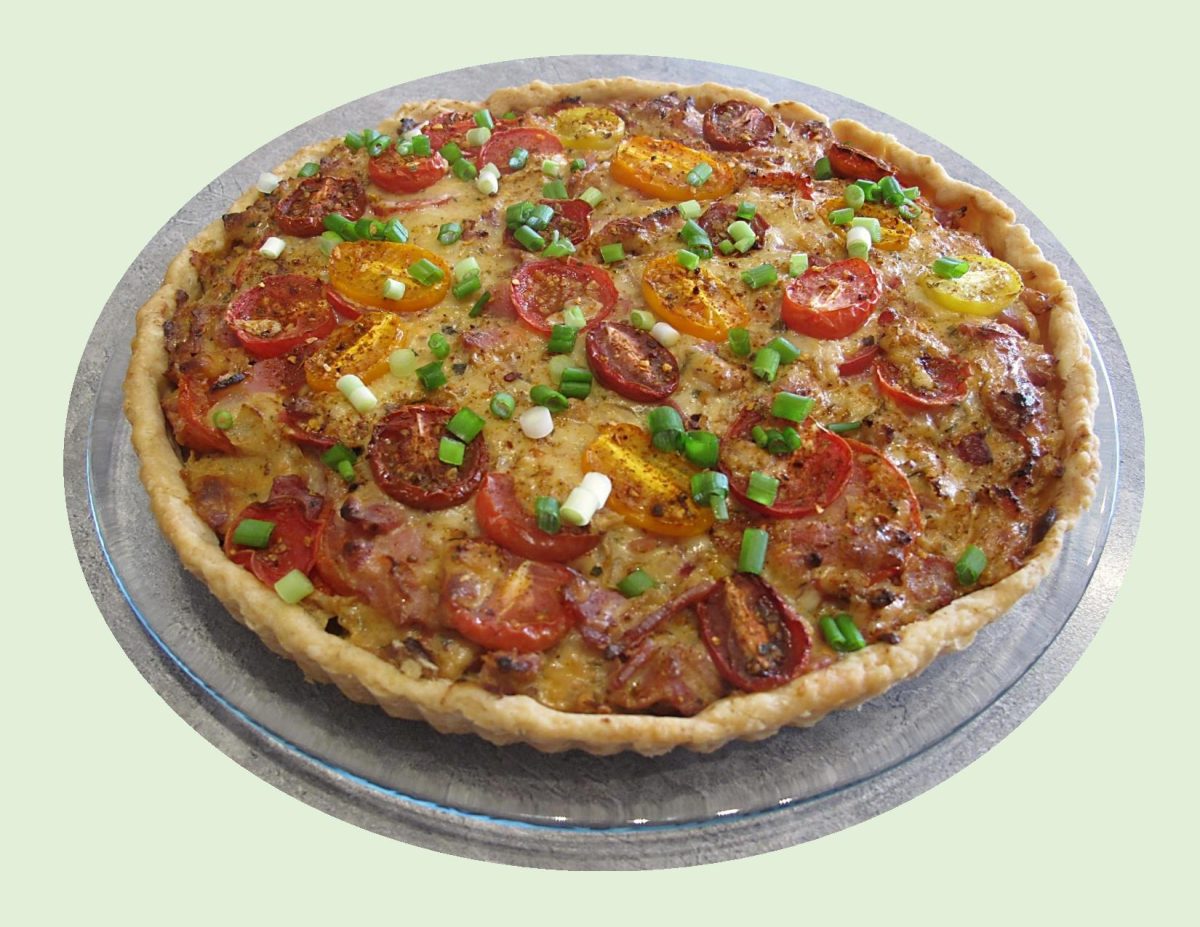
Savory Heirloom Tomato Tart

There’s something real special about using heirloom tomatoes as opposed to hybrid varieties. Heirloom tomatoes are ‘breed true’, meaning that the seeds can be saved to grow more of the same tomatoes year after year.  Generally, they are more expensive because they are not as prolific as hybrids, and they do not ship or store well.

The seeds from heirloom tomatoes (also called heritage tomatoes) have been selected over many years for desirable traits, such as size, color, and taste.  They are open-pollinated, meaning that bees, moths, birds, bats, wind, or rain pollinate the tomato flowers.

These days, many hybrid tomatoes are bred for traits such as high yield, disease resistance, and the ability to ship and store well.  This decreases costs for farmers and consumers and minimizes waste due to spoiled produce.

However, this cost savings and efficiency comes at the expense of flavor.  When you cross two tomato plants to make the offspring disease resistant or highly productive, you may also lose other traits, such as rich flavor.

This is exactly what has happened to many hybrid tomato varieties: they have lost some of the sugar and nutrient content that makes heirloom tomatoes taste sweeter and juicier. These little gems add such a special touch to this savory summer tart.

Print Recipe
Savory Heirloom Tomato Tart
Votes: 1
Rating: 5
You:
Rate this recipe!
Servings
Ingredients
Servings
Ingredients
Votes: 1
Rating: 5
You:
Rate this recipe!
Instructions
Filling
  1. Preheat oven to 400°F. Cut tomatoes into ½-inch-thick slices. Place about 7 or 8 slices (enough to cover top of pie) on a baking sheet lined with paper towels, and sprinkle with ¼ teaspoon of the salt. Cover with additional paper towels, and reserve.
  2. Arrange remaining tomatoes in a single layer on a lightly greased wire rack set on a large baking sheet. Sprinkle with ½ teaspoon of the salt. Bake in preheated oven until wilted and slightly dried out, 40 to 45 minutes. Cool completely, about 1 hour.
  3. Make Parmesan-Buttermilk Pie Crust. Instructions below.
  4. While pie crust cools, cook bacon in a skillet over medium-high until fat is beginning to render, 4 to 5 minutes. Add chopped shallots, and cook until bacon is crisp and shallots are caramelized, 6 to 7 more minutes. Stir in garlic; cook until fragrant, about 1 minute. Using a slotted spoon, transfer bacon mixture to a plate lined with paper towels to drain. Cool 20 minutes.
  5. Stir together cheese, ranch dressing, basil paste, chives, Dijon, and egg until combined. Sprinkle with pepper and remaining ¼ teaspoon salt & spices. Fold in bacon mixture.
  6. Gently spread a third of cheese mixture onto cooled Parmesan-Buttermilk Crust; layer with half of the roasted tomato slices in slightly overlapping pattern. Spread another third of cheese mixture on top of tomato slices. Repeat with remaining roasted tomato slices and cheese mixture. Top with reserved sliced fresh tomatoes, pressing filling gently into crust. Shield edges of pie with aluminum foil.
  7. Bake in preheated oven until filling is set, 40 to 45 minutes. Transfer to a wire rack, and let stand 1 hour before serving. Garnish with chopped green onion or chives.
Pastry
  1. Pulse flour, cheese, 1/2 teaspoon salt, and 1/4 teaspoon pepper in food processor until combined. Add butter and shortening. Pulse until butter and shortening are pea size pieces, about 5 times. Drizzle in buttermilk processing until dough begins to just come together. Gather and lightly knead dough into a ball on a large piece of plastic wrap; flatten into disk and wrap tightly. Chill at least 2 hours or up to 2 days.
  2. Preheat oven to 400°F. Roll dough on a floured surface into a 15- to 16-inch circle about 1/3 inch thick. Transfer to a 9-inch deep dish pie plate. Trim edges leaving a 1-inch overhang. Fold edges under and crimp. Freeze dough at least 20 minutes.
  3. Line piecrust with parchment paper, and fill with pie weights or dried beans. Bake at 400°F 20 minutes. Remove parchment and weights and bake until edges are golden and bottom of crust is set, about 8 more minutes. Cool completely, about 30 minutes.
Recipe Notes
  • Whether using store-bought or homemade dough, don't forget to blind-bake the crust (bake it a bit on its own) before adding the filling. This extra step will keep the crust from turning soggy as the pie bakes.
  • Another good pastry alternative would be one with cornmeal in it.

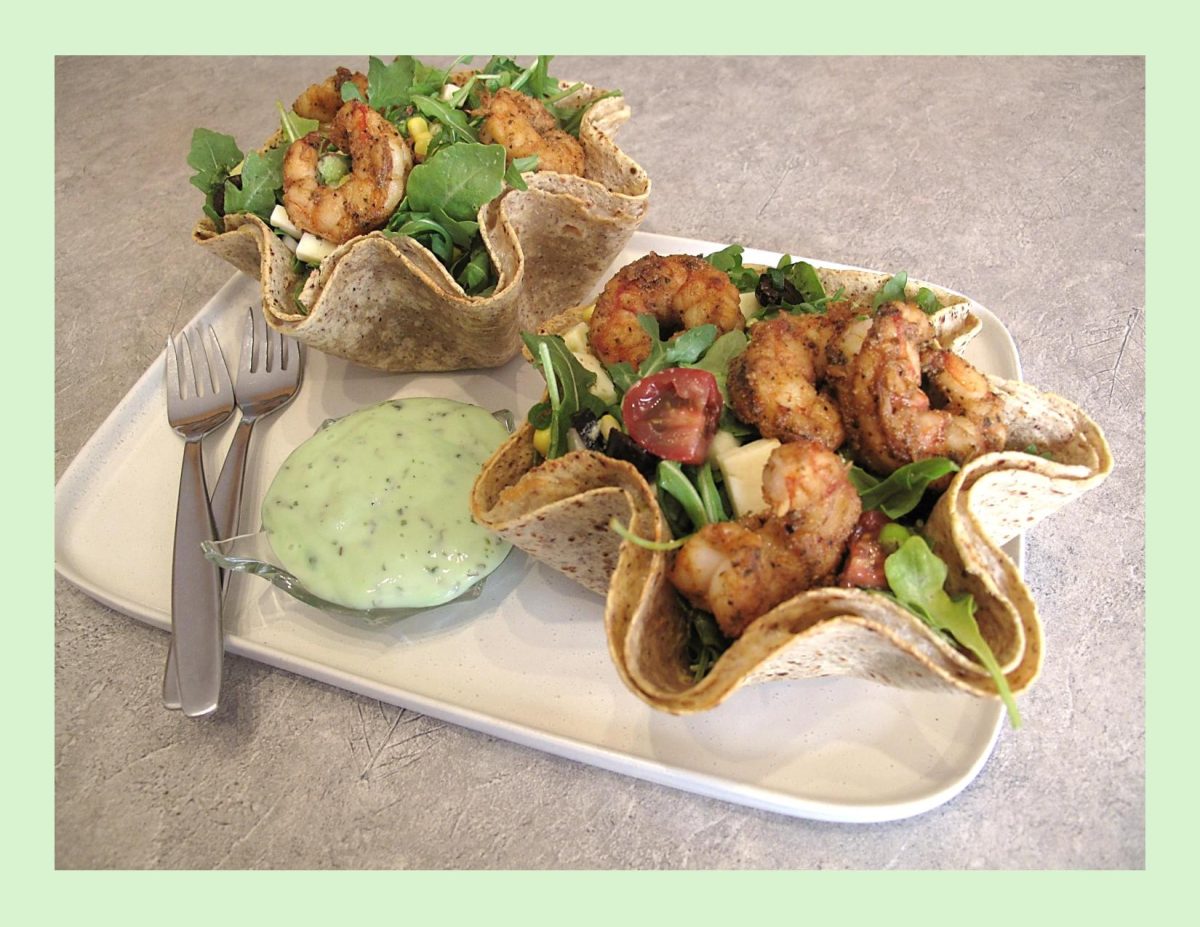
Shrimp Taco Salad

When you think of Mexican food you probably think of the standard burritos, nachos and quesadillas. While those dishes are definitely tasty why not do the summer ‘thing’ and incorporate these ingredients in a salad.

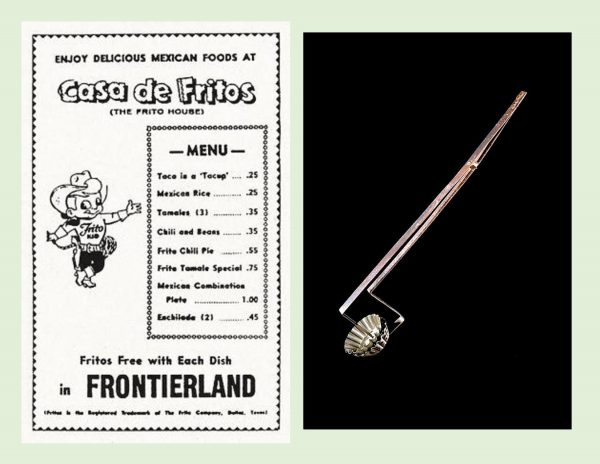
The idea of a full meal salad has always appealed to me. Of course, there are many of these using a variety of ingredients. Probably one of the most popular was the taco salad. The earliest record of it dates back to the 1960’s with its predecessor being the small teacup sized ‘Tacup’. It consisted of beef, beans, sour cream and cheese, served in a small ‘bowl’ made entirely of a Fritos tortilla.

The taco in a Tacup was invented by Charles Elmer Doolin, the founder of Fritos (tortilla chips). He created a device that looked like tongs but with two tart molds at the end of each tong. One mold would fit within the other mold with a tortilla sandwiched between them. The scalloped-edged shell was dipped into hot oil. Holes in the bottom mold exposed the tortilla to the hot oil, enabling it to cook evenly.

Tacups were first served in Dallas, Texas in the early 1950’s and by 1955, he was selling them in Fritos’ flagship restaurant, ‘Casa de Fritos’, at Disneyland in Anaheim, California. It became popular enough that the Tacup was made bigger and served as a full, main-dish sized salad bowl.

Today’s salad is a satisfying meal, a seriously feel-good dinner salad that’s crisp, spicy, and fresh all at once. Tacos de camarones (‘shrimp tacos’) originated in Baja California in Mexico. But these shrimp tacos in salad form gives you that full meal deal. All the very best elements —seasoned shrimp, healthy fresh veggies, in an edible tortilla bowl with a homemade cilantro lime dressing.

Print Recipe
Shrimp Taco Salad
Instructions
Cilantro Dressing
  1. In a food processor, place the cilantro, garlic, avocado, lime juice, honey, coriander & salt. Pulse to combine. With the machine is running, pour in the olive oil & process until smooth.
Shrimp
  1. In a medium bowl, add all marinade ingredients (except shrimp) & blend well. Add shrimp tossing well to coat. Set aside to marinate for 15 minutes. In a saucepan, melt a Tbsp butter then sauté shrimp over medium-high heat for 5 minutes or just until shrimp is cooked.
Salad Ingredients
  1. In a saucepan, fry bacon until cooked but not too crisp, drain on paper towel & chop. Drain canned or cook fresh corn on the cob & remove kernels from cob. Peel, pit & cube avocado. Sprinkle a bit of lime juice on it to keep it from going brown. Halve grape tomatoes. Slice green onions, chives & dill. Drain sliced black olives. Cube cheese.
Tortilla Bowls
  1. Preheat oven to 350 F.
  2. Brush inside of 2 heat resistant glass bowls with oil. Place one tortilla in each bowl so that the shape more or less adheres to the bowl. Line each tortilla with cheese slices then place a second tortilla on top.
  3. Place the bowls with the layered tortillas in the oven & bake for 7 minutes. Remove the bowls from the oven & allow to cool before removing the 'edible tortilla bowls'.
Assembly
  1. Place tortilla bowls on serving plates. In a large mixing bowl place shrimp & all salad ingredients. Toss gently, then divide between tortilla bowls. Drizzle with cilantro dressing (or dressing of choice) & serve.

Pork & Apple Skewers

Cooking pork with apples could be one of humanity’s most ancient recipes. This combination appears in some of the oldest known cookbooks. The more recent ancient history of apples and pork is easier to decipher since European cooks began recording their recipes from around the fourth or fifth century AD onward. The continent’s earliest recipe collections paint the history of how cooks stewed apples and pork together, and sometimes crushed the fruit into sauces.

The association of pigs with apples is obvious at one level – pigs were often let to graze in apple orchards, where they could feast on the windfalls, so the fruit was converted by the pig’s metabolism into pork, instead of rotting into compost and being ‘wasted’ as a food source. Apples are ripe in autumn, which was also the traditional time for culling the surplus stock that could not be overwintered. The pig was the victim of choice here as much of it was eminently preservable for winter use in the form of sausages, ham, and bacon. The fresh cuts were enjoyed at the time in a fresh meat feast which would be the last for a long time – and as the apples were ripe and in abundance at the same time ….. apple sauce with pork made sense.

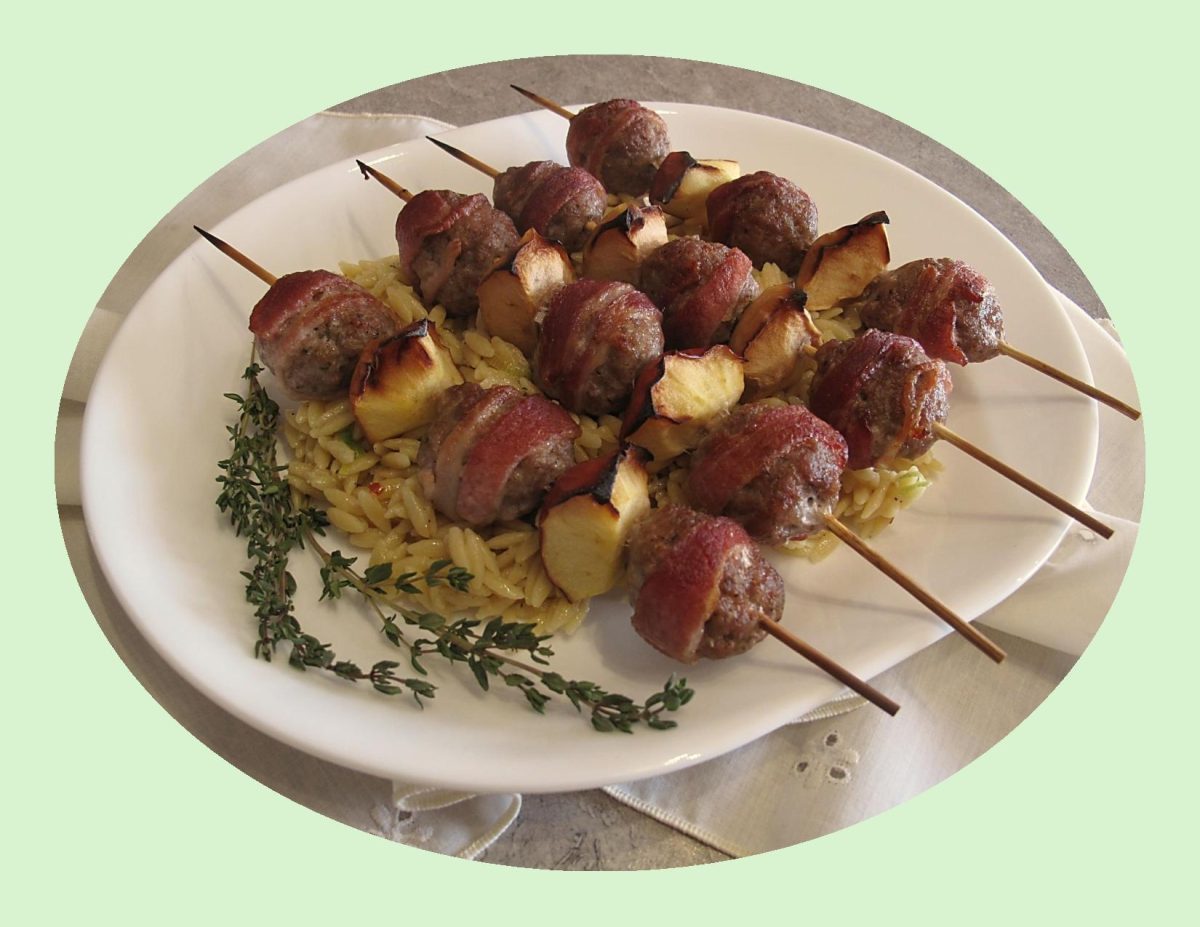
Generally, when I make pork skewers, I like to use pork tenderloin. But when I saw this recipe on the internet, the ingredients and the look got my attention. The idea of wrapping each meatball in bacon and barbecuing them with apple chunks sounded so good. There is something special about the sweet taste of apples and the full flavor of pork that work so well together.

Print Recipe
Pork & Apple Skewers
Votes: 1
Rating: 5
You:
Rate this recipe!
Course Main Dish
Cuisine American
Servings
SKEWERS
Course Main Dish
Cuisine American
Servings
SKEWERS
Votes: 1
Rating: 5
You:
Rate this recipe!
Instructions
  1. Soak 5 wooden skewers in cold water for about 30 minutes.
  2. In a bowl, combine all meatball ingredients & form into 18 balls. Wrap each meatball with a half slice of bacon. Prepare apples.
  3. Assemble skewers starting with a meatball then a piece of apple, another meatball, apple & end with a meatball.
  4. Preheat the BBQ to medium heat & cook the skewers on each side to brown the bacon well.
Recipe Notes
  • Brion & I enjoyed this meal with some creamy orzo parmesan pasta.

Bedfordshire Clangers w/ Variations

July is such a wonderful month. The weather’s warm, there’s still plenty of summer left, and the produce is literally amazing.

Midsummer means the farmer’s markets are brimming with great fruit & veggies. With such a colorful bounty of goods, we can settle into our summer cooking routines with tasty meals hot or cold.

But, even in summer, we sometimes crave ‘comfort food’ such as a ‘hand pie’. The humble hand pie goes by many different names: call it a pasty, a turnover, an empanada, or a ‘Bedfordshire clanger’….

A Bedfordshire Clanger dates back to at least the 19th century. It was typically made for agricultural workers to take with them to work as their lunch. The original pastry was made from suet and cooked by a boiling method. There is a theory that the pastry crust was not originally intended for consumption but as a vessel in which to protect the filling from the soiled hands of the workers.

The clanger originated from the county of Bedfordshire, a small, low-lying and predominantly agricultural county nestled in the east of England and adjacent counties, including Buckinghamshire and Hertfordshire. 

The name is as intriguing as the food itself. The word clanger, it had been suggested, referred to the mistake of mixing sweet and savory fillings. But a more likely explanation was that in nearby Northamptonshire dialect, ‘clang’ means to eat voraciously.

Knowing their husbands would need lots of protein and carbohydrate sustenance, homemakers came up with the brilliant idea of a doubled, loaf-shaped pie. One end contained a savory filling that used the famed pork of the area while the other end was filled with stewed apples (made from local apples) as dessert. So, the two fillings didn’t combine, there was a ‘pastry wall’ in between blocking any flavors from mixing. A ‘secret code’ denoted which end was meat, and which was dessert: two knife slits on one end of the pastry top means meat, three small holes on the other shows the sweet. This was brilliant, an entire meal for the field workers – handheld, portable and delicious.

The version we have today is not its beginnings but its evolution. Once you’ve nailed this basic Bedfordshire clanger recipe you can experiment with all sorts of flavor combos, there’s really no limit to what you can combine in this savory/sweet pastry.

Since Brion takes lunch to work, I became intrigued with the idea and decided to get creative with the fillings. That way I could make a variety and freeze them and use as needed. These tasty little ‘clangers’ can be served as the main course for a warm-weather picnic or for a hand-held, backyard meal with the addition of a nice fresh salad at home.

Print Recipe
Bedfordshire Clangers w/ Variations
Votes: 1
Rating: 5
You:
Rate this recipe!
Servings
Ingredients
Chicken w/ Caramelized Onions
Raspberry / Nectarine Filling
Blueberry Filling
Apple / Apricot Filling
Plum / Rhubarb Filling
Rhubarb / Apple Filling
Servings
Ingredients
Chicken w/ Caramelized Onions
Raspberry / Nectarine Filling
Blueberry Filling
Apple / Apricot Filling
Plum / Rhubarb Filling
Rhubarb / Apple Filling
Votes: 1
Rating: 5
You:
Rate this recipe!
Instructions
Pastry
  1. In a medium bowl, whisk together the flour, sage & salt. Sprinkle the butter cubes over the flour mixture & use your fingers to work them in. Alternately you could use a pastry cutter to do this.
  2. When the mixture resembles cornmeal with pea-sized bits of butter remaining, stir in cheese with a fork until evenly distributed. Sprinkle 6 Tbsp ice water over mixture & stir with a fork until dough begins to come together. If needed, add an additional Tbsp or two of ice water.
  3. Turn the dough out onto a lightly floured surface & knead for about three times. Gather the dough into a disk & wrap in plastic wrap. refrigerate for at least 30 minutes or overnight.
Pork Filling
  1. Bake potato in microwave, peel & cut into small cubes. Set aside.
  2. Heat oil in a skillet & sauté celery, onion, garlic & bacon together on medium heat until veggies are soft & bacon is cooked. Add ground pork, breaking it up well. Stir in dried herbs & spices. Cover & simmer for about 10 minutes. Remove from heat & stir in cooked potato & cheese. Set aside to cool.
Spiced Meat Combo
  1. In a saucepan, sauté onion & garlic. Add ground meat, basil, thyme, cardamom & salt & pepper. Scramble fry until cooked, remove from heat & add parmesan & potato. Place in a dish.
  2. In the saucepan, melt butter; add flour to make a roux. Cook, stirring constantly for 2-3 minutes. Slowly add beef broth, stirring until sauce thickens. Season to taste. Add to ground meat mixture & combine to form filling. Set aside until ready to use.
Turkey Filling
  1. In a skillet, cook bacon until just crisp, then remove to a paper towel lined plate to drain; chop when cooled. Remove all but 1 Tbsp of the bacon drippings from skillet.
  2. Add butter to the skillet, sauté onions, garlic & mushrooms with herbs & spices, scraping up any brown bits, until the onions have softened & mushrooms have lost most of their size & moisture. Stir in the bacon & shredded cooked turkey, taste for seasoning. Cook for another minute or two, then remove from heat & set aside.
  3. In a saucepan, combine Boursin, milk & spices (if using). Stir until Boursin has melted. Remove from heat. Add to turkey/veg mixture.
Chicken w/ Caramelized Onions
  1. Heat butter over medium low heat in a heavy ovenproof skillet. Add the onions cook for 20 minutes or so, stirring occasionally. When the onions are a deep golden color, remove them from the pan and set aside.
  2. Preheat oven to 350 F.
  3. Combine the flour, salt, chili powder, thyme, allspice, & black pepper. Dredge each piece of chicken in the flour mixture, shaking off the excess. In the same pan as the onions, heat the oil over medium high heat. Add each piece of chicken & fry for a few minutes until golden brown; flip & cook for a few more minutes. Transfer to a plate (it will not be fully cooked at this point, just browned – it will finish cooking in the oven).
  4. Turn the heat down & let the oil cool off a little bit. Make a roux with excess oil in skillet & dredging flour. Add chicken broth & cook until a sauce forms. Add the onions & chicken to the pan. Bake for about 20 minutes longer. When chicken/onion mixture is cooked, remove from oven. Allow to cool until ready to use.
Raspberry/Rhubarb Filling
  1. In a small saucepan, whisk together sugar, cornstarch, cardamom & salt. Add water & stir then add chopped nectarines. Simmer until nectarine is slightly soft & liquid is thickened. Remove from heat & carefully fold in raspberries. Set aside to cool.
Blueberry Filling
  1. In a small saucepan, combine all ingredients except blueberries. Cook until sauce starts to thicken then gently fold in blueberries & cook a couple of minutes more. Remove from heat & set aside to cool.
Apple/Apricot Filling
  1. Peel & dice apples. Drain canned apricot juice into a small saucepan. Add sugar, cornstarch, cinnamon & salt & combine. Add apples & cook until apples are tender. Cut canned apricot halves into quarters. When apples are cooked & sauce has thickened, remove from heat & add apricots. Gently combine & set aside to cool.
Plum/Rhubarb Filling
  1. In a small saucepan, combine sugar, cornstarch, salt & lemon zest. Add rhubarb & plums. Gently stir over a low heat. When enough juice has formed, allow to simmer until rhubarb is soft & juice has thickened. Remove from heat. Set aside to cool.
Sour Cherry Filling
  1. In a small saucepan, place sugar, cornstarch & salt. Add juice/water mixture & stir to thoroughly combine. Bring to a boil over medium-high heat, stirring frequently. Simmer until thickened, about 2 minutes. Immediately remove from heat. Gradually fold in cherries. Set aside to cool.
Rhubarb/Apple Filling
  1. In a small saucepan, add the rhubarb, apples, salt & sugar. Add a drizzle of water if necessary & heat on medium. The rhubarb will begin to release liquid & break down as the apples soften. Heat the mixture until the moisture has evaporated & begins to thicken. Once the mixture is thickened, add the lemon juice, lemon zest and cinnamon. Place it in a bowl & allow to cool.
Apple/Pear Filling
  1. Heat butter in a small skillet until melted, add apples & pears & cook until fruit begins to soften, about 5 minutes. Sprinkle sugar over mixture & continue to cook stirring often until fruit begins to lose its juices. Mix together cornstarch & lemon juice & add to pan. Simmer until mixture has thickened, about 4 minutes. Remove from heat & allow to cool.
Assembly/Baking
  1. Divide pastry into 5 equal pieces. On a lightly floured surface (or dry wax paper) roll out each piece of pastry into 14 x 7 1/2-inches. The excess trimmed from the sides will be used for little pastry ‘walls’ dividing the sweet & savory fillings. Roll excess pastry into a 3-inch length.
  2. Cut each piece of pastry in half horizontally so you have (2) 7-inch long pieces from each piece of pastry. From the top of each piece, LIGHTLY make a line across your pastry 4-inches from the outside edge. This will help to place your fillings properly.
  3. On the 3-inch wide section, place savory filling to cover 2/3 of the area. Place one of the rolled strips after that then place sweet filling on the remaining 1/3 to complete the 'clanger'. The little rolled piece of pastry divides the savory & sweet filling.
  4. On the sweet side make 3 holes for vents & on the savory side make 2 slashes. This is the 'code' to let the person eating the clanger which was savory or sweet.
  5. Preheat oven to 350 F.
  6. Brush the edges of each pastry with egg wash. Lift the pastry from the opposite side over the fillings & seal the edges with a fork.
  7. Brush clangers with remaining egg wash & bake for about 30-35 minutes or until golden.
Recipe Notes
  • Due to the length of this recipe, I found making the savory & fruit fillings on one day & the pastry, assembling & baking the next, worked out well for me. Although these pastries are VERY time consuming, believe me, the are well worth it in the end, especially if your freezing some to use later. I baked them all & then wrapped them well before freezing.
  • You will probably find there will be enough savory & sweet fillings left over to make about 10 more clangers.
  • All of them will freeze well which will be a time saver for your next batch. Just make a recipe of pastry & your ready to assemble & bake.
  • If your not interested in freezing the 'leftovers', the fruit combined will make a wonderful crisp & the savory fillings can be used in quiche or casseroles.

Baked Chicken w/ Tomato Bacon Relish

CELEBRATING FATHER’S DAY!

Honoring your father on Father’s Day doesn’t require his physical presence. I feel what is more important is just the act of doing it. I am very grateful to have had a father who was such a strong role model in my life. Everything he did was driven by his commitment to provide and care for the family he loved.

My father passed away in 2005 and Brion’s in 2011. Both our dads loved to talk and tell stories from their lives. We often wish we could retrace that time and hear their voices again. It seems you never fully appreciate your parents until they are no longer on this earth. It is so important to appreciate every hour they are in your life.

Brion & I eat a lot of chicken, so I’m always interested in another way of serving it. This recipe gives you not only crispy chicken but a flavorful tomato bacon relish to compliment it.

If you’re a bacon lover, it probably goes without saying, but bacon goes well with everything. Tomato bacon relish sounds like it would be savory, but it’s actually pretty sweet, just like other fruit jams! However, it does have a lot more complexity thanks to the bacon and spices.

The concept may sound strange, but it tastes like caramelized tomatoes–richer, sweeter, and more mellow than their fresh counterparts, balanced by the savory and smoky flavors of the bacon and smoked paprika. A little vinegar and mustard add a subtle tang, and you’ll get a hint of heat at the end from red pepper flakes.

It’s perfect spread on toast, in an omelet or a grilled cheese sandwich, on roasted veggies, next to cheese and crackers on a charcuterie board, or spread over cream cheese or brie for a party appetizer, etc. etc.

My special meal in honor of our dad’s on this Father’s Day is baked chicken tenders with bacon tomato relish.

Print Recipe
Baked Chicken w/ Tomato Bacon Relish
Votes: 1
Rating: 5
You:
Rate this recipe!
Servings
Servings
Votes: 1
Rating: 5
You:
Rate this recipe!
Instructions
Chicken
  1. Preheat oven to 425 F.
  2. In a shallow bowl, mix bread crumbs, 2 Tbsp thyme & 1/4 tsp each salt & pepper. Place flour & egg in separate shallow bowls. Dip chicken in flour; shake off excess. Dip in egg, then in crumb mixture, patting to help coating adhere. Place chicken on a greased rack in a 15x10x1-inch baking pan. Bake about 15 minutes or until no pink remains.
Bacon Tomato Relish
  1. In a skillet, over medium high heat, fry bacon until crispy. Remove bacon to plate. Drain all but 1 Tbsp bacon drippings.
  2. In the same skillet, sauté onions in reserved bacon drippings until onion starts to soften, about 4 minutes. Add garlic during last minute of sautéing.
  3. Add bacon & all remaining ingredients; stir to combine. Increase heat & bring mixture to a boil.
  4. Decrease heat & simmer, stirring occasionally, until tomatoes are tender.
  5. Serve over baked chicken tenders.

Baked Cheesy Ground Beef Stuffed Potatoes

For the most part, a baked potato with a pat of butter and a little salt is just great on its own. But stuff them with an assortment of savory ingredients such as shrimp, oysters or ground meat and it easily constitutes a whole meal.

I think my first encounter with this idea came when the Wendy’s restaurant chain introduced the Stuffed Baked Potato to their menu in 1983. Their original goal was to give the customer another choice or alternative to the same old ‘fries’. I think it retailed for 99 cents at the time. The one I remember having a couple of times was with cheese sauce and fresh broccoli. It tasted great to me, not being a fried food lover.  Of course, since then the whole concept has been ratcheted up in both flavor and eye appeal.

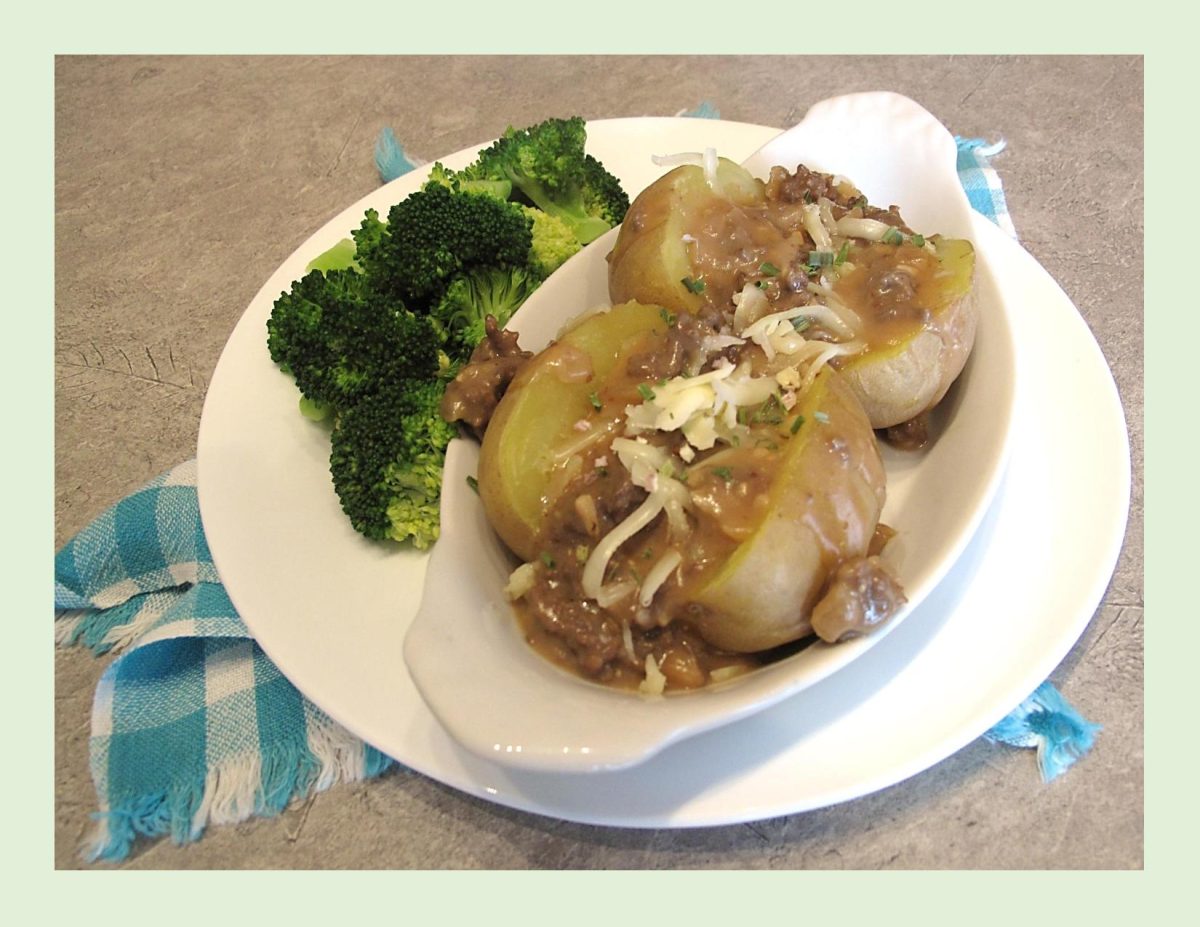
This version is browned ground beef in a cheesy mustard béchamel sauce served over baked potatoes. Makes such a super good meal with a bit of steamed broccoli.

Print Recipe
Baked Cheesy Ground Beef Stuffed Potatoes
Votes: 1
Rating: 5
You:
Rate this recipe!
Servings
Votes: 1
Rating: 5
You:
Rate this recipe!
Instructions
  1. Pre-heat the oven to 400 F.
  2. Wash the potatoes & pat dry. Prick with a knife or the tines of a fork, place on the oven rack and bake for approximately 45 minutes or until tender.
  3. While the potatoes are cooking, brown the ground beef in a large skillet. Season with 1/4 teaspoon of salt & set aside.
  4. In a separate pan, add 1 tablespoon of the butter & the diced onion. Cook on medium low heat, stirring often, until the onions begin to caramelize. Add the minced garlic, continue cooking for another minute and then remove from the heat. Add the cooked onion & garlic mixture to the cooked ground beef.
  5. In the pan, melt the remaining 3 tablespoons of butter & whisk in the flour. Cook for a minute to make a roux. Slowly whisk in the beef stock, milk, Worcestershire sauce, mustard, salt, ground black pepper & shredded cheddar cheese. Continue cooking & stirring, on low heat, until the mixture begins to thicken. Add the beef mixture into the sauce.
  6. When the potatoes are cooked, slice open and pour on the cheesy beef mixture. Garnish with parsley if you wish. Serve hot.