Apple Hand Pies

We are now entering the last month of the autumn season here in Canada.  Fall air is light and crisp—and it carries a signature scent …. a mix of rain, earth, tree bark, and leaves. It’s a scent that always makes you want to take deeper, longer breaths, and just fill your lungs with all the smells of nature. Fall is nature’s most prolific and imaginative painter who loves to splash stunning shades of red, orange, and yellow splash across this canvas we call planet earth.

If fall recipes are known for two things, those things are pumpkin and apples. The smell of the spices in our fall desserts, things like pumpkin spice and apple cinnamon, bring back memories of family Thanksgivings. Not only are these flavors generally found in hot drinks and foods, which are comforting in themselves, their smells are what actually makes them so coveted. 

With the abundance of apples available to us this time of year, it’s no surprise our kitchens are often full of the aromas of wonderful baked apples, cinnamon, nutmeg, and the plethora of smells that often accompany apple dishes. There are just so many ways to incorporate apples into our dishes, both savory and sweet.

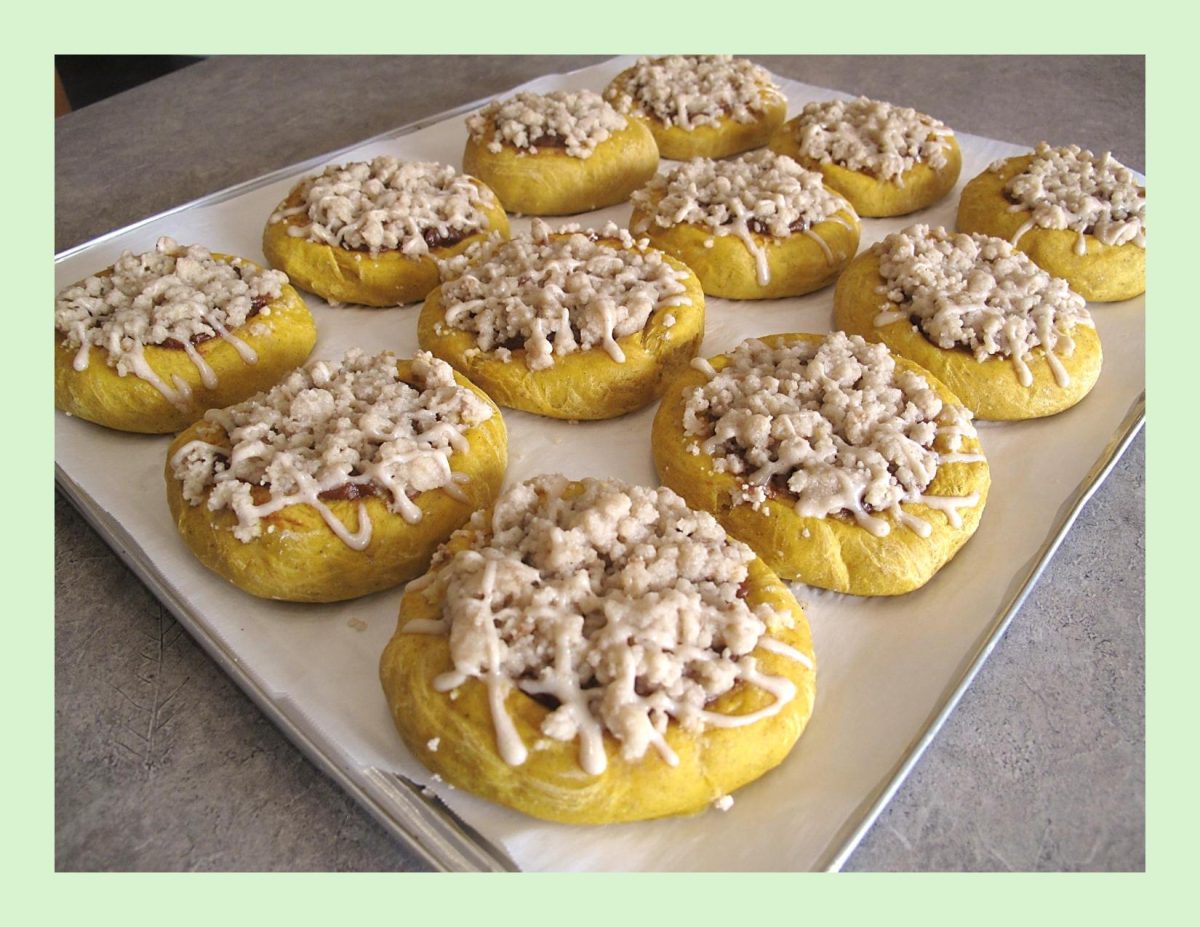
Over the years, I have posted many different hand pies, both sweet and savory. So, just as a salute to ‘apple season’, I’m making some apple hand pies topped with a fall motif.

Print Recipe
Apple Hand Pies
Votes: 1
Rating: 5
You:
Rate this recipe!
Course dessert
Cuisine American
Keyword apple hand pies
Servings
Votes: 1
Rating: 5
You:
Rate this recipe!
Instructions
Pastry
  1. In a large bowl, whisk together flour, baking soda, baking powder & salt. Cut in white & yellow shortening until it resembles small peas. In a one cup measure, place egg & vinegar; combine. Add enough cold water to make 3/4 cup. Pour all at once over flour mixture, mixing quickly, until dough pulls away from sides of bowl. This should only take a couple of minutes; DO NOT OVERMIX PASTRY. Cover with plastic wrap & place in refrigerator until filling is ready.
Apple Filling
  1. Peel & dice apples, toss with lemon juice, brown sugar, spice of choice & salt in a mixing bowl.
  2. Melt butter in a small saucepan over medium heat, add apple mixture & cook until sugar dissolves completely & the apple pieces are starting to soften.
  3. Mix cornstarch with cold water & add this slurry to the saucepan. Stir until filling thickens, about 1 minute. Take off the heat & set aside to cool completely.
Assembly
  1. Prepare egg wash. Remove pastry from fridge & roll out to 1/8-inch thickness. Using a 4-inch cookie cutter, cut into 16 rounds. If you wish cut out some fall designs such as acorns or maple leaves for the top of the hand pies. On each round place a scoop of apple filling (I weighed my filling & divided it between the 16 pastry rounds). Fold in half & seal with a fork or alternately use a perogy cutter to cut, fold & seal.
  2. Place the mini turnovers on a parchment lined baking sheet & keep in the fridge or freezer while you continue to make the rest of the pastries.
Baking
  1. Preheat oven to 375 F.
  2. Brush egg wash all over the pastry crusts. Sprinkle with a tiny bit of coarse sugar. Bake for about 14 minutes or until crust is golden brown.
  3. Remove from oven & place pastries on a wire rack to cool.

Rhubarb Curd Shortbread Cookies

Rhubarb is an easy-care plant that lasts for decades in the same spot. Hardy rhubarb thrives in our cool northern climate and is the base for many truly delicious desserts. It’s the plant you’ll see still thriving amidst the tall grasses beside long-deserted old prairie homesteads, along with a lilac bush and a peony plant.

Curds are in a category all to themselves when it comes to the world of preserving fruits. Yes you can make jams, jellies, and butters ~ but when you really want to treat yourself to something special, make curd. Fruit curds are a centuries old treat that goes back to traditional tea time in Britain. Usually made with lemon or other citrus fruits, curds can be made with any almost any fruit, even rhubarb!

Rhubarb varies a lot in color, from beautiful garnet to stalks some that are more yellowy-green than red. When the eggs are blended with the fruit the color sometimes goes a bit beige due to basic color mixing principles. A drop or two of food coloring brightens it back up. You can use regular or gel food coloring, or if you want to go more natural, use some dehydrated strawberry or raspberry powder.

Tart rhubarb makes a great substitute for citrus in curd but rhubarb also has a beautiful fruity and floral taste to complement its tartness. Use curd to dress up toast and shortbread swirl it into ice cream, fill crêpes and layer cakes, or just eat it by the spoonful.

Print Recipe
Rhubarb Curd Shortbread Cookies
Votes: 1
Rating: 5
You:
Rate this recipe!
Servings
Ingredients
Shortbread Cookies
Candied Rhubarb for topping
Servings
Ingredients
Shortbread Cookies
Candied Rhubarb for topping
Votes: 1
Rating: 5
You:
Rate this recipe!
Instructions
Shortbread Cookies
  1. Sift cornstarch, powdered sugar & flour together. Blend in butter with a fork, mixing until a soft dough forms. Wrap in plastic wrap & chill for at least an hour. When ready to bake, roll out dough on a lightly floured surface to about 1/8-inch thickness. Using a 2-inch round cookie cutter, cut out 80 circles. In 40 of them, cut out a small circle in the center.
  2. Preheat oven to 300 F. Bake for about 15-20 minutes or until edges are lightly browned. Cool on a wire rack until ready to fill with curd.
Candied Rhubarb
  1. Prepare rhubarb & place in a small saucepan along with sugar & water. Bring to a simmer & cook until rhubarb is soft but still holds its shape. Strain rhubarb & reserve for topping on cookies.
Rhubarb Curd
  1. Prepare rhubarb & place in saucepan with the 'syrup' that was stained from the candied rhubarb. Cook until rhubarb falls apart & there are no whole pieces left. If rhubarb starts to stick to bottom before it is finished cooking, add a Tbsp or 2 of water. Once cooked, use an immersion blender to puree the mixture.
  2. Using a double boiler pot, add some water to the bottom & set over medium heat. In the top pot, add egg yolks, butter, sugar, lemon zest & lemon juice & whisk to combine. When sugar has dissolved completely, add the rhubarb puree by the spoonful, to temper the eggs. When all rhubarb has been added, set pot over bottom pot, the water should be simmering. Continue stirring the rhubarb mixture; after about 5 minutes the mixture will be warm & slightly thickened. Remove from heat & blend with blender to achieve a pudding-like texture. Set aside to completely cool until ready to use.
Assembly
  1. Fill a piping bag with cold rhubarb curd. Lay out 40 of the 'solid' cookies. Top each with a dollop of rhubarb curd. Top each cookie with the remaining cookies. Divide candied rhubarb between the filled cookies giving them a nice garnished look. The idea of making the holes in the top cookie helps to give the candied rhubarb something to stick to with that bit of curd pushing out.

Zesty Chicken Wraps

People in Mexico, the Mediterranean, and South Asia  have been eating wraps since around the 1900’s. The wrap in its Western form probably comes from California, as a generalization of the Mexican/Tex-Mex burrito and became popular in the 1990’s.

Wraps have become a popular option in sandwich shops and restaurants, and for good reason. Like all sandwiches, wraps are an outlet for culinary creativity. A wrap can be anything you want it to be – breakfast, lunch, dinner, even a snack!

Wraps offer the same flexibility and creative options as a sandwich, but in a more convenient format all rolled up in a tasty tortilla or flatbread. The usual flatbreads are wheat tortillas, lavash or pita; the filling may include cold sliced meat, poultry, or fish, shredded lettuce, diced tomato, guacamole, sautéed mushrooms, bacon, grilled onions, cheese, and a sauce, such as Ranch dressing or honey mustard.

They are the perfect on-the-go meal. Most wraps can be eaten one-handed, leaving the rest of you free to continue about your day. They’re the perfect meal solution for a busy schedule.

It is remarkably easy to create your own personalized wrap: choose a bread, pick your condiments, layer your fillings, decide whether you want to grill it or not and enjoy. Does it get any better than that!

I have to admit, I absolutely love wraps so I like to fit them in to our meals whenever I can. These zesty chicken wraps are so good !

Print Recipe
Zesty Chicken Wraps
Votes: 1
Rating: 5
You:
Rate this recipe!
Course Lunch
Cuisine Mexican
Servings
Course Lunch
Cuisine Mexican
Servings
Votes: 1
Rating: 5
You:
Rate this recipe!
Instructions
Chicken
  1. In a large bowl, combine 2 Tbsp oil, lemon juice & seasonings; add chicken & turn to coat. Cover & refrigerate for 1-4 hours.
Filling
  1. In a heavy skillet, heat 2 Tbsp oil & sauté zucchini & onions until tender crisp. Remove & keep warm. Drain marinade from chicken & cook in the same skillet until no longer pink, about 5-6 minutes. Return zucchini/onion to pan, heat through.
Assembly
  1. Lightly spread 4 tortillas with a bit of guacamole or sour cream. Spoon filling down the center of tortillas. Add toppings saving a good bit of the cheese for sprinkling over them after they are rolled.
  2. Roll up & place on a microwave safe dish. Sprinkle with remaining cheese & microwave only until cheese is melted. Top with sliced green onions & tiny grape tomatoes. Serve extra toppings on the side if you like.

Individual Strawberry Royale

Strawberry Royale puts an interesting spin on an old classic by using some little ‘Swiss Rolls’ to make seasonal individual desserts.

Despite the name, the cake does not stem from any type of Swiss tradition or cuisine. The origin of Swiss Roll is not Switzerland, but its beginning is still a mystery. Some think it is an old English recipe, some think it is possibly inspired from the Austrians. Historians believe it was invented around the 19th century. 

The earliest published reference for a rolled cake spread with jelly was in the Northern Farmer, a journal published in Utica, New York, in December 1852.

During the 1960s, manufacturing Swiss Roll as snacks became fairly popular. Big brands such as Little Debbie and Lyons Company began their Swiss Roll businesses around that time.

Different countries have their own version of Swiss Roll. Depending on the country’s taste, they develop their own flavors of cakes and choices of fillings.

In France, Bûche de Noël or Yule Log, is a traditional French dessert during Christmas. It is basically a Swiss Roll decorated with chocolate frosting to resemble a tree branch.

In Sweden, they called it Rulltarta, and some of their Swiss Rolls are made with potato flour instead of wheat flour.

There are many varieties of Swiss Rolls that can be found in most bakeries in Asia. Hong Kong styled Swiss Rolls are typically lighter than western style, because they usually only use standard whipping cream filling.

Indian Swiss Rolls are called Jam Rolls, using filling such as a pineapple jelly.

In Japan, it is common to use Matcha (green tea powder) to flavor the sponge cake, and red bean flavored whipped cream is sometimes used as fillings.

In Malaysia, fruity flavored Swiss Rolls like coconut, strawberry, and blueberry are quite popular. 

Along with great eye appeal this is such a nice, easy summer dessert.

Print Recipe
Individual Strawberry Royale
Votes: 1
Rating: 5
You:
Rate this recipe!
Servings
Ingredients
Strawberry Sauce
Servings
Ingredients
Strawberry Sauce
Votes: 1
Rating: 5
You:
Rate this recipe!
Instructions
Cake/Filling
  1. Line 6 ramekins with plastic wrap. In a large bowl whip cream until stiff peaks form; set aside in refrigerator. In another large bowl, beat pudding mix & milk until smooth.
  2. In a small dish, sprinkle gelatin over boiling water & stir until dissolved. Mix gelatin into pudding mixture & fold in whipped cream. Add sliced strawberries, mix gently.
  3. Cut Swiss rolls into 1/4-inch slices & arrange in ramekin dishes to cover bottom & sides. Pour pudding mixture over cake. Cover with plastic wrap & refrigerate until set.
Sauce
  1. In a small saucepan, combine cornstarch, sugar & salt. Add water & strawberries; cook until 'clear' & bubbling.
  2. Remove from heat & add butter, lemon juice & zest (if using). Allow to cool then place in a blender. Blender until sauce is smooth or omit the blending process & use as is with chunks of strawberries. Cool sauce completely.
  3. Invert desserts onto serving plates. Drizzle with strawberry sauce & serve.

Parsnip Muffins w/ Lemon & Poppy Seed

A roast isn’t complete without roasted parsnips – and they add a whole new dimension to casseroles and soups too. So, why wouldn’t they be just as good in baked goods?

Eating vegetables is something which comes easy for me. I grew up on a farm where my mother always had a huge garden. I enjoyed the taste and had no issues with pretty much any vegetable. Even as I grew older, it was second nature to incorporate them into every meal.

One area in which we tend to overlook or rarely consider is dessert or sweet recipes. It’s often assumed that vegetables are only correlated to savory dishes but in actual fact, they can be a wonderful edition to baked goods. Vegetables like squash, pumpkin, sweet potato, zucchini and even beets are the perfect additions to many baked goods, lending an incredibly moist and/or dense texture.

Carrot cakes have been a stalwart of afternoon teas, coffee shop counters and supermarket cake aisles for decades. No one bats an eye at the prospect of a grated root vegetable in their cakes in this sense, as they hold a piece of history, using the natural sweetness of fruit and veg to make what was likely a wartime born cake more palatable.

These unusual muffins are everything a carrot muffin wants to be. They are sweet, moist, lightly spiced and probably the best way to eat a vegetable or two!

Print Recipe
Parsnip Muffins w/ Lemon & Poppy Seed
Votes: 1
Rating: 5
You:
Rate this recipe!
Servings
Ingredients
Muffins
Lemon Drizzle
Servings
Ingredients
Muffins
Lemon Drizzle
Votes: 1
Rating: 5
You:
Rate this recipe!
Instructions
Muffins
  1. Preheat oven to 350 F.
  2. Peel & finely grate parsnip. Set aside.
  3. With an electric mixer, beat butter & sugar together in a large bowl until light & fluffy.
  4. Add eggs one at a time, beating each in well. Beat in zest, lemon juice & vanilla. Blend well then add the sour cream; combine.
  5. Sift in flour, baking powder, baking soda & salt; stir in the poppy seeds & parsnip. Combine it all thoroughly, but don't overmix. Spoon mixture into 10 paper lined muffin cups.
  6. Bake for 20 minutes or until an inserted skewer comes out clean. Allow to cook for a few minutes in the muffin tray, then transfer to a wire rack to cool completely.
Drizzle
  1. Stir 5 tsp lemon juice with powdered sugar to a runny consistency. Drizzle over the completely cooled muffins.

Strawberry-Banana Crumble

Crumbles aren’t just for Autumn and Winter. Most people don’t like to turn on the oven in summer and I realize no-bake desserts are wonderful, but there are some desserts worth risking the heat for. Fruit crumbles certainly fall into that category and of course, it goes without saying that it should be topped with ice cream or a whipped topping at least.

It seems that nearly any fruit is improved when you cover it in a layer of crunchy, buttery crumble. Strawberry and banana are a winning combination for many reasons. Strawberry gives a slight sweet and sour taste and banana adds a sweet and creamy texture.

This crumble is an incredibly simple and delicious dessert for when you need a last-minute dessert or for when you’re just craving a sweet, fruity treat.

Print Recipe
Strawberry-Banana Crumble
Votes: 1
Rating: 5
You:
Rate this recipe!
Course dessert
Cuisine American
Servings
Course dessert
Cuisine American
Servings
Votes: 1
Rating: 5
You:
Rate this recipe!
Instructions
  1. Preheat oven to 350 F.
  2. In a large bowl, combine strawberries, bananas, 3 Tbsp flour, sugar, lemon juice & salt. Toss together gently to avoid bruising the bananas, Pour into a 9-inch baking dish or 6 ramekins.
  3. Combine all ingredients for topping using fingertips to form a crumble. Completely cover fruit mixture with crumb topping.
  4. Bake for about 40 minutes or until mixture is bubbling on the sides. Allow to sit for 15 minutes before serving with ice cream or whipped topping.

Stuffed Raspberry Cream Pancakes

HAPPY MOTHER’S DAY!

Here in Canada, we set aside the second Sunday in May to honor our mother’s with expressions of love and gratitude.

As I grow older, I realize how many ways I unconsciously emulate my mother. I loved everything about her and as a kid I could never imagine life without her. But in the natural sequence of events, that’s not how it works. I guess along with many other things, I’m grateful for the fact that she was there through my childhood. She passed away at the age of sixty and although she is no longer on this earth, her wonderful memory will live on in our hearts forever.

We are fortunate to still have Brion’s mother, Dolores. In January this year, we were able to spend four days visiting with her. It was so wonderful to be able to do that once again.  

This blog is especially to honor: the special memories of my mother for her endless giving of selfless love – my mother-in-law, Dolores, for her kind ways and raising that ‘special’ man I love sharing my life with – to my sisters, who have given so much of themselves to be such great moms.

Pancakes are one of mankind’s oldest prepared foods, which is why you’ll find some iteration of them in virtually every cuisine around the world.

For most North Americans, the word ‘pancake’ conjures a stack of fluffy, hot-off-the-griddle ‘flapjacks’, a pat of butter slowly melting beneath some maple syrup. But pancakes take many forms around the world, from delicate French crepes sprinkled with sugar to spongy, sour Ethiopian injera to chewy-crisp Japanese okonomiyaki, studded with seafood and drizzled with sticky brown sauce and mayo.

Both pancakes and flatbreads embody the idea that the most common and basic ingredients can combine into a whole far greater than the sum of its parts. They’re quick-cooking and don’t require anything more than a pan (or a rock) and a heat source, but they’re also the basis for more involved cooking methods, canvases for countless ingredient combinations. They’re staple foods to be peppered with seafood, poultry, aromatics, or fruit; topped with whipped cream or cheeses, syrups, caviar, chutneys, or jam.

Have you ever made stuffed pancakes? If not, you’re going to love this recipe! Stuffed pancakes do take a bit more time to prepare than regular pancakes, but they are really worth it.

Print Recipe
Stuffed Raspberry Cream Pancakes
Votes: 1
Rating: 5
You:
Rate this recipe!
Servings
Ingredients
Raspberry Sauce
Cream Cheese Filling
Sour Cream Pancakes
Servings
Ingredients
Raspberry Sauce
Cream Cheese Filling
Sour Cream Pancakes
Votes: 1
Rating: 5
You:
Rate this recipe!
Instructions
Raspberry Sauce
  1. In a small saucepan, combine cornstarch, sugar & salt. Add water & raspberries; cook until 'clear' & bubbling. Remove from heat & add butter, lemon juice. If you wish , press sauce through a sieve to eliminate the seeds. Set aside.
Cream Cheese Filling
  1. In a bowl, beat cream cheese until smooth. Add remaining filling ingredients beating until smooth. Set aside.
Pancakes
  1. In a large bowl, whisk together egg, sugar, milk, sour cream, butter & vanilla.
  2. In a separate bowl, combine flour, baking powder, baking soda & salt.
  3. Add flour mixture to the liquid mixture & whisk together until no large lumps remain but don't overmix. Let the batter sit for 15 minutes. You can even refrigerate it overnight & cook the next morning.
  4. Heat a nonstick griddle on medium-low heat. To ensure your pancakes cook all the way through, you'll want the heat a little lower than for other pancakes.
  5. Using a 1/3 cup measuring cup & scoop the batter to fill it up & pour an evenly round circle of batter on the griddle. I find using the bottom of the measuring cup helps to create the circle.
  6. Let it cook until little bubbles form, then pop, & the indentations stay on the batter. Pipe a small amount of the filling on half of the pancake, making sure not to get too close to the edges & not to overfill it.
  7. Fold the uncooked pancake over the filling. The edge of raw batter on the top half should touch the raw edge on the bottom when folded. It will continue to cook & seal itself on the griddle.
  8. Put a 'lid' over the pancakes to help them to cook through. Flip as needed to keep the browning even. Allow them to cook until all the batter looks cooked through.
  9. Serve with fresh raspberries & sauce.

Hot Cross Bun French Toast/Buns

CELEBRATING GOOD FRIDAY!

I find the aroma of the hot cross buns baking, is so intoxicating. Brion & I have always loved these soft, spicy little buns. Each year, at Easter time, I really enjoy making some version of Easter bread or buns (of course, trying to make it just a bit better than the year past). While I was giving this some thought, I read a comment where someone was complaining that they had too many hot cross buns leftover from Easter. Is there really such a thing as having too many hot cross buns … seriously!

For me, brunch is never an afterthought, especially on a holiday. I think a decadent French toast made with light and fluffy hot cross bread, in an orange and vanilla scented milk bath, topped with raspberry compote and Greek yogurt is the perfect Easter brunch idea.

While hot cross buns are now sold and enjoyed throughout the year, they were once reserved for Good Friday alone. There is no one clear explanation … some theories rest in Christian symbolism while there are also more than a few stories that indicate hot cross buns were baked on Good Friday for superstitious reasons.

Since I have become a huge fan of Dom Benedictine Liqueur not only as a drink but in sweet & savory recipes, I’m using it in this hot cross bun bread to kick it up one notch higher. I think it will be the perfect choice for an amazing Easter brunch French toast.

Print Recipe
Hot Cross Bun French Toast/Buns
Votes: 1
Rating: 5
You:
Rate this recipe!
Course Brunch
Cuisine American
Servings
Ingredients
Hot Cross Bun/Loaf Dough
Icing for Hot Cross Buns
Orange Scented Milk bath for French Toast
Raspberry Compote
Course Brunch
Cuisine American
Servings
Ingredients
Hot Cross Bun/Loaf Dough
Icing for Hot Cross Buns
Orange Scented Milk bath for French Toast
Raspberry Compote
Votes: 1
Rating: 5
You:
Rate this recipe!
Instructions
Hot Cross Bun/Loaf Dough h
  1. Marinate raisins & candied fruit in Benedictine liqueur overnight. Stirring occasionally.
  2. Dissolve yeast in 1/4 cup lukewarm water with 1 tsp sugar. Set aside for 5 minutes.
  3. In a large bowl, sift 2 cups of the flour. Stir in yeast mixture & lukewarm milk. Cover with plastic & let stand in a draft free place until doubled in volume, about 1 hour. Punch down firmly & work in beaten eggs, 1/2 cup sugar, lemon zest, vanilla & pieces of softened butter.
  4. Sift remaining 3 1/3 cups of flour with salt, cinnamon & cardamom & work 2 cups in to form a soft dough. Turn dough onto a lightly floured work surface. Knead in remaining 1 1/3 cup of flour & fruit mixture. This becomes a very soft & buttery dough but is not sticky. Invert the dough onto a lightly floured work surface & dust with flour. Cut the dough into 2 equal portions.
  5. With the first portion, roll out the dough into a 9x12-inch rectangle. Roll dough up in jelly-roll fashion & place in a 12 x 5-inch cylinder baking pan. With the second piece of dough, cut into 12 pieces & form into balls to make hot cross buns. Place in a 9-inch round baking pan. Brush loaf & buns with egg wash.
  6. Cover both loosely with plastic wrap & allow to rise in a warm, draft-free place until 1 1/2 times the size, about 1-2 hours. Toward the end of the rising time, preheat the oven to 350 F. & set an oven rack in the middle position.
  7. Gently brush risen dough again with egg wash. Bake 30-35 minutes or until both loaf & buns are a nice golden brown. Cool on a wire rack.
Icing for Hot Cross Buns
  1. To pipe a cross on the top of the buns, wait until the buns have cooled. Whisk together the lemon juice & some of the powdered sugar. Keep adding powdered sugar until you get a thick consistency. Place in a plastic sandwich bag. Snip off a small piece from the corner of the bag and use the bag to pipe crosses on buns.
Orange Scented Milk Bath
  1. Heat pan or skillet over medium heat. Mix eggs, milk, vanilla and orange zest in a shallow flat bowl or dish until well combined. Dip the bread in the egg mixture allowing the bread to soak up some of the mixture. Turn the bread and repeat on the other side. Grease preheated pan with butter. Fry toast until golden brown on one side. Flip toast and fry until golden on remaining side. Serve immediately with raspberry syrup.
Raspberry Syrup
  1. In a small pot, combine the syrup ingredients. Place over a medium heat & cook for 5-7 minutes or until the sugar has dissolved & the raspberries have become syrupy. Press through a sieve. Serve with French toast along with yogurt if preferred.
Recipe Notes
  • The story of Benedictine dates back to 1510 when a Venetian monk of the Abbey of Fécamp, Dom Bernardo Vincelli, created an elixir intended to support good health. It includes a combination of 27 herbs and spices derived from plants from around the globe, including juniper, myrrh, saffron, vanilla, thyme, coriander and more. The liqueur tastes primarily of honey and baking spices, with citrus peel, herb, and stone fruit notes.

Garlic Butter Turkey/Pork Meatballs w/ Zucchini Noodles

Everyone has their own idea of the ideal meatball. For me, it’s a plump, juicy ball of well-seasoned meat that’s so tender a spoon can pass right through it with almost no resistance.

Too often turkey meatballs are dry because ground turkey is leaner than more traditionally used beef or pork. Perhaps you had never considered it but working both ground turkey and pork into your meatballs improves the texture and flavor.

Instead of buying pork sausage meat, we always buy just plain ground pork. I can make my own sausage easily enough with the ground meat, and this gives me more options of how I use it. It’s the perfect complement, in both flavor and fat content, to the turkey. Together, they make a wonderful meatball.

Some years ago, I had posted a blog making zucchini noodles. We found it was a good alternative to pasta for something different. Turkey/pork meatballs compliment zucchini noodles nicely.

Print Recipe
Garlic Butter Turkey/Pork Meatballs w/ Zucchini Noodles
Votes: 1
Rating: 5
You:
Rate this recipe!
Servings
Ingredients
Meatballs
Sauce / Zucchini Noodles
Servings
Ingredients
Meatballs
Sauce / Zucchini Noodles
Votes: 1
Rating: 5
You:
Rate this recipe!
Instructions
Meatballs
  1. In a large bowl, combine ground turkey and ground pork, cheese, grated garlic, Italian seasoning, bouillon cube, red chili pepper flakes, chopped cilantro, & black pepper. Mix well with your hands or fork & form medium turkey meatballs. Arrange the turkey meatballs on a plate & set them aside.
  2. Melt 2 tablespoons butter in a large skillet over medium-low heat. Cook the turkey meatballs for 8 – 10 minutes on all sides, until browned and cooked through. While cooking, baste the turkey meatballs with a mix of butter & juices. Remove to a clean plate & set aside.
Sauce/Zucchini Noodles
  1. In the same skillet melt the remaining tablespoon of butter; then add lemon juice, hot sauce, minced garlic, & red pepper flakes (if you wish). Add the zucchini noodles & cook for 3 or 4 minutes, stirring regularly, until zucchini noodles are done but still crisp and juices have reduced a bit. Adjust seasoning with salt & pepper & garnish with more cilantro or parsley if you like.
  2. Push zucchini noodles on one side of the skillet add the turkey meatballs back to the pan and reheat for a minute or two. Serve the garlic butter turkey meatballs with lemon zucchini noodles immediately.

Spicy Chicken Naan Pizzas

CELEBRATING FAMILY DAY!

Family Day is observed on the third Monday in February in the Canadian provinces of Alberta, British Columbia, New Brunswick, Ontario, and Saskatchewan. This holiday celebrates the importance of families and family life of people and their communities. Its timing is said to have been selected to coincide with the American holiday of Presidents Day. About two-thirds of all Canadians will have the day off on Family Day.

Alberta was the first province to adopt Family Day as a statutory holiday in 1990. 

There are no established traditions surrounding Family Day as there are for occasions like Christmas and New Year’s Day. But, as the name implies, many Canadians take advantage of the three-day weekend in February to spend extra time with loved ones. Road trips, winter sports outings, and extended family gatherings are all popular ways to observe the holiday.

Who needs a holiday to eat pizza? Not Brion & I … YUM!

Print Recipe
Spicy Chicken Naan Pizzas
Instructions
Chicken Marinade
  1. In a large resealable plastic bag, combine all ingredients. Seal & turn to coat; refrigerate for 1-4 hours.
Guacamole
  1. In a bowl, mash avocados with lime juice & salt. Stir in garlic, onion & cilantro. Blend well. Cover & set aside until ready to use. You will have a bit extra for something else.
Pizza Topping Prep
  1. In a skillet, cook bacon until fairly crisp, drain & blot on paper towels; chop coarsely. Wipe skillet with paper towel, add marinated chicken & stir-fry until cooked then remove to a dish. Add onion to skillet & sauté until tender crisp.
Assembly & Bake
  1. Preheat oven to 375 F.
  2. On a large baking sheet, lay a piece of parchment paper. Place the 4 Naan breads on it. Spread each naan bread with guacamole then spinkle each with a bit of cheese. Layer onion, bacon, chicken, tomato & remaining cheese.
  3. Bake for 15 minutes or until hot & cheese is nicely melted. Remove from oven, top with sliced avocado & serve.