Bedfordshire Clangers w/ Variations

July is such a wonderful month. The weather’s warm, there’s still plenty of summer left, and the produce is literally amazing.

Midsummer means the farmer’s markets are brimming with great fruit & veggies. With such a colorful bounty of goods, we can settle into our summer cooking routines with tasty meals hot or cold.

But, even in summer, we sometimes crave ‘comfort food’ such as a ‘hand pie’. The humble hand pie goes by many different names: call it a pasty, a turnover, an empanada, or a ‘Bedfordshire clanger’….

A Bedfordshire Clanger dates back to at least the 19th century. It was typically made for agricultural workers to take with them to work as their lunch. The original pastry was made from suet and cooked by a boiling method. There is a theory that the pastry crust was not originally intended for consumption but as a vessel in which to protect the filling from the soiled hands of the workers.

The clanger originated from the county of Bedfordshire, a small, low-lying and predominantly agricultural county nestled in the east of England and adjacent counties, including Buckinghamshire and Hertfordshire. 

The name is as intriguing as the food itself. The word clanger, it had been suggested, referred to the mistake of mixing sweet and savory fillings. But a more likely explanation was that in nearby Northamptonshire dialect, ‘clang’ means to eat voraciously.

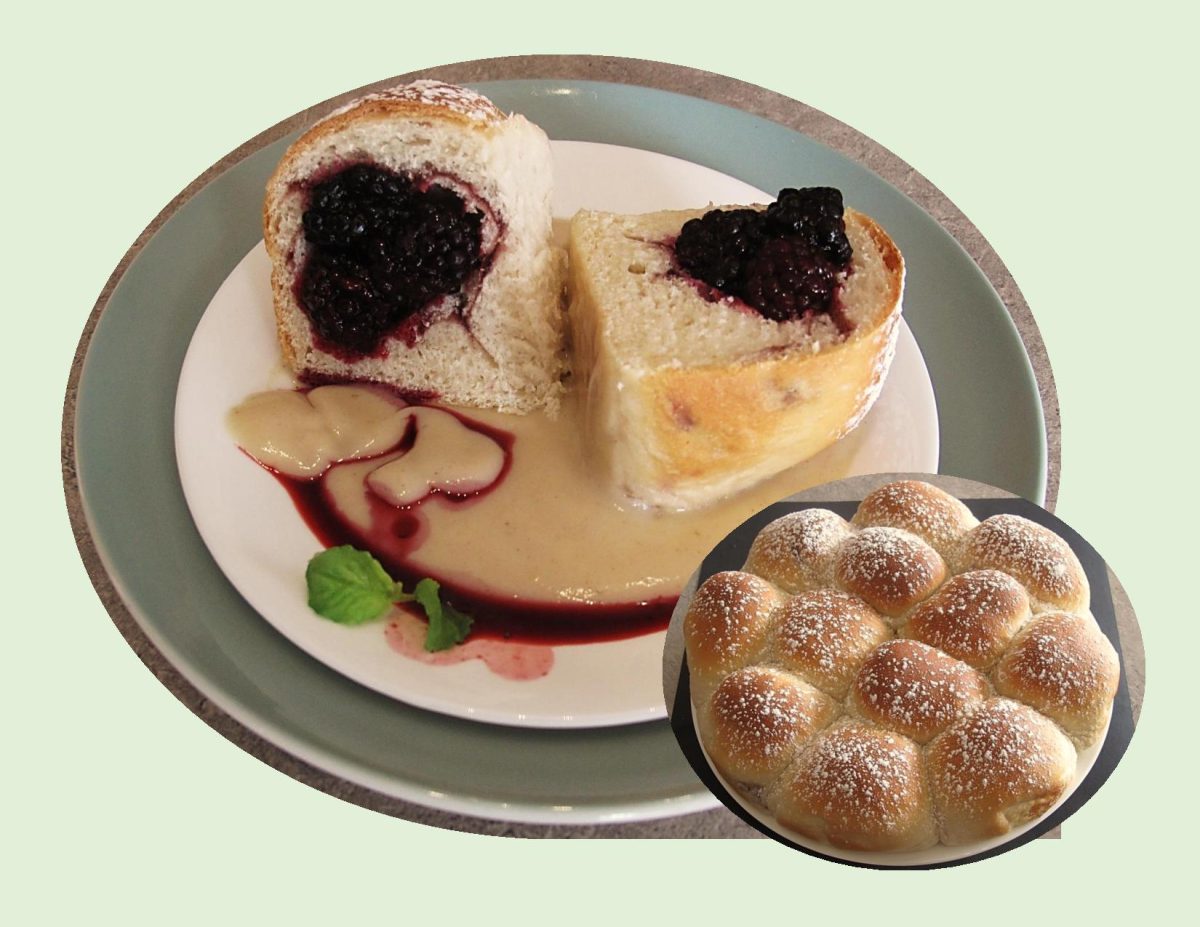
Knowing their husbands would need lots of protein and carbohydrate sustenance, homemakers came up with the brilliant idea of a doubled, loaf-shaped pie. One end contained a savory filling that used the famed pork of the area while the other end was filled with stewed apples (made from local apples) as dessert. So, the two fillings didn’t combine, there was a ‘pastry wall’ in between blocking any flavors from mixing. A ‘secret code’ denoted which end was meat, and which was dessert: two knife slits on one end of the pastry top means meat, three small holes on the other shows the sweet. This was brilliant, an entire meal for the field workers – handheld, portable and delicious.

The version we have today is not its beginnings but its evolution. Once you’ve nailed this basic Bedfordshire clanger recipe you can experiment with all sorts of flavor combos, there’s really no limit to what you can combine in this savory/sweet pastry.

Since Brion takes lunch to work, I became intrigued with the idea and decided to get creative with the fillings. That way I could make a variety and freeze them and use as needed. These tasty little ‘clangers’ can be served as the main course for a warm-weather picnic or for a hand-held, backyard meal with the addition of a nice fresh salad at home.

Print Recipe
Bedfordshire Clangers w/ Variations
Votes: 1
Rating: 5
You:
Rate this recipe!
Servings
Ingredients
Chicken w/ Caramelized Onions
Raspberry / Nectarine Filling
Blueberry Filling
Apple / Apricot Filling
Plum / Rhubarb Filling
Rhubarb / Apple Filling
Servings
Ingredients
Chicken w/ Caramelized Onions
Raspberry / Nectarine Filling
Blueberry Filling
Apple / Apricot Filling
Plum / Rhubarb Filling
Rhubarb / Apple Filling
Votes: 1
Rating: 5
You:
Rate this recipe!
Instructions
Pastry
  1. In a medium bowl, whisk together the flour, sage & salt. Sprinkle the butter cubes over the flour mixture & use your fingers to work them in. Alternately you could use a pastry cutter to do this.
  2. When the mixture resembles cornmeal with pea-sized bits of butter remaining, stir in cheese with a fork until evenly distributed. Sprinkle 6 Tbsp ice water over mixture & stir with a fork until dough begins to come together. If needed, add an additional Tbsp or two of ice water.
  3. Turn the dough out onto a lightly floured surface & knead for about three times. Gather the dough into a disk & wrap in plastic wrap. refrigerate for at least 30 minutes or overnight.
Pork Filling
  1. Bake potato in microwave, peel & cut into small cubes. Set aside.
  2. Heat oil in a skillet & sauté celery, onion, garlic & bacon together on medium heat until veggies are soft & bacon is cooked. Add ground pork, breaking it up well. Stir in dried herbs & spices. Cover & simmer for about 10 minutes. Remove from heat & stir in cooked potato & cheese. Set aside to cool.
Spiced Meat Combo
  1. In a saucepan, sauté onion & garlic. Add ground meat, basil, thyme, cardamom & salt & pepper. Scramble fry until cooked, remove from heat & add parmesan & potato. Place in a dish.
  2. In the saucepan, melt butter; add flour to make a roux. Cook, stirring constantly for 2-3 minutes. Slowly add beef broth, stirring until sauce thickens. Season to taste. Add to ground meat mixture & combine to form filling. Set aside until ready to use.
Turkey Filling
  1. In a skillet, cook bacon until just crisp, then remove to a paper towel lined plate to drain; chop when cooled. Remove all but 1 Tbsp of the bacon drippings from skillet.
  2. Add butter to the skillet, sauté onions, garlic & mushrooms with herbs & spices, scraping up any brown bits, until the onions have softened & mushrooms have lost most of their size & moisture. Stir in the bacon & shredded cooked turkey, taste for seasoning. Cook for another minute or two, then remove from heat & set aside.
  3. In a saucepan, combine Boursin, milk & spices (if using). Stir until Boursin has melted. Remove from heat. Add to turkey/veg mixture.
Chicken w/ Caramelized Onions
  1. Heat butter over medium low heat in a heavy ovenproof skillet. Add the onions cook for 20 minutes or so, stirring occasionally. When the onions are a deep golden color, remove them from the pan and set aside.
  2. Preheat oven to 350 F.
  3. Combine the flour, salt, chili powder, thyme, allspice, & black pepper. Dredge each piece of chicken in the flour mixture, shaking off the excess. In the same pan as the onions, heat the oil over medium high heat. Add each piece of chicken & fry for a few minutes until golden brown; flip & cook for a few more minutes. Transfer to a plate (it will not be fully cooked at this point, just browned – it will finish cooking in the oven).
  4. Turn the heat down & let the oil cool off a little bit. Make a roux with excess oil in skillet & dredging flour. Add chicken broth & cook until a sauce forms. Add the onions & chicken to the pan. Bake for about 20 minutes longer. When chicken/onion mixture is cooked, remove from oven. Allow to cool until ready to use.
Raspberry/Rhubarb Filling
  1. In a small saucepan, whisk together sugar, cornstarch, cardamom & salt. Add water & stir then add chopped nectarines. Simmer until nectarine is slightly soft & liquid is thickened. Remove from heat & carefully fold in raspberries. Set aside to cool.
Blueberry Filling
  1. In a small saucepan, combine all ingredients except blueberries. Cook until sauce starts to thicken then gently fold in blueberries & cook a couple of minutes more. Remove from heat & set aside to cool.
Apple/Apricot Filling
  1. Peel & dice apples. Drain canned apricot juice into a small saucepan. Add sugar, cornstarch, cinnamon & salt & combine. Add apples & cook until apples are tender. Cut canned apricot halves into quarters. When apples are cooked & sauce has thickened, remove from heat & add apricots. Gently combine & set aside to cool.
Plum/Rhubarb Filling
  1. In a small saucepan, combine sugar, cornstarch, salt & lemon zest. Add rhubarb & plums. Gently stir over a low heat. When enough juice has formed, allow to simmer until rhubarb is soft & juice has thickened. Remove from heat. Set aside to cool.
Sour Cherry Filling
  1. In a small saucepan, place sugar, cornstarch & salt. Add juice/water mixture & stir to thoroughly combine. Bring to a boil over medium-high heat, stirring frequently. Simmer until thickened, about 2 minutes. Immediately remove from heat. Gradually fold in cherries. Set aside to cool.
Rhubarb/Apple Filling
  1. In a small saucepan, add the rhubarb, apples, salt & sugar. Add a drizzle of water if necessary & heat on medium. The rhubarb will begin to release liquid & break down as the apples soften. Heat the mixture until the moisture has evaporated & begins to thicken. Once the mixture is thickened, add the lemon juice, lemon zest and cinnamon. Place it in a bowl & allow to cool.
Apple/Pear Filling
  1. Heat butter in a small skillet until melted, add apples & pears & cook until fruit begins to soften, about 5 minutes. Sprinkle sugar over mixture & continue to cook stirring often until fruit begins to lose its juices. Mix together cornstarch & lemon juice & add to pan. Simmer until mixture has thickened, about 4 minutes. Remove from heat & allow to cool.
Assembly/Baking
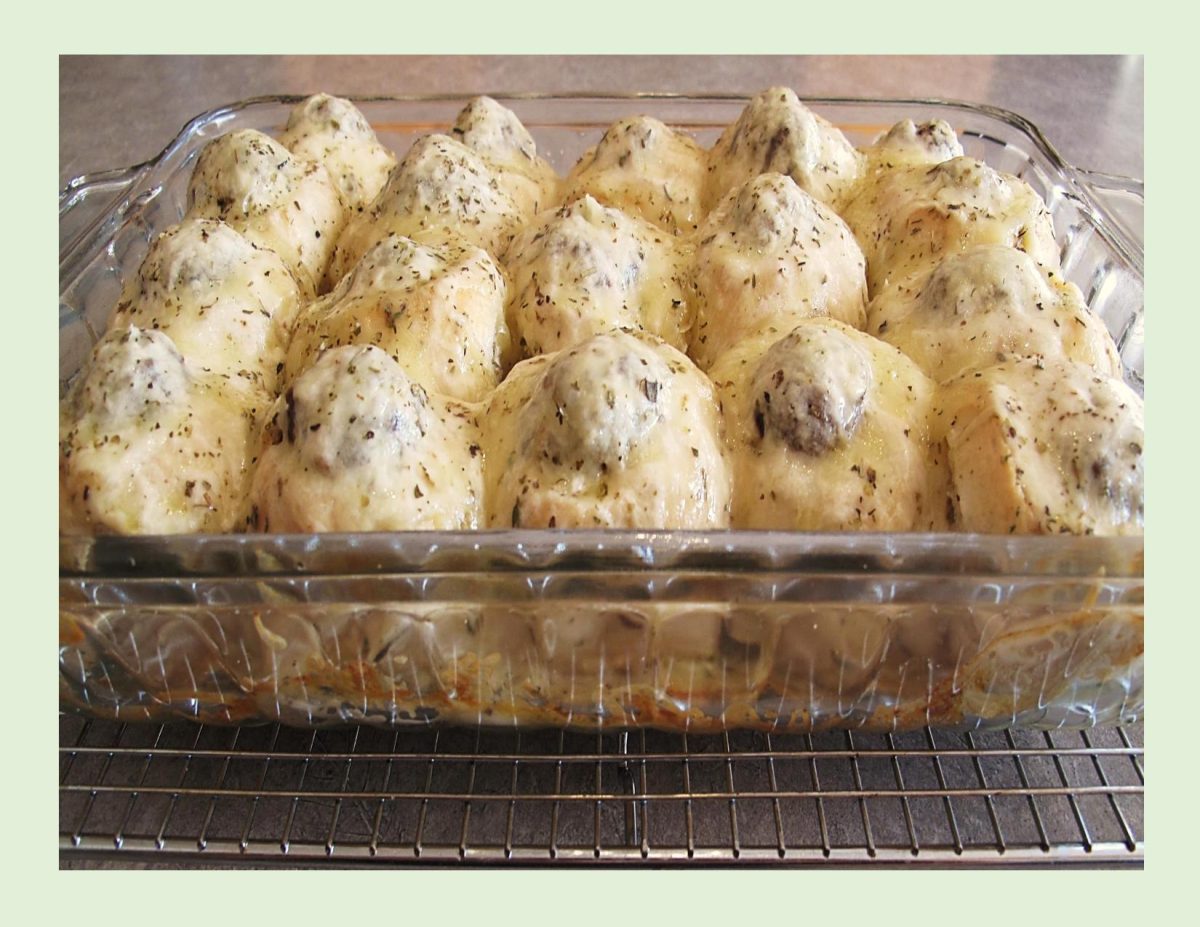
  1. Divide pastry into 5 equal pieces. On a lightly floured surface (or dry wax paper) roll out each piece of pastry into 14 x 7 1/2-inches. The excess trimmed from the sides will be used for little pastry ‘walls’ dividing the sweet & savory fillings. Roll excess pastry into a 3-inch length.
  2. Cut each piece of pastry in half horizontally so you have (2) 7-inch long pieces from each piece of pastry. From the top of each piece, LIGHTLY make a line across your pastry 4-inches from the outside edge. This will help to place your fillings properly.
  3. On the 3-inch wide section, place savory filling to cover 2/3 of the area. Place one of the rolled strips after that then place sweet filling on the remaining 1/3 to complete the 'clanger'. The little rolled piece of pastry divides the savory & sweet filling.
  4. On the sweet side make 3 holes for vents & on the savory side make 2 slashes. This is the 'code' to let the person eating the clanger which was savory or sweet.
  5. Preheat oven to 350 F.
  6. Brush the edges of each pastry with egg wash. Lift the pastry from the opposite side over the fillings & seal the edges with a fork.
  7. Brush clangers with remaining egg wash & bake for about 30-35 minutes or until golden.
Recipe Notes
  • Due to the length of this recipe, I found making the savory & fruit fillings on one day & the pastry, assembling & baking the next, worked out well for me. Although these pastries are VERY time consuming, believe me, the are well worth it in the end, especially if your freezing some to use later. I baked them all & then wrapped them well before freezing.
  • You will probably find there will be enough savory & sweet fillings left over to make about 10 more clangers.
  • All of them will freeze well which will be a time saver for your next batch. Just make a recipe of pastry & your ready to assemble & bake.
  • If your not interested in freezing the 'leftovers', the fruit combined will make a wonderful crisp & the savory fillings can be used in quiche or casseroles.

Spiced Upside Down Peach Crisp

Fruit crisp is a classic dessert that has been around for centuries. The first known recipe was published in an 1828 cookbook. The recipe used frozen fruit instead of fresh and while fresh fruit is often used in baking, frozen fruit is a great alternative. 

Fresh fruit always has such appeal. It brightens the fridge and counter with cheery colors and sweet scents. Frozen fruit allows for some flexibility by extending a typically short shelf life. Both have their place in the kitchen.

 Frozen fruit may not have the same crispness or texture as it’s fresh counterpart but there are some great benefits to using it.

  • It’s available all year round
  • You can use it straight from the freezer
  • Convenience – it’s already washed and ready to go
  • Frozen fruit is generally quick-frozen at its peak and as soon as it’s picked

This peach crisp is amazing! The frozen peaches are enhanced with fresh lemon juice and flavorings and the spiced oatmeal topping has toasted pecans to add a little crunch. Yum!

Print Recipe
Spiced Upside Down Peach Crisp
Votes: 1
Rating: 5
You:
Rate this recipe!
Course dessert
Cuisine American
Servings
Ingredients
Crisp Topping
Spiced Cream Topping
Course dessert
Cuisine American
Servings
Ingredients
Crisp Topping
Spiced Cream Topping
Votes: 1
Rating: 5
You:
Rate this recipe!
Instructions
Fruit
  1. Preheat oven to 350 F. Line & lightly grease a 9-inch spring form baking pan with foil.
  2. In a large bowl, combine thawed & drained peaches, lemon juice, sugar, cornstarch, vanilla, almond extract & salt. Set aside.
Crisp Topping
  1. In a large bowl, whisk together brown sugar, flour, oats, pecans & spices. Add butter & mix with a wooden spoon until topping is crumbly.
Assembly
  1. Into prepared baking dish pour peach mixture. Sprinkle the crisp topping evenly over the peaches. Bake for 40 - 45 minutes or until top is golden brown. Remove from oven & allow to cool. When cool enough to handle, remove outside ring from pan then flip crisp over on a serving plate & slice.
Spiced Cream Topping
  1. Add heavy cream to a chilled bowl & beat until stiff peaks are just about to form. Beat in vanilla, sugar & spices until peaks form.
  2. Serve crisp with spiced cream topping or vanilla ice cream if you would rather.
Recipe Notes
  • Since there are just two of us, I made only half of the recipe, that's why mine is quite thin in the picture. Still gave us 10 pieces!
  • I baked it long enough to really caramelize the peaches. Yum!

Pumpkin Angel Food Mini Bundt Cakes

Pumpkin angel food?! That’s probably not what you’d expect when you think of angel food cake or pumpkin, but this recipe is actually a very tasty combo. 

Of course, pumpkin-based desserts are a traditional fall dessert, so I am sure that you will be surprised that I am posting this pumpkin angel food cake recipe in April. It seems I have some pumpkin puree that’s in the freezer just waiting to be used before we get too far into the spring and summer season.

Brion has always loved angel food, so I thought why not add the pumpkin puree to kick it up a notch. Pairing it with the right fruits can also enhance its flavors. Instead of frosting or a whipped topping I am making some caramelized apples and raisins spiced with anise and cardamom.

  • Anise has a distinct licorice-like flavor. It adds depth and enhances the overall aromatic profile of the compote.
  • Cardamom is a fragrant spice with citrusy and herbal notes. It adds warmth and sophistication and complements pumpkin beautifully.

For a cake that’s quite sweet, some salted pepita seeds sprinkled on top are a bit of necessary and delicious balance.

Simply put, it’s an easy cake mix recipe dressed up with warm spices and pumpkin purée served with caramelized apples, raisins and salted pepita seeds. Yum!

Print Recipe
Pumpkin Angel Food Mini Bundt Cakes
Votes: 1
Rating: 5
You:
Rate this recipe!
Servings
MINI BUNDT CAKES
Ingredients
Pumpkin Angel Food Mini Bundt Cakes
Caramelized Apples & Raisins
Servings
MINI BUNDT CAKES
Ingredients
Pumpkin Angel Food Mini Bundt Cakes
Caramelized Apples & Raisins
Votes: 1
Rating: 5
You:
Rate this recipe!
Instructions
Cake
  1. Preheat oven to 350 F.
  2. In a large mixing bowl combine everything except the Angel Food Cake mix and ingredients to prepare cake. Mix until combined. Set aside.
  3. In a different bowl combine the Angel Food Cake mix and ingredients required to make the cake. Carefully fold in 1/4 of the batter into the pumpkin mixture. Then gently fold in the rest of the batter.
  4. Carefully pour or spoon into an 24 ungreased mini bunt cake pans. Place pans in oven on the middle rack.
  5. Bake for 15 -20 minutes or until cake is golden brown and springs back. Immediately invert pans onto a wire rack.
  6. Cool for 10 minutes.
  7. Serve with caramelized apples & raisins & a dollop of whipped topping. Sprinkle with salted pepita seeds.
Apples & Raisin Compote
  1. In a medium saucepan, melt butter then add water & sugar. When the caramel is golden brown, add the raisins, swirling them into the caramel.
  2. When raisins begin to plump, add apples & orange zest, then sprinkle with spices. Lower heat & simmer 5-10 minutes to thicken.
  3. Do not overcook compote as it will thicken when cooled.

Chai Spiced Hot Cross Bread Pudding w/ Vanilla Sauce

CELEBRATING GOOD FRIDAY!

Bread pudding always gives me reason to remember good things. Truly a comfort food for those of us that recall it from childhood days. It’s not that the dish was invented here — that honor likely goes to clever medieval or even ancient cooks in Europe and the Middle East who had a surplus of stale bread on their hands. The perfect embodiment of the virtues of frugality and indulgence: day old bread, too precious to waste, is bathed in a mixture of milk and eggs and made into either a sweet or savory bread pudding (with a few other additions) and baked into something sublime. What makes it special is the blend of spices mixed into it and the sauce.

The chai spice baking blend, which is sometimes overlooked, adds a distinct warm flavor and depth. It can include a number of different spices. Cardamom is the most common ingredient, followed by some mixture of cinnamon, ginger, star anise and cloves. Pepper, coriander, nutmeg and fennel are also used but they are slightly less common.

This bread pudding combines hot cross buns with spices inspired by the world’s love affair with Indian chai. The origins of hot cross buns may go back as far as the 12th century. According to the story, an Anglican monk baked the buns and marked them with a cross in honor of Good Friday. Over time they gained popularity, and eventually became a symbol of Easter weekend.

Bread pudding, when done right, should have the perfect balance of gooey goodness and chewy texture. That’s why stale bread/buns are important. The bread needs a degree of crunch otherwise you will have ‘mush pudding’. For additional flavor, the pudding is served with a vanilla sauce. Who says bread pudding has to be boring!

Print Recipe
Chai Spiced Hot Cross Bread Pudding w/ Vanilla Sauce
Votes: 1
Rating: 5
You:
Rate this recipe!
Servings
Ingredients
Bread Pudding
Vanilla Sauce
Servings
Ingredients
Bread Pudding
Vanilla Sauce
Votes: 1
Rating: 5
You:
Rate this recipe!
Instructions
Bread Pudding
  1. Place cubed hot cross buns in a greased 9 x 9-inch baking dish.
  2. In a large bowl, combine the milk, brown sugar, eggs, vanilla, spices & salt. Pour over buns, making sure that the bread is completely covered by the milk mixture.
  3. Cover & refrigerate for at least an hour or overnight.
  4. Set out the chilled bread pudding while you preheat the oven to 350 F.
  5. Bake 40 - 45 minutes, or until a knife inserted into the center of the pudding comes out clean. Remove from oven & serve with vanilla sauce.
Vanilla Sauce
  1. In a small saucepan, melt butter & add flour. Stir until mixture has a nutty aroma.
  2. Add salt, cream & sugar; stir until mixture becomes thick. Remove from heat & stir in vanilla.
  3. Spoon over servings of warm bread pudding.
Recipe Notes
  • You will notice I have only used 2 Tbsp sugar in the vanilla sauce to offset the sweetness of the pudding.

Benedictine Liqueur Christmas Braid

Christmas bread has a lot of different interpretations. The most traditional iterations involve sugar and spice, and often—but not always—yeast, and ultimately have strong cultural associations and country ties. One thing we can all agree on is that Christmas bread is celebratory, whether or not we observe the holiday. From the unleavened matzo of Passover to the German stollen of Christmas, from the British hot cross buns baked on Good Friday to the Russian kolach baked for any special occasion, bread in its many forms brings people together, linking traditions and generations.

The scent of Christmas spices, bread baking, and fresh-cut pine define holiday memories. Generations ago, the rich dough itself – lush with butter, eggs, dried fruit, sugar – relayed a cook’s generosity, her willingness to share the most precious ingredients in her pantry. The time and effort it took to make and bake the Christmas loaves expressed the cook’s devotion and love.

Last year, I was introduced to the liqueur known as Dom Benedictine. After doing much research into this interesting liqueur, I incorporated it in some savory and sweet recipes. We really enjoyed them so this year I was interested in doing a bit of recipe development to create a Christmas bread with it.

The story of Benedictine dates back to 1510 when a Venetian monk of the Abbey of Fécamp, Dom Bernardo Vincelli, created an elixir intended to support good health. It includes a combination of 27 herbs and spices derived from plants from around the globe, including juniper, myrrh, saffron, vanilla, thyme, coriander and more. The liqueur tastes primarily of honey and baking spices, with citrus peel, herb, and stone fruit notes.

So here you have it, my newly created Christmas bread tradition. Hope you can try it and enjoy it as much as Brion & I have.

Print Recipe
Benedictine Liqueur Christmas Braid
Votes: 1
Rating: 5
You:
Rate this recipe!
Servings
SERVINGS
Ingredients
Bread Dough
Lemon Glaze
Servings
SERVINGS
Ingredients
Bread Dough
Lemon Glaze
Votes: 1
Rating: 5
You:
Rate this recipe!
Instructions
  1. Marinate raisins, candied fruit & cranberries in Benedictine liqueur overnight, Stir occasionally.
  2. Dissolve yeast in 1/4 cup lukewarm water with 1 tsp sugar. Set aside for 5 minutes.
  3. In a large bowl, sift 2 cups of the flour. Stir in yeast mixture & lukewarm milk. Cover with plastic & let stand in a draft free place until doubled in volume, about 1 hour. Punch down firmly & work in beaten eggs, 1/2 cup sugar, lemon zest, vanilla & pieces of softened butter.
  4. Sift remaining 3 cups of flour with salt, cinnamon & cardamom & work 2 cups in to form a soft dough. Turn dough onto a lightly floured work surface. Knead in remaining cup of flour & fruit mixture. This becomes a very soft & buttery dough but is not sticky.
  5. Invert the dough onto a lightly floured work surface & dust with flour. Cut the dough into four equal pieces & then stretch & roll each piece into a rope about 20 inches long. Lay the ropes parallel to one another (vertically). Pinch them tightly at the top, then fan them out.
  6. Begin by taking the strand farthest to the right & weave it toward the left through the other strands using this pattern: over, under, over. Take the strand furthest to the right & repeat the weaving pattern again: over, under, over. Repeat this pattern, always starting with the strand farthest to the right, until the whole loaf is braided, Tuck the ends under to give the loaf a finished look.
  7. Carefully transfer the braided loaf to a parchment-lined 13x18-inch baking sheet, brush with egg wash. Cover the loaf loosely with plastic wrap & allow to rise in a warm, draft-free spot until about 1 1/2 times the size, about 1-2 hours. Toward the end of the rising time, preheat the oven to 350 F. & set an oven rack in the middle position.
  8. Gently brush risen dough again with egg wash. Place in an air-bake pan to prevent the bottom crust from browning too much.
  9. Bake 40-45 minutes or until a nice golden brown. Cool on a wire rack. Combine powdered sugar & lemon juice/zest to make glaze. When braid is completely cool, brush loaf with lemon glaze & decorate to your liking.
Recipe Notes
  • To see a more in-depth article on Dom Benedictine Liqueur, check out my blog from December 21/2022 - Benedictine Liqueur Cupcakes.

Fruity Roast Chicken w/ Couscous

I’m not sure how far back I came to really enjoy using fig balsamic dressing as a marinade for various roasted meats. This dressing marinade adds a bold, zesty flavor to almost anything. Bursting with fig juice, balsamic vinegar, and herbs and spices. So, it only makes good sense that I take the idea further and test the possibilities of using fig preserves with savory meals.

Most people think of fig jam or preserves as what you find in the middle of a fig newton…basically dried figs and sugar, but a good preserve is a combination of sweet figs with a nice balance of balsamic acidity and the mustard heat lends itself to a whole lot of dishes far beyond a simple cheese plate.  

The flavor of the preserves is more complex and less sweet than most fruit spreads, so it gives you enough of a contrast with salty items without tasting too sugary.

This is the very definition of a winning weeknight chicken dish: quick, sweet and savory, a little something different. The herbs enhance the savory quality of the dish and provide a touch of earthiness to balance the sweet. 

Print Recipe
Fruity Roast Chicken w/ Couscous
Votes: 1
Rating: 5
You:
Rate this recipe!
Servings
Ingredients
Spicy Fruit Filling
Servings
Ingredients
Spicy Fruit Filling
Votes: 1
Rating: 5
You:
Rate this recipe!
Instructions
Fruit Filling
  1. Combine apricots, raisins, apple & orange juice in a small bowl. Season with spices; mix well. Set aside to marinate.
Chicken
  1. Preheat oven to 350 F.
  2. Place chicken thighs in a heavy freezer bag. Gently pound until about 1/4-inch thick. On a sheet of plastic wrap lay out thighs to form a 'solid' piece. Sprinkle chopped fresh herbs over meat (if using). Mound the filling on flattened thighs then using the plastic wrap, roll up, tucking in the ends.
  3. Line a baking sheet with foil & lightly spray center area. Transfer chicken roll to foil & top with fig preserves. Pull foil up around meat to form a catch 'basin' for meat & fruit juices (leave top open).
  4. Roast about 25 minutes until meat is cooked. When you remove it from the oven reserve fruit & meat juices to use over your couscous if you wish. While the meat is cooking, prepare the couscous.
Couscous
  1. Heat first amount of oil in a medium saucepan. Add next 4 ingredients. Cook & stir for about 3 minutes until green onion is softened. Add honey. Heat & stir for about 30 seconds until green onion is coated.
  2. Add broth. Bring to a boil. Add couscous & second amount of olive oil; simmer covered for about 10 minutes. Fluff with fork & stir in remaining 3 ingredients.
  3. Place couscous on a serving plate topped with sliced chicken thigh roll. Serve.

Garlic Bread Meatball Bombs

HAPPY LABOR DAY!

Although, we have not officially reached the first day of fall (Sept. 23), this part of the year often begins with a tinge of melancholy. Even so, there are many ways to appreciate Canada’s most sentimental season.

Part of our country’s appeal is its four season’s: Winter, Spring, Summer & Fall. We are entering the season of the fall harvest and the leaves on the trees begin their transformation to stunning shades of orange, red and yellow.

Labor day week-end gives us an opportunity to enjoy family and friends before summer is officially over. I remember as a kid, once we arrived at the Labor Day week-end all those ‘lazy, hazy, crazy days of summer were gone’. Back to school for another year. So, whatever your choice of relaxation is, you know good food will play a big part in the week-end gatherings.

Meatball bombs are a round homemade ‘hot pocket’. They have everything in them you need to make a great tasting meal. Serve two bombs per person. That means each person gets two meatballs, two dinner rolls, lots of sauce, and some gooey, cheesy goodness. Serve these with a simple side salad to round out the entire meal.

Speaking of Hot Pockets, I’m sure most everyone has tried them at some time since they have been around for over 40 years.

Probably the one lasting memory if you have,  is you know that the first bite of the microwavable, molten-in-the-middle meal will burn at least three layers clean off the roof of your mouth.

The frozen creations known as Hot Pockets were created by two Jewish Iranian brothers Paul and David Merage, who immigrated to the United States from Tehran. In 1977, the Merage brothers founded Chef America Inc. and set out to create a portable sandwich whose dough would actually retain its crispness after a few minutes in the microwave. Their creation, which debuted in 1980, was called the Tastywich, but it didn’t last long with its original name. By 1983, after some recipe tweaking, the Tastywich had a new name and Hot Pockets officially hit the market.

History aside, if you’re looking for some flavorful garlic bread meatball bombs, this is just the dish for you! And, you have the choice to use a lot of prepared ingredients from your grocery store, or you can make them all from scratch. There are options for both types in this recipe.

Print Recipe
Garlic Bread Meatball Bombs
Votes: 1
Rating: 5
You:
Rate this recipe!
Servings
Ingredients
Dinner Rolls
Garlic Butter
White Sauce
Servings
Ingredients
Dinner Rolls
Garlic Butter
White Sauce
Votes: 1
Rating: 5
You:
Rate this recipe!
Instructions
Dinner Rolls
  1. Dissolve yeast & sugar in lukewarm water & allow to sit a few minutes until frothy. Add oil, salt, & 2 1/2 cups flour, beat until smooth. Stir in enough remaining 1/2 cup flour to form a stiff dough..
  2. Turn onto a floured surface; knead until smooth and elastic, 6-8 minutes. Place in a greased bowl, turning to grease the top. Cover: let rise in a warm place until doubled, about an hour.
  3. Punch down the dough. Divide the dough into 18 pieces. Pinch the ends of each dough piece together in the center. Place seam side down. Use the palm of your hand to gently roll each dough ball until smooth and round.
  4. Place the dough balls in a parchment lined baking dish. Cover & allow rise until doubled in size, about 30 minutes.
  5. Preheat the oven to 350F.
  6. Lightly brush with egg wash. Bake until golden brown, 20-25 minutes. Remove rolls to a wire rack.
Meatballs
  1. Preheat oven to 350 F.
  2. In a large bowl, combine all ingredients for the meatballs & mix well. Divide mixture into 18 meatballs & place on a foil lined baking tray. Bake 35 minutes or until meatballs are cooked through. Remove from oven & set aside.
White Sauce
  1. In a saucepan, cook butter & flour until bubbly. Slowly add broth & cream; boil for a FEW minutes, add soy, salt & pepper. Set aside.
Assemble & Bake
  1. Hollow out the top of each roll with a sharp knife. The hole will need to be slightly bigger than the meatballs, but not so deep that you puncture the bottom.
  2. Set the rolls into a 9×13" baking pan which has been coated with non-stick cooking spray. Set aside.
  3. Whisk together garlic butter ingredients. Using the back of a teaspoon, liberally smear the holes of the dinner rolls with the garlic butter. Use all of the butter evenly into each dinner roll.
  4. Spoon about a tablespoon of the prepared sauce into each of the hollowed out dinner rolls. Place a cooked meatball into each hole. Top each meatball with the remaining sauce mixture. Evenly distribute the cheese over each of the dinner rolls. Sprinkle on the Italian seasoning.
  5. Bake for 10-12 minutes, or until the cheese is melted and bubbly. Remove from oven.
  6. Using a sharp knife, slice between each dinner roll. Garnish with parsley if you wish.
Recipe Notes
  • For a QUICK & EASY meal use:
  • 12 (store bought) dinner rolls
  • 12 frozen meatballs, cooked
  • FOR SAUCE: 
  • 1/2 cup dried tomato paste
  • 2 cups marinara sauce
  • 1 Tbsp olive oil
  • NOTE: I found for the original recipe it was easier to make the meatballs & sauce first, then the rolls. Just a suggestion!

Late Summer Plum Tart

As peach season wanes and the late summer sun shines brightest, plums arrive in their multicolored splendor. They come in vibrant red, yellow, orange, green, and pink-purple colors.

Plums belong to the same family as peaches, nectarines and apricots. Over 2,000 varieties of plums exist, each with a diverse set of shapes and colors, and they are divided into the following six categories – Japanese, American, Ornamental, Damson, Wild, and European.

One of the best things about plums is how versatile they are. Both sweet and spicy recipes work well with them. Brown sugar, cardamom, nutmeg, and cinnamon are plums’ best friends.

Plums aren’t the summer darling of fruits and are underutilized. But that means you can easily use them to add an unexpected twist to traditional recipes.

Gently spiced, this plum tart celebrates the summer-into-fall season. Quartered and nestled into the batter, the plums soften into mulberry-colored pockets as they bake.

While a slice of this seasonal fruit tart needs no embellishment, a scoop of vanilla ice cream or some whipped cream doesn’t hurt.

Print Recipe
Late Summer Plum Tart
Votes: 1
Rating: 5
You:
Rate this recipe!
Course dessert
Cuisine American
Servings
Ingredients
Course dessert
Cuisine American
Servings
Ingredients
Votes: 1
Rating: 5
You:
Rate this recipe!
Instructions
  1. Preheat oven to 350 F. Line the sides of a 9-inch springform pan with parchment paper.
  2. In a bowl, whisk together flour, baking powder, salt, cinnamon & cardamom.
  3. In a large bowl, using an electric mixer, cream butter & 1 cup sugar until pale & fluffy, about 3 minutes. Add egg & vanilla; beat on low speed until well combined. Gradually add the flour mixture alternating with the milk. Beat on low speed until smooth & thick.
  4. Transfer the batter to prepared baking pan & smooth the top with a spoon or offset spatula. Arrange plums on top, skin side up, in circular patterns. Sprinkle the remaining 2 Tbsp of sugar over plums.
  5. Bake for 60 minutes or until golden on top & set in the center.
  6. Remove from oven then remove sides from springform pan leaving the base in place. Cool completely on a wire rack. Slice & serve with ice cream or whipped cream if desired.

Crunchy Streusel Rhubarb Cupcakes

One thing that really makes muffins and coffee cakes of all types extra special good is a sweet and crunchy streusel topping. These fluffy vanilla rhubarb cupcakes are topped with a swirl of cream cheese frosting, drizzled with poached rhubarb and then sprinkled with some crunchy, spicy, baked streusel.

The simple addition of Chinese 5-spice powder makes for a delicious aromatic streusel. Five spice powder combines Chinese cinnamon with anise, cloves, ginger and fennel in a delicious balance that complements rhubarb, coaxing out more of its natural aroma. Adding pepita seeds and baking the crumble separately, creates a special crunchier topping.

The basic streusel is very versatile in that it can be customized to your personal preferences or what you have on hand. Here are a few suggestions:

  • Use 2 cups flour OR 1 cup rolled oats * 3/4 cup whole-grain flour * 3/4 cup cookie or cracker crumbs
  • Use 3/4 cup sugar OR 3/4 cup brown sugar * 1/2 cup raw sugar * 1/2 cup maple syrup
  • Use 1 cup butter OR 1 cup brown butter * 1/2 cup nut/seed butter * 1/4 cup coconut oil * 1/4 cup oil or sesame oil
  • Add-Ins .. 1 cup coconut flakes or nuts * spices & zests * 1/2 cup toasted seeds * 1/2 cup cocoa powder or wheat germ

I realize, this is a lot of steps for just a cupcake, but I think you’ll love them.

Print Recipe
Crunchy Streusel Rhubarb Cupcakes
Votes: 1
Rating: 5
You:
Rate this recipe!
Course dessert
Cuisine American
Servings
Ingredients
Poached Rhubarb
Pepita 5-Spice Streusel
Ginger Cream Frosting
Course dessert
Cuisine American
Servings
Ingredients
Poached Rhubarb
Pepita 5-Spice Streusel
Ginger Cream Frosting
Votes: 1
Rating: 5
You:
Rate this recipe!
Instructions
Cupcakes
  1. Preheat oven to 425 F. Line 9 muffin cups with large paper cups.
  2. Wash rhubarb & trim ends. Cut rhubarb into a 1/4-inch dice. Set aside.
  3. In a medium bowl, whisk together the flour, baking powder, salt & cinnamon. Set aside.
  4. In another bowl, whisk together sugars, eggs, sour cream, melted butter, vanilla & orange zest. Add the wet ingredients to the flour mixture. Stir until the flour is fully incorporated. Do not over-mix. Fold in rhubarb. The batter will be thick. Scoop the batter into 9 muffin cups, evenly distributing batter.
  5. Bake for 7 minutes. After 7 minutes, decrease the oven temperature to 350 F. & bake for another 12 - 15 minutes or until cupcakes test done. Remove from oven & cool completely on a wire rack.
Poached Rhubarb
  1. Place rhubarb, water, sugar, food coloring (if using) & cardamom in a saucepan. Simmer very gently for about 3-5 minutes or until rhubarb is soft but NOT mushy! Put a strainer on top of a bowl. Pour mixture into strainer & put the rhubarb pieces in another dish to cool. Pour the liquid back into the saucepan & let simmer until slightly thickened, about 5-10 minutes. Pour into a bowl to let cool. Gently combine rhubarb & syrup.
Pepita 5-Spice Streusel
  1. Combine all ingredients in a small bowl. Using a wooden spoon, stir until incorporated. Using your fingers, form fine crumbs. Spread the crumbs on a small cookie sheet and bake on a rack in the middle of the oven for 10-15 minutes, or until light golden brown. Remove from the oven and allow to cool completely to room temperature. Crumble with fingers.
Frosting
  1. Beat butter until pale. Add powdered sugar & beat until smooth & pale, about 1 minute. Add softened cream cheese & ginger; beat until smooth.
Assembly
  1. Fill a piping bag fitted with a large round nozzle with frosting. Top each cupcake with a dollop of frosting then using a spoon, create a well in each dollop. Spoon a bit of poached rhubarb inside of each well. Sprinkle with pepita streusel.

Blackberry Dampfbuchteln

When I was growing up, I remember my mother making something she called ‘dampfnudeln’. The taste was wonderful and as I recall, these were sweet yeast dumplings in a vanilla custard sauce. I’m not sure if they had anything in the center or not.

Dampfnudels have been a pretty big deal in Germany since the 1600s. As legend has it, during the war, a hungry Swedish army arrived in Freckenfeld, a small town in Germany. The army had threatened to murder everyone there and destroy the town, however, they agree to leave in peace if they were fed. That was the moment town baker, Johanes Muck, rose to the occasion and along with his wife and apprentice, made 1,286 dampfnudels. To honor his heroic efforts, Johanes’ grandson, built a gate known as Dampfnudeltor, made with 1,286 little stone bumps.

The people of Freckenfeld still celebrate the origins of the dumpling and the heroic baker 400 years on with an annual festival. The Dampfnudeltor is even featured in the town’s coat of arms. And if that isn’t enough not only is there a song about them, but a film too – the Dampfnudel Blues!

Traditionally, cooks steam dampfnudel dough as it bakes. Once these ingredients are mixed, they are formed into tight balls of dough and placed close together in an iron pan. The pan is covered with a lid and placed in the oven to cook. The lid is required to create the soft, noodle-like texture associated with this dish. By the time the dish is done, all the liquid will have evaporated from the dish.

Depending on whether the dish is served as a meal or a dessert, dampfnudel may have a sweet flavor. As a dessert, this dish is typically topped with a sweet vanilla sauce, or served with a rich custard. It can also be eaten with stewed fruit. As a main dish, this dough is typically served with vegetables or sauerkraut. It can also be used as side to dip in stews or soup and may even be steamed in chicken broth when served in this manner.

It seems there are endless recipes and preparations, variations on recipes and variations on variations …. ROHRNUDELN, HEFENUDELN, GERMKNODEL, DAMPFNUDELN, BUCHTELN and on and on. Basically, they are all yeast dumplings, sweet (or savory) but the preparation varies somewhat. Some are poached in a milk/sugar liquid, whereas others are baked. Some are filled, some not. Most seem to be served with a vanilla custard.

For mine, I’m trying to incorporate some blackberry compote in a soft, sweet yeast bun with some vanilla custard. I think I’ll call them ‘dampfbuchteln’. Buchteln are a typical Bohemian dish from the region in the middle of Europe that was formerly German. It was from there, that recipes like this made their way into German and Austrian kitchens. That name seems fitting, having the characteristics of both kinds of buns.

Print Recipe
Blackberry Dampfbuchteln
Votes: 1
Rating: 5
You:
Rate this recipe!
Course dessert
Cuisine German
Servings
Ingredients
Blackberry Compote
Sweet Roll Dough
Vanilla Cardamom Sauce
Course dessert
Cuisine German
Servings
Ingredients
Blackberry Compote
Sweet Roll Dough
Vanilla Cardamom Sauce
Votes: 1
Rating: 5
You:
Rate this recipe!
Instructions
Blackberry Compote
  1. In a saucepan, combine sugar, cornstarch & salt; add juice & stir to combine. Bring to a boil over medium-high heat, stirring frequently, simmer until thickened, about 1-2 minutes. Immediately remove from heat. Gradually fold in blackberries. Cool to room temperature, stirring occasionally. I found it easier to make the compote a day ahead of the buns.
Dough
  1. In a small dish, heat milk to lukewarm. Add yeast & 1 tsp sugar; let sit for 5 minutes to allow yeast to activate. In a large bowl, whisk together remaining 1/4 cup sugar, melted butter, sour cream & egg. Add yeast mixture & stir to combine.
  2. In another bowl, whisk together flour & salt. Add flour mixture to yeast mixture, 1 cup at a time combining well after each addition. Once the flour has all been added, knead on a lightly floured surface for about 2 minutes.
  3. Lightly grease the large bowl, place dough in it & cover with plastic & a tea towel. Allow to rise for at least 1 hour in a draft free place until dough has doubled in volume.
  4. Punch dough down & turn out onto a lightly floured work surface. Divide the dough into 12 equal sized pieces & roll each into a ball. Place under a tea towel so they won't dry out. Take one ball & shape it into a flat circle large enough to hold a spoonful of compote.
  5. Fold over & pinch the edges, then carefully shape into a ball again. Place in a buttered 12-inch spring form pan, seam side down. Repeat with remaining dough balls. Cover with tea towel & let rise for another 30 minutes.
  6. Preheat oven to 350 F. Bake buns for about 20-25 minutes or until golden. Remove from oven; cool for just a few minutes then pat with butter. When completely cooled, sprinkle with powdered sugar if you wish.
Vanilla Cardamom Custard
  1. Sift together cornstarch, flour & cardamom. Using a whisk, combine the beaten eggs & the flour mixture until powders are dissolved. In a saucepan over medium heat, stir together milk, sugar & salt. Once sugar & salt are dissolved, add in the egg mixture & keep stirring everything until the mixture is thickened. Remove from heat & stir in butter & vanilla. Nice to serve warm under the blackberry dampfbuchteln.