CELEBRATING FAMILY DAY!
Family Day is observed on the third Monday in February in 5 Canadian provinces, where it is a day off for the general population with schools and most businesses being closed. However, there are some provinces where the holiday is named slightly different and is for different reasons. Its timing is said to have been selected to coincide with the American holiday of Presidents Day. About two-thirds of all Canadians will have the day off on Family Day.
Alberta was the first province to adopt Family Day as a statutory holiday in 1990. Family Day was scheduled to fall between New Year’s Day and Good Friday in order to grant another day off between these celebrations as they are approximately three months apart.
Chicken always seems like a family meal to me. Growing up on a farm where there were chickens being raised, that was always my mother’s ‘go-to‘ meal. That’s not to say it wasn’t delicious but definitely she knew every possible way there was to cook chicken I’m sure.
Using Boursin cheese in the sauce for this chicken takes it from your basic meal to something special without any effort at all, giving you more time with family & friends.
Print Recipe
Boursin Chicken
Votes: 1
Rating: 5
You:
Rate this recipe!
|
|
Votes: 1
Rating: 5
You:
Rate this recipe!
|
Instructions
Cut the chicken breasts in half lengthwise to get 4 thinner pieces. Season them with the garlic powder and some salt & pepper.
Add the oil and butter to a skillet over medium-high heat and let it heat up for a few minutes. Cook the chicken for about 5-6 minutes/side or until cooked through, then transfer it to a plate.
To the skillet, add the onions and sauté for about 5 minutes or until softened and lightly browned. If the pan seems dry, add a small splash more olive oil.
Add the chicken broth and the Boursin cheese to the skillet. Stir until you've got a smooth sauce. Let it bubble for 5 minutes, then stir in the chopped parsley if using.
Add the chicken (and any plate juices) back into the skillet and let it warm through for a couple of minutes. The sauce should be thicker by now (you can always cook it a bit longer if need be). If it's too thick, you can add another splash of chicken broth.
Season with salt & pepper if needed (I find the sauce fairly salty when using regular broth) and serve immediately.
Wine is not just a beverage with dinner, but can also be a key ingredient in dinner. Madeira wines are known for their versatility. Madeira perfectly complements all sorts of ingredients because of its vast range of wines. It not only adds flavors, but also dimension to the dishes. From soups to stews to desserts, it packs quite a punch and has an intense impact on the final product.
Madeira wine evolved on the island of the same name on the coast of Portugal. It presents different characteristics to all other types of fortified wine due to its specific winemaking process, since it is obtained by intentional heating, and characterized by a distinct ‘baked’ bouquet.
Madeira is classified according to several designations, including vintage, grapes used, and sweetness. There are a few variations on the production method, but Madeira must be oxidized and heated (a process called “maderization,” named after the wine). This makes for a fortified wine that can last for centuries.
Madeira has several taste profiles, but most will have flavors of caramel, walnut oil, peach, hazelnut, orange peel, and burnt sugar.
The first thing to check before cooking a Madeira based dish is what kind of wine does the dish require? It is always safe to use an average blended Madeira. Choose the safest- Finest or Rainwater type. These are packed with flavors and aromas and are typically inexpensive.
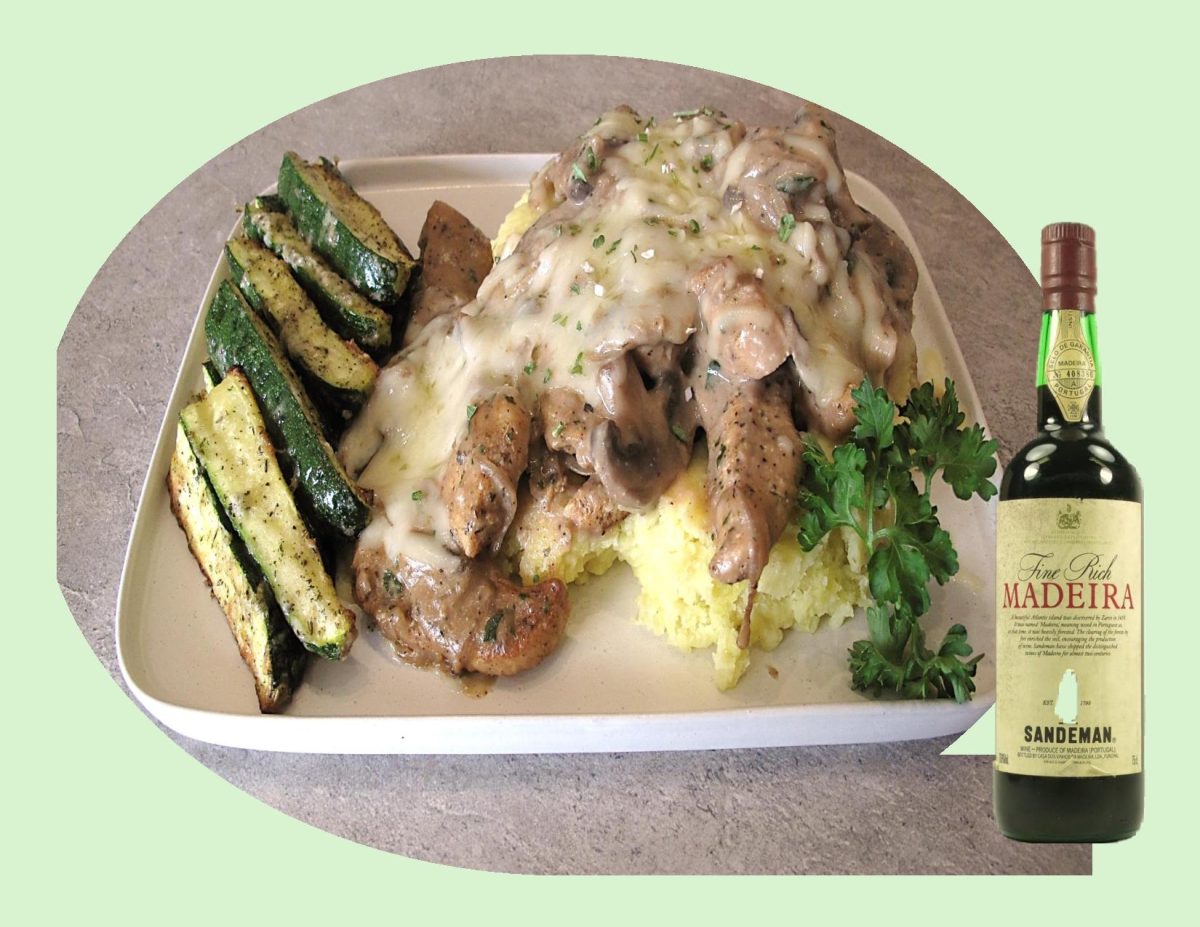
A good example is Sandeman Madeira Rainwater. It is light in body but full of flavor. It has a light amber color with golden highlights, as well as clean, nutty aromas. Its flavor is nutty and lightly complex, with a clean finish. This Madeira makes a wonderful accompaniment to a variety of foods and is also a fabulous cooking wine that can be used in various traditional dishes. ‘Rainwater Madeira’ was so named in the 18th century because it is as soft as rainwater and the color of straw, glistening after a shower of rain.
Print Recipe
Chicken Madeira
Votes: 1
Rating: 5
You:
Rate this recipe!
|
|
Votes: 1
Rating: 5
You:
Rate this recipe!
|
Instructions
In a large saucepan melt 2 tablespoons of butter. Add 1 tablespoon of oil then add the mushrooms to the pan. Cook the mushrooms for about 5 minutes until they become soft.
Add the onions to the pan & cook them along with the mushrooms for about 2-3 minutes. Add garlic & parsley to the pan & sauté them for a minute or two. Then, transfer this mixture to a plate.
Slice the chicken breast in lengthwise strips. Season with garlic powder, Italian seasonings, paprika, salt & pepper.
In the saucepan, melt a tablespoon of butter. Add a tablespoon of oil as well & let the butter foam. Add the chicken breast to the pan & cook it on both sides for 3-4 minutes each until golden brown. When it is cooked, transfer it to the plate with the mushrooms.
In the same pan, pour in the Madeira wine & bring it to a boil. When it has reduced to almost half its volume, add the beef stock & boil it for about 10 minutes until only ¼ of the original volume remains.
Add the heavy cream to the pan & simmer it for 2-3 minutes until it thickens. Sprinkle a pinch of salt & pepper into the pan to add flavor & stir.
Return the cooked chicken to the pan along with the mushrooms. Top it with the shredded mozzarella cheese. Place the pan in the oven broiler and broil it for 2-3 minutes until the cheese has completely melted.
Remove the pan from the oven. Place chicken on a serving platter & garnish with some parsley. Nice served with mashed potatoes.
Italian cuisine is renowned for its delicious and aromatic flavors, and one of the most essential ingredients that contribute to this is a blend of herbs and spices that add a distinct flavor to various dishes.
While these herbs are readily available in Italy, they were not always easy to find in America. As a result, early Italian immigrants needed a way to add their preferred flavors to dishes. ‘Italian seasoning’ provided exactly that. Its origins are a bit mysterious, with some people believing it originated in Italy and others insisting it is an American invention. However, the most common understanding is that the Greeks and Romans developed Italian seasoning somewhere in the Mediterranean during ancient times.
Italian seasoning is a mix of dried herbs with an earthy, piney flavor that’s subtly sweet and peppery. This kitchen staple includes dried basil, dried oregano, dried rosemary, dried thyme and dried marjoram, but there are several variations that also feature additions like dried sage, fennel seeds or even spices like garlic powder or crushed red-pepper flakes. Traditionally, though, it is just those five core herbs.
It has become a staple in North American kitchens and can be used to flavor just about anything, but some of our favorite uses are in classic Italian American dishes like meatballs, pizza or chicken Parmesan. It adds extra interest to olive oil for dipping bread or vinaigrette for salads. Or stir it into marinades to infuse your meat with woodsy, herbal flavor.
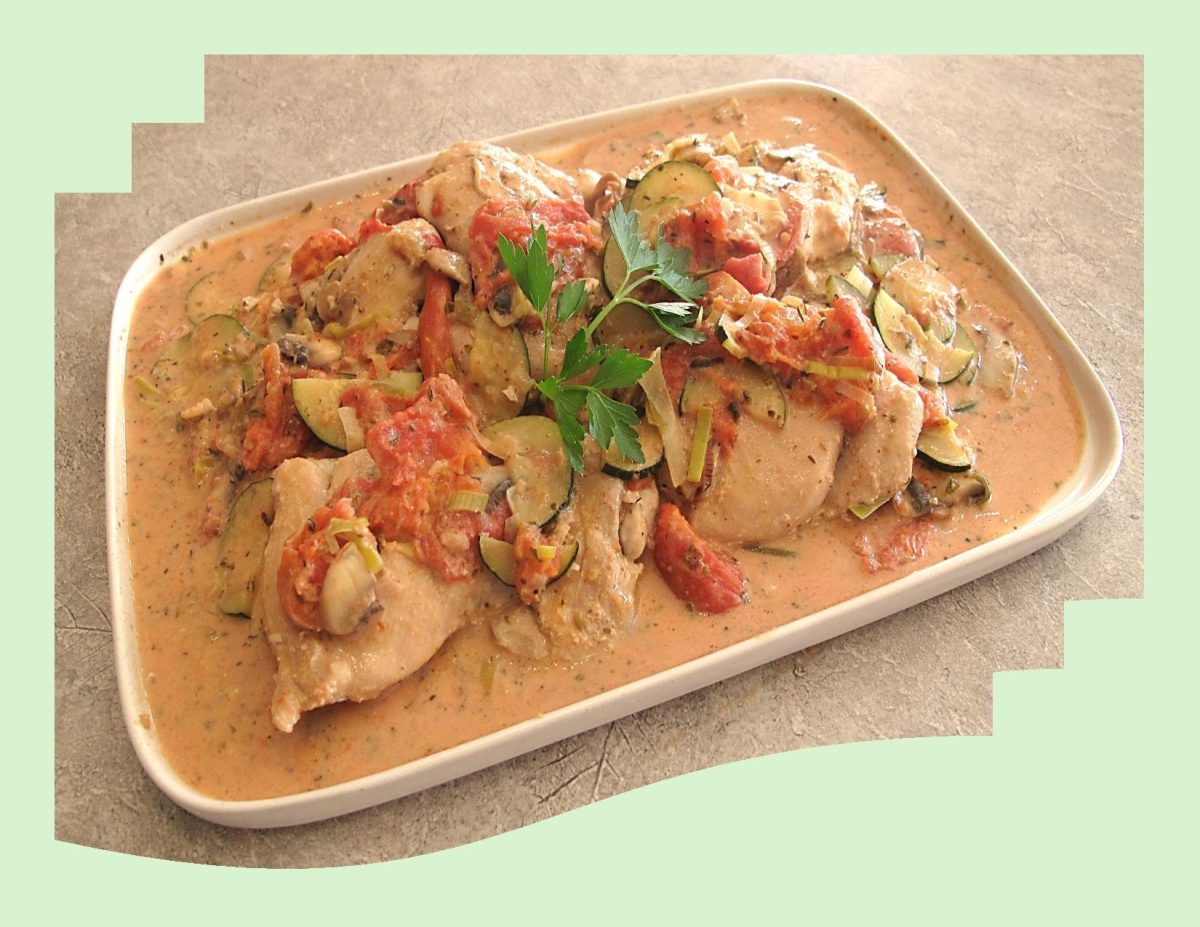
These chicken cutlets cook quickly and are highlighted with a creamy sauce made with tomatoes, zucchini and Italian seasoning. Nice served with roasted mashed cauliflower, brown or Basmati rice or orzo pasta.
Print Recipe
Creamy Chicken Skillet w/ Italian Seasoning
Votes: 1
Rating: 5
You:
Rate this recipe!
|
|
Votes: 1
Rating: 5
You:
Rate this recipe!
|
Instructions
Chicken
In a small dish, combine all chicken seasonings & sprinkle on both sides of chicken cutlets. Heat 1 tablespoon oil in a large skillet over medium heat. Add the chicken & cook, turning once, until browned & cooked through. Transfer to a plate.
Sauce
Add the remaining 1 tablespoon oil, zucchini, mushrooms & onions to the pan. Cook, stirring, until starting to soften, about 2 minutes. Cook, scraping up any browned bits, until the liquid has mostly evaporated, about 2 minutes. Add tomatoes, cream cheese & Italian seasoning. Bring to a simmer and cook, stirring to melt the cream cheese, for 5 minutes. Return the chicken to the pan and turn to coat with the sauce. Serve topped with basil or Italian parsley if desired.
Nice to serve with roasted mashed cauliflower, brown rice, orzo or basmati rice.
When you think of Mexican food you probably think of the standard burritos, nachos and quesadillas. While those dishes are definitely tasty why not do the summer ‘thing’ and incorporate these ingredients in a salad.
The idea of a full meal salad has always appealed to me. Of course, there are many of these using a variety of ingredients. Probably one of the most popular was the taco salad. The earliest record of it dates back to the 1960’s with its predecessor being the small teacup sized ‘Tacup’. It consisted of beef, beans, sour cream and cheese, served in a small ‘bowl’ made entirely of a Fritos tortilla.
The taco in a Tacup was invented by Charles Elmer Doolin, the founder of Fritos (tortilla chips). He created a device that looked like tongs but with two tart molds at the end of each tong. One mold would fit within the other mold with a tortilla sandwiched between them. The scalloped-edged shell was dipped into hot oil. Holes in the bottom mold exposed the tortilla to the hot oil, enabling it to cook evenly.
Tacups were first served in Dallas, Texas in the early 1950’s and by 1955, he was selling them in Fritos’ flagship restaurant, ‘Casa de Fritos’, at Disneyland in Anaheim, California. It became popular enough that the Tacup was made bigger and served as a full, main-dish sized salad bowl.
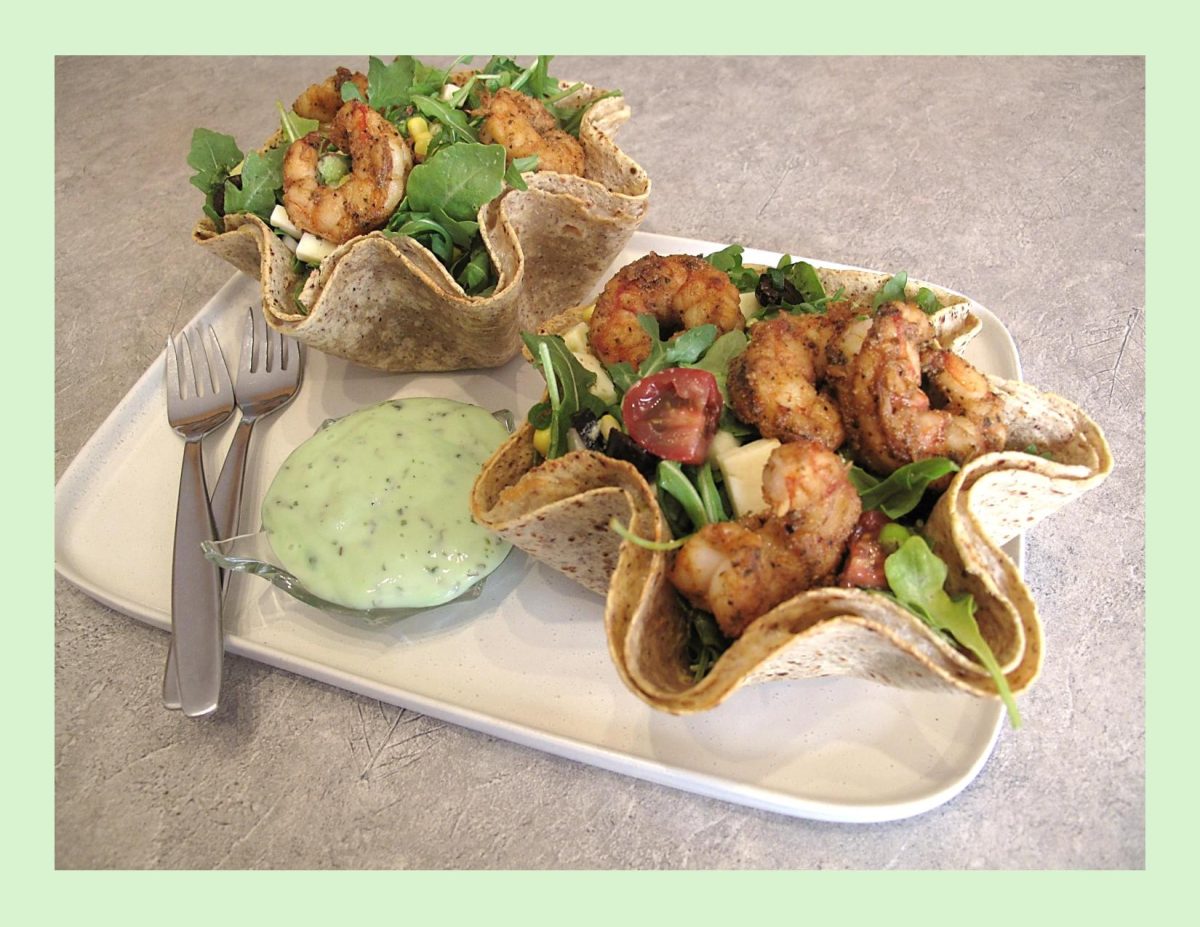
Today’s salad is a satisfying meal, a seriously feel-good dinner salad that’s crisp, spicy, and fresh all at once. Tacos de camarones (‘shrimp tacos’) originated in Baja California in Mexico. But these shrimp tacos in salad form gives you that full meal deal. All the very best elements —seasoned shrimp, healthy fresh veggies, in an edible tortilla bowl with a homemade cilantro lime dressing.
Print Recipe
Shrimp Taco Salad
Votes: 1
Rating: 5
You:
Rate this recipe!
Ingredients
Creamy Cilantro Lime Dressing
Ingredients
Creamy Cilantro Lime Dressing
|
Votes: 1
Rating: 5
You:
Rate this recipe!
|
Instructions
Cilantro Dressing
In a food processor, place the cilantro, garlic, avocado, lime juice, honey, coriander & salt. Pulse to combine. With the machine is running, pour in the olive oil & process until smooth.
Shrimp
In a medium bowl, add all marinade ingredients (except shrimp) & blend well. Add shrimp tossing well to coat. Set aside to marinate for 15 minutes. In a saucepan, melt a Tbsp butter then sauté shrimp over medium-high heat for 5 minutes or just until shrimp is cooked.
Salad Ingredients
In a saucepan, fry bacon until cooked but not too crisp, drain on paper towel & chop. Drain canned or cook fresh corn on the cob & remove kernels from cob. Peel, pit & cube avocado. Sprinkle a bit of lime juice on it to keep it from going brown. Halve grape tomatoes. Slice green onions, chives & dill. Drain sliced black olives. Cube cheese.
Tortilla Bowls
-
Brush inside of 2 heat resistant glass bowls with oil. Place one tortilla in each bowl so that the shape more or less adheres to the bowl. Line each tortilla with cheese slices then place a second tortilla on top.
Place the bowls with the layered tortillas in the oven & bake for 7 minutes. Remove the bowls from the oven & allow to cool before removing the 'edible tortilla bowls'.
Assembly
Place tortilla bowls on serving plates. In a large mixing bowl place shrimp & all salad ingredients. Toss gently, then divide between tortilla bowls. Drizzle with cilantro dressing (or dressing of choice) & serve.
Often, when we think of chicken meals, rice comes to mind as an accompaniment. Couscous can be used as a fluffy grain alternative to rice and, because the flavors of each are subtle, swapping them won’t throw your entire recipe off course. Both rice and couscous take on the flavors of the seasonings you add, and neither needs much to shine.
While rice is a grain and couscous are a type of pasta, you can buy whole-grain versions of both. Couscous’s flexibility has made it a favorite ingredient in kitchens worldwide. This tiny pasta can be used as a side dish, as a part of an entrée, or added to soups and salads to boost texture. Its mild flavor makes it ideal for combining with seasonings ranging from sweet to spicy, and it can be used to recreate dishes from any cuisine.
Couscous is a pale, delicate grain that North Africans have served for centuries with a meat or vegetable stew on top.
Although it is made from wheat, couscous is the North African equivalent of rice, and it could be called a second cousin of German spaetzle, although it does not contain egg and the granules are much smaller.
Steamed in a manner similar to rice, couscous takes about 10 minutes to prepare. Delicious when served hot, it is equally good at room temperature.
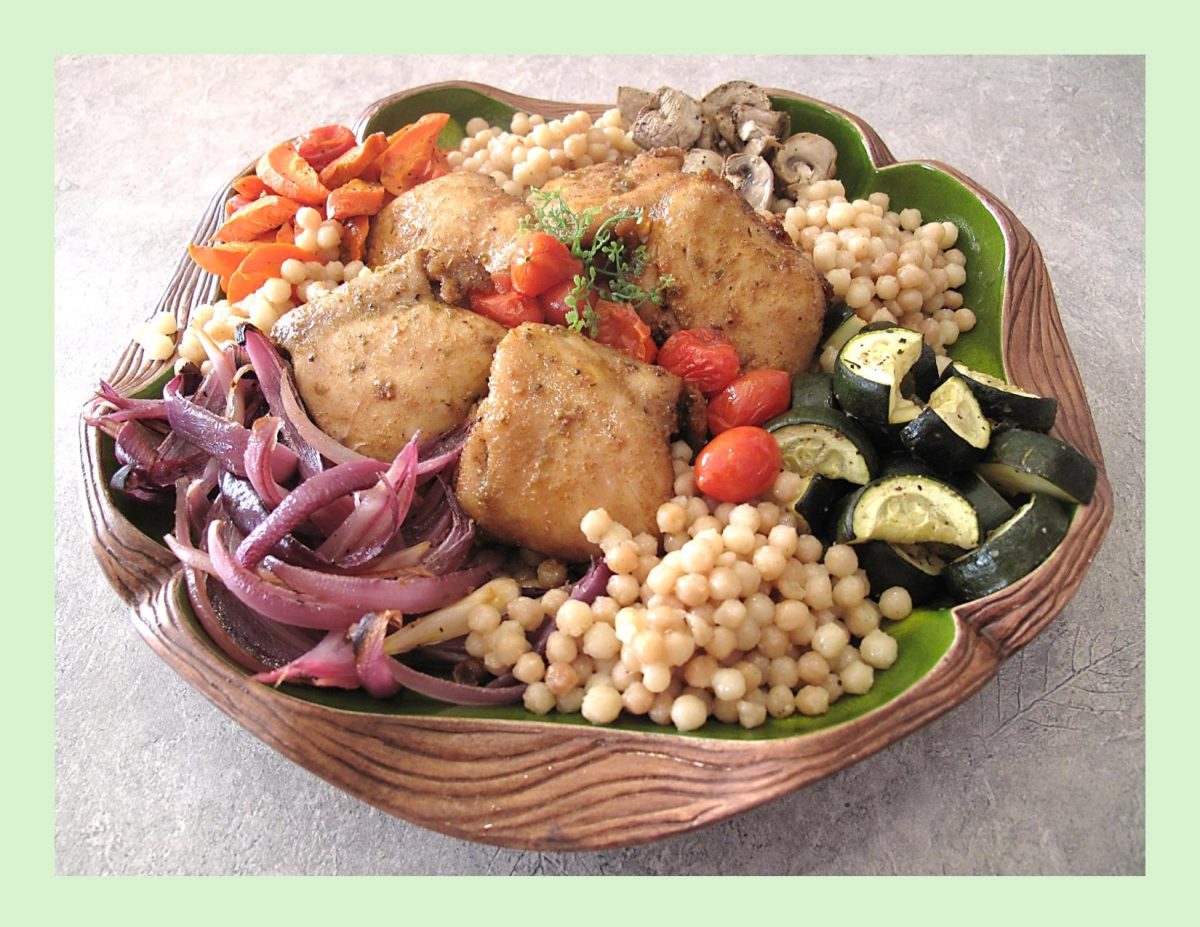
Today, I’m preparing a sheet pan meal with roast veggies and chicken thighs and serving them with a couscous accompaniment. Should be good!
Print Recipe
Pearl Couscous w/ Chicken Thighs
Votes: 1
Rating: 5
You:
Rate this recipe!
|
|
Votes: 1
Rating: 5
You:
Rate this recipe!
|
Instructions
Vegetables
-
In a plastic bag place Italian dressing. Add carrots, onions, zucchini, mushrooms & garlic. Shake well to marinate (do them separately if you wish). Place on a foil lined baking sheet & roast until tender. Marinate cherry tomatoes in a bit of dressing & add to the pan for the last 10 minutes of baking.
Chicken Thighs
In a small dish combine all chicken seasonings. In a plastic bag, place chicken & 2 Tbsp olive oil. Shake well to cover thighs with oil then add spice mixture & shake well again.
Line a baking sheet with foil. Add chicken thighs & roast in oven at the same time as veggies are cooking.
Couscous
In a medium saucepan, heat oil over medium-high until just shimmering. Add the pearl couscous & toss around to toast until golden brown.
Boil water & add it to the toasted pearl couscous. Season with salt. Bring to a boil, then turn the heat to low. Cover & cook for about 14 minutes or until couscous is tender. Remove from heat.
Serving
On a serving plate, place the couscous & vegetables. Top with chicken thighs & drizzle juice from roast chicken over all. Serve.
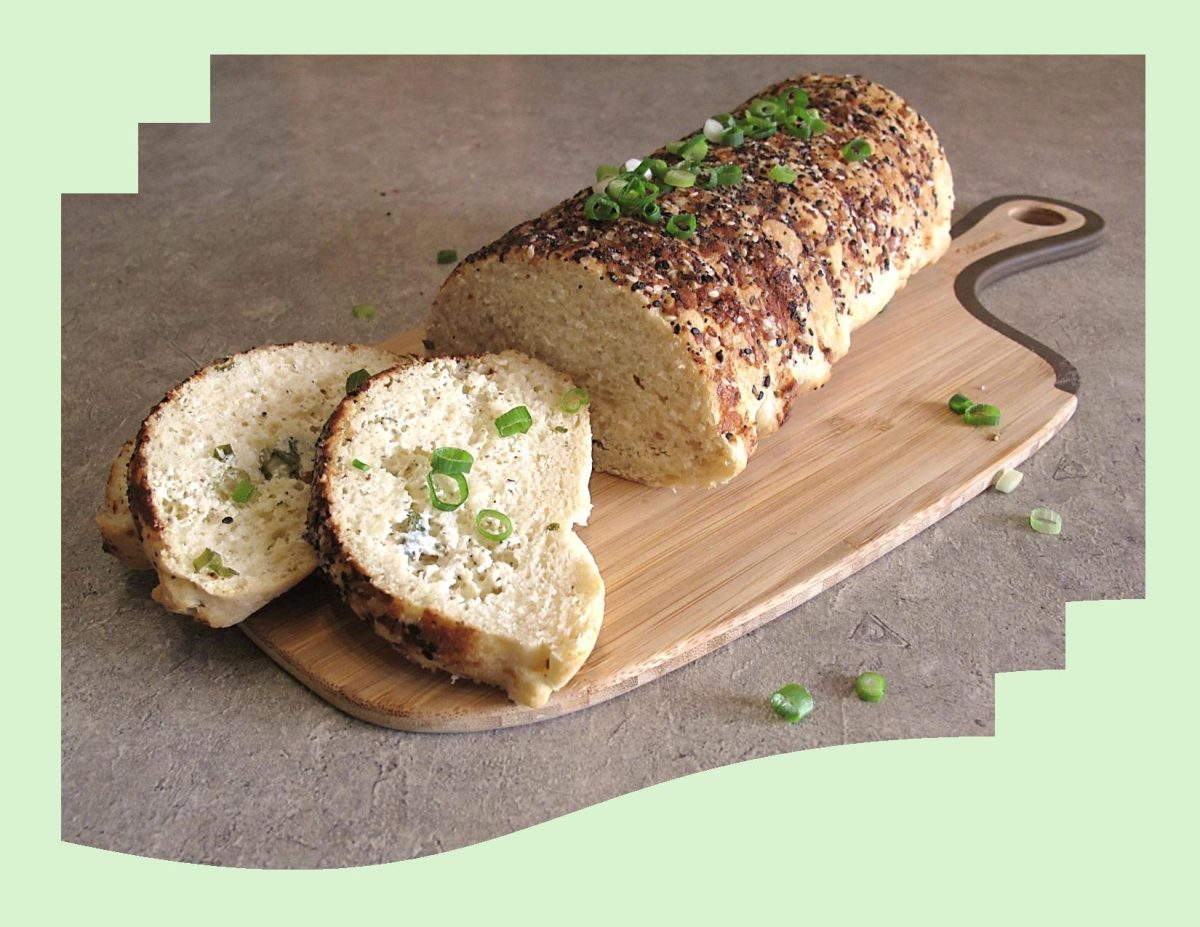
A glass of beer, a loaf of bread, a bowl of cereal, a standard of measurement, a form of currency, a medication – they all began with barley – an ancient grain, possibly even older than rice. Barley’s once exalted status has been redefined. No longer does it serve as a unit of monetary exchange or a unit of measurement. No physician thinks of prescribing it for an ailing patient. Now, barley is largely relegated to being a food or a key ingredient in the making of beer.
We owe much to the desert nomads and the camel caravans who endured sandstorms and unrelenting heat to trade their sacks of barley with distant neighbors, who then traded with other distant neighbors. Our steaming bowl of mushroom barley soup is a hand-me-down recipe with roots that take us back to prehistoric man. In 2005 barley ranked fourth for cereal production. There are many types of barley, many different uses for it and a long history of its importance to mankind.
Barley has a unique family-friendly quality. You can make a batch ahead on a Sunday, and it keeps well for at least three days in the fridge, and up to three months in the freezer. Monday, you can use it as breakfast and Tuesday, put a cup or two in your salad, and on Wednesday, you can add a barley casserole to your meal.
Four ways to cook barley. For each cup of barley, add 2 1/4 cups of water.
-Stove top: bring barley to a boil, reduce heat and simmer for 30 to 50 minutes.
-Rice cooker: barley will cook in the same amount of time as brown rice — approximately one cycle in a rice cooker.
-Oven: place barley and liquid in a covered casserole dish and cook it in the oven.
-Slow cooker: cook barley in a slow cooker for 3 to 4 hours on low heat.
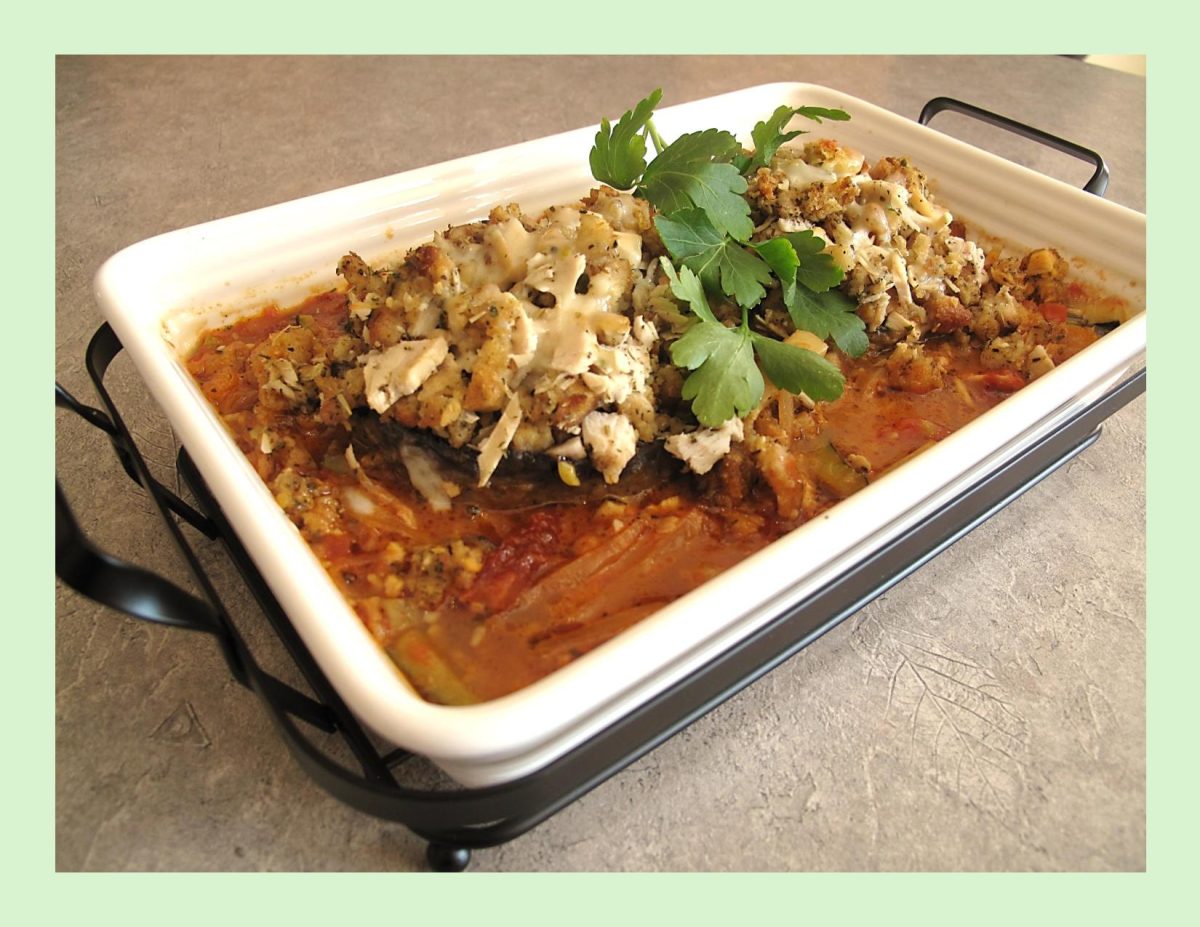
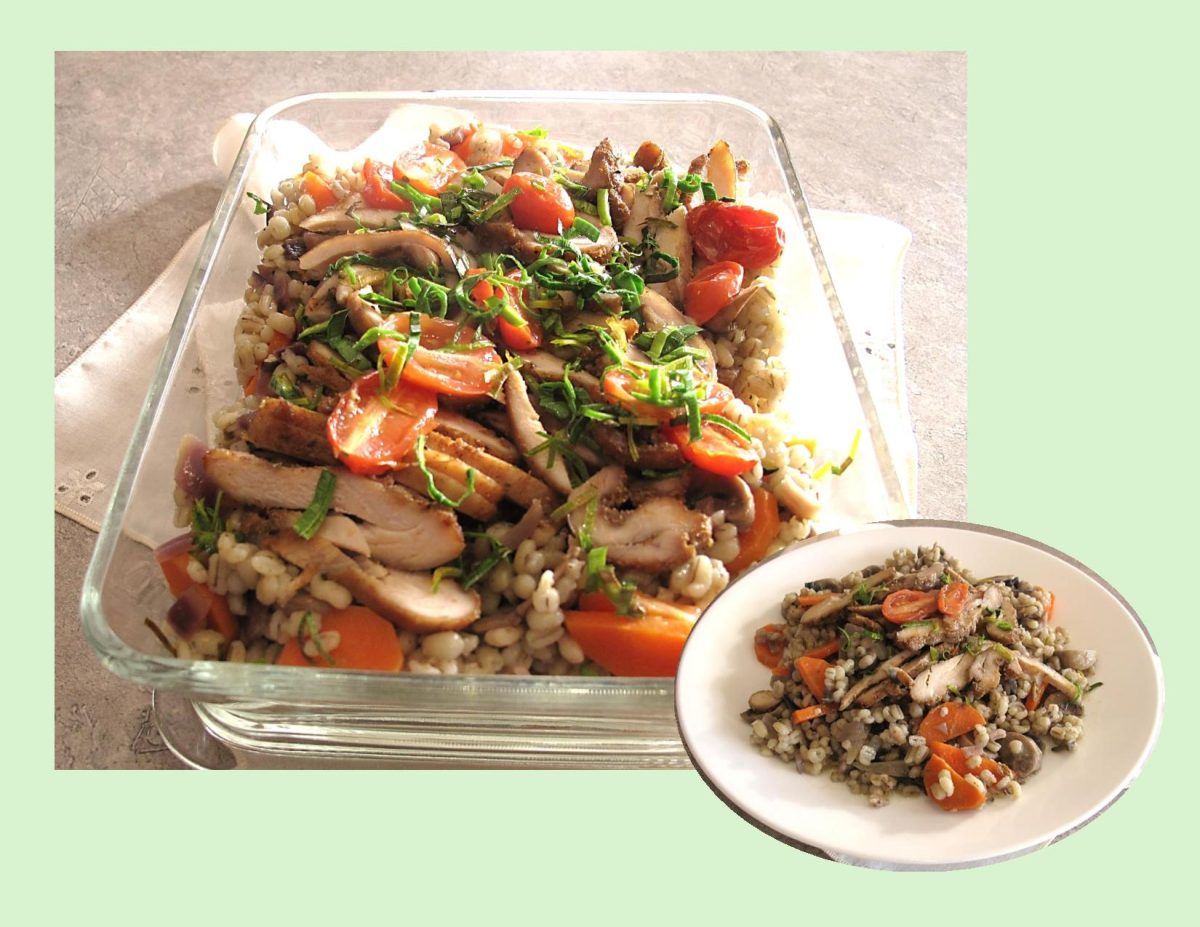
Barley Chicken & Mushroom Casserole is such a wholesome and comforting meal.
Print Recipe
Barley Chicken & Mushroom Casserole
Votes: 1
Rating: 5
You:
Rate this recipe!
|
|
Votes: 1
Rating: 5
You:
Rate this recipe!
|
Instructions
Chicken Thighs
Preheat oven to 400° F. Line a rimmed baking sheet with foil or parchment paper. Set aside.
In a small bowl, whisk together the seasonings until well combined. Pat the chicken thighs dry with paper towels and place them in the baking dish.
Rub both sides of the chicken with olive oil. Sprinkle the seasoning mixture over the chicken, rubbing it on both sides of the chicken thighs.
Bake in the preheated oven, without moving or turning, until the internal temperature of the thickest part of the chicken reaches at least 165° F. This will take about 30-40 minutes, depending on the size of your chicken thighs. During the last 15 minutes, place the cherry tomatoes on baking tray & roast. Remove chicken thighs & tomatoes from oven. Slice thighs in 1/4-inch thick slices. Keep chicken & roasted tomatoes warm.
Barley
In a saucepan, place the water & vegetable broth powder, stir to dissolve. Add barley & bring to a boil. Reduce heat to a simmer & cook barley until tender. Cooking time for pearl barley is around 35 minutes. Turn off the heat, stir the barley, cover the saucepan and let it stand for another 5 to 10 minutes.
Vegetables
In a saucepan, sauté vegetables in 1 Tbsp oil until tender then season to taste. Combine with cooked barley.
Serving
In a casserole serving dish, place the veg/barley mixture. Top with sliced chicken thighs & roasted tomatoes. Garnish with sliced green onion & serve.
Recipe Notes
- If you find the barley & vegetables seem a bit dry add a bit more vegetable broth.

With Christmas right around the corner, pasta meals are an easy quick fix on those busy days leading up to the big day. Stuffed Shells are truly the perfect meal to make ahead of time since you can prepare everything but hold off on baking them until you’re ready to eat.
Stuffed shells are a tasty dish that is usually made with ricotta cheese or other types of cheese inside the pasta shells. Tomato sauce is another common ingredient in the dish. However, there are so many ways to jazz it up and one might be surprised just how many unique ingredients one can put into a shell.
I have always loved stuffed pasta shells and over the years I have stuffed them in every way I could imagine. There are endless variations such as using different cheeses and herbs or making some homemade marinara or sun-dried tomato sauce.
There’s a reason surf and turf is often one of the most desired items on a restaurant menu — it’s because meat and fish are the perfect complement to each other! The light flavor of fish and shellfish is a great addition to the richer, heartier flavor of meat.
Today, I’m combining some shrimp and chicken sausage in my filling and topping it with a nice smoky sun-dried tomato parmesan sauce. Should be good!
Print Recipe
Shrimp & Chicken Sausage Pasta Shells
Votes: 1
Rating: 5
You:
Rate this recipe!
|
|
Votes: 1
Rating: 5
You:
Rate this recipe!
|
Instructions
Pasta / Filling
Cook pasta shells in a pot of salted boiling water for about 10-12 minutes. Drain well & lay on a wire rack to keep them from sticking together until ready to fill.
In a large skillet, heat 1 Tbsp oil over medium heat. Add onion & mushrooms; sauté until tender & moisture has evaporated from mushrooms. Add chicken sausage & minced garlic. Cook for 3 minutes, stirring frequently. Add wine & cook until sausage is no longer pink about 4-5 minutes more. Drain well & transfer to a large bowl.
Peel & devein shrimp; chop into 1/2-inch pieces. In a small bowl, whisk together broth & flour. Set aside.
In the same skillet, heat remaining 1 Tbsp oil over medium heat. Add shrimp; cook, stirring constantly, until shrimp begins to turn pink. Stir in flour mixture. Add cream, Old Bay seasoning, garlic powder & Italian seasoning; stir until thickened. Remove from heat & stir in sausage mixture. Set aside until ready to use.
Sun-Dried Tomato Sauce
In a skillet, heat oil. Add onion & cook for 2 minutes until it starts to soften. Add garlic, oregano, thyme, paprika & sun-dried tomatoes. Cook for 2 minutes while stirring. Add vegetable broth; bring to a boil & simmer for 5 minutes.
Stir in cream & parmesan cheese into the sauce. Remove from heat & cool for a few minutes. Pour sauce into food processor & process to a fairly smooth consistency. It will not be completely smooth but that is fine.
Assembly / Baking
-
Spread half of the sauce over the bottom of a 13 x 9-inch baking dish. Divide filling between cooked shells. Lay in rows over sauce. Pour remaining sauce over top carefully covering all the shells.
Loosely lay a piece of foil paper over baking dish and bake for 45 minutes or until bubbling nicely.
Pastetli were invented in the early 1800s in Antonin Carême’s pastry store in Paris, France where they’re called vol-au-vent, French for ‘windblown’ to describe its lightness. While they’re served as an appetizer in France, they’re eaten as a main meal not only in Switzerland but also in Belgium and the Netherlands. It is also from the Netherlands where the Swiss name Pastetli origins from. The Dutch call them pasteitje (little pastry). From there it came to the German Pastete. Just to add a little complication though, a Pastete in Switzerland is rectangle cake shaped puff pastry pie filled with sausage meat, mushrooms in a creamy sauce.
A vol-au-vent is a light puff pastry shell that resembles a bowl with a lid. The shell is generally filled with a creamy sauce (most often a velouté sauce) containing vegetables, chicken, meat or fish. The lid is placed on the filled shell and the pastry is then served as an appetizer, also known as bouchée à la Reine, or as the main course of a meal. When prepared, the pastry dough is flattened and cut into two circles. A smaller circle is cut out of the center of one of the circles, which then will be used as the lid. The circle without the center cut and the circle with the center cut are then joined together around the edges so as the pastry bakes, it rises into a shell with a hole in the top. The lid, which is baked separately, is added later. The pastry shell may be made the size of an individual serving, or it can be made in several different sizes to become a main serving for one or a larger size to be served for more than one.
Vol-au-vents rose to prominence in Paris in the 19th century. In post-war Britain, they were a mainstay of any self-respecting buffet, served to suitably impressed guests alongside welcome drinks at dinner parties. By the 1990s, they had become unfashionable and remained so for decades. Updated vol-au-vents started reappearing in chic restaurants a year or two before the covid pandemic (2020) erupted and have become the retro appetizer or main course to have.
You can even adapt them to make some elegant desserts. Fill with cream and fresh fruit or melt a chocolate orange with a dash of Grand Marnier and orange zest then spoon this quick-fix mousse into the cases and top with sweetened Chantilly cream and chocolate shavings.
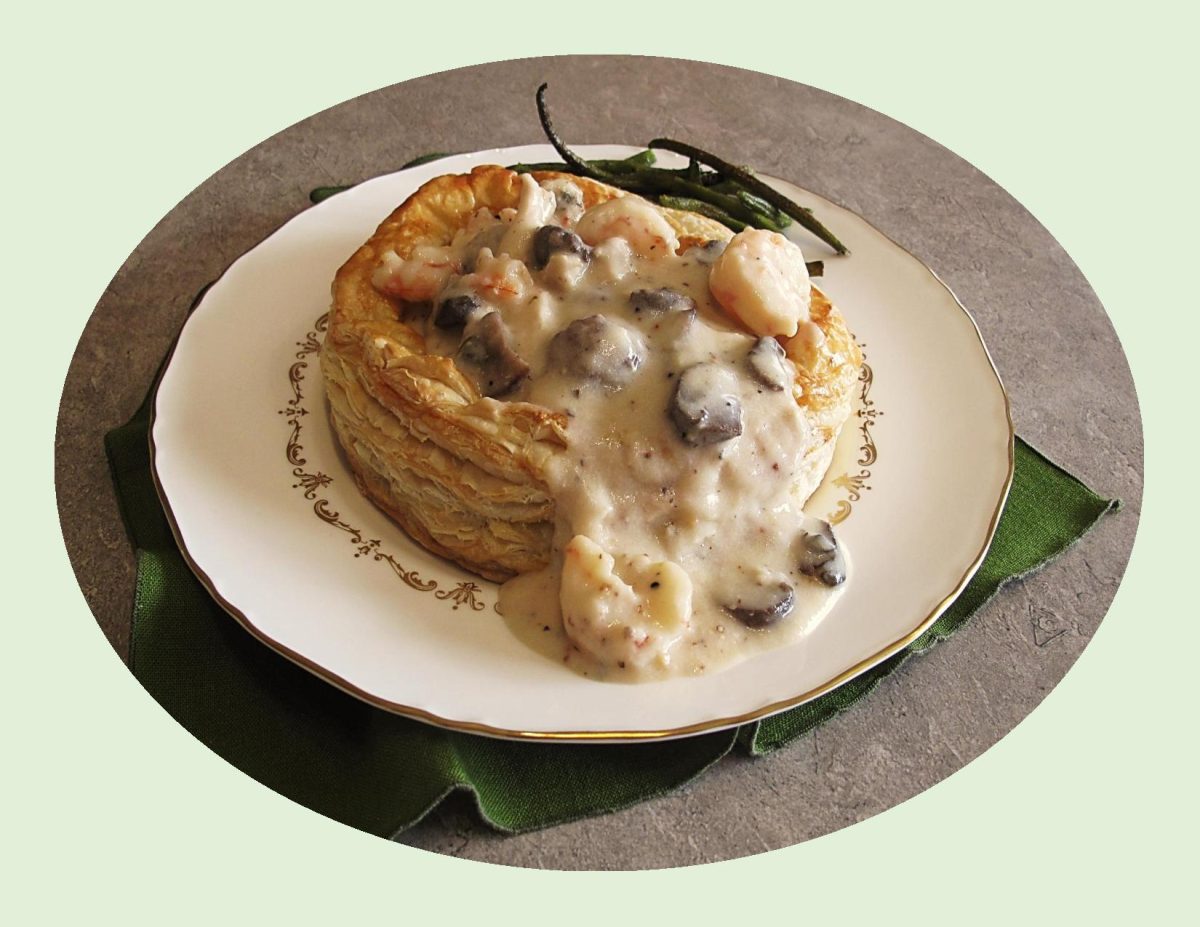
For our main course vol-au-vents, I am making an interesting filling which includes, chicken, shrimp, mushrooms and tiny meatballs. Sounds a little odd but is packed with flavor.
Print Recipe
Chicken, Veal & Shrimp Pastetli (Vol-Au-Vent)
Votes: 1
Rating: 5
You:
Rate this recipe!
|
|
Votes: 1
Rating: 5
You:
Rate this recipe!
|
Instructions
Chicken/Broth
Add the rosemary, garlic, bay leaves, cloves, chopped celery, carrot and onion to a stock pot. Season generously with pepper and salt. Cut the chicken up: legs, wings and breasts. Also chop up the remaining carcass. Add it all to the pot. Then fill it with water (about 7 cups) until the chicken is fully submerged.
Place the pot over high heat until boiling, then leave it there for 10 minutes. Turn the heat lower and gently cook the chicken for about 30 minutes. Remove the chicken from the heat and let it cool down for another 45 minutes.
Mushrooms/ Shrimp/ Cheese
Chop the mushrooms into bite-size pieces. Peel & devein shrimp. Grate parmesan cheese.
Puff Pastry Shells
-
Cut (4) 5-inch circles from puff pastry. Beat the egg & prick holes in the large circles with a fork & brush with egg. Cut 12 more RINGS from pastry about an inch wide. Lay a ring on each of the 4 circles & brush with egg wash. Repeat this until there are 3 rings on each large circle. Bake the puff pastry shells for 25 minutes.
Finish the Broth
Remove the cooked chicken from the hot stock. Reserve stock for later. Remove any chicken skin, bones, veins, cartilage, or sinew (discard all this) & pick the cooked meat from the bones. Shred the larger bits up roughly. Then transfer the chicken meat to a large saucepan.
Strain the chicken stock in a fine sieve or colander over a large pan. You should end up with about 6 cups (1,4 l) of chicken stock. Discard the cooked vegetables.
Meatballs
In a bowl, combine ground veal (pork), salt & pepper, egg & breadcrumbs. Mix well and make tiny balls of ½ oz (15 g) each. You should end up with about 20 of them. Cover the meatballs with cling film and store them in the fridge until later.
Bring the stock to a gentle boil again. Once warm, add the meatballs, shrimp & mushrooms.
Poach them for about 5 minutes. Then remove the meatballs, shrimp & mushrooms using a slotted spoon. Add them to the shredded chicken in the large saucepan.
Béchamel Sauce
Take the chicken stock off the heat now. In a large saucepan melt the butter over medium heat. Add the flour and whisk well until you get a wet crumble. Gently cook this over medium-low heat for about a minute. Then gradually add splashes of the warm chicken stock until you get a sticky flour paste. Keep stirring. Don't add too much at once or the sauce will become lumpy.
Whisk well. Gradually add more chicken stock (about 3 to 4 cups) until you get a pretty runny sauce. Bring the sauce to a low simmer & cook for 3-4 minutes or until thickened. whisk in Montreal Steak Spice, onion salt, garlic powder, mustard & grated parmesan.
Add the béchamel sauce to the chicken, meatballs, shrimp & mushrooms. Stir carefully. Cover the pan for another 5 minutes and let the vol au vent filling warm through or place it back over very low heat.
Put the vol au vent puff pastry casings onto 4 serving plates. Top with the chicken, meatball, shrimp & mushroom filling. Garnish with chopped fresh parsley if desired. Serve the vol au vents hot.