Celebrating 10 Years of Blogging!

Today, February 14th 2026, is the tenth anniversary of the blog ‘Good Food & Treasured Memories’. Ten years ago, I decided to start writing a food blog. Brion and I had just spent three months in Ecuador. Prior to going, I needed to have a shoulder replacement operation. After we returned, I had the operation and with Brion’s help recovered successfully. The only thing was, even though my shoulder was much improved, it pretty much took me out of the workforce as I had known it before. After having been so busy in the previous years, it took a lot of ‘regrouping’ to settle it with myself that I had reached a different phase of my life. Prior to our time spent in Ecuador I had written and with Brion’s technical savvy, published two books.

In 2014, Good Food & Treasured Memories, my first ‘print’ copy memorabilia/cookbook was published with good success in Northern Alberta. It was followed by a second book in 2015 titled ‘The Taste of a Memory’. This book was written in memory of my parents, which took its readers back to a gentler time with some personal childhood memories. The book also contains a sweet and savory collection of at least 160 recipes about the ultimate ‘comfort food’ – bread pudding!

With the turndown in our economy, I wrote my first eBook, Living Large on a Lean Food Budget’, which outlines smart strategies for navigating a realistic food budget to keep ‘life in balance’. It was published on Amazon.com in March 2016 and is still available today.

With these projects finished, it seemed only natural to continue this passion for food and writing in the form of a food blog. Once again, Brion’s technical abilities came into play as I needed a very specific site to work with. I wasn’t interested in working with lots of sponsors that required me to advertise their products, etc. The whole purpose of the site was to post interesting articles along with some great food. Having spent 35 years in the food industry, food and food history is something I always gravitate to.

With much time and effort, Brion built a website with a clean, precise format I could work with. We decided to use the ‘Good Food & Treasured Memories’ name again as it was so fitting of its content.

With blogs, it’s not only the award winning sites that have something to offer; its the blogs written by people in their pajama’s at late hours of the night, created because those writers are dying to make something, to publish something, to give a voice to all the thoughts in their head, its the blogs written by people who don’t want to forget their recipes, who want them recorded somewhere for their friends and their nieces and nephews and their kids, its the blogs pursed for no other reason than because they’re fun.

Over the course of ten years I have enjoyed the many aspects of writing a food blog. In order to write about food and its history, I have done many hours of research to keep my articles accurate and interesting. Recipe development is and has always been something I love doing, so creating relevant recipes for each blog article put the icing on the cake so to speak.

Each year, at least 120 blogs with new articles and recipes have been added. When I first started writing the blog I had no idea how time consuming it would be. When I would look at other personal blogs and see they had only kept them up for a few years I wondered why. After ten years of blogging I now understand why. It definitely takes commitment to keep it current but I have also learned that good organization still allows you lots of time to do the other things that make life enjoyable such as spending time with my husband Brion.

With the website being available online at Google, Pinterest, Instagram as well as Facebook it is being read around the world. It has been so unique and rewarding receiving feed back from readers worldwide.

Thanks to everyone who has read and enjoyed the blog for the last ten years. It has been an incredible journey for me and I hope to continue blogging for many more.

Alice & Brion

Since it’s Valentines Day, I thought this strawberry rhubarb cake would be a fitting dessert for the occasion as well.

Print Recipe
Strawberry Rhubarb Crumble Cake
Instructions
Cake
  1. Preheat your oven to 325 F. Spray two 9 x 13 baking pans with nonstick spray, line the bottom of each pan with parchment paper and spray again. Set aside.
  2. In a medium bowl or measuring cup, whisk together the egg whites, whole egg, and vanilla. Set aside.
  3. In a bowl of an electric mixer, fitted with a paddle attachment, combine the dry ingredients together on low speed for 30 seconds.
  4. Add the butter one piece at a time, about every 10 seconds. Once all the butter is added, pour in the buttermilk and mix on low for about 1 minute, until the ingredients are incorporated.
  5. Scrape down the sides of bowl and begin to add the egg mixture in 3 separate batches, mixing on medium-low until light and fluffy, about two minutes. Fold once or twice to ensure the batter at the bottom of the bowl is incorporated and mix for another 20 to 30 seconds.
  6. Scrape down the sides of bowl and begin to add the egg mixture in 3 separate batches, mixing on medium-low until light and fluffy, about two minutes. Fold once or twice to ensure the batter at the bottom of the bowl is incorporated and mix for another 20 to 30 seconds.
  7. Divide batter evenly between the 2 pans (about ------- ounces of batter in each of the two 9 x 13 pans), spreading evenly with a small offset palette knife.
  8. Bake for about 25 to 30 minutes. Check cake around 23 to 25 minutes and then set the timer for 2-to-3-minute intervals if the cake needs to bake longer. You're looking for a few moist crumbs to come out on the toothpick when inserted into the center of the cake.
  9. Let the cake layers cool on racks for 10 minutes before inverting onto greased wire racks. Gently turn the cakes back up so the tops are up and cool completely. Once the cakes are cooled completely, level the tops if needed.
  10. Wrap each cake layer with plastic wrap and chill in freezer for at least an hour before using. The cake layers can be stored for up to a few days wrapped once in plastic wrap and frozen. To store longer than a few days, wrap twice in plastic wrap, then in foil, and seal in a zip-lock bag.
Compote
  1. In a medium size saucepan, combine the strawberries, rhubarb, sugar & vanilla over medium heat. Bring to a boil. Once the mixture is boiling, reduce the heat to low & let simmer, stirring occasionally, until the fruit is tender. Let cool completely before using in the cake. Can be made ahead of time and stored in an airtight container for up to a week.
Crumble
  1. Preheat your oven to 375 F. Line a baking sheet with parchment paper. Set aside.
  2. In a medium size bowl, combine the flour, sugar, salt & cinnamon. Whisk to blend. Add the cubes of butter & rub in with your fingertips. The mixture will stick together like clumps. Mix in the oats & nuts.
  3. Bake for 8 to 10 minutes, stirring the crumble halfway through. Let cool completely before using in the cake.
Buttercream
  1. In the bowl of a stand mixer fitted with the paddle attachment beat the butter on medium speed for about 2 to 3 minutes, until the mixture is light and fluffy. Adjust the mixer to low speed, slowly add the powdered sugar, followed by the heavy cream, clear vanilla extract & a dash of salt. Continue to beat the buttercream on medium-high speed for an additional 3 to 5 minutes. Before frosting your cake, mix the frosting by hand with a wooden spoon to push out the air pockets.
Assembly
  1. Place the first cake layer, top side up, on a cake board. Using an offset icing spatula, spread a thin layer of frosting over the cake layer. This creates a barrier between the cake and fruit filling, so the cake doesn't become soggy.
  2. Pipe a rim of frosting around the edge of the cake layer. This will help support the cake layers and prevent the fruit filling from spilling out. 2. Spread about 1/2 cup of the fruit filling on the cake layer. 3. Sprinkle about half of the crumble over the fruit filling. 4. Gently place the second cake layer top side down on the filling and crumble.
  3. Spread about 1/2 cup of the fruit filling on the cake layer. Sprinkle crumble over the fruit filling. Gently place the second cake layer top side down on the filling and crumble.
  4. Freeze the cake for about 10 minutes to help set the frosting and filling, making it a bit more stable for when you frost.
  5. After the filling is set, use a small amount of frosting to apply a crumb coat around the entire cake. Freeze the cake again for another 10 minutes to set the crumb coat.
  6. After the crumbs are locked in, continue to frost and decorate the cake.

Apricot Chai Liqueur Scones

I’ve probably posted at least twenty different kinds of scones on the blog over the years, but I had yet to make scones using chai ‘liqueur’.

There are many recipes using chai spices such as cinnamon, ginger, cardamom, cloves, nutmeg and anise. I wanted to incorporate the actual liqueur in these scones as well to pop up the flavor a bit more.

And while most fruits pair well with chai, some may have a delicate flavor that won’t taste great with the various spices in chai. When selecting these fruits, always go for dried options such as raisins, prunes, dates, apricots, figs, and peaches.

These scones make an excellent choice for breakfast or as an afternoon snack this time of year.

Print Recipe
Apricot Chai Liqueur Scones
Votes: 1
Rating: 5
You:
Rate this recipe!
Course Brunch
Cuisine Asia
Servings
SCONES
Ingredients
Scones
Chai Cream Cheese Icing
Course Brunch
Cuisine Asia
Servings
SCONES
Ingredients
Scones
Chai Cream Cheese Icing
Votes: 1
Rating: 5
You:
Rate this recipe!
Instructions
Scones
  1. Preheat oven to 375 F. Line a large baking sheet with parchment paper.
  2. In a food processor, combine flour, oats, brown sugar, baking powder, baking soda, salt, and spices. Cut in butter until mixture resembles coarse crumbs. Place in a large bowl.
  3. In a small bowl combine egg, chai liqueur & sour cream. Add wet mixture to flour mixture along with the apricots. Stir ONLY until combined. Do NOT overmix.
  4. Divide dough in half. Using a spatula scrape each piece of dough onto the parchment paper on the baking sheet. Dip the spatula in flour, then flatten each piece of dough to about 1-inch in height as well as forming it in a circle shape. Cut each round into 8 wedges.
  5. Bake scones for 12 to 15 minutes or until golden brown. Remove from baking sheet. Recut the scones. Cool slightly on wire rack.
Icing
  1. Using a mixer, combine cream cheese, butter, powdered sugar, chai liqueur & milk. Beat on low speed, gradually increasing to high until light & fluffy. Pipe over scones.
Recipe Notes

The amount of sugar used in these scones is what you prefer personally. I only used the 1/3 cup which makes them nice to serve with coffee.

Banana Crumble

Crumbles have everything. They are sweet/tart, yielding, crunchy and caramelized. Another beauty of crumbles is that they have so few ingredients, sometimes as few as four – fruit, flour, butter and sugar – which, with the addition of heat, transform themselves into puddings of sublime comfort.

The most likely origin story for crumble is that it originated in the United Kingdom in the 18th century. At that time, crumble was known as ‘cottage pudding’ and was a more accessible and simpler alternative to pastry-based pies, which required more ingredients and time to prepare. Crumble gained popularity in Britain, Ireland, and across the Commonwealth of Nations, becoming a ‘national institution’. 

While the exact origin of ‘banana’ crumble is less clear, the dessert is a variation of the traditional crumble, featuring bananas as the main fruit component. Have you ever wondered why you see crumble recipes for berries, pears, apple – just about any fruit but bananas? Generally, bananas don’t come to mind when we think about fruit desserts like crisps or crumbles. We naturally assume that they would not hold up to being baked. However, it all comes down to the ripeness of the bananas being used.  You want the banana to be ripe as far as being a nice bright yellow without any green on it or any signs of starting to over ripen. 

I think you will find banana crumble is extremely good all by itself but is made even better with a scoop of vanilla ice cream. 

Print Recipe
Banana Crumble
Votes: 1
Rating: 5
You:
Rate this recipe!
Course dessert
Cuisine British
Keyword banana crumble
Servings
Ingredients
Filling
Course dessert
Cuisine British
Keyword banana crumble
Servings
Ingredients
Filling
Votes: 1
Rating: 5
You:
Rate this recipe!
Instructions
Topping
  1. Combine all the topping ingredients ( except pecans) in a medium size bowl & work them together with your fingers until they become crumbly. Add the toasted pecans to the bowl. Stir to mix. Refrigerate the topping while you make the filling.
Filling
  1. In a saucepan, melt 2 tablespoons of butter over low heat. Add the brown sugar & stir until it dissolves, about 3 minutes. It will become a wet looking mass of sugar that slides around the pan. Stir in the cinnamon, cardamom & salt. Add the orange juice, be careful it will sizzle up & splatter a little bit. Cook about one minute until it thickens slightly.
  2. Preheat oven to 350 F.
  3. Add the banana chunks & toss gently until they are coated. Divide banana chunks with sauce evenly between 6 ramekins. Sprinkle the topping evenly over the bananas.
  4. Bake until topping is golden brown, about 20 minutes. Let cool about 10 minutes before serving.
  5. Top with vanilla ice cream or whipped cream if desired.

Black Sesame Seed Cookies

Black sesame seed cookies are enjoyed for their unique combination of nutty, earthy flavor and visually appealing dark color. They offer a different flavor profile than white sesame cookies, with a richer, more pronounced taste that can be balanced with sweetness. Additionally, the black sesame seeds contribute to a subtle crunch and visual appeal.

Black sesame seeds are a popular ingredient in Asian cuisine used in sweet and savory dishes. In traditional Chinese and Japanese cooking, these seeds are often ground into a paste and used as a filling for pastries and dumplings. They are also sprinkled on rice dishes, noodles, and vegetables for flavor and crunch.

Black sesame seeds hold significant positive symbolism in many cultures, particularly in Asian traditions and Hinduism. They are often associated with longevity, good health, prosperity, and spiritual purity. 

The ‘Open Sesame’ phrase that originated from the story of Ali Baba and the Forty Thieves from One Thousand and One Nights, where the words ‘open sesame’ were used to open a cave containing treasure. The phrase refers to the sesame seed pods feature of splitting open to reveal its contents, symbolizing the unlocking of treasures and knowledge.

Today, I had originally started out to bake some quick little flaxseed cookies but when I realized I was out of flaxseed but had some black sesame seeds on hand, they became one of those ‘the same only different’ type cookies. Brion & I were pleasantly surprised at how nice they tasted.

Print Recipe
Black Sesame Seed Cookies
Votes: 1
Rating: 5
You:
Rate this recipe!
Course dessert
Cuisine Asia
Servings
Ingredients
Course dessert
Cuisine Asia
Servings
Ingredients
Votes: 1
Rating: 5
You:
Rate this recipe!
Instructions
  1. Preheat oven to 350 F.
  2. In bowl, beat together butter with brown & white sugars until light; beat in egg & vanilla.
  3. In separate bowl, whisk together flour, oats, black sesame seeds & baking soda; stir into butter mixture until soft dough forms.
  4. Drop by level tablespoonfuls, 2 inches (5 cm) apart, on ungreased rimless baking sheets. Bake in top & bottom thirds of oven, rotating & switching pans halfway through, until golden, about 8 minutes. Let cool on pan on rack for 2 minutes.
  5. Transfer cookies to rack; let cool.

Blackberry Cookies

Blackberries, with their juicy and sweet-tart flavor, have a fascinating history that spans thousands of years. The history of blackberries is a tapestry woven with ancient uses, cultural symbolism, and artistic inspiration. These delectable berries have captivated people across different cultures and have been cherished for their taste and medicinal properties. From their medicinal properties in traditional medicine to their role in folklore and literature, blackberries have left an indelible mark on human history.

Blackberries have held symbolic meaning in various cultures throughout history. In some European folklore, blackberries were associated with protection against evil spirits and were often used in rituals and ceremonies. They were also believed to bring good fortune and prosperity to those who consumed them.

In Celtic mythology, blackberries were associated with the changing seasons. It was believed that the blackberries gained their rich color when the fairies and spirits of the ‘otherworld’ would bless them during the summer months. Eating blackberries after a certain date, often referred to as ‘Old Michaelmas Day, also called Devil Spits Day’, was considered bad luck, as it was believed that the devil had claimed them according to old British folklore.

Their journey across continents and their ability to adapt to different environments speak to their resilience and popularity.

Brion & I became aware of these wonderful berries several years ago. Now, every chance I get I try to incorporate them into something I’m making whether its sweet or savory. Today they are front and center in these cookies adding loads of flavor.

Print Recipe
Blackberry Cookies
Votes: 1
Rating: 5
You:
Rate this recipe!
Course dessert
Cuisine American
Servings
Ingredients
Course dessert
Cuisine American
Servings
Ingredients
Votes: 1
Rating: 5
You:
Rate this recipe!
Instructions
  1. Preheat oven to 350 F. Line two baking sheets with parchment paper.
  2. In a mixing bowl, whisk together the old-fashioned rolled oats, flour, baking soda, cinnamon & salt. Set dry mixture aside.
  3. In a separate mixing bowl, cream together the softened butter, sugars until the mixture is light & fluffy.
  4. Add egg & vanilla to the wet mixture & beat until well combined.
  5. Gradually add the dry ingredients to the wet ingredients, mixing until a cookie dough forms.
  6. Scoop cookie dough onto the prepared baking sheets, leaving enough space between each cookie.
  7. Make an indentation in the center of each cookie with your thumb or the back of a spoon. Fill each indentation with 3-4 blackberries. If they are large cut them in half.
  8. Bake the cookies in the preheated oven for 12-15 minutes, or until the edges are lightly golden.
  9. Remove the cookies from the oven and let them cool on the baking sheets for a few minutes before transferring them to a wire rack to cool completely.

Individual Grape Crisps

I’ve always felt that grapes are an under-utilized baking ingredient. When it comes to grapes, we think automatically of wine. But not every bunch is destined for the next great vintage. Grapes act like any other berry (which is what they are) in baking applications, unleashing their depth of flavor as well as lending their color and beauty.

There are endless possibilities for the use of grapes beyond wine in both sweet and savory. I probably have more recipe ideas for them than I’ll ever get around to making but …

Today, I just wanted to make a simple crisp for our dessert. The beauty of crisps is that you can make them all year long, using any fruit that is in season. We are lucky enough to have nice tasting grapes available at our grocery stores all season long. Crisps are perfect because they are super easy to assemble, and they are hard to ruin.

For the record, there’s not a huge difference between crisps and crumbles. Some say that a crisp has oats while a crumble does not. Another theory suggests that crumbles are the English version of crisps. For me, the two terms have always been interchangeable so no need to overcomplicate things, just enjoy!

Print Recipe
Individual Grape Crisps
Votes: 1
Rating: 5
You:
Rate this recipe!
Course dessert
Cuisine Canadian
Servings
Ingredients
Crisp Topping
Course dessert
Cuisine Canadian
Servings
Ingredients
Crisp Topping
Votes: 1
Rating: 5
You:
Rate this recipe!
Instructions
  1. Preheat oven to 350 F. Spray 4 ramekins with cooking spray & set aside.
Grapes
  1. In a bowl, toss the grapes with sugar, ginger & cinnamon. Divide evenly between the 4 ramekins.
Topping
  1. In another bowl, combine the melted butter, flour, oats, brown sugar, pecans & salt. Mix until a crumbly mixture forms.
  2. Sprinkle the crumble mixture on top of each ramekin.
  3. Bake for 25-30 minutes or until the tops begin to brown.
  4. Serve with vanilla ice cream or whipped topping if desired.

Oatmeal Freezer Cookies

Oatmeal Cookies are incredibly versatile! Part crispy cookie, part moist cake, the oatmeal cookie is made in a variety of ways: from thin and crispy, to moist and chewy, to even extra sweet or laced with salt. You can customize the classic combination by mixing in different ingredients so you get a completely different flavor than you would expect.

Oatmeal cookies came into North American kitchens by way of the Quaker Oats Company. The original oatmeal cookie recipe was mass distributed in 1908, printed on boxes of rolled oats. Billed as ‘oat cakes’ the recipe called for 3 cups of rolled oats along with butter, sugar, and flour. The oat cakes were an instant hit with homemakers. In 1943, the Quaker Oats company reformulated their recipe, this time using the term ‘oatmeal cookies’. The revised recipe utilized bacon drippings or shortening instead of butter and dried fruits for minimal sugar needs.

The oatmeal cookie recipe released by Quaker Oats has been re-branded twice, re-emerging on oatmeal packages as ‘Famous Oatmeal Cookies’, and as it is known today as ‘Quaker’s Best Oatmeal Cookies’. This oatmeal cookie recipe has earned the distinction of the longest printed recipe on any Quaker Oats products.

Here’s just a few add-ins to bump up the basic recipe if you choose to:

  • Dried fruit: Dates, Apricots, Cherries, Apples, Coconut
  • Nuts: Walnuts, Pecans, Cashews, Peanuts
  • Spices: Cinnamon, Ginger, Nutmeg
  • Chocolate Chunks: White, Milk, Dark

This recipe gives you the option of freezing the dough and baking it later or using it right away. Rolling them in ground flax seed gives them an added bonus in flavor – as if oatmeal cookies could get any better!

Print Recipe
Oatmeal Freezer Cookies
Votes: 2
Rating: 5
You:
Rate this recipe!
Course dessert
Cuisine American
Servings
Votes: 2
Rating: 5
You:
Rate this recipe!
Instructions
  1. Whisk both flours, baking powder, baking soda, salt & cardamom in a medium bowl.
  2. Using an electric mixer, beat butter & both sugars on high speed until light & creamy. 2-3 minutes. Add eggs one at a time, beating to blend & scraping down bowl between additions. Beat in vanilla.
  3. Reduce speed to low. Gradually add dry ingredients & mix just until combined. Fold in oatmeal & fruit.
  4. Divide dough between 2 large sheets of parchment paper. Using paper as an aid, roll up each piece of dough into a 1 1/2-inch diameter log. Wrap in plastic; freeze for at least 4 hours up to 3 weeks.
  5. When ready to bake: Preheat oven to 350 F. Unwrap dough & cut into 1/2-inch thick rounds. Roll edges of rounds in ground flax seed. Place 2-inches apart on a parchment paper lined baking sheet.
  6. Bake until edges are golden brown, 15-18 minutes. Transfer to a wire rack; let cool. Store in an airtight container or freeze.
Recipe Notes
  • Any fruit, nuts or seeds should be chopped quite small so your cookies can be sliced frozen. 
  • Rolling the edges in ground flax seed gives them such a nice flavor.

Apple Crisp Snack Cake

In Canada, apples are available throughout the year. About 100 species of apples are grown in the country. With their bright colors, crisp texture and clean, slightly spicy flavor, apples are the perfect fall icon.

Today’s blog recipe is a bit of a different take on a beloved old classic. Apple crisp is a North American dessert which combines tender apples covered with a delectable crunchy topping. It is one of the common desserts that does not have the regular bottom crust and uses sliced or diced apples, generously doused in cinnamon and sugar, as the bottom layer.

The streusel which covers the apples can employ a wide variety of different flour types, nuts, and oats, commonly combined with butter and sugar. It results in a crumbly topping, which usually completely coats the apples, allowing them to release and cook inside the flavorful juices.

Apple crisp is believed to have stemmed from the British crumble, and today these two classics merely differ in their names. Even though the North American crisp was particularly made with oats, which resulted in a crunchier coating, nowadays both varieties can employ various ingredients.

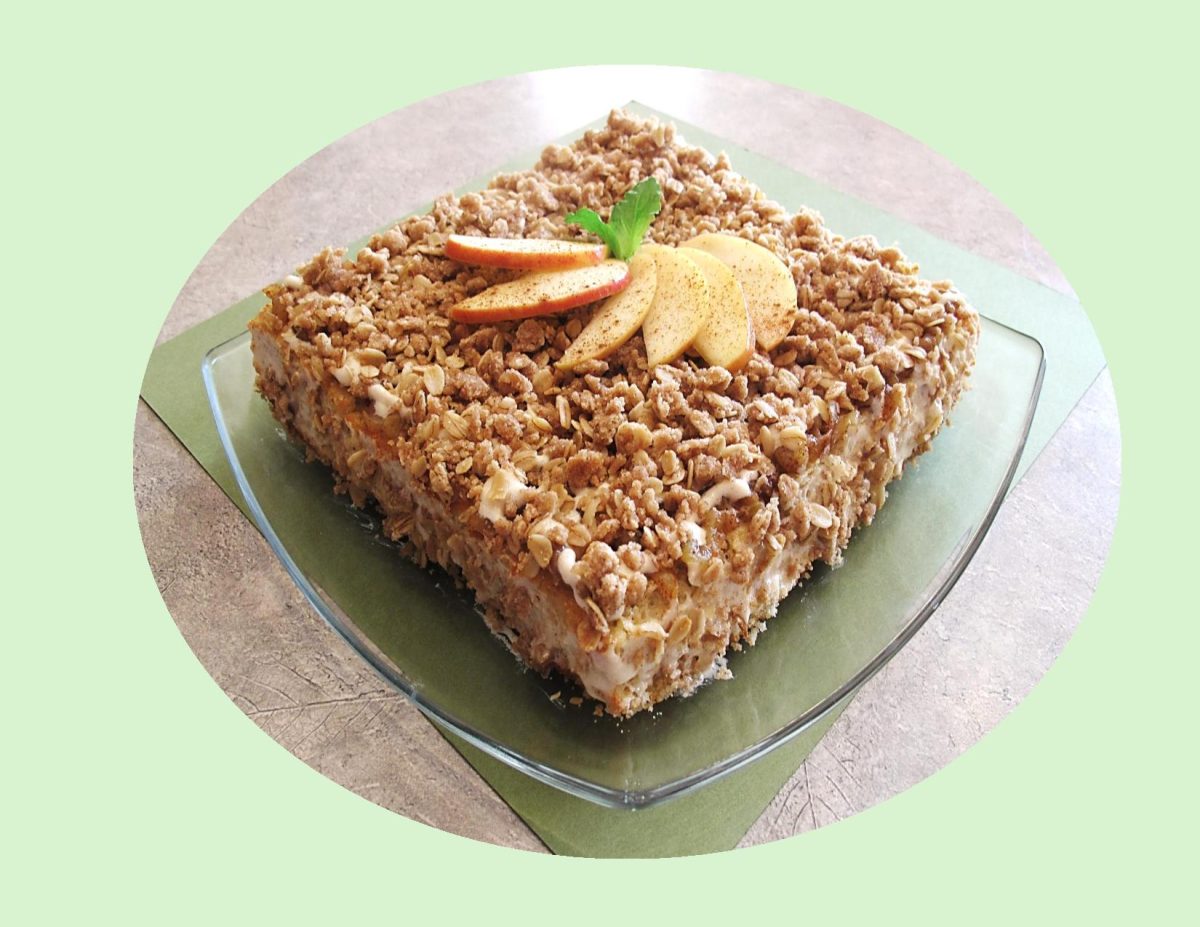
This warm and spicy ‘apple crisp snack cake’ is a comforting twist on the favorite fall dessert. Filled with apples and topped with more apples, cream cheese drizzle the perfect crispy streusel. Orange pumpkins might be more popular this month, but there’s no better time than now to take advantage of apple fresh season.

Print Recipe
Apple Crisp Snack Cake
Votes: 1
Rating: 5
You:
Rate this recipe!
Course dessert
Cuisine American
Servings
SERVINGS
Ingredients
Apple Topping
Baked Crisp Topping
Course dessert
Cuisine American
Servings
SERVINGS
Ingredients
Apple Topping
Baked Crisp Topping
Votes: 1
Rating: 5
You:
Rate this recipe!
Instructions
Cake
  1. Preheat oven to 350 F. Line an 8 x 8inch baking pan with parchment paper. Set aside.
  2. Peel, core & grate apples. Sift flour, cornstarch, baking powder, cinnamon, allspice, cardamom & salt together in a medium bowl & set aside.
  3. Using a mixer, cream butter & sugar until light. Scrape the bowl & add the whole egg, mixing on medium-high for about a minute. Scrape the bowl again & add the egg white & vanilla; mix for another 2 minutes.
  4. Alternately fold in flour mixture & buttermilk, then gently fold in grated apples.
  5. Pour/spread batter into prepared baking pan. Bake for about 30-40 minutes or until a cake tester comes out with just a few moist crumbs. Allow to cool in pan on a wire rack.
Baked Crisp Topping
  1. Line a cookie sheet with parchment paper. Place all ingredients except butter in a bowl. Combine well then add softened butter. Mix until the mixture begins to form pea-sized clusters. Spread mixture evenly on the parchment lined cookie sheet, then bake at 350 F. for 5 minutes. Stir the topping around a bit, then bake for another 5 minutes until it begins to turn golden brown. Let crisp topping cool completely to room temperature. If crisp mixture is too chunky break it up with your fingers slightly.
Apple Topping
  1. Place apples , lemon juice & water in a small saucepan. Cook over medium heat until softened, but not falling apart. Add brown sugar, cinnamon & salt. Cook for a minute to dissolve sugar. Remove & cool until cake is baked & ready to top.
Drizzle
  1. Sift powdered sugar with salt. Set aside. Cream softened cream cheese & butter with a mixer for about 2 minutes. Add vanilla & mix to combine. Add powdered sugar & slowly incorporate into wet mixture. Add milk & beat to create a drizzle consistency.
Assembly
  1. When cake is cool, carefully & evenly spread apple topping over top of cake. Using a small piping bag, drizzle icing over apples (using a spatula, lightly spread a bit of drizzle on sides). Next, top cake with baked crisp topping. Slice & serve.
Recipe Notes
  • To make your own buttermilk, place 2 tsp of white vinegar or lemon juice in your measuring cup & add milk to equal 2/3 cup, stir & let stand until room temperature.
  • If you prefer cupcakes over the snack cake, no problem. Same idea just a different shape. Your choice!


Apple Maple Boursin Muffins w/ Sweet Potato

Boursin’s story began in 1957, in a small Normandy village, located in France, when cheese maker François Boursin set up a factory producing soft cheese. At that time, he had no idea his name would become internationally famous.

Boursin Garlic & Herbs was launched in 1963 and quickly became a household name across France. Sixty years later, the original recipe remains unchanged and food lovers in more than 35 countries have spread their passion for Boursin all around the world. Perfect on bread, as appetizers or in a creamy sauce for main or side dishes. Since 2011, Boursin has been made in Canada in St. Hyacinthe, Québec, by Agropur, the Canadian dairy co-operative, for Bel Cheese Canada, the Canadian arm of Bel Group, the France-based multinational. 

There are seven flavors of Boursin Cheese sold in Canada: Garlic & Fine Herbs, Shallot & Chive, Bouquet of Basil & Chive, Cranberry & Pepper, Cracked Black Pepper, Fig & Balsamic, Apple & Maple.

Boursin is sometimes dubbed a Gournay cheese, Gournay being the name of the region in Normandy where Boursin was first made. The cheesemaker used the name when he was first asked to classify the cheese for customs purposes.

Today, I am doing a bit of recipe development with Apple Maple Boursin. The apple flavor and the silkiness of maple syrup perfectly complement Boursin’s incomparable texture along with some sweet potato, dates and dried cranberries. The whole combination creates an exceptional sweet and savory cheese muffin. Brion & I really enjoyed my new muffin creation.

Print Recipe
Apple Maple Boursin Muffins w/ Sweet Potato
Votes: 2
Rating: 5
You:
Rate this recipe!
Servings
Votes: 2
Rating: 5
You:
Rate this recipe!
Instructions
Topping
  1. In a small bowl, combine topping ingredients. Spread out on a large plate & place in freezer until; ready to use.
Muffin Batter
  1. Cook, peel & mash sweet potato. Chop dates. Slice, core & grate apple. Grate orange (zest). Chop pecans. Crumble Boursin.
  2. Preheat oven to 350 F. Line muffin tin with baking cups.
  3. In a large bowl, combine first 12 ingredients using a fork. Make a well in center.
  4. Beat egg until frothy. Whisk in sugar, oil, sweet potato & sour cream. Crumble in 75 gm of the Boursin cheese.
  5. Pour into well & stir only to moisten. Divide between the 12 muffin cups. Remove topping from freezer & place some on top of each muffin.
  6. Bake for 20-25 minutes. Let rest for 5 minutes then remove from pan. BEST SERVED WARM!

Strawberry-Banana Crumble

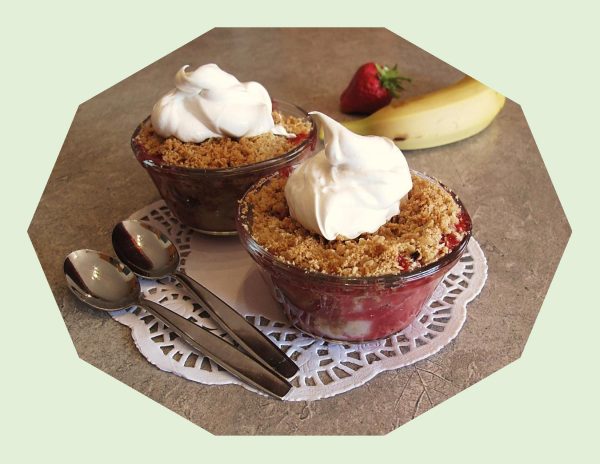
Crumbles aren’t just for Autumn and Winter. Most people don’t like to turn on the oven in summer and I realize no-bake desserts are wonderful, but there are some desserts worth risking the heat for. Fruit crumbles certainly fall into that category and of course, it goes without saying that it should be topped with ice cream or a whipped topping at least.

It seems that nearly any fruit is improved when you cover it in a layer of crunchy, buttery crumble. Strawberry and banana are a winning combination for many reasons. Strawberry gives a slight sweet and sour taste and banana adds a sweet and creamy texture.

This crumble is an incredibly simple and delicious dessert for when you need a last-minute dessert or for when you’re just craving a sweet, fruity treat.

Print Recipe
Strawberry-Banana Crumble
Votes: 1
Rating: 5
You:
Rate this recipe!
Course dessert
Cuisine American
Servings
Course dessert
Cuisine American
Servings
Votes: 1
Rating: 5
You:
Rate this recipe!
Instructions
  1. Preheat oven to 350 F.
  2. In a large bowl, combine strawberries, bananas, 3 Tbsp flour, sugar, lemon juice & salt. Toss together gently to avoid bruising the bananas, Pour into a 9-inch baking dish or 6 ramekins.
  3. Combine all ingredients for topping using fingertips to form a crumble. Completely cover fruit mixture with crumb topping.
  4. Bake for about 40 minutes or until mixture is bubbling on the sides. Allow to sit for 15 minutes before serving with ice cream or whipped topping.