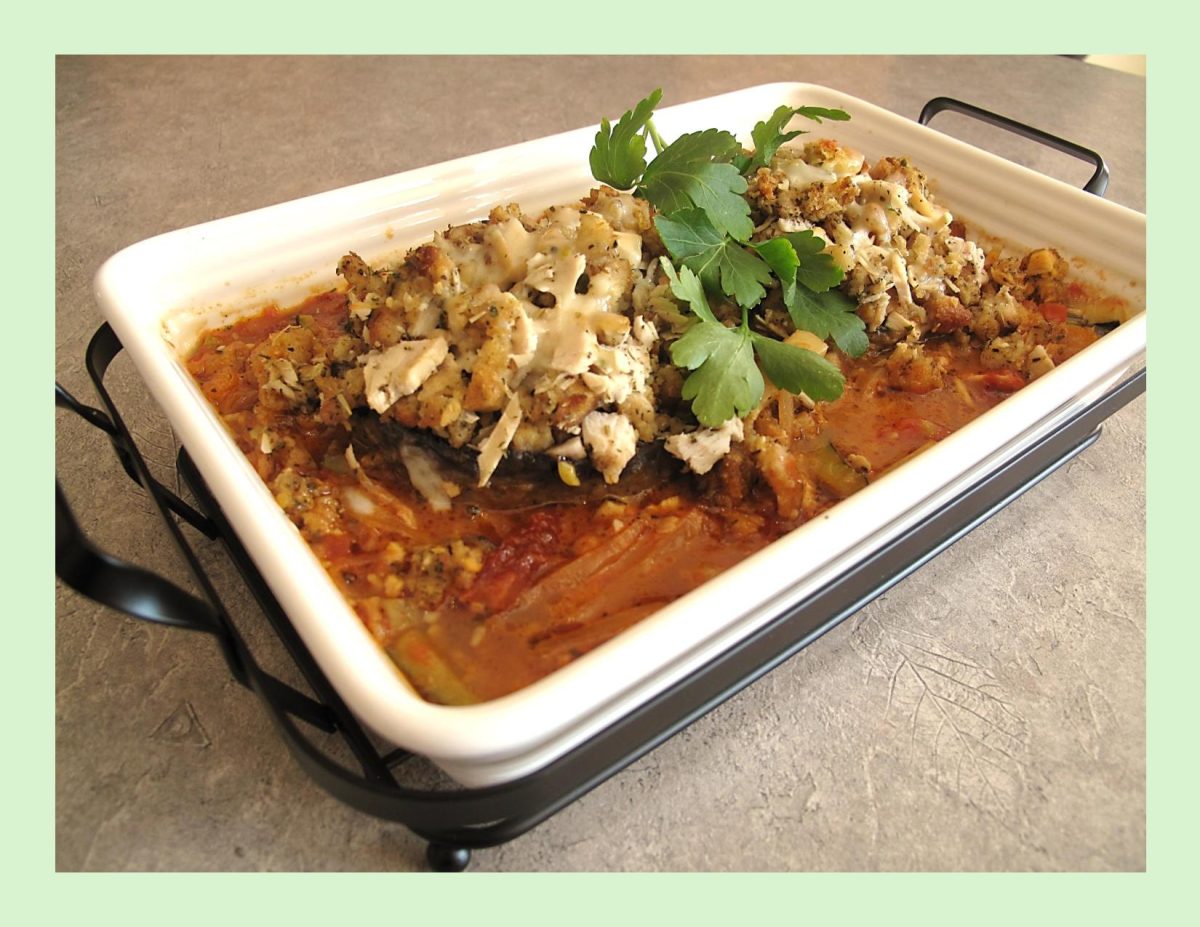
Cheesy Chicken & Stuffing Stuffed Portabella Mushrooms

How is it spelled? Portobello or Portabella – from what I understand there is no ‘right’ spelling. Both versions are accepted, but the Mushroom Council  decided to go with Portabella to provide some consistency across the market.

Have you ever stopped and thought about how many vegetables are fantastic when stuffed? Any vegetable with a fairly sturdy shape can become an edible vessel for dinner. All we need to do is fill the inside with a stuffing of our choice, a little time in the oven until everything is heated through and dinner is ready!

I find the versatility of the portabella mushroom is endless. They have a rich, meaty texture and flavor which is retained even after cooking. You can use them in soups, stews, baked pasta, rice dishes or as a meat substitute in salads. Portabellas are excellent paired with fresh herbs, cheese, tomato or cream-based sauces, leafy greens, garlic and onions.

I’m sure the appeal of mushrooms isn’t for everyone. For Brion & I, we love that earthy taste. There is hardly anything you can’t use mushrooms in from appetizers to main course.

For our stuffed mushrooms today, I made a sun-dried tomato sauce then stuffed the Portabella caps with some chicken & stuffing and baked them in it for a supper entrée. Tasty and filling!

Print Recipe
Cheesy Chicken & Stuffing Stuffed Portobello Mushrooms
Votes: 1
Rating: 5
You:
Rate this recipe!
Servings
Votes: 1
Rating: 5
You:
Rate this recipe!
Instructions
Chicken & Stuffing
  1. In a small bowl, create a seasoning blend by mixing together garlic powder, dried basil, onion salt, dried parsley, salt, black pepper, & celery salt. Rub the seasoning blend evenly on both sides of the chicken breasts.
  2. Preheat oven to 375 F.
  3. Place the seasoned chicken breasts in a baking dish & add the chicken broth to the dish. Cover the baking dish with foil & bake for approximately 25-30 minutes, or until the chicken is cooked through. Remove the chicken from the oven, dice it & set it aside.
  4. Prepare the chicken stuffing mix according to the package directions. Toss with cooked chicken. Grate cheddar cheese.
Sauce
  1. In a skillet, heat oil. Add onion & cook for 2 minutes until it starts to soften. Add reserved mushroom stems, garlic, oregano, paprika, sun-dried tomatoes & zucchini. Cook for 2 minutes while stirring with a spatula. Add wine & allow to bubble for 2 minutes then add vegetable broth, salt & pepper. Bring to a boil & simmer for 5 minutes.
  2. Stir the cream & Parmesan cheese into the sauce. Place in a 9 x 13-inch baking dish.
Mushrooms
  1. Whisk the egg lightly in a shallow bowl. In a separate shallow bowl, combine flour, salt, pepper, oregano, thyme, paprika & garlic salt. In a large skillet, heat olive oil on medium-high. Dip the mushrooms in the egg then in the flour mixture. Coat the outside of the mushrooms, trying not to get too much flour inside the ‘cap’. In the skillet, fry mushrooms on both sides until lightly golden. Use a tong to help fry the sides as well. Remove mushrooms to a plate. 4. Set aside, keep warm.
Assembly & Baking
  1. Preheat oven to 350F.
  2. Pack each Portobello mushroom cap with the chicken & stuffing mixture, ensuring it's firmly packed to stay in place during baking. Nestle the stuffed mushrooms on top of the sauce in the baking dish. Cover the baking dish with foil.
  3. Bake for about 20-25 minutes or until the mushrooms are tender & the stuffing is heated through. For the last 5 minutes of baking, remove the foil & sprinkle with cheese. When cheese is melted, remove the stuffed mushrooms from the oven.
  4. Nice to serve with pasta or potatoes.
Recipe Notes
  • Since their is just two of us, I only made half the recipe as you will notice in the picture.

Artichoke & Garlic Chicken Rissoles

Rissole is an interesting group of dishes with an intriguing history. The original French rissoles were prepared by enclosing the main ingredients in pastry dough and frying them, but over time the original recipe has evolved and changed.

Many nations have created their own version of the rissole. This food is commonly on offer in street stalls as a casual snack food, or in fast-food restaurants. Some fancy restaurants also serve rissole dishes, although they may use fancier ingredients and dress things up with complex sauces to make their rissoles more interesting. Today, rissoles can be found in numerous European countries, but also in Australia, New Zealand, and even Indonesia and Brazil.

Some cooks refrain from using any sort of coating for a rissole, preferring to make a blend of meat, potatoes, eggs, and breadcrumbs which can be molded into a firm patty. Ingredients such as onions may be added to rissoles as well, along with various spices, especially in nations with a culinary tradition of heavily spiced food. They can be made with ground or cut meat, seafood, or vegetables, and the sweet varieties are usually made with fruit. Most of them, including both sweet and savory rissoles, are usually served with a sauce on the side. Primarily, rissoles were deep-fried, but today the name also encompasses the varieties that are baked in an oven or fried in shallow oil.

Today, I’m making artichoke & garlic chicken rissoles. The sauce gives the rissoles a nice punch of flavor and pairs so well with creamy mashed potatoes & roasted green beans.

Print Recipe
Artichoke & Garlic Chicken Rissoles
Votes: 1
Rating: 5
You:
Rate this recipe!
Servings
Ingredients
Artichoke & Garlic Sauce
Chicken Rissoles
Servings
Ingredients
Artichoke & Garlic Sauce
Chicken Rissoles
Votes: 1
Rating: 5
You:
Rate this recipe!
Instructions
Sauce
  1. Place all ingredients except oil in a food processor. With motor running, add olive oil in a slow stream to make an emulsion. Continue processing while adding the cream to make a fairly smooth consistency. Remove from food processor & set aside.
Chicken Rissoles
  1. Place chicken, panko crumbs, salt, egg, garlic & soup mix in a bowl. Combine well. Divide into 6 portions. Form each portion into a patty shape.
  2. Heat oil in a large saucepan, Cook rissoles for 2-3 minutes. Turn & cook for a further 1-2 minutes or until golden. Transfer to a plate a wipe out saucepan.
  3. Return rissoles back in saucepan & add sauce. Simmer for 10 minutes until rissoles are cooked through. Nice to serve with creamy mashed potatoes & roasted green beans.

Shrimp & Chicken Sausage Pasta Shells

With Christmas right around the corner, pasta meals are an easy quick fix on those busy days leading up to the big day. Stuffed Shells are truly the perfect meal to make ahead of time since you can prepare everything but hold off on baking them until you’re ready to eat.

Stuffed shells are a tasty dish that is usually made with ricotta cheese or other types of cheese inside the pasta shells. Tomato sauce is another common ingredient in the dish. However, there are so many ways to jazz it up and one might be surprised just how many unique ingredients one can put into a shell.

I have always loved stuffed pasta shells and over the years I have stuffed them in every way I could imagine. There are endless variations such as using different cheeses and herbs or making some homemade marinara or sun-dried tomato sauce.

There’s a reason surf and turf is often one of the most desired items on a restaurant menu — it’s because meat and fish are the perfect complement to each other! The light flavor of fish and shellfish is a great addition to the richer, heartier flavor of meat.

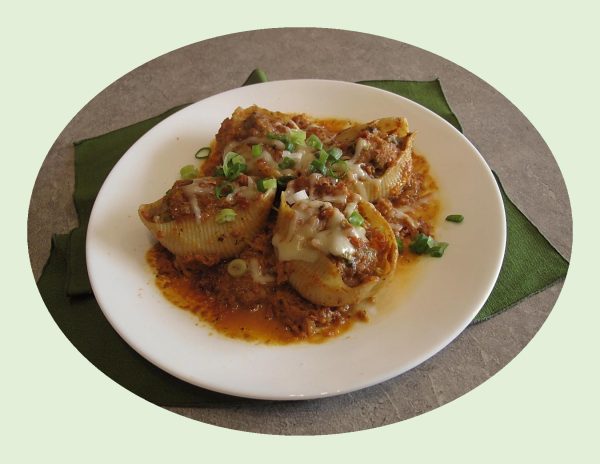
Today, I’m combining some shrimp and chicken sausage in my filling and topping it with a nice smoky sun-dried tomato parmesan sauce. Should be good!

Print Recipe
Shrimp & Chicken Sausage Pasta Shells
Instructions
Pasta / Filling
  1. Cook pasta shells in a pot of salted boiling water for about 10-12 minutes. Drain well & lay on a wire rack to keep them from sticking together until ready to fill.
  2. In a large skillet, heat 1 Tbsp oil over medium heat. Add onion & mushrooms; sauté until tender & moisture has evaporated from mushrooms. Add chicken sausage & minced garlic. Cook for 3 minutes, stirring frequently. Add wine & cook until sausage is no longer pink about 4-5 minutes more. Drain well & transfer to a large bowl.
  3. Peel & devein shrimp; chop into 1/2-inch pieces. In a small bowl, whisk together broth & flour. Set aside.
  4. In the same skillet, heat remaining 1 Tbsp oil over medium heat. Add shrimp; cook, stirring constantly, until shrimp begins to turn pink. Stir in flour mixture. Add cream, Old Bay seasoning, garlic powder & Italian seasoning; stir until thickened. Remove from heat & stir in sausage mixture. Set aside until ready to use.
Sun-Dried Tomato Sauce
  1. In a skillet, heat oil. Add onion & cook for 2 minutes until it starts to soften. Add garlic, oregano, thyme, paprika & sun-dried tomatoes. Cook for 2 minutes while stirring. Add vegetable broth; bring to a boil & simmer for 5 minutes.
  2. Stir in cream & parmesan cheese into the sauce. Remove from heat & cool for a few minutes. Pour sauce into food processor & process to a fairly smooth consistency. It will not be completely smooth but that is fine.
Assembly / Baking
  1. Preheat oven to 350 F.
  2. Spread half of the sauce over the bottom of a 13 x 9-inch baking dish. Divide filling between cooked shells. Lay in rows over sauce. Pour remaining sauce over top carefully covering all the shells.
  3. Loosely lay a piece of foil paper over baking dish and bake for 45 minutes or until bubbling nicely.

Garlic Bread Meatball Bombs

HAPPY LABOR DAY!

Although, we have not officially reached the first day of fall (Sept. 23), this part of the year often begins with a tinge of melancholy. Even so, there are many ways to appreciate Canada’s most sentimental season.

Part of our country’s appeal is its four season’s: Winter, Spring, Summer & Fall. We are entering the season of the fall harvest and the leaves on the trees begin their transformation to stunning shades of orange, red and yellow.

Labor day week-end gives us an opportunity to enjoy family and friends before summer is officially over. I remember as a kid, once we arrived at the Labor Day week-end all those ‘lazy, hazy, crazy days of summer were gone’. Back to school for another year. So, whatever your choice of relaxation is, you know good food will play a big part in the week-end gatherings.

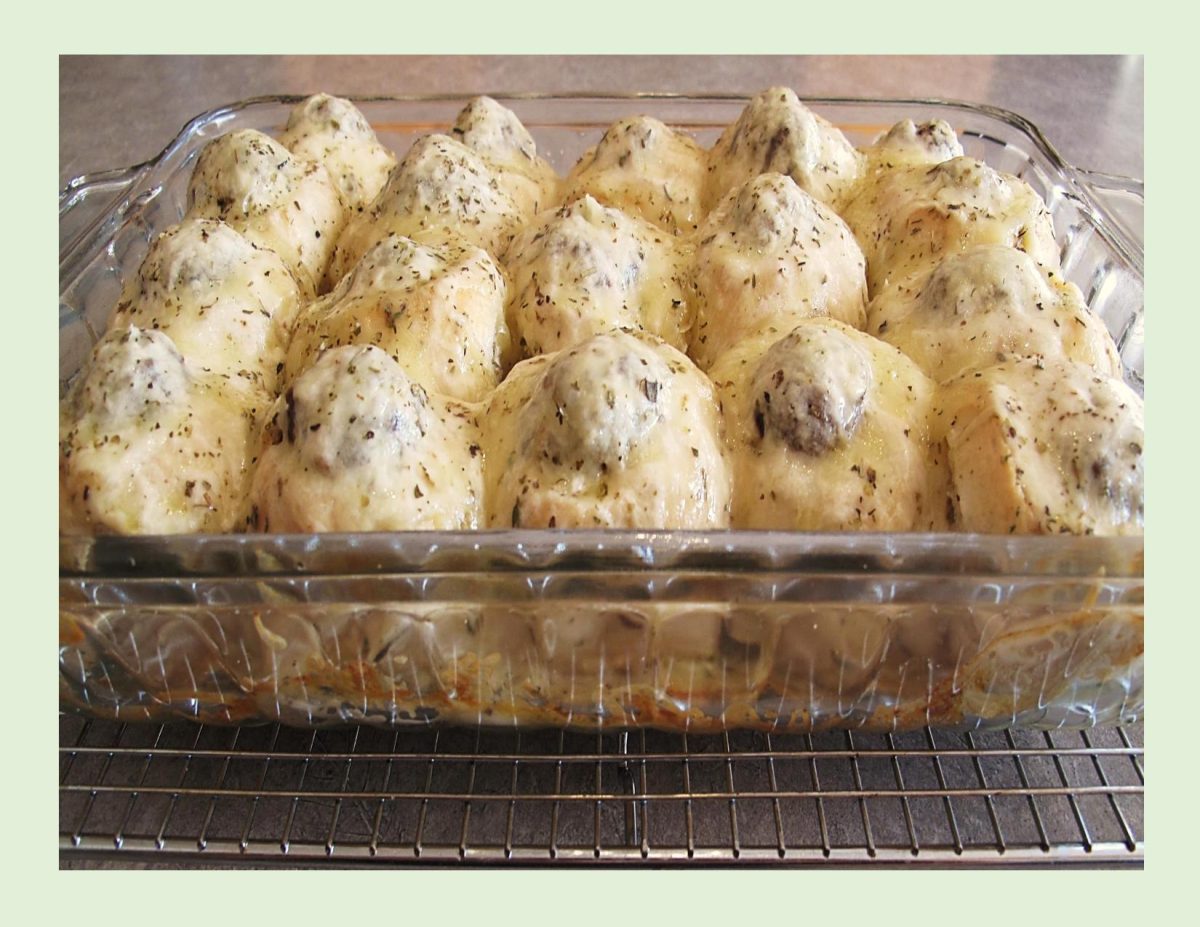
Meatball bombs are a round homemade ‘hot pocket’. They have everything in them you need to make a great tasting meal. Serve two bombs per person. That means each person gets two meatballs, two dinner rolls, lots of sauce, and some gooey, cheesy goodness. Serve these with a simple side salad to round out the entire meal.

Speaking of Hot Pockets, I’m sure most everyone has tried them at some time since they have been around for over 40 years.

Probably the one lasting memory if you have,  is you know that the first bite of the microwavable, molten-in-the-middle meal will burn at least three layers clean off the roof of your mouth.

The frozen creations known as Hot Pockets were created by two Jewish Iranian brothers Paul and David Merage, who immigrated to the United States from Tehran. In 1977, the Merage brothers founded Chef America Inc. and set out to create a portable sandwich whose dough would actually retain its crispness after a few minutes in the microwave. Their creation, which debuted in 1980, was called the Tastywich, but it didn’t last long with its original name. By 1983, after some recipe tweaking, the Tastywich had a new name and Hot Pockets officially hit the market.

History aside, if you’re looking for some flavorful garlic bread meatball bombs, this is just the dish for you! And, you have the choice to use a lot of prepared ingredients from your grocery store, or you can make them all from scratch. There are options for both types in this recipe.

Print Recipe
Garlic Bread Meatball Bombs
Votes: 1
Rating: 5
You:
Rate this recipe!
Servings
Ingredients
Dinner Rolls
Garlic Butter
White Sauce
Servings
Ingredients
Dinner Rolls
Garlic Butter
White Sauce
Votes: 1
Rating: 5
You:
Rate this recipe!
Instructions
Dinner Rolls
  1. Dissolve yeast & sugar in lukewarm water & allow to sit a few minutes until frothy. Add oil, salt, & 2 1/2 cups flour, beat until smooth. Stir in enough remaining 1/2 cup flour to form a stiff dough..
  2. Turn onto a floured surface; knead until smooth and elastic, 6-8 minutes. Place in a greased bowl, turning to grease the top. Cover: let rise in a warm place until doubled, about an hour.
  3. Punch down the dough. Divide the dough into 18 pieces. Pinch the ends of each dough piece together in the center. Place seam side down. Use the palm of your hand to gently roll each dough ball until smooth and round.
  4. Place the dough balls in a parchment lined baking dish. Cover & allow rise until doubled in size, about 30 minutes.
  5. Preheat the oven to 350F.
  6. Lightly brush with egg wash. Bake until golden brown, 20-25 minutes. Remove rolls to a wire rack.
Meatballs
  1. Preheat oven to 350 F.
  2. In a large bowl, combine all ingredients for the meatballs & mix well. Divide mixture into 18 meatballs & place on a foil lined baking tray. Bake 35 minutes or until meatballs are cooked through. Remove from oven & set aside.
White Sauce
  1. In a saucepan, cook butter & flour until bubbly. Slowly add broth & cream; boil for a FEW minutes, add soy, salt & pepper. Set aside.
Assemble & Bake
  1. Hollow out the top of each roll with a sharp knife. The hole will need to be slightly bigger than the meatballs, but not so deep that you puncture the bottom.
  2. Set the rolls into a 9×13" baking pan which has been coated with non-stick cooking spray. Set aside.
  3. Whisk together garlic butter ingredients. Using the back of a teaspoon, liberally smear the holes of the dinner rolls with the garlic butter. Use all of the butter evenly into each dinner roll.
  4. Spoon about a tablespoon of the prepared sauce into each of the hollowed out dinner rolls. Place a cooked meatball into each hole. Top each meatball with the remaining sauce mixture. Evenly distribute the cheese over each of the dinner rolls. Sprinkle on the Italian seasoning.
  5. Bake for 10-12 minutes, or until the cheese is melted and bubbly. Remove from oven.
  6. Using a sharp knife, slice between each dinner roll. Garnish with parsley if you wish.
Recipe Notes
  • For a QUICK & EASY meal use:
  • 12 (store bought) dinner rolls
  • 12 frozen meatballs, cooked
  • FOR SAUCE: 
  • 1/2 cup dried tomato paste
  • 2 cups marinara sauce
  • 1 Tbsp olive oil
  • NOTE: I found for the original recipe it was easier to make the meatballs & sauce first, then the rolls. Just a suggestion!

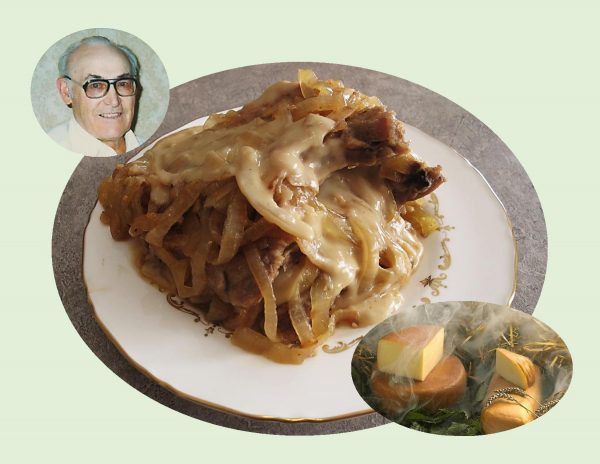
Smoked Gouda Pork Chops w/ Caramelized Onions

Today, March 21, our family celebrates the birth date of my father. Although he left this earth many years ago, I have so many memories of the wonderful childhood I enjoyed due to the parents I had. As my life unfolds, I realize more each day the impact having had a strong role model has made on my life. The word ‘thank you’ is so inadequate.

This meal seems so fitting to have today in honor of my father’s birthday. I’m sure he would have loved it. Brion & I seem to have a natural affinity to smoked cheeses. I had first thought I would make some pork chops stuffed with smoked gouda & bacon but then the caramelized onions started were calling me ….

Smoked Gouda is a semi-hard to hard, cow’s milk cheese which is creamy and mild with a natural smoked flavor and rich musky aftertaste. The rind is typically brown rather than the yellow rind on the unsmoked version. Only cheese exposed to real smoke may be called ‘smoked’. Cheese that has only had liquid smoke added to it must be labeled with ‘smoke flavor’.

Smoking cheese imparts a unique flavor, everything from the intensity of the heat or kind of wood chips used, can effect the flavor outcome. Every part of the process, no matter how small it may seem, has some bearing on the final taste of the product.

Print Recipe
Smoked Gouda Pork Chops w/ Caramelized Onions
Votes: 2
Rating: 5
You:
Rate this recipe!
Servings
Votes: 2
Rating: 5
You:
Rate this recipe!
Instructions
  1. Preheat oven to 350 degrees F
  2. Heat 3 tablespoons oil in heavy large skillet over high heat. Season pork with salt and pepper then dredge in 1 cup flour; shake off excess flour and place pork in skillet.
  3. Sauté pork for 3 minutes on each side then place pork in a baking dish. Sprinkle 1 teaspoon paprika over pork.
  4. Clean skillet and add 2 tablespoons oil; heat over medium-high heat. Add onions and brown sugar; sauté for 15 minutes or until brown and tender. Add garlic and sauté for another minute. Add the remainder 1 tablespoon of paprika. Place onions and broth over pork. Cover with foil and bake until pork is tender, about 35 to 45 minutes.
  5. Remove pork from oven and use tongs to transfer pork to plate; cover plate with foil. Reserve onion and liquid content from baking dish.
  6. In a large saucepan, over medium heat, melt butter. Add 4 tablespoons flour and cook for 4 minutes or until flour just starts to brown. Whisk in reserved contents from baking dish and half-and-half. Whisking constantly, bring to a boil, about 5 to 8 minutes, or until thick. Remove from heat and whisk in Gouda cheese. Season with salt and pepper.
  7. Transfer pork to plates and spoon sauce over pork.

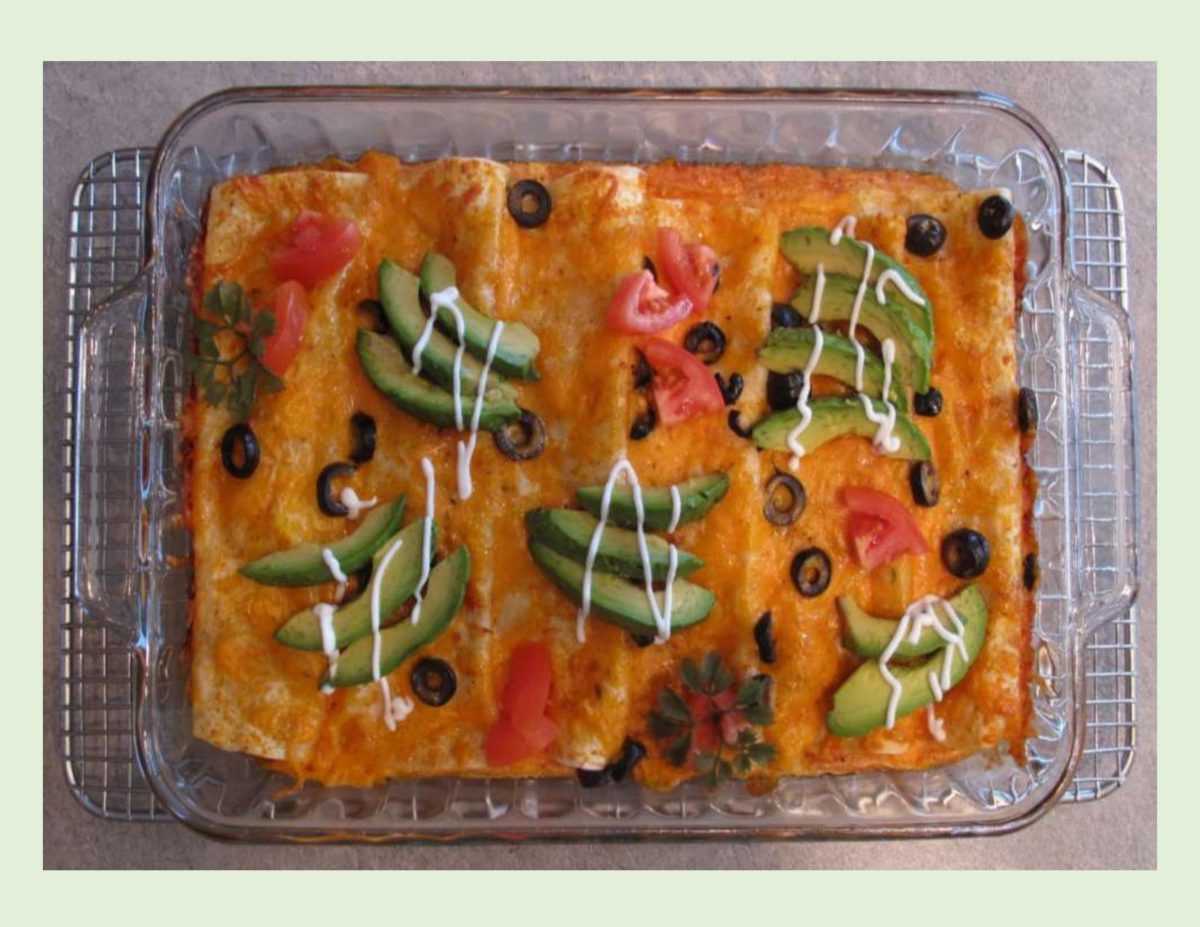
Breakfast Enchilada Bake

ENJOY FAMILY DAY!

First held in the province of Alberta in 1990, Family Day is supposed to reflect the values of family and home that were important to the pioneers who founded Alberta. It was to give workers the opportunity to spend more time with their families to help prevent the erosion of family values in Canadian society.

‘Family Day’ is a public holiday in 5 Canadian provinces, where it is a day off for the general population with schools and most businesses being closed. However, there are some provinces where the holiday is named slightly different and for different reasons.

Family Day was scheduled to fall between New Year’s Day and Good Friday in order to grant another day off between these celebrations as they are approximately three months apart.

This meal seems so appropriate for today. Just put breakfast in the oven, sit back, enjoy a coffee while it bakes. What a great way to start a ‘family day’ together!

Easy to make, a breakfast bake sits in the fridge for several hours or better yet, overnight, so when you pop it in the oven the following morning, all the work will have already been done. Plus, variations abound according to your tastes and favorite ingredients: substitute sausage for bacon (or use both). Forego all meats for a vegetarian version and substitute fresh spinach, roasted peppers, blanched broccoli. Of course, make-ahead breakfast bakes are genius and forgiving; it can use up multiple supplies in your kitchen, appeal to a variety of tastes and be absolutely delicious every time.

Print Recipe
Breakfast Enchilada Bake
Votes: 1
Rating: 5
You:
Rate this recipe!
Servings
Votes: 1
Rating: 5
You:
Rate this recipe!
Instructions
  1. Heat olive oil in a large skillet over medium-high heat. Add green pepper, onion, garlic & all spices; cook 3-4 minutes or until softened.
  2. Add chicken sausage & cook, stirring frequently, for another 5-6 minutes or until cooked through, breaking up the sausage into small pieces. Once fully cooked, stir in 3/4 cup of cheese.
  3. Spray a 13 X 9-inch baking dish with cooking spray. On a work surface, lay out tortillas. Spoon about 1/4 cup of the sausage filling onto one side of the tortillas; roll each tightly. Place seam side down in the baking pan; sprinkle any extra sausage mixture on top.
  4. In a bowl, whisk together eggs & half & half until completely combined. Pour over enchiladas & sprinkle with remaining 1 1/4 cups shredded cheese. Cover with foil & refrigerate overnight or at least 8 hours.
  5. Preheat oven to 350 F.
  6. Remove chilled enchiladas from fridge, bake for 20 minutes covered, then remove foil & bake for an additional 15 minutes OR until center is set (eggs should no longer be jiggly) & cheese is lightly browned. If you prefer, leave the casserole covered & bake longer, before removing foil. Serve with your choice of toppings.

Scallop Shell Pies

Scallop shell pies are a nice touch in the savory pie world, I guess you could say it’s a seafood inspired twist on a classic!

We are only in the month of March, so there’s plenty of time to savor comfort food at its finest. Typically, pot pie does not have an abundance of ingredients so it is imperative to build a good flavor profile.

When making the sauce, I always use stock as opposed to water. Any thickened sauce depends on a roux. Making sure its cooked to a light golden brown helps to avoid the ‘flour’ taste and allows the other ingredients to come to the forefront.

Within the loose definition of a ‘pot pie’, its easy to add (or remove) flavors that interest you. Its all about creative expression!

When choosing the pastry, there are no right answers, just numerous possibilities that depend on the maker. Modern convenience embraces the use of puff pastry as a flakier, more delicate solution. You could call it a weeknight comfort food’s best friend.

This pot pie is made with a puff pastry ‘scallop shell’ lid and no bottom crust. The golden crust acts like a piece of bread and soaks up some of the decadence with every bite. Adding scallops to a creamy vegetable based filling creates an amazing meal.

Print Recipe
Scallop Shell Pies
Votes: 2
Rating: 3.5
You:
Rate this recipe!
Course Main Dish
Cuisine American
Servings
Course Main Dish
Cuisine American
Servings
Votes: 2
Rating: 3.5
You:
Rate this recipe!
Instructions
Pastry
  1. Thaw puff pastry. Leave on parchment & cut out 2 shell shapes to cover your ramekins. Mark with the lines on them to replicate sea shells. Place in fridge until ready to use.
Filling
  1. In a saucepan, fry bacon until crisp; remove & drain on paper towel. Sauté leek, mushrooms & garlic in bacon drippings for a few minutes. Add cooked, diced potatoes, flour & seasoning.
  2. Preheat oven to 425 F.
  3. Sauté for another minute, making sure to coat everything with the flour. Add chicken broth, stirring well to dissolve the flour; bring to a simmer. Reduce heat, add scallops, crumbled bacon, cream & salt & pepper to taste; gently stir to combine.
  4. Remove filling from heat & divide between ramekins. Top with chilled puff pastry & brush with egg wash. Bake for about 20 minutes or until nice & golden.
Recipe Notes
  • When I have some pastry scraps leftover, I make a bit of cinnamon/sugar to sprinkle on it. It makes a few little tasty sweet snacks to nibble on.

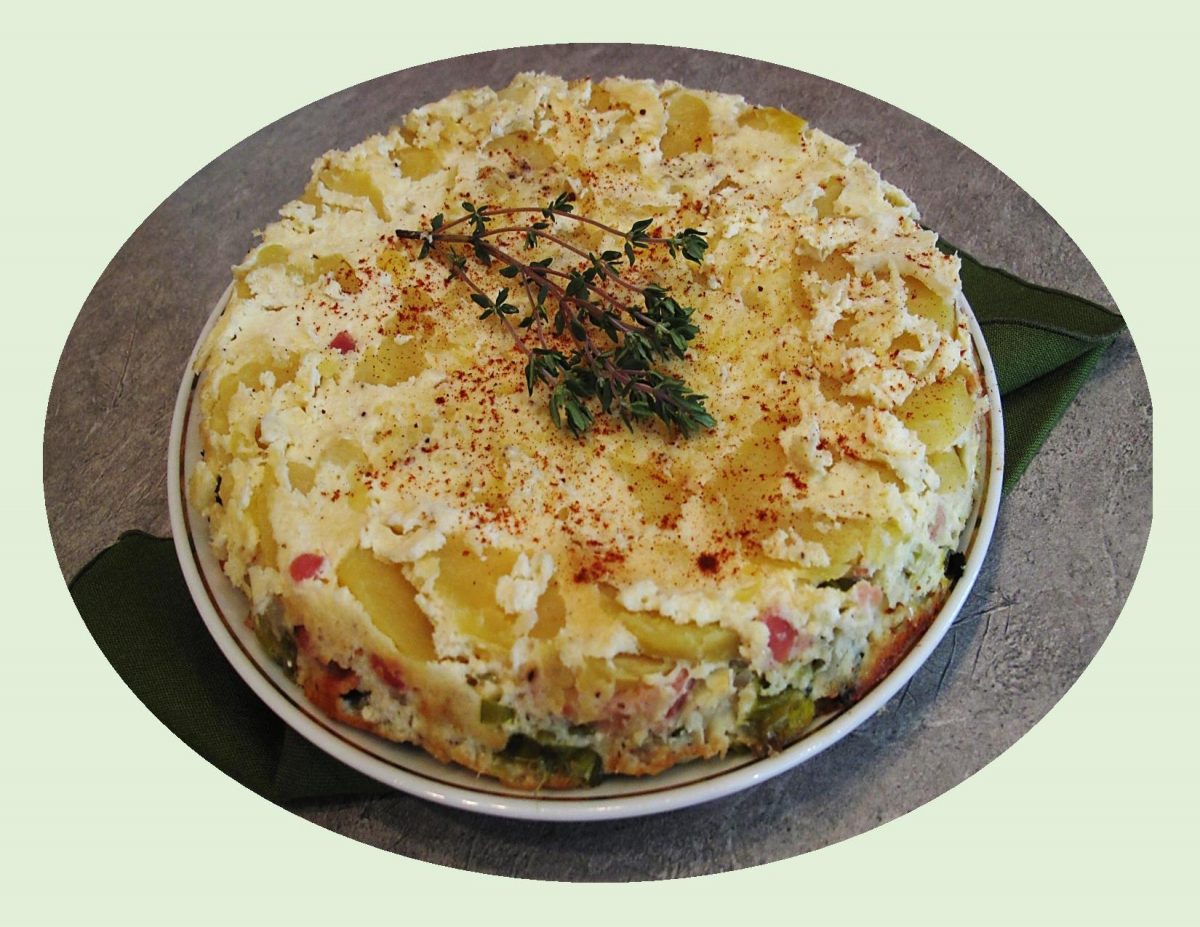
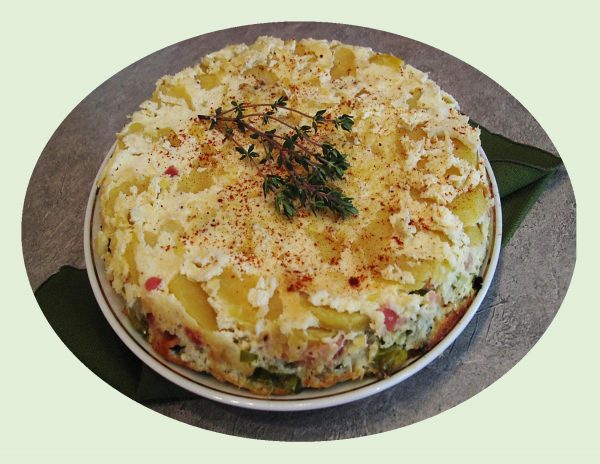
Bacon, Potato & Leek Frittata

A frittata is a ‘blank canvas’ for so many different flavor combinations …. a giant omelet that is started on the top of the stove and finished in the oven.

Vegetables and cheeses are very common ingredients for frittatas, but two of my personal choices are leeks and potatoes. Leeks are like onions after charm school: less of an edge, a little more refined, with a more colorful personality. As for potatoes, their a classic breakfast ingredient that add great heartiness to a frittata.

Yukon Gold’ is my absolute favorite when it comes to potatoes. This variety was created in Canada in the 1960’s. It was bred from a potato grown in North Dakota, called Norgleam with a wild, yellow-fleshed variety grown in Peru. It has become one of the most successful potatoes in the world, a true culinary star!

Yukon Gold is an oblong, medium to large potato in size, with a slightly flattened shape. Their smooth, thin, gold to light brown skin is relatively ‘eye’ free, creating a uniform texture and shape. When cooked, they take on a creamy and tender consistency with a rich, buttery, earthy flavor. You can bake it, boil it, scallop it and even deep fry them. Yukon Gold answers the market’s demand for a disease-resistant, yellow fleshed potato that could be easily grown in North America.

This frittata is one of those meals that looks pretty ordinary but the flavor is amazing!

Print Recipe
Bacon, Potato & Leek Frittata
Votes: 3
Rating: 3.33
You:
Rate this recipe!
Servings
Ingredients
Servings
Ingredients
Votes: 3
Rating: 3.33
You:
Rate this recipe!
Instructions
  1. Cut OUTER dark green tips off of the leek. Trim off root end, then separate the leaf sheaths; wash thoroughly. Slice leek crosswise into 1/2" pieces. Set aside.
  2. In a large pot over medium-high heat, cook bacon until crisp. Drain on paper towel & set aside. Remove all but 1 Tbsp of the bacon drippings from the pot. Add the sliced leek & 1/2 tsp sea salt. Stir & cook for about 5 minutes until leek has started to soften. Add 1/4 cup water to deglaze the pot, scraping up any leek bits from the bottom. Reduce heat to medium & cover pot for another 3 minutes, until leek is tender. Turn off heat & keep pot covered.
  3. Preheat oven to 350 F.
  4. In a 9-inch pie pan, scatter cooked potato cubes across the bottom. Top with cooked bacon, gruyere cheese & leek. In a bowl, beat eggs with ricotta cheese, cream, grated Parmesan, sea salt & pepper until smooth. Pour over ingredients in pie pan.
  5. Bake in the middle of the oven for 1 hour, until top is golden brown & center is cooked through. Serve hot or at room temperature. Can be made several days ahead & reheated in the microwave for about 1 minute.

Stuffed Mushrooms in Sun-Dried Tomato Sauce

Stuffed mushrooms are one of those items that can be an appetizer as well as a main course. They are as versatile as you can get. The number of different fillings are endless and can be anything from a simple bread stuffing to seafood, veggies or any kind of meat.

Portobello mushrooms are big, meaty and the ideal vessel for stuffing, creating a dish that is a meal unto itself. Few things can match the flavor of stuffed mushrooms.

Depending on the source, this unique dish has been around since the late 19th century or early 20th century. The fact that they resemble stuffed zucchini, it is likely that the Italians should receive credit for their creation.

Print Recipe
Stuffed Portobello Mushrooms in Sun-Dried Tomato Sauce
Instructions
Mushrooms
  1. Trim stems from mushrooms & finely chop them; reserve for sauce. Whisk the egg lightly in a shallow bowl. In a separate shallow bowl, combine flour, salt, pepper, oregano, thyme, paprika & garlic salt.
  2. In a large skillet, heat olive oil on medium-high. Dip the mushrooms in the egg then in the flour mixture. Coat the outside of the mushrooms, trying not to get too much flour inside the 'cap'.
  3. In a skillet, fry mushrooms on both sides until lightly golden. Use a tongs to help fry the sides as well. Remove mushrooms to a plate. To the skillet, add a splash of water & Swiss chard leaves. Sprinkle with salt & pepper & saute until leaves are wilted, about 1 minute.
  4. Divide cream cheese between the 4 mushroom caps. Top with wilted Swiss chard; sprinkle with grated Parmesan & paprika. Set aside, keeping warm.
Sauce
  1. In a skillet , heat oil. Add onion & cook for 2 minutes until it starts to soften. Add reserved mushroom stems, garlic, oregano, paprika, sun-dried tomatoes, red peppers & zucchini. Cook for 2 minutes while stirring with a spatula. Add wine (or chicken broth) & allow to bubble for 2 minutes then add vegetable broth, salt & pepper. Bring to a boil & simmer for 5 minutes.
  2. Stir the cream & Parmesan cheese into the sauce, then nestle the mushrooms on top. Garnish with chopped fresh parsley. Nice to serve with pasta or potatoes and/or a meat item.

Mini Dutch Apple Waffle Pies

Frozen waffles are like having a blank canvas begging for you to add your personal touch to create something unique.

The little toaster waffles called Eggo’s popped up on the market in 1953. They were created by three brothers, Anthony, Sam & Frank Dorsa, who had previously been known for their mayo business that had took off in the 1930’s.

When Eggo’s first appeared on the freezer shelves in grocery stores, they had a totally different name … Froffles! It was meant to be a combination of frozen and waffles but it didn’t last long. The name was swapped out for Eggo waffles by 1955. This unique frozen breakfast item didn’t become truly popular until about 1968.

So if you like waffles and apple pie, this dessert should interest you.

Print Recipe
Mini Dutch Apple Waffle Pies w/ Caramel Sauce
Votes: 1
Rating: 5
You:
Rate this recipe!
Servings
Ingredients
Waffle Pies
Streusel Topping
Caramel Sauce
Servings
Ingredients
Waffle Pies
Streusel Topping
Caramel Sauce
Votes: 1
Rating: 5
You:
Rate this recipe!
Instructions
Waffle Pies
  1. Preheat oven to 425 F.
  2. In a small bowl, whisk together water & cornstarch. Pour into a medium pot over medium-high heat with both sugars, spices & salt. Once sauce begins to thicken up, add the diced apples & reduce heat. Cook for 10-12 minutes to soften the apples, stirring occasionally.
  3. While apples are cooking, press waffle shells into 12 custard cups & then divide apple filling between them.
Streusel Topping
  1. In a bowl, combine streusel ingredients; using your fingertips, work to make very coarse crumbs. Divide evenly between 'pies'. Bake for 16-17 minutes. Remove from oven & cool slightly.
Caramel Sauce
  1. In a small saucepan over medium-high heat, combine sauce ingredients. Cook until bubbly & thickened, whisking constantly, about 5-7 minutes. Drizzle over apple desserts when serving.
Recipe Notes
  • Adjust sugar amounts in any part of the recipe if you wish.