
I’m one of those people who almost always has chicken frozen in my freezer, so I’m always interested in ‘another’ chicken recipe.
Marinated in honey, lime juice, soy sauce, and garlic, these honey lime chicken skewers have a tangy, sweet, and salty taste,
A perfect marinade for chicken guarantees the chicken will be flavorful and juicy. So, marinades should always combine an acid (such as vinegar or lime juice), fat, and sweetness. Salt, herbs, and spices also contribute to the end flavor of marinated chicken.
Honey and lime is an all-time flavor pairing. It not only works on sweet things, but it also plays nice with savory dishes. I think the reason it works so well is that it’s got that perfect balance between tangy and sweet. Add in a few savory and salty elements in the rest of the marinade, and the flavors are just mouthwatering.
The honey lime chicken marinade I’m using today infuses the chicken with loads of flavor, but it also helps caramelize the outside of the chicken, so you get not only gorgeous flavor, but a beautiful textural contrast between the crisp, caramelized exterior and the tender, flavorful interior.
Print Recipe
Spicy Honey Lime Chicken
Votes: 1
Rating: 5
You:
Rate this recipe!
|
|
Votes: 1
Rating: 5
You:
Rate this recipe!
|
Instructions
Marinade
Whisk all marinade ingredients together in a small bowl or blend them in a food processor.
Marinate Chicken
Pour HALF the marinade into a zip-lock bag or container & add chicken. Marinate for 30 minutes at room temperature or 6-12 hours in the refrigerator. IMPORTANT: If marinating overnight, leave out the lime juice & increase zest so it doesn't 'cook' the chicken.
Glaze
Use the reserved marinade for basting & glazing. Mix the cornstarch into the reserved marinade & microwave for about 1 minute, watching carefully. Set aside.
Grilling
Spray grill with oil. Heat grill to medium-high heat. Skewer marinated chicken pieces onto skewers & PAT DRY. Discard the marinade used for marinating. Lightly spray chicken with oil to avoid sticking.
Grill on all sides until chicken cooks to a golden brown (you will need to turn chicken a couple of times), for 9-12 minutes in total (depending on the thickness & how tightly packed the skewers are), basting once or twice with the GLAZE.
Any extra glaze can be drizzled over cooked skewers. Serve with lime wedges if you wish. Serve hot or at room temperature.

CELEBRATING CINCO de MAYO!
A big dish of baked chicken tacos seems like the perfect way to celebrate Cinco de Mayo, a yearly celebration that is held on May 5. This traditional Mexican holiday was created to commemorate the 1862 victory of the Mexican army over French adversaries at the Battle of Puebla. Cinco de Mayo is sometimes mistaken for Mexico’s Independence Day—the most important national holiday in Mexico—which is celebrated on September 16.
More popular in the United States than Mexico, Cinco de Mayo has become associated with the celebration of Mexican American culture. Celebrations began in California, where they have been observed annually since 1863. The day gained nationwide popularity beyond those of Mexican American heritage in the 1980’s due to advertising campaigns by beer, wine, and tequila companies. In Mexico, the commemoration of the battle continues to be mostly ceremonial, such as through military parades or battle reenactments.
Nowadays, Cinco De Mayo is celebrated officially in every continent and in over 40 different countries, including Canada.
Print Recipe
Baked Chicken Tacos
Votes: 1
Rating: 5
You:
Rate this recipe!
|
|
Votes: 1
Rating: 5
You:
Rate this recipe!
|
Instructions
Preheat oven to 400°F. Spray a 9×13-inch baking dish with nonstick spray.
Heat the olive oil over medium heat in a medium skillet. Add onion to skillet & cook for 2-3 minutes, or until the onion is translucent & fragrant.
Stir in the chicken, taco seasoning, tomatoes (fully drained), and green chiles (fully drained). Stir to combine fully. Reduce to simmer & allow to cook for 5-8 minutes.
Place the taco shells in the baking dish, standing up. Bake the taco shells for 5 minutes by themselves to allow them to crisp up. Remove from the oven. Spoon 1 tablespoon ( or more) of beans into the bottom of each taco shell. Top with the chicken mixture, almost to the top of each shell. Sprinkle each shell generously with shredded cheese.
Bake for 7-10 minutes, or until cheese is fully melted & the edges of the shells are browned. Remove from the oven. Add toppings of choice.
Recipe Notes
- SOME TOPPING SUGESTIONS:
- Shredded lettuce or arugula
- Salsa
- Sour Cream
- Jalapenos
- Cilantro
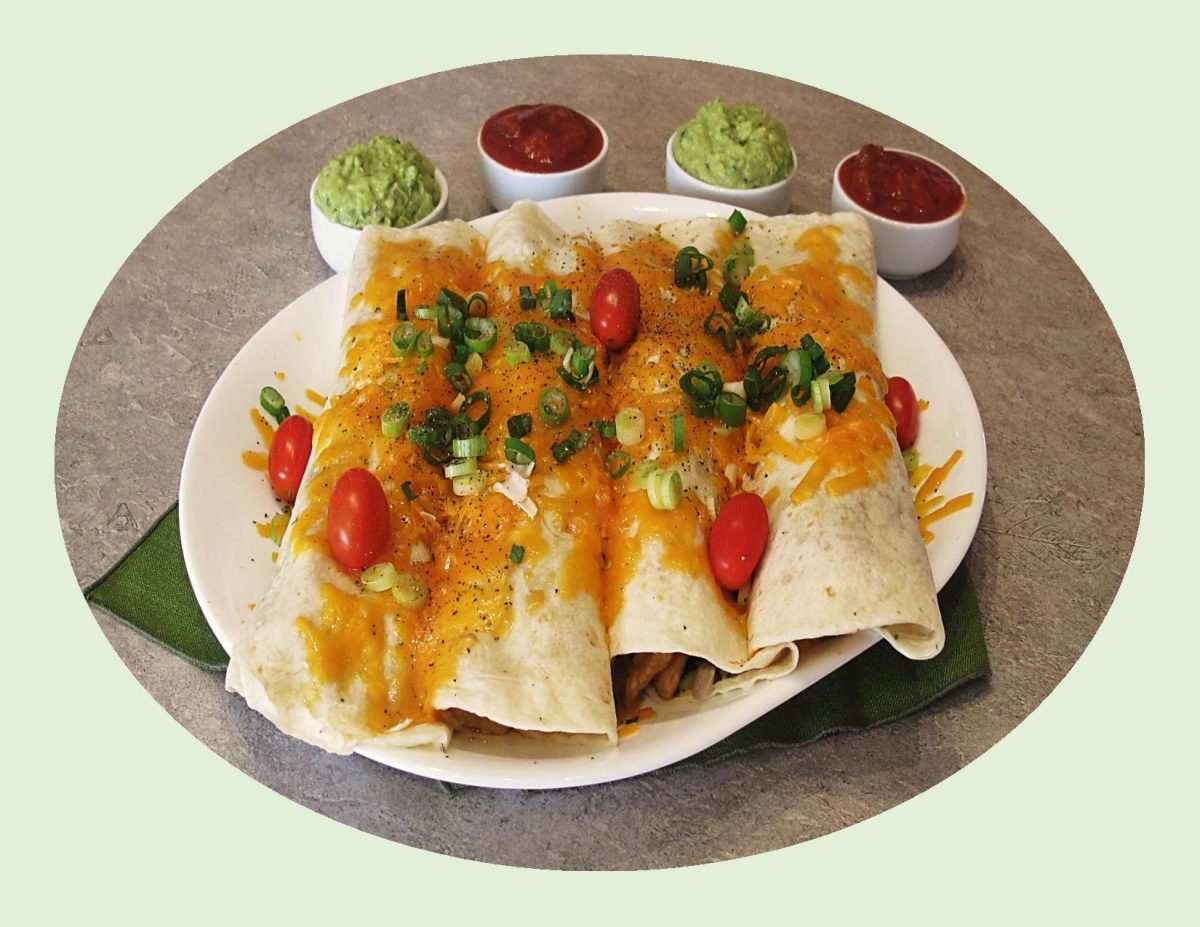
People in Mexico, the Mediterranean, and South Asia have been eating wraps since around the 1900’s. The wrap in its Western form probably comes from California, as a generalization of the Mexican/Tex-Mex burrito and became popular in the 1990’s.
Wraps have become a popular option in sandwich shops and restaurants, and for good reason. Like all sandwiches, wraps are an outlet for culinary creativity. A wrap can be anything you want it to be – breakfast, lunch, dinner, even a snack!
Wraps offer the same flexibility and creative options as a sandwich, but in a more convenient format all rolled up in a tasty tortilla or flatbread. The usual flatbreads are wheat tortillas, lavash or pita; the filling may include cold sliced meat, poultry, or fish, shredded lettuce, diced tomato, guacamole, sautéed mushrooms, bacon, grilled onions, cheese, and a sauce, such as Ranch dressing or honey mustard.
They are the perfect on-the-go meal. Most wraps can be eaten one-handed, leaving the rest of you free to continue about your day. They’re the perfect meal solution for a busy schedule.
It is remarkably easy to create your own personalized wrap: choose a bread, pick your condiments, layer your fillings, decide whether you want to grill it or not and enjoy. Does it get any better than that!
I have to admit, I absolutely love wraps so I like to fit them in to our meals whenever I can. These zesty chicken wraps are so good !
Print Recipe
Zesty Chicken Wraps
Votes: 1
Rating: 5
You:
Rate this recipe!
|
|
Votes: 1
Rating: 5
You:
Rate this recipe!
|
Instructions
Chicken
In a large bowl, combine 2 Tbsp oil, lemon juice & seasonings; add chicken & turn to coat. Cover & refrigerate for 1-4 hours.
Filling
In a heavy skillet, heat 2 Tbsp oil & sauté zucchini & onions until tender crisp. Remove & keep warm. Drain marinade from chicken & cook in the same skillet until no longer pink, about 5-6 minutes. Return zucchini/onion to pan, heat through.
Assembly
Lightly spread 4 tortillas with a bit of guacamole or sour cream. Spoon filling down the center of tortillas. Add toppings saving a good bit of the cheese for sprinkling over them after they are rolled.
Roll up & place on a microwave safe dish. Sprinkle with remaining cheese & microwave only until cheese is melted. Top with sliced green onions & tiny grape tomatoes. Serve extra toppings on the side if you like.

Breakfast taquitos are like the smaller cousin to breakfast burritos. They use smaller corn tortillas and have a filling rolled into center of each tortilla. Taquitos are a great way to get some vegetables into your morning meal, and if you need, you can even take them on the go with you once they’re done. What’s more, they’re easily adaptable to your needs. So, if you prefer different veggies or have some leftover ones to use up, you love breakfast sausage or prefer them meatless, there’s a way to make breakfast taquitos work for you.
What’s more, these taquitos are baked, not fried, so they’re a little less guilt-inducing than you might think. Customize the recipe to your liking, swapping out what you dislike and putting in what you do. Serve breakfast taquitos with some fresh fruit, salsa verde, guacamole or sour cream and green onions.
These tasty taquitos are everything you want in a brunch item. They are hearty, savory, and easy to make. Another bonus is that you can prepare and bake the taquitos. Allow to cool completely and then place in a freezer Ziploc bag. When ready to eat, microwave them until warm. Could breakfast food get more convenient than that?!
Print Recipe
Breakfast Turkey Taquitos
Votes: 1
Rating: 5
You:
Rate this recipe!
|
|
Votes: 1
Rating: 5
You:
Rate this recipe!
|
Instructions
Filling
Heat a large non-stick skillet on high. Add olive oil, onion, and garlic & cook until soft, approximately 2 to 3 minutes. Add tomato, cook until the tomato starts to break apart and dissolve into the mixture, approximately 3 minutes.
Add the turkey, cumin, smoked paprika & chili powder; cook until the turkey is cooked through, using a wooden spoon to break the turkey into small pieces. This will take approximately 5 minutes.
Add the cilantro & beaten eggs to the mixture & cook until the eggs are cooked through, approximately 3 minutes. Remove from heat.
Heat tortillas for 10 to 15 seconds in the microwave before working with them. While the tortillas are warm, divide the filling between them topping with diced avocado & 100 grams of the shredded cheese. Roll the tortillas & place in the baking pan seam side down.
Top taquitos with salsa & remaining 50 grams shredded cheese.
Assembly
Preheat oven to 400 F. Spray a 13 x 9-inch baking pan with oil.
Heat tortillas for 10 to 15 seconds in the microwave before working with them. While the tortillas are warm, divide the filling between them topping with diced avocado & 100 grams of the shredded cheese. Roll the tortillas & place in the baking pan seam side down. Top taquitos with salsa & remaining 50 grams shredded cheese.
Bake in the oven for 15 minutes, until the cheese is melted and the tortilla is crispy. Serve immediately.

The French dip sandwich is on menus across North America and beyond, from delis to upscale restaurants, served as it was originally conceived or with some variants. For instance, cheese might show up on the thinly sliced beef; some might be smeared with mustard or horseradish. It has also provided inspiration for other cultural dishes.
Although the French Dip Sandwich is not French, (the name referring to the kind of bread used to make the sandwich, a French baguette, rather than its origin), the inventor, Philippe Mathieu was. In 1918, Philippe owned the still existing delicatessen and sandwich shop called Philippe the Original in Los Angeles.
According to the story at the restaurant, Philippe was preparing a sandwich for a policeman and accidentally dropped the sliced French roll into the drippings of a roasting pan. The policeman liked the sandwich and came back the next day with some friends to order the sandwich dipped in the meat pan. As they say, and the rest is history.
However, there is a second theory that the sandwich was created in 1908 at Cole’s P. E. Buffet in LA, possibly for a customer with sore gums, who requested that the crunchy bread be softened with meat juice. For what it’s worth, the controversy remains unresolved.
The classic French dip is a sandwich traditionally consisting of sliced roast beef, served on French bread, and eaten au jus (‘with juice,’ referring to the flavorful drippings of the meat left over from roasting). The juice is commonly served on the side in a small dipping bowl.
These French dip tortilla roll ups put an interesting Mexican spin on the classic.
Print Recipe
French Dip Tortilla Roll Ups
Votes: 1
Rating: 5
You:
Rate this recipe!
|
|
Votes: 1
Rating: 5
You:
Rate this recipe!
|
Instructions
-
Lay out 4 tortillas on a work surface. Distribute shredded provolone cheese evenly over each of the tortillas. Place thin slices of roast beef evenly over the cheese, then sprinkle the French-fried onions on top.
Roll up each tortilla tightly & place seam side down in a greased baking dish. Brush the remaining oil over the tops of the roll-ups.
Bake about 10-15 minutes, until roll-ups are browned.
While the roll-ups are baking, combine the beef consommé, water, soy sauce, onion & garlic powder in a saucepan over medium heat. Cook until warmed through.
Slice roll-ups in half & serve with warm sauce for dipping.
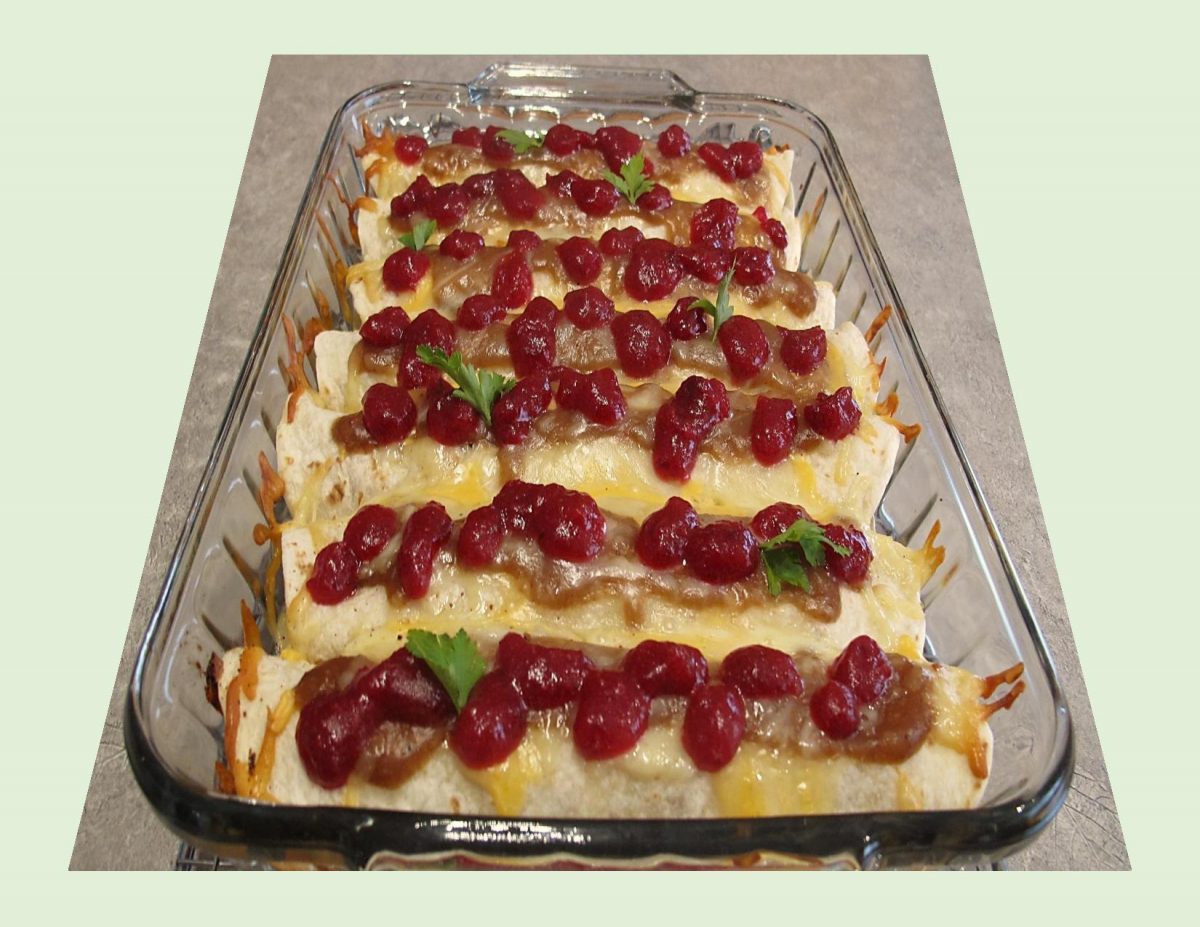
Most families have a roundup of classic holiday dishes that they make every year. Those dishes provide plenty of leftovers for days (maybe even weeks) after the holiday has passed. It follows that during the holiday season, the meals start to look the same. We love leftovers, we really do, but every meal enjoyed after Christmas Day starts to seem identical. That is, until you plan a boxing day feast with a spicy twist? These tasty enchiladas are a saucy, cheesy way to use up any leftover turkey from your Christmas dinner.
Print Recipe
Turkey & Rice Enchiladas
Votes: 1
Rating: 5
You:
Rate this recipe!
|
|
Votes: 1
Rating: 5
You:
Rate this recipe!
|
Instructions
Preheat oven to 425 F. Coat a 9 x 13-inch baking dish with nonstick spray.
Cook rice. Allow to cool slightly. Stir together rice, half the cheese, stuffing, turkey, green onions, salt and pepper in a medium bowl. Spread 1/2 cup of gravy on the bottom of prepared pan.
Divide filling down the center of each tortilla. Roll each tortilla up tightly and place seam-side down in baking dish. Top with the remaining gravy and sprinkle with remaining cheese.
Bake, uncovered, for 20 to 25 minutes, or until tortillas are lightly browned and the filling is heated through.
Top with cranberry sauce and sprinkle with parsley.
Quesadillas are basically toasted tortillas with cheese inside. The name in Spanish literally means ‘little cheesy thing’. What constitutes a quesadilla varies greatly between Mexico and its neighboring countries. They agree that the quesadilla and taco or burrito are different; the former being cooked after being filled or stuffed while the later two are filled with pre-cooked ingredients. Also they may be made with flour, corn or wheat tortillas as well as Mexican Masa (tamale version).
The quesadilla originated in central and southern colonial Mexico, beginning as a corn tortilla gently heated until soft enough to fold, then filled with cheese and toasted on both sides until golden and crispy on the outside and gooey with cheese on the inside. Over time, chopped, cooked vegetables and bits of roasted, shredded meat also found their way into these cheesy tortillas.
Influenced by the many micro-cultures of Mexico and Latin America, the quesadilla has been adopted and adapted by chefs and home cooks around the world, especially since the little cheesy things make it so easy to feed vegetarians and meat-eaters at the same table. A vegetarian quesadilla can be as simple as cheese folded into a tortilla. For the meat or seafood lovers, just add some shredded chicken, pulled pork or ‘roasted’ shrimp.
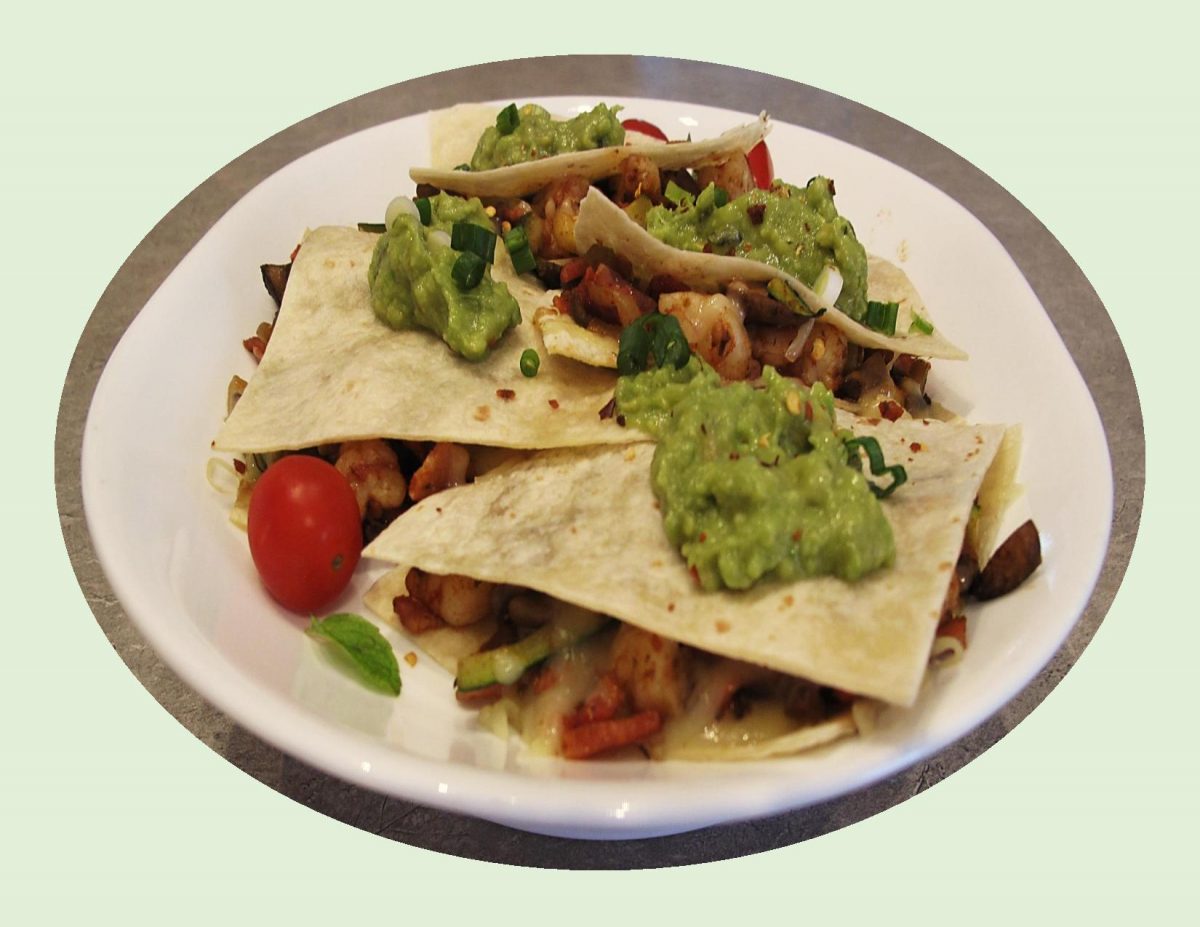
Speaking of shrimp …. to maximize the flavor, don’t sauté them – roast them! Much like roasting meat on the bone, roasting shrimp in their shells gives them a more intense flavor and keeps them from drying out as easily. The flavor from the shells penetrates the flesh, making them even tastier.
Something else I wanted to mention is a suggestion to help make your quesadillas nice and crunchy. Don’t use butter or oil to cook them in, use mayo instead. The fact that mayo contains a bit of sugar will promote browning and also give some extra crispiness.
Print Recipe
Shrimp Quesadillas w/ Guacamole
Votes: 1
Rating: 5
You:
Rate this recipe!
Ingredients
- 3 slices bacon, cooked & crumbled
- 1 cup zucchini, julienned
- 250 gm mushrooms, sliced
- 2 cloves garlic, minced
- 454 gm WILD, jumbo shrimp, peeled & deveined
- 1 1/2 tsp chili powder
- 1/4 tsp EACH garlic powder, onion powder, dried oregano, smoked paprika, cumin, salt & pepper
- 4 large flour or corn tortillas
- 100 gm melting cheese such as mozzarella, smoked cheddar, Mexican blend or Monterey Jack, grated
- guacamole, sour cream or salsa for serving
- 3 green onions, sliced for serving
|
Votes: 1
Rating: 5
You:
Rate this recipe!
|
Instructions
In a skillet, fry bacon to a cooked but not real crisp stage. Remove from pan to paper towel. Sauté mushrooms, zucchini & garlic until most of the moisture evaporates. Cut each shrimp in thirds & add to skillet with seasonings. Cook for another minute or until shrimp begins to turn pink. Remove from heat & add cooked bacon & combine.
Grate cheese. Lightly butter one side each of 4 tortillas. Place on a griddle, & cook until warm & browned slightly. Remove 2 of them & keep warm. To each of the remaining 2, sprinkle with 1/4 of the cheese, top each one with 1/2 of the filling then sprinkle with remaining cheese over filling. Place the 2 warm tortillas on top of the filled ones.
Place a lid (or a baking pan) over the griddle for a few minutes to give the cheese a chance to melt.
Remove quesadillas to a cutting board & cut each one into 4 pieces. Serve hot with your choice of toppings.
Recipe Notes
- As I mentioned in the blog article, roasting the shrimp really intensifies the flavor. If you have the time, try it instead of just sautéing them.
-
Preheat the oven to 400 F.
-
Place the shrimp (shells-on) on a lightly greased baking sheet and toss with 1 tablespoon olive oil and minced garlic.
-
Sprinkle evenly with the seasoning (such as Old Bay) and arrange the shrimp in a single layer.
-
Bake the shrimp for 8-10 minutes or until just pink and opaque throughout.
-
Remove from oven.

A quesadilla is a Mexican dish that dates back to the 16th century. Traditional quesadillas were made with a corn tortilla that was warmed on a griddle, filled with cheese and various other fillings (meat, vegetables), and then folded over to be eaten by hand. The addition of toppings like guacamole, salsa and sour cream seems to have come along later.
Quesadillas are simple and quick to make. Place the quesadilla in a dry griddle (or skillet) over low to medium low heat. That way, you don’t have to handle greasy tortillas with your hands. But more importantly, oil is a heat conductor which browns the tortillas faster than the filling heats through and the cheese melts. Tortillas are thin – and they cook fast!
If you cover with a lid, the filling heats through and melts the cheese faster, before the tortilla gets too brown. Cook until underside is golden and crispy, then remove the lid.
Pulled pork and savory black beans are a great match by themselves but adding creamy avocado takes it up a few more notches.
Print Recipe
Black Bean Pulled Pork Quesadillas
Votes: 1
Rating: 5
You:
Rate this recipe!
|
|
Votes: 1
Rating: 5
You:
Rate this recipe!
|
Instructions
On a griddle, heat butter & sauté mushrooms until moisture has evaporated; add corn & green onions. Sauté for another few minutes. Remove from heat; transfer to a dish.
Wipe griddle with paper towel; place 2 tortillas on dry griddle & top each with 60 gm of the cheese. Next, divide black beans, green onions, corn & mushrooms between the 2 tortillas. Top with another 60 gm each of the remaining cheese. Cover the tortillas with the 2 remaining tortillas.
If your griddle does not have a cover, use a sheet pan to cover the 'quesadillas' until cheese melts & quesadillas are heated through. Remove from griddle onto cutting board. Cut into wedges & place on serving plates. Top with avocado slices & diced Roma tomatoes. If you prefer, sprinkle with additional cheese & green onion. Serve with your choice ... salsa or sour cream or maybe both!
There are so many great things to make with tortillas. You can load up burritos for breakfast, stuff some quesadillas with shrimp or make tortilla chips and cover them with cheese, guacamole and spicy salsa.
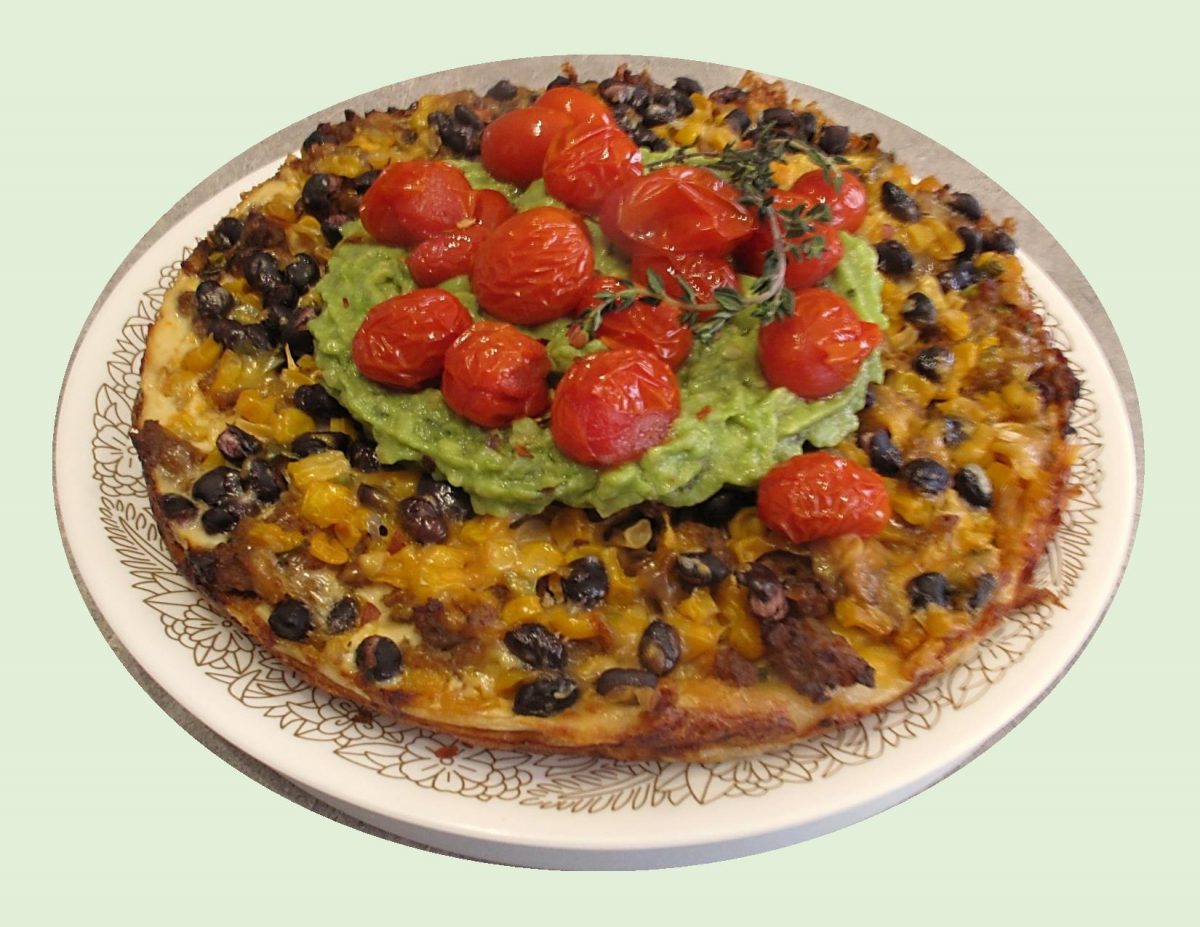
A tortilla quiche combines a classic breakfast quiche and a tortilla tart without having the traditional pastry crust.
Breakfast for supper is always good with Brion & I. Making this meal a day ahead of serving it allows the flavors to become exceptional.
Print Recipe
Mexicali Quiche w/ Avocado & Roasted Tomatoes
Votes: 1
Rating: 5
You:
Rate this recipe!
Ingredients
- 250 gm lean, ground pork
- 1 cup onion, chopped
- 125 gm mushrooms, sliced
- 1 cup canned, corn niblets, drained
- 540 ml black beans, rinsed
- 1 Tbsp chili powder
- 3/4 tsp cumin
- 3 large eggs
- 1 1/2 cups milk OR 1/2 & 1/2 cream
- 2 Tbsp green chili peppers, seeded & chopped. optional
- 1/2 tsp salt
- 1/8 tsp pepper
- 150 gm Monterey Jack cheese, shredded
- 2 large corn or flour tortillas
- 18-24 cherry tomatoes/olive oil
- 2 avocados, mashed
- 1/2 tsp salt
- 1 clove garlic, minced
- 1 Tbsp lime juice
|
Votes: 1
Rating: 5
You:
Rate this recipe!
|
Instructions
In a skillet, cook ground pork, onion, mushrooms & garlic. Cook until meat is brown & crumbly & moisture has mostly evaporated from the mushrooms. Stir in corn, beans, chili powder & cumin. Remove from heat.
-
In a bowl combine eggs, milk, green chili peppers (if using), salt & pepper. Grate cheese.
Lightly butter bottom of an 8-inch baking dish. Place one of the tortillas on the bottom of dish; sprinkle with a bit of grated cheese & top with half of the pork mixture. Tear other tortilla into pieces & place on top then sprinkle with a bit more cheese & remaining pork mixture.
Carefully pour milk mixture over quiche then top with remaining cheese. Bake for about 30 minutes or until set.
While the quiche is baking, place cherry tomatoes in a foil lined baking pan, drizzle with olive oil & roast until skins pop.
On a plate, mash avocados; add salt, garlic & lime juice. When quiche is ready, top with avocado mixture & roasted tomatoes. Serve.

Over the years, I have used guava paste numerous times. I found it was equally as good in both sweet and savory preparations, adding a nice ‘zing’ due to the natural acidity in guava fruit.
This specialty ingredient is made by cooking together guava fruit and sugar until it is very, very thick and then leaving the mixture to dry to remove excess moisture. This results in a paste that keeps well and is very flavorful. Guava paste is typically sold in short, wide cans or plastic packaging.
Guava paste is an ingredient found in many Cuban, Caribbean and South American recipes. A common pairing with cheese as an appetizer or baked into pastries as part of the filling. Also known as goiabada or pasta de guayaba, has a sweet, floral taste lending a distinct and tropical flavor to anything it is used in.
Today, I’m using it in some scones with cream cheese. Should be good!
Print Recipe
Guava Cream Cheese Scones
Votes: 1
Rating: 5
You:
Rate this recipe!
|
|
Votes: 1
Rating: 5
You:
Rate this recipe!
|
Instructions
Preheat oven to 350 F. Line a round 8" baking pan with parchment paper.
In a bowl, whisk together flour, sugar & baking soda. With fingers, cut in cold butter & cream cheese until mixture resembles small peas. Do NOT over work dough. Carefully stir in guava paste cubes with a fork.
In a small cup, beat egg slightly then combine with buttermilk & vanilla. Add wet ingredients to flour mixture, stirring ONLY until combined.
Pour dough into lined baking pan, spreading evenly. Sprinkle with sanding sugar. Bake about 20 minutes or until golden & tests done. Slice into 8 wedges & serve warm.


