Summer Calzones w/ Corn, Tomatoes & Bacon

A calzone is a savory Italian turnover. It traditionally consists of a cheesy filling in a leavened dough and is served with marinara sauce on the side. The calzone originated in Naples in the 18th century.

The best results come when the filling is not too moist because it can make the dough soggy. Like with a stir-fry, it is also better to have a filling where the ingredients are broken down into bite-size pieces, so the filling is easy to eat.

There is nothing better this time of year than fresh corn and tomatoes. This easy corn, tomato & bacon calzone is the perfect way to celebrate fresh summer produce! Don’t overload the filling with ingredients; make your point with a mixture of a few simple flavors then load it with cheese!

Eating vegetables during their seasons really gives you the best flavors.

Print Recipe
Summer Calzones w/ Corn, Tomatoes & Bacon
Instructions
Dough
  1. In a large bowl, place lukewarm water, honey & yeast; allow to stand for a few minutes until frothy. In another bowl, flour & salt.
  2. When yeast is ready, add the 2 Tbsp of oil. Add flour, mixing with a fork until a shaggy dough forms. Turn onto a work surface & knead dough for about 5-8 minutes, until smooth & elastic. Place dough ball in a lightly greased bowl, cover with plastic wrap & let rise in a warm place until doubled in size while you prepare filling.
Filling
  1. In a large skillet, cook the bacon until crispy. Remove the bacon from the pan & set aside to drain on a plate lined with paper towels.
  2. To the bacon drippings, add the mushrooms, shallot & garlic. Sauté over medium heat for a few minutes then add the corn, red pepper flakes & a pinch of salt & pepper.
  3. Cook for a few minutes then add the halved cherry tomatoes & basil. Cook, stirring frequently, for a couple minutes. You want the tomatoes to just warm through, not to completely break down. Stir in the crisped bacon & remove the pan from the heat so the mixture can cool to room temperature.
Assembly/Baking
  1. On a lightly greased work surface, divide the risen dough into 8 even balls. Roll each ball into an OVAL shape, about 7 x 6-inch size. Divide filling into 8 portions.
  2. On each oval, spoon a couple tablespoons of the ricotta in a straight line on the middle of the dough. Next, spoon a couple tablespoons of the corn-tomato filling on top of the ricotta. Finally, add about 2-3 tablespoons of grated Monterey Jack cheese.
  3. Keep one side free & cut the other side of the dough into thin strips using a knife. Fold the uncut side over the filling first, then continue rolling over the cut side.
  4. Line a large baking sheet with parchment paper & place the ‘calzones’ on it, curving them into a C shape. (Place the side with the ‘strips’ curving to the outside). Brush calzones lightly with egg wash, sprinkle with cornmeal if you wish. Cover with plastic wrap & allow to rise for about 20 minutes.
  5. Preheat oven to 350 F.
  6. Bake for 25 minutes or until the dough is golden and crisp and the filling is gooey. Allow to cool slightly before serving with warmed marinara sauce.

Roasted Grape Pizza w/ Ground Meat & Arugula

Gone are the days when the only association with grapes was a glass of wine.

The origin of grapes on pizza is unclear but is presumably related to the Tuscan dish, ‘schiacciata all’uva’ (flattened bread or focaccia with grapes). During the harvest season in Italy, grapes (with seeds) are baked into flatbreads to create a slightly sweet snack or dessert. The crunch and tartness of the grapes add a layer of complexity to the dough.

Today’s blog recipe is for a gourmet-style pizza that features roasted red grapes with 2 different cheeses, a ground meat combo & arugula which make it quite unique and irresistible.

Grapes have an extremely high natural sugar content, so roasting causes the skin of the grapes to burst a bit in the oven and become lightly blistered and caramelized. The inside is juicy, with a jam-like consistency (a bit like a wine flavored jam). Roasted grapes are amazing over grilled meats, easy-yet-elegant desserts, next-level salads and toasts, cheese boards, roast meat, or…pizza.

In Alberta, Canada, where we live, the colder climate historically posed challenges to grape ‘farming’. However, with the advent of cold-hardy grape varieties and innovative farming techniques, the Alberta grape and wine industry, though niche, is showing promising growth and resilience.

Fresh grapes are wonderful on their own, but their culinary versatility is broad. When roasted it concentrates their sweetness. When frozen, grapes turn into bite-sized sorbets, a cool treat for summer. Grape juice, with its sweet and tart profile, is a base for many beverages and sauces. And of course, grapes are paramount in winemaking.

Brion & I have been growing Valiant grapes in our back yard for about thirteen years now. I have featured various savory recipes using grapes before but today I thought it was a good time for another Roasted Grape Pizza .

Print Recipe
Roasted Grape Pizza w/ Ground Meat & Arugula
Instructions
  1. Preheat oven to 400 F.
  2. Toss the grapes with 1 Tbsp olive oil & salt & place on a parchment lined baking sheet. Roast 20-25 minutes until the skins start to burst & the juices begin to caramelize. Set aside to cool slightly.
  3. In a saucepan over medium heat, cook the ground meat until fully browned. Break meat into small pieces as it cooks. Drain any excess fat to prevent a soggy crust. Stir in the garlic powder & herbs during the last minute of cooking.
  4. Spread ricotta evenly over Naan breads & season with salt & pepper. Add a thin layer of shredded cheese followed by the cooked meat & onion. Scatter roasted grapes & fresh thyme over the top
  5. Bake at 400 F. for 8-12 minutes until filling is hot & melty.
  6. Immediately after removing the pizza from the oven scatter fresh arugula over the top[ for a peppery bite. The residual heat will slightly wilt the greens. Drizzle with honey for an extra layer of flavor.

Rice Krispie & Ricotta Strawberry Tart

Crunchy and soft, tasty and light: sweets with rice krispies are easy and quick to make. Rice krispie cereal is an extremely versatile ingredient but it’s in snack and dessert recipes that its taste and texture is most successfully enhanced. There is something about those original crispy, buttery bars that is almost irresistible – especially when they’re freshly made and still slightly warm – and I can see the appeal of trying to translate it into other dishes. That is exactly what I tried to do when I came up with this Rice Krispie & Ricotta Strawberry Tart. The base includes mini marshmallows and rice krispie cereal for a cereal treat-like flavor.

Whether you spell it as rice krispie treats, rice krispy treats, or rice crispy treats, one thing is for sure, whatever you chose to create with them, it will be good.

This dessert is a real winner when it comes to something special that’s easy to prepare, tastes great and has eye appeal all in one.

Print Recipe
Rice Krispie & Ricotta Strawberry Tart
Votes: 1
Rating: 5
You:
Rate this recipe!
Servings
Ingredients
Glaze
Rice Krispie Base
Servings
Ingredients
Glaze
Rice Krispie Base
Votes: 1
Rating: 5
You:
Rate this recipe!
Instructions
Glaze
  1. Place the crushed strawberries, sugar & gel coloring (if using) in a small saucepan. Dissolve the cornstarch in the cold water & stir in as well. Bring to a boil over medium-high heat, stirring frequently. Once boiling, cook 3 minutes more, stirring, then remove to a glass measuring cup to cool completely.
Base
  1. Generously spray a 9-inch pie or springform pan with non-stick cooking spray.
  2. In a saucepan over low heat, melt the butter, marshmallows, vanilla extract & salt, stirring frequently until completely smooth. Remove the saucepan from the heat & gently fold in the crispy rice cereal until the pieces are evenly coated.
  3. Let the mixture cool for 2–3 minutes so it's safe to handle. Lightly butter your hands or a rubber spatula & press the mixture firmly but GENTLY into the bottom of the springform pan. DO NOT OVER-COMPACT THE CRUST, or it will become too hard to slice later.
  4. Place the crust in the refrigerator for about 15 minutes to fully set.
Filling
  1. In a food processor, pulse ricotta to become more of a creamy texture, add powdered sugar. Add vanilla extract & blend well. Set aside.
Fruit
  1. Hull then wash & dry strawberries. Slice about 1/8" thick. Add strawberries to cooled glaze & gently stir with a rubber spatula to completely coat berries.
Assembly
  1. Evenly top crispy rice base with ricotta filling the carefully spoon glazed strawberries over all. Garnish with a few fresh strawberry leaves. Slice & serve.

Chocolate Puffed Rice & Ricotta Fruit Tart

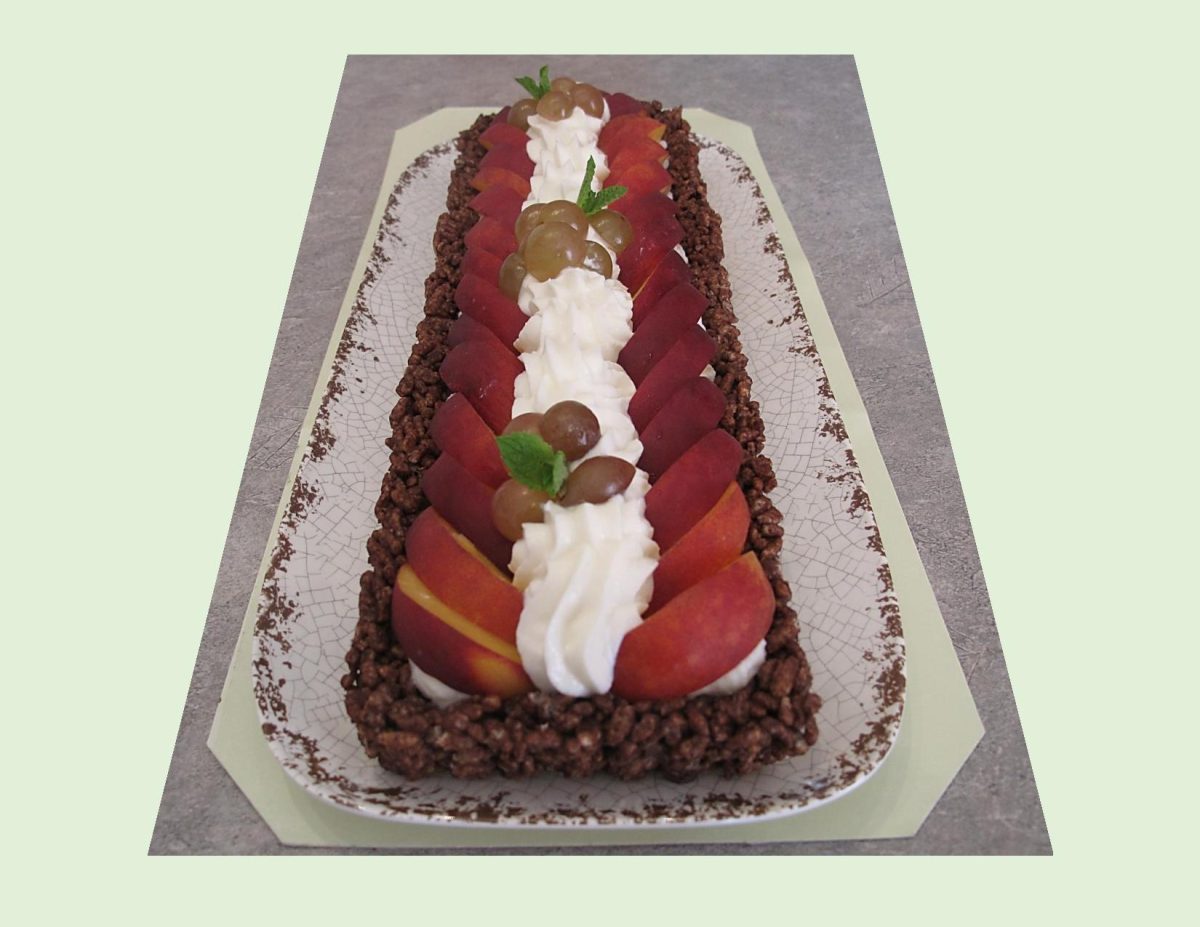
This dessert is a fun twist on a fruit tart, featuring a chocolate puffed rice crust and fresh fruit.

Crunchy and soft, tasty and light: sweets with puffed rice are easy and quick to make. Puffed rice, in fact, is an extremely versatile ingredient but it’s in snack and dessert recipes that its taste and texture is most successfully enhanced. Moreover, preparing desserts with puffed rice is very easy as the only cooking required is the one needed to melt a little chocolate!

Puffed rice and crisped rice (like Rice Krispies) are both made with rice, but each have distinctive tastes and textures. The making of crisped rice cereal involves sugar in the popping process.  Puffed rice is made by dry roasting white or brown rice kernels alone, hence the difference.

This tart base is made with ‘puffed rice’ as it is great for the crunchy base of creamy desserts like cheese tarts.

Print Recipe
Puffed Rice & Ricotta Fruit Tart
Votes: 1
Rating: 5
You:
Rate this recipe!
Servings
Ingredients
Fruit
Servings
Ingredients
Fruit
Votes: 1
Rating: 5
You:
Rate this recipe!
Instructions
Base
  1. Finely chop dark chocolate with a knife & place it in a microwavable dish. Melt chocolate on high for a few seconds, then remove the dish & mix with a spoon. Place the chocolate back in the microwave & heat for a few seconds & mix again. Repeat this until the chocolate is completely melted.
  2. Heat the puffed rice in the microwave for 30 seconds to avoid thermal shock once the two ingredients are combined. Place the hot puffed rice in a large bowl with the melted chocolate & stir to mix them well.
  3. Transfer the mixture to a 14 x 4-inch rectangular tart pan with a removeable bottom. Distribute the mixture evenly in the pan, pressing it down to compact it as much as possible. Place in refrigerator for at least an hour to become firm.
Filling
  1. In a food processor, pulse ricotta to become more of a creamy texture, add powdered sugar. Cut the vanilla pod lengthwise & with a knife extract seeds to add to the cream to flavor it. Blend well. Fill puffed rice pastry shell with half of the ricotta cream & spread into a smooth layer. Place remaining cream in a pastry bag with a star tip nozzle.
Fruit
  1. Wash nectarines/peaches & slice thinly keeping the peel. Wash & dry grapes. Slice each in half.
Assembly
  1. Line sides & ends with sliced nectarines/peaches. Pipe a creative pattern of ricotta cream down the center of tart. Add a few clusters of halved grapes & some fresh mint leaves for decoration.
Recipe Notes
  • The cold ricotta tart can be kept in the refrigerator for 2-3 days. Freezing is not recommended.

Bacon, Potato & Leek Frittata

A frittata is a ‘blank canvas’ for so many different flavor combinations …. a giant omelet that is started on the top of the stove and finished in the oven.

Vegetables and cheeses are very common ingredients for frittatas, but two of my personal choices are leeks and potatoes. Leeks are like onions after charm school: less of an edge, a little more refined, with a more colorful personality. As for potatoes, their a classic breakfast ingredient that add great heartiness to a frittata.

Yukon Gold’ is my absolute favorite when it comes to potatoes. This variety was created in Canada in the 1960’s. It was bred from a potato grown in North Dakota, called Norgleam with a wild, yellow-fleshed variety grown in Peru. It has become one of the most successful potatoes in the world, a true culinary star!

Yukon Gold is an oblong, medium to large potato in size, with a slightly flattened shape. Their smooth, thin, gold to light brown skin is relatively ‘eye’ free, creating a uniform texture and shape. When cooked, they take on a creamy and tender consistency with a rich, buttery, earthy flavor. You can bake it, boil it, scallop it and even deep fry them. Yukon Gold answers the market’s demand for a disease-resistant, yellow fleshed potato that could be easily grown in North America.

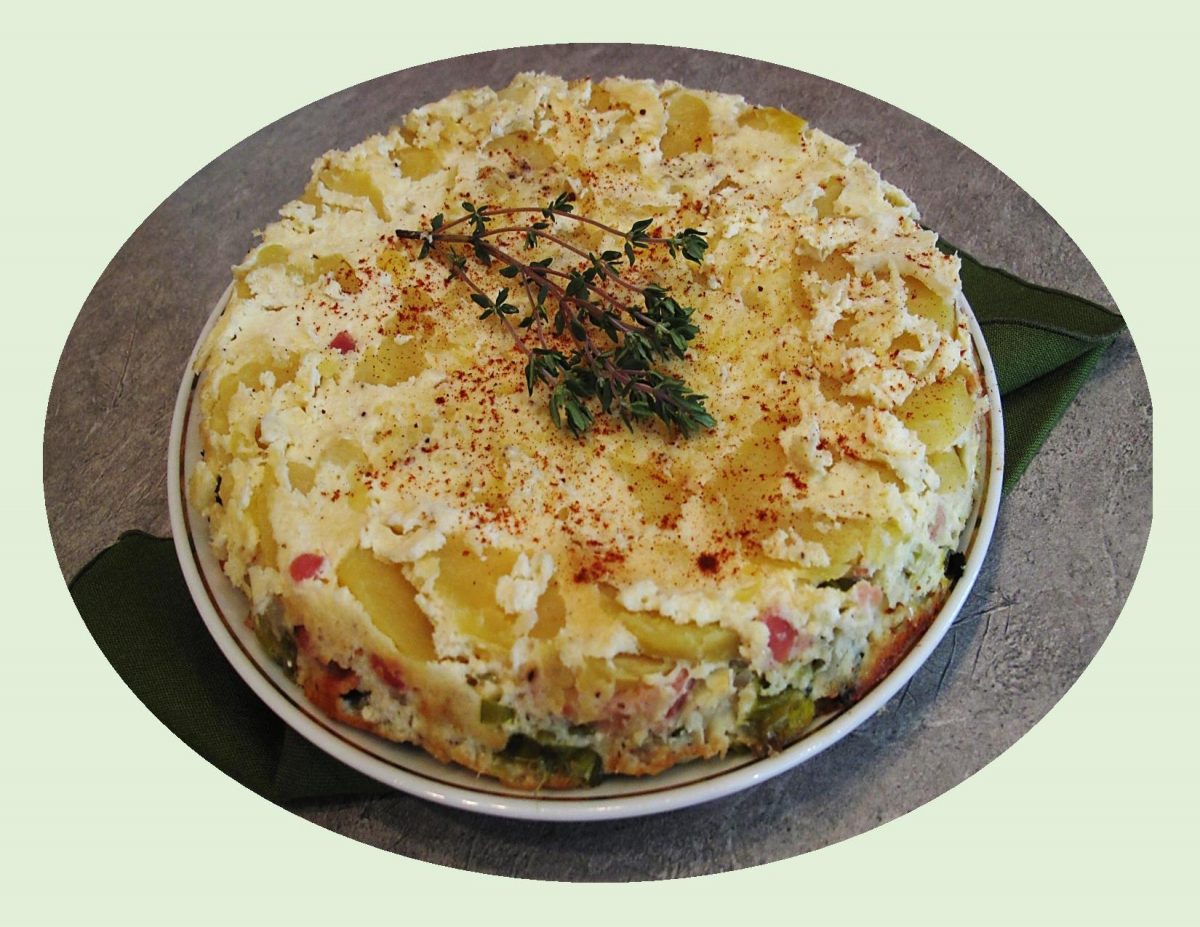
This frittata is one of those meals that looks pretty ordinary but the flavor is amazing!

Print Recipe
Bacon, Potato & Leek Frittata
Votes: 3
Rating: 3.33
You:
Rate this recipe!
Servings
Ingredients
Servings
Ingredients
Votes: 3
Rating: 3.33
You:
Rate this recipe!
Instructions
  1. Cut OUTER dark green tips off of the leek. Trim off root end, then separate the leaf sheaths; wash thoroughly. Slice leek crosswise into 1/2" pieces. Set aside.
  2. In a large pot over medium-high heat, cook bacon until crisp. Drain on paper towel & set aside. Remove all but 1 Tbsp of the bacon drippings from the pot. Add the sliced leek & 1/2 tsp sea salt. Stir & cook for about 5 minutes until leek has started to soften. Add 1/4 cup water to deglaze the pot, scraping up any leek bits from the bottom. Reduce heat to medium & cover pot for another 3 minutes, until leek is tender. Turn off heat & keep pot covered.
  3. Preheat oven to 350 F.
  4. In a 9-inch pie pan, scatter cooked potato cubes across the bottom. Top with cooked bacon, gruyere cheese & leek. In a bowl, beat eggs with ricotta cheese, cream, grated Parmesan, sea salt & pepper until smooth. Pour over ingredients in pie pan.
  5. Bake in the middle of the oven for 1 hour, until top is golden brown & center is cooked through. Serve hot or at room temperature. Can be made several days ahead & reheated in the microwave for about 1 minute.

Zucchini Lasagna Roll-Ups with Asiago Sausage

Even though we are almost at the end of fall, there is still time to embrace those summer zucchini. I realize using zucchini instead of lasagna noodles is not a new idea but definitely a natural substitution. Lasagna, in any form, has to be up there on our list of comfort foods. Their saucy, cheesy and you have endless possibilities with fillings.

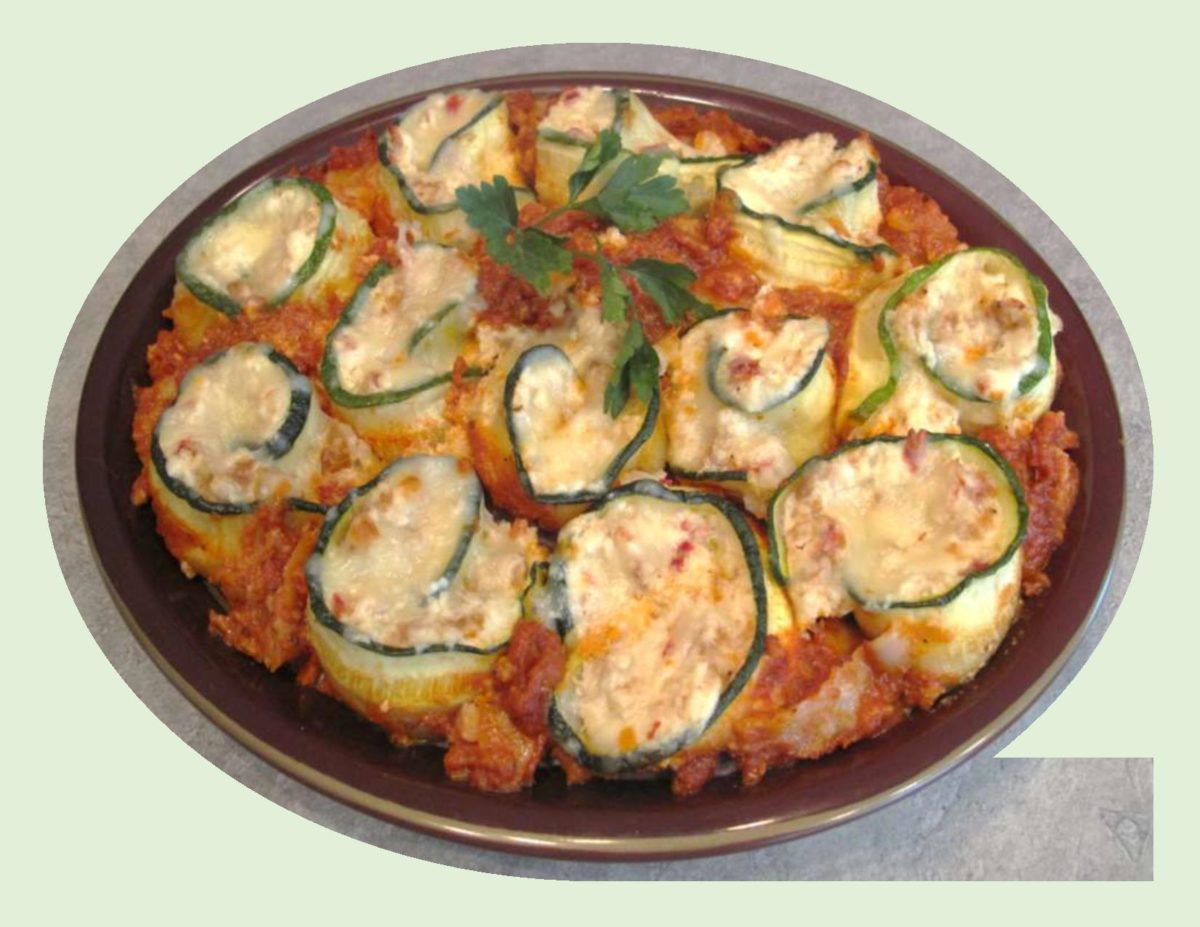
Thinly sliced zucchini stands in for the noodles and the three cheeses give this vegetarian lasagna plenty of richness, but for an even more substantial dish, I added some cooked and crumbled Asiago sausage.

It certainly has wonderful eye appeal but even more important, the flavor was amazing. Asiago/Red Pepper sausage is made in-store by Save-On Foods in our city. It has become my ultimate favorite in fresh sausage to use.

Print Recipe
Zucchini Lasagna Roll-Ups with Asiago Sausage
Votes: 1
Rating: 5
You:
Rate this recipe!
Course Main Dish
Servings
Votes: 1
Rating: 5
You:
Rate this recipe!
Instructions
  1. Preheat oven to 400 F. Grease a sheet pan with 1 Tbsp oil; set aside. Slice zucchini into 1/8-inch thick slices. Lay zucchini slices on prepared baking sheet & roast for 10-12 minutes. Remove from oven & cool for 5 minutes before handling. Leave oven on for baking casserole.
  2. In a saucepan, crumble-fry sausage; remove & drain on paper towel. In a bowl, beat egg & combine with ricotta cheese, Parmesan cheese, 1/2 cup mozzarella cheese, salt & pepper.
  3. In a 9 X 13-inch baking dish, spread some marinara sauce on the bottom. Assemble zucchini roll-ups by laying the zucchini strips on a flat work surface. Divide filling between strips & spread. Sprinkle each strip with a bit of mozzarella cheese. Roll up & place in casserole dish. Drizzle remaining sauce on rolls & sprinkle with remaining mozzarella cheese.
  4. Bake, uncovered for 20-25 minutes or until cheese is melted & bubbly.

Scalloped Potato Roll

I guess this meal could be classed as making the most of a traditional comfort food. Scalloped potatoes seem to feed both stomach and soul. Maybe that comes from so many of us having childhood memories of this dish. It seems most of the recipes now contain cheese. From what I remember, it was basically thin sliced potatoes and onions placed in a baking dish alternated with flour, butter, hot milk, salt & pepper and topped with buttered bread crumbs. It tasted so creamy and good!

Meatloaf and scalloped potatoes seem to be synonymous with each other. When I saw this recipe for scalloped potato roll on the internet, I felt it certainly kicked the two up a notch. You can use whatever ground meat that you prefer. I like a combo of beef, veal and pork. Beef is necessary for texture as well as flavor, veal contains a high level of gelatin keeping meat tender and the pork adds flavor. Just a little side note for what its worth — if you only have ground beef on hand, add half a teaspoon of unflavored powdered gelatin to 454 gm. The gelatin will act much like veal, keeping the texture softer and moister.

This meal looks like a lot of work but it really isn’t. The combo of roasted potatoes, ground meat, three cheeses and spinach or chard is excellent.


Print Recipe


Scalloped Potato Roll

Votes: 8
Rating: 4
You:
Rate this recipe!

Course Main Dish
Cuisine American, European

Servings

Votes: 8
Rating: 4
You:
Rate this recipe!


Instructions
  1. Preheat oven to 350 F. Line a 11 X 7-inch baking sheet with parchment paper. Sprinkle half of the Parmesan cheese evenly over parchment. Peel & slice potatoes 1/8-inch thick. Rinse & pat dry on paper towels. Place the potatoes over the Parmesan so each potato is overlapping the previous potato both vertically and horizontally. Continue until the entire pan is filled with potatoes. Sprinkle the rest of the Parmesan evenly over the potatoes. Season with 1 teaspoon of salt. Bake 30 minutes, until golden. The potatoes should be slightly crispy & flexible .

  2. In a saucepan, heat 2 Tbsp of olive oil & saute onions until caramelized, about 15 minutes. Add ground meat, scramble fry with onions. Mix in tomatoes, 3 Tbsp parsley, paprika, 1 tsp salt & 1/2 tsp pepper. Stir, cooking until meat is browned & cooked through. Remove from heat & place in a bowl.

  3. Add 2 Tbsp of olive oil to the saucepan. Add spinach (or chard); cook until wilted. Add 1 tsp of salt & the garlic; stir to combine then remove from heat. Combine ricotta with spinach mixture & spread evenly over potato 'sheet' followed by the meat mixture & then topping all with the mozzarella.

  4. Take one end of the potato sheet, holding the parchment paper begin rolling upward, making sure the ingredients are not coming out the ends. Once the filled potato sheet is completely rolled, arrange it in the center of the parchment on the baking sheet & bake for about 15 minutes. Sprinkle with remaining parsley & a bit more cheese if you wish.

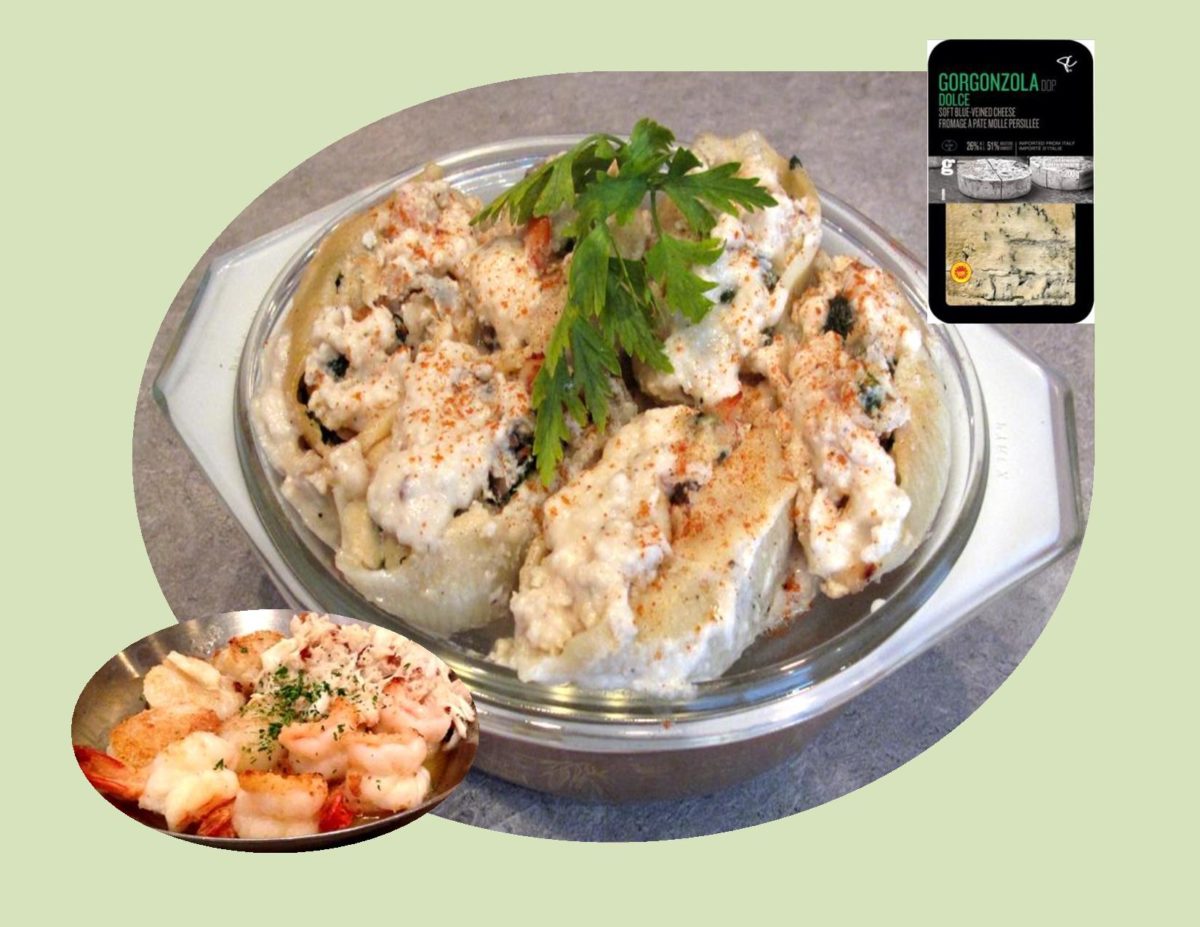
Seafood-Gorgonzola Pasta Shells

One of my all time favorite pasta dishes to make are jumbo stuffed pasta shells. They are easy to prepare and are perfectly portioned for individuals and groups alike.The best part is the multitude of different fillings you can make them with.

Some years ago, Brion and I had the pleasure of eating lunch at Gayles Bakery & Rosticceria in the little seaside town of Capitola, California (see my blog article from July 2016 for Fig & Gorgonzola Chicken Breast). It was there I tasted Spinach-Gorgonzola Pasta. Until then I had never even tasted this kind of cheese. With a strong dislike for Blue Cheese, it looked suspiciously similar. Long story short, it seemed everyone was ordering this pasta so I decided to try it. It was just incredible! The combination of Gorgonzola, ricotta and parmesan make this dish especially decadent and delicious.

Info I found on Gorgonzola Dolce reads like this — Imported from Italy, this sweet or ‘dolce’ Gorgonzola has the characteristically creamy texture and nutty aroma Gorgonzola is known for, yet is milder due to a shorter aging period. A great option for those who normally shy away from blue cheese.

The fact that Brion and I are both seafood lovers, I decided to incorporate this kind of pasta with a little seafood medley. The end result did not disappoint, bringing back that ‘taste of a memory’ once again.

Print Recipe
Seafood-Gorgonzola Pasta Shells
Votes: 2
Rating: 3
You:
Rate this recipe!
Course Main Dish
Cuisine American, Italian
Servings
Ingredients
Bechamel Sauce
Course Main Dish
Cuisine American, Italian
Servings
Ingredients
Bechamel Sauce
Votes: 2
Rating: 3
You:
Rate this recipe!
Instructions
Bechamel Sauce
  1. In a heavy saucepan over medium heat, heat milk until hot but not boiling. Meanwhile, combine flour & butter in another heavy saucepan. Stir over medium heat with a wooden spoon or whisk until the mixture has gently bubbled for 2 minutes, being careful not to brown flour.
  2. Begin to add the hot milk to the flour mixture a little at a time while whisking vigorously. Continue to add the milk until it is fully incorporated. Bring the mixture to a boil, reduce heat to low; simmer, stirring constantly, until the mixture thickens, about 6-8 minutes. It should resemble heavy cream. Crumble the cheese & add to hot bechamel sauce, whisking continuously until smooth. Add nutmeg & pepper & stir. Remove from heat to cool.
Pasta & Filling
  1. Cook the pasta shells in salted boiling water to which a small amount of oil has been added for 8-10 minutes. Drain & set aside.
  2. In a large skillet, melt butter. Saute spinach & mushrooms until spinach is wilted. Remove to paper towels. Add shrimp & scallops to skillet; saute for 3-4 minutes until opaque & just barley cooked; set aside. Preheat oven to 350 F.
  3. In a large bowl, combine spinach, shrimp, scallops, crab meat, ricotta cheese, garlic & salt & pepper. Fill pasta shells. Spread some sauce in the bottom of a 9 x 13-inch baking pan. Lay filled shells single file in pan. Pour remaining sauce over all & top with a sprinkling of parmesan. Bake 20-30 minutes, until the cheese becomes a little brown.

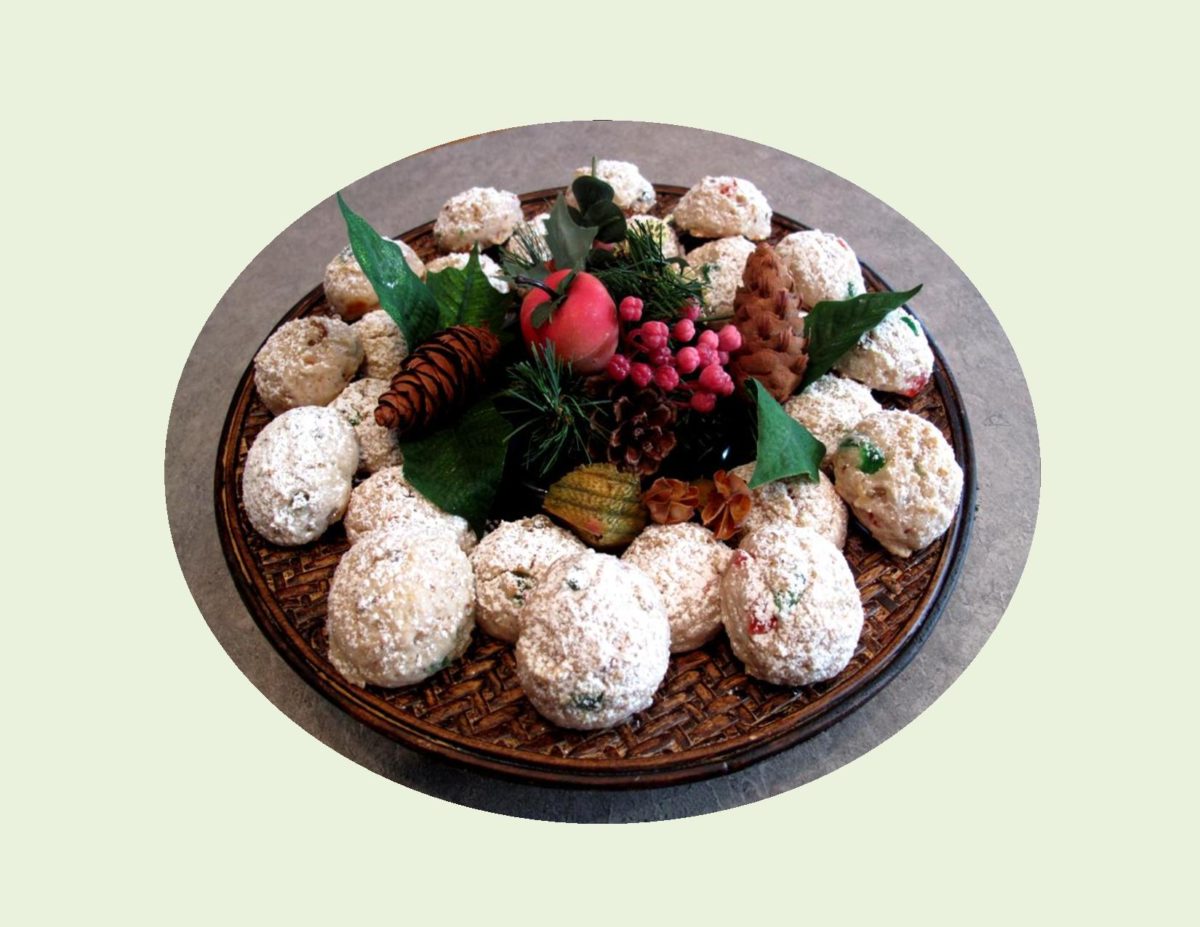
Christmas ‘Stollen’ Scones

Having spent many years in the commercial food industry, baking is something I have definitely done a lot of. Of course it goes without saying, it is truly one of my passions.

It only seems logical, if you like muffins, you will also like scones. It wasn’t until a few years ago that I took more of an interest in scones. I found a recipe for ‘buttermilk scones’ that only made 6 wedges which was perfect for the two of us. Of course, I could never just leave it at that. From there my addiction to ‘recipe development’ created a whole new section in my recipe file for scones.

Scones are much like muffins in the way that they share many of the same ingredients, but each varies slightly in the way they’re made. With muffins, the wet and dry ingredients are measured separately before mixing them together and then baking. Scones, on the other hand require the shortening to be cut into the dry ingredients. They both fall under the category of ‘quick breads’, because they are leavened with baking powder or baking soda instead of yeast. One big similarity between the two methods though, is that over-mixing will cause them to be tough and dry.

Over time, in North America at least, it seems that the difference between the two has become a little blurred. It all comes down to who makes them I guess which brings me to the blog recipe today. Just for fun I decided to try to create that magical ‘stollen’ flavor in a scone just to see what would happen. Brion and I really enjoyed them and I hoping you will to.

Print Recipe
Christmas 'Stollen' Scones
Votes: 1
Rating: 5
You:
Rate this recipe!
Course Brunch, dessert
Cuisine German
Servings
mini scones
Course Brunch, dessert
Cuisine German
Servings
mini scones
Votes: 1
Rating: 5
You:
Rate this recipe!
Instructions
  1. Preheat oven to 350 F. Line a baking sheet with parchment paper.
  2. In a large bowl, combine flour, sugar, baking powder, spices & salt; cut in margarine until it resembles fine crumbs.
  3. In a small bowl, combine ricotta cheese, candied fruit, raisins, almonds, extracts, lemon zest, eggs & almond milk. Stir into dry ingredients until just moistened. Scoop onto baking sheet & bake 12-14 minutes.