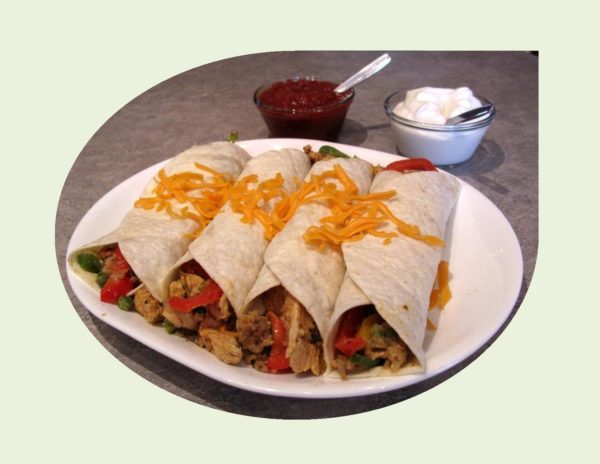
EASTER GREETINGS!
Easter is synonymous with spring, it represents a time of renewal. The winter months are now in our rear view mirrors and we can look forward to those wonderful summer days. Fresh new buds are on the trees, just waiting to burst out as the season unfolds. Everything speaks of new life and fresh hope. Spring is so unique (even if we still have snow on the ground in our part of the country).
Though ham is traditional in many homes, there are just as many people who would prefer something different for dinner on Easter Sunday. Holiday cooking is all about making a meal that feels more special than what you would cook on a regular basis.
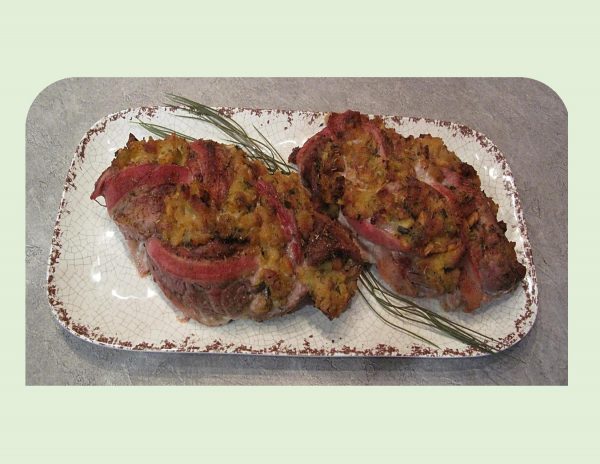
Pork tenderloin is one of my favorite meats due to its tenderness and versatility. This meal started out with an idea to stuff a tenderloin and developed into so much more. I must say, I was even more pleased with the final results when we both enjoyed it.
Print Recipe
Braided Pork Tenderloin w/ Pineapple Stuffing
Votes: 1
Rating: 5
You:
Rate this recipe!
|
|
Votes: 1
Rating: 5
You:
Rate this recipe!
|
Instructions
Pineapple Stuffing
Drain pineapple; reserving 1/3 cup juice. In a large saucepan, melt margarine. Add walnuts, celery & sage; cook stirring until celery is tender-crisp. Stir in green onions, pineapple & reserved juice. Remove from heat; toss in cornbread stuffing mix & set aside.
Tenderloin
Using a sharp knife starting 3-inches from end, slice tenderloin lengthwise twice; making 3 equal strips. Carefully take the knife & cut pockets lengthwise every 3-inches in the center of each of the tenderloin strips. Spread the combined rub ingredients over meat & allow to stand at room temperature for about 20 minutes before continuing with preparation.
When meat is marinated, stuff each pocket with pineapple stuffing. Place a strip of bacon along each tenderloin strip. Braid the stuffed tenderloin/bacon by crossing the right section over the middle section then the left section over the new middle section. Continue until you run out of tenderloin.
Insert a wooden or metal skewer into the end of braided tenderloin to keep it together. Tuck in the remaining stuffing mixture in the folds of the braid.
Preheat oven to 425 F. Bake, uncovered for 25-30 minutes or until meat thermometer reads 160 F. Remove from oven & loosely cover with foil. Allow to rest for 3-5 minutes before slicing. Serve with pineapple salsa.
Pineapple Salsa
In a large skillet, combine pineapple, sugar, vinegar, lime juice, red onion, cumin, salt & pepper. Bring to a boil & cook over medium-high heat until thickened, 7-10 minutes. If there is still a lot of liquid left, use a slotted spoon to transfer the pineapple to a bowl & continue to cook the liquid over high heat for 5 minutes more, then pour the liquid over the pineapple. Mix in the onions & cilantro. Season with salt to taste.
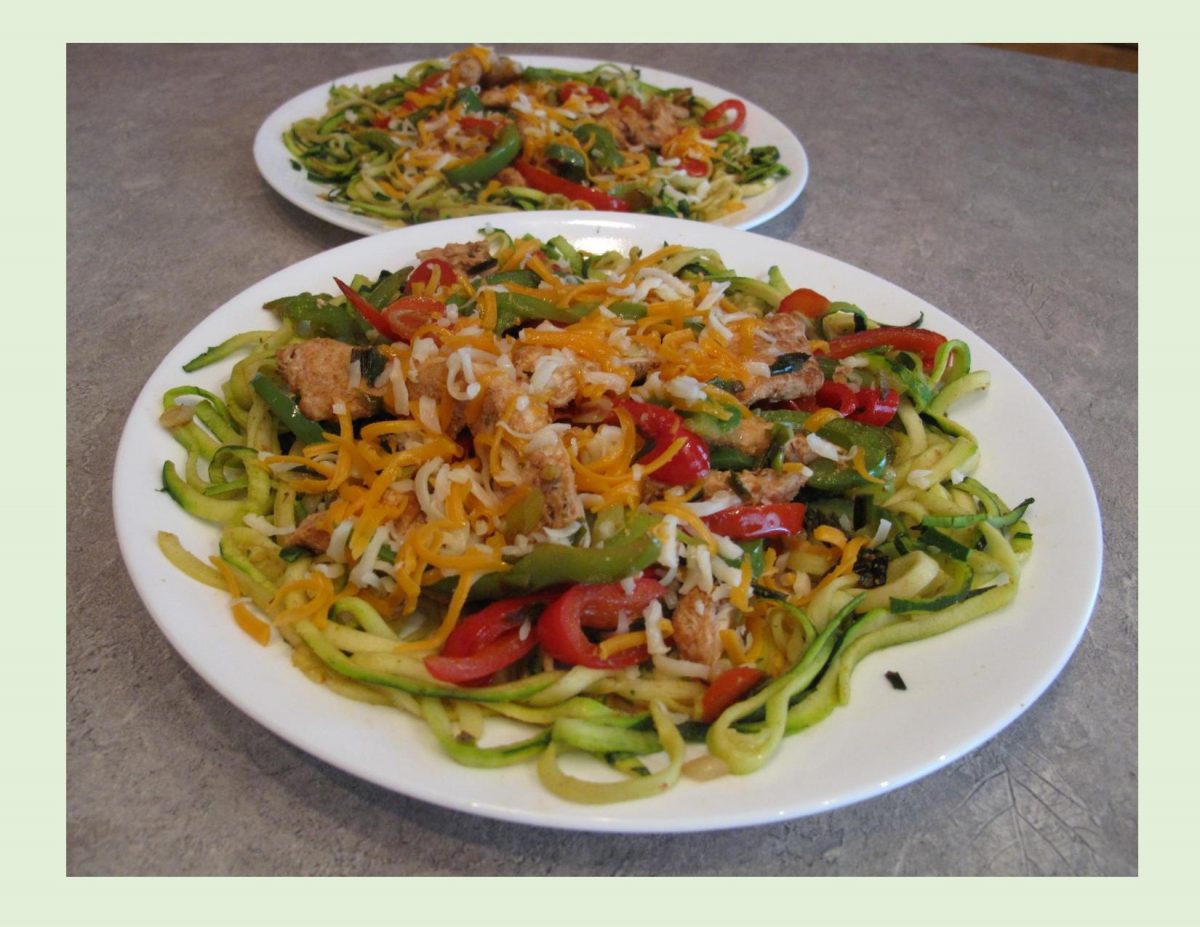
Despite having a fairly short history, Mexican fajitas are one of the most popular dishes in the world today. Apart from the fact that fajitas are incredibly tasty, they are actually very healthy not to mention the ease in cooking and assembling them.
As with many foods, time has changed the contents of the fajita and has evolved slightly from the original simplicity of the ranch worker’s dish, with different cuts of meat being chosen such as chicken or seafood. The vegetables have not changed as much as the meat, with peppers, onions & chilies still being predominant ingredients in the dish.
Probably, the most important thing when making fajitas is the marinade. It not only makes the ingredients incredibly tender but very flavorful.
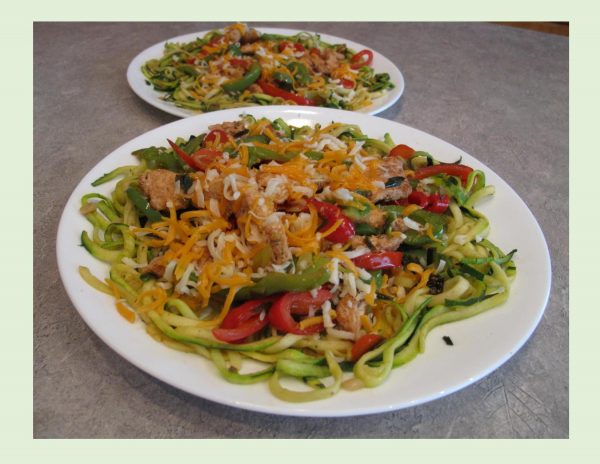
Fajitas usually require some tortillas. While they are wonderful tasting, using zucchini noodles (or zoodles) as a base for the fajita chicken gives this meal an amazing flavor. Zucchini is perhaps the most popular choice for vegetable noodles. It’s long, thin shape makes it easy to spiralize and its neutral flavor allows it to pair well with almost any sauce or topping. This meal has such eye appeal along with a great taste.
Print Recipe
Fajita Chicken w/ Zucchini Noodles
Votes: 1
Rating: 5
You:
Rate this recipe!
|
|
Votes: 1
Rating: 5
You:
Rate this recipe!
|
Instructions
In a large resealable plastic bag, combine oil, lemon juice & seasonings (RESERVE a small bit of seasoning for zucchini noodles); add chicken, seal & turn to coat. Refrigerate for at least an hour.
Wash zucchini & trim off ends. Using a spiralizer, cut zucchini into 'noodles'. Set aside. Prepare peppers & green onion.
When chicken has finished marinating, Add 1 Tbsp oil to a griddle & saute peppers & onion until just tender crisp. set aside & keep warm. Add another Tbsp oil to griddle. Saute zucchini noodles for 2-3 minutes. Remove from heat, sprinkle with reserved seasoning & keep warm.
Grill marinated chicken strips until cooked through. Divide zucchini between serving plates. Top with peppers, onions & grilled chicken. Sprinkle with grated cheese.

Due to the fact that rice flour pairs perfectly with taco-worthy fillings such as avocado, beans, cheese etc. gave me inspiration for this meal. This flour is a staple of South east Asia, Japan & India. Rice flour or rice powder is very different from rice starch, which is produced by steeping rice in a strong alkaline solution.
The technique of frying with rice flour has become universal. Rice absorbs less oil than other flours while frying, resulting in fewer calories from fat and a less oily product. Even many fast food restaurants dust their french fries with rice flour to give them that characteristic, satisfying crunch. By blending traditional wheat or cornstarch batters with rice flour will lighten the batter up and reduces some of the ‘gumminess’.
Rice flour is well suited to crepes but it is important to make them in thin, crisp rounds. If they are too thick the most likely they will crack if you are wrapping filling inside.
The recipe I’m using for my crepe stacks is pretty much a basic crepe recipe with rice flour substituted for all purpose flour. For the classic Asian rice ‘crepe’, coconut milk and turmeric are generally used.
This combination of flavors was very interesting. The recipe seems kind of long but it comes together fairly quickly. It certainly will be a ‘keeper’ for us.
Print Recipe
Rice Flour Crepes with Black Beans & Guacamole
Votes: 1
Rating: 5
You:
Rate this recipe!
|
|
Votes: 1
Rating: 5
You:
Rate this recipe!
|
Instructions
Rice Flour Crepes
In a pitcher, whisk all ingredients together until smooth. Refrigerate for at least 30 minutes while preparing the rest of the recipe.
Crepe Filling
In a large skillet, heat oil over medium-high heat. Add turkey; stir-fry until no longer pink. Stir in water chestnuts, carrot, cilantro, garlic, apricot preserve, soy sauce, ginger & red pepper flakes. Remove from heat & set aside.
Guacamole
In a bowl, coarsely mash avocados, lime juice, salt, garlic, onion & cilantro with a fork. Cover & refrigerate until ready to use.
Black Beans
In a bowl, combine all ingredients except chicken broth (or water). In a food processor, pulse 1/2 cup of the mixture with broth until smooth. Add to mixture in bowl & stir to combine well.
Heat griddle to a medium-high temperature. Using a 1/4 measure, pour batter on griddle. With bottom of 1/4 cup measure, enlarge crepe by making circular motion in the batter. Cook each crepe for about 2 minutes until bottom is lightly browned. Lay on a plate until ready to use making sure not to let them dry out.
Assembly
On each serving plate lay one crepe. Spread each with some of the guacamole, top each with some of the turkey filling, black beans, diced fresh tomato & a sprinkle of smoked Gouda cheese. Repeat with 2 more layers on each plate. End with a swirl of guacamole for some eye appeal. Serve extra beans on the side if you wish.

I guess this meal could be classed as making the most of a traditional comfort food. Scalloped potatoes seem to feed both stomach and soul. Maybe that comes from so many of us having childhood memories of this dish. It seems most of the recipes now contain cheese. From what I remember, it was basically thin sliced potatoes and onions placed in a baking dish alternated with flour, butter, hot milk, salt & pepper and topped with buttered bread crumbs. It tasted so creamy and good!
Meatloaf and scalloped potatoes seem to be synonymous with each other. When I saw this recipe for scalloped potato roll on the internet, I felt it certainly kicked the two up a notch. You can use whatever ground meat that you prefer. I like a combo of beef, veal and pork. Beef is necessary for texture as well as flavor, veal contains a high level of gelatin keeping meat tender and the pork adds flavor. Just a little side note for what its worth — if you only have ground beef on hand, add half a teaspoon of unflavored powdered gelatin to 454 gm. The gelatin will act much like veal, keeping the texture softer and moister.
This meal looks like a lot of work but it really isn’t. The combo of roasted potatoes, ground meat, three cheeses and spinach or chard is excellent.
Print Recipe
Scalloped Potato Roll
Votes: 8
Rating: 4
You:
Rate this recipe!
Ingredients
- 4-6 potatoes, peeled
- 220 grams parmesan cheese, grated DIVIDED
- 3 tsp salt
- 4 Tbsp olive oil, divided
- 1 large onion, diced
- 350 grams ground meat OR (175 gm beef, 90 gm veal, 85 gm pork)
- 410 ml canned, diced tomatoes
- 4 Tbsp fresh parsley, DIVIDED
- 1 tsp Paprika
- 1/2 tsp pepper
- 240 grams spinach or chard
- 2 cloves garlic,minced
- 250 grams ricotta cheese
- 100 grams mozzarella cheese, grated
Ingredients
- 4-6 potatoes, peeled
- 220 grams parmesan cheese, grated DIVIDED
- 3 tsp salt
- 4 Tbsp olive oil, divided
- 1 large onion, diced
- 350 grams ground meat OR (175 gm beef, 90 gm veal, 85 gm pork)
- 410 ml canned, diced tomatoes
- 4 Tbsp fresh parsley, DIVIDED
- 1 tsp Paprika
- 1/2 tsp pepper
- 240 grams spinach or chard
- 2 cloves garlic,minced
- 250 grams ricotta cheese
- 100 grams mozzarella cheese, grated
|
Votes: 8
Rating: 4
You:
Rate this recipe!
|
Instructions
-
Preheat oven to 350 F. Line a 11 X 7-inch baking sheet with parchment paper. Sprinkle half of the Parmesan cheese evenly over parchment. Peel & slice potatoes 1/8-inch thick. Rinse & pat dry on paper towels. Place the potatoes over the Parmesan so each potato is overlapping the previous potato both vertically and horizontally. Continue until the entire pan is filled with potatoes. Sprinkle the rest of the Parmesan evenly over the potatoes. Season with 1 teaspoon of salt. Bake 30 minutes, until golden. The potatoes should be slightly crispy & flexible .
-
In a saucepan, heat 2 Tbsp of olive oil & saute onions until caramelized, about 15 minutes. Add ground meat, scramble fry with onions. Mix in tomatoes, 3 Tbsp parsley, paprika, 1 tsp salt & 1/2 tsp pepper. Stir, cooking until meat is browned & cooked through. Remove from heat & place in a bowl.
-
Add 2 Tbsp of olive oil to the saucepan. Add spinach (or chard); cook until wilted. Add 1 tsp of salt & the garlic; stir to combine then remove from heat. Combine ricotta with spinach mixture & spread evenly over potato 'sheet' followed by the meat mixture & then topping all with the mozzarella.
-
Take one end of the potato sheet, holding the parchment paper begin rolling upward, making sure the ingredients are not coming out the ends. Once the filled potato sheet is completely rolled, arrange it in the center of the parchment on the baking sheet & bake for about 15 minutes. Sprinkle with remaining parsley & a bit more cheese if you wish.
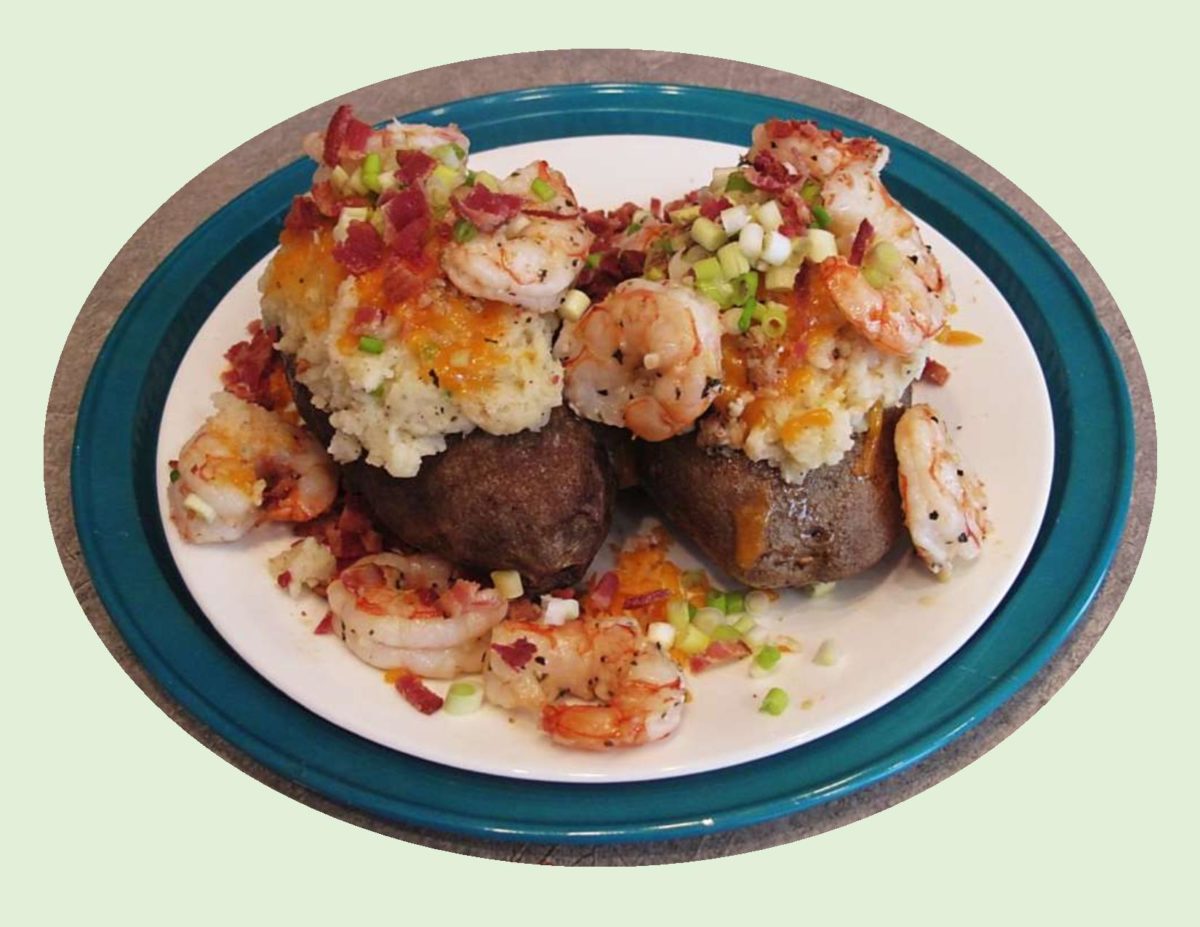
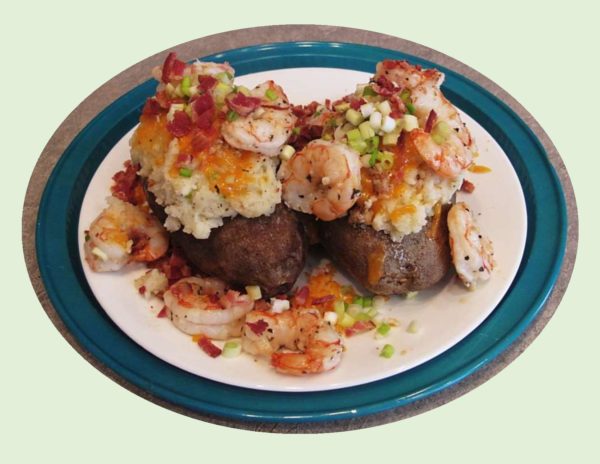
Shrimp makes for a unique and elegant twist on a stuffed baked potato. For most part, a baked potato with a pat of butter and a little salt is just great on its own. But stuff them, with an assortment of savory ingredients such as shrimp, oysters or ground meat and it easily constitutes a whole meal.
I think my first encounter with this idea came when the Wendy’s restaurant chain introduced the Stuffed Baked Potato to their menu in 1983. Their original goal was to give the customer another choice or alternative to the same old ‘fries’. I think it retailed for 99 cents at the time. The one I remember having a couple of times was with the cheese sauce and fresh broccoli. It tasted great to me, not being a fried food lover. Of course, since then the whole concept has been ratcheted up in both flavor and eye appeal.
For Canadians, barbecue season lasts until the first snow falls (sometimes even a bit after). This is a meal that can easily be cooked on the BBQ as well as in the oven and it is soooo– good!
Print Recipe
Stuffed Baked Potatoes with Garlic Shrimp
Votes: 5
Rating: 5
You:
Rate this recipe!
Ingredients
Gourmet Stuffed Baked Potatoes
Ingredients
Gourmet Stuffed Baked Potatoes
|
Votes: 5
Rating: 5
You:
Rate this recipe!
|
Instructions
Stuffed Baked Potatoes
Preheat oven to 400 F. Rub potatoes with oil & place on a baking sheet. Bake about an hour or until soft to the touch. Let stand until cool enough to handle. Cut a slice off the top of each potato lengthwise. Scoop out pulp, leaving a thin shell. Place pulp in a large bowl & mash.
In a small skillet, fry bacon until crisp. Drain on a paper towel & crumble. Saute green onions in 1/4 cup butter until tender. In a small dish, stir Ranch dressing powder (mix) into sour cream & add to potato pulp along with milk, salt & pepper. Fold in half of the cheese. Divide mixture between potato shells & drizzle with remaining butter. Place baking pan on BBQ where the heat is lower & warm potatoes through while shrimp is cooking.
Garlic Shrimp
In a foil BBQ pan, Gently combine shrimp, olive oil, garlic, oregano, basil, parmigiana-reggiano, salt & pepper. Roast until pink, firm & cooked through, about 6-8 minutes.
To Serve
On each serving plate, place a stuffed potato, top with shrimp & garnish with crumbled bacon & remaining cheese.

Today, July 25th, is my sister Loretta’s birthday. I am truly grateful for having the privilege of Loretta in my life. More than family, she has always been a friend. Her support, encouragement and selfless love have always been a constant throughout my life. Loretta and her precious little Dachshund ‘Amigo’, have spent a lot of time over the years ‘house sitting’ for Brion and I so we could enjoy some holiday time. Her own ‘personalized’ bedroom at our house is there any time they can come to visit.
Loretta shares our love of seafood, so I’m making a shrimp etouffee for supper. This year, we have the pleasure of Loretta & Amigo being here with us on this date, making the meal extra special.
The word etouffee means ‘smothered or braised’. Classic seafood etouffee consists of butter, flour for a roux, onion, celery, green pepper, garlic & salt. One constant always remains in any etouffee and that is that it served over a plate of hot rice. Etouffee starts with roux, the color tends to be warm brown and most often butter is used rather than oil. The sauce will benefit greatly from using a shrimp stock.
HAPPY BIRTHDAY, LORETTA!
OUR FAMILY CELEBRATES YOU WITH LOVE ON YOUR SPECIAL DAY
Print Recipe
Shrimp Etouffee
Votes: 1
Rating: 5
You:
Rate this recipe!
|
|
Votes: 1
Rating: 5
You:
Rate this recipe!
|
Instructions
Shrimp
Remove shrimp shells (heads & tails) & devein. Rinse shrimp & lay on paper towels & refrigerate. In a saucepan, pour chicken stock over shrimp shells & bring to a boil. Allow to a simmer & cook for 10-20 minutes; remove from heat. Pour stock through a wire-mesh strainer over a measuring cup. Add a little water if needed to equal 1 1/2 cups.
Spice Blend
In a small bowl, whisk together SPICE BLEND mixture
Roux
In a heavy skillet, melt butter; sprinkle with flour & stir quickly to combine butter & flour evenly into a thick, smooth roux. Continue cooking, stirring often, as the roux turns from white to golden brown, about 2 minutes. Add spice blend, onion, green pepper, celery & garlic & stir quickly, mixing the vegetables into the roux. Cook until everything is fragrant & softened, 1-2 minutes more.
Slowly add the stock, stirring & scraping to mix it in evenly. When the sauce is bubbling & boiling gently, lower the heat. Cook, stirring now & then, until sauce is thickened & smooth, about 15 minutes.
Scatter in the shrimp & allow them to cook undisturbed until the sides are turning visibly orange to pink, about 1 minutes. Toss well & continue cooking, stirring often, until the shrimp are pink, firm & cooked through & nicely flavored by the sauce. Add green onions & parsley; stir well. Transfer the etouffee to a serving dish. Serve hot over rice.
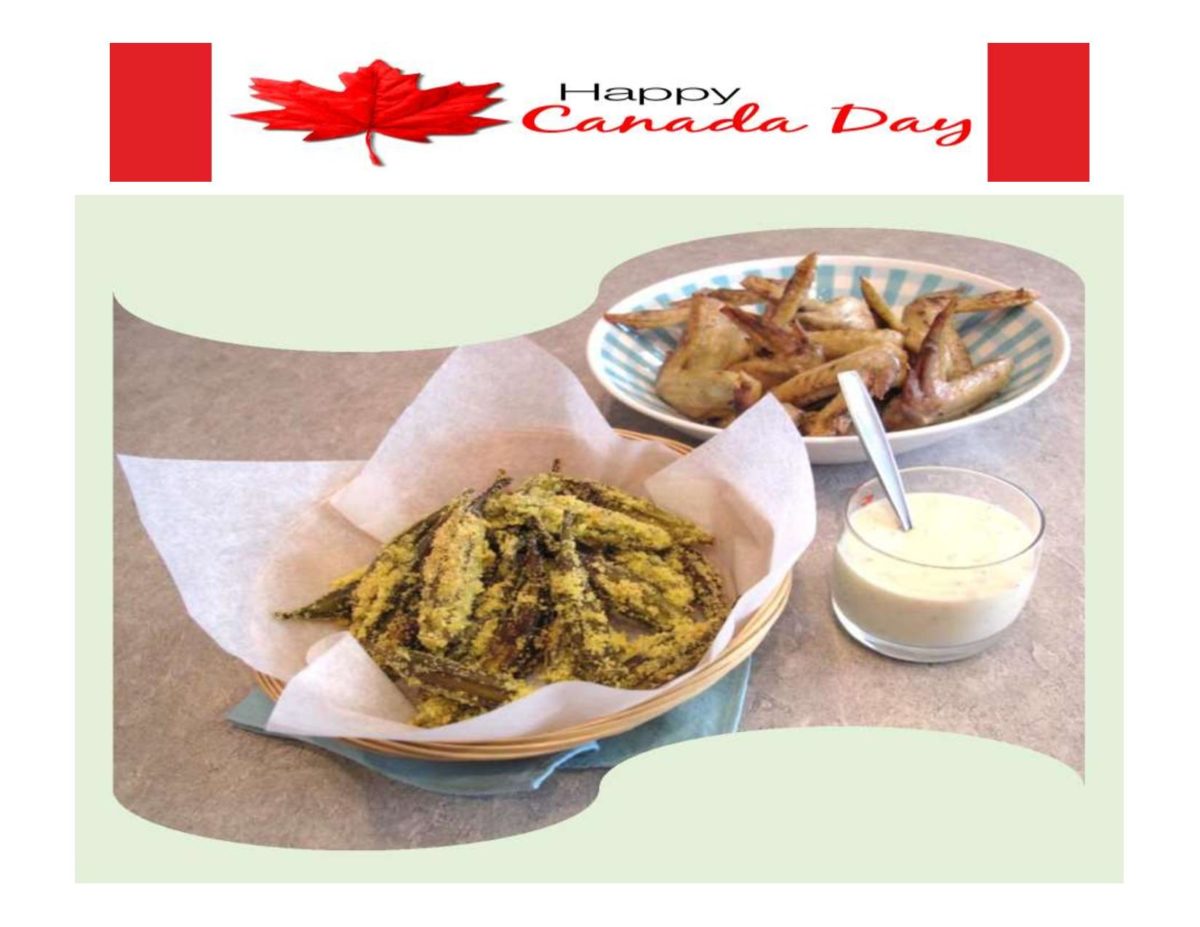
CELEBRATING CANADA DAY!
In Canada, July 1st marks the day for Canadians to show pride in their nations history, culture and achievements. From coast to coast, the country’s birthday is marked with colorful parades, firework displays and singing of the national anthem, O Canada!
This is the date of the historical event in which Canada gained its independence from Great Britain in 1867.
Canada Day has been called a few names in the past. It used to be known as Dominion Day, the First of July, Confederation Day and July the First.
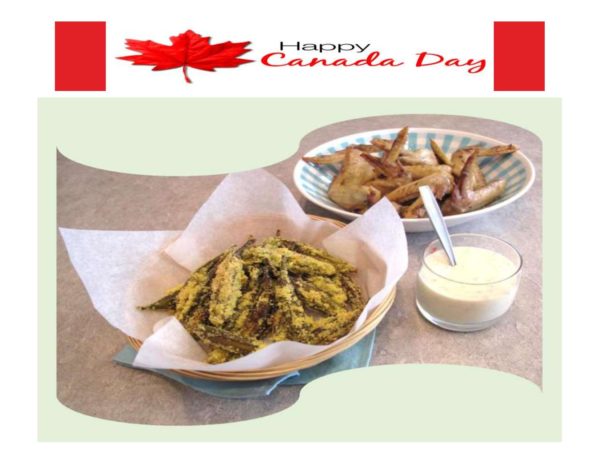
Food and drink are almost as synonymous with Canada Day as the colors of red and white. Barbecues are definitely the preferred choice of food event for the day. For us it will be chicken wings with some tasty little roasted okra fries.
Print Recipe
Roasted Okra Fries with Chicken Wings
Votes: 1
Rating: 5
You:
Rate this recipe!
|
|
Votes: 1
Rating: 5
You:
Rate this recipe!
|
Instructions
Chicken Wings
Preheat oven to 375 F. Line a baking sheet with foil & spray with cooking spray.
In a large, resealable plastic bag, combine oil & spices. Add chicken wings; toss to coat evenly. Place wings on prepared pan & bake for 30-35 minutes or until chicken is no longer pink inside. Remove from oven, wrap in foil to keep warm until served.
Okra Fries
Adjust heat to 400 F. Line a baking sheet with parchment paper. Place okra on baking sheet; drizzle with olive oil & massage into each piece. Sprinkle with salt & pepper. Roast for 20-25 minutes, turning once or twice, until lightly browned & softened.
Recipe Notes
- If you prefer, okra fries can be breaded with cornmeal as well before roasting.
- Both chicken wings & okra fries can easily be done on the BBQ if you prefer, rather than turning on the oven.
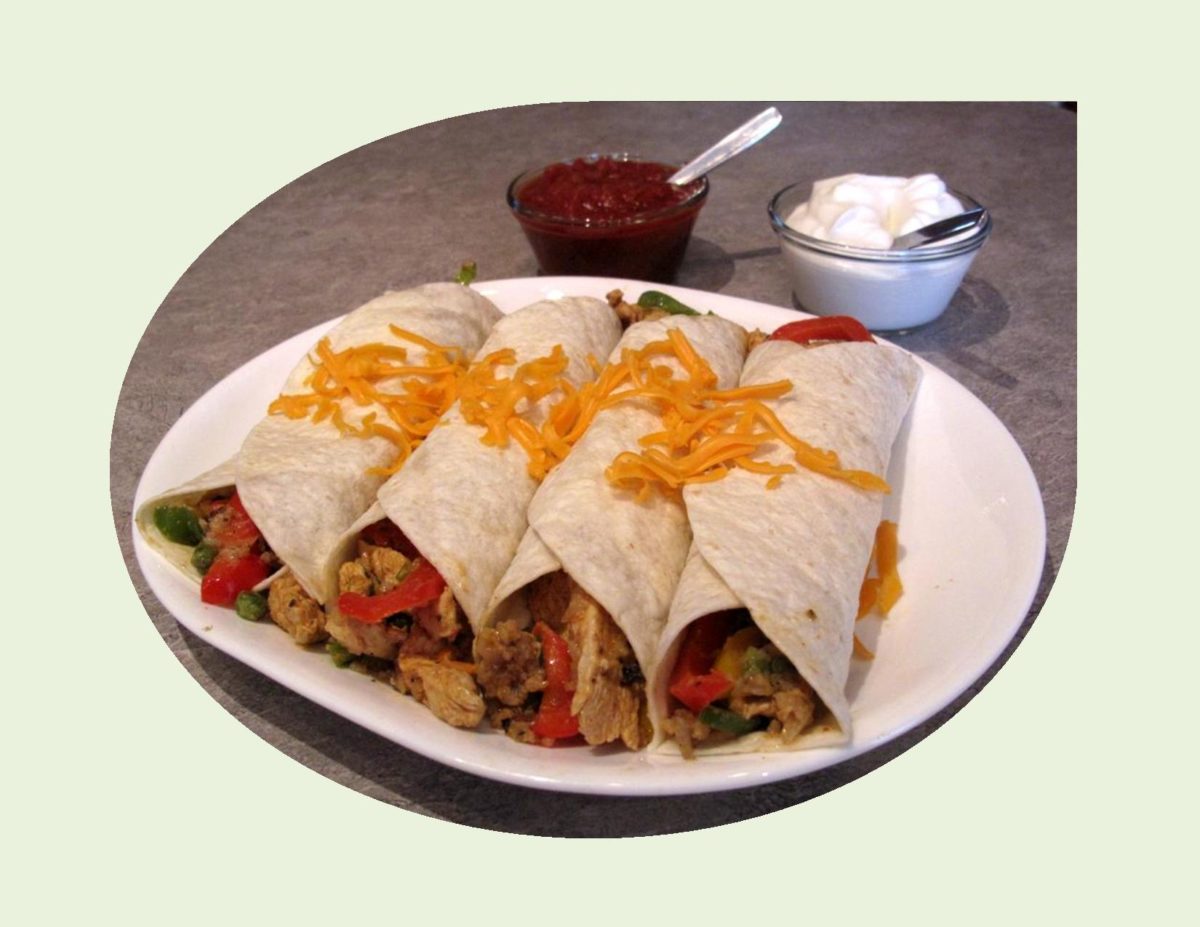
When I’m working in the yard, summer always tempts me to spend less time in the kitchen. As much as I love to cook, I find the ‘gardener’ in me takes over. I can’t simply just go out and do a bit of looking. The first thing I know, there’s a little weed that needs to be picked or a plant to prune and that does it — I’m hooked for hours. Nevertheless, one thing for sure and that is the fresh air and exercise builds an appetite which brings me to a fast-to-fix meal.
Today, I’m thinking some chicken fajitas for our evening meal. Before I even go outside, I’ll do a bit of quick prep work, that way it will be a ‘no brainer’ later when I’m tired.
Technically, only beef was used in fajitas, but the term has become ‘blurred’ and describes just about anything that is cooked and served rolled up in a soft flour tortilla. The origin of the fajita goes back to Mexican ranch workers living in West Texas (along the Rio Grande on the Texas-Mexican border) in the late 1930’s or early 1940’s. When a steer was butchered, the workers were given the least desirable parts to eat for partial payment of their wages. Because of this, the workers learned to make good use of a tough cut of beef known as shirt steak. The first print mention of the word fajitas anywhere in the world didn’t occur until the 1970’s.
The chicken breast I’m using in this recipe is marinated for a number of hours making it nice and spicy as well as tender. This is a great little, quick and easy hand held meal.
Print Recipe
Chicken Fajitas
Votes: 2
Rating: 5
You:
Rate this recipe!
Ingredients
- 4 Tbsp vegetable oil, divided
- 2 Tbsp lemon juice
- 1 1/2 tsp seasoned salt
- 1 1/2 tsp dried oregano
- 1 1/2 tsp cumin
- 1 tsp garlic powder
- 1/2 tsp chili powder
- 1/2 tsp Paprika
- 1/2 tsp crushed red pepper flakes, optional
- 680 grams chicken breasts, B/S, cut into thin strips
- 1/2 medium sweet red pepper, julienned
- 1/2 medium green pepper, julienned
- 4 green onions, thinly sliced
- 1/2 cup onion, chopped
- 6 - 8" flour tortillas, warmed
- cheddar cheese, shredded
- taco sauce OR salsa
- guacamole OR sour cream
Ingredients
- 4 Tbsp vegetable oil, divided
- 2 Tbsp lemon juice
- 1 1/2 tsp seasoned salt
- 1 1/2 tsp dried oregano
- 1 1/2 tsp cumin
- 1 tsp garlic powder
- 1/2 tsp chili powder
- 1/2 tsp Paprika
- 1/2 tsp crushed red pepper flakes, optional
- 680 grams chicken breasts, B/S, cut into thin strips
- 1/2 medium sweet red pepper, julienned
- 1/2 medium green pepper, julienned
- 4 green onions, thinly sliced
- 1/2 cup onion, chopped
- 6 - 8" flour tortillas, warmed
- cheddar cheese, shredded
- taco sauce OR salsa
- guacamole OR sour cream
|
Votes: 2
Rating: 5
You:
Rate this recipe!
|
Instructions
In a large resealable plastic bag, combine 2 Tbsp oil, lemon juice & seasonings. Add chicken. Seal & turn to coat; refrigerate for 1-4 hours.
In a large skillet, saute peppers & onions in remaining oil until crisp-tender. Remove & keep warm. In the same skillet, cook chicken over medium-high heat for 5-6 minutes or until no longer pink. Return pepper mixture to pan; heat through. Spoon filling down the center of the tortillas; fold in half. Serve with cheese & choice of other toppings.
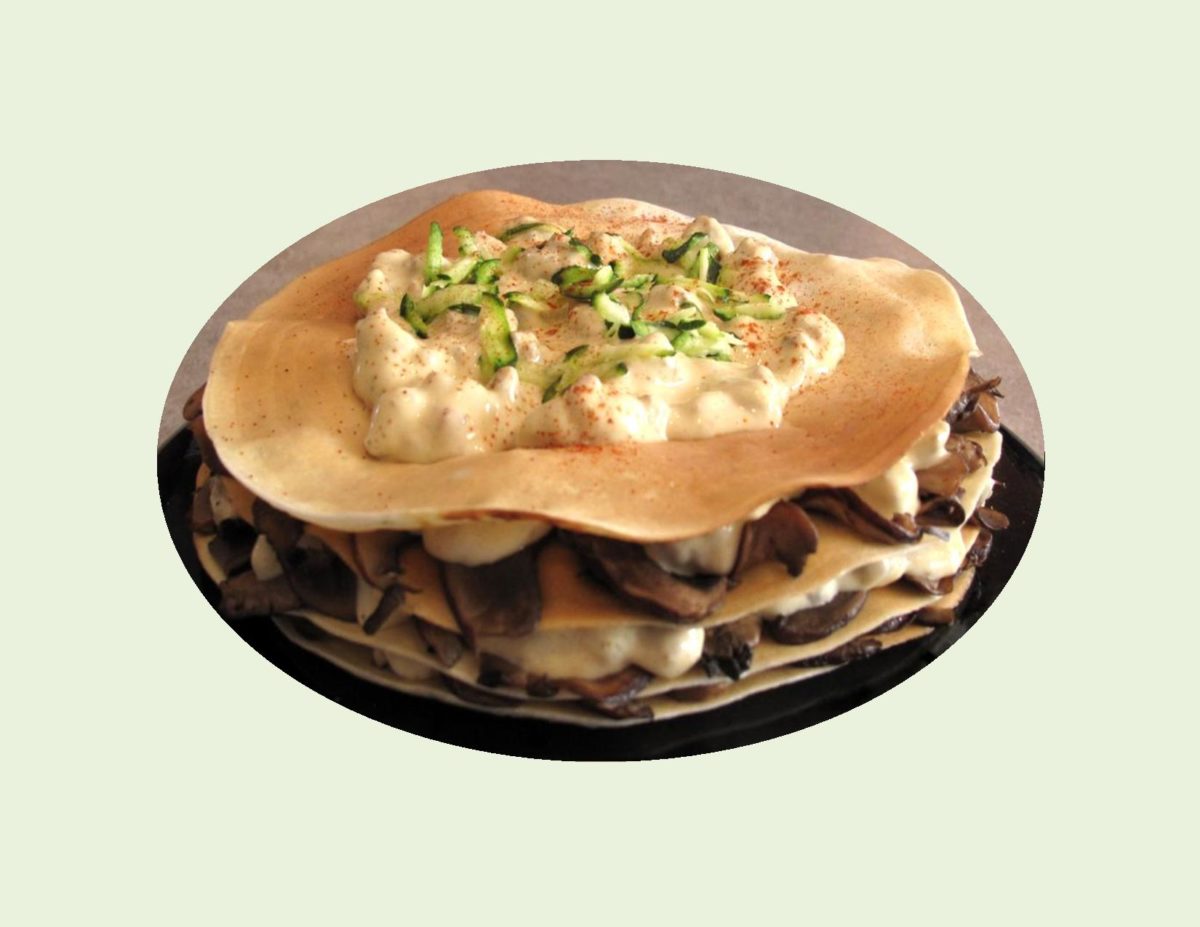
Savored for centuries, crepes are popular not only throughout France but worldwide. Crepe making has evolved from being cooked on large cast- iron hot plates heated over a wood fire in a fireplace to pans or griddles that are gas or electrically heated.
Around the 12th century, buckwheat was introduced to Brittany, France from the east. Buckwheat could thrive on the desolate, rocky Breton moors and was high in fiber, protein and essential amino acids. At that point, all crepes were being made from buckwheat flour. White flour crepes appeared only at the turn of the 20th century when white flour became affordable.
Almost every country in the world has its own name and adaptation of crepes including Italian crespelle, Hungarian palacsintas, Jewish blintzes, Scandinavian plattars, Russian blini and Greek kreps.
Although crepes are simple in concept, by creating fillings that are complex in flavors, takes this entree to a whole new level.
On July 25/2016, I posted a blog featuring both sweet and savory crepes you might enjoy to read. For something different today, I made ‘crepe stacks’ which have a savory filling of my own ‘design’. Hope you find time to make some.
Print Recipe
Savory Portobello & Pork Crepe Stacks
Smoked Gouda cheese gives such a nice flavor to these crepes.
Votes: 1
Rating: 5
You:
Rate this recipe!
|
|
Votes: 1
Rating: 5
You:
Rate this recipe!
|
Instructions
Crepes
In a large container with a cover, beat eggs well on medium speed. Gradually add dry ingredients alternately with milk & oil. Beat until smooth. Refrigerate at least 1 hour before cooking.
Gouda Sauce
In a saucepan, melt margarine; add flour while stirring for a couple of minutes. Gradually whisk in milk, chicken broth & spices. Add cheese; cook, stirring until cheese is melted. Set aside to cool slightly then place in food processor. Process until smooth & fluffy.
Filling
In a bowl, combine water & seasonings. Add ground pork & mix well. In a skillet, saute mushroom slices in margarine; remove from skillet & set aside. Scramble fry pork until no longer pink. Spoon onto paper towels to drain. Add to Gouda sauce.
To Assemble:
Place one crepe on each dinner plate. Top with slices of sauteed mushrooms & some pork/Gouda sauce. Repeat 3 more times on each plate. Garnish if you prefer. It may be necessary to reheat for a couple of minutes in the microwave before serving.

Today, July 25th, we celebrate my sister Loretta’s birthday.
‘To have a sister like you is like finding a treasure in ones life’. ‘HAPPY BIRTHDAY, LORETTA’, you deserve all the best!’
In the fall of 2001, Brion & I, joined by Loretta, made our first trip to Europe. Before that our holidays had pretty much been in the USA. This was a whole new learning curve that has forever changed the meaning of travel for us. Our destination was France, starting out in Paris, then renting a car and driving to the west coast then on down through southern France.
The hotel we were staying at in Paris looked out over a ‘pedestrian only’ street. When we arrived it was evening and the street was dark and pretty much deserted. The next morning we heard a lot of hustle-bustle in the street below. When we looked out, the sight was just incredible! The street was lined with shops which were now open for business. It was the most beautiful sight to look down on with all its colors and activity. During the next few days we enjoyed everything Paris to the fullest.
Down from our hotel we came upon a little street vendor selling crepes of all things. The taste was amazing! Fifteen years later, they have joined our ‘taste of a memory’ food list, knowing that so much of it was time & place.
Crepes are such a great meal. Simple to make with so many options whether it is a savory or sweet version. One of our favorite savory choices is a Seafood Crepe, which I feature in my ebook, ‘LIVING LARGE ON A LEAN FOOD BUDGET’. For a sweet treat, you might enjoy to try these Strawberry-Citrus Crepes.
Print Recipe
French Crepes
Crepe batters can be stored in the fridge for a day ---- cooked crepes in the freezer.
Votes: 1
Rating: 5
You:
Rate this recipe!
Ingredients
Parmesan Herb Crepe; add to ingredients of Basic Crepe batter
Chocolate Dessert Crepe; add toingredients of Basic Crepe batter
Basic Dessert Crepe; decrease milk in Basic Crepe to 1 1/3 cups & add the following
Seafood Filling
- 340 grams shrimp/scallop combo, raw
- 2 Tbsp oil
- 1 medium zucchini, diced small
- 4 green onions, sliced
- 1 tsp garlic, minced
- 1 cup fresh mushrooms, sliced, sliced
- 1 small green or red pepper, diced
- 1/2 cup water chestnuts, finely diced (optional)
- 1/4 tsp ginger, ground
- 4 1/2 tsp soy sauce
- 2 Tbsp water
- 2 Tbsp sesame seeds, toasted (optional)
Gouda Sauce for Seafood Crepes
Strawberry-Citrus Filling
Ingredients
Parmesan Herb Crepe; add to ingredients of Basic Crepe batter
Chocolate Dessert Crepe; add toingredients of Basic Crepe batter
Basic Dessert Crepe; decrease milk in Basic Crepe to 1 1/3 cups & add the following
Seafood Filling
- 340 grams shrimp/scallop combo, raw
- 2 Tbsp oil
- 1 medium zucchini, diced small
- 4 green onions, sliced
- 1 tsp garlic, minced
- 1 cup fresh mushrooms, sliced, sliced
- 1 small green or red pepper, diced
- 1/2 cup water chestnuts, finely diced (optional)
- 1/4 tsp ginger, ground
- 4 1/2 tsp soy sauce
- 2 Tbsp water
- 2 Tbsp sesame seeds, toasted (optional)
Gouda Sauce for Seafood Crepes
Strawberry-Citrus Filling
|
Votes: 1
Rating: 5
You:
Rate this recipe!
|
Instructions
Crepes
Place all ingredients in blender; whirl for 1 minute at high speed. Scrape down sides, whirl for another 15 seconds. Pour into a bowl & cover; refrigerate 1 hour. Heat a non-stick griddle to 350 F. Measure about 3 Tbsp of batter per crepe onto griddle. With back of spoon form batter into an 8-inch circle. Cook until golden on each side then lay on a wire rack to cool.
Gouda Crepe Sauce
In a small saucepan, melt margarine; sprinkle with flour & seasonings. Mix well; add milk & broth, stirring until sauce becomes thickened. Add cheese & blend.
Seafood Filling
In a large skillet, saute zucchini, onion & garlic in oil for several minutes. Add mushrooms, green pepper & water chestnuts; cook 1 more minute. Combine ginger, soy sauce & water in a cup; add to vegetable mixture along with seafood. Gently stir fry ONLY until seafood is cooked. Reserve 1/2 cup Gouda sauce & add the rest to mixture.
Divide filling between crepes; roll crepes & place on serving plates. Spoon remaining sauce over each of the filled crepes. Place each meal in microwave (covered) for 15 - 20 seconds on high. Sprinkle with toasted sesame seeds if desired. Serve immediately.
Strawberry-Citrus Filling
In a small saucepan, combine water, cornstarch, lemon juice, orange juice & sugar; blend well. Over medium heat, bring to a boil, stirring constantly until mixture thickens & becomes clear. Remove from heat & set aside to cool. Slice strawberries either by hand or using an egg slicer. In a small dish, combine yogurt & honey.
In a large bowl, gently fold about 1 1/2 cups citrus glaze together with sliced strawberries (I used about 3 large strawberries per crepe). Lay 12 crepes on work surface & place equal amounts of strawberry/glaze mixture on one half of each crepe. Fold over opposite side then fold in half again. Place 3 crepes on each of four serving plates. Sprinkle with powdered sugar if desired. Serve Honey/Yogurt on the side as well as any extra citrus sauce you have left from filling.
Recipe Notes
- I have been making crepes for a long time but have never bothered to buy a 'crepe' pan to cook them in. A non-stick griddle has always worked great for me. Using a 1/4 measuring cup, first to pour a circle of batter on the griddle then with the bottom of it, keep enlarging the crepe to the size you want.
- Being able to make all your crepe ingredients the day before then putting it all together on the day served is such a bonus.