Salmon Galette w/ Cornmeal Crust

If you have never tried a little cornmeal in your pastry crust, now is the time. The texture really is amazing. Tender and flaky, you will have a hard time going back to a traditional crust.

We all know that what separates a good quiche from a great one is the pastry crust. No matter how good the filling is, if the pastry is undercooked or overcooked, then the quiche becomes one of ‘those’ kind of meals. Cornmeal adds a touch of nutty flavor to the tart shell which makes this a great choice to use for both savory and sweet pies.

Despite its notoriety for being the key ingredient in cornbread, cornmeal is not a one-note ingredient. Cornmeal’s vibrant color and flavor brighten up many dishes and it creates a light, crispy crust when baked. 

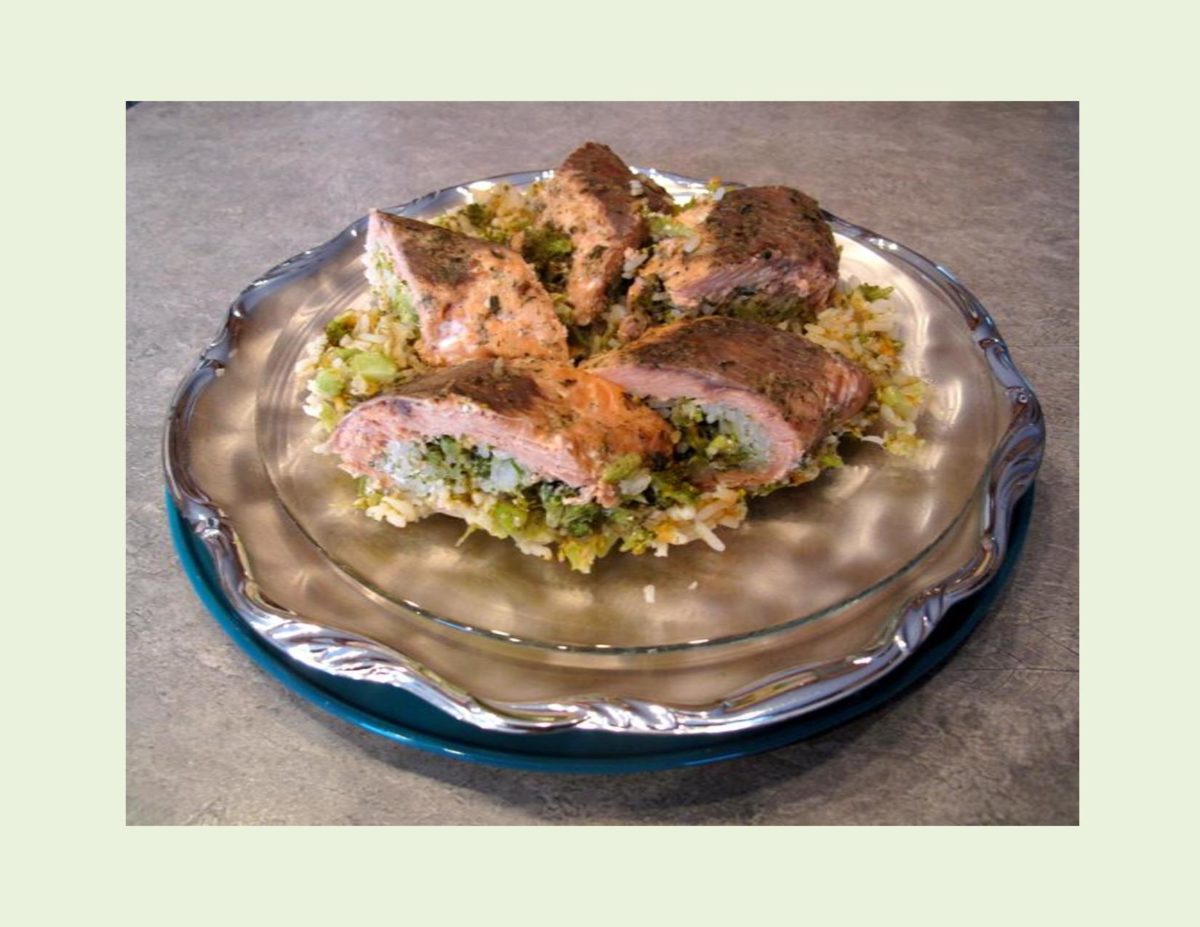
Since I started making cornmeal pastry years ago, it has become my go-to for sweet, savory and ‘in between’. In this quiche, it pairs extremely well with the salmon and veggies.

Print Recipe
Salmon Galette w/ Cornmeal Crust
Votes: 1
Rating: 5
You:
Rate this recipe!
Servings
Ingredients
Sour Cream Cornmeal Pastry
Servings
Ingredients
Sour Cream Cornmeal Pastry
Votes: 1
Rating: 5
You:
Rate this recipe!
Instructions
Cornmeal Pastry
  1. In a small bowl, combine sour cream & ice water; set aside. In a large bowl, whisk together flour, cornmeal, sugar & salt. Using a pastry blender or fingertips, cut in butter until mixture resembles BOTH coarse crumbs & small peas. Sprinkle the cold sour cream mixture over dough, I Tbsp at a time, tossing with a fork to evenly distribute it. After you have added all the sour cream mixture, dough should be moist enough to stick together when pressed; if not, add additional cold water, 1 tsp at a time. DO NOT overwork dough.
  2. Press dough into a disk shape & wrap in plastic wrap. Refrigerate for at least 2 hours. The dough can be kept in the refrigerator for a day or two or it can be wrapped airtight & frozen for a month. When ready to use, thaw, still wrapped in refrigerator.
Filling
  1. Preheat oven to 375 F.
  2. In a container, lightly beat eggs & add cream, dill, mustard spices & basil paste. Combine well.
  3. Roll out chilled pastry on a lightly floured surface into a 13-inch circle. Transfer pastry to a pie plate, leaving rough edges overhang dish.
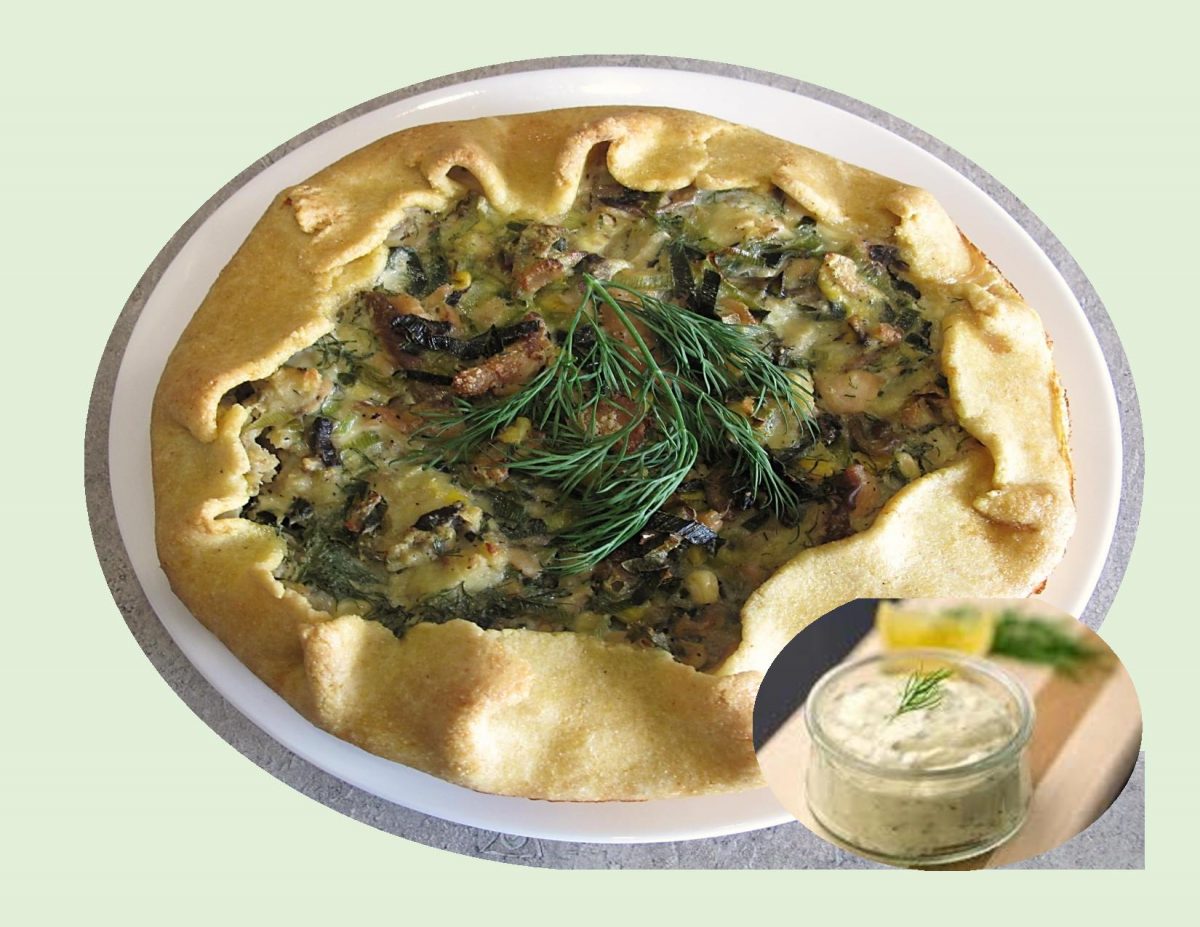
  4. Spoon salmon into shell followed by leeks, red pepper & corn. Pour cream mixture over all then fold the rough pie edges into galette. Brush pastry edges with egg wash & bake until custard is set when a knife is inserted near center & pastry is baked, about 40-50 minutes.
  5. Remove galette from oven, allow to sand a few minutes, then slice & serve or serve at room temperature.
Recipe Notes
  • Brion & I really enjoyed this galette with tartar sauce as a condiment.

Shrimp Dutch Baby Pancake

A Dutch baby pancake is a cross between a fluffy style pancake and a soufflé. Its less work than standard pancakes and less complicated than a soufflé.

If you follow our blog, you probably have seen other versions, both sweet & savory featured on it. Dutch baby’s are such an easy meal to make, they are a regular in our meal rotation, not to mention how delicious they are.

Dutch baby recipes work best in cast iron pans because they retain heat and cook evenly. If you don’t have cast iron cook-ware, I find pyrex bowls will work as a substitute.

Because of the delicate nature of the batter, you can only add your toppings once the batter has baked. For some toppings, this will require cooking these ingredients on the stove top while the eggy batter bakes.

Be careful with recipes that instruct you to mix chopped veggies and meat directly into the batter. The combination of weight and moisture will prevent the batter from cooking and puffing up as it should. One exception to this would be finely grated Parmesan cheese. To help create height, bring the eggs to room temperature before mixing into the batter.

Being seafood lovers, this meal really works for us.

Print Recipe
Shrimp Dutch Baby Pancake
Votes: 3
Rating: 5
You:
Rate this recipe!
Servings
SERVINGS
Votes: 3
Rating: 5
You:
Rate this recipe!
Instructions
Dutch Baby Pancakes
  1. In a bowl, whisk together eggs & milk. Add flour & whisk until incorporated then whisk in parmesan cheese, scallions, parsley, thyme, salt & pepper. Set aside in refrigerator until sauce & filling are made.
Gouda Sauce
  1. In a small saucepan, melt butter; sprinkle with flour & seasonings. Mix well; add milk & broth, stirring until sauce becomes thickened. Blend in cheese; set aside
Shrimp Filling / Baking
  1. Peel & devein shrimp (you can chop into pieces if you prefer). Prepare filling veggies for cooking.
  2. Preheat oven to 425 F.
  3. Place 2 Tbsp butter in each of TWO 7-inch pyrex baking bowls (alternately you can use one 10-inch cast iron skillet). Place bowls in hot oven to melt butter (and heat the bowls for baking pancakes in). Once the butter is melted & the bowls are hot, divide the batter between them. Bake for 25 minutes.
  4. The Dutch Baby will puff up during cooking, but once its removed from the oven & starts to cool it will deflate slightly. At this point its nice to do the final sautéing of your filling so that when the pancakes come out of the oven you are ready to fill & serve.
  5. In a large skillet, sauté zucchini, onion, mushrooms & garlic in oil until tender-crisp. Combine soy sauce with water in a cup; add to vegetable mixture along with shrimp. Gently stir fry ONLY until shrimp is cooked, then fold in Gouda sauce.
  6. When Dutch Baby pancakes are finished baking, remove from oven & transfer to 2 serving dishes. Divide filling between the 2 pancakes & serve hot.

Shrimp Quiche Casserole

Quiche has always been an incomparable, one dish meal in my opinion. It’s kind of a whole food with protein, vegetables, dairy and carbohydrates. Quiche’s convenience wins hands down. After mixing the basics … eggs, milk or cream … any ingredients will work from leftovers to freshly cooked. You can use just about anything that you have in the refrigerator.

While some recipes are crust-free, most quiches have some kind of foundation. Potatoes, rice, cauliflower all make nice ‘crust’ options. Quiche makes a great choice for breakfast, lunch or dinner. To keep it interesting, I’m always trying to find ways to tweak the ingredients to make it taste just a bit different each time.

Two of Brion’s favorite foods are broccoli and rice. I decided to make a rice/cheese crust, which I pre-baked so it would get a little crispy. Then, when it bakes with the filling, it holds together quite nicely. The seasoning plays a crucial part in the quiche.

Print Recipe
Shrimp Quiche Casserole
Votes: 1
Rating: 5
You:
Rate this recipe!
Course Lunch, Main Dish
Cuisine American, French
Servings
Votes: 1
Rating: 5
You:
Rate this recipe!
Instructions
Rice Crust
  1. Preheat oven to 350 F. Blend crust ingredients. Using the back of a large spoon, press into a greased 8-inch round baking dish & bake for 15-20 minutes.
Filling
  1. In a skillet, melt 1 Tbsp butter; saute garlic & mushrooms, stirring for about 5 minutes. Stir in onions, cook for another 2 minutes. Transfer to a large bowl.
  2. Pour 2 cups water into skillet & bring to a simmer. Cook shrimp for about 1 minute or JUST until pink. Reserving 1 cup of the liquid, rinse shrimp under cold running water. Shell & devein shrimp; arrange over rice in baking dish.
  3. Preheat oven to 325 F. (If you have turned it off after pre-baking crust). In a heavy saucepan, melt remaining butter & stir in flour. Cook, stirring, for about 2 minutes, without browning; gradually whisk in reserved liquid & milk. Cook, stirring, for about 20 minutes or until thickened.
  4. Remove from heat; stir in 1/2 cup of the cheese, lemon zest & spices until cheese is melted. Stir into vegetable mixture & pour over shrimp in rice crust.
  5. In a small bowl, stir together remaining 1/4 cup cheese & bread crumbs. Sprinkle evenly over 'quiche'. Bake for about 40 minutes or until quiche is 'set'. Cut into wedges & serve.

Cauliflower, Bratwurst & Potato Casserole

Cauliflower used to be a boring vegetable. That reputation couldn’t be more different today. The cauliflower craze has managed to last longer then anyone would have expected. It seems to have checked all the boxes … healthy, versatile and ‘tasteless’. Not only can you turn it into rice, steak, pizza crust, gnocchi etc., but you can use any sauce, seasoning and/or flavoring on it as well. It’s entirely a blank canvas for all your cooking needs.

This casserole pairs cauliflower with some tasty bratwurst. The spices used to flavor traditional German bratwurst typically include salt, pepper, nutmeg and marjoram. Other seasonings like coriander, cardamom, ginger, caraway and garlic are sometimes used depending on the region and personal preference. The name is derived from old high German.Brat‘ which means finely ground meat and ‘wurst’ which means sausage. The fine grind of the meat gives the sausage a lighter texture.

There are many ways to make bratwurst so don’t hesitate to put your on personal touch on it. This combination of the cauliflower, bratwurst and potatoes in a cheese sauce is so good. If you would prefer, don’t hesitate to just pick up a package of ‘brats’ at the store and make it even quicker to prepare.

Print Recipe
Cauliflower, Bratwurst & Potato Casserole
Votes: 1
Rating: 5
You:
Rate this recipe!
Course Main Dish
Servings
Course Main Dish
Servings
Votes: 1
Rating: 5
You:
Rate this recipe!
Instructions
Bratwurst
  1. In a bowl, combine all ingredients & mix well. Form into small meatballs. In a saucepan, fry meatballs until just cooked & drain on paper towel. Spread out on bottom of a 9 X 9-inch casserole dish.
Casserole
  1. Peel potatoes & cut into small cubes. Cook in salted, boiling water for about 5 minutes. With a slotted spoon, remove & distribute potato cubes evenly with bratwurst in casserole dish.
  2. Break cauliflower into florets; add to potato water & boil for 5 minutes. With a slotted spoon, remove & add to other casserole dish ingredients.
  3. Preheat oven to 375 F. In a saucepan, heat butter & stir in flour. Cook until slightly browning then whisk in milk & 1/2 cup reserved potato/cauliflower water. Bring to a boil, while continuing to whisk add salt & pepper to taste. Cook for a few minutes more.
  4. Pour sauce over other casserole ingredients, sprinkle with the cheese & bake for about 20 minutes.

Stuffed Chicken Leg Quarters

The versatility of chicken, as well as the ease and speed with which it can be cooked make it one of the most popular meats around.

Chicken leg quarters, also referred to as whole chicken legs, consist of both the thigh and drumstick. This cut is sold bone-in/skin-on and for most part, quite economical. Because they are dark meat and many people prefer white meat, chicken legs are often over looked by the consumer.

I like to purchase these with six fresh leg quarters to the package. Usually you will find a bit of extra fat on them which needs to be trimmed as well as the backbone rinsed out. Freezing them in a meal size portions makes it so handy when ready to use.

Roasting them in a real slow oven temperature with just a little oil, salt & pepper always produces tasty results. After they have baked for an hour you can always turn up the temperature for a few minutes to crisp the skin if you wish.

Today, I thought it would be nice to do something a bit more special. Stuffing them with a veggie-cheese mixture not only tastes great but they had a nice visual effect on our plates.

Print Recipe
Stuffed Chicken Leg Quarters
Votes: 9
Rating: 3.56
You:
Rate this recipe!
Course Main Dish
Cuisine American
Servings
Votes: 9
Rating: 3.56
You:
Rate this recipe!
Instructions
  1. In a saucepan, melt butter, add onion & peppers; saute until tender crisp. Add grated zucchini, continue to cook for 2 minutes.
  2. Remove from heat & place in a bowl. Add breadcrumbs, egg, salt, pepper & cheese. Refrigerate until cold.
  3. Preheat oven to 350 F. Using fingers, loosen skin on chicken legs. Spoon some filling into each chicken leg working the stuffing down the drumstick. Combine the 2 Tbsp melted butter, dry mustard & Dijon mustard together & brush over chicken. Place the chicken in a shallow baking dish & bake for about 45 minutes or until cooked through. Remove from oven & serve.

Chicken Parmigiana with Basil Sauce

From what I understand, the global dish called chicken parmigiana is a variation on the Italian entree known as eggplant parmigiana. Simply put, you deep fry eggplant, add cheese and tomato sauce and bake it. At some point in time, various regions in the world with large Italian immigrant populations, realized chicken would be an excellent alternative to the eggplant and chicken parmigiana evolved.

In America, the dish became popular around 1958. Often the name has been simplified to just ‘chicken parm‘. Usually composed of fried or breaded chicken fillets, smothered in mozzarella (or provolone), parmesan and tomato sauce all of which is then baked. Another version is using veal instead of chicken. Parmigiana is traditionally served over hot pasta as the main entree but it has also become a sandwich filling favored in subs, hoagies, etc.

In today’s recipe, I’m using parmesan cheese but omitting the mozzarella-tomato sauce. I wanted to accent the flavor with fresh basil in the sauce instead. We quite enjoyed it.

Print Recipe
Chicken Parmigiana with Basil Sauce
Votes: 1
Rating: 5
You:
Rate this recipe!
Course Main Dish
Cuisine American, Italian
Servings
Ingredients
Course Main Dish
Cuisine American, Italian
Servings
Ingredients
Votes: 1
Rating: 5
You:
Rate this recipe!
Instructions
Chicken
  1. In a small bowl, combine breadcrumbs, cheese & parsley. Chop bacon finely & fry until crisp; drain. Add bacon to breadcrumb mixture.
  2. Preheat oven to 350 F. In a saucepan, melt butter, add minced garlic, Worcestershire sauce & dry mustard. Mix well. Dip chicken fillets in butter mixture & place in a shallow ovenproof dish. Press crumb mixture on top of each fillet.
  3. Bake, uncovered for 20 - 25 minutes.
Basil Sauce
  1. In a saucepan, combine oil, vinegar, minced garlic, finely chopped basil leaves & cream; stir until heated through. Add egg yolk & stir until sauce thickens. Do not boil. Season with salt & pepper. Serve over chicken parmigiana.

Classic Beef PLov

‘Plov’ originated from Uzbekistan (a landlocked country in Central Asia), centuries ago. It has become known and loved throughout Central Asia as well as being a staple dish in Russia.. This meal differs according to the occasion: a wedding plov is the most magnificent, a holiday plov a bit less exotic and there is even an everyday plov. These vary both in cooking technique and ingredients. Traditionally, plov is made with mutton, rice, carrots and spices and involves three main stages.

There are over sixty different plov recipes in Uzbek cuisine. In every area it is cooked in a special way. To an experienced gourmet, it would be easy to recognize its origin from what I’ve read.

Time has changed and refined plov recipes with more ingredients being added. Plov is usually served on big ceramic or porcelain plates.

This turned out to be a very nice meal. As usual I always enjoy food history as much as trying the recipe. I hope you found the blog interesting and the plov tasty if you had a chance to try it.


Print Recipe


Classic Beef PLov

Votes: 1
Rating: 5
You:
Rate this recipe!

Course Main Dish
Cuisine European, German

Servings


Ingredients

Course Main Dish
Cuisine European, German

Servings


Ingredients

Votes: 1
Rating: 5
You:
Rate this recipe!


Instructions
  1. Season cubed meat with salt. In a large skillet, heat a splash of olive oil & add meat cubes; brown well. Remove meat from skillet. To the same pan add onion, carrot & garlic. Saute until golden brown. Return meat to pan & add broth, seasonings & stir together. Cover; reduce heat to low & simmer for 1 hour or until meat is tender.

  2. When plov has finished simmering, add garbanzo beans. Sprinkle uncooked rice evenly over the meat & broth. DO NOT stir the rice & meat together, simply arrange it so it submerged under broth. Season with fresh ground pepper, cover & continue to cook over a low heat. DO NOT stir the rice during cooking time to create light & airy rice that is not mashed together. When rice is cooked THEN stir together & serve.


Recipe Notes
  • Traditionally, plov is accompanied by salads made of fresh or marinated vegetables - tomatoes, cucumbers, radish & fruits & herbs such as pomegranate, dill or basil.

Seafood Shepherd’s Pie

Very often, when I’m deciding what to make for our supper, an idea is derived from the taste of a memory. I don’t know if you’re familiar with smoked Haddock fish. I recall a meal my mother made that was called ‘Finnan Haddie’. It was a perfect cold weather meal. Basically, smoked haddock cooked in milk and served with potatoes and peas.

Finnan Haddie is cured with the smoke of green wood, turf or peat. The name comes from the Scottish town of Findon and the slang word for haddock. In the 1800’s, Findon fishwives hung lightly salted haddock in their chimney’s to be smoked gently over peat fires.

Finnan Haddie has a distinct and unique flavor and can be made into many dishes. It can be combined with other seafood where the smoky flavor carries through and influences all the elements such as in a seafood pie.

This brings me back to supper, which is going to be a seafood pie that I’m going to top with mashed potatoes. I guess in essence could be called Seafood Shepherd’s Pie.

Print Recipe
Seafood Shepherd's Pie
Votes: 1
Rating: 5
You:
Rate this recipe!
Course Lunch, Main Dish
Cuisine American, European
Servings
Votes: 1
Rating: 5
You:
Rate this recipe!
Instructions
Mashed Potato Topping
  1. Bring potatoes to a boil & cook until fork tender. Drain; return to pot & add salt (to taste), margarine & cream. Mash & set aside. Preheat oven to 400 F.
Seafood Filling
  1. In a saute pan, melt 1 Tbsp of margarine; add shallots, celery, mushrooms, thyme & a pinch of salt. Saute, stirring often until soft & fragrant, about 5-8 minutes. Turn off heat & set aside.
  2. In another saucepan, add cream, chicken broth, flour, salt, mustard & cayenne pepper. Whisk together to incorporate all ingredients. Bring to a boil, whisking often then turn down heat & continue cooking until thick, whisking for about 8 minutes. Turn off heat & add remaining 1/2 Tbsp margarine along with the vegetable mixture. Blend well, taste & adjust seasoning if necessary. Set aside.
Assembly
  1. Spray or butter a casserole dish. Place cod (or finnan haddie), scallops, shrimp & drained, sliced water chestnuts on the bottom of the dish in an even layer. Sprinkle with paprika & parsley. Add lemon juice & a pinch of salt & pepper. Pour cream sauce over seafood. Top evenly with mashed potatoes.
  2. Bake for about 25 minutes, until bubbly & potato peaks are browned. Allow to rest 10-20 minutes before serving.
Recipe Notes
  • For an extra flavor boost you could top it with some grated 'old' cheddar cheese before baking the casserole.

Savory Portobello & Pork Crepe Stacks

Savored for centuries, crepes are popular not only throughout France but worldwide. Crepe making has evolved from being cooked on large cast- iron hot plates heated over a wood fire in a fireplace to pans or griddles that are gas or electrically heated.

Around the 12th century, buckwheat  was introduced to Brittany, France from the east. Buckwheat could thrive on the  desolate, rocky Breton moors and was high in fiber, protein and essential amino acids. At that point, all crepes were being made from buckwheat flour. White flour crepes appeared only at the turn of the 20th century when white flour became affordable.

Almost every country in the world has its own name and adaptation of crepes including Italian crespelle, Hungarian palacsintas,  Jewish blintzes, Scandinavian plattars,  Russian blini  and Greek kreps.

Although crepes are simple in concept, by creating fillings that are complex in flavors, takes this entree to a whole new level.

 On July 25/2016, I posted a blog featuring both sweet and savory crepes you might enjoy to read. For something different today, I made ‘crepe stacks’ which have a savory filling of my own ‘design’. Hope you find time to make some.

Print Recipe
Savory Portobello & Pork Crepe Stacks
Smoked Gouda cheese gives such a nice flavor to these crepes.
Votes: 1
Rating: 5
You:
Rate this recipe!
Cuisine American, French
Servings
Ingredients
Crepes
Gouda Sauce
Cuisine American, French
Servings
Ingredients
Crepes
Gouda Sauce
Votes: 1
Rating: 5
You:
Rate this recipe!
Instructions
Crepes
  1. In a large container with a cover, beat eggs well on medium speed. Gradually add dry ingredients alternately with milk & oil. Beat until smooth. Refrigerate at least 1 hour before cooking.
Gouda Sauce
  1. In a saucepan, melt margarine; add flour while stirring for a couple of minutes. Gradually whisk in milk, chicken broth & spices. Add cheese; cook, stirring until cheese is melted. Set aside to cool slightly then place in food processor. Process until smooth & fluffy.
Filling
  1. In a bowl, combine water & seasonings. Add ground pork & mix well. In a skillet, saute mushroom slices in margarine; remove from skillet & set aside. Scramble fry pork until no longer pink. Spoon onto paper towels to drain. Add to Gouda sauce.
To Assemble:
  1. Place one crepe on each dinner plate. Top with slices of sauteed mushrooms & some pork/Gouda sauce. Repeat 3 more times on each plate. Garnish if you prefer. It may be necessary to reheat for a couple of minutes in the microwave before serving.

Fresh Salmon Roll-Ups

As I have mentioned in previous blogs, Brion and I never pass up the opportunity to have a good fish/seafood meal. Living in the prairie province of Alberta, Canada, fresh fish is not always readily available. This week when we checked out the fish department at the grocery store, they were featuring ‘wild’ fresh salmon. Along with enjoying our salmon for supper it brought back some very special memories I’d like to share with you today.

I’m not sure if you have heard of or maybe you have visited the island of Burano in northern Italy. Situated 7 km from Venice, it’s just a short, 40 minute trip by Venetian water taxi or ‘vaporetto‘. Burano is an old fishing village, whose traditions date back to Roman times. Fishing was the main source of income for most of Burano’s history but the number of fisherman has greatly declined over the years.

Although the island was settled in the 6th century, its significance came in the 16th century. At that time women on the island began making lace with needles. Due to competition from cheaper machine made lace from Asia and dwindling interest among young people both in making lace and using lacy linens, the industry is dying out. 

With a population of less than 3000, this little, densely built-up island is interwoven by canals filled with colorful fishing boats which match the rainbow of colored houses. The first homes of Burano were built on raised piles, with walls made of woven canes and afterwards plastered with mud. Later these houses were replaced with ones made of bricks and the inhabitants began painting them with bright colors. The origin of the colors is unknown but as the story goes that years ago, when the fishermen returned from sea, they couldn’t recognize their homes through the fog, so they started painting them different colors. The houses follow a special color pattern, based on a specific system that has been in place since the village was founded. If you are a resident of the island, and wish to paint your house, you must send a request to the government, which responds by making a note of the colors permitted for that specific lot of houses.

Another interesting Burano sight is the ominously leaning, bell-tower of the church of St. Martin Bishop. The tower rises some 160 feet with the tower leaning 6 feet from its axis. Yikes!

Brion and I had the opportunity, while on a vacation one year with the Trafalgar Tours,  to visit the island of Burano. We boarded the ‘water taxi’ which took across the lagoon to the island. It like you were stepping into a postcard with its brightly colored houses and clothes hung out to dry on lines strung across second-story windows. Extra splashes of color came from the many flower boxes. As we strolled through the narrow streets, many ladies were sitting in the sun, chatting with their neighbors, while making their intricate and beautiful Burano Lace.

The highlight of the afternoon came when we were treated to a fabulous seafood lunch at a local restaurant. I’m not quite sure how to best describe this meal other than it was ‘just incredible’. 

Memories are priceless gifts to savor!

Print Recipe
Fresh Salmon Roll-Ups
Votes: 1
Rating: 5
You:
Rate this recipe!
Course Main Dish
Cuisine American, Italian
Servings
Course Main Dish
Cuisine American, Italian
Servings
Votes: 1
Rating: 5
You:
Rate this recipe!
Instructions
  1. Cook rice. Place salmon fillet in a large plastic bag. 'Gently' pound to flatten to an even thickness. Slice bag down one side and across bottom; open out & set aside in refrigerator.
  2. Microwave broccoli florets about 1 minute; chop. Shred cheese. Melt margarine & add spices; stir well.
  3. Preheat oven to 400 F. Combine rice, broccoli & cheese with 2/3 margarine/spice mixture. Spread 2/3 of the filling evenly over salmon; pat down. Using the help of the plastic bag, roll filled salmon up in a jelly-roll style. Line a 9 x 13-inch baking pan with foil & spread remaining filling in it. Place salmon roll on top, pushing under layer close up around roll. Spread remaining butter sauce over salmon roll. Bake for 20-25 minutes. Slice & serve.