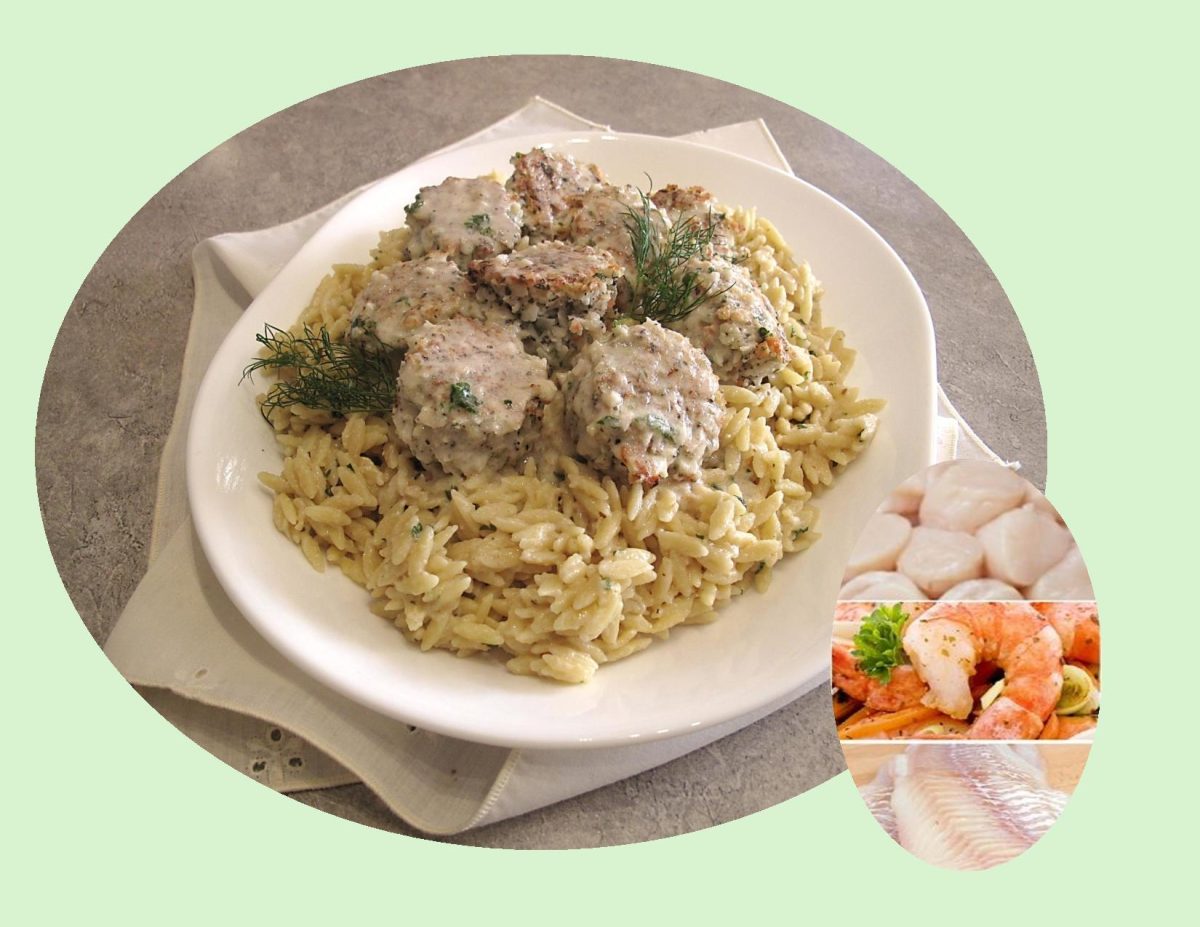
Seafood Meatballs w/ Orzo

Meatballs have become a beloved culinary delight in various cuisines around the world. The concept of combining ground meat with other ingredients to form compact balls can be traced back to ancient civilizations.

While commonly associated with Italian cuisine, the origin of meatballs is a tale that stretches across time and cultures.

Sweden has made its mark on the global meatball scene with its distinctive version, known as köttbullar. Swedish meatballs gained international recognition, thanks in part to the association with the popular furniture retailer, IKEA.

The Middle East boasts its own variation of meatballs, known as kofta. Kofta has a long history in the region and can be found in various Middle Eastern and Mediterranean countries, including Turkey, Lebanon, Egypt, and others.

Meatballs have traveled the world, adapting and evolving to suit different tastes and ingredients.

Asian cuisines have their own variations of meatballs. In Thailand, fish balls are popular street food made from a paste of minced fish, mixed with herbs, spices, and sometimes starch to achieve a firm texture. They are usually served in soups, stir-fries, or on skewers with dipping sauces.

As immigrants from various countries arrived in North America, they brought with them their culinary traditions, including their beloved meatball recipes.

In recent years, the popularity of global cuisine has further fueled the creativity and innovation around meatballs in North America. Food trucks and trendy restaurants offer inventive variations, such as fusion meatballs with a blend of different cultural flavors or vegetarian and vegan alternatives made with plant-based ingredients like lentils, mushrooms, or chickpeas.

Today, meatballs in North America can be found in a variety of forms and flavors, reflecting the country’s multicultural heritage.

Whether enjoyed in a tomato-based sauce with pasta, in a creamy gravy with lingonberry sauce, or alongside aromatic rice and fragrant spices, meatballs continue to satisfy appetites. The enduring popularity of meatballs is a testament to their versatility and the universal appeal of a simple, comforting dish.

Print Recipe
Seafood Meatballs w/ Orzo
Votes: 1
Rating: 5
You:
Rate this recipe!
Servings
MEATBALLS
Votes: 1
Rating: 5
You:
Rate this recipe!
Instructions
Orzo
  1. Bring 2 1/2 cups vegetable broth to a boil & cook orzo until tender. Drain excess vegetable broth from orzo & reserve. Set orzo & reserved water aside.
Sauce
  1. In a saucepan over medium heat, melt butter & add the garlic. Cook 3-4 minutes while stirring. Whish in remaining sauce ingredients. Simmer 4-5 minutes, stirring until sauce slightly thickens. Remove from heat.
Seafood Meatballs
  1. In a small bowl, mix the eggs & lemon juice. Place all meatball ingredients (except the olive oil) in the bowl of a food processor & pulse until combined.
  2. In a large saucepan, heat olive oil over medium-low heat. Scope seafood mixture (makes 20 balls) into saucepan. Using a large spoon, continuously turn the meatballs until all sides obtain a golden brown color. Place meatballs on a plate lined with paper towel.
Serving
  1. On a large platter, place orzo & top with seafood meatballs. Drizzle sauce over all. Place in the microwave for a couple of minutes just to ensure everything is hot for serving.

Spicy Honey Lime Chicken

I’m one of those people who almost always has chicken frozen in my freezer, so I’m always interested in ‘another’ chicken recipe. 

Marinated in honey, lime juice, soy sauce, and garlic, these honey lime chicken skewers have a tangy, sweet, and salty taste, 

A perfect marinade for chicken guarantees the chicken will be flavorful and juicy. So, marinades should always combine an acid (such as vinegar or lime juice), fat, and sweetness. Salt, herbs, and spices also contribute to the end flavor of marinated chicken.

Honey and lime is an all-time flavor pairing. It not only works on sweet things, but it also plays nice with savory dishes. I think the reason it works so well is that it’s got that perfect balance between tangy and sweet. Add in a few savory and salty elements in the rest of the marinade, and the flavors are just mouthwatering.

The honey lime chicken marinade I’m using today infuses the chicken with loads of flavor, but it also helps caramelize the outside of the chicken, so you get not only gorgeous flavor, but a beautiful textural contrast between the crisp, caramelized exterior and the tender, flavorful interior.

Print Recipe
Spicy Honey Lime Chicken
Votes: 1
Rating: 5
You:
Rate this recipe!
Course Main Dish
Cuisine Mexican
Servings
SERVINGS
Votes: 1
Rating: 5
You:
Rate this recipe!
Instructions
Marinade
  1. Whisk all marinade ingredients together in a small bowl or blend them in a food processor.
Marinate Chicken
  1. Pour HALF the marinade into a zip-lock bag or container & add chicken. Marinate for 30 minutes at room temperature or 6-12 hours in the refrigerator. IMPORTANT: If marinating overnight, leave out the lime juice & increase zest so it doesn't 'cook' the chicken.
Glaze
  1. Use the reserved marinade for basting & glazing. Mix the cornstarch into the reserved marinade & microwave for about 1 minute, watching carefully. Set aside.
Grilling
  1. Spray grill with oil. Heat grill to medium-high heat. Skewer marinated chicken pieces onto skewers & PAT DRY. Discard the marinade used for marinating. Lightly spray chicken with oil to avoid sticking.
  2. Grill on all sides until chicken cooks to a golden brown (you will need to turn chicken a couple of times), for 9-12 minutes in total (depending on the thickness & how tightly packed the skewers are), basting once or twice with the GLAZE.
  3. Any extra glaze can be drizzled over cooked skewers. Serve with lime wedges if you wish. Serve hot or at room temperature.

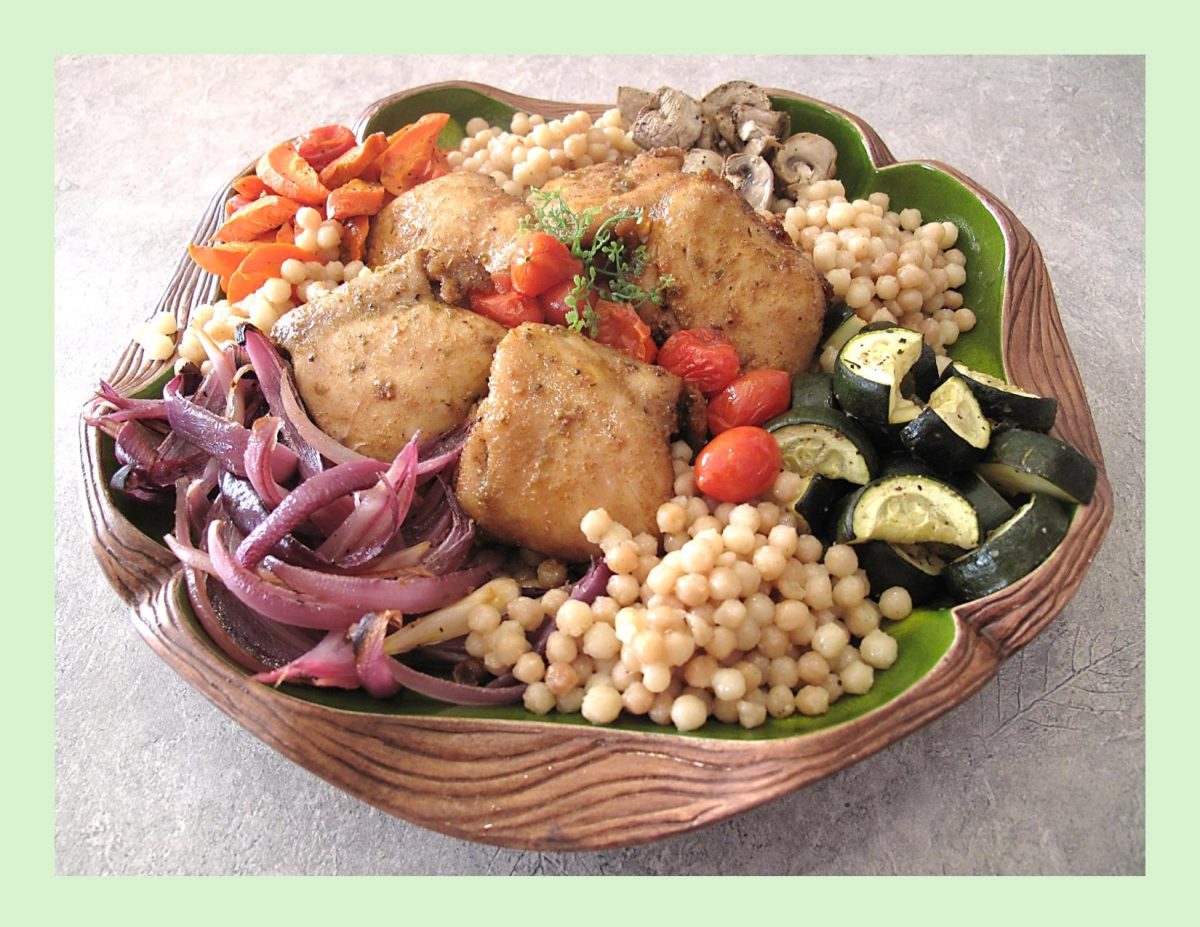
Pearl Couscous w/ Chicken Thighs

Often, when we think of chicken meals, rice comes to mind as an accompaniment. Couscous can be used as a fluffy grain alternative to rice and, because the flavors of each are subtle, swapping them won’t throw your entire recipe off course. Both rice and couscous take on the flavors of the seasonings you add, and neither needs much to shine.

While rice is a grain and couscous are a type of pasta, you can buy whole-grain versions of both. Couscous’s flexibility has made it a favorite ingredient in kitchens worldwide. This tiny pasta can be used as a side dish, as a part of an entrée, or added to soups and salads to boost texture. Its mild flavor makes it ideal for combining with seasonings ranging from sweet to spicy, and it can be used to recreate dishes from any cuisine.

Couscous is a pale, delicate grain that North Africans have served for centuries with a meat or vegetable stew on top.

Although it is made from wheat, couscous is the North African equivalent of rice, and it could be called a second cousin of German spaetzle, although it does not contain egg and the granules are much smaller.

Steamed in a manner similar to rice, couscous takes about 10 minutes to prepare. Delicious when served hot, it is equally good at room temperature.

Today, I’m preparing a sheet pan meal with roast veggies and chicken thighs and serving them with a couscous accompaniment. Should be good!

Print Recipe
Pearl Couscous w/ Chicken Thighs
Votes: 1
Rating: 5
You:
Rate this recipe!
Servings
Votes: 1
Rating: 5
You:
Rate this recipe!
Instructions
Vegetables
  1. Preheat oven to 400 F.
  2. In a plastic bag place Italian dressing. Add carrots, onions, zucchini, mushrooms & garlic. Shake well to marinate (do them separately if you wish). Place on a foil lined baking sheet & roast until tender. Marinate cherry tomatoes in a bit of dressing & add to the pan for the last 10 minutes of baking.
Chicken Thighs
  1. In a small dish combine all chicken seasonings. In a plastic bag, place chicken & 2 Tbsp olive oil. Shake well to cover thighs with oil then add spice mixture & shake well again.
  2. Line a baking sheet with foil. Add chicken thighs & roast in oven at the same time as veggies are cooking.
Couscous
  1. In a medium saucepan, heat oil over medium-high until just shimmering. Add the pearl couscous & toss around to toast until golden brown.
  2. Boil water & add it to the toasted pearl couscous. Season with salt. Bring to a boil, then turn the heat to low. Cover & cook for about 14 minutes or until couscous is tender. Remove from heat.
Serving
  1. On a serving plate, place the couscous & vegetables. Top with chicken thighs & drizzle juice from roast chicken over all. Serve.

Bacon Wrapped Shrimp & Scallop Skewers

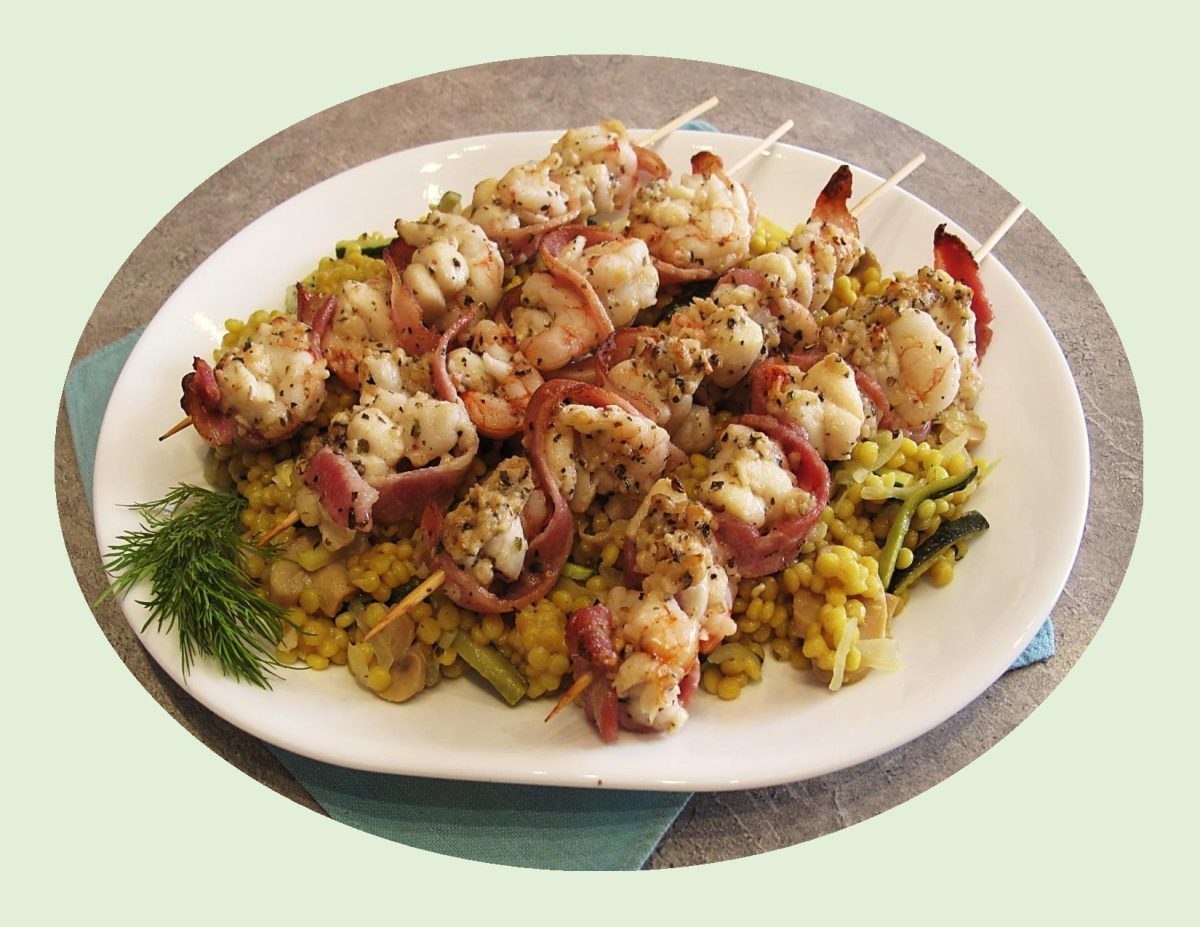
Bacon-wrapped shrimp and scallops may sound like an appetizer only served at fancy cocktail parties. But tossed in parmesan and spices then wrapped in bacon makes for some incredible skewers to serve with some vegetable couscous as a main dish.

There are all kinds of tasty add-ins to couscous, such as mushrooms and zucchini. Mushrooms add an earthy, savory flavor to couscous that makes it a good complement to main dishes like roast chicken, pork, beef or seafood.

Couscous has become one of my favorite pantry staples. It’s quick, convenient, versatile and makes a good alternative to ‘traditional’ rice or pasta.

Couscous used to be hand rolled into tiny pasta. It is now available in instant- cook packages or bulk, where couscous has already been pre-cooked by steaming and then dried. This leaves us with the simple task of re-hydrating in water or broth, which typically takes something like 5-10 minutes!

Print Recipe
Bacon Wrapped Shrimp & Scallop Skewers
Votes: 1
Rating: 5
You:
Rate this recipe!
Servings
Ingredients
Vegetable Couscous
Servings
Ingredients
Vegetable Couscous
Votes: 1
Rating: 5
You:
Rate this recipe!
Instructions
Vegetable Couscous
  1. In a saucepan, slightly pre-cook bacon strips. Remove from saucepan onto a paper towel. To saucepan containing bacon drippings, add zucchini, mushrooms, onion, garlic & cilantro paste; sauté until tender crisp. Place in a bowl.
  2. To the saucepan, add broth & salt (if using) & bring to a boil; add couscous. Cover & remove from heat; set aside until liquid has been absorbed, about 5-10 minutes.
  3. Add bowl of vegetables & gently toss with a fork. Keep warm while you cook seafood.
Shrimp & Scallops
  1. Preheat oven to 400 F.
  2. In a bowl, combine oil, garlic, basil, oregano & Parmesan. Add shrimp & scallops; toss gently until well coated then tread on wooden skewers along with bacon strips.
  3. Line 9 x 13-inch baking pan with foil. Place skewers with tip ends resting on pan edges.
  4. Place in oven & roast JUST until seafood is slightly firm & cooked through & bacon is cooked. Serve immediately with vegetable couscous.

Potato Pie w/ Artichokes & Sausage

Italian cuisine has developed through centuries of social and political changes and is noted for its regional diversity and abundance of difference in taste.

Tortiera di Patate Carciofi e Salsiccia or ‘potato pie with artichokes and sausage’, is classic, simple comfort food at its finest. A seasonal dish that can serve as a hearty vegetable side dish (omitting the sausage) to a meat or fish meal, but which can also be the main course by adding the sausage meat as I did here.

Being a vegetable lover, I think vegetables are all good, but put together they make for fantastic preparations. 

This is a very easy preparation, which does not require special techniques or even special skills. Potatoes go very well with artichokes and sausage, making it a dish with a harmonious and truly savory taste.

Print Recipe
Potatoes Layered w/Artichokes & Breadcrumbs
Votes: 1
Rating: 5
You:
Rate this recipe!
Servings
Ingredients
Servings
Ingredients
Votes: 1
Rating: 5
You:
Rate this recipe!
Instructions
Béchamel Sauce
  1. In a small saucepan, add milk. Slowly whisk in flour until blended then add salt, pepper & smoked paprika. Bring to a boil over medium heat while whisking constantly. Reduce heat to low & simmer, stirring for about 5 minutes. remove from heat & stir in parmesan.
Veggies & Sausage
  1. Cook potatoes in microwave until soft but not overcooked. Peel (if you wish) & slice into 1/4-inch slices; set aside.
  2. Clean artichokes, remove the harder outer leaves, cut them into fairly thin slices & brown in a pan with oil, season with salt. Add water & cook only until soft. Drain any excess water & set aside.
  3. Scramble fry sausage meat, remove from heat & drain on paper towels. Grate cheese. Prepare some breadcrumbs for topping.
Assembly
  1. Preheat oven to 350 F.
  2. Line a 8-inch round baking dish with foil & brush with oil. Place a layer of potatoes in the bottom of pan then top with a layer of artichokes. Sprinkle half of the sausage meat on top then half of the grated cheese. Spread half of the béchamel sauce over all. Repeat the same procedure to form a second layer.
  3. Bake for about 45 minutes or until bubbling & hot. Remove from oven & allow to cool about 10 minutes. Invert onto a serving plate. Carefully remove foil & sprinkle with breadcrumbs. Serve.

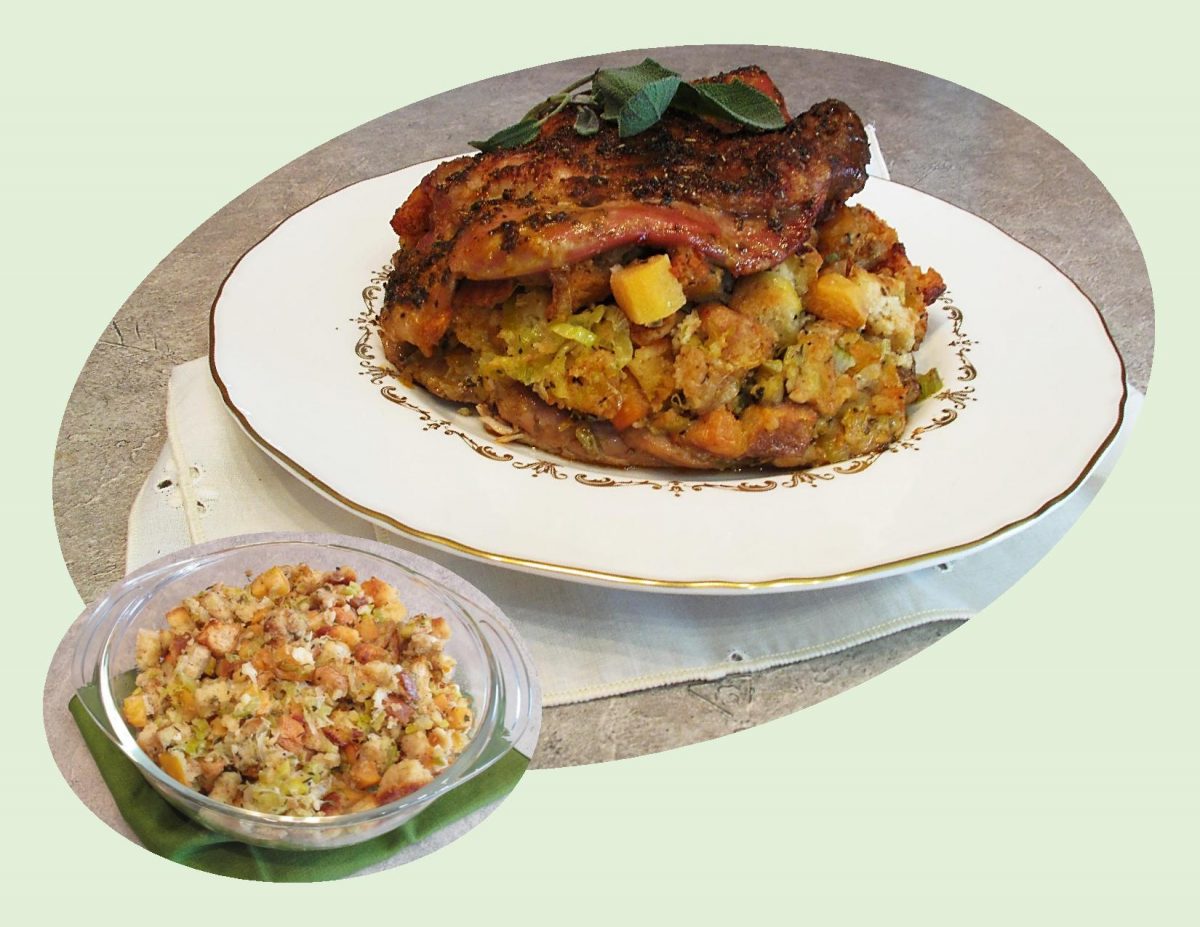
Turkey Thighs w/ Persimmon Sage Stuffing

Cooking turkey parts instead of the entire bird serves a few purposes. It not only cuts way back on the cooking time but it allows you to cook more of your favorite pieces. For dark meat lovers, roasted turkey thighs are the perfect option as the meat is succulent and flavorful without losing its moistness during the roasting time.

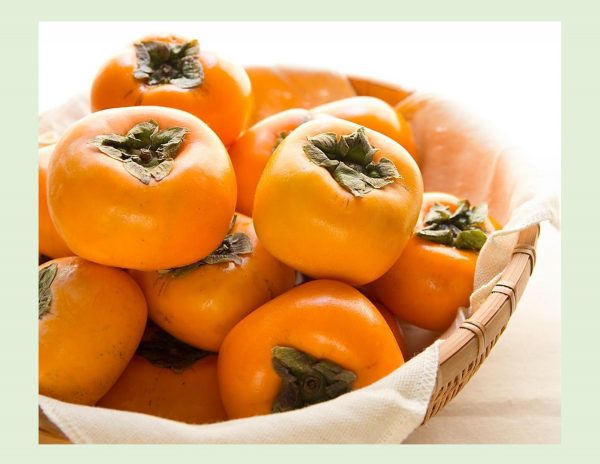
As soon as I spot persimmons in the grocery store I can’t resist them. Persimmons are in season between November and February. They are mildly sweet and juicy with a slight crunch reminiscent of a cross between a peach and a pear. Since there is only a short window in which you can enjoy this exotic fruit, persimmons make up for it by working well in both sweet and savory recipes.

In acknowledgement to the USA Thanksgiving today (November 25th), I’m stuffing some turkey thighs with an interesting dressing containing persimmons & fresh sage. I know most people have their own traditional, go-to‘ stuffing recipes, but I’m hoping at least a few will venture from the norm and try a little persimmon in your stuffing. I can assure you, its worth it.

Print Recipe
Turkey Thighs w/ Persimmon Sage Stuffing
Instructions
Stuffing
  1. Preheat oven to 200 F. On a parchment or foil lined baking sheet, spread out the cubes of bread. Bake for about 10 minutes, until lightly toasted yet still pale in color. Set aside. Turn oven off until ready to bake ready to roast thighs if you wish.
  2. In a large saucepan or pot over medium heat, add 1 Tbsp olive oil & 1 Tbsp butter. When butter has melted, add the shallot, celery & leek. Cook until softened, about 10 minutes. Add garlic, sage, thyme & pepper; cook until mixture is fragrant, about 2 minutes.
  3. Pour in the broth and toss lightly until everything is completely mixed. Give the stuffing a taste & add salt to your personal taste. Fold in the beaten egg & cubed persimmons; toss lightly till combined.
Herb Butter
  1. In a small dish, combine all herb butter ingredients & set aside.
Assembly & Baking
  1. Arrange turkey thighs, skin side down on a work surface so they lay open & flat. Cover with plastic wrap, then pound lightly with a meat mallet to flatten to an even thickness.
  2. Preheat oven to 350 F.
  3. Discard plastic wrap; spread stuffing over 2 turkey thighs, leaving a 1/4-inch border around edge. Top each with a remaining turkey thigh. Butter a casserole dish with remaining butter & transfer any leftover stuffing to casserole dish, spreading it out evenly.
  4. Line a roasting pan with heavy duty foil paper. Grease foil on the bottom of pan & place the stuffed turkey thighs in roasting pan. Carefully spread HERB BUTTER over tops of stuffed thighs.
  5. Roast uncovered, basting occasionally, until thighs reach an internal temperature of 180 F. about 2 hours. Cover with foil if top browns too quickly. Bake the extra stuffing for about 30-40 minutes, until the top of the stuffing is golden brown.
  6. Remove turkey thighs from oven, tent with foil & allow to rest for about 5-10 minutes. Slice & serve.

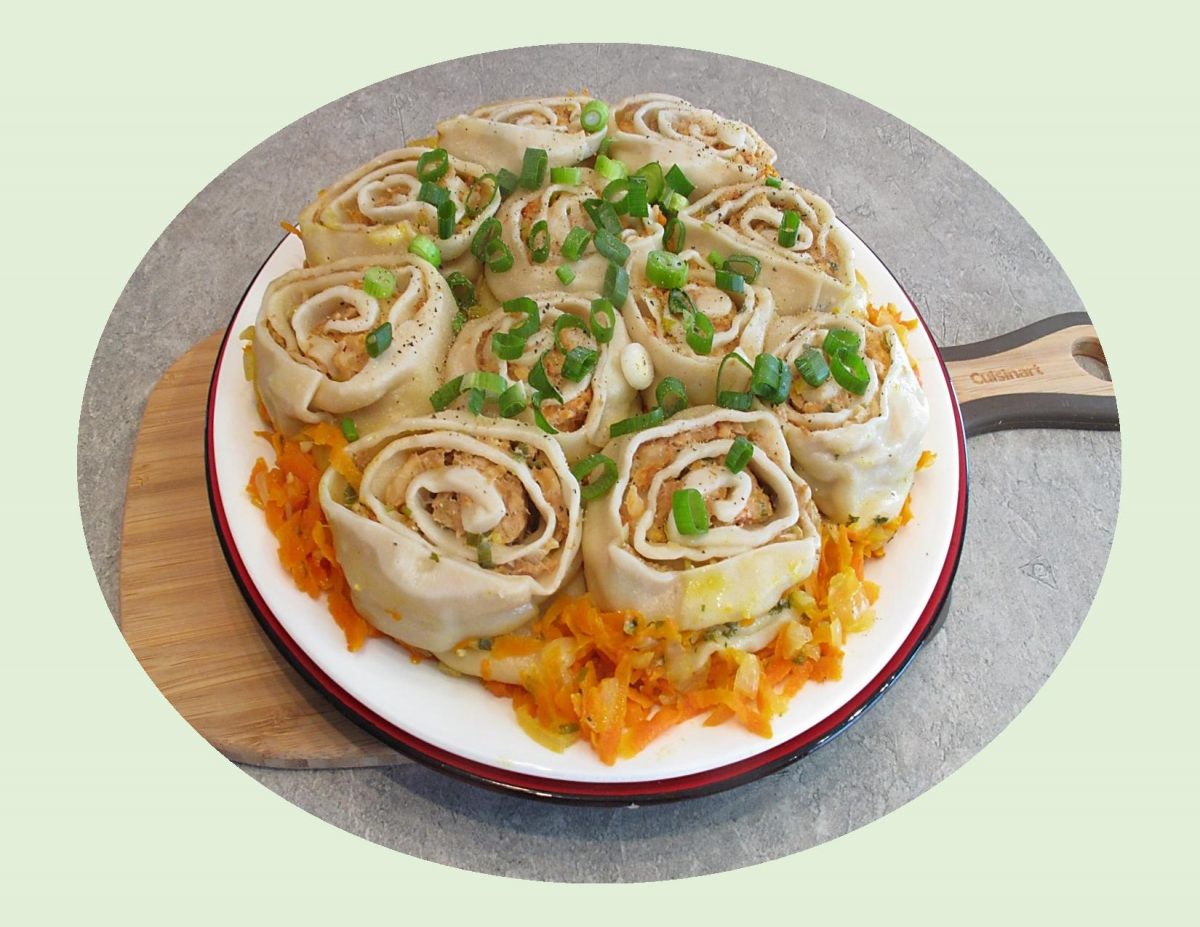
Shrimp & Chicken Pelmeni

Though they come in all shapes and sizes, dumplings are a near-universal culinary constant as almost every culture has one. So naturally, dumpling recipes are incredibly versatile, coming with a wide array of fillings, wrappers, shapes and sizes. Eaten as an appetizer, dessert, side dish or for the main meal, they might just be the ultimate comfort food.

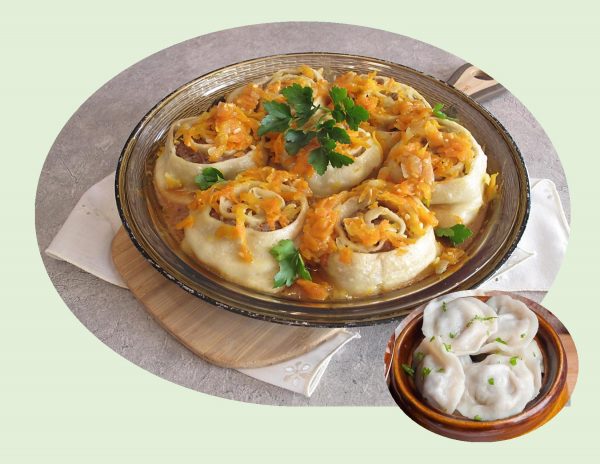
Chicken and shrimp go together surprisingly well, and this dish is no exception. In March of this year (2021), I posted a blog about Russian Pelmeni. Since then, Brion & I have had ‘pelmeni’ numerous times in which I’ve experimented with various fillings. In case you’re not familiar with these dumplings, traditional Russian pelmeni consist of a filling wrapped in thin, unleavened dough. The word “pelmeni” describes the ear-shaped appearance of these dumplings.

When I made them for the March blog, I used a different technique for preparing them. Instead of making them into the traditional ear shape, I rolled the dough out into a large rectangle. I then spread the raw meat filling over it very thinly and rolled it up in a jelly roll fashion. After slicing the roll into 2-inch pieces, they were steam cooked in broth in a skillet. It’s a quick and easy take on authentic pelmeni.

Since Brion & I eat a lot of chicken and shrimp, I could see no reason to ‘develop’ a new version with an almost oriental twist on it.

Print Recipe
Shrimp & Chicken Pelmeni
Votes: 1
Rating: 5
You:
Rate this recipe!
Servings
Ingredients
Servings
Ingredients
Votes: 1
Rating: 5
You:
Rate this recipe!
Instructions
Dough
  1. In a bowl, combine all dough ingredients & knead until a smooth dough ball forms, about 10 minutes. Cover with plastic wrap & set aside to rest until your filling is prepared.
Filling
  1. Chop mushrooms & mince garlic. In a skillet, heat butter & add garlic. When aromatic & light golden, add mushrooms & a light sprinkle of salt. Cook for about 2 minutes, until fragrant, soft & roughly a third of the original volume. Set aside in a bowl to cool.
  2. Chop shrimp into pieces the size of large peas. Add to the mushrooms with the chicken, green onion, water chestnuts & ginger. Combine with a fork.
  3. Stir together salt & white pepper, sugar, soy sauce & water. Pour over the filling; stir to mix & firm up. Cover & set aside to rest for 30 minutes.
Assembly
  1. Once dough has rested, transfer to a floured surface. Roll out the dough into a large, THIN rectangle. Spread filling over the dough, leaving a 1/4-inch at the far side of the dough.
  2. Tightly roll dough up, starting from the wider side, forming a log. Put seam side down to seal the edges. Seal ends of the dough as well. Using a very sharp knife, cut the dough log into 2-inch sections.
  3. In a large skillet that will accommodate all pelmeni, heat oil & cook onion until translucent. Add garlic & continue cooking until fragrant. Add grated carrot; cook about 1-2 minutes more.
  4. Place pelmeni rolls on top of veggies, add vegetable broth, salt & pepper. Cover with a lid & simmer for 30 minutes on a low heat. Check pelmeni from time to time, to make sure there is still some broth in the skillet. Add more broth if it evaporates too fast. Garnish with extra sliced green onions if desired. Serve.
Recipe Notes
  • A nice condiment for these dumplings would be a sweet chili sauce.

Russian Pelmeni

My love for noodles, dumplings, etc. probably could be accredited to my German heritage. This recipe for Russian pelmeni has been hovering in my ‘must try’ file for quite some time, so today’s the day.

It seems most food historians agree that these Russian dumplings originated in Siberia. Although pelmeni forms the heart of Russian cuisine and culture, it does have numerous look-a-likes in particular the Ukrainian vareniki and the Polish pierogi. The easiest way to spot the difference is to look at the shape and size; a typical pelmeni is almost circular and about two inches in diameter. The other forms are usually more elongated and larger in size.  Also, the fillings in pelmeni are usually raw, while the fillings of vareniki and pierogi are typically precooked. Pelmeni will never have a sweet filling , unlike its Ukrainian counterpart. The recipe may actually be an adaptation of Chinese pot stickers.

Fillings differ but essentially they are ground meat (pork, beef or sometimes lamb), fish or mushrooms as well as being quite spicy.

The word pelmeni comes from ‘pelnyan’ which means ‘bread ear’, a reference to the food’s ear-like shape.

Although this meal was favored by hunters who were looking for light, easy to prepare, nourishing food to take with them on long trips in the winter, its also seen as Russian fast food among students or bachelors.

This recipe gives you the option of making traditional pelmeni or using an alternate method called ‘lazy’ pelmeni. Both equally as good.

Print Recipe
Russian Pelmeni
Votes: 1
Rating: 5
You:
Rate this recipe!
Course Lunch, Main Dish
Cuisine European
Keyword Russian pelmeni
Servings
Ingredients
Course Lunch, Main Dish
Cuisine European
Keyword Russian pelmeni
Servings
Ingredients
Votes: 1
Rating: 5
You:
Rate this recipe!
Instructions
Dough
  1. In a bowl, combine all dough ingredients & knead until a smooth dough ball forms, about 10 minutes. Cover, set aside & allow dough to rest until your filling is prepared.
Filling
  1. In a bowl, combine ground meats, onion, garlic, salt & pepper. Mix well.
Assembly
  1. FOR THE TRADITIONAL PELMENI: Divide the dough in half & roll each portion out into 1/8-inch thickness on a lightly floured surface. Cut into 2-inch diameter circles & place about a teaspoon of the filling on each circle. Fold the circle in half & crimp edges well, then bring the ends together & crimp. Repeat to use remaining dough & filling. It is best to refrigerate or freeze finished pelmeni before you are ready to boil them.
  2. To cook, bring a large pot of salted water to a boil. Place pelmeni in the boiling water & cook until they float to the top then cook for about 5 minutes more. Remove with a slotted spoon to a bowl. Add butter & mix to coat. Serve with sour cream & fresh parsley.
  3. FOR 'LAZY' PELMENI VERSION: Once dough has rested, transfer to a floured surface. Roll out the dough into a large thin rectangle. Spread meat filling over the dough, leaving a 1/4-inch at the far side of the dough.
  4. Tightly roll the dough up, starting from the wider side, forming a log. Put seam side down to seal the edges. Seal ends of the dough as well. Using a very sharp knife, cut the dough log into 2-inch sections.
  5. In a large skillet that will accommodate all pelmeni, heat oil & cook onion until translucent. Add garlic & continue cooking until fragrant. Add carrot & 1 bay leaf; cook until the carrot is tender, about 1-2 minutes.
  6. Place pelmeni rolls into the skillet with veggies, add the vegetable broth, salt, pepper & the other bay leaf. Cover with the lid & cook for 30 minutes on low heat. Check pelmeni from time to time, to make sure there is liquid in the skillet. Add more if it evaporates too fast. Garnish with fresh parsley. Serve immediately with sour cream if you wish.

Seafood Stuffed Pork Medallions with Peppercorn Sauce

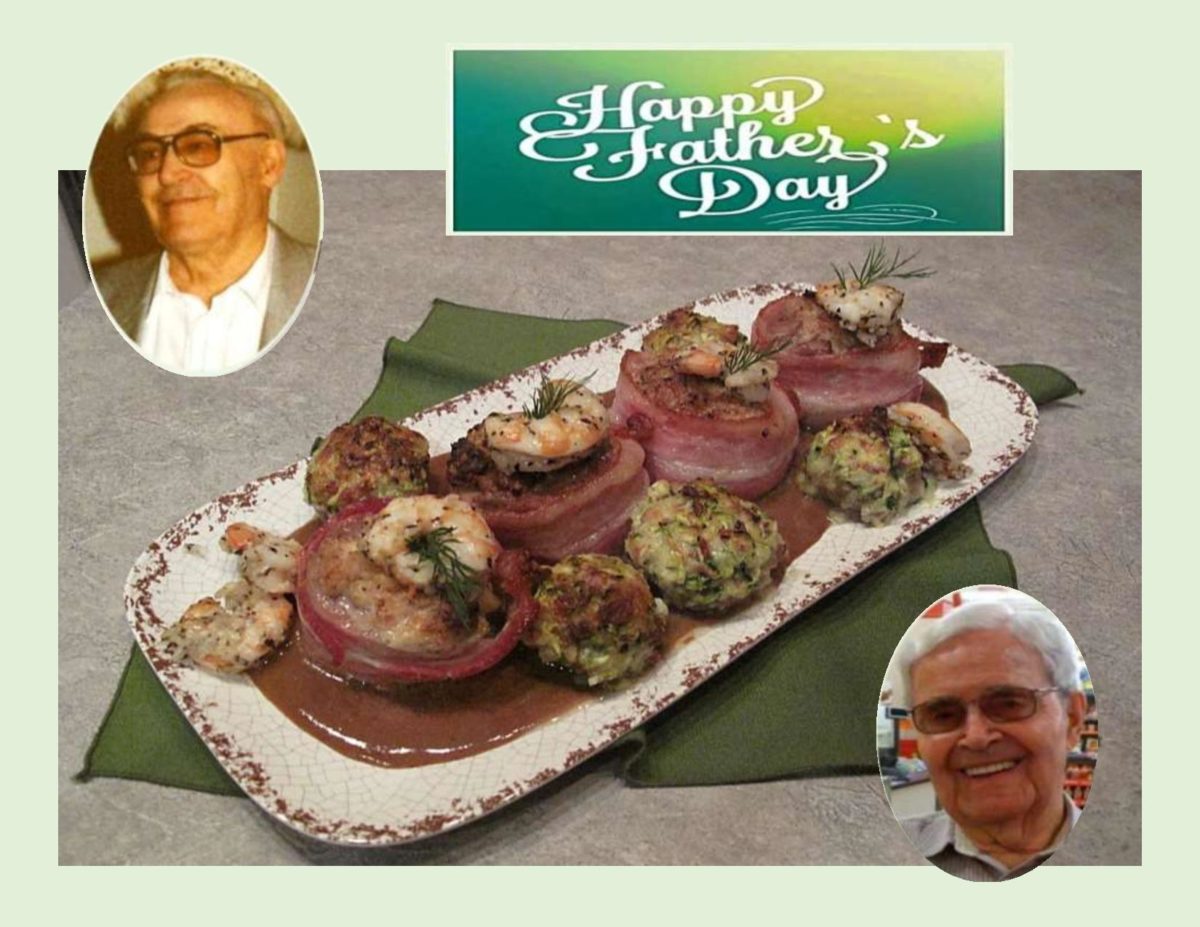
CELEBRATING FATHER’S DAY!

Honoring your father on Father’s Day doesn’t require his physical presence. I feel what is more important, is just the act of doing it. I am very grateful to have had a father who was such a strong role model in my life. Everything he did was driven by his commitment to provide and care for the family he loved.

My father passed away in 2005 and Brion’s in 2011. Both our Dad’s loved to talk and tell stories from their lives. We often wish we could retrace that time and hear their voices again. It seems you never fully appreciate your parents until they are no longer on this earth. It is so important to appreciate every hour they are in your life.

My special meal to honor them on this Father’s Day, is a nice medley of pork, shrimp and mushrooms.

Print Recipe
Seafood Stuffed Pork Medallions with Peppercorn Sauce
Instructions
Stuffed Mushrooms
  1. Shred zucchini, sprinkle with a little salt & set aside. In a bowl, combine the cheeses, crumbled bacon, egg & seasonings. Squeeze as much liquid from zucchini as possible. Add it to the filling & mix well. Divide the filling between mushrooms. Place a small amount of Zesty Italian dressing in a cup. Dip bottom of each mushroom in dressing & allow to dip off for a few seconds. Place stuffed mushroom caps on a small baking dish making sure they will stay upright. Place in fridge until ready to bake.
Parmesan Shrimp
  1. In a bowl, combine oil, garlic, oregano, basil, Parmesan, salt & pepper. Add shrimp & toss gently; thread onto skewers. Place on a plate & refrigerate until ready to cook.
Stuffing / Tenderloin
  1. In a saucepan, saute garlic & shallots in 1 Tbsp olive oil for a few minutes. Add a few pinches of salt & pepper; stir in breadcrumbs. Add water; stir till all is combined & transfer to a bowl.
  2. In a bowl, cream together butter & cream cheese. Add 1/2 of the capers, the parsley & stir thoroughly. Add the Gruyere & scallops, stirring gently. Set aside.
  3. 'Butterfly' tenderloin & pound making it all the same thickness. Spread stuffing evenly on flattened cut side. Starting with the long side, carefully ROLL the tenderloin as opposed to just FOLDING it over. On work surface, lay out bacon strips side by side. Lay stuffed tenderloin at one end & roll up in bacon strips, placing a toothpick at end of each strip.
  4. Preheat the oven to 400 F. In a skillet, heat remaining 2 Tbsp olive oil, add the roast carefully & saute for about 3-4 minutes on each side to cook the bacon a bit. Place a rack in a shallow roasting pan & lay stuffed tenderloin on it; bake at 400 F. for 10 minutes, then reduce heat to 350 F. & bake for another 20 minutes. Remove from oven, set the roast on a cutting board, cover loosely with foil, & let rest while the shrimp & stuffed mushrooms are cooking. When ready to serve, slice into 1 - 1 1/2" thick 'medallions'.
  5. Increase oven temperature to 400 F. Remove stuffed mushrooms from refrigerator, bake for 20-30 minutes or until filling is golden & mushrooms have softened. Meanwhile, line a baking sheet with foil, place skewered shrimp in oven for the last 6-8 minutes of cooking the mushrooms.
Peppercorn Sauce
  1. This can be made earlier or while the last items are cooking in the oven. In a hot skillet, add butter, shallots & peppercorns; stir until shallots are golden, about 1 minute. Add broth & thyme sprigs; reduce heat & allow sauce to simmer for a few minutes. Remove thyme sprigs. Add cream & salt & pepper to taste. If you wish to thicken sauce, combine cornstarch & water in a small dish, stirring until smooth. Add a bit at a time to your hot mixture, stirring until desired thickness is achieved.

Tortilla Crepe Stacks

To some of us, Mexican food terms get a little confusing. I mean there is the taco, burrito, quesadilla, enchilada and taquito just to name a few. Before anything, one needs to know what a tortilla is. Simply put, it is wheat or corn plain bread that is used as a wrapping material around different types of filling ingredients to make the various Mexican dishes. 

Masa Harina is a traditional flour used to make corn tortillas and tamales as well as other Mexican meals. To make masa harina, field corn (or maize) is dried and then treated in a solution of lime and water called slaked lime (or wood-ash lye). This loosens the hulls from the kernels and softens the corn. In addition, the lime reacts with the corn so that the nutrient niacin can be assimilated by the digestive tract.

The soaked maize is then washed, and the wet corn is ground into a dough called masa. It is this fresh masa, when dried and powdered, that becomes masa harina. Water is added again to make dough for the corn tortillas or tamales.

Cornmeal and masa harina are very different preparations of corn. Do not try to substitute cornmeal or regular wheat flour in recipes calling for masa harina as they will not produce the same results.

Today, I want to make some tortilla crepe stacks. Crepes as we all know, have always been a hallmark of French cuisine. So the question is, ‘how did they come to be in Mexican cuisine’? In the 1860’s, French forces invaded Mexico. They came, they conquered, they cooked and then they got kicked out. Cinco de Mayo commemorates that victory for Mexico from 1862. However, it took another five years before the French left Mexico for good. During their stay, the French left their mark on the country’s cuisine.

One of the reasons I have always loved crepes, is that they are so easy to make and taste so good. You can either roll the filling inside or just stack them with their fillings and make a ‘cake’.

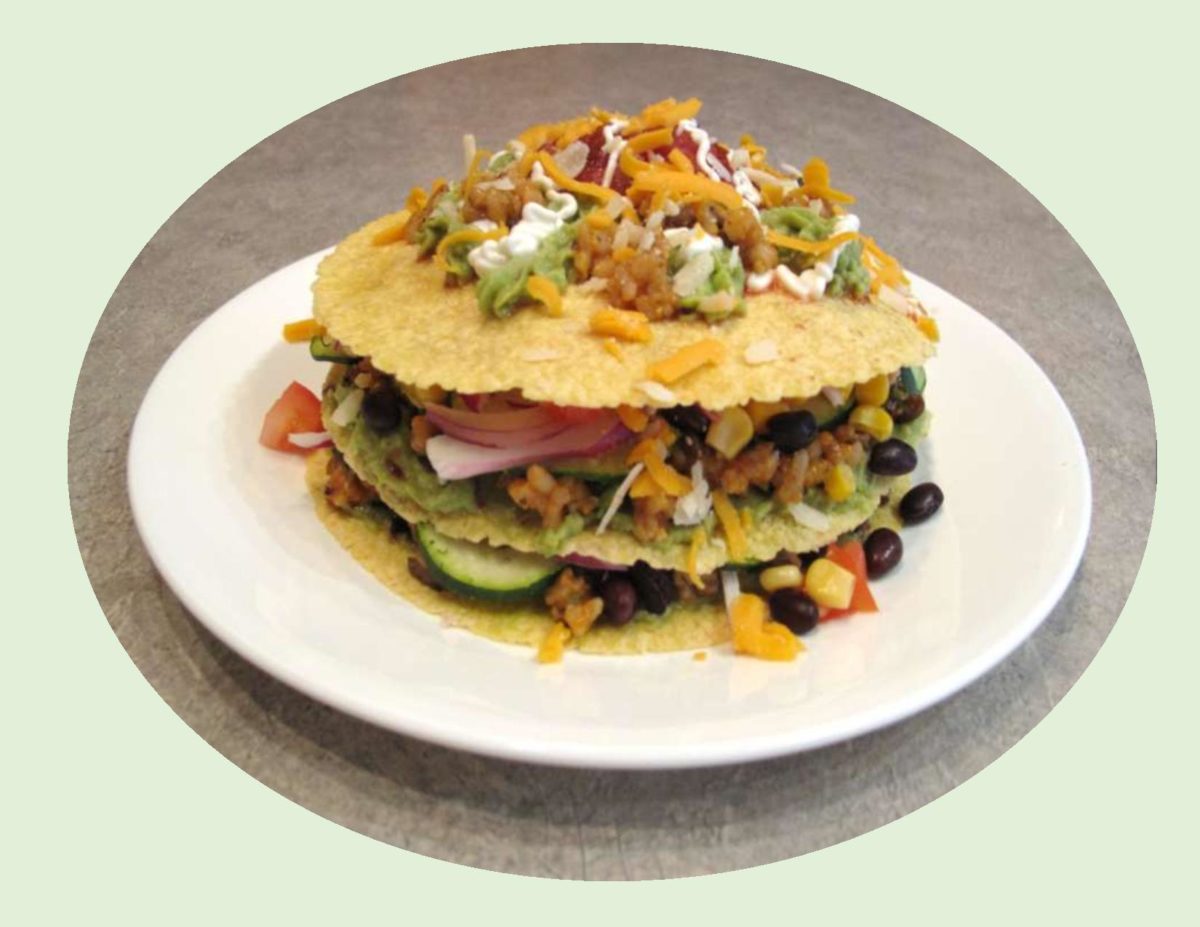
These tortilla crepes are made with half masa harina and half white flour. Next, I made a mushroom rice & barley pilaf and some guacamole. You can pick and choose when it comes to the extra filling add-ons. I guess it did get a bit more involved but worth it —.


Print Recipe


Tortilla Crepe Stacks

Votes: 2
Rating: 5
You:
Rate this recipe!

Servings

Votes: 2
Rating: 5
You:
Rate this recipe!


Instructions
Tortilla Crepes
  1. In a blender, beat eggs with milk & oil. Gradually add masa harina, white flour & salt, beat until smooth. Allow to stand for 1 hour or longer. Heat an electric griddle to 350 F. Using a 1/4 cup measure, scoop batter onto griddle. With bottom of 1/4 cup, make circles in the batter, gradually enlarge to size of tortilla you wish to make. I made 3 for each crepe stack. Cook each crepe for a few minutes on each side then remove to a wire cooling rack.

Rice & Barley Pilaf
  1. In a saucepan, saute onion, garlic & mushrooms until tender crisp. Add chicken broth & bring to a boil. Add all remaining pilaf ingredients & reduce heat to simmer. Simmer until barley & rice are cooked & liquid is absorbed. Remove from heat; place in a dish & set aside to cool.

Guacamole
  1. Mince onion & sun-dried tomatoes & mash avocados. In a small bowl, combine avocados, onion, sun-dried tomatoes, & remaining guacamole ingredients. Blend well, cover & refrigerate.

Crepe Stack Fillings
  1. Cook chicken & shred, Grate cheese & prepare all filling ingredients.

Assembly
  1. Spread 4 tortillas with guacamole, reserving a bit for 'decorating' the top of each stack. Over the guacamole, put a layer of rice/barley pilaf. Top each of them with chicken, green peppers, olives, corn, red onion, fresh tomatoes, zucchini, black beans & a sprinkling of cheese. On 2 serving plates, place one filled tortilla topped by a second one. Complete each stack with another corn tortilla. 'Decorate' each with remaining guacamole, salsa, sour cream & remaining cheese. Heat each crepe stack for a few minutes in the microwave before serving.