Perfect veggies to roast together because they cook at the same rate and broccoli’s grassy, earthy and slight bitterness complements cauliflower’s sweet nutty flavor.
The same vegetable, however, they are not. For whatever reason, these two vegetables are often confused for one another, even though they are strikingly different in many ways.
Broccoli is green, except when it’s purple and its cauliflower. Cauliflower is usually white, except when it’s orange or green, and looks like broccoli, or when it’s purple, and it actually is broccoli.
The word ‘broccoli’ is derived from Italian and means, ‘flowering crest of a cabbage.’ The word ‘cauliflower,’ on the other hand, comes from Latin, and means, ‘the flowers of a cabbage’.
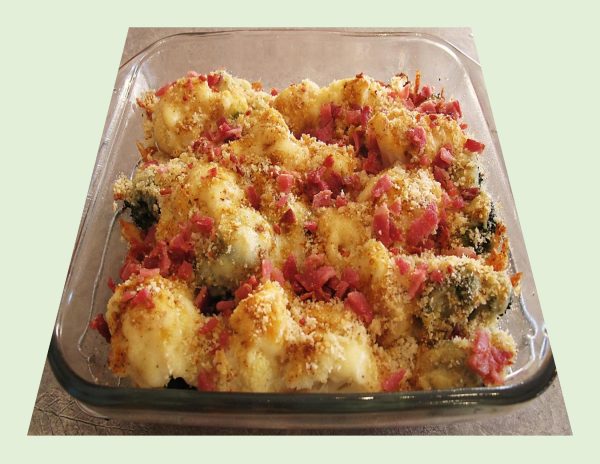
This is such a nice fall side dish. Broccoli and cauliflower coated with a rich, creamy, cheesy sauce, covered with Panko breadcrumbs, baked to perfection and garnished with bacon. How good is that!
Print Recipe
White Cheddar Broccoli/Cauliflower Gratin
Votes: 1
Rating: 5
You:
Rate this recipe!
|
|
Votes: 1
Rating: 5
You:
Rate this recipe!
|
Instructions
-
Bring a pot of salted water to a boil. Cook florets until tender-firm, about 5-6 minutes. Drain well.
In a saucepan, melt butter over medium heat. Add in onions & sauté until softened, about 4-5 minutes. Add in garlic & sauté 20 seconds longer. Add in flour & cook whisking constantly, 1 1/2 minutes.
While whisking, slowly pour in milk & add nutmeg. Whisk constantly until mixture reaches a boil, then remove from heat & stir in 1 1/4 cups cheddar cheese & the parmesan. Season with salt & pepper to taste.
Pour & spread 1/3 of the cheese sauce into a 9 x 9-inch baking dish. Top with drained broccoli/cauliflower combo then slowly & evenly pour remaining 2/3 of the cheese sauce over top.
Sprinkle over remaining 1/4 cup white cheddar then sprinkle evenly with panko crumbs. Spray panko with olive oil cooking spray to lightly coat.
Bake for 20 minutes, then broil for 1-2 minutes to help brown further as needed. Remove from oven, sprinkle with bacon & parsley & serve warm.

All onions are not created equal so using the best onion for the job can really add a depth of flavor to your meals.
Onions are the workhorses of the kitchen and the foundation of so many billions of dishes across the globe that we forget how lovely and delicious they are all by themselves.
For most of the year, you’ll find red storage onions at the supermarket, which are pungent and spicy. In the summer months, you’ll often find fresh red onions, which are much milder, and lack a bit of the ‘onion-y’ flavor you’ll find in their yellow and white cousins.
The main difference between red onion and white onion is that red onions are a little spicy in taste while the white are comparatively sweeter and less mild.
It is a well-known fact that almost all dishes feel and taste incomplete without the presence of onion in them. Stuffed onions are an impressive side dish and a perfect complement to any main dish.
Print Recipe
Creamy Roasted Red Onions
Votes: 1
Rating: 5
You:
Rate this recipe!
|
|
Votes: 1
Rating: 5
You:
Rate this recipe!
|
Instructions
Onions
-
Peel onions, trim the root ends so they will sit upright & cut about 1/2-inch from tops. Rub onions with olive oil & season with salt. Bake for 50 minutes. Remove from oven & allow to cool slightly.
Gently remove the centers leaving a shell of about 2-3 layers. Return a slice of the center to form a bottom. Coarsely chop onion centers.
Filling
In a bowl, combine cream cheese, sour cream, salt, herbs de Provence, garlic powder, minced garlic & chopped onions. Spoon filling into onion shells.
Topping
In a small bowl, combine Panko, butter, cooked bacon & parsley. Spoon carefully over onions.
Bake for 30 minutes or until filling is heated through & bread crumbs start to brown. Serve immediately.
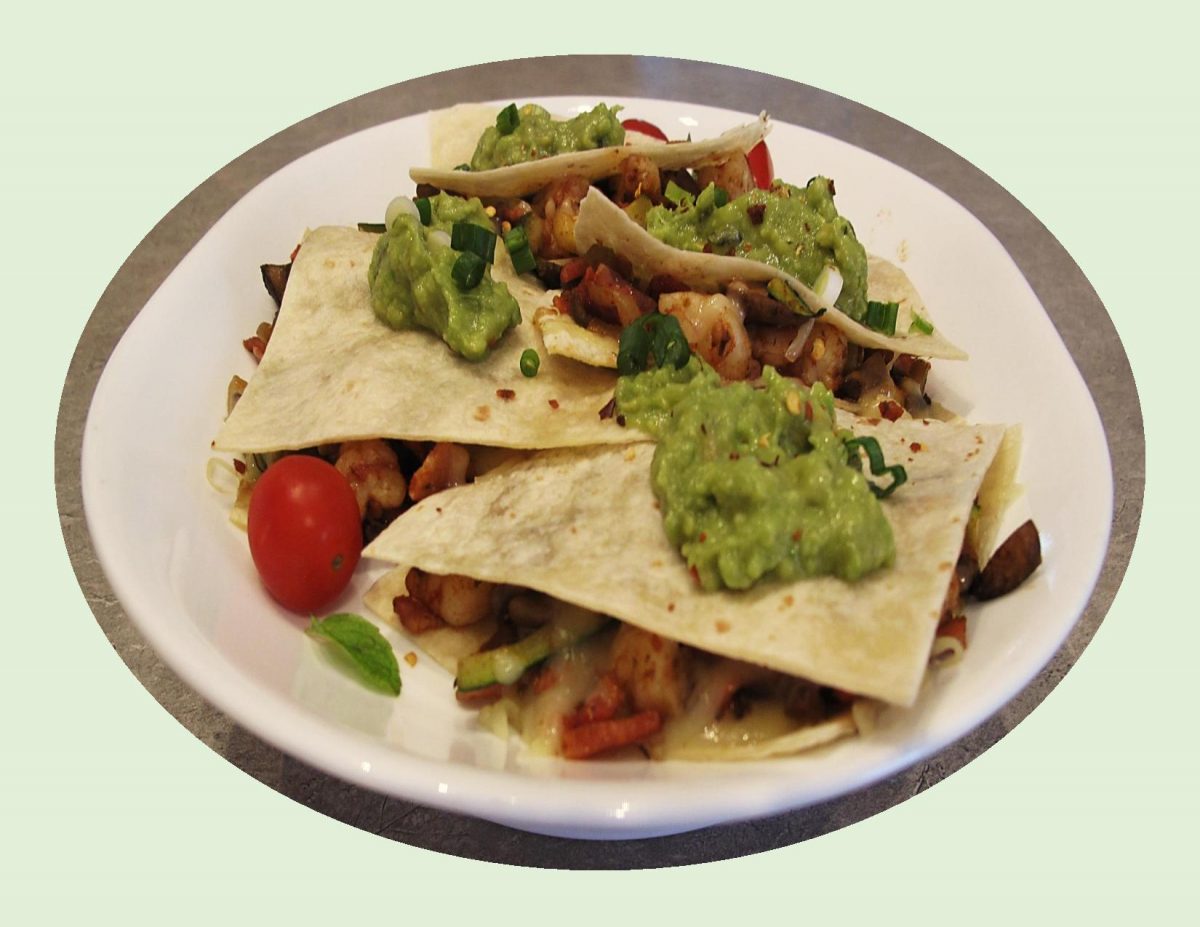
Quesadillas are basically toasted tortillas with cheese inside. The name in Spanish literally means ‘little cheesy thing’. What constitutes a quesadilla varies greatly between Mexico and its neighboring countries. They agree that the quesadilla and taco or burrito are different; the former being cooked after being filled or stuffed while the later two are filled with pre-cooked ingredients. Also they may be made with flour, corn or wheat tortillas as well as Mexican Masa (tamale version).
The quesadilla originated in central and southern colonial Mexico, beginning as a corn tortilla gently heated until soft enough to fold, then filled with cheese and toasted on both sides until golden and crispy on the outside and gooey with cheese on the inside. Over time, chopped, cooked vegetables and bits of roasted, shredded meat also found their way into these cheesy tortillas.
Influenced by the many micro-cultures of Mexico and Latin America, the quesadilla has been adopted and adapted by chefs and home cooks around the world, especially since the little cheesy things make it so easy to feed vegetarians and meat-eaters at the same table. A vegetarian quesadilla can be as simple as cheese folded into a tortilla. For the meat or seafood lovers, just add some shredded chicken, pulled pork or ‘roasted’ shrimp.
Speaking of shrimp …. to maximize the flavor, don’t sauté them – roast them! Much like roasting meat on the bone, roasting shrimp in their shells gives them a more intense flavor and keeps them from drying out as easily. The flavor from the shells penetrates the flesh, making them even tastier.
Something else I wanted to mention is a suggestion to help make your quesadillas nice and crunchy. Don’t use butter or oil to cook them in, use mayo instead. The fact that mayo contains a bit of sugar will promote browning and also give some extra crispiness.
Print Recipe
Shrimp Quesadillas w/ Guacamole
Votes: 1
Rating: 5
You:
Rate this recipe!
Ingredients
- 3 slices bacon, cooked & crumbled
- 1 cup zucchini, julienned
- 250 gm mushrooms, sliced
- 2 cloves garlic, minced
- 454 gm WILD, jumbo shrimp, peeled & deveined
- 1 1/2 tsp chili powder
- 1/4 tsp EACH garlic powder, onion powder, dried oregano, smoked paprika, cumin, salt & pepper
- 4 large flour or corn tortillas
- 100 gm melting cheese such as mozzarella, smoked cheddar, Mexican blend or Monterey Jack, grated
- guacamole, sour cream or salsa for serving
- 3 green onions, sliced for serving
|
Votes: 1
Rating: 5
You:
Rate this recipe!
|
Instructions
In a skillet, fry bacon to a cooked but not real crisp stage. Remove from pan to paper towel. Sauté mushrooms, zucchini & garlic until most of the moisture evaporates. Cut each shrimp in thirds & add to skillet with seasonings. Cook for another minute or until shrimp begins to turn pink. Remove from heat & add cooked bacon & combine.
Grate cheese. Lightly butter one side each of 4 tortillas. Place on a griddle, & cook until warm & browned slightly. Remove 2 of them & keep warm. To each of the remaining 2, sprinkle with 1/4 of the cheese, top each one with 1/2 of the filling then sprinkle with remaining cheese over filling. Place the 2 warm tortillas on top of the filled ones.
Place a lid (or a baking pan) over the griddle for a few minutes to give the cheese a chance to melt.
Remove quesadillas to a cutting board & cut each one into 4 pieces. Serve hot with your choice of toppings.
Recipe Notes
- As I mentioned in the blog article, roasting the shrimp really intensifies the flavor. If you have the time, try it instead of just sautéing them.
-
Preheat the oven to 400 F.
-
Place the shrimp (shells-on) on a lightly greased baking sheet and toss with 1 tablespoon olive oil and minced garlic.
-
Sprinkle evenly with the seasoning (such as Old Bay) and arrange the shrimp in a single layer.
-
Bake the shrimp for 8-10 minutes or until just pink and opaque throughout.
-
Remove from oven.

CELEBRATING OKTOBERFEST!
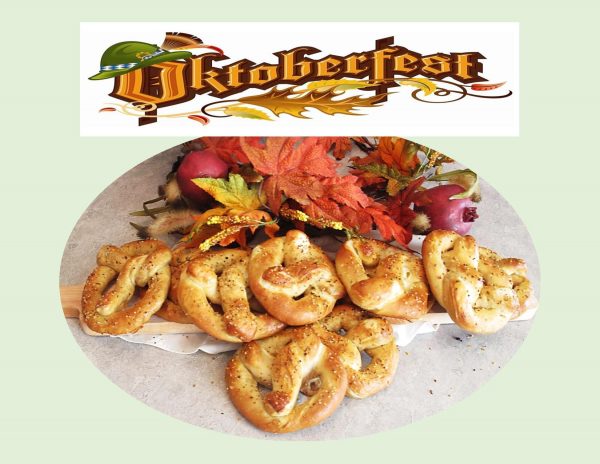
Oktoberfest has somewhat strayed from its roots. The first festival in 1810 was originally to celebrate the marriage of German Crown Prince Ludwig, who later became king, and Princess Therese of Saxony-Hildburghausen. Since then, its become a decadent celebration of fall flavors and fine beers worldwide. This 16-day festival is a celebration of German culture, music, bratwurst, beer, pretzels and much more.
In keeping with Oktoberfest, I thought I would try my hand at making some pretzels this year.
Traditionally, pretzels are a baked bread product made from yeast dough and shaped into a twisted knot. Salt is the most common seasoning for pretzels but various sweet and savory options are now being used. The soft pretzels are eaten soon after they are baked while the hard pretzels have a longer shelf life.
The characteristic flavor and crust of a pretzel comes from the soda treatment. After being shaped, the dough is dipped in boiling water to which soda has been added and then baked. This treatment helps what is known as the Maillard reaction. The process of boiling the pretzels in soda water breaks the protein and increases the amino acid content in the dough, giving it an amazing crust.
Just for a bit of extra flavor, I am stuffing our pretzels. Should be good!
Print Recipe
Stuffed Pretzels
Votes: 1
Rating: 5
You:
Rate this recipe!
Ingredients
Chicken Bacon Ranch Filling
Pulled Pork & Cheese Filling
Ingredients
Chicken Bacon Ranch Filling
Pulled Pork & Cheese Filling
|
Votes: 1
Rating: 5
You:
Rate this recipe!
|
Instructions
Pretzels
In a small bowl, combine 1 1/2 cups lukewarm water, yeast & a pinch of salt; allow to sit for 5 minutes until frothy.
In a large bowl, combine flour, salt & sugar. Add the frothy yeast mixture along with the melted butter; stir to combine. On a lightly floured work surface, knead dough for about 5 minutes & shape into a ball. Lightly butter the bowl, place the dough in it, cover with a tea towel & allow to rise for 45 minutes in a draft-free place.
Prepare fillings. This can be done ahead of time which will make the process easier, if you wish.
Chicken Bacon Ranch Filling
In a large skillet, cook bacon until crispy. Remove from skillet, blot on a paper towel & crumble. Place in a bowl & combine with cooked chicken, cheese & ranch dressing; toss until well mixed. Set aside.
Pulled Pork & Cheese Filling
In a bowl, add pork filling ingredients & combine well. Set aside.
Bratwurst & Sauerkraut Filling
In a skillet, sauté bratwurst until browned & cooked through. Drain on paper towel; place in a bowl with other bratwurst filling ingredients & combine well. Set aside.
Assembly
After dough has risen, cut into 12 equal pieces & form each one into a 14-inch strand. Use a rolling pin to flatten the dough, lengthwise then roll it out a bit widthwise.
Divide each of your fillings into 4. Lay a line of filling down the center of each flattened pretzel. You will have 4 of each kind. Press the edges of the dough together to seal in the filling. Roll each strand back & forth to fully seal it up.
Shape into a pretzel by twisting the two ends around each other then bring it back down over the body of the pretzel.
Boiling & Baking
Preheat oven to 400 F. Bring 3 cups of water & 1/3 cup baking soda to a low boil. Line a large baking sheet with parchment paper.
Dip each pretzel in soda water for 20 seconds, remove, using a slotted spoon to drain excess water. Lay pretzels on parchment lined baking sheet & brush with egg wash. Sprinkle with coarse salt.
Bake until tops turn golden brown, 13-15 minutes. Remove from oven & cool on wire rack.
CELEBRATING CANADA DAY!
Every year Canada celebrates its birthday on July 1st with parades, fireworks and other fun events. This year, due to the pandemic and out of respect for Canada’s Indigenous people, celebrations here in our city of Edmonton, Alberta will be virtual or be on a smaller scale.
No matter which way you decide to celebrate the day, we know good food will be an important part of it. Gorgonzola has been a favorite of Brion & I for many years. It’s actually kind of surprising as neither of us care for ‘blue’ cheese or Roquefort.
Gorgonzola is one of those classic Italian ingredients that’s more famous than understood here in North America. The name itself, refers to the little town in Lombardy, near Milan, where the cheese was invented.
There are two kinds of gorgonzola, Dolce (sweet) and Piccante (spicy). In Italian these terms mean fresh verses aged cheeses. Because dolce is softer and creamier, its great for spreading on bread or used in salad dressing, pasta sauce, pizza or burgers. Piccante is harder and tends to crumble.
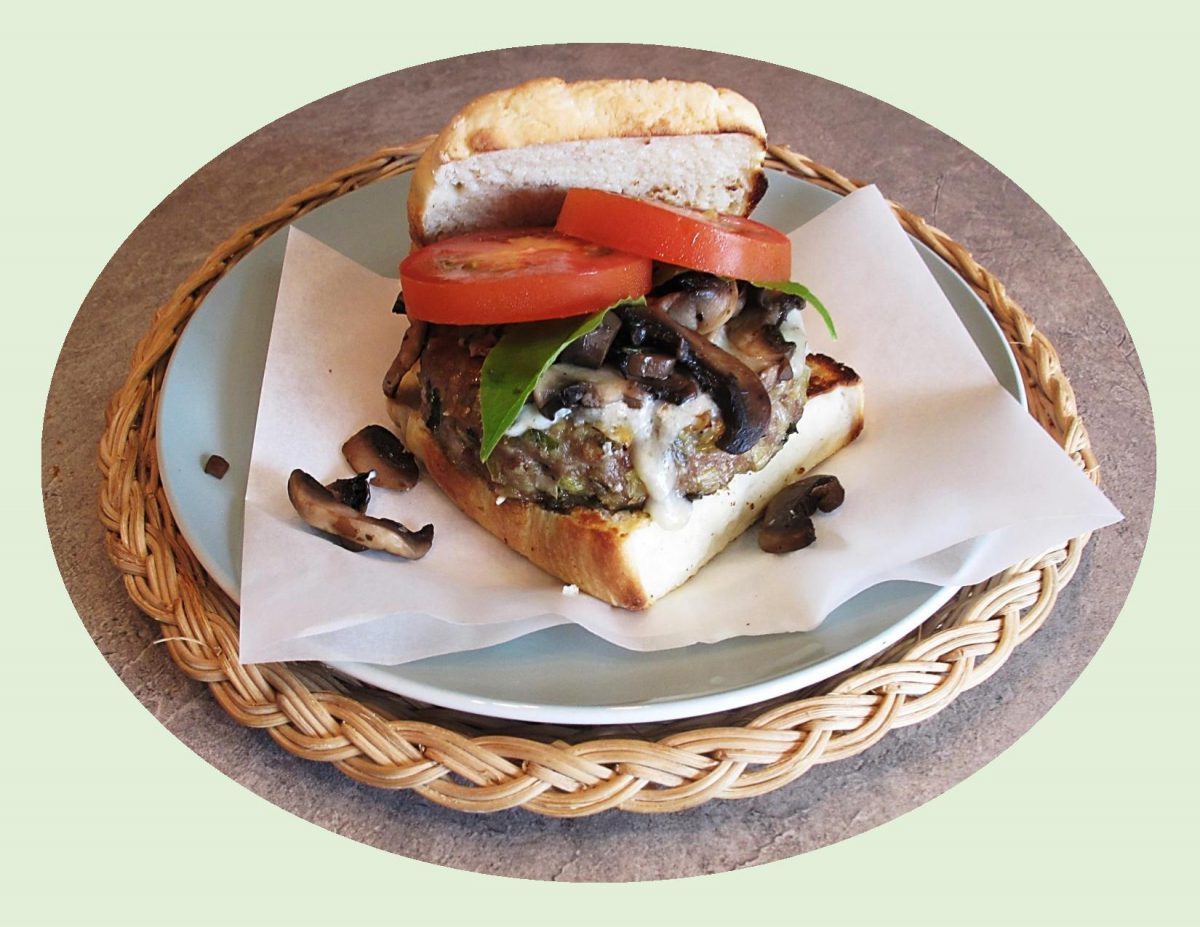
This turkey burger is made special with the combo of gorgonzola, bacon and guacamole. Just great for celebrating Canada Day!
Print Recipe
Gorgonzola & Bacon Turkey Burgers
Votes: 1
Rating: 5
You:
Rate this recipe!
|
|
Votes: 1
Rating: 5
You:
Rate this recipe!
|
Instructions
In a skillet, fry bacon until soft cooked. Remove from pan & blot on paper towel. Chop & set aside.
Using bacon drippings, saute finely chopped leeks & garlic until tender. Remove from skillet & cool.
In a large bowl, combine ground turkey, sauteed leeks & garlic, panko, salt, pepper, sugar, coriander, sage & ginger. Mix well.
Shape into (8) 1/2-inch thick patties. Place 1/8 (10 gm) of the crumbled Gorgonzola & 1/4 of chopped bacon on each of 4; top with another patty, pressing edges to seal, making (4) 1-inch thick patties.
Place on a preheated grill over medium heat. Close lid & grill, turning once, until meat is no longer pink inside, about 12-14 minutes.
Alternately, you can place them in a 375 F oven on a foil-lined tray & bake for about 20-25 minutes.
When burgers are almost done, top each with remaining Gorgonzola.
Serve in toasted ciabatta buns with your choice of toppings.

One of the first things Brion and I noticed when we lived in Ecuador for three months, was how much rice the grocery store had on its shelves. Brion is a true rice lover, so when we went grocery shopping, it was definitely on the ‘list’. To our amazement there was an entire isle, from top to bottom, dedicated to rice alone.
Rice has been a staple of the Ecuadorian diet forever, both along the coastal regions and in the mountainous areas. A large scoop of white, starchy rice accompanies most meals. In stores, you can buy brown rice, white ‘new rice’, aged rice (but not minute rice).
Shrimp rice is a classic Ecuadorian and Latin American dish. The fact that Ecuadorians love rice, anything you can think of, there is a rice-based dish for it, especially if it concerns any type of seafood. Because of the fertile soils and the humid, tropical climate of the coast, Ecuador also produces a stunning variety of fruits and vegetables, most notably bananas, melons and other exotic fruits like guava and passion fruit.
This is a short cut version of their ‘arroz con camarones’ (rice & shrimp) dish. Great little meal!
Print Recipe
Cheesy Shrimp & Rice Casserole
Votes: 3
Rating: 4.33
You:
Rate this recipe!
|
|
Votes: 3
Rating: 4.33
You:
Rate this recipe!
|
Instructions
In a large skillet, saute onions, peppers & garlic in oil until tender-crisp, about 5 minutes. Stir in tomato sauce & salsa; simmer 2 minutes, stirring occasionally. Stir in shrimp & corn; simmer 2 minutes. Stir in bacon.
Preheat oven to 375 F. Spoon cooked rice in a buttered, 9 X 13-inch baking dish; top with shrimp mixture & cheese. Cover with foil. Bake casserole, covered, 35 minutes or until heated through, uncovering the last 20 minutes.

What to call it — an omelette, frittata or quiche? While this trinity of brunch egg dishes all contain eggs, the preparation methods vary. All are delicious but here’s what defines them.
The traditional French omelette contains eggs, a splash of water and a pinch of salt and pepper. The briskly whipped eggs are cooked in clarified butter then turned out of the pan when still a little custardy and unset. These (colorless) omelettes are rolled up like a business letter and served with only a few herbs. In North America, we seem to want to ‘clean out the fridge’ so to speak, adding just about anything and everything. This version is cooked until mostly dry on top and golden on the bottom. As a rule, they are folded over once, then served.
Frittatas are generally thicker than omelettes. The ingredients are mixed in, instead of sprinkled on. While started on the stove, sometimes they are finished under the broiler then served in slices like a pie.
Quiche, on the other hand, is a savory custard baked in a pastry crust or a potato crust. Quiche gets its richness from the addition of whole milk, half & half or even heavy cream. Just to add another twist to the mix — enter the ‘crustless quiche-omelette’.
This particular meal at our house, was one of those ‘clean out the fridge’ ideas that turned out absolutely wonderful. I had posted the salmon/dill scones on a blog a number of years ago. They made an ideal compliment for this meal.
Print Recipe
Baked Avocado Bacon Omelette with Salmon/Dill Scones
Votes: 1
Rating: 5
You:
Rate this recipe!
|
|
Votes: 1
Rating: 5
You:
Rate this recipe!
|
Instructions
Baked Omelette
Preheat oven to 350 F. Spray a deep pie plate with cooking spray.
In a skillet, saute bacon until cooked but not real crisp; dry on paper towel & crumble. Add onions, mushrooms & garlic to skillet, sauteing in bacon drippings until tender crisp. Chop tomato & 1 avocado. Grate cheese. In a bowl, whisk together eggs, milk, salt & pepper. Add all prepared ingredients; gently stir.
Pour mixture into pie plate distributing evenly. Bake 35-40 minutes, rotating once half way through. Let omelette cool for 5 minutes. Top with remaining sliced avocado & serve.
Salmon/Dill Scones
Preheat oven to 350 F. Line 8 muffin cups with paper liners. In a bowl, mix together flour & baking powder. Add grated cheese, smoked salmon & dill. In a separate bowl, whisk egg, buttermilk & oil.
Place half of the wet ingredients into the dry ingredients & stir well. Then add the rest of the wet ingredients & mix until completely combined. Spoon into paper liners until each is filled halfway, then place a heaping tsp of cream cheese in the middle of each scone. Divide the rest of the batter between the 8 cups.
Bake for 10 minutes, rotate pan & continue to bake for another 10 minutes or until scones are just browning on top & test done.
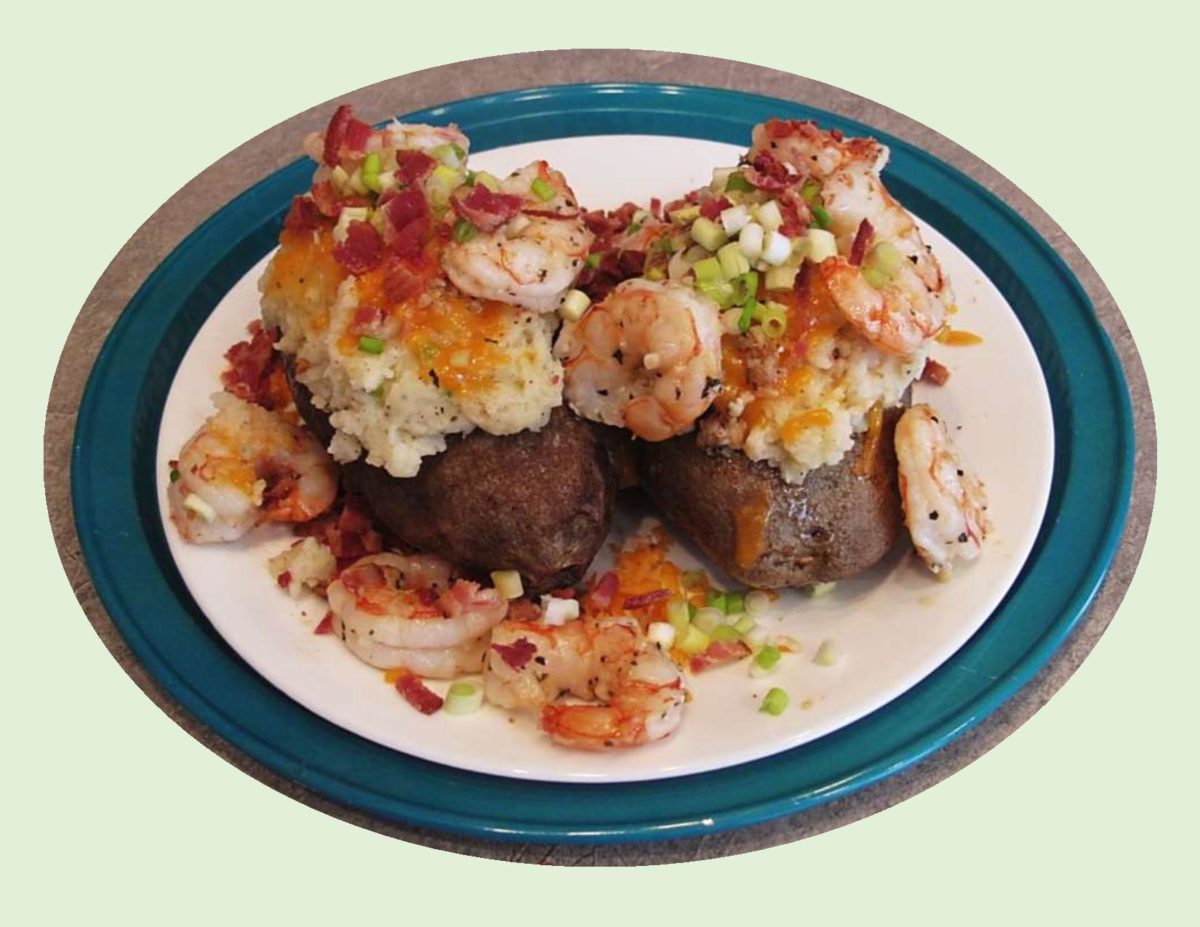
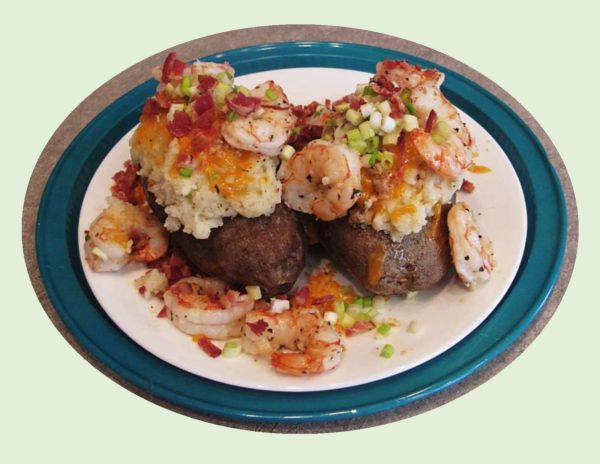
Shrimp makes for a unique and elegant twist on a stuffed baked potato. For most part, a baked potato with a pat of butter and a little salt is just great on its own. But stuff them, with an assortment of savory ingredients such as shrimp, oysters or ground meat and it easily constitutes a whole meal.
I think my first encounter with this idea came when the Wendy’s restaurant chain introduced the Stuffed Baked Potato to their menu in 1983. Their original goal was to give the customer another choice or alternative to the same old ‘fries’. I think it retailed for 99 cents at the time. The one I remember having a couple of times was with the cheese sauce and fresh broccoli. It tasted great to me, not being a fried food lover. Of course, since then the whole concept has been ratcheted up in both flavor and eye appeal.
For Canadians, barbecue season lasts until the first snow falls (sometimes even a bit after). This is a meal that can easily be cooked on the BBQ as well as in the oven and it is soooo– good!
Print Recipe
Stuffed Baked Potatoes with Garlic Shrimp
Votes: 5
Rating: 5
You:
Rate this recipe!
Ingredients
Gourmet Stuffed Baked Potatoes
Ingredients
Gourmet Stuffed Baked Potatoes
|
Votes: 5
Rating: 5
You:
Rate this recipe!
|
Instructions
Stuffed Baked Potatoes
-
Preheat oven to 400 F. Rub potatoes with oil & place on a baking sheet. Bake about an hour or until soft to the touch. Let stand until cool enough to handle. Cut a slice off the top of each potato lengthwise. Scoop out pulp, leaving a thin shell. Place pulp in a large bowl & mash.
-
In a small skillet, fry bacon until crisp. Drain on a paper towel & crumble. Saute green onions in 1/4 cup butter until tender. In a small dish, stir Ranch dressing powder (mix) into sour cream & add to potato pulp along with milk, salt & pepper. Fold in half of the cheese. Divide mixture between potato shells & drizzle with remaining butter. Place baking pan on BBQ where the heat is lower & warm potatoes through while shrimp is cooking.
Garlic Shrimp
-
In a foil BBQ pan, Gently combine shrimp, olive oil, garlic, oregano, basil, parmigiana-reggiano, salt & pepper. Roast until pink, firm & cooked through, about 6-8 minutes.
To Serve
-
On each serving plate, place a stuffed potato, top with shrimp & garnish with crumbled bacon & remaining cheese.
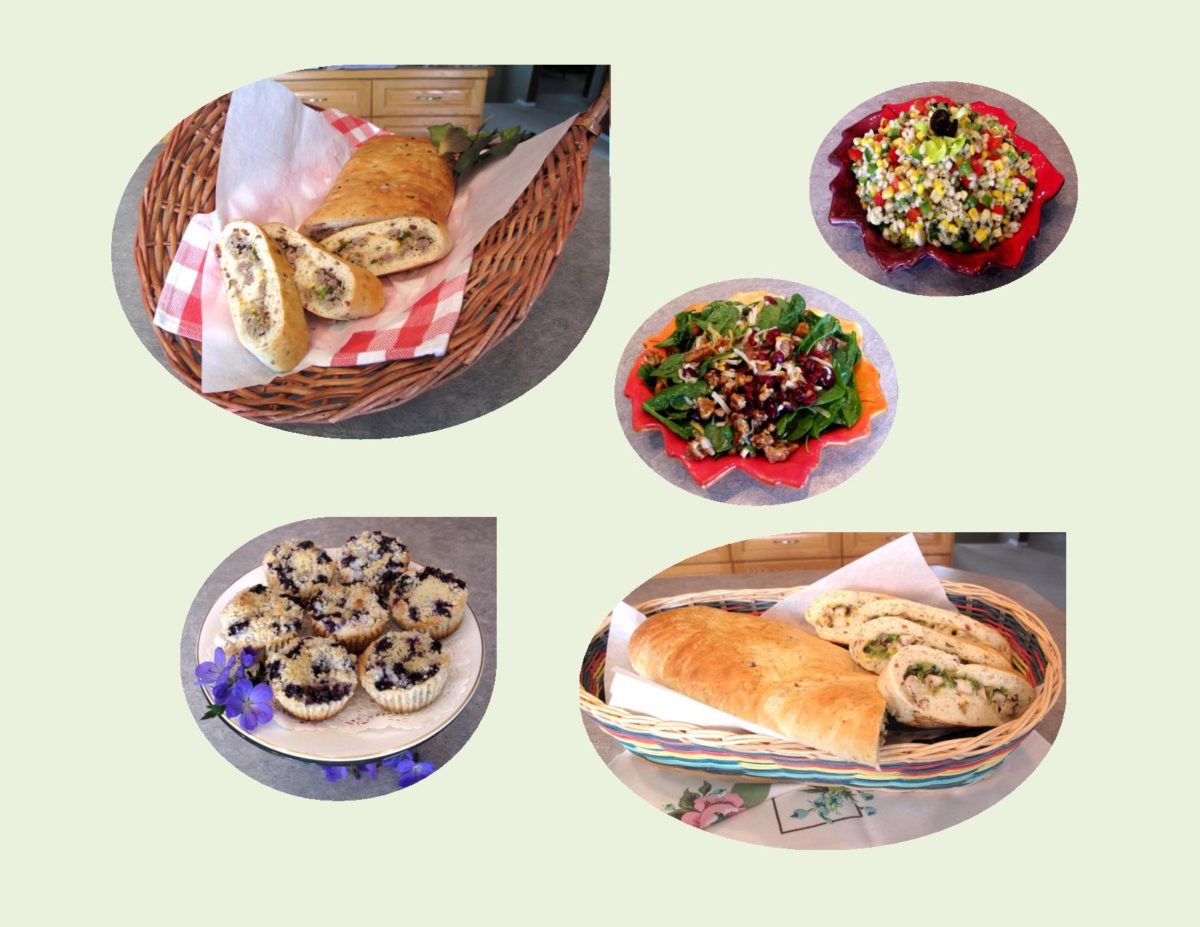
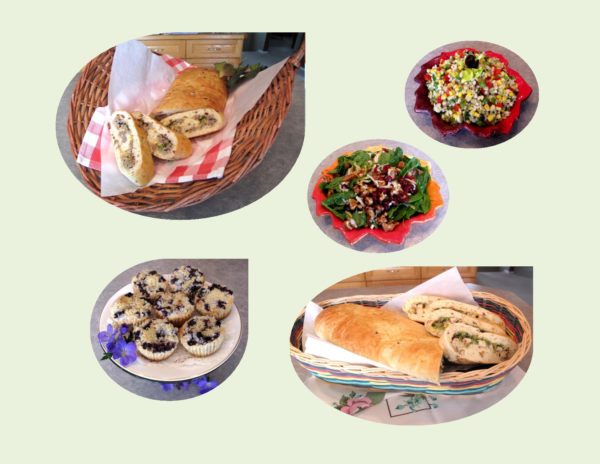
MENU
SPICED CHICKEN POTATO LOAF * SAVORY PORK POTATO LOAF
BARLEY, CORN & PEPPER SALAD * CANDIED NUT & GORGONZOLA SALAD
SOUR CREAM BLUEBERRY TARTS
Print Recipe
Savory Pork Stuffed Potato Loaf
Recipes from some of this picnic menu are featured in previous blog posts.
SPICED CHICKEN STUFFED POTATO LOAF - from April 8/16.
SALADS - from June 9/16.
SOUR CREAM BLUEBERRY TARTS - from July 7/16.
Votes: 1
Rating: 5
You:
Rate this recipe!
|
|
Votes: 1
Rating: 5
You:
Rate this recipe!
|
Instructions
Savory Pork Filling
In a large bowl, combine water & seasonings. Add pork & mix well. In a skillet, cook pork mixture until no longer pink. Remove from heat; drain on paper towels while it cools.
Potato Loaf
Boil potato, mash & cool. Fry bacon, drain & crumble. In a small bowl, combine yeast with lukewarm water; whisk until yeast is dissolved. Let stand about 3 minutes until foamy. Add butter, salt, sour cream & potato; mix well. Add bacon; mix until just combined.
Stir in flour, one cup at a time. When dough is completely blended, turn onto a lightly floured surface. Knead dough about 10 minutes, until smooth & elastic. Place dough in a lightly greased bowl, cover with plastic wrap & let rise in a warm place until doubled in size, about 1 hour.
Remove risen dough from bowl, turn onto lightly floured surface; roll dough to about a 12" x 15" rectangle. Place a large piece of parchment on a sheet pan. Roll dough onto your rolling pin then unroll onto parchment paper. Place 1/2 of the cheese down the center of dough, top it with pork, green onions & remaining cheese.
Fold short ends in about 1". Using parchment, roll from the long side in a jelly roll fashion. Press down slightly to make a flatter shape. Cover with plastic wrap; allow to rise for 15 minutes while preheating oven to 375 F. Brush with egg wash if preferred. Bake for 25-30 minutes until golden.
Recipe Notes
- If time is of the essence, use purchased frozen bread dough or pizza crust.
- This picnic is definitely favored by men due to the 'hearty' potato loaf sandwiches.


