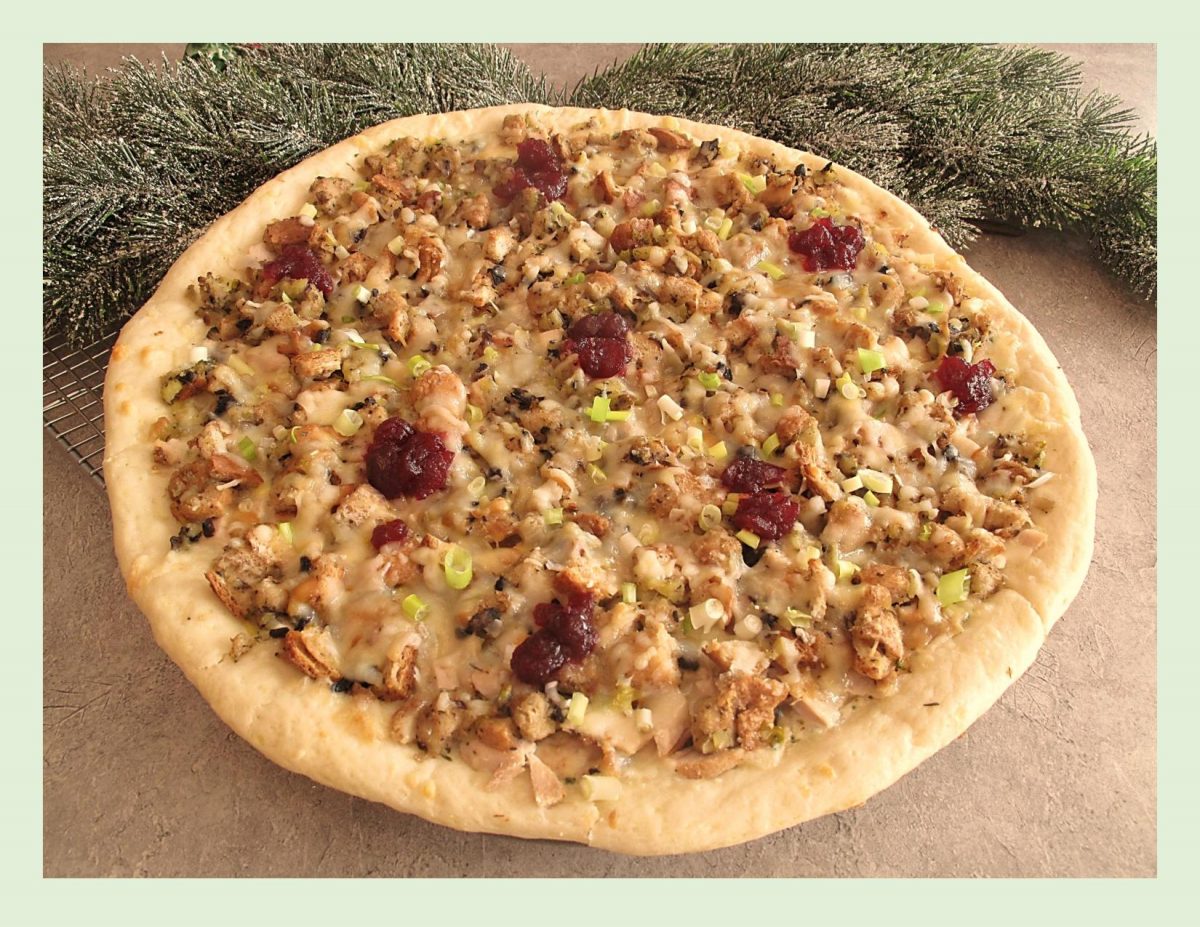
In 2019, Boston Pizza, a Canadian pizza chain created a Christmas pizza which literally consisted of a turkey dinner on top of a pizza crust.
The most notable aspect of their Christmas pizza was the ‘singing box’ it came in. The company had an advertising agency create a caroling delivery box. Using a play on ‘Carol of the Bells’, the jingle ran through the components of the holiday menu item: ‘cranberry sauce, gravy on top, turkey as well and also cheese. Why the cheese? Cause we love cheese, turkey & cheese, four kinds of cheese’.
Like those musical greeting cards that emit tinny tunes when you open them, the ‘Chorus of the Pizza’, playing box reportedly operated using a light senor device. When the box was opened, the music played, as soon as it closed, silence.
The singing box was to replicate carolers coming to your door, but it was better because they brought pizza and you didn’t have to stand awkwardly listening to people sing to you.
I’m not sure if Boston Pizza is using this kind of promotion in 2020, but based on their ad from 2019, I developed a Christmas pizza ‘copy cat’ recipe. Great taste and a nice way to use some leftover turkey.
Print Recipe
Christmas Turkey Pizza
Votes: 1
Rating: 5
You:
Rate this recipe!
|
|
Votes: 1
Rating: 5
You:
Rate this recipe!
|
Instructions
Pizza Dough
Cook potato, peel, mash & cool. In a small container, combine yeast with lukewarm water; whisk until yeast is dissolved. Let stand about 3 minutes until foamy.
In a large bowl, combine yeast/water, butter, salt, sour cream & potato; mix well.
Stir in flour, one cup at a time. When dough is completely blended, turn onto a lightly floured surface. Knead dough about 5-10 minutes, until smooth & elastic. Place dough in a lightly greased bowl, cover with plastic wrap. Allow to rise in a draft-free place until doubled in size, about an hour.
Herb Sauce
In a skillet, melt butter; add herbs & cook for 2 minutes. Pour in your choice of either heavy cream OR chicken broth. Heat until hot, about 2 minutes more. Season with salt & pepper to taste. Set aside to cool slightly.
Assembly
-
On a large sheet of parchment paper, roll or press dough into a 16-inch circle. Transfer with paper to either a 14-inch pizza pan or a flat baking sheet.
Carefully spread the 1/2 cup herb sauce over the bottom of the pizza (leaving the outside ring without sauce). Sprinkle a bit of the cheese over sauce then layer with turkey & stuffing. Drizzle with turkey gravy & top with remaining cheese. If you prefer, brush the outside edge of the pizza ring with egg wash.
Bake for 15-20 minutes or until golden brown. Remove from oven & slice.
When you are ready to serve, dot pizza with cranberry sauce or just let everyone put on their own.
Recipe Notes
- As an alternate to the herb sauce, using 1/2 cup bottled lite Alfredo sauce w/ Parmesan cheese makes a good choice.

Italy, often regarded as the home country of pasta, still has a deep love for another popular dish called risotto. Risotto like pasta can be dressed with an endless variety of ingredients.
Mushroom risotto is a delicious variation on this classic dish. The beauty of mushroom risotto is in its earthiness of the mushrooms you choose. Italians make mushroom risotto with fresh porcini mushrooms when they are in season in spring and fall. If you are unable to find some at an Italian store, dried porcini mushrooms make an excellent substitute in this recipe.
The key to preparing items en croute is that however long it takes to cook the pastry until its golden brown, is how long the item will spend in the oven.
Normally, Beef En Croute can be an expensive proposition. By using a well seasoned ground beef instead of ‘Beef Tenderloin‘, it can be transformed into a more economical meal but still have a degree of richness & elegance to it.
Print Recipe
Beef w/ Porcini Risotto en Croute
Votes: 1
Rating: 5
You:
Rate this recipe!
|
|
Votes: 1
Rating: 5
You:
Rate this recipe!
|
Instructions
Risotto
Dice onion & garlic finely. Melt 2 Tbsp butter in a saucepan & cook until tender soft. Add risotto mix along with hot chicken broth. The rice should be soft cooked in about 20 minutes. Stir in Parmesan & 1 1/2 tsp butter. Your mixture should not be loose or dry. Set aside to cool.
Beef
In a saucepan, saute ground beef along with diced onions, garlic & spices. Cook ONLY until beef is no longer pink. Remove from heat & allow to cool.
Mushrooms
Brush mushrooms with a clean damp cloth & slice. Heat oil in saucepan & saute mushrooms with thyme to release some of their moisture. Remove from heat & set aside to cool.
-
Assembly
-
Brush one of the puff pastry sheets with egg white. Down the center of the pastry sheet, spread the risotto & top with half of the mushrooms. Next, top with the spiced beef & remaining mushrooms.
Lay the second sheet of pastry on top & either braid the edges or press pastry together with a fork. Beat together egg yolk & remaining white plus a bit of water. Brush pastry evenly with beaten egg. Bake until golden about 20 - 25 minutes.
Recipe Notes
- When using dried mushrooms for this or any dish, soak them in boiling water for 30 minutes, strain the liquid, & add it to your dish or save for another day. In this preparation, add it to the broth.

It probably seems odd that I would post this meal today instead of around St. Patrick’s Day. The truth of the matter is, corned beef is really not an Irish classic as most would think. So for us, it’s just a case of enjoying corned beef in a pot pie.
You cook this dish the same way you would cook chicken pot pie. Instead of roasting the corned beef myself, I picked some up at the deli counter. I had them slice it about 1/4″ thick then I cut it into small cubes. Logic would tell you that a ‘beef’ pie needs beef gravy, but corned beef is different. I used chicken broth in the white sauce, which is delicate enough to allow the flavor of the corned beef to come through nicely.
There is often debate whether pot pies should have one or two crusts. For me, its just whatever appeals to me when I’m making some. Today, since I’m using frozen puff pastry, I went with just a top crust. Draped over them, gave such a rustic look … just for the sake of eye appeal.
Print Recipe
Corned Beef & Cabbage Pot Pie
Votes: 4
Rating: 3.5
You:
Rate this recipe!
|
|
Votes: 4
Rating: 3.5
You:
Rate this recipe!
|
Instructions
In a large Dutch oven or pot, melt butter over medium heat. Add potatoes, carrot & cabbage & cook, stirring, for about 5 minutes. Add flour & cook, stirring, for about 1 minute more. Add chicken broth, milk, mustard, thyme, salt & pepper. Stir to combine. Bring mixture to a boil, then reduce heat to simmer. Simmer 15-20 minutes, or until vegetables are tender. Stir in corned beef & cheese, cook, stirring until cheese has melted. Taste to adjust seasoning as necessary. Remove from heat & allow to cool 15-20 minutes.
Cut thawed puff pastry sheets to suit your preference. I used 4 - 14 oz. (414 ml) ramekins with a top crust only.
Preheat oven to 425 F. Place ramekins on a baking sheet & spoon cooled filling in to them. Place pastry squares over top. Cut several slits in the middle to allow steam to vent. Combine egg with water & brush top of puff pastry with it.
Bake for about 20 minutes or until puff pastry is golden & filling is bubbling. Allow to stand 5 minutes before serving.

EASTER GREETINGS!
Easter is synonymous with spring, it represents a time of renewal. The winter months are now in our rear view mirrors and we can look forward to those wonderful summer days. Fresh new buds are on the trees, just waiting to burst out as the season unfolds. Everything speaks of new life and fresh hope. Spring is so unique (even if we still have snow on the ground in our part of the country).
Though ham is traditional in many homes, there are just as many people who would prefer something different for dinner on Easter Sunday. Holiday cooking is all about making a meal that feels more special than what you would cook on a regular basis.
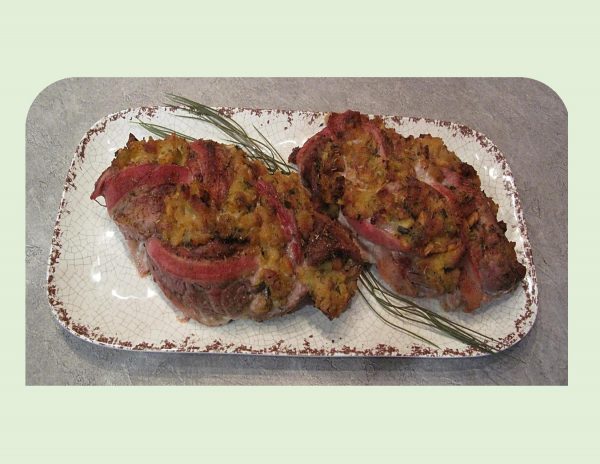
Pork tenderloin is one of my favorite meats due to its tenderness and versatility. This meal started out with an idea to stuff a tenderloin and developed into so much more. I must say, I was even more pleased with the final results when we both enjoyed it.
Print Recipe
Braided Pork Tenderloin w/ Pineapple Stuffing
Votes: 1
Rating: 5
You:
Rate this recipe!
|
|
Votes: 1
Rating: 5
You:
Rate this recipe!
|
Instructions
Pineapple Stuffing
Drain pineapple; reserving 1/3 cup juice. In a large saucepan, melt margarine. Add walnuts, celery & sage; cook stirring until celery is tender-crisp. Stir in green onions, pineapple & reserved juice. Remove from heat; toss in cornbread stuffing mix & set aside.
Tenderloin
Using a sharp knife starting 3-inches from end, slice tenderloin lengthwise twice; making 3 equal strips. Carefully take the knife & cut pockets lengthwise every 3-inches in the center of each of the tenderloin strips. Spread the combined rub ingredients over meat & allow to stand at room temperature for about 20 minutes before continuing with preparation.
When meat is marinated, stuff each pocket with pineapple stuffing. Place a strip of bacon along each tenderloin strip. Braid the stuffed tenderloin/bacon by crossing the right section over the middle section then the left section over the new middle section. Continue until you run out of tenderloin.
Insert a wooden or metal skewer into the end of braided tenderloin to keep it together. Tuck in the remaining stuffing mixture in the folds of the braid.
Preheat oven to 425 F. Bake, uncovered for 25-30 minutes or until meat thermometer reads 160 F. Remove from oven & loosely cover with foil. Allow to rest for 3-5 minutes before slicing. Serve with pineapple salsa.
Pineapple Salsa
In a large skillet, combine pineapple, sugar, vinegar, lime juice, red onion, cumin, salt & pepper. Bring to a boil & cook over medium-high heat until thickened, 7-10 minutes. If there is still a lot of liquid left, use a slotted spoon to transfer the pineapple to a bowl & continue to cook the liquid over high heat for 5 minutes more, then pour the liquid over the pineapple. Mix in the onions & cilantro. Season with salt to taste.

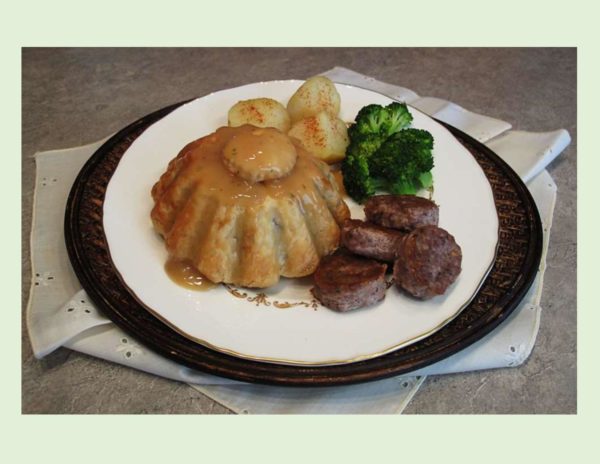
Mushroom Wellington is a vegetarian spin on the French classic ‘beef wellington’. The original is an elegant meal, using a beef tenderloin covered with liver pate’, wrapped in pastry and baked. The key to preparing items in this fashion, is that however long it takes to bake the pastry to a golden brown is how long it will be in the oven. In other words, the filling needs to require less time to cook.
A plant based filling makes that even easier to achieve than its meat filled cousin. The use of different types of mushrooms cut into varying sizes gives the dish texture and heartiness along with an earthy flavor. The secret to a deliciously juicy yet flaky mushroom wellington is to drain everything dry and make sure it is completely cold before wrapping it in the puff pastry. Skip this step and your pastry is not only going to be soggy, it will tear when you try to wrap up your wellington. Believe me — ‘bin there, done that’!
Although this would probably be the center piece of a vegan meal, it works beautifully as an accompaniment to meat and roast veggies as well.
Print Recipe
Mushroom Wellington
Votes: 1
Rating: 5
You:
Rate this recipe!
|
|
Votes: 1
Rating: 5
You:
Rate this recipe!
|
Instructions
Mushroom Wellington
-
In a skillet, fry diced bacon until crispy. Remove bacon to paper towels & blot dry, leaving drippings in skillet. Chop mushrooms, onion & garlic. Saute veggies with spices in bacon drippings until moisture has evaporated. Remove from heat, add bacon & drain or blot off any excess moisture. Cool mixture completely then add cold, cooked Basmati rice, stirring to blend. While the mixture cools prepare vegetable gravy if you are using it.
-
Preheat oven to 400 F. Line your choice of preferred baking pan mold with thawed puff pastry. You should have excess enough to fold over the 'top' of filling. This will form the bottom of your wellington when baked. In each wellington, place 1/4 of the filling, topping each with 50 gms of the cheese. Divide remaining filling between the two wellingtons & fold the excess pastry over it.
-
If you choose to make a decoration for your baked wellingtons, cut it from some of the excess before closing them. Bake the decorations on a separate pan. Place molds on a baking sheet & bake for about 35 minutes or until pastry is cooked. Remove from oven. I like to flip them onto paper towel at this point just to blot off any excess butter from pastry. Do what you prefer in this case.
Vegetable Gravy
-
In a saucepan, bring water to a boil. Add bouillon powder, garlic, carrot, celery & onion. Cover & simmer until veggies are very soft. Remove from heat & cool slightly. Puree in food processor or blender. Combine cornstarch & water in a small dish. Stir into puree; return to heat & stir until boiling & slightly thickened. Stir in sour cream IF USING. Serve over mushroom wellingtons.
Recipe Notes
- If you prefer, omit bacon & use butter to saute your veggies in making it a more vegetarian friendly entree.

Pasta shells, filled with a range of flavors and baked in a creamy sauce — what’s not to like? I think my love affair with stuffed pasta shells started somewhere in the 90’s. The versatility of this meal makes it king of the comfort food dinners served family style. Easy to prepare, makes everyone happy and are perfectly portioned for individuals and groups alike.
Another bonus, is that this meal can be prepared ahead of time and refrigerated. The concern with reheating pasta is always that the pasta will absorb any additional sauce or liquids as it is sitting in the fridge. In order to make this meal ahead of time, cook pasta and stuff shells but keep the sauce in a separate container. When ready to serve, microwave sauce just until its liquified, pour over pasta shells and bake until hot and bubbly.
Unbaked shells can be frozen for up to one month. To bake from the freezer, first thaw in the refrigerator, then let them stand at room temperature for 30 minutes. Cover and bake for 30 minutes, uncover; bake 10-15 minutes longer until bubbly.
The hickory smoked bacon in these pasta shells adds such a unique flavor to the turkey filling.
Print Recipe
Turkey & Hickory Bacon Stuffed Pasta Shells
Votes: 1
Rating: 5
You:
Rate this recipe!
|
|
Votes: 1
Rating: 5
You:
Rate this recipe!
|
Instructions
Sauce
In a small saucepan, melt butter; stir in flour & cook until lightly browned. Slowly whisk in chicken broth. Add mustard & cook until thickened, stirring constantly. Set aside.
Pasta & Filling
Cook pasta shells in boiling, salted water with a few drops of oil added for 10-12 minutes. Drain, rinse in cold water, drain again. Grate Gouda cheese. In a saucepan, fry bacon to a soft crisp stage, blot on paper towel & chop.
In a large bowl, combine ground turkey, onion, garlic, Parmesan, soy sauce, basil, thyme, 1/2 of chopped bacon, salt & pepper. Add a small amount of prepared sauce (to help to hold filling together).
Preheat oven to 350 F. Using a 9-inch baking dish, spread some sauce over the bottom. Divide turkey filling between shells. Place filled shells, single file in pan. Pour remaining sauce over all & top with remaining bacon. Sprinkle smoked Gouda cheese evenly over top. Cover & bake for 30-40 minutes or until filling is cooked.

Having always had a passion for collecting recipes, I recall one of my mothers cupboard drawers being full of recipe pamphlets. I loved sifting through them to find a recipe I could make. Anyone who’s ever checked out the kitchen section of an antique store can attest, recipe pamphlets were once big business. Long before we had access to the internet, home brands like General Mills & Cuisinart regularly released pocket-sized magazines full of tips, recipes and instructions on their products. Glossy covers depicted the recipes inside, the price was right and they were easy to use. There was no reason to buy an expensive big cookbook when it was all here in a pamphlet form.
The Campbell Soup Company had its own kitchen dedicated to pumping out such pamphlets. In 1955, Dorcas Reilly, the recipe supervisor at the time, devised and tested the infamous ‘green bean casserole’ recipe. Her inspiration for the dish was to create a quick and easy recipe around two things most folks always had on hand in the 1950’s. They were green beans and Campbell’s cream of mushroom soup. Reilly’s recipe became immediately popular. This simple combination consisted of green beans, cream of mushroom soup, soy sauce, milk and french fried onions. The idea that it could be made ahead and reheated, made it perfect for holiday dinners. Even in the face of North America’s obsession with fresh, locally grown and artisan foods, its popularity continues.
Like with most iconic dishes, time brings changes and healthier upgrades or just different personal tastes. I’ve never been a fan of those french fried onions, so I opted for a crispy panko topping. Along with fresh green beans and mushrooms I’m using a bechamel sauce. It worked out quite nice.
Print Recipe
Panko-Crusted Green Bean & Mushroom Casserole
Votes: 1
Rating: 5
You:
Rate this recipe!
Ingredients
- 3 slices thick-cut bacon, diced
- 1/2 cup onion, finely chopped
- 2 cloves garlic, minced
- 350 grams wild mushroom blend, chopped
- 3 Tbsp butter,
- 3 Tbsp flour
- 1 cup half & half cream
- 1 tsp Worcestershire sauce
- 1 cup chicken broth
- 60 grams white cheddar cheese OR Parmigiana-Reggiano
- 3/4 tsp dried thyme
- 1/2 tsp salt
- 1/4 tsp pepper
- 454 grams fresh green beans, trimmed, halved & blanced (boil 5 minutes, place beans in ice water for a couple of minutes, drain)
- 1 cup Panko crumbs
- 3 Tbsp butter, melted
|
Votes: 1
Rating: 5
You:
Rate this recipe!
|
Instructions
Preheat oven to 350 F. In a large skillet, fry bacon until almost crisp. Add onions, cook until soft & translucent, about 4-5 minutes. Add mushrooms & garlic; cook another 4-5 minutes until mushrooms are soft. Transfer the mixture to a bowl.
Using the same skillet, melt butter & whisk in flour. Once combined, continue whisking for another 2 minutes until mixture has slightly deepened in color. Add half & half, Worcestershire sauce & chicken broth while constantly whisking to prevent lumps. Once slightly thickened, add grated cheese & whisk until melted & smooth.
Add the mushroom/bacon mixture along with thyme, salt & pepper. Let the sauce simmer for a couple of minutes, then add the blanched green beans. Stir to combine.
Pour the bean mixture into a 13 X 9-inch casserole dish. Combine panko crumbs with melted butter & sprinkle over casserole. Bake uncovered for 30 minutes.
Recipe Notes
- Everything can be done in advance except for adding the panko crumbs. Add those just before baking. Let casserole sit for at least 30 minutes after removing it from the fridge before baking.
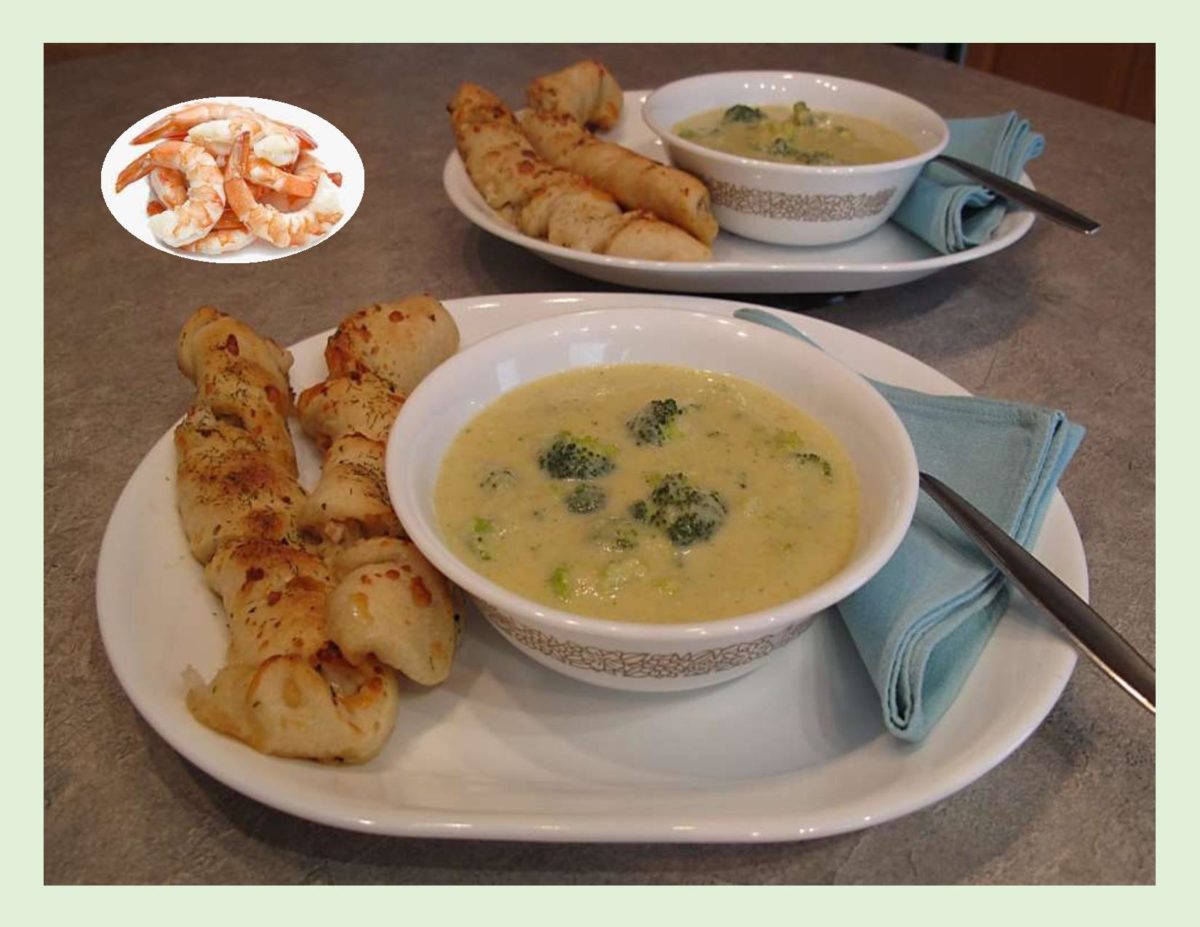
It seems we never get enough of taking just about anything we do to the next level. Case in point would be pizza dough. It started as a very thin, crispy crust and evolved into whatever thickness you wanted to make it. Enter the ‘stuffed’ crust with a ring of cheese encased in the outer edges of your pizza! Then, of course, the actual pizza fillings can be virtually anything that you choose or have available.
Bread sticks, on the other hand, aren’t something that have remained unscathed either. Probably the original simple design was ‘grissini’ (as they are known in Italy). Today’s bread sticks come in many forms from super crispy, thin ones to the larger ones often served with spaghetti and used to mop up excess sauce. Now, here’s where it gets one step better. Enter ‘homemade stuffed’ bread sticks. For inspiration all you have to do is think about all of your pizza toppings. Use them as options for either mixing into your dough or actually stuffing into a bread stick.
Being shrimp and Parmesan lovers, the natural thing for me to do was incorporate both into some bread sticks. The next step was to pair them with a nice light broccoli-cheddar soup. A match made in heaven even if I do say so myself.
Print Recipe
Parmesan-Shrimp Bread Sticks with Broccoli Cheddar Soup
Votes: 1
Rating: 5
You:
Rate this recipe!
Ingredients
Parmesan Shrimp Bread Sticks
Lite Broccoli Cheddar Soup
Ingredients
Parmesan Shrimp Bread Sticks
Lite Broccoli Cheddar Soup
|
Votes: 1
Rating: 5
You:
Rate this recipe!
|
Instructions
Parmesan Shrimp Bread Sticks
Combine all ingredients, in the order listed, in a bowl of a stand mixer fitted with a dough hook. Mix on medium-low until the dough comes together. Continue to mix on medium-low for 5 minutes to knead. Dough is ready when it is stretchy & smooth. Transfer the dough to an oiled bowl, cover with plastic wrap & allow to rise for about an hour or until doubled in bulk.
Bread Stick Filling
Peel, devein & slightly chop raw shrimp; place in a bowl. Grate & slightly chop fresh Parmesan cheese. Combine oil, minced garlic, spices & Parmesan cheese with chopped shrimp.
Preheat oven to 425 F. Line a baking sheet with parchment paper. Punch dough down; on a lightly floured work surface, press dough into roughly an 8 X 12-inch rectangle. Top with shrimp filling & sprinkle with dill weed. Slice lengthwise into 8 strips; fold each strip in half enclosing filling. Twist each strip slightly & lay on baking sheet. Top each bread stick with some grated mozzarella cheese (or you could put it on as soon as they come out of the oven). Bake for 7-10 minutes or until golden brown. Serve warm with soup.
Broccoli-Cheddar Soup
In a large saucepan, saute onion & garlic in olive oil until tender. Stir in flour; cook for 1 minute. Gradually whisk in broth. Bring to a boil; cook & stir for 1-2 minutes or until slightly thickened.
Add the broccoli, tarragon, thyme & pepper; return to a boil. Reduce heat; cover & simmer for 10 minutes or until broccoli is tender. Add milk; cook, uncovered 5 minutes longer. Remove from heat; cool to room temperature.
In a blender, process about half of the soup until smooth. Return to saucepan; heat through. Reduce heat. Add 100 grams of cheese; stir just until melted. Serve immediately, garnishing with remaining cheese.
Recipe Notes
- When time is of the essence and you need to speed up the process, use a tube of purchased refrigerated pizza or bread stick dough instead of making your own.
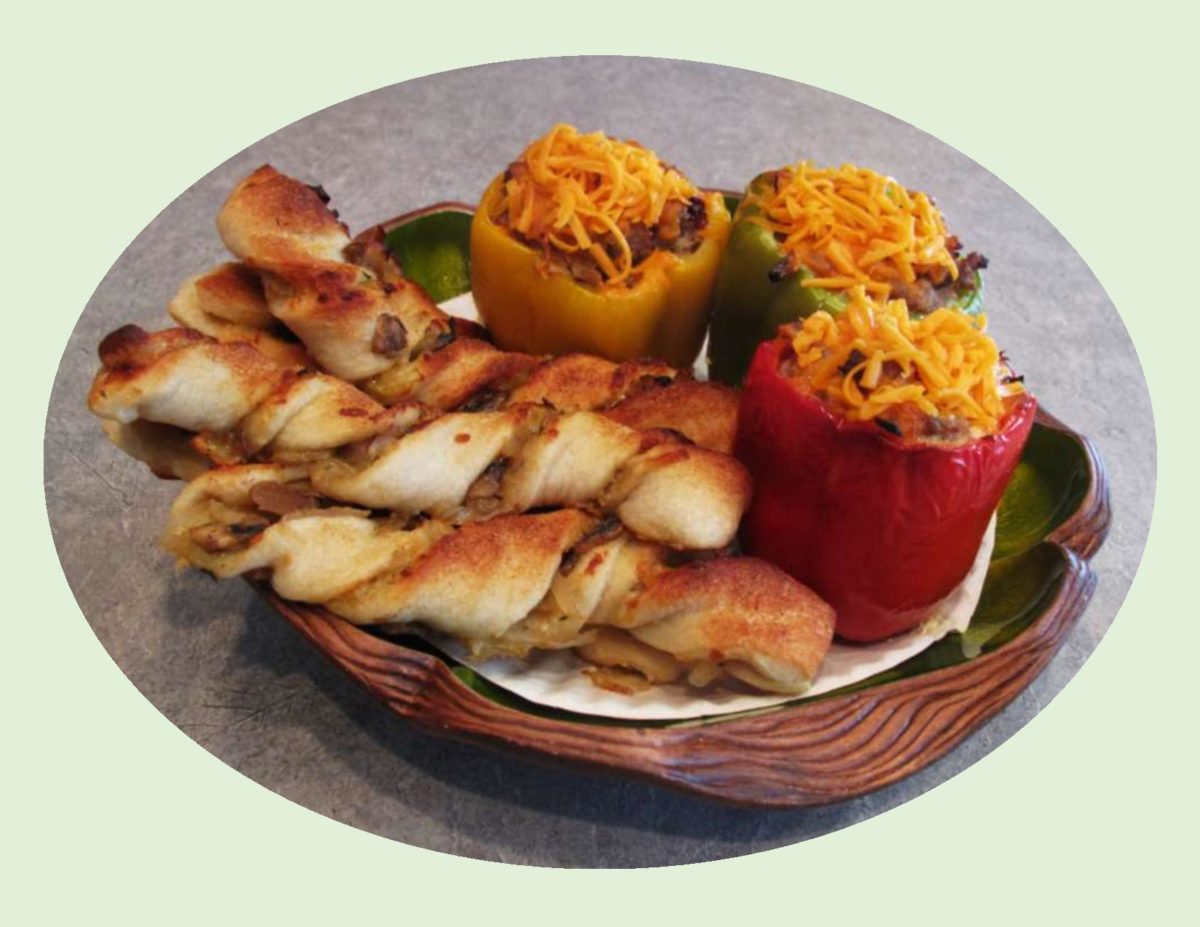
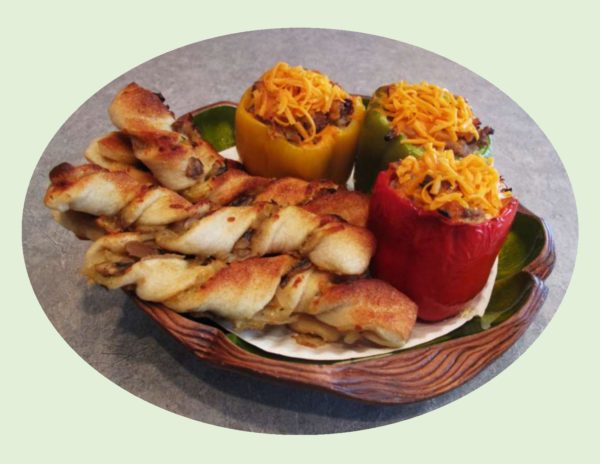
When I think of stuffed peppers, quiche never ever came to mind. I have always enjoyed quiche anytime of day, with or without crust. The idea of using a pepper as your ‘crust’ certainly puts a new twist on the traditional quiche.
I wanted to make these pepper cups for a supper meal and since there was no pastry involved here, bread sticks seemed like a good accompaniment.
Quiche is like making pizza– there are no limits to what the filling can consist of. For our meal today, I just put together a variety of items I had on hand for both the quiche and bread stick twists. It turned out to be real enjoyable and so easy.
Print Recipe
Pork & Pepper Quiche Cups w/ Onion Mushroom Twists
Votes: 1
Rating: 5
You:
Rate this recipe!
|
|
Votes: 1
Rating: 5
You:
Rate this recipe!
|
Instructions
Onion-Mushroom Twists
In a skillet, saute mushrooms & onion in butter until tender. Add thyme & salt; cook 1 minute longer or until blended. Remove from heat & cool slightly. Roll pizza dough into a 16 X 8-inch rectangle. Sprinkle cheese on half of the dough, then top cheese with HALF of the mushroom/onion mixture. Fold un-topped half of dough over topped side; slice into 8 strips to form twists.
Preheat oven to 375 F. Line a baking sheet with parchment paper. Carefully lift & twist each strip before placing on baking sheet. Sprinkle with garlic powder & salt to taste. Bake 12-15 minutes or until golden brown.
Pepper Quiche Cups
In a skillet, place ground pork, water, salt, rubbed sage, black pepper, red pepper flakes & ground ginger. Stir-fry until no longer pink. Remove from heat & drain on paper towel. Chop sun-dried tomato pieces & shred cheese.
In a large measuring cup with a spout, place 1/2 & 1/2 milk, salt & pepper. Add eggs & beat well. Remove stems, seeds & membrane from peppers & stand in a roasting dish that will hold them upright & level. Divide cooked pork, remaining mushroom/onion mixture & sun-dried tomatoes.
Top each pepper with some grated cheddar, then carefully pour in the milk/egg mixture. Bake until eggs are set. If you prefer, 'float' a piece of foil over peppers for the first part of the baking time. It will help the cheese not to over bake.

At the heart of our Autumn cuisine is the squash. The signs of fall are all around us — cool, crisp mornings, the leaves have started to wear their autumn colors and winter squash is appearing in the farmer’s markets.
Winter squash are harvested late summer through fall, then ‘hardened off’ or ‘cured’ in the open air to toughen their exterior. Spaghetti squash is known for its unique flesh that separates into pasta-like strands after it is cooked. These squash are not particularly sweet but have a mild flavor that takes to a wide variety of preparations.
Native people considered corn, beans and squash three inseparable ‘sisters’. They planted the three crops together to create a more nutritious, sustainable soil with the exchange of nutrients between them.
Spaghetti squash has also been called ‘vegetable spaghetti’. In this recipe I’m serving it with tomato-beef meat sauce. Some fresh, homemade, Parmesan bread sticks should make a nice compliment to this meal.
Print Recipe
Vegetable Spaghetti (Squash) with Beef & Tomatoes
Votes: 1
Rating: 5
You:
Rate this recipe!
|
|
Votes: 1
Rating: 5
You:
Rate this recipe!
|
Instructions
Squash
Preheat oven to 375 F. Microwave squash for a few minutes to soften shell. Cut lengthwise & remove membrane & seeds. In a baking dish, place cut side down & bake for 45 minutes until tender. Remove from oven & cool until it can be handled. Using a fork, run it inside the squash to create spaghetti 'noodles'.
Meat Sauce
In a large saucepan, brown ground beef, onions, garlic & mushrooms. Cook until meat is no longer pink. Stir in tomatoes, green pepper & spices. Reduce heat & simmer for 10 minutes.
Serving
Divide spaghetti noodles between 4 serving plates & top each with a quarter of the meat sauce. Sprinkle with grated Parmesan & serve with fresh bread sticks.