CELEBRATING HERITAGE DAY!
In 1974, the first Monday of August was made an official provincial holiday to recognize and celebrate the varied cultural heritage of Albertans. Businesses can choose whether or not to recognize the day as a general holiday, which most do.
The Heritage Festival held in our city of Edmonton, Alberta Canada is a three-day event to sample delicious food, see creative performances and celebrate Canada’s multiculturalism. Thousands of visitors come to enjoy the tastes, smells and sounds of different nations around the world.
Even though many people will take in the day’s events and cultural food at the festival, some choose to pack a picnic lunch and take a drive somewhere just to relax.
I am posting a seafood stromboli today that should work well with that idea.
Heritage Festival in our city of Edmonton, Alberta Canada is one of the world’s largest multicultural events, taking place every August. It features over 70 pavilions representing almost 100 countries set up in William Hawrelak Park. All ethnic minorities of Canada come together to exchange experiences, entertainment, cultures and to celebrate Canada’s diversity. Thousands of visitors come to enjoy the tastes, smells and sounds of different nations around the world.
Print Recipe
Everything Bagel Seafood Stromboli
Votes: 1
Rating: 5
You:
Rate this recipe!
Ingredients
Everything Bagel Seasoning
Ingredients
Everything Bagel Seasoning
|
Votes: 1
Rating: 5
You:
Rate this recipe!
|
Instructions
Seasoning
Mix everything bagel seasoning ingredients together & set aside.
Seafood Filling
In a large saucepan, heat olive oil over medium heat. Sauté onion, garlic, mushrooms & seasonings in the oil. When onions are slightly softened, stir in shrimp & scallops. Let simmer uncovered for 5 minutes, stirring occasionally.
Add alfredo sauce & cheese, stirring until cheese is melted. Let simmer uncovered for another 5 minutes Taste & add salt & pepper if necessary. Remove from heat & let cool for 10 minutes or until ready to use.
Dough
In large bowl, dissolve sugar in warm water. Sprinkle yeast into water & let sit until frothy. In a separate bowl, combine flour, Italian seasoning & salt.
Stir oil into yeast mixture. Add flour & with a fork, combine into a shaggy dough. When dough is completely combined, turn dough out onto a work surface & knead dough for about 5 minutes, until smooth and elastic. Place dough in a lightly greased bowl, cover with plastic wrap & let rise in a warm place until doubled in size, about 1 hour.
Assembly/Bake
-
Remove risen dough from bowl, turn onto a large piece of parchment paper. Roll dough out to about a 12" X 14" rectangle. With a straight edge, make parallel horizontal cuts in the dough at 1" intervals down both sides. Your strips should be cut in 4" from outer edge on both sides, leaving a 1" border at the top and bottom.
Leaving the pastry on the parchment, move it to an 11 3/4 x 4-inch ribbed semi-circle bread pan. The strips will now be hanging down the sides of the pan. Gently press the pastry to conform to the shape of the pan making sure your pastry comes all the way to the top of the pan at the ends.
Place filling in the pastry. Starting with the top right-hand strip of dough, fold it over the filling. Cross the top left-hand strip over the filling. Continue alternating strips to create a braided effect.
Make sure both ends are sealed well then brush the top of stromboli with egg wash & sprinkle with bagel seasoning.
Bake 45 minutes until golden brown.
Recipe Notes
• For this seafood stromboli I used a European ribbed semi-circle bread/cake pan. The size is bigger than a 9 x5-inch loaf pan so it is quite easy to fit dough/filling into it. If a ribbed pan is not available just go with the contemporary style of rolling the stromboli.
• Brush a simple egg wash over the exposed edges of the dough to help ensure the stromboli seals well & doesn’t burst open as it bakes. To fold, tuck the short sides towards the center, then fold the long side with the thinner border towards the side with the wider border. Aim to fold the stromboli twice, creating 3 layers.
• Once assembled, carefully transfer to a parchment-lined baking sheet. Brush the tops with egg wash for a golden finish, then place in the oven. Be sure to rest the baked stromboli a few minutes before slicing & serving!

A calzone is a savory Italian turnover. It traditionally consists of a cheesy filling in a leavened dough and is served with marinara sauce on the side. The calzone originated in Naples in the 18th century.
The best results come when the filling is not too moist because it can make the dough soggy. Like with a stir-fry, it is also better to have a filling where the ingredients are broken down into bite-size pieces, so the filling is easy to eat.
There is nothing better this time of year than fresh corn and tomatoes. This easy corn, tomato & bacon calzone is the perfect way to celebrate fresh summer produce! Don’t overload the filling with ingredients; make your point with a mixture of a few simple flavors then load it with cheese!
Eating vegetables during their seasons really gives you the best flavors.
Print Recipe
Summer Calzones w/ Corn, Tomatoes & Bacon
Votes: 1
Rating: 5
You:
Rate this recipe!
Ingredients
Filling
- 4 slices bacon, chopped
- 1 shallot, minced
- 2 cloves garlic, minced
- 2 ears corn, husked & kernels cut from cobs
- 1 cup cherry tomatoes, halved
- 4 large mushrooms, sliced & sauteed
- 1/4 cup fresh basil, chopped
- 1 tsp red pepper flakes
- salt & pepper to taste
- 125 gm ricotta cheese
- 150 gm (about 1 1/2 cups) monterey jack cheese, grated
- Cornmeal for sprinkling, optional
- Marinara sauce, for serving
Ingredients
Filling
- 4 slices bacon, chopped
- 1 shallot, minced
- 2 cloves garlic, minced
- 2 ears corn, husked & kernels cut from cobs
- 1 cup cherry tomatoes, halved
- 4 large mushrooms, sliced & sauteed
- 1/4 cup fresh basil, chopped
- 1 tsp red pepper flakes
- salt & pepper to taste
- 125 gm ricotta cheese
- 150 gm (about 1 1/2 cups) monterey jack cheese, grated
- Cornmeal for sprinkling, optional
- Marinara sauce, for serving
|
Votes: 1
Rating: 5
You:
Rate this recipe!
|
Instructions
Dough
In a large bowl, place lukewarm water, honey & yeast; allow to stand for a few minutes until frothy. In another bowl, flour & salt.
When yeast is ready, add the 2 Tbsp of oil. Add flour, mixing with a fork until a shaggy dough forms. Turn onto a work surface & knead dough for about 5-8 minutes, until smooth & elastic. Place dough ball in a lightly greased bowl, cover with plastic wrap & let rise in a warm place until doubled in size while you prepare filling.
Filling
In a large skillet, cook the bacon until crispy. Remove the bacon from the pan & set aside to drain on a plate lined with paper towels.
To the bacon drippings, add the mushrooms, shallot & garlic. Sauté over medium heat for a few minutes then add the corn, red pepper flakes & a pinch of salt & pepper.
Cook for a few minutes then add the halved cherry tomatoes & basil. Cook, stirring frequently, for a couple minutes. You want the tomatoes to just warm through, not to completely break down. Stir in the crisped bacon & remove the pan from the heat so the mixture can cool to room temperature.
Assembly/Baking
On a lightly greased work surface, divide the risen dough into 8 even balls. Roll each ball into an OVAL shape, about 7 x 6-inch size. Divide filling into 8 portions.
On each oval, spoon a couple tablespoons of the ricotta in a straight line on the middle of the dough. Next, spoon a couple tablespoons of the corn-tomato filling on top of the ricotta. Finally, add about 2-3 tablespoons of grated Monterey Jack cheese.
Keep one side free & cut the other side of the dough into thin strips using a knife. Fold the uncut side over the filling first, then continue rolling over the cut side.
Line a large baking sheet with parchment paper & place the ‘calzones’ on it, curving them into a C shape. (Place the side with the ‘strips’ curving to the outside). Brush calzones lightly with egg wash, sprinkle with cornmeal if you wish. Cover with plastic wrap & allow to rise for about 20 minutes.
-
Bake for 25 minutes or until the dough is golden and crisp and the filling is gooey. Allow to cool slightly before serving with warmed marinara sauce.

CELEBRATING CANADA DAY!
In Canada, July 1st marks the day for Canadians to reinforce national unity, sovereignty, and shared values against external economic pressures and to mark the 60th anniversary of the flag. It acts as a unifying force against trade tensions, protects our identity from being absorbed by larger neighbors, and boosts morale.
Today, Canadian pride and sense of belonging have reached their highest levels in years. Being Canadian brings pride through a strong commitment to multiculturalism, inclusivity, and freedom, alongside a reputation for politeness, resilience, and a high quality of life.
From coast to coast the country’s birthday is marked with various events. Barbecues are definitely the preferred choice of food event for the day. Of course, the staple at most barbecues, tailgates and picnics is the classic burger. But a burger doesn’t have to be just a burger. The surf and turf burger is a variation of the surf and turf dish, typically made with minced meat and marine products like lobster, shrimp, or crab.
The concept of ‘surf and turf’ is reported to have originated in the US as a dining trend in the mid-20th century. It refers to a dish that combines both seafood (surf) and meat (turf) in a single meal. While the idea of pairing seafood and meat together has been around for centuries in various forms, the modern surf and turf combination gained popularity in the 1960s and 1970s. The surf and turf burger is a creative twist on this classic concept.
Brion & I thought this was truly a gourmet meal burger in a bun. Much more than just a delicious meeting of ocean and prairie.
Print Recipe
Surf & Turf Burgers
Votes: 1
Rating: 5
You:
Rate this recipe!
|
|
Votes: 1
Rating: 5
You:
Rate this recipe!
|
Instructions
Burgers
In a bowl, combine all seasonings & add ground beef & beaten egg. Lightly combine without overmixing. Form into 4 burger patties. Set aside in refrigerator.
Shrimp
Peel & devein shrimp. Rinse in cold water & dry with paper towel. Toss shrimp in olive oil & Old Bay seasoning. Set aside in refrigerator.
Avocado Steak Sauce
In food processor, add all sauce ingredients. Process on high speed until smooth. Remove from processor & place in a glass dish. Cover with plastic wrap & refrigerate.
Other Ingredients
Slice tomato & red onion. Slice or shred cheese. Very lightly butter hamburger buns.
Cooking / Assembly
Heat a griddle to medium-high & cook shrimp until they are just done, about 1-2 minutes per side. Set them aside.
Place burgers on the griddle & cook them until done or to your liking.
Assemble surf & turf burgers as follows: roll, burger, cheese, arugula, tomato & onion, generous amount of avocado steak sauce, shrimp & top of roll.
-

Chicken parmesan stuffed garlic bread, a perfect fusion of cheesy goodness and garlicky delight. It’s a scrumptious twist on the classic Italian favorite.
Chicken parmesan, also known as ‘chicken parm’, is a dish that originated in the United States from Italian immigrants. The most widely accepted theory is that chicken parm was created in the 1950s, when Italian immigrants began to adapt their traditional dishes to American ingredients and cooking methods. The dish became a popular staple in restaurants serving Italian American cuisine by the 1950s. The first recorded instance of the dish is in a 1953 recipe book called ‘The Italian Cook Book’ by Ada Boni.
Chicken parmigiana as we know it always contains the same basic ingredients: chicken breast, often butterflied, breadcrumbs, Italian seasonings, tomato sauce, and mozzarella cheese. But it wasn’t always that way. In the Old World, that’s Italy prior to the Italian diaspora, the large-scale emigration of Italians from Italy to America, proteins like chicken were not widely available. As such, the original chicken parmigiana was actually made with breaded, fried slices of eggplant in place of chicken for a dish called melanzane alla Parmigiana. This form of the dish originated in Southern Italy, where the poor soil made it difficult to raise animals for food but where enterprising — and thrifty — peasants could scratch out a living growing hardier crops like eggplant. It also thrived in the hot climate of the South.
In North America, most of the time eggplant parmesan is thought of as just the vegetarian version of an Italian American classic. However, it is actually the other way around — eggplant is the original version of this dish.
You would expect a recipe for something with the word ‘parmesan’ in its name to contain just that, but you would be wrong. The cheese most associated with this dish is mozzarella.
This recipe certainly takes chicken parm & garlic bread up a notch. Yum!
Print Recipe
Chicken 'Parm' Stuffed Garlic Bread
Votes: 1
Rating: 5
You:
Rate this recipe!
|
|
Votes: 1
Rating: 5
You:
Rate this recipe!
|
Instructions
Chicken
Slice chicken lengthwise. In a large resealable plastic bag, combine salt, spices & oil; add chicken breast slices. Seal bag & turn to coat.
Preheat oven to 375 F. Line a baking tray with foil paper.
Spread chicken out evenly & bake about 45 minutes or until no longer pink inside. Don't overcook. Remove from oven, cool & chop. Set aside.
Other
Cook bacon & process in food processor for a few seconds, just until a LARGE crumbly texture is reached.
Grate the two different cheeses & combine. Set aside.
Garlic Bread
Cook potato, mash & cool. In a small bowl, combine yeast with lukewarm water; whisk until yeast is dissolved. Let stand about 3 minutes until foamy. Add butter, minced garlic, salt, sour cream & potato; mix well.
Stir in flour, one cup at a time. When dough is completely blended, turn onto a lightly floured surface. Knead dough about 10 minutes, until smooth & elastic. Place dough in a lightly greased bowl, cover with plastic wrap & let rise in a warm place until doubled in size, about 1 hour.
Remove risen dough from bowl, turn onto lightly floured surface; roll dough to about a 9" x 20" rectangle. Place a large piece of parchment on a sheet pan. Roll dough onto your rolling pin then unroll onto parchment paper. Place 1/2 of the cheese down the center of dough, top it with crumbled bacon, chicken & remaining cheese.
Starting from the long side , bring the two sides up to meet in the center & pick dough together firmly. Fold the short ends in about 1-inch & pinch together. Using the parchment paper, roll 'baguette' over so the pinched seam side is on the bottom.
Cover with plastic wrap; allow to rise for 15 minutes while preheating oven to 375 F. Brush with egg wash if preferred. Bake for 25-30 minutes until golden.
Serving
Remove from oven & serve hot with 'pizza sauce' for dipping.

PORK, stuffed with PORK and wrapped in PORK bacon = a total delight for meat lovers!
Pork tenderloin is a wonderful cut of pork that when cooked well, produces a tender meal full of flavor. Wrapping the pork in bacon simply enhances the flavor as, let’s face it – bacon makes everything taste great!!
Bacon wrapped sausage stuffed pork tenderloin is made with a lean pork tenderloin stuffed with spicy Italian pork sausages and herbs, wrapped in pieces of crispy bacon and a spicy pepper crust.
Although there were certain small differences in original Italian sausages, most consist of ground pork seasoned with some combination of fennel, anise, red bell peppers, paprika, garlic, and red pepper flakes. The red pepper flakes are what give the spicy varieties of Italian sausage their signature kick, while fennel is the hallmark flavor that makes Italian sausage distinct from other kinds of sausage.
This sausage typically comes as one of the following three kinds: hot, mild and sweet. The main difference between hot and mild is the addition of cayenne pepper or hot red pepper flakes. The difference between sweet and mild is the addition of sweet basil to the recipe.
All things considered, this combo should make a super good meal!
Print Recipe
Pork Tenderloin w/ Italian Sausage & Herb Stuffing
Votes: 1
Rating: 5
You:
Rate this recipe!
|
|
Votes: 1
Rating: 5
You:
Rate this recipe!
|
Instructions
Butterfly pork tenderloin & pound flat with a meat mallet.
In a saucepan, heat oil & add onion & garlic. Sauté until aromatic. Add Italian seasoning, sage & sausage meat. Cook until browned then add panko crumbs & vegetable broth. Season with salt & pepper to taste. Remove from heat & allow to cool.
Place the sausage mixture on top of the pork tenderloin, leaving about 1-inch around the sides. Tightly wrap the tenderloin into a roll.
Starting at one side, wrap the bacon around the stuffed tenderloin. Overlap, using the bacon to secure the tenderloin from coming apart.
-
In a skillet over medium heat, sear the pork tenderloin roll in a pan on the stove top on all sides.
Transfer bacon wrapped tenderloin into the oven & roast for about 25-30 minutes or until internal thermometer reads 145-150 F.
Allow meat to rest under foil for about 10 minutes before carving.

When most people think of beef and cabbage, soup or cabbage rolls come to mind. But what about rethinking the way we eat this duo?
Beef and cabbage go well together for a variety of reasons. They are both substantial dishes that can handle bold seasonings. Beef and cabbage also have a similar texture, making them easy to combine in a dish. Cabbage’s mild acidity balances the beef’s richness, creating a dish that’s full of nuanced flavor.
The name ‘cabbage burger’ can be a little misleading for people unfamiliar with this culinary delight. It’s not a new type of veggie burger. Instead, it consists of juicy ground beef patties served on flavorful slices of roasted cabbage spread with a tomato sauce and topped off with some melted cheese! The perfect combination of savory, sensational flavors.
Burgers in some context can be found in nearly every part of the world. Over time the concept has evolved, and meat patties are served with an endless variety of creative ‘buns’ and toppings. This is a tasty fusion dish that combines the classic appeal of burgers with the goodness of cabbage, elevating your culinary experience to a whole new level.
Print Recipe
Oven Baked Cabbage Burgers
Votes: 1
Rating: 5
You:
Rate this recipe!
|
|
Votes: 1
Rating: 5
You:
Rate this recipe!
|
Instructions
-
Arrange cabbage slices on a rimmed sheet pan. Brush a little oil on the cabbage slices & season with salt & pepper.
Roast cabbage slices for about 10 minutes to precook them slightly to prevent over cooking the burgers.
In a large bowl, combine ground meat, garlic, green onion, parsley, red pepper flakes half the cheese, salt & pepper. Form the mixture into 4 patties.
Remove the cabbage from the oven & spread a Tbsp of tomato sauce (or salsa) on top. Add a sprinkle of shredded cheese the top with a meat patty. Finally, sprinkle another layer of shredded cheese.
Bake cabbage burgers for 10-12 minutes or until burgers are cooked to your liking & the cheese is melted & bubbly. Serve immediately.
Italian cuisine is renowned for its delicious and aromatic flavors, and one of the most essential ingredients that contribute to this is a blend of herbs and spices that add a distinct flavor to various dishes.
While these herbs are readily available in Italy, they were not always easy to find in America. As a result, early Italian immigrants needed a way to add their preferred flavors to dishes. ‘Italian seasoning’ provided exactly that. Its origins are a bit mysterious, with some people believing it originated in Italy and others insisting it is an American invention. However, the most common understanding is that the Greeks and Romans developed Italian seasoning somewhere in the Mediterranean during ancient times.
Italian seasoning is a mix of dried herbs with an earthy, piney flavor that’s subtly sweet and peppery. This kitchen staple includes dried basil, dried oregano, dried rosemary, dried thyme and dried marjoram, but there are several variations that also feature additions like dried sage, fennel seeds or even spices like garlic powder or crushed red-pepper flakes. Traditionally, though, it is just those five core herbs.
It has become a staple in North American kitchens and can be used to flavor just about anything, but some of our favorite uses are in classic Italian American dishes like meatballs, pizza or chicken Parmesan. It adds extra interest to olive oil for dipping bread or vinaigrette for salads. Or stir it into marinades to infuse your meat with woodsy, herbal flavor.
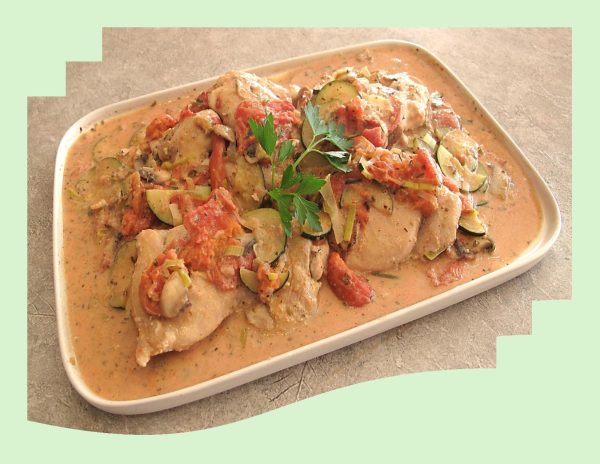
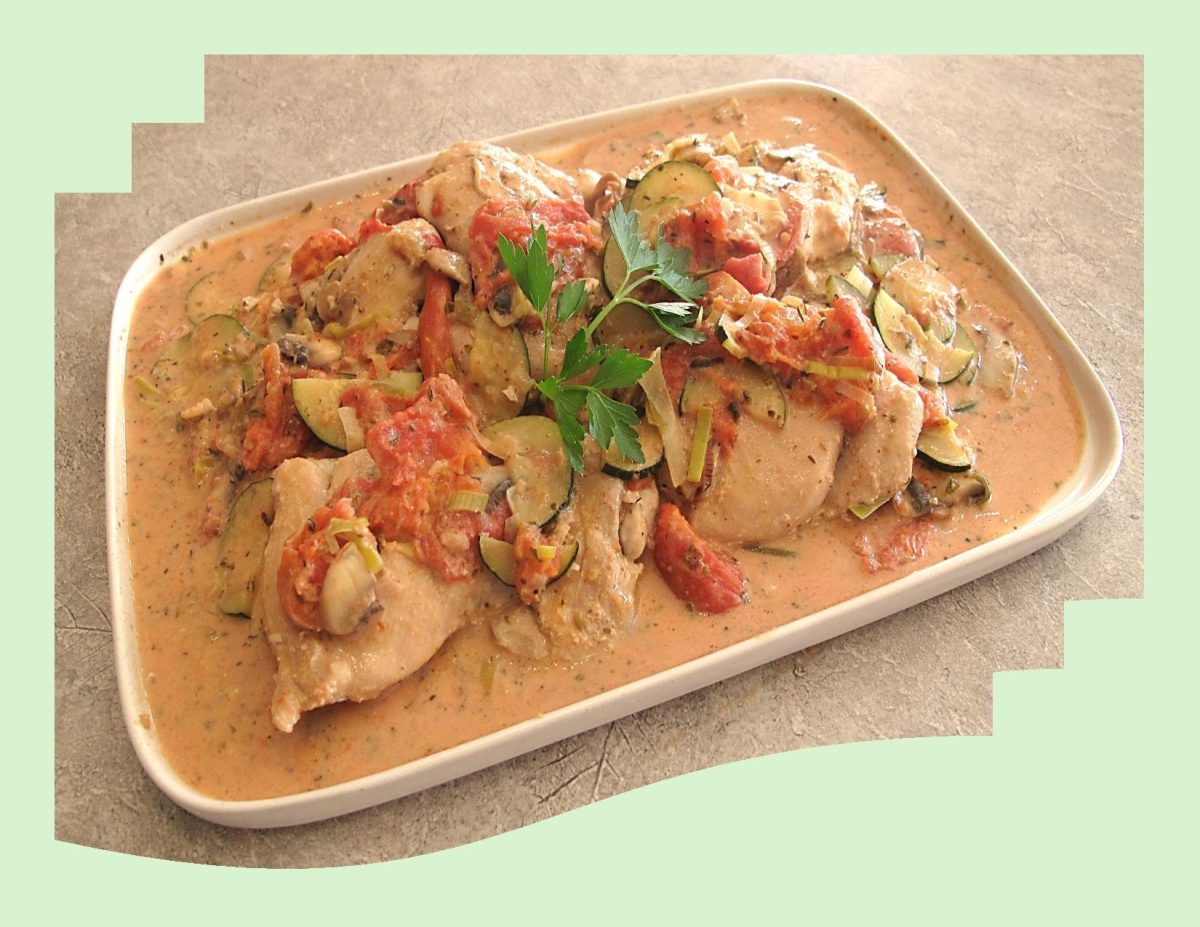
These chicken cutlets cook quickly and are highlighted with a creamy sauce made with tomatoes, zucchini and Italian seasoning. Nice served with roasted mashed cauliflower, brown or Basmati rice or orzo pasta.
Print Recipe
Creamy Chicken Skillet w/ Italian Seasoning
Votes: 1
Rating: 5
You:
Rate this recipe!
|
|
Votes: 1
Rating: 5
You:
Rate this recipe!
|
Instructions
Chicken
In a small dish, combine all chicken seasonings & sprinkle on both sides of chicken cutlets. Heat 1 tablespoon oil in a large skillet over medium heat. Add the chicken & cook, turning once, until browned & cooked through. Transfer to a plate.
Sauce
Add the remaining 1 tablespoon oil, zucchini, mushrooms & onions to the pan. Cook, stirring, until starting to soften, about 2 minutes. Cook, scraping up any browned bits, until the liquid has mostly evaporated, about 2 minutes. Add tomatoes, cream cheese & Italian seasoning. Bring to a simmer and cook, stirring to melt the cream cheese, for 5 minutes. Return the chicken to the pan and turn to coat with the sauce. Serve topped with basil or Italian parsley if desired.
Nice to serve with roasted mashed cauliflower, brown rice, orzo or basmati rice.
Cooking pork with apples could be one of humanity’s most ancient recipes. This combination appears in some of the oldest known cookbooks. The more recent ancient history of apples and pork is easier to decipher since European cooks began recording their recipes from around the fourth or fifth century AD onward. The continent’s earliest recipe collections paint the history of how cooks stewed apples and pork together, and sometimes crushed the fruit into sauces.
The association of pigs with apples is obvious at one level – pigs were often let to graze in apple orchards, where they could feast on the windfalls, so the fruit was converted by the pig’s metabolism into pork, instead of rotting into compost and being ‘wasted’ as a food source. Apples are ripe in autumn, which was also the traditional time for culling the surplus stock that could not be overwintered. The pig was the victim of choice here as much of it was eminently preservable for winter use in the form of sausages, ham, and bacon. The fresh cuts were enjoyed at the time in a fresh meat feast which would be the last for a long time – and as the apples were ripe and in abundance at the same time ….. apple sauce with pork made sense.
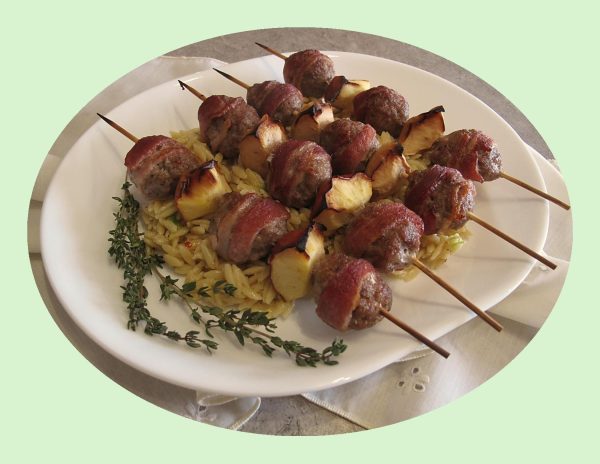
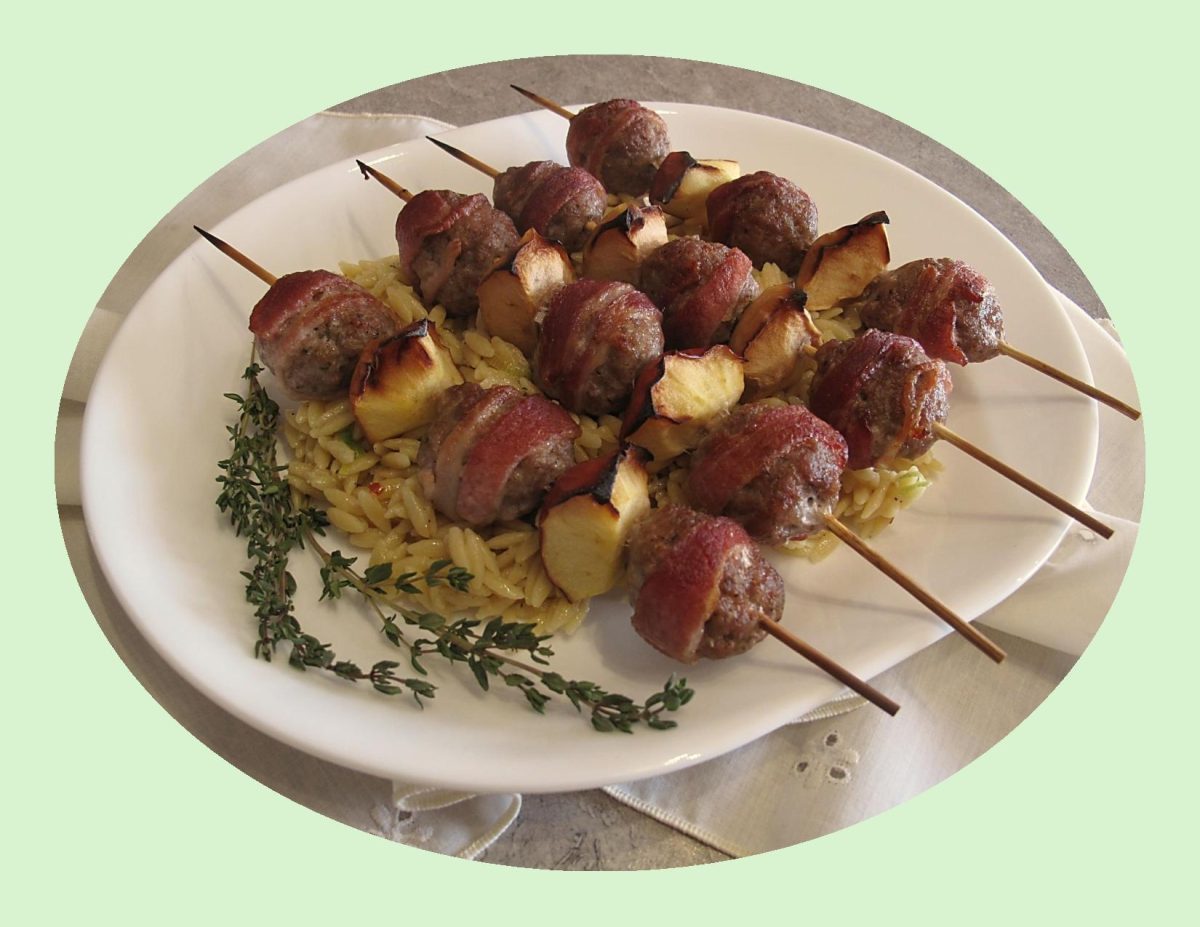
Generally, when I make pork skewers, I like to use pork tenderloin. But when I saw this recipe on the internet, the ingredients and the look got my attention. The idea of wrapping each meatball in bacon and barbecuing them with apple chunks sounded so good. There is something special about the sweet taste of apples and the full flavor of pork that work so well together.
Print Recipe
Pork & Apple Skewers
Votes: 1
Rating: 5
You:
Rate this recipe!
|
|
Votes: 1
Rating: 5
You:
Rate this recipe!
|
Instructions
Soak 5 wooden skewers in cold water for about 30 minutes.
In a bowl, combine all meatball ingredients & form into 18 balls. Wrap each meatball with a half slice of bacon. Prepare apples.
Assemble skewers starting with a meatball then a piece of apple, another meatball, apple & end with a meatball.
Preheat the BBQ to medium heat & cook the skewers on each side to brown the bacon well.
Recipe Notes
- Brion & I enjoyed this meal with some creamy orzo parmesan pasta.

I’m one of those people who almost always has chicken frozen in my freezer, so I’m always interested in ‘another’ chicken recipe.
Marinated in honey, lime juice, soy sauce, and garlic, these honey lime chicken skewers have a tangy, sweet, and salty taste,
A perfect marinade for chicken guarantees the chicken will be flavorful and juicy. So, marinades should always combine an acid (such as vinegar or lime juice), fat, and sweetness. Salt, herbs, and spices also contribute to the end flavor of marinated chicken.
Honey and lime is an all-time flavor pairing. It not only works on sweet things, but it also plays nice with savory dishes. I think the reason it works so well is that it’s got that perfect balance between tangy and sweet. Add in a few savory and salty elements in the rest of the marinade, and the flavors are just mouthwatering.
The honey lime chicken marinade I’m using today infuses the chicken with loads of flavor, but it also helps caramelize the outside of the chicken, so you get not only gorgeous flavor, but a beautiful textural contrast between the crisp, caramelized exterior and the tender, flavorful interior.
Print Recipe
Spicy Honey Lime Chicken
Votes: 1
Rating: 5
You:
Rate this recipe!
|
|
Votes: 1
Rating: 5
You:
Rate this recipe!
|
Instructions
Marinade
Whisk all marinade ingredients together in a small bowl or blend them in a food processor.
Marinate Chicken
Pour HALF the marinade into a zip-lock bag or container & add chicken. Marinate for 30 minutes at room temperature or 6-12 hours in the refrigerator. IMPORTANT: If marinating overnight, leave out the lime juice & increase zest so it doesn't 'cook' the chicken.
Glaze
Use the reserved marinade for basting & glazing. Mix the cornstarch into the reserved marinade & microwave for about 1 minute, watching carefully. Set aside.
Grilling
Spray grill with oil. Heat grill to medium-high heat. Skewer marinated chicken pieces onto skewers & PAT DRY. Discard the marinade used for marinating. Lightly spray chicken with oil to avoid sticking.
Grill on all sides until chicken cooks to a golden brown (you will need to turn chicken a couple of times), for 9-12 minutes in total (depending on the thickness & how tightly packed the skewers are), basting once or twice with the GLAZE.
Any extra glaze can be drizzled over cooked skewers. Serve with lime wedges if you wish. Serve hot or at room temperature.

In 2019 & 2020 Brion & I spent a couple of holidays in the beautiful town of Mérida on the Yucatán Peninsula in Mexico. Of course there were many places to explore such as the archeological sites like Chichen Itza and Uxmal while we were there. If you would like to see pictures and read about some of our adventures in Mérida, you can find them on the website blogs in February 2019 & January 2020.
When I decided to make this chicken meal today the peninsula’s bright and sunny flavors came back to me remembering the chicken lime soup we had tasted there. In Yucatán, the lime they use for this soup is the region’s native lima ágria.
In Mexico, using lime juice is quite common. People squeeze limes over grilled meats, fruits, vegetables, salads, soups, drinks, and even chips. The lime juice brings out the flavors in food in a way best described as ‘bright’. It’s tangy, refreshing, and brings out the best flavors in the food it’s on.
The apricot-lime glaze, with a touch of hot sauce, makes the perfect combo of sweet, sour, and spicy on these chicken thighs.
Print Recipe
Apricot-Lime Glazed Chicken
Votes: 1
Rating: 5
You:
Rate this recipe!
|
|
Votes: 1
Rating: 5
You:
Rate this recipe!
|
Instructions
Heat grill to medium. In a small bowl, combine preserves, lime juice, hot sauce & red pepper flakes.
Season chicken with 1/2 tsp black pepper & grill, covered, turning occasionally 10-15 minutes. Uncover & continue grilling, basting with sauce until chicken is cooked through, 5-7 minutes more.
Bring a large pot of water to a boil. cut each ear of corn into 3-4 pieces. Add corn to pot with 2 tsp salt & simmer until just tender, 3-4 minutes. Drain, transfer to platter & serve with chicken & lime wedges.