These chicken and mushroom crepes are a fantastic summer recipe to serve for lunch or a fancy brunch. The best part about it is most of it can be made the day ahead, leaving just the bechamel sauce, assembly, and baking to the day of your event.
Béchamel sauce is a key ingredient in hundreds of recipes, from simple dishes like creamed peas to elegant cheese soufflés. At one time considered a sauce reserved for the well-do-to, Béchamel today is probably the most frequently made sauce in the Western world.
Also known as white sauce, Béchamel is an ‘ingredient’ sauce – a sauce made to use in another dish or as a foundation for a more complex sauce. It is composed of whole milk heated and thickened with a roux.
The popularity of Béchamel sauce has spread far and wide, and today there are many variations of this sauce found throughout the world.
Print Recipe
Chicken & Mushroom Crepes
Votes: 1
Rating: 5
You:
Rate this recipe!
|
|
Votes: 1
Rating: 5
You:
Rate this recipe!
|
Instructions
Chicken
Preheat oven to 375 F. Place chicken on a rimmed baking sheet fitted with a rack & roast for 35-40 mins or until the chicken is cooked through. Set aside to cool. Then shred of meat with forks & transfer to a bowl. Set aside until ready to use. This can be done in advance.
Crepes
Combine flour & salt together in a large bowl then add the milk slowly, whisking until combined. Add the beaten eggs, whisking until smooth. Then whisk in the melted butter & the dill.
Heat a non-stick 12-inch skillet on medium-high heat. Grease the pan with a paper towel with canola or vegetable oil. Once hot pour 1 ladle full of batter into the pan & swirl the batter around until it covers the bottom of the pan. Allow to cook until set and edges start to turn golden brown.
Slide a thin spatula under the crepe enough to grab hold of it & flip it quickly with your hands. Cook on the other side for 30 seconds more. Slide the crepe off the pan onto a cutting board. Repeat the process until all batter is used. Allow the crepes to cool while you prepare the filling.
Filling
In a large skillet melt the butter, add the leeks & cook until they are soft & fragrant. Then add the mushrooms, Worcestershire sauce, salt & pepper to taste & freshly chopped parsley. Transfer mixture to a bowl & set aside to cool.
Béchamel Sauce
Melt the butter in a deep skillet. Once foamy add the flour, whisking together until a paste is formed. Slowly add the milk, whisking until combined. Simmer mixture until thickened, then add 1 minced garlic clove & season with salt & pepper to taste.
Assembly
-
Place crepe over a small gratin dish, fill with 2 Tbsp of the mushroom mixture, top with ¼ cup of shredded chicken. Ladle 2 Tbsp of béchamel sauce on top. Roll crepe & drizzle more béchamel on top. Sprinkle with gruyere cheese & paprika.
Bake for 10-12 mins. Then place under the broiler for another 1-2 minutes. Garnish with fresh parsley.
For the most part, a baked potato with a pat of butter and a little salt is just great on its own. But stuff them with an assortment of savory ingredients such as shrimp, oysters or ground meat and it easily constitutes a whole meal.
I think my first encounter with this idea came when the Wendy’s restaurant chain introduced the Stuffed Baked Potato to their menu in 1983. Their original goal was to give the customer another choice or alternative to the same old ‘fries’. I think it retailed for 99 cents at the time. The one I remember having a couple of times was with cheese sauce and fresh broccoli. It tasted great to me, not being a fried food lover. Of course, since then the whole concept has been ratcheted up in both flavor and eye appeal.
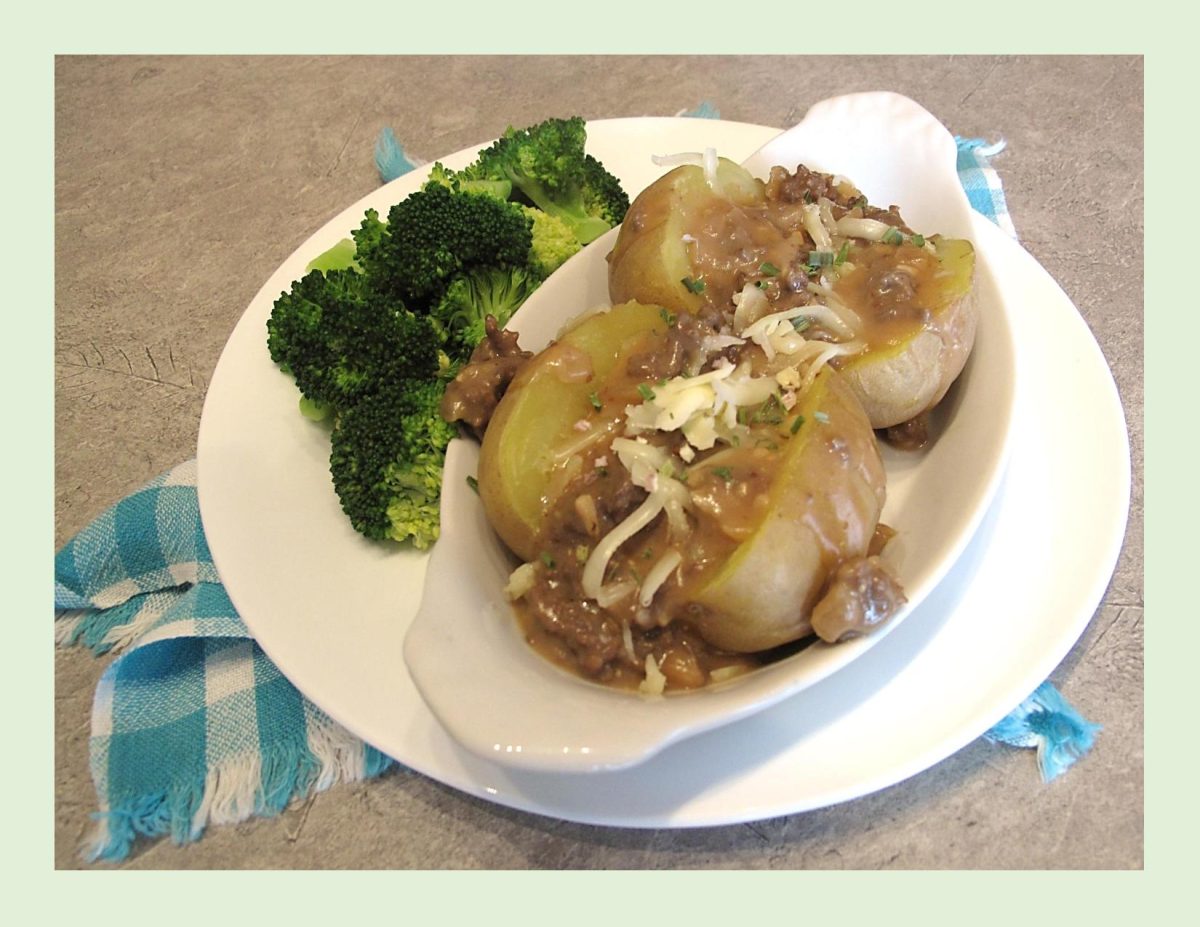
This version is browned ground beef in a cheesy mustard béchamel sauce served over baked potatoes. Makes such a super good meal with a bit of steamed broccoli.
Print Recipe
Baked Cheesy Ground Beef Stuffed Potatoes
Votes: 1
Rating: 5
You:
Rate this recipe!
|
|
Votes: 1
Rating: 5
You:
Rate this recipe!
|
Instructions
Pre-heat the oven to 400 F.
Wash the potatoes & pat dry. Prick with a knife or the tines of a fork, place on the oven rack and bake for approximately 45 minutes or until tender.
While the potatoes are cooking, brown the ground beef in a large skillet. Season with 1/4 teaspoon of salt & set aside.
In a separate pan, add 1 tablespoon of the butter & the diced onion. Cook on medium low heat, stirring often, until the onions begin to caramelize. Add the minced garlic, continue cooking for another minute and then remove from the heat. Add the cooked onion & garlic mixture to the cooked ground beef.
In the pan, melt the remaining 3 tablespoons of butter & whisk in the flour. Cook for a minute to make a roux. Slowly whisk in the beef stock, milk, Worcestershire sauce, mustard, salt, ground black pepper & shredded cheddar cheese. Continue cooking & stirring, on low heat, until the mixture begins to thicken. Add the beef mixture into the sauce.
When the potatoes are cooked, slice open and pour on the cheesy beef mixture. Garnish with parsley if you wish. Serve hot.
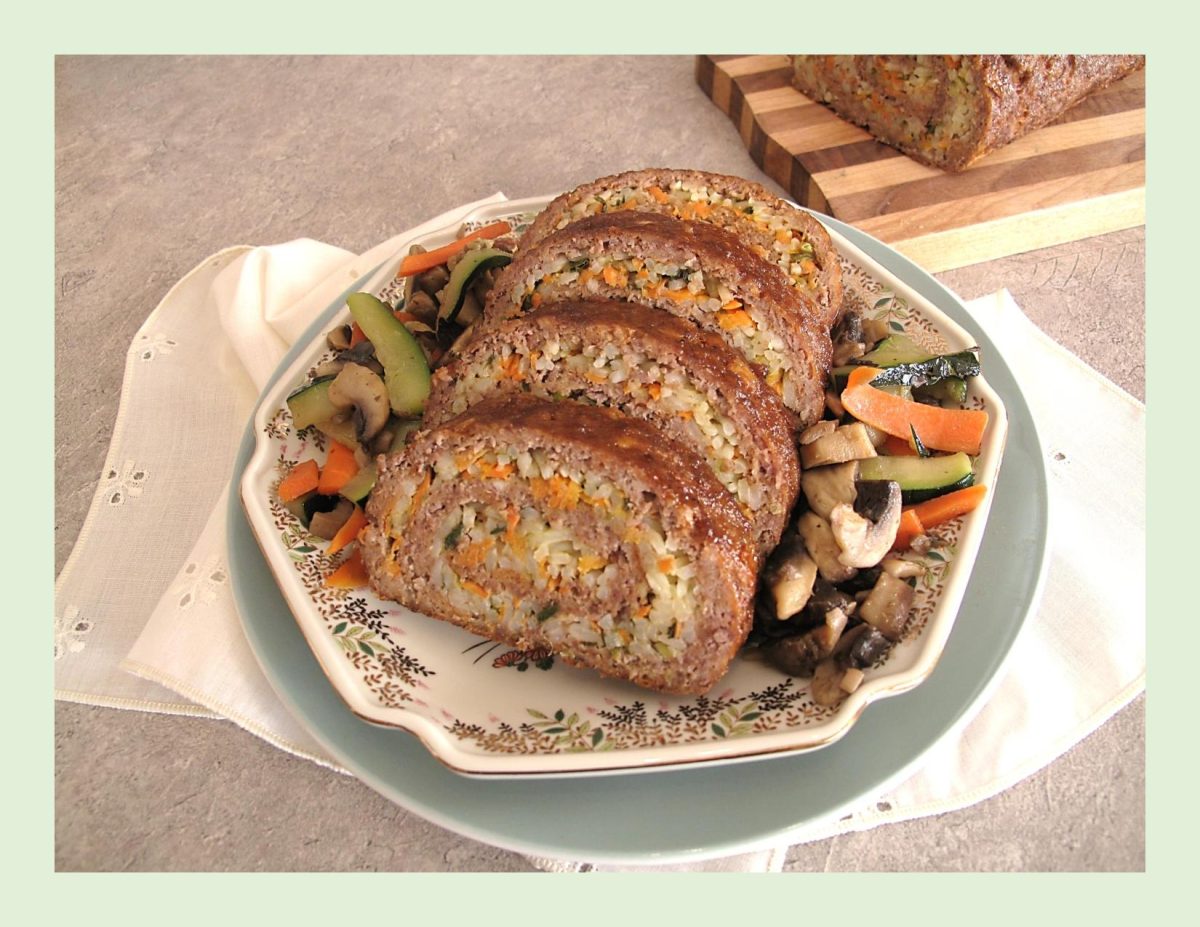
Hoisin is not a sauce I use regularly but in this case I found it puts a nice Asian twist on a traditional meatloaf. Impressive enough to serve to guests but easy enough to prepare on a weeknight.
The history of hoisin sauce is as rich and complex as its flavor. The name ‘hoisin’ comes from the Chinese phrase meaning ‘seafood sauce’ due to its seafood-like flavor but ironically, the sauce doesn’t contain any seafood. It’s believed to have originated in southern China, and its use has evolved over centuries. Once a luxury only the wealthy could afford, it has become a staple in Chinese households and restaurants worldwide. An intriguing tale associated with hoisin sauce is its role during the mid-Autumn festival in China, where it’s used in preparing traditional mooncakes, symbolizing unity and completeness.
Traditionally, hoisin sauce was made from fermented soybeans, rice wine, sugar, spices, and other ingredients. Today, hoisin sauce is widely used in many Chinese dishes including Peking duck, dim sum, barbecued pork, and spring rolls. It has also become a popular ingredient in other Asian cuisines such as Japanese and Vietnamese.
Hoisin sauce is a culinary chameleon, seamlessly blending into a wide array of dishes. Some of the many roles of hoisin sauce are as a
- Dipping sauce for spring rolls, dumplings, and other appetizers. Its sweet and savory notes perfectly balance the flavors of these bite-sized delights.
- As marinade and glaze hoisin sauce works wonders with meats like chicken, pork, and beef. The sugars in the sauce caramelize beautifully when grilled, creating a rich and flavorful exterior.
- Adding hoisin sauce to stir-fried vegetables and proteins introduces a delectable dimension to your dishes. Its thick consistency helps create a glossy coating that clings to the ingredients, delivering an irresistible taste in every bite.
- From noodle stir-fries to fried rice, hoisin sauce can elevate these dishes with its unique blend of flavors. Just a drizzle can transform a simple plate of noodles into a gourmet delight.
Print Recipe
Hoisin Beef & Rice Roulade
Votes: 1
Rating: 5
You:
Rate this recipe!
|
|
Votes: 1
Rating: 5
You:
Rate this recipe!
|
Instructions
Prepare rice according to package directions. Cool slightly. Stir cooked rice with carrot, red pepper, green onion & cilantro. Reserve.
Preheat oven to 350 F. In a medium sized bowl, stir breadcrumbs with milk, eggs, ginger, Worcestershire sauce, garlic, salt & pepper. Let stand for 5 minutes.
Line a rimmed baking sheet with foil. Grease foil well; top with a second sheet of foil (to use as a guide when rolling the beef). Crumble beef into bread crumb mixture; mix gently until combined. Press the beef into a 1/3-inch thick, rectangular layer on the prepared baking sheet.
Spread rice mixture evenly over the beef, leaving a 1-inch border around the edge. Roll beef, jellyroll-style, using the top layer of foil to guide & shape the beef into a compact log. Discard extra foil. Smooth the surface using fingers to fill in any gaps. Pinch ends closed. Bake for 45 minutes.
Meanwhile, stir hoisin sauce with lime juice, ketchup, honey & sesame oil; brush evenly over roulade. Bake roulade for an additional 15 minutes.
Salmon croquettes are basically a version of a salmon cake, salmon balls or patties and can be fried or baked. They were originally made of beef, probably leftovers that needed to be used up. Croquettes originated in France in about 1898 by the founder of classical French cuisine, Escoffier. As Escoffier’s chefs started to travel throughout the world, they took the recipe with them to other cultures where it was transformed based on local cuisines. From the original beef croquette, it branched out into salmon croquettes, chicken, vegetarian, and many other versions.
There are many variations of ‘croquettes‘ on the market, and just about every culture has developed their own recipe. Constantly, new recipes are formulated and something new is invented and created. With the input of different cultures, the original recipe has taken itself into many directions, different applications and ingredients. Very often salmon croquettes (cakes, balls or patties) are made with canned salmon though there are quite a few newer recipes that use fresh salmon that has been either chopped finely or ground to mold into the various shapes.
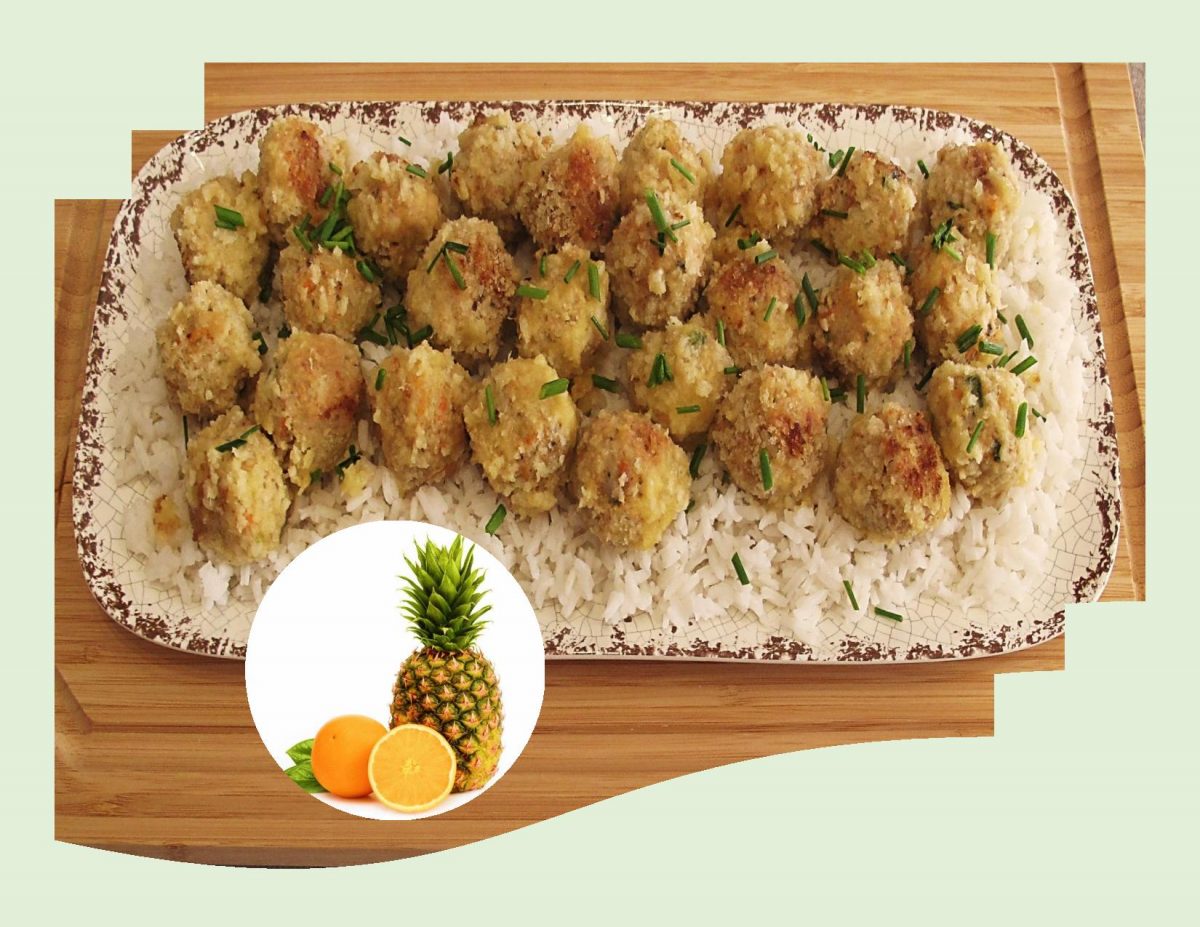
I think, using a zesty orange-pineapple glaze is the perfect compliment to these baked salmon balls.
Print Recipe
Baked Salmon Balls w/ Orange Pineapple Glaze
Votes: 1
Rating: 5
You:
Rate this recipe!
|
|
Votes: 1
Rating: 5
You:
Rate this recipe!
|
Instructions
Salmon Balls
-
If using canned salmon, drain & flake well. If using fresh salmon, brush with olive oil and season lightly with salt and pepper. Grill for about 6 minutes or bake wrapped in foil at 350 F. for approximately 10 minutes. When cool, flake salmon. Add carrot, green onion, potatoes, tartar sauce, egg, lemon juice, Worcestershire sauce, cilantro paste, Old Bay Seasoning, salt & pepper. Combine well.
Using a small scoop (about 1/2 oz size), measure salmon mixture out into palm of your hand & gently roll into balls. Mixture should make about 32 balls.
Roll salmon balls in Panko crumbs & place on a well buttered or sprayed baking sheet. Lightly spray tops with spray as well.
Bake about 30-40 minutes, turning halfway through. Remove from oven.
Glaze
Place all glaze ingredients into a small saucepan over medium heat. Stir gently & simmer for 15-20 minutes or until liquid begins to thicken slightly & reduces by half.
Drizzle over salmon balls or serve on the side. These salmon balls are nice served with rice & a steamed veggie.
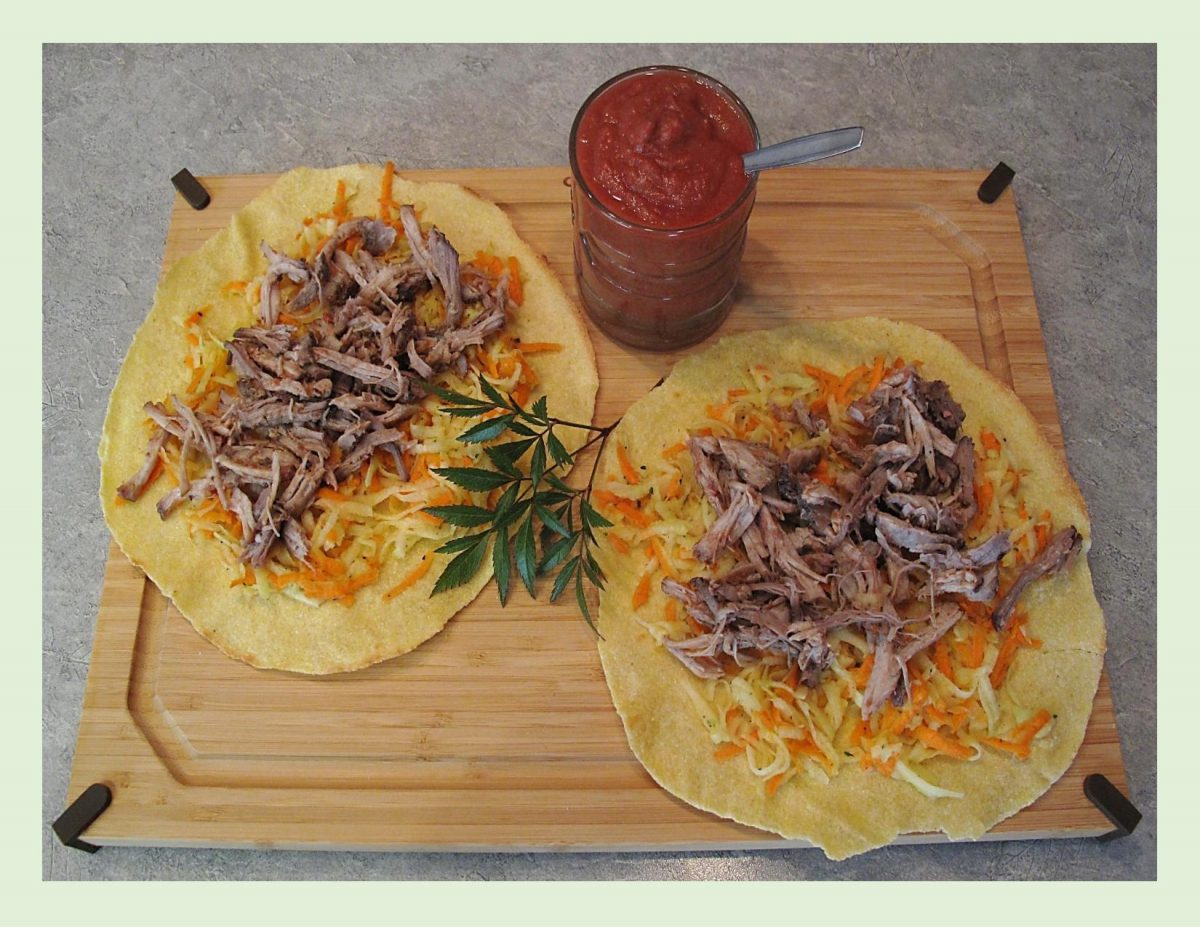
Slow cooked meat is definitely not a new thing. Truly authentic pulled pork is actually a barbecue dish, cooked for hours over a charcoal pit until it falls apart, ready to be easily shredded or ‘pulled’ apart to serve.
I’m sure most of us have attended a classic Hawaiian Luau at one time or another in our lives. The main course of this Hawaiian feast is always the ‘kalua’ roast pork. Kalua is a traditional Hawaiian cooking method that utilizes an ‘Imu’, a type of underground steam oven.
My experience, was that it was definitely pull-apart tender but far too greasy for my liking. It has taken a lot of years for me to want to make even a North American version of this pulled pork idea. To my surprise, it didn’t turn out greasy and was pretty tasty.
The idea that it has to be roasted in an outdoor pit is really not true. It can be made easily in a standard domestic oven. Of course the seasonings, temperatures and serving methods are all open to debate.
Pork shoulder is ideal for pulling purposes, either bone-in or boneless. It has an optimum fat content that yields to create tender, ‘melty‘ meat, but its essential to cook it slowly to allow the protein to break down properly. Using a dry rub will also help create tenderness and flavor.
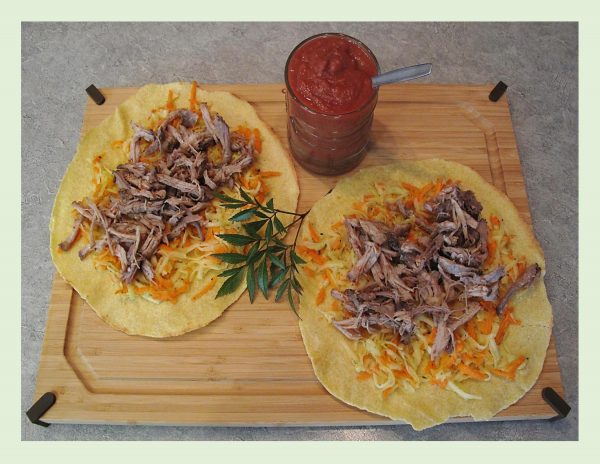
There are numerous ways you can serve pulled pork such as on some fresh brioche buns, with cornbread or in tacos. We are going to have ours in corn tortillas with some kohlrabi coleslaw and roasted rhubarb sauce.
Print Recipe
Pulled Pork w/ Roasted Rhubarb Sauce
Votes: 1
Rating: 5
You:
Rate this recipe!
Ingredients
Dry Rub for Pork Shoulder
Ingredients
Dry Rub for Pork Shoulder
|
Votes: 1
Rating: 5
You:
Rate this recipe!
|
Instructions
Pork Shoulder
Drizzle pork with 2 Tbsp of oil; sprinkle with spices & orange zest & rub into meat. Place in a plastic zip-lock bag & refrigerate overnight (about 24 hours).
Bring meat to room temperature. Preheat oven to 275 F. Place meat in a roasting pan & bake until thickest part registers 170 F. on a meat thermometer. Basically, roast until it's falling apart. Remove roast from oven & transfer to a large platter. Allow the meat to rest for about 10 minutes. While still warm, take 2 forks & 'pull' the meat to form shreds. Keep warm until ready to assemble tortillas.
Roasted Rhubarb Sauce
Prepare sauce on the day you START to marinate meat.
Preheat oven to 425 F. Line a baking sheet with foil & spray generously with non-stick cooking spray.
Place chopped rhubarb & garlic cloves on the prepared baking sheet. Roast for 15-20 minutes, or until rhubarb is soft.
Transfer the rhubarb & garlic to a food processor or blender. Puree with one cup of water until smooth.
Pour the puree into a medium saucepan. Add remaining ingredients & mix well. Add additional water, as needed, until sauce is desired consistency.
Bring to a simmer over medium-low heat. Simmer for 10-15 minutes. Cool before pouring into a small glass pitcher. Refrigerate any leftovers when meal is finished.
Kohlrabi Coleslaw
Prepare dressing in a screw-top jar; combine vinegar, oil, sugar, salt & pepper. Cover & shake well. In a bowl, combine kohlrabi & carrots; drizzle with dressing.
Assembly
During the roasting time of the meat, prepare kohlrabi coleslaw. When everything is ready, lay out warm tortillas, top with coleslaw & pulled pork shreds. Drizzle with prepared rhubarb sauce. Fold or roll tortilla & enjoy!
Recipe Notes
- Instead of drizzling the rhubarb sauce, you can put your shredded pork in a bowl with some rhubarb sauce & combine. I find that distributes the sauce more evenly ... just a personal preference.

If you like corn, chances are you are also a big fan of cornbread in its many interesting forms. I used to think that cornbread was so good it didn’t need anything extra thrown in the ‘mix’.
Cornbread appeals to all of our senses, a pop and sizzle as batter pours onto a hot griddle, the earthy fragrance that fills the kitchen when its baking. Then there’s the taste …. !! We love what makes us feel good, especially comfort foods that are warm, simple and delicious.
The beauty of cornbread is that it can take on so many different flavors. It can be sweet, savory or as spicy as you would like. Thanks to its simplicity, there are very few food items it wouldn’t pair with, so the limits to cornbread-based culinary creations are endless.
While this isn’t necessarily your classic cornbread it makes a very interesting meal served with a baked potato and some Parmesan zucchini fries.
Print Recipe
Ham & Cheese Cornbread Roll
Votes: 1
Rating: 5
You:
Rate this recipe!
|
|
Votes: 1
Rating: 5
You:
Rate this recipe!
|
Instructions
Cornbread Roll
Preheat oven to 400 F. Line a 15 X 10 X 1-inch jelly-roll pan with parchment paper. Set aside.
In a small bowl, whisk together cornmeal, flour, sugar & baking powder; set aside. With a hand mixer, beat egg whites with cream of tartar until stiff but not dry. Alternately fold in cornmeal mixture & oil; fold in cheddar cheese saving some to sprinkle on top of roll before placing in the oven.
Spread batter evenly in prepared pan & bake for 5-6 minutes (top should spring back when lightly touched with finger; do NOT over bake). Remove from oven & turn bread onto a towel that has been lightly sprinkled with cornmeal. Remove & discard parchment paper. Starting at narrow end, roll bread with towel; set on a wire rack & allow to cool for 5 minutes.
Filling
In a small bowl, mash together butter, mustard, onion & Worcestershire sauce until combined & thick. Unroll bread, remove towel & top with ham slices; spread filling mixture over ham & sprinkle with shredded Swiss cheese. Reroll bread & place, seam side down on lined jelly roll pan. Sprinkle with remaining cheddar cheese & bake until cheese is melted, about 5-6 minutes.

HAPPY NEW YEAR!
The word ‘new’ brings thoughts of hope and an opportunity to focus on new goals and challenges. Throughout the world, New Year’s Day is filled with traditions and symbolic ritual with many of the traditions revolving around food. Certain foods symbolize wealth, prosperity, health and good luck for the coming year. Fish are believed to be a lucky new year’s eve food because their scales resemble coins and they swim in schools which evokes the idea of abundance.
If you want to have seafood other than fish … shrimp, clams, mussels, squid and oysters are all thought to be good choices as new year’s ‘lucky foods’. It seems the start of a new year has a tendency to turn even non-believers a bit superstitious.
This shrimp dish can be used either as an appetizer or a main course. Brion & I love shrimp so we made it a full meal deal!
Print Recipe
Stuffed Baked Jumbo Shrimp
Votes: 1
Rating: 5
You:
Rate this recipe!
|
|
Votes: 1
Rating: 5
You:
Rate this recipe!
|
Instructions
In a large bowl, combine stuffing mix, mayonnaise, Old Bay seasoning, Worcestershire sauce, garlic powder, egg & water. Stir to combine & set aside to thicken slightly.
Butterfly shrimp by making light incisions in the inner part of the shrimp starting from the tail down; remove veins trying not to slice too deep. Season shrimp lightly with sea salt.
Preheat oven to 400 F. Lightly grease a baking dish.
Divide filling between shrimp. Place stuffed shrimp into prepared baking dish. Drizzle with melted butter & bake for 20-25 minutes.
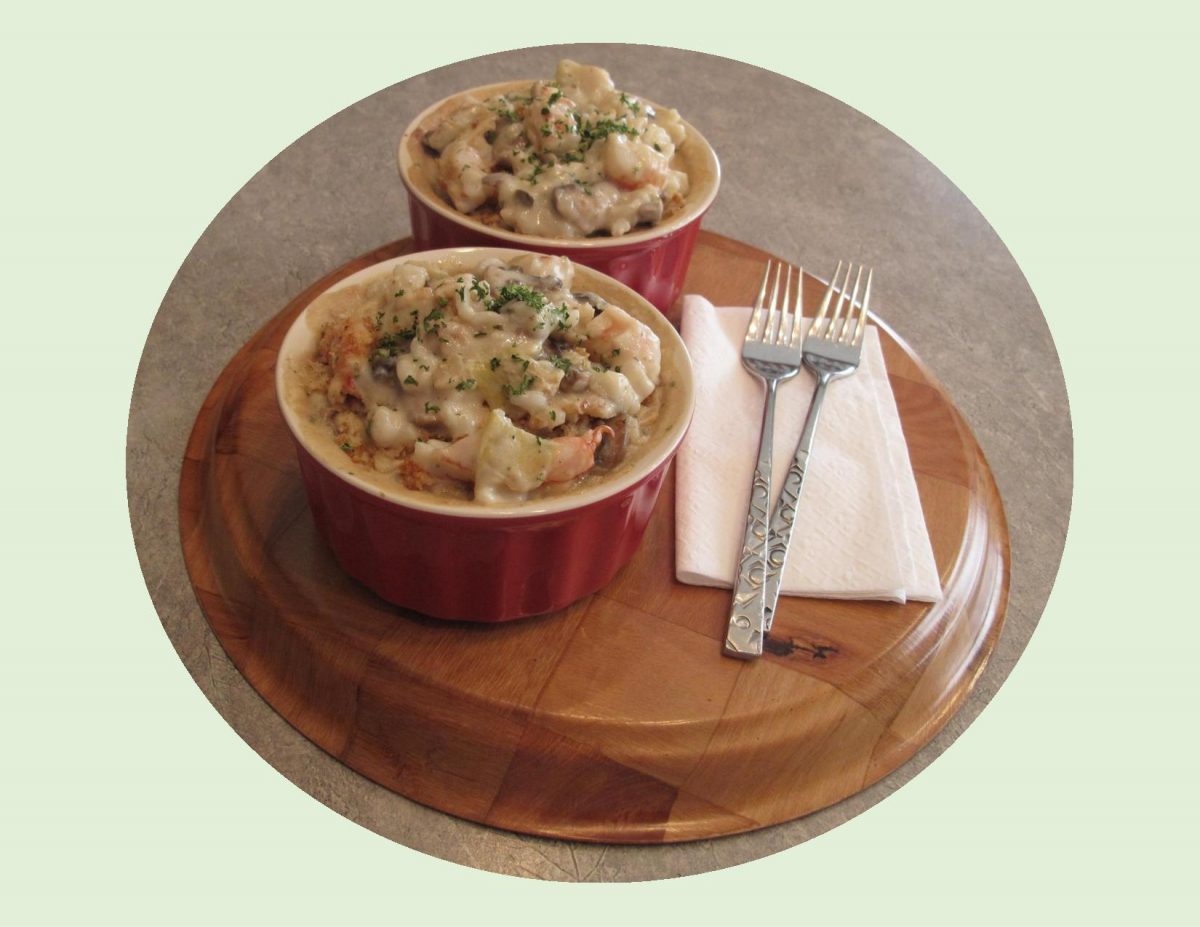
The art of casserole creation is a blend of inspiration and what’s on hand. The word casserole is used to refer both to an ovenproof baking dish as well as the baked, savory food item baked in it.
In North America, the Campbell’s Soup Company started publishing casserole recipes in the 1940’s as a way to promote sales for their cream soups. Casserole cooking goes back to slow-cooking dishes in earthenware containers. The ingredients are usually bound with some kind of sauce and often they are leftovers from a previous meal. It can be layered or all ingredients might be mixed together.
The height of the casserole era was during the 1950’s & 1960’s. This style of cooking was popular because it didn’t require a lot of constant watching and was hailed as the way forward for busy, efficient homemakers. By the 1970’s, quiche came to look down on the humble casserole.
Nevertheless, Brion and I really enjoy a casserole and this one ticks all the boxes for us.
Print Recipe
Shrimp, Mushroom & Artichoke Casseroles
Votes: 1
Rating: 5
You:
Rate this recipe!
Ingredients
- 1 cup water, salted
- 1/2 cup Arborio rice, uncooked
- 1 Tbsp butter,
- 200 gm fresh mushrooms, sliced
- 284 ml cream of mushroom soup
- 205 ml Lite Alfredo sauce
- 1 Tbsp Worcestershire sauce
- 1/2 tsp sea salt
- 1/8 tsp black pepper
- 170 ml marinated artichoke hearts, drained & halved Reserve 2 Tbsp marinate for sauce
- 300 gm WILD jumbo shrimp, peeled, deveined & rinsed
- 1/2 cup fresh parsley, chopped (optional)
- 1/2 cup Parmesan cheese, grated
- 1/2 cup bread crumbs, buttered
|
Votes: 1
Rating: 5
You:
Rate this recipe!
|
Instructions
In a saucepan, combine 1 cup salted water with 1/2 cup rice; cover & bring to a boil. Reduce heat & simmer gently for 12-15 minutes or until liquid is absorbed & rice is tender. Fluff with fork & remove to a dish; set aside. Add 1 Tbsp butter to saucepan & saute sliced mushrooms.
Preheat oven to 400 F. Butter either 2-3 individual casserole dishes or a 9 x 9-inch baking dish. Set aside. Drain marinated artichoke hearts (reserving 2 Tbsp) & halve each piece. In a large bowl, whisk together soup, Alfredo sauce, Worcestershire, artichoke marinade, salt & pepper until combined. Gently stir in cooked rice, mushrooms, artichokes, shrimp (cut each in thirds) & parsley.
Spoon mixture into prepared dishes. Combine Parmesan with buttered crumbs & sprinkle over casseroles. Bake until shrimp are cooked through, approximately 25 minutes.

From what I understand, the global dish called chicken parmigiana is a variation on the Italian entree known as eggplant parmigiana. Simply put, you deep fry eggplant, add cheese and tomato sauce and bake it. At some point in time, various regions in the world with large Italian immigrant populations, realized chicken would be an excellent alternative to the eggplant and chicken parmigiana evolved.
In America, the dish became popular around 1958. Often the name has been simplified to just ‘chicken parm‘. Usually composed of fried or breaded chicken fillets, smothered in mozzarella (or provolone), parmesan and tomato sauce all of which is then baked. Another version is using veal instead of chicken. Parmigiana is traditionally served over hot pasta as the main entree but it has also become a sandwich filling favored in subs, hoagies, etc.
In today’s recipe, I’m using parmesan cheese but omitting the mozzarella-tomato sauce. I wanted to accent the flavor with fresh basil in the sauce instead. We quite enjoyed it.
Print Recipe
Chicken Parmigiana with Basil Sauce
Votes: 1
Rating: 5
You:
Rate this recipe!
|
|
Votes: 1
Rating: 5
You:
Rate this recipe!
|
Instructions
Chicken
In a small bowl, combine breadcrumbs, cheese & parsley. Chop bacon finely & fry until crisp; drain. Add bacon to breadcrumb mixture.
Preheat oven to 350 F. In a saucepan, melt butter, add minced garlic, Worcestershire sauce & dry mustard. Mix well. Dip chicken fillets in butter mixture & place in a shallow ovenproof dish. Press crumb mixture on top of each fillet.
Bake, uncovered for 20 - 25 minutes.
Basil Sauce
In a saucepan, combine oil, vinegar, minced garlic, finely chopped basil leaves & cream; stir until heated through. Add egg yolk & stir until sauce thickens. Do not boil. Season with salt & pepper. Serve over chicken parmigiana.


