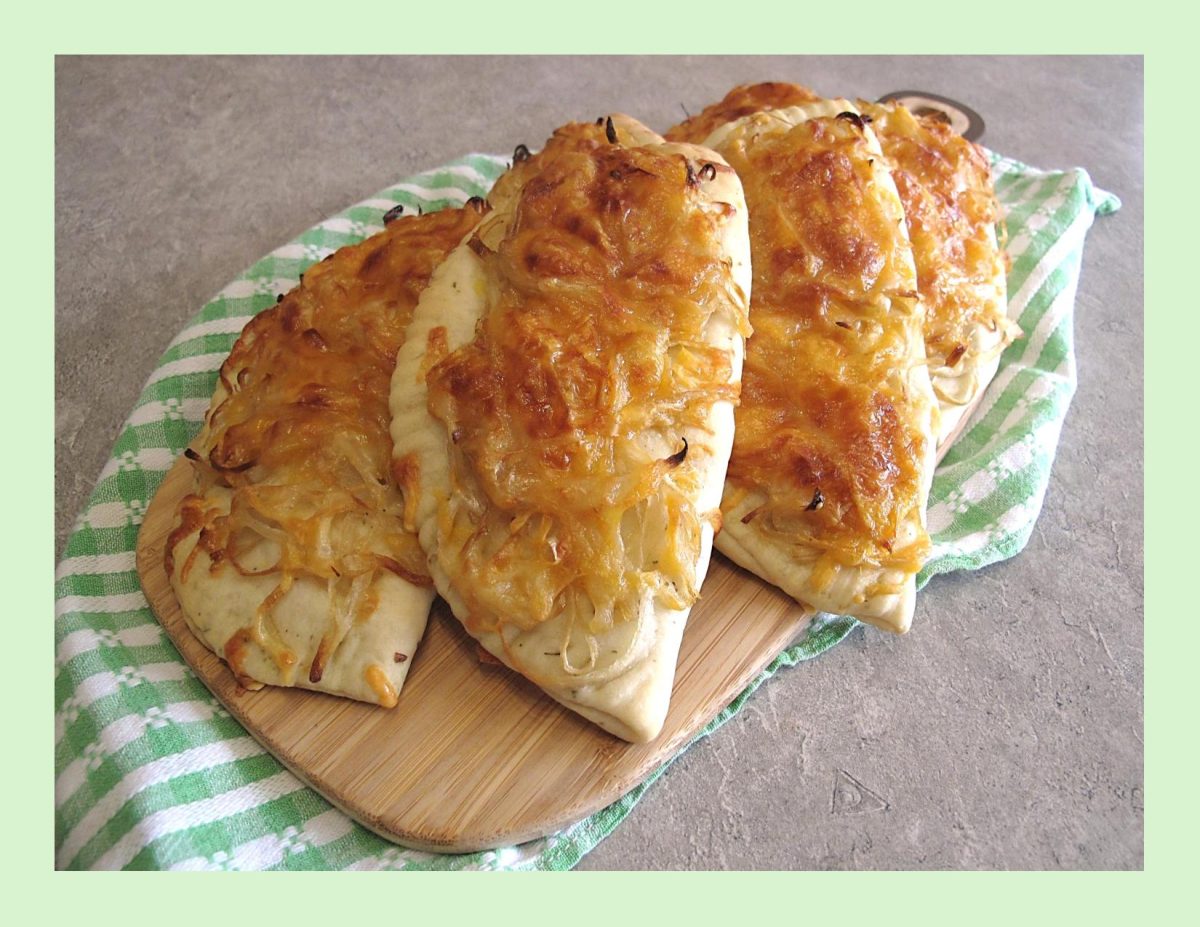
Cheesy Onion & Chicken Turnovers

Turnovers are a tasty handheld pastry stuffed with a variety of sweet or savory fillings. Depending on where you are in the world, you might know turnovers by another name. It’s a calzone in Italy, an empanada in Latin America, a pasty in England, a patty in Jamaica and a hand pie in North America.

Whether they’re made with pastry or yeast dough, these tasty morsels get their name from the folding technique used to enclose the fillings. They can be fried or baked, and the result is a convenient self-contained meal or snack.

While store-bought turnovers are readily available, there’s something uniquely special about crafting your own savory ‘pies’ at home. The aroma that fills the kitchen as the turnovers bake in the oven, the satisfaction of creating a perfectly flaky crust, and the freedom to customize the fillings to suit your taste – these are the joys that make them truly special.

During the summer months I like to have a big variety of savory turnovers in the freezer (already baked). There are so many times when you are too busy to make lunch and there they are — ready to heat and eat!

These cheesy onion and chicken turnovers were inspired by some Boursin cheese with cranberries & pepper I had waiting to be used. The total result has made them keepers!
Print Recipe
Cheesy Onion & Chicken Turnovers
Votes: 1
Rating: 5
You:
Rate this recipe!
Servings
TURNOVERS
Ingredients
Servings
TURNOVERS
Ingredients
Votes: 1
Rating: 5
You:
Rate this recipe!
Instructions
Dough
  1. Cook potato, peel & mash. In a bowl, combine yeast with lukewarm water. Allow to stand for about 3 minutes until foamy; add butter, salt, Italian seasoning, sour cream & potato & mix well.
  2. Stir in flour, one cup at a time. When dough is completely blended, turn onto a lightly floured work surface. Knead dough about 10 minutes, until smooth & elastic.
  3. Place dough in a greased bowl, cover with plastic wrap & allow to rise in a draft free place until doubled in bulk, about 1 hour.
Topping & Fillings
  1. In a skillet, heat 1 Tbsp oil. Sauté onion until caramelized & tender. In a bowl, combine shredded chicken with 1/2 of the Boursin cheese. Grate cheddar cheese.
Assembly
  1. Divide dough into 6 equal pieces & shape each piece into a round ball. On a lightly oiled surface, flatten each ball with a rolling pin to a 6-inch diameter. Spread each piece of dough with some of the remaining Boursin cheese.
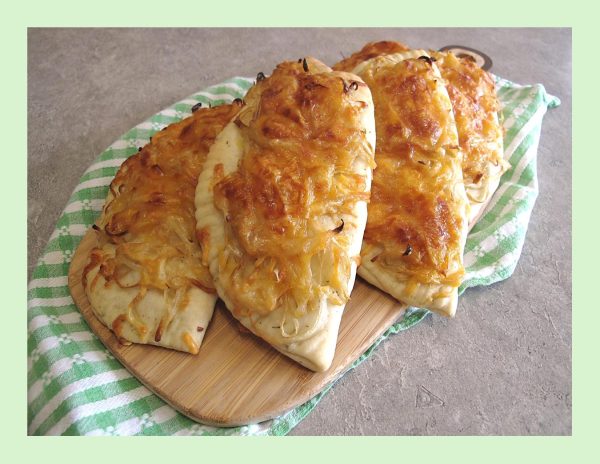
  2. Divide chicken/Boursin mixture between the 6 turnovers, laying it to one side leaving a half inch border. Fold each one in half to form turnovers.
  3. Line a baking sheet with parchment paper. Place turnovers on baking sheet giving them space to rise a bit. Top each one with some caramelized onions & cheese. Cover turnovers with a tea towel & place in a draft free place to rise for about 15 minutes.
  4. Preheat oven to 350 F.
  5. Bake turnovers until a nice golden brown color. Remove from oven & allow to cool on a wire rack.

Everything Bagel Pull-Apart Bread

Pull-Apart Bread …. an interesting concept that has been called many names such as bubble bread or loaf, jumble bread, monkey bread etc. Initially it was formed pieces of yeast dough dipped in butter and baked in a loaf to be served with jam or preserves. In 1942, General Mills (Betty Crocker) promoted ‘Hungarian Coffee Cake’, which consisted of balls of yeast dough dipped in melted butter, then in sugar frequently mixed with cinnamon and/or chopped nuts. It was baked in a ring pan because the central tube helped prevent the center from being under baked and sinking due to all the butter. ‘Betty Crocker’ had a real way of turning unknown recipes into mainstream ideas.

By the 1990’s, General Mills promotions began entitling this sugar-coated treat as ‘Monkey Bread’. However, it may have been silent-screen movie star, ‘Zasu Pitts’, who provided this whimsical name. The term and recipe initially appeared in the Thursday, February 8th, 1945 edition of the Winnipeg Free Press (Canada) in the column ‘Culinary Clinic’. Zasu was most often remembered for her extraordinary name, huge eyes and fluttering fingers. Besides acting, she had a passion for cooking and published a 93-page cookbook in 1963.

Most of the early recipes called for rolling out the dough and cutting it into diamond shapes instead of forming balls. The widespread popularization of money bread corresponded to the advent of the commercial refrigerated biscuit dough in the 1950’s. One of the later innovations is to insert a little cinnamon-sugar coated cube of cream cheese in the center of each dough ball or drizzle with a cream cheese glaze.

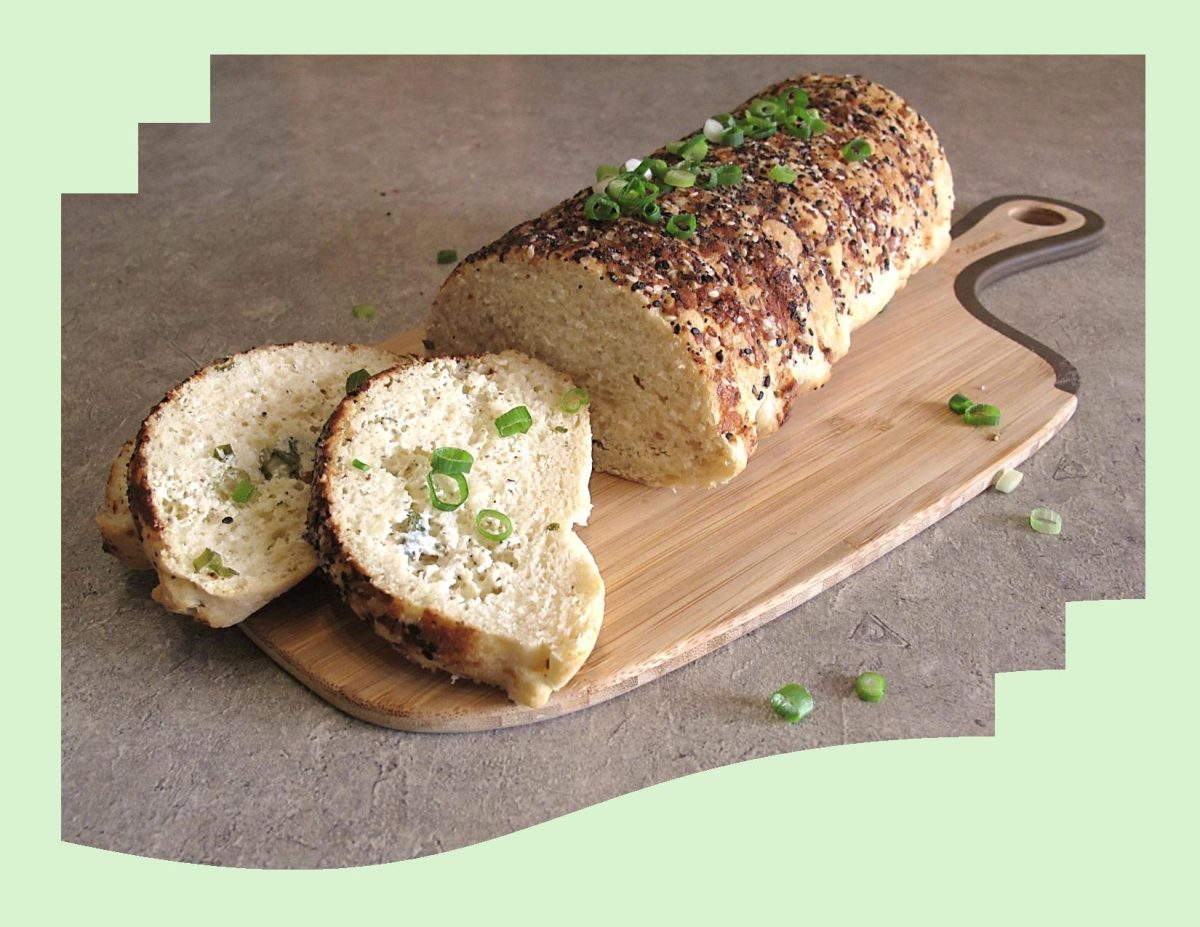
Today, I’m taking the idea in a savory direction, combining buttery homemade dough, garlic herb cream cheese filling and my ‘go-to’ favorite – everything bagel seasoning!

Print Recipe
Everything Bagel Pull-Apart Bread
Votes: 1
Rating: 5
You:
Rate this recipe!
Servings
LOAF
Servings
LOAF
Votes: 1
Rating: 5
You:
Rate this recipe!
Instructions
Dough
  1. In a large bowl, combine lukewarm milk with sugar & yeast. Allow to sit for 5-10 minutes until frothy.
  2. Add butter, egg, flour & salt. With an electric mixer, beat on low for about 3 minutes. Dough will be soft. Transfer to a lightly floured work surface. Using lightly floured hands, knead for 1 minute then shape into a ball.
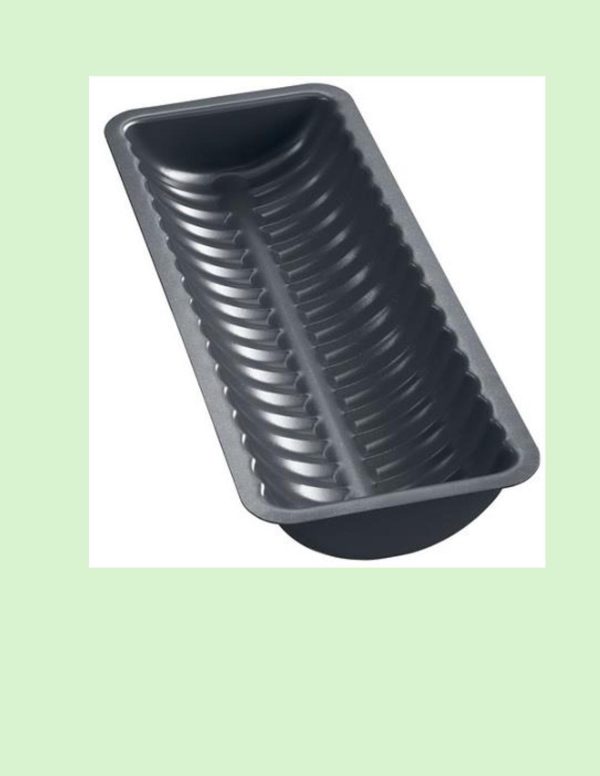
  3. Place the dough in a greased bowl & cover with plastic wrap. Place in a draft-free area to rise until doubled in size about 1 1/2 hours. As dough rises, prepare filling. Butter a 11 3/4 x 4-inch ribbed semi-circle bread pan. Sprinkle with everything bagel seasoning making sure to get the seasoning up the sides & on the ends of the pan. Set aside.
Filling
  1. In a small bowl, using a hand mixer, beat all of the filling ingredients together until combined. Set aside but don't refrigerate unless making well in advance.
Assembly
  1. Flip dough on a lightly floured work surface & with a rolling pin, roll out the dough until it is 1/4-inch thick. Spread cream cheese filling on top & sprinkle with sliced green onions. Using a 3 1/2-inch circle cookie cutter, cut into circles. Fold circles in half & line prepared pan, round side down fitting into the 'ribs' of the pan. Tuck the remaining pieces that are leftover into the crevice's between the folded circles.
  2. Cover with oiled plastic wrap & allow to rise once again in a draft-free area until puffy, about 30 minutes.
  3. Preheat oven to 350 F. when bread is nearly finished rising.
  4. Bake until golden brown, about 30-35 minutes. Remove from oven & place on wire cooling rack. Cool for 10 minutes in the pan then remove from pan, slice or pull apart & serve.
Recipe Notes
  • If you prefer, you can make your own everything bagel seasoning with 1 Tbsp each poppy & sesame seeds, 1 1/2 tsp each dried minced onion & garlic flakes & 1 tsp coarse salt.
  • For this pull-apart loaf I used a European ribbed semi-circle bread/cake pan. The size is bigger than a 9 x5-inch loaf pan so it is quite easy to fit all the dough into it.
  • Brion & I really enjoyed this bread made into a savory French toast for brunch.

Pumpkin Streuseltaler

Nothing tastes more like fall than fresh baked pumpkin goods. I love just about anything with pumpkin in it. It definitely wasn’t always that way but it’s amazing how your taste buds change as time passes.

My original thoughts were to make some German pumpkin plachinda. It was one of those wonderful things my mother used to make that got pushed into the back of my memory.

It seems most recipes you find on the internet make plachinda as individual pastry turnovers with a pumpkin filling. I think I recall my mother making it in a rectangle casserole dish with the pastry on the bottom and up the sides and the filling showing.

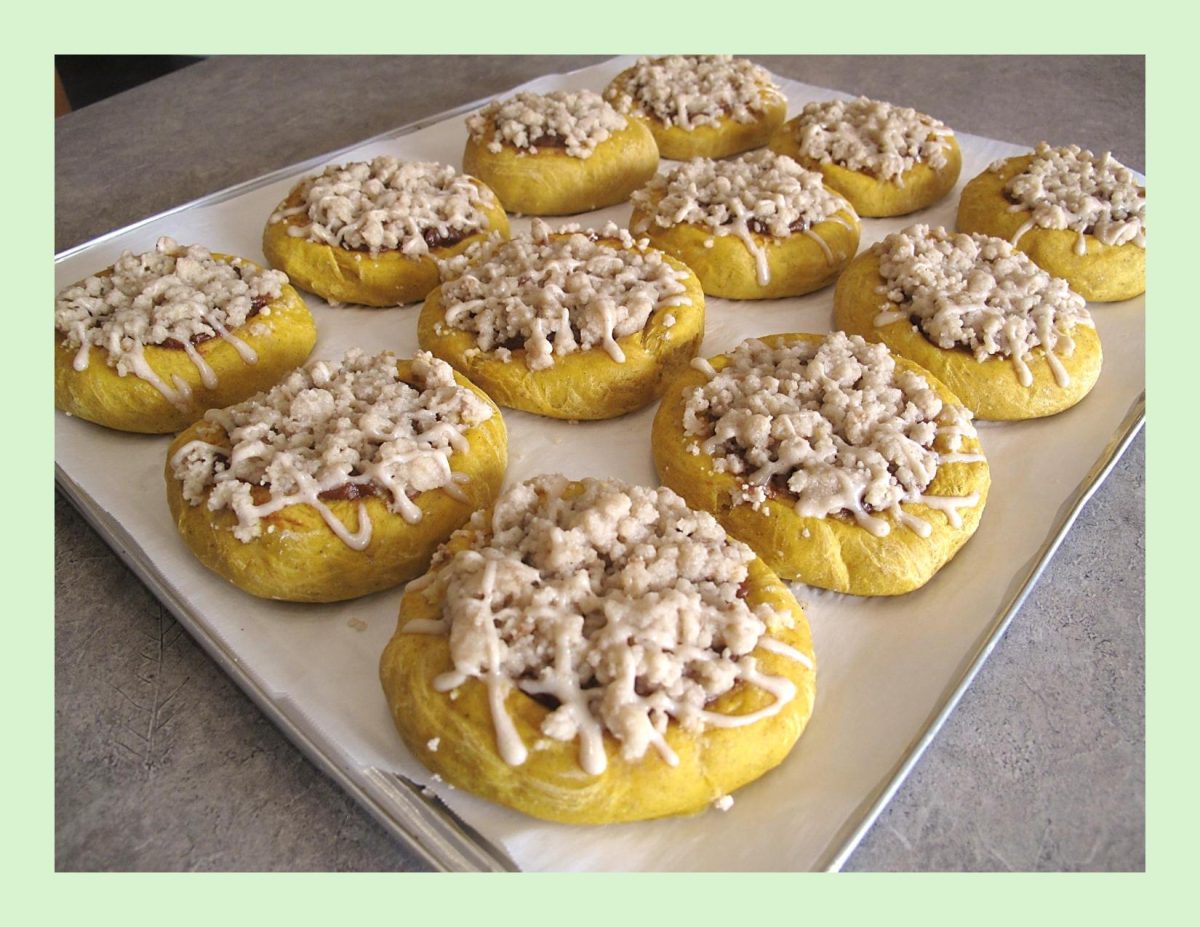
I decided to do some ‘recipe development’ and try making some German streuseltaler and top it with a sweet pumpkin (plachinda) filling.

Streuseltaler was inspired by the round shape of the taler, a silver coin used throughout Europe for almost four hundred years. Its name lives on in the currency called dollar.

Taler is a German word for coin, so the name of the dessert literally translates to streusel coin. Basically, a free form tart made with a yeast dough topped with a huge amount of streusel, sometimes filled with custard and often with a sugar glaze.

A traditional German streusel (streusel meaning something ‘strewn or scattered’ in German) bakes up into shortbread balls. It makes a crunchy, cookie-like top but is soft on the bottom where it meets the bread or fruit compote.

Streusel was first popularized in Germany. In its simplest form, it consists of flour, sugar and butter but gets even better with the addition of oatmeal, cinnamon and nuts …. just my opinion of course!

In the history of cooking, one could find recipes that have constantly changed and could be seen as a connecting link between modern times and our past. I guess this is my contribution to the evolution of plachinda.

For all of you who love pumpkin, here’s a treat you don’t want to miss!

Print Recipe
Pumpkin Streuseltaler
Votes: 1
Rating: 5
You:
Rate this recipe!
Course dessert
Cuisine German
Servings
SERVINGS
Ingredients
Pumpkin Dough
Pumpkin Filling
Glaze
Course dessert
Cuisine German
Servings
SERVINGS
Ingredients
Pumpkin Dough
Pumpkin Filling
Glaze
Votes: 1
Rating: 5
You:
Rate this recipe!
Instructions
Dough
  1. In a small bowl, add yeast, lukewarm water & 1 tsp sugar. Allow to sit about 10 minutes until frothy.
  2. In a large bowl, combine yeast mixture, butter, salt, cinnamon, eggs & pumpkin puree. Mix well. Add flour, one cup at a time, until well combined. Knead dough for about 8-10 minutes or until smooth & soft. Place dough in a greased bowl, cover with a tea towel & allow to rise for about 1 hour or until double in size.
Filling
  1. In a small dish, combine the filling ingredients, set aside.
Streusel Topping
  1. In a small bowl, combine flour, sugar, vanilla, cinnamon & salt. With a pastry blender, cut in butter until mixture resembles coarse crumbs. Set aside.
Assembly & Baking
  1. Line a baking sheet with parchment paper. Place dough on a lightly floured work surface & divide into 12 pieces. Form each piece into a ball & allow it to rest for about 5 minutes.
  2. Space out the balls on parchment lined baking sheet. With fingertips or the back of a Tbsp., press out center of each ball to about 4-inch diameter. Add about a Tbsp of pumpkin filling to each dough piece & spread leaving a border around the outside.
  3. Divide streusel topping evenly between the pastries. Allow to rise for about 15-20 minutes.
  4. Preheat oven to 350 F.
  5. Bake for about 10-12 minutes. Allow to cool completely on a wire rack. In the meantime, you can prepare the glaze.
Glaze
  1. In a small dish, whisk powdered sugar & lemon juice to a thick glaze. When streuseltaler are cooled, drizzle with glaze.
Recipe Notes
  • The picture at the bottom of the recipe is MY version of my mother's plachinda. I had posted it on a blog in October 2016. She used to serve this wonderful pastry when she made a white bean soup. At the time I thought it was an odd combination but it works! Another one of those 'taste of a memory' kind of comfort foods.

Plum Yeast Cakes (Kuchens)

I know it sounds quite ordinary, but we are not just talking about just any plum cake. Variations of the German specialty, ‘zwetschgenkuchen’, exist where some versions are made with a shortbread pastry verses a yeast dough, some have streusel – some do not – some are round, others are rectangular. One thing for sure is that they all use the plump, sweet, juicy European plums also known as Italian Prune Plums or Empress Plums. This variety is ideal for cooking not only because of their texture but also because their flavor becomes more complex through cooking.

Fruit and yeast-based cakes are a German hallmark with this cake being a perfect example. It’s not overly sweet, has a touch of tartness to it, a small hint of cinnamon and that tender yeast dough.

Italian prune plums are available in Canada in late summer to early fall. When I was growing up and my mother used these ‘little gems’ in her canning and baking, I thought it was because they were available at the time. I had no idea that they played such a special part in German baking until I was an adult.

Prune plums are native to the Mediterranean coastal regions of Italy, and though they are named after their country of origin, they are not a favorite there. Instead, because of the German affinity for plums, they feature in many German desserts.

When ripe, prune plums are wonderfully sweet with a rich complex flavor. The flesh has a greenish-amber color that turns a deep shade of fuchsia when cooked. The single pit at the center separates easily and almost fall out on their own.

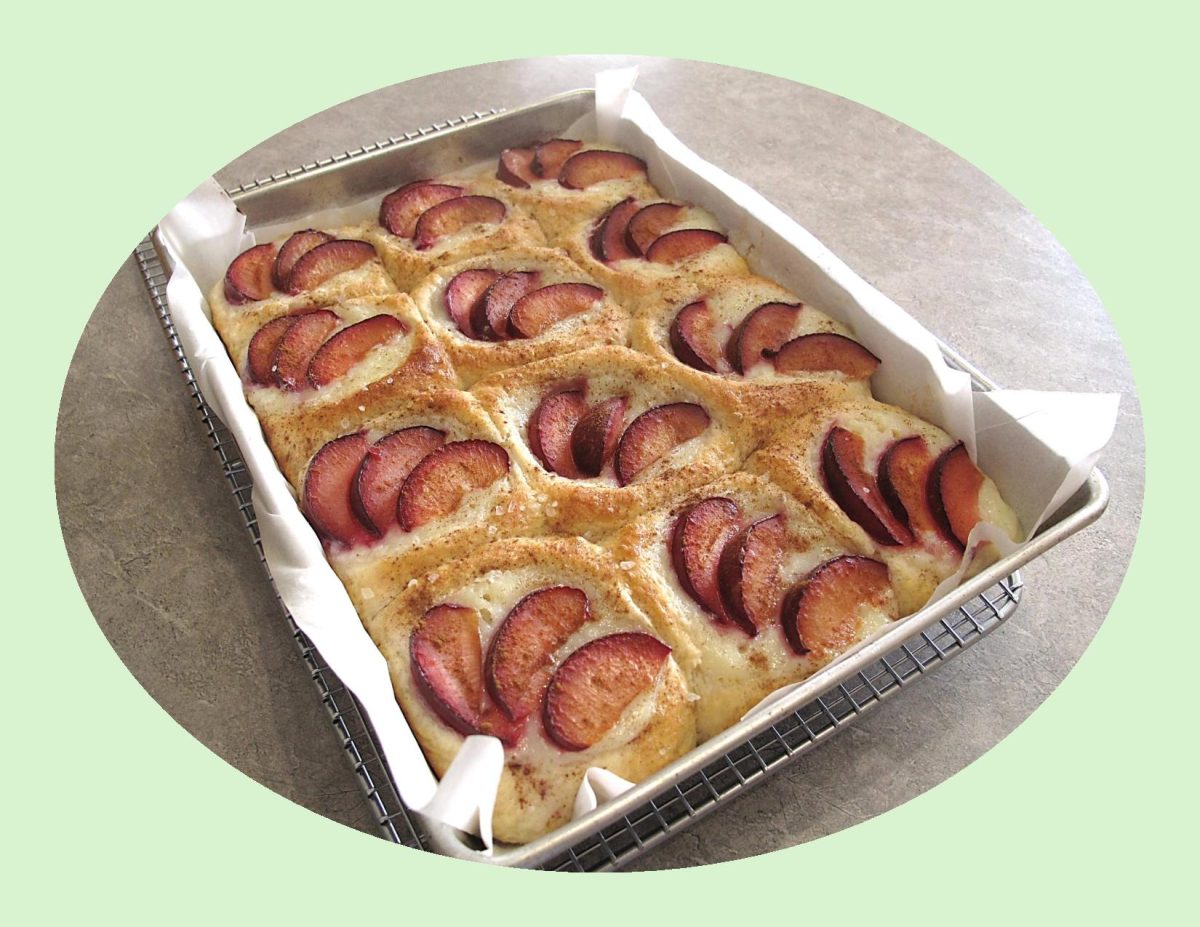
I wanted to highlight the prune plum in another blog before this deliciously sweet fruit closes the summer season. This recipe makes individual kuchens (kuchen translates to ‘cake’ in German) as opposed to one large cake.

Print Recipe
Plum Yeast Cakes (Kuchens)
Votes: 1
Rating: 5
You:
Rate this recipe!
Course dessert
Cuisine German
Servings
Course dessert
Cuisine German
Servings
Votes: 1
Rating: 5
You:
Rate this recipe!
Instructions
Dough
  1. In a small container, warm milk to lukewarm, stir in yeast & a pinch of sugar. Allow to sit until frothy, about 5 minutes.
  2. Combine the flour, remaining sugar and the salt in a stand mixer fitted with the paddle attachment. Mix on low speed to combine.
  3. Separate 1 of the eggs & set aside the white for the egg wash. Whisk the egg yolk & remaining whole egg into the yeast mixture. Add the yeast mixture to the flour, then mix on low speed to make a smooth, thick dough.
  4. Increase the speed to medium & add the butter. Once the butter has been added, beat on high until smooth, about 1 minute. Switch to the dough hook & knead the dough until it forms a smooth, springy ball on the hook, 4 to 5 minutes (add a little more flour, if needed, if the dough doesn't form a ball).
  5. Grease a large bowl & turn the dough in the bowl to coat. Cover & allow rise at room temperature until doubled, 1 - 2 hours.
Custard
  1. In a large saucepan, combine the cream, sugar, cornstarch, salt, egg & yolk. Whisk it together & heat over medium heat until thick, 4 to 5 minutes.
  2. Remove from the heat, add the butter & extract; stir until combined. Transfer to a clean bowl. Cover the surface of the custard with plastic wrap. Let cool at room temperature.
Assembly/Baking
  1. Line a 9 x 13-inch baking pan with parchment paper. Cut the dough in half, then cut each half into 6 equal pieces. Working with one piece at a time, form the dough into balls by folding the dough under itself and pinching to seal underneath.
  2. Set the ball, smooth-side up, on a floured surface, and turn in your hand to form a tight round shape. Cover loosely with plastic wrap & allow to rise until doubled, about 30 minutes.
  3. Preheat the oven to 350 F.
  4. Once the buns have risen, gently press down on each to make indentations that will make space for the custard. Fill the indentations with the custard. Top with the plums wedges.
  5. Brush the buns with the reserved egg white mixed with a splash of water & sprinkle with a pinch of cinnamon & a bit of sea salt.
  6. Bake until the buns are risen & golden & the custard is set, 25 - 30 minutes. Transfer to a wire rack to cool.
Recipe Notes
  • If you wish, instead of making 'pan buns' use 2 baking sheets so they bake individually. Same taste - different look!

Copycat Chachi’s Cran & Brie Sandwich

Several years ago, Brion and I came across a deli we had never noticed before. It was called Chachi’s which proved to be a great find. After checking out the menu we decided on what they called a Cran & Brie Sandwich. OMG .. it was so good! Since then, we have had them numerous times so of course I had to see if I could come up with a copycat version.

Chachi’s Deli is a popular chain started in Calgary, Alberta and now has over 20 locations across BC, Alberta & Manitoba. The concept serves sandwiches with local ingredients, in a contemporary style butcher shop environment. They also serve mac ‘n’ cheese as well as other comfort food offerings. Known for sourcing high-quality ingredients from local partners, Chachi’s has built a reputation for delicious fast food and is raising the bar for ‘mall food’ although some find it a bit pricey.

In December 2006, the first Chachi’s opened in TD Square in downtown Calgary. Derek Brock and Jason Cunningham started the company because they felt there was a need in the marketplace for a premium sandwich offering, above what was being offered by the sub giants. The question that they were asking themselves was … what would happen if you made a sandwich with the best local ingredients possible? That’s how the first Chachi’s sandwich was made and that’s how the company started.

Derek Brock and Jason Cunningham first met over 20 years ago while working as managers at Starbucks Coffee. After forming a strong friendship, they partnered to open the first ever Jugo Juice in 1998. The Jugo Juice brand was a pioneer in the smoothie and juice industry and has since grown to a national chain with stores across the country.

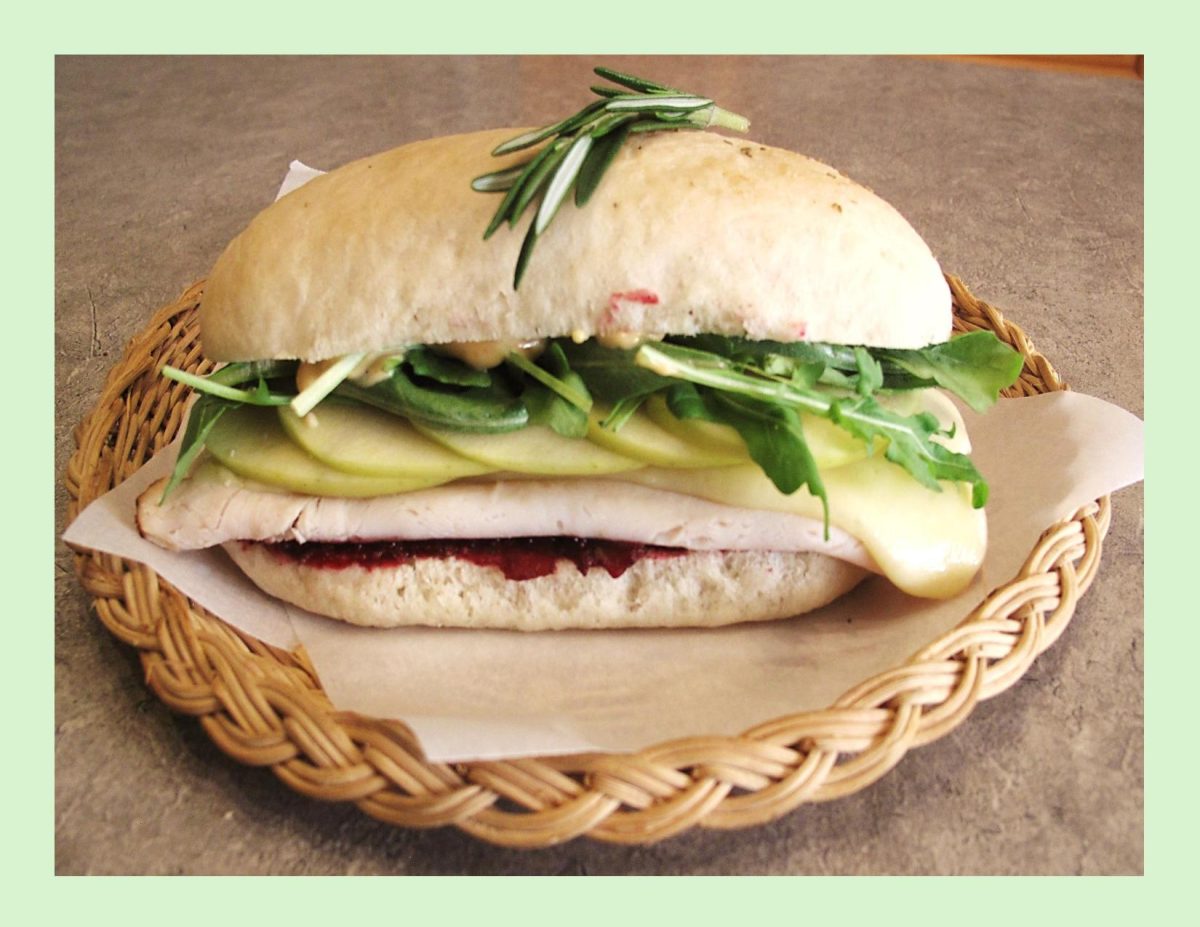
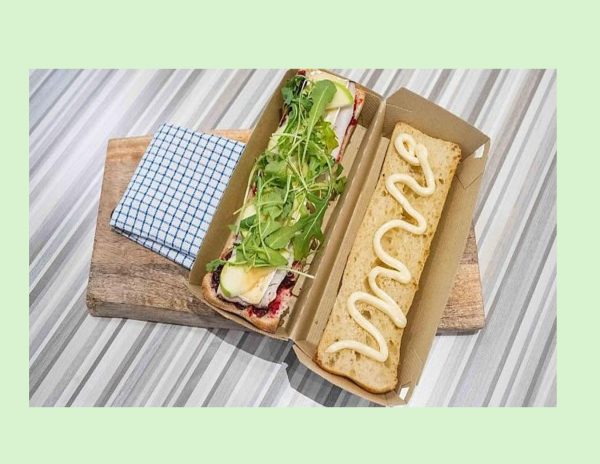
Chachi’s Cran & Brie sandwich consists of roast turkey breast, brie, cranberry chutney, mayo, arugula, granny smith apple & rosemary. Here is my copycat version which I’m sure will never quite match the original but …..

Print Recipe
Copycat Chachi's Cran & Brie Sandwich
Instructions
Ciabatta Rolls
  1. In a small bowl, combine yeast & 1/4 tsp sugar. Add lukewarm water set aside until frothy.
  2. In the bowl of your food processor or mixer (with dough hook), add flour, salt, remaining tablespoon of sugar and rosemary. Pulse once or twice to mix.
  3. When yeast is foamy, with mixer running, pour the liquid into dry ingredients. Add 3 tablespoons olive oil, continuing to mix until dough comes together in a ball. Add a little more flour if necessary, but your dough should by very sticky.
  4. Turn dough out onto floured surface & knead until smooth & elastic, about 20 times. Shape into ball & place into oiled bowl. Cover loosely & place in a draft-free, warm area.
  5. When dough has doubled in size, turn onto lightly floured surface & knead just a few times to deflate. Do not over knead. Divide dough into 6 equal pieces & shape into 6-inch long rolls. Place rolls on parchment paper. Press down & outward to flatten them to about 1-inch thickness. Cover loosely with plastic wrap which has been sprayed with cooking oil spray & set in a warm place until doubled in size.
  6. Preheat oven to 375 F.
  7. When rolls have risen & oven is hot, Remove plastic wrap, poke top of rolls with fingers to create slight indentations. Drizzle olive oil lightly & evenly over rolls. Sprinkle with coarse salt & dried rosemary if you wish.
  8. Slide parchment onto baking sheet bake for 20-25 minutes, until light golden brown.
Cranberry Chutney
  1. Place all chutney ingredients into a large saucepan. Bring to a simmer & cook on low heat until cranberries pop & fruit is soft, about 15-20 minutes. Adjust seasonings or sweetness to your taste. Remove from heat & cool slightly.
  2. Place chutney in a food processor & pulse a few times to puree ever so slightly. I like it to still have a nice texture but your not seeing specific chunks of apple.
Assembly
  1. Slice the ciabatta rolls in half lengthwise. On the bottom half of each, spread cranberry chutney & top with deli roast turkey slices. Layer brie cheese over the turkey. Next lay slices of Granny Smith apple. On the top halves of the ciabatta rolls squeeze some mayo.
  2. Place all prepared bottom & top halves of the rolls in a toaster oven to toast slightly & melt the brie cheese. When slightly toasted & brie is nice & melted, remove from toaster oven & top with arugula & bits of fresh rosemary (if you wish).
Recipe Notes
  • Brion & I used a 'smoky bacon mayo' on our sandwiches & it was real good!

Benedictine Liqueur Christmas Braid

Christmas bread has a lot of different interpretations. The most traditional iterations involve sugar and spice, and often—but not always—yeast, and ultimately have strong cultural associations and country ties. One thing we can all agree on is that Christmas bread is celebratory, whether or not we observe the holiday. From the unleavened matzo of Passover to the German stollen of Christmas, from the British hot cross buns baked on Good Friday to the Russian kolach baked for any special occasion, bread in its many forms brings people together, linking traditions and generations.

The scent of Christmas spices, bread baking, and fresh-cut pine define holiday memories. Generations ago, the rich dough itself – lush with butter, eggs, dried fruit, sugar – relayed a cook’s generosity, her willingness to share the most precious ingredients in her pantry. The time and effort it took to make and bake the Christmas loaves expressed the cook’s devotion and love.

Last year, I was introduced to the liqueur known as Dom Benedictine. After doing much research into this interesting liqueur, I incorporated it in some savory and sweet recipes. We really enjoyed them so this year I was interested in doing a bit of recipe development to create a Christmas bread with it.

The story of Benedictine dates back to 1510 when a Venetian monk of the Abbey of Fécamp, Dom Bernardo Vincelli, created an elixir intended to support good health. It includes a combination of 27 herbs and spices derived from plants from around the globe, including juniper, myrrh, saffron, vanilla, thyme, coriander and more. The liqueur tastes primarily of honey and baking spices, with citrus peel, herb, and stone fruit notes.

So here you have it, my newly created Christmas bread tradition. Hope you can try it and enjoy it as much as Brion & I have.

Print Recipe
Benedictine Liqueur Christmas Braid
Votes: 1
Rating: 5
You:
Rate this recipe!
Servings
SERVINGS
Ingredients
Bread Dough
Lemon Glaze
Servings
SERVINGS
Ingredients
Bread Dough
Lemon Glaze
Votes: 1
Rating: 5
You:
Rate this recipe!
Instructions
  1. Marinate raisins, candied fruit & cranberries in Benedictine liqueur overnight, Stir occasionally.
  2. Dissolve yeast in 1/4 cup lukewarm water with 1 tsp sugar. Set aside for 5 minutes.
  3. In a large bowl, sift 2 cups of the flour. Stir in yeast mixture & lukewarm milk. Cover with plastic & let stand in a draft free place until doubled in volume, about 1 hour. Punch down firmly & work in beaten eggs, 1/2 cup sugar, lemon zest, vanilla & pieces of softened butter.
  4. Sift remaining 3 cups of flour with salt, cinnamon & cardamom & work 2 cups in to form a soft dough. Turn dough onto a lightly floured work surface. Knead in remaining cup of flour & fruit mixture. This becomes a very soft & buttery dough but is not sticky.
  5. Invert the dough onto a lightly floured work surface & dust with flour. Cut the dough into four equal pieces & then stretch & roll each piece into a rope about 20 inches long. Lay the ropes parallel to one another (vertically). Pinch them tightly at the top, then fan them out.
  6. Begin by taking the strand farthest to the right & weave it toward the left through the other strands using this pattern: over, under, over. Take the strand furthest to the right & repeat the weaving pattern again: over, under, over. Repeat this pattern, always starting with the strand farthest to the right, until the whole loaf is braided, Tuck the ends under to give the loaf a finished look.
  7. Carefully transfer the braided loaf to a parchment-lined 13x18-inch baking sheet, brush with egg wash. Cover the loaf loosely with plastic wrap & allow to rise in a warm, draft-free spot until about 1 1/2 times the size, about 1-2 hours. Toward the end of the rising time, preheat the oven to 350 F. & set an oven rack in the middle position.
  8. Gently brush risen dough again with egg wash. Place in an air-bake pan to prevent the bottom crust from browning too much.
  9. Bake 40-45 minutes or until a nice golden brown. Cool on a wire rack. Combine powdered sugar & lemon juice/zest to make glaze. When braid is completely cool, brush loaf with lemon glaze & decorate to your liking.
Recipe Notes
  • To see a more in-depth article on Dom Benedictine Liqueur, check out my blog from December 21/2022 - Benedictine Liqueur Cupcakes.

Blueberry Chocolate Yeast Braid

I’m not sure what it is about chocolate that makes it such a good pair with berries. Blueberries for one, are the perfect match for dark chocolate. Bitter, sweet, fruity and awesome!

Some years ago, Brion & I were in California at a winery sampling some of their wines. They offered us some chocolate covered blueberries and that wonderful flavor has never left me.

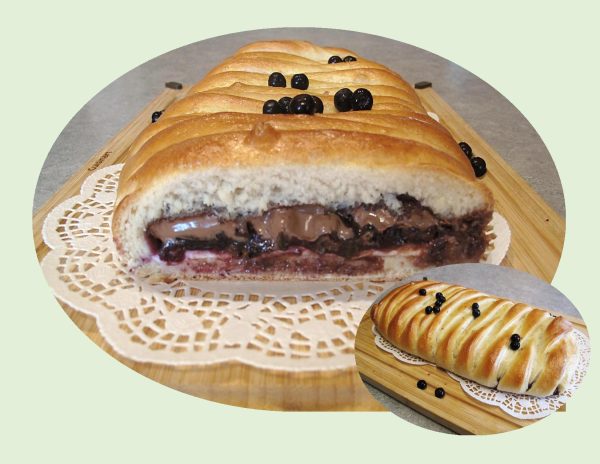
Since we are already into December and Christmas baking is up front and center, I thought it might be nice to experiment with a different filling for this yeast braid.

Christmas breads are often more decorative and have celebratory qualities to them, such as the Bulgarian Christmas Bread that symbolizes prosperity for the upcoming year. Other classic Christmas breads from around the world include Panettone or Stollen which are filled with fruits and nuts. Whether it’s for the sake of tradition or you just want to make something new and different, this is the best time of the year to get in the kitchen and whip up some beautiful ‘Christmas bread’.

Print Recipe
Blueberry Chocolate Yeast Braid
Votes: 1
Rating: 5
You:
Rate this recipe!
Servings
SLICES
Ingredients
Sweet Dough
Servings
SLICES
Ingredients
Sweet Dough
Votes: 1
Rating: 5
You:
Rate this recipe!
Instructions
Sweet Dough
  1. In a small dish, heat milk to lukewarm. Add yeast & 1 tsp sugar; let sit for 5 minutes to allow yeast to activate. In a large bowl, whisk together remaining 1/4 cup sugar, melted butter, sour cream & egg. Add yeast mixture & stir to combine.
  2. In another bowl, whisk flour & salt. Add flour mixture to yeast mixture 1 cup at a time, combining after each addition. Once the flour has been added, knead on a lightly floured surface for about 2 minutes.
  3. Lightly grease the large bowl, place dough in it & cover with plastic wrap & a tea towel. Allow to rest for at least one hour, in a draft free place until dough has doubled in volume.
Blueberry Filling
  1. In a saucepan, combine blueberries, sugar, cornstarch & lemon juice. Heat mixture over medium heat, stirring constantly, for several minutes until it thickens. Remove from heat & cool until ready to use.
Cream Cheese
  1. Slice cream cheese in about 1/8-inch thick & about 4-inches in length. Lay out on a piece of plastic wrap to form a rectangle about 10 X 4-inches in size. Lay plastic wrap with cheese on a tray & place in refrigerator until ready to use.
Assembly/Baking
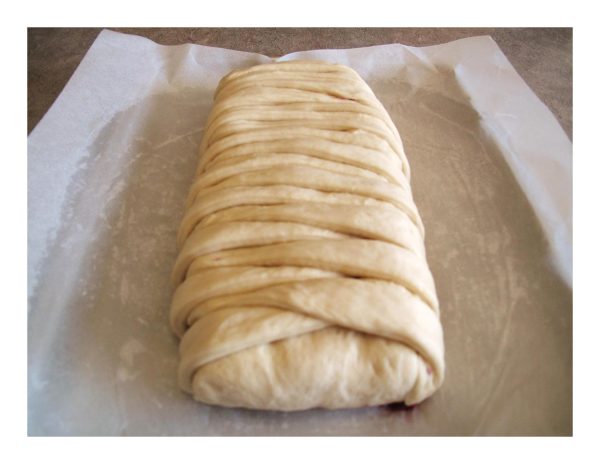
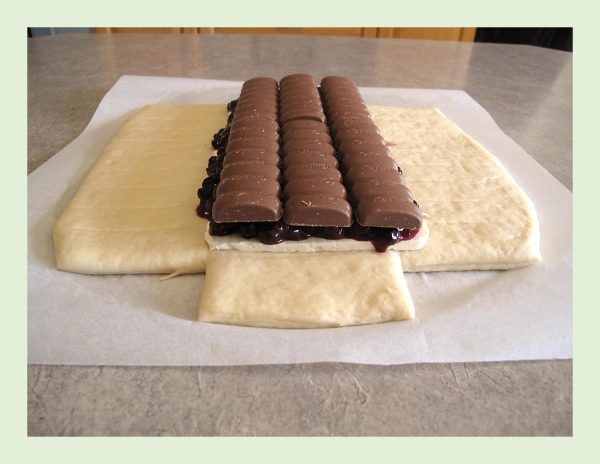
  1. On a large sheet of parchment paper, roll risen dough into a rectangle 13 X12-inches in size. With a straight edge, mark it in thirds lengthwise. On the two outer pieces, mark 1-inch strips. At the top & bottom you will need a 1 1/2-inch piece. The center rectangle should be 10 X 4-inches in size. Cut out the 4 corner 'wedges' as it will make a nice clean braid this way. ( I just made a couple of little sweet dough buns with a bit of jam filling with this excess dough.)
  2. Start with the cream cheese layer. Using the plastic wrap, flip it in the center rectangle. Next, top the cream cheese with blueberry filling then lay the chocolate bar over all to complete the third layer.
  3. Cut the strips on either side of the braid. Pull the end dough pieces up over the filling then start to braid with the side strips until you reach the other end. Using the parchment paper, lift the braid onto a baking sheet. Cover with a dry tea towel & allow braid to rest & rise for about 30 minutes in a draft free place.
  4. Preheat oven to 350 F. before the braid is finished rising.
  5. Carefully brush braid with egg wash & bake for 30 minutes until it is browned nicely.
  6. Remove from oven & cool slightly before serving. If you have leftovers for another day, warm the bread slightly so that the chocolate will be soft & runny. Yum!

Sweet Red Bean Buns/ Anpan

Many people are often surprised to hear that beans can be enjoyed as dessert. But ‘anko’, a paste made from red beans called ‘azuki’, is a staple in traditional Japanese confectionery, and has been enjoyed by Japanese people for centuries. Anko, or sweet red bean paste, is the equivalent of chocolate in the western world. 

The origin of red bean paste dates back to the Heian period when Chinese travelers visited Japan with recipes for steamed buns. Japan adopted the recipe and incorporated meat and vegetables; however, Buddhist priests were unable to eat the meat-filled buns, so they opted for a substitute of boiled azuki beans. The beans only began to be sweetened during the Muromachi period when Dutch traders started importing sugar to Japan.

Anpan is a sweet roll that was first made in 1874 by a samurai named Mr. Kimura. He lost his job due to the dissolution of the samurai as a social class back in Meiji period. During that time, Japan was becoming more westernized, and bakeries started to appear. His new job was as a baker.

Soon after Mr. Kimura founded the well-known bakery called ‘Kimuraya’, which still exists today. Kimura created a bread that was more suited to Japanese tastes. He replaced the traditional Japanese red bean mochi (a Japanese rice cake made from short-grain glutinous rice) with western bread instead of mochi and it is here where anpan, the traditional soft Japanese bread roll filled with red bean paste, was first invented.  

Anpan, derived from anko red bean paste, and pan, taken from the French word for bread (pain), is undoubtedly one of Kimuraya’s most famous products, and one of the most popular types of bread in Japan. Like true artisans, their original recipe has not changed since their first conception. Kimuraya have also not patented their recipe, allowing other bakers to make the same product as they please.

You can find anpan in bakeries and convenience stores all throughout Japan. Anpan is almost always filled with azuki bean paste in varying textures. Some are smooth, and others are chunky. Zunda beans (green beans) and white soybeans are common fillings. Other non-azuki bean paste flavors are pumpkin, chocolate, and cream, to name a few.

Red Bean paste comes in many shapes and forms, but one thing is constant: the ingredient is a special and meaningful component of different East Asian cultures. With its creamy texture, red bean paste is suitable for a multitude of desserts. Its flavor is sweet and savory at the same time, with notes of chocolate and walnuts.

Just for fun, I thought I would try making some anpan buns to see if we would like them. Of course, what’s not to like …. there sweet and soft!!

Print Recipe
Sweet Red Bean Buns
Votes: 1
Rating: 5
You:
Rate this recipe!
Servings
Ingredients
Sweet Red Bean Filling
Servings
Ingredients
Sweet Red Bean Filling
Votes: 1
Rating: 5
You:
Rate this recipe!
Instructions
  1. In a small bowl, dissolve yeast & 1 tsp sugar in lukewarm milk. Let stand for 5 minutes to allow yeast to activate. In a large bowl, whisk together 1/4 cup sugar, melted butter, sour cream & egg. Add yeast mixture, stirring to combine.
  2. In another bowl, combine flour & salt. Add flour mixture, 1 cup at a time, combining with wet mixture. Once all flour has been added, knead dough for about 2 minutes until smooth & elastic consistency, Place dough in a greased bowl & cover with a towel or plastic wrap. Allow to rise in a warm place until doubled in bulk, about an hour.
  3. Lightly butter 2 muffin pans using only 20 cups total.
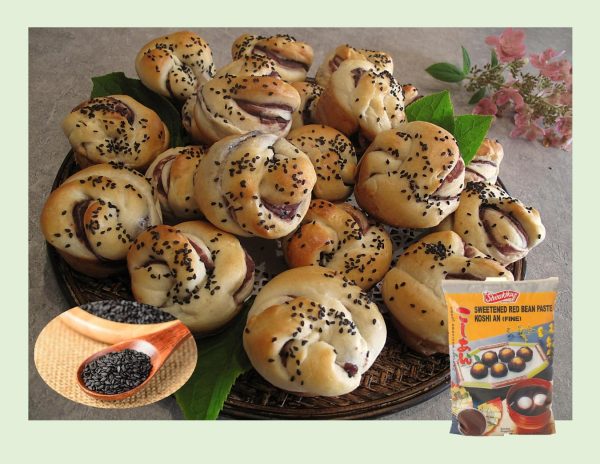
  4. Punch the risen dough down & transfer to a lightly buttered work surface. Divide the dough into 20 equal portions with about 50 grams each. Take one portion of the dough, shape it round, flatten it with a rolling pin, put a ball of red bean paste and seal it properly. Shape the ball, use a rolling pin to flatten (not too forceful or it will break the dough) it into a rectangular shape, use a sharp knife to cut 4 lines in the middle of the dough about ½-inches apart.
  5. Roll up, starting at the longest side of dough, twist & attach ends together. Place each bun in a muffin cup.
  6. Brush egg wash over tops of buns & sprinkle with sesame seeds. Cover buns with a tea towel & allow to rise for about 30 minutes or until doubled in size.
  7. Preheat oven to 350 F.
  8. Bake for 20 minutes or until golden in color. Remove from oven. Take buns out of pans & cool on wire racks.
Recipe Notes
  • If you prefer your bun dough a bit sweeter use 1/4 cup as opposed to 2 Tbsp as I did.

Ube Bread Pudding w/ Ube Cream Cheese Drizzle

Ube (pronounced OO-bay), is a purple yam native to the Philippines and other areas of Southeast Asia. Ube is a very versatile ingredient. It is not a purple sweet potato or taro, it is a purple yam. Its special taste reminds one of vanilla, pistachios or chestnuts. The vibrant purple color inside and out is uniquely photogenic.

Ube has been used for decades in Filipino cuisine and has now caught on in North America, especially in the form of desserts.

When I first tried using it sometime back, it was in some sweet rolls that were filled with ube ‘halaya’ or jam and topped with Edam cheese. We absolutely loved them. My next adventure was some ube cheesecake for Easter (2019). Both of these recipes have been published here on the blog.

Now, I’m taking it another step further and making an Ube Bread Pudding. This dessert is best made over two days due to that fact that you are making the ube bread from scratch. Should be interesting!

Print Recipe
Ube Bread Pudding w/ Ube Cream Cheese Drizzle
Votes: 1
Rating: 5
You:
Rate this recipe!
Servings
Ingredients
Ube Halaya (jam) Filling for Bread
Ube Bread Pudding
Ube Cream Cheese Drizzle
Servings
Ingredients
Ube Halaya (jam) Filling for Bread
Ube Bread Pudding
Ube Cream Cheese Drizzle
Votes: 1
Rating: 5
You:
Rate this recipe!
Instructions
Ube Halaya
  1. In a medium, heavy saucepan, melt butter. Add coconut & condensed milks; stir until heated. Add thawed, grated ube & stir everything together. This process takes about 40-50 minutes until the ube is cooked. The mixture will be thick & sticky. It is important to stir the mixture often during cooking to prevent it from forming a crust. Transfer the ube halaya to a container & set aside.
Ube Bread
  1. In a small dish, heat milk to lukewarm. Add yeast & 1 tsp sugar; let sit for 5 minutes to allow yeast to activate. In a large bowl, whisk together remaining 1/4 cup sugar, melted butter, sour cream & egg. Add yeast mixture & stir to combine.
  2. In another bowl, whisk flour & salt. Add flour mixture to yeast mixture 1 cup at a time, combining after each addition. Once all the flour has been added, knead on a lightly floured surface for about 2 minutes.
  3. Lightly grease the large bowl, place dough in it & cover with plastic wrap & a tea towel. Allow to rest for at least one hour, in a draft-free place until dough has doubled in volume. Grate cheese & set aside in refrigerator until needed.
  4. Grease 2 loaf pans. Punch dough down & divide in half. Roll each piece out to about 7x7-inch (18x18 cm) square. Spread ube halaya over each one leaving about 1/2-inch border all the way around. Sprinkle each square with Edam cheese then roll up in jelly-roll style. Pinch to seal seams & place seam side down in loaf pans. Cover with plastic wrap & a tea towel. Allow to rise for an hour or until doubled in size.
  5. Preheat oven to 350 F. Bake bread for about 50 minutes until golden brown. Remove from oven; cool for just a few minutes then pat with butter. Sprinkle with more grated cheese.
Ube Bread Pudding (ON THE FOLLOWING DAY)
  1. Preheat oven to 350 F. Butter a 8 x 8-inch baking dish. Cut thick slices of ube bread into 1-inch cubes & spread out in baking dish. In a saucepan, melt butter into milk on medium-high; do not let it boil. Remove from heat when butter is melted.
  2. In a small bowl, whisk eggs & coconut extract together. Slowly pour egg mixture into butter/milk mixture & begin whisking immediately to avoid scrambling the egg mixture. Pour custard over the ube bread pieces; use a spoon to work liquid between the pieces.
  3. Bake for about 30-45 minutes or until the top is springy. While the bread pudding is baking, make the ube drizzle.
Ube Drizzle
  1. In a bowl, using a mixer, beat butter for 2 minutes then add cream cheese & beat for another minute. Add powdered sugar slowly then beat thoroughly; add vanilla. Mix in ube halaya until well combined. Add enough milk to make a drizzle consistency. Either drizzle bread pudding before or after cutting into serving pieces.
Recipe Notes
  • You will have extra Ube Bread & Ube Halaya but it will no doubt be eaten before you have a chance to freeze it. Other than just enjoying it by the slice, it makes great French toast as well.

Garlic Bread Meatball Bombs

HAPPY LABOR DAY!

Although, we have not officially reached the first day of fall (Sept. 23), this part of the year often begins with a tinge of melancholy. Even so, there are many ways to appreciate Canada’s most sentimental season.

Part of our country’s appeal is its four season’s: Winter, Spring, Summer & Fall. We are entering the season of the fall harvest and the leaves on the trees begin their transformation to stunning shades of orange, red and yellow.

Labor day week-end gives us an opportunity to enjoy family and friends before summer is officially over. I remember as a kid, once we arrived at the Labor Day week-end all those ‘lazy, hazy, crazy days of summer were gone’. Back to school for another year. So, whatever your choice of relaxation is, you know good food will play a big part in the week-end gatherings.

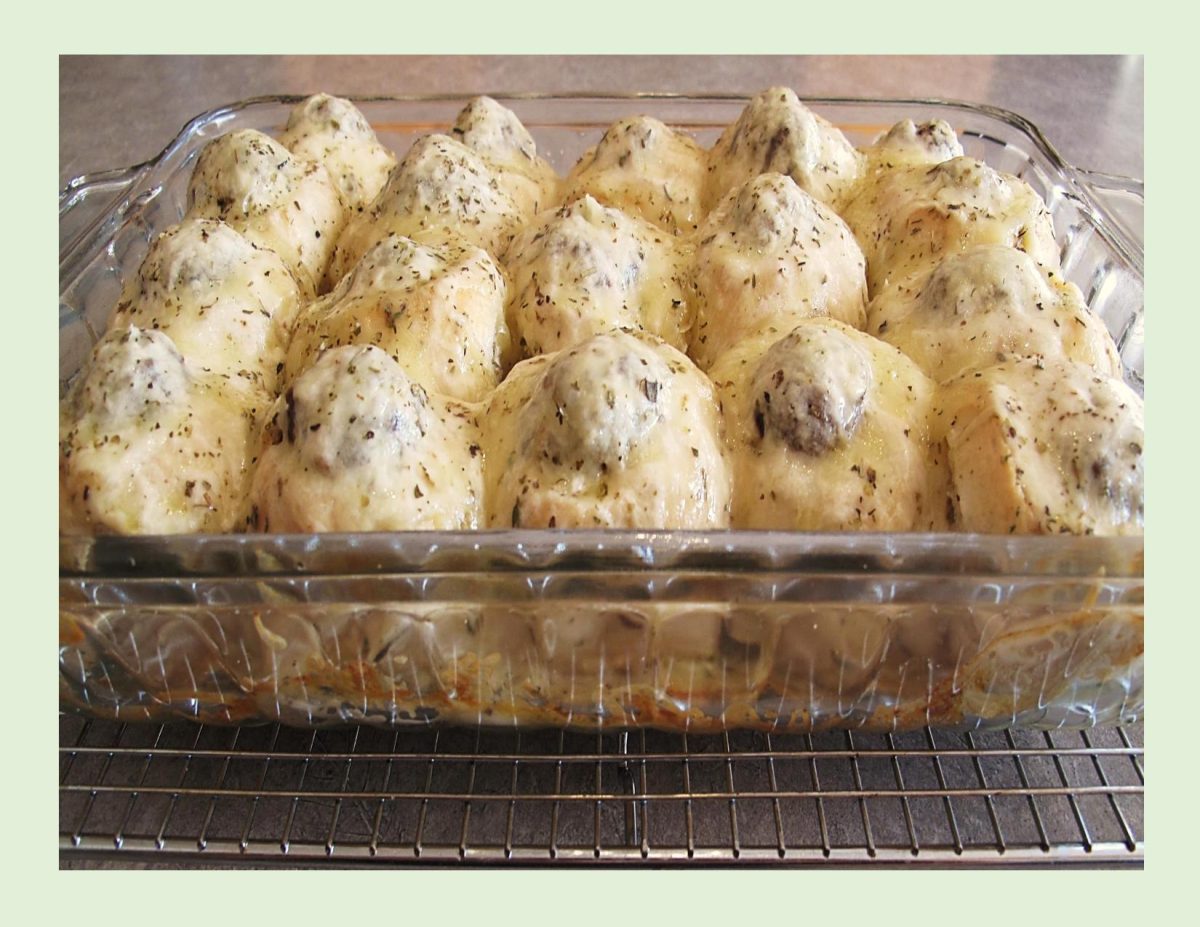
Meatball bombs are a round homemade ‘hot pocket’. They have everything in them you need to make a great tasting meal. Serve two bombs per person. That means each person gets two meatballs, two dinner rolls, lots of sauce, and some gooey, cheesy goodness. Serve these with a simple side salad to round out the entire meal.

Speaking of Hot Pockets, I’m sure most everyone has tried them at some time since they have been around for over 40 years.

Probably the one lasting memory if you have,  is you know that the first bite of the microwavable, molten-in-the-middle meal will burn at least three layers clean off the roof of your mouth.

The frozen creations known as Hot Pockets were created by two Jewish Iranian brothers Paul and David Merage, who immigrated to the United States from Tehran. In 1977, the Merage brothers founded Chef America Inc. and set out to create a portable sandwich whose dough would actually retain its crispness after a few minutes in the microwave. Their creation, which debuted in 1980, was called the Tastywich, but it didn’t last long with its original name. By 1983, after some recipe tweaking, the Tastywich had a new name and Hot Pockets officially hit the market.

History aside, if you’re looking for some flavorful garlic bread meatball bombs, this is just the dish for you! And, you have the choice to use a lot of prepared ingredients from your grocery store, or you can make them all from scratch. There are options for both types in this recipe.

Print Recipe
Garlic Bread Meatball Bombs
Votes: 1
Rating: 5
You:
Rate this recipe!
Servings
Ingredients
Dinner Rolls
Garlic Butter
White Sauce
Servings
Ingredients
Dinner Rolls
Garlic Butter
White Sauce
Votes: 1
Rating: 5
You:
Rate this recipe!
Instructions
Dinner Rolls
  1. Dissolve yeast & sugar in lukewarm water & allow to sit a few minutes until frothy. Add oil, salt, & 2 1/2 cups flour, beat until smooth. Stir in enough remaining 1/2 cup flour to form a stiff dough..
  2. Turn onto a floured surface; knead until smooth and elastic, 6-8 minutes. Place in a greased bowl, turning to grease the top. Cover: let rise in a warm place until doubled, about an hour.
  3. Punch down the dough. Divide the dough into 18 pieces. Pinch the ends of each dough piece together in the center. Place seam side down. Use the palm of your hand to gently roll each dough ball until smooth and round.
  4. Place the dough balls in a parchment lined baking dish. Cover & allow rise until doubled in size, about 30 minutes.
  5. Preheat the oven to 350F.
  6. Lightly brush with egg wash. Bake until golden brown, 20-25 minutes. Remove rolls to a wire rack.
Meatballs
  1. Preheat oven to 350 F.
  2. In a large bowl, combine all ingredients for the meatballs & mix well. Divide mixture into 18 meatballs & place on a foil lined baking tray. Bake 35 minutes or until meatballs are cooked through. Remove from oven & set aside.
White Sauce
  1. In a saucepan, cook butter & flour until bubbly. Slowly add broth & cream; boil for a FEW minutes, add soy, salt & pepper. Set aside.
Assemble & Bake
  1. Hollow out the top of each roll with a sharp knife. The hole will need to be slightly bigger than the meatballs, but not so deep that you puncture the bottom.
  2. Set the rolls into a 9×13" baking pan which has been coated with non-stick cooking spray. Set aside.
  3. Whisk together garlic butter ingredients. Using the back of a teaspoon, liberally smear the holes of the dinner rolls with the garlic butter. Use all of the butter evenly into each dinner roll.
  4. Spoon about a tablespoon of the prepared sauce into each of the hollowed out dinner rolls. Place a cooked meatball into each hole. Top each meatball with the remaining sauce mixture. Evenly distribute the cheese over each of the dinner rolls. Sprinkle on the Italian seasoning.
  5. Bake for 10-12 minutes, or until the cheese is melted and bubbly. Remove from oven.
  6. Using a sharp knife, slice between each dinner roll. Garnish with parsley if you wish.
Recipe Notes
  • For a QUICK & EASY meal use:
  • 12 (store bought) dinner rolls
  • 12 frozen meatballs, cooked
  • FOR SAUCE: 
  • 1/2 cup dried tomato paste
  • 2 cups marinara sauce
  • 1 Tbsp olive oil
  • NOTE: I found for the original recipe it was easier to make the meatballs & sauce first, then the rolls. Just a suggestion!