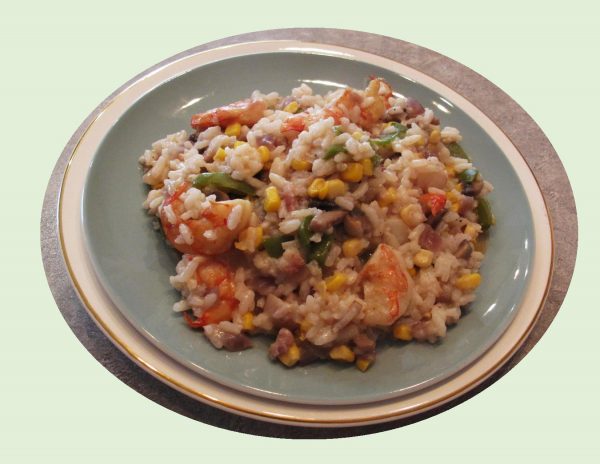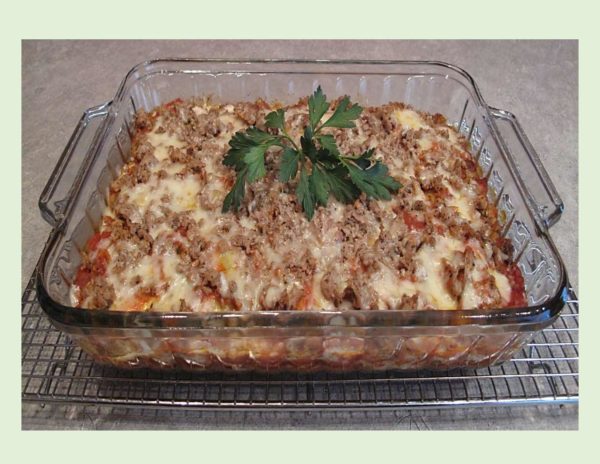
Comforting, creamy risotto is one of those dishes that isn’t difficult to prepare but it can be quite time consuming. I find it works best for me when I’m doing other things in the kitchen at the same time.
Risotto is typically made with arborio rice, but pearl barley is a good substitute; it produces a similar texture but with a nuttier taste.
Over the years, I have made various kinds of risotto. Brion is the eternal rice lover. He could eat rice everyday of the week. Even though his favorite is just plain white rice, I can’t resist adding risotto to the mix now and again.
As a rule, if you are using corn in risotto, it would probably be fresh. In February, ‘fresh’ is not happening in our part of the country yet. One of the most favorite canned vegetables in North America is corn. Personally, I love corn no matter if its canned, frozen or fresh. Without trying to sound like an advertisement, I found that Green Giant Steam Crisp was real nice for this recipe. It’s supposedly picked at its peak and then quickly steamed in the can to preserve as many vitamins and nutrients as possible. I added some bacon and mushrooms to give it some extra pizzazz!
Print Recipe
Sweet Corn Risotto w/ Sauteed Shrimp
Votes: 1
Rating: 5
You:
Rate this recipe!
Ingredients
- 3 cups PLUS 1/4 cup chicken broth
- 3 strips bacon, chopped
- 1-2 Tbsp unsalted butter
- 150 gm fresh mushrooms, sliced
- 1/2 large green pepper
- 1 small white onion, minced
- 1 cup pearl barley or arborio rice
- 341 ml Green Giant Steam Crisp corn, drained
- 2 Tbsp unsalted butter
- 1/4 cup Parmesan cheese, grated
- 2 Tbsp fresh parsley, chopped
- salt & pepper to taste
- 2 cloves garlic, minced
- 1 small shallot, minced
- 1 tsp red pepper flakes, crushed
- 300 gm WILD, jumbo shrimp, peeled & deveined
- 2 Tbsp fresh basil, chopped
|
Votes: 1
Rating: 5
You:
Rate this recipe!
|
Instructions
In a medium saucepan, bring chicken broth to a simmer.
In another large saucepan, saute bacon until lightly browned but not crispy. Using a slotted spoon, transfer bacon to a plate lined with paper towels. Drain off fat & wipe out pan with paper towels.
Add butter to pan & melt over medium heat. Saute mushrooms until moisture evaporates; add onion & green pepper. Saute for 5 minutes or until tender crisp then add barley (or rice) & hot chicken broth; simmer, stirring occasionally until all broth is absorbed, 15-20 minutes. If you need to make more broth, do so but be sure it is hot before adding it.
When barley (or rice) is cooked & broth is absorbed, remove from heat & stir in corn, butter, Parmesan & parsley. Season with salt & pepper & transfer to a large bowl.
Add remaining 2 Tbsp olive oil to skillet & heat over medium-high heat. Add garlic, shallot & red pepper flakes & cook until fragrant, 1-2 minutes. Add shrimp & cook until pink & beginning to brown, 3-4 minutes. Add 1/4 cup chicken broth & let simmer until evaporated, about 2 minutes. Remove from heat, season with salt & pepper & stir in basil. Add risotto & bacon back to skillet, stirring to combine with shrimp. Serve.

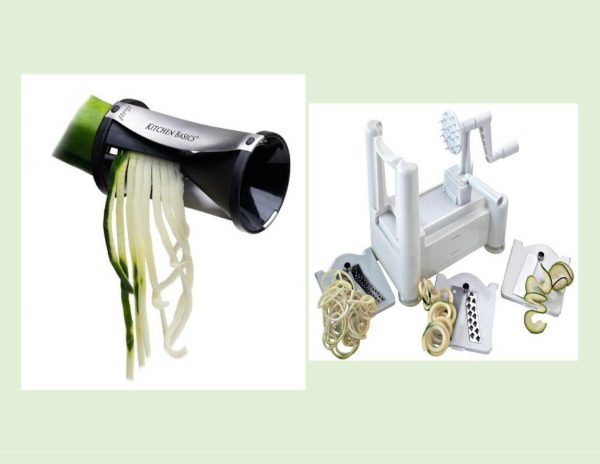
Spiral vegetable slicers, also known as spiralizers, have been a trending kitchen gadget since about 2014. This nifty apparatus can transform veggies such as zucchini, pumpkin, carrots, parsnips, beets, turnips, squash, potatoes ……. into linguine-like strands which can be used as an alternate to pasta.
The process is pretty simple, either peel or wash the raw piece of produce and use the tool to spiral it down into a noodle shape. There are two basic varieties of vegetable spiralizers on the market to consider.
For smaller kitchens and counter spaces there is an hourglass-shaped tool. It is two sided for the option of thin or thicker noodles and calls for an easy manual twisting of the vegetable to produce noodles. It comes with a small metal prong to hold the veggie in place.
For larger kitchens and counter spaces there is a tri-blade version with a variety of attachments and a handle so you can crank out your noodles.
Spiralled veggies are easy and fast to cook. For best results make sure to pat them dry before cooking. I prefer to season and saute ours for a few minutes.
What makes pasta great is not the actual pasta but the sauce you put on it. Vegetable noodles have the same consistency as pasta, so when it comes to sauces, the less water the better. Reduce tomato-based sauce as much as possible or choose thicker cream-based sauces to pair with your veggie noodles.
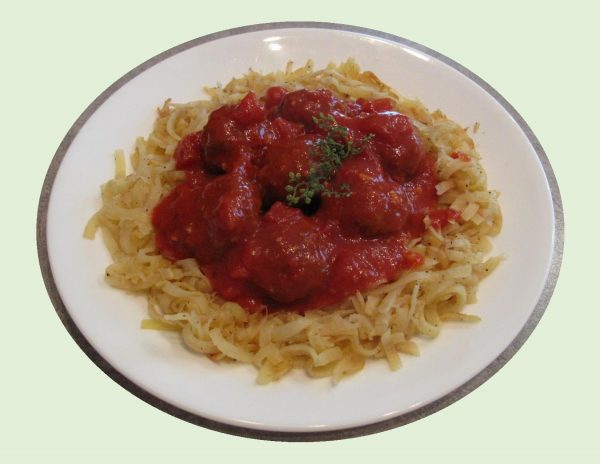
Parsnips are a vegetable we both enjoy, so for something different, I spiralized them. Brion was amazed at how much this meal looked like spaghetti and meatballs. Nice change!
Print Recipe
Parsnip Noodles with Meatballs
Votes: 1
Rating: 5
You:
Rate this recipe!
Ingredients
- 220 grams turkey, ground
- 220 grams pork, ground
- 50 grams cheese of your choice, shredded
- 4 cloves garlic, grated + 2 cloves garlic, minced
- 1 tsp Italian seasoning
- 1/2 tsp red pepper flakes, crushed (optional)
- 1 bouillon cube, crumbled
- salt & pepper to taste
- 1 cup fresh cilantro or parsley, chopped
- 3 Tbsp butter,
- 4 medium parsnips, spiralized
- Juice of 1/2 lemon
- 1 Tbsp hot sauce of your choice
- Purchased OR homemade pasta sauce of choice
|
Votes: 1
Rating: 5
You:
Rate this recipe!
|
Instructions
In a large bowl, combine ground meat, cheese, grated garlic, Italian seasoning, bouillon cube, red pepper flakes, chopped cilantro & some black pepper. Combine well & form into meatballs.
In a large skillet, over medium-low heat, melt 2 Tbsp butter. Cook meatballs for 8-10 minutes until browned & cooked through. Add pasta sauce & continue cooking until sauce is hot. Remove to a bowl & keep hot while you saute your parsnip noodles.
In the same skillet, melt remaining Tbsp butter; add lemon juice, hot sauce & minced garlic. Add the spiralized, parsnip noodles & saute for 3-4 minutes, stirring regularly, until parsnips are tender-crisp. Adjust seasoning with salt & pepper.
Divide parsnip noodles between serving plates & top each with meatballs & sauce.
-
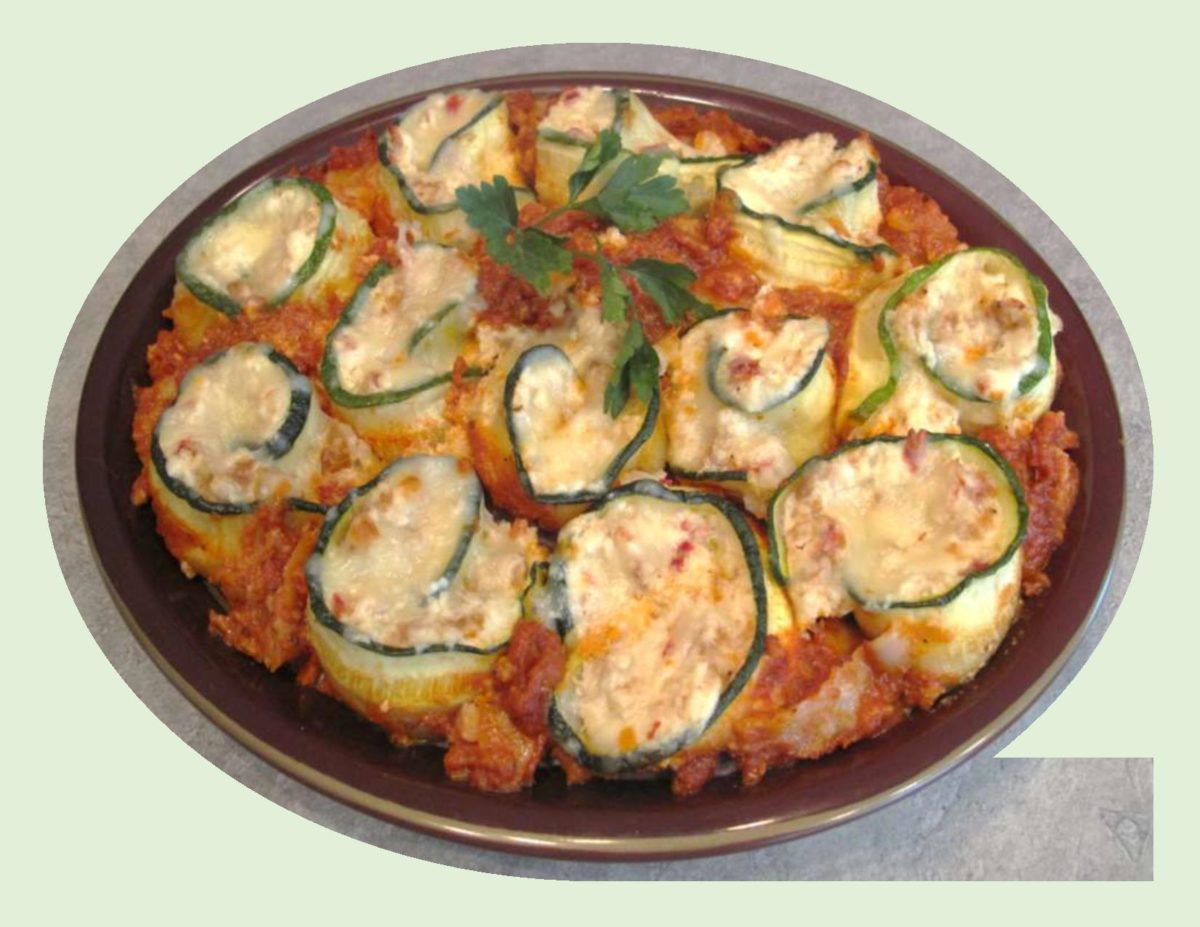
Even though we are almost at the end of fall, there is still time to embrace those summer zucchini. I realize using zucchini instead of lasagna noodles is not a new idea but definitely a natural substitution. Lasagna, in any form, has to be up there on our list of comfort foods. Their saucy, cheesy and you have endless possibilities with fillings.
Thinly sliced zucchini stands in for the noodles and the three cheeses give this vegetarian lasagna plenty of richness, but for an even more substantial dish, I added some cooked and crumbled Asiago sausage.
It certainly has wonderful eye appeal but even more important, the flavor was amazing. Asiago/Red Pepper sausage is made in-store by Save-On Foods in our city. It has become my ultimate favorite in fresh sausage to use.
Print Recipe
Zucchini Lasagna Roll-Ups with Asiago Sausage
Votes: 1
Rating: 5
You:
Rate this recipe!
|
|
Votes: 1
Rating: 5
You:
Rate this recipe!
|
Instructions
Preheat oven to 400 F. Grease a sheet pan with 1 Tbsp oil; set aside. Slice zucchini into 1/8-inch thick slices. Lay zucchini slices on prepared baking sheet & roast for 10-12 minutes. Remove from oven & cool for 5 minutes before handling. Leave oven on for baking casserole.
In a saucepan, crumble-fry sausage; remove & drain on paper towel. In a bowl, beat egg & combine with ricotta cheese, Parmesan cheese, 1/2 cup mozzarella cheese, salt & pepper.
In a 9 X 13-inch baking dish, spread some marinara sauce on the bottom. Assemble zucchini roll-ups by laying the zucchini strips on a flat work surface. Divide filling between strips & spread. Sprinkle each strip with a bit of mozzarella cheese. Roll up & place in casserole dish. Drizzle remaining sauce on rolls & sprinkle with remaining mozzarella cheese.
Bake, uncovered for 20-25 minutes or until cheese is melted & bubbly.

Mostaccioli, known in Italy as ‘penne lisce’, are a specialty of the Campania Region in Southern Italy, which includes the cities of Naples, Capri and Sorrento. This pasta is smooth in texture, tube-shaped with angled ends cut to resemble a quill or pen point.
Without realizing it, the pasta shape we choose plays an important role in the outcome of the dish. Long or short, smooth or ridged, thick or thin, with or without curves and crevices, different shapes of pasta capture sauce differently.
Shaped pastas pair well with sauces that have some texture. The crevices and twists will give pieces of meat and veggies a place to nestle into.
Short tubular pastas are great for sauces that are thick and chunky.
Long, thin, dried pasta need lots of lubrication. Olive-oil based sauces will coat, but not drown the pasta. The thicker pasta, like fettuccine can stand up to cream sauces and ragus. If your adding vegetables or herbs, cut them string-like rather than in cubes for ease in blending them.
This is a quick, low-cost meal but has good flavor.
Print Recipe
Chili Mostaccioli
Votes: 1
Rating: 5
You:
Rate this recipe!
|
|
Votes: 1
Rating: 5
You:
Rate this recipe!
|
Instructions
In a bowl, combine meat, milk, crumbs, garlic, onion & seasonings; shape into 4-5 oblong patties. In a skillet, brown patties in hot oil. Remove to drain on paper towel.
Drain any liquid from skillet & wipe with paper towel. In the skillet, combine soup with water & bring to a simmer. Add meat patties; gently simmer, covered for about 10 minutes then add drained & rinsed kidney beans. Simmer 5 more minutes until beans are hot.
Cook pasta according to package directions; drain. Place on a large warm serving platter. Arrange patties over mostaccioli pasta. Pour sauce over meat & pasta; sprinkle with Parmesan cheese & serve.
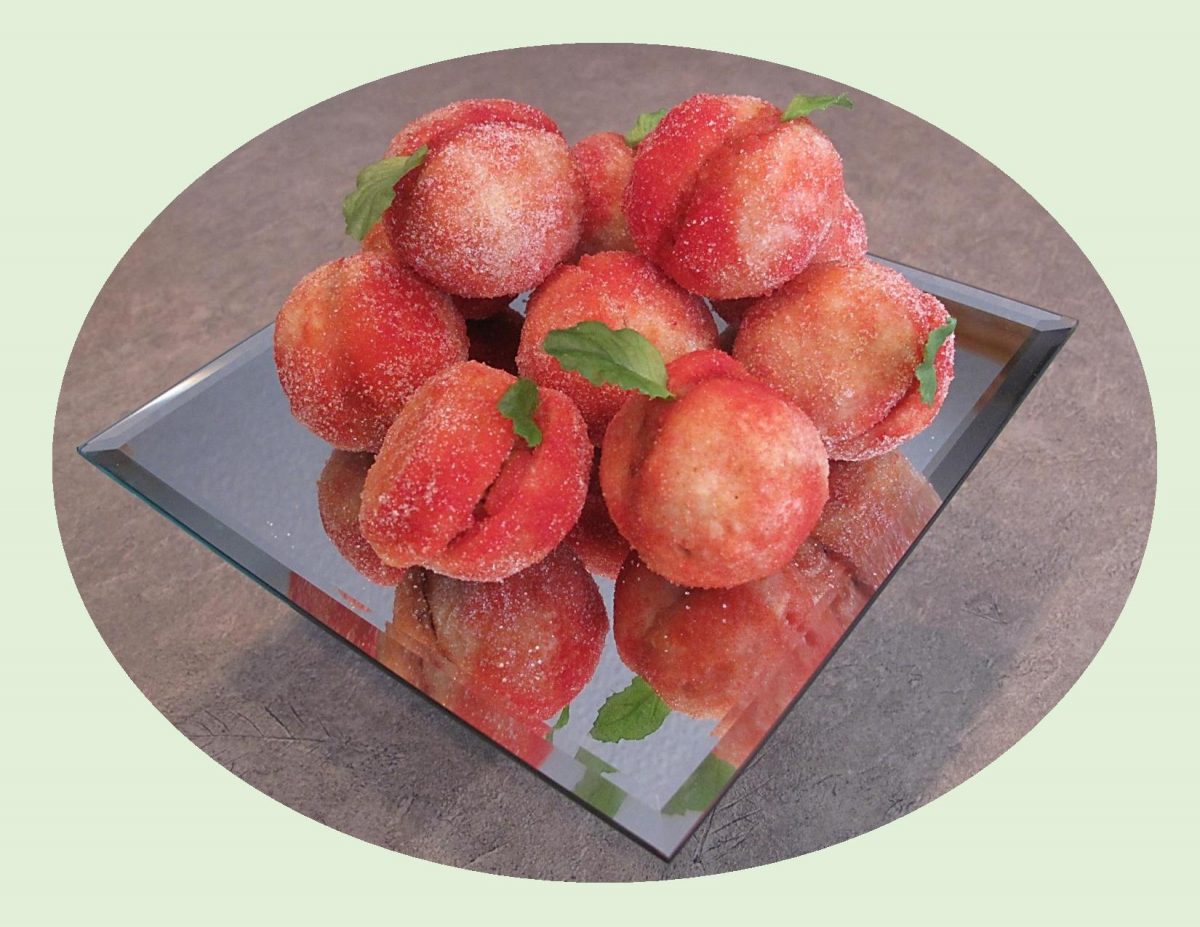
It’s that wonderful time of year when there is an abundance of fresh fruit available so why not make the most of it?! Peaches are a favorite of mine, not only because of their great taste but they have such versatility in their uses. Just for something different today, I want to take the peach idea in a whole different direction. These beautiful, old fashioned pastries were very popular in the 1980’s. They are known for their unique look that resembles a fresh peach with a flavor that is delicately sweet and buttery. Traditionally served at Italian wedding showers, Pesche (or peach), are now served at any celebration and may be found throughout many countries in Europe.
Peach cookies are two cookie domes, carved on the inside and paired together to hold a dollop of custard. Once assembled, they are dipped in Alchermes, a crimson colored liqueur infused with a blend of anise flowers, cinnamon, cloves, coriander, jasmine, mace, nutmeg, orange peel, sugar and vanilla. These ingredients are stepped in alcohol, which is then flavored with rose water. Alchermes gives these pastries a vibrant pink hue and a unique, light alcohol flavor that combines custard and cookie beautifully. To further enhance the peach resemblance, they are rolled in a sanding sugar.
Alchermes is a very ancient liqueur of Arabic origin. It’s main feature is an unmistakable scarlet color, which was originally acquired by adding ‘kermes’, a scale insect that eat oak trees. Modern alchermes liqueurs no longer use the kermes insect. Alchermes was created in the Frati’ Convent at Santa Maria Novella in Florence, Italy.
These peach cookies are an impressive dessert, perfect for special summer occasions. You can use any filling you choose such as a pastry cream, lemon curd, limoncello or just plain nutella spread. Since it is almost impossible to find the alchermes liqueur in Canada, I’ve listed a few substitutes that can be used instead.
Print Recipe
Peach Cookies or Pesche
Votes: 2
Rating: 4.5
You:
Rate this recipe!
|
|
Votes: 2
Rating: 4.5
You:
Rate this recipe!
|
Instructions
Cookie Dough
Preheat oven to 350 F. Line a cookie sheet with parchment paper.
In a large bowl, sift flour & baking powder. In another bowl, whisk egg with sugar until combined & fluffy. Whisk in milk, melted butter, vanilla & lemon zest until well combined. Gradually add flour mixture into wet ingredients until incorporated & a soft dough is achieved. Form the dough into 16-20 small balls; place on baking sheet & press slightly on top to flatten a bit.
Bake for approximately 15-20 minutes. Remove from oven & cool on wire rack until cool enough to hold. With a sharp small knife remove the middle of the cookie forming a small hole. Reserve crumbs for filling.
Filling
In a small bowl, combine filling ingredients; stir in reserved crumbs. Spoon into center holes of cookies & press together to form a peach.
Coating
In a shallow bowl, combine lemon & peach gelatin powder. Place package of strawberry gelatin in another bowl. Place sugar in a third bowl.
Assembling
Working with one cookie at a time, spritz cookie with a bit of water. Dip in lemon mixture, then in strawberry gelatin & then in sugar. Spritz with additional water & add more gelatin as needed to create desired 'peach blush' effect. Place on a wire rack to dry for an hour. Attach mint leaves to top of each cookie with additional preserves. Store in refrigerator.
-
Recipe Notes
- Alchermes can be substituted for a peach liqueur or Chambord raspberry liqueur. For my peach cookies, I kept it simple & used a combination of jello powders to replicate the traditional idea.

Ever since I made pizza with yeasted potato crust it has become a staple in our meal rotation list. It seems like all it takes to come up with an amazing filling combo is just a little inspiration so the influence of flavors Brion and I tasted in Mexico became a natural choice for me.
Although avocado on pizza may sound weird, if you are a guacamole lover, its glorious. When you think about it, tomato or tomato sauce is a big part of pizza most of the time. Often guacamole is made with tomato, so it compliments pizza well. I used all the ingredients you would normally fit into a tortilla for toppings. Spicy chicken, bacon, avocado, onion, tomato, cheese and GUACAMOLE!
When I make guacamole for pizza, I like to keep it simple: mashed avocados, onion, garlic, lime juice, salt and cilantro. Another thing I found, was that any left over pieces can be wrapped tightly in plastic wrap and placed in a freezer bag and frozen. When you want to use them, thaw at room temperature then heat slightly in the microwave. Most often pizza is frozen unbaked and needs assembly and baking. This pizza tasted just as good as when it was freshly baked!
Print Recipe
Spicy Chicken, Bacon & Avocado Pizza
Votes: 1
Rating: 5
You:
Rate this recipe!
Ingredients
Pizza Toppings
- Marinated chicken strips
- 3-4 slices bacon, crisply cooked, coarsley chopped
- 1/4 cup onion, chopped & cooked a few minutes in the microwave
- 1 EACH red & green pepper, small, julienned
- 1 large Roma tomato, seeded & chopped
- 1 avocado, peeled, seeded & sliced thin
- 100 grams Gouda or your choice of cheese, shredded
- 100 grams 100% mozzarella cheese, shredded
- 1/2 cup Guacamole
|
Votes: 1
Rating: 5
You:
Rate this recipe!
|
Instructions
Pizza Dough
Cook potato, peel, mash & cool. Combine yeast with lukewarm water; whisk until yeast is dissolved. Let stand about 3 minutes until foamy. Add butter, salt, sour cream & potato; mix well.
Stir in flour, one cup at a time. When dough is completely blended, turn onto a lightly floured surface. Knead dough about 10 minutes, until smooth & elastic. Place dough in a lightly greased bowl, cover with a tea towel & allow to rise in a warm place until doubled in bulk, about 1 hour.
Chicken Marinade
In a large resealable plastic bag, combine all ingredients. Seal & turn to coat; refrigerate for 1-4 hours.
Guacamole
In a large bowl, coarsely mash avocados with lime juice & salt. Stir in garlic, onion & cilantro. Blend well. Cover & set aside until ready to use. You will have extra for something else.
Pizza Topping Prep
In a skillet, cook bacon until fairly crisp, drain on paper towels & chop coarsely. Wipe skillet with paper towel. Add marinated chicken, stir-fry until cooked then remove to a dish. Add peppers & onion to skillet; sauteing until tender crisp.
Assembly
Preheat oven to 375 F. On a large sheet of parchment paper, roll or press dough into a 16-inch circle. Transfer with paper to a baking sheet.
Using some grated cheese, make a ring around the outer edge of the dough. Roll dough once over cheese ring. Carefully spread the 1/2 cup of guacamole over the bottom of pizza, then sprinkle with a bit more cheese. Layer with avocado slices, onion, bacon, chicken, tomato & remaining cheese. If you prefer, brush to top of the outside ring with egg wash.
Bake for 15-20 minutes or until golden brown, Remove from oven & slice.
Recipe Notes
- You may choose to prepare your marinated chicken & guacamole before you start making the dough.

The customization of pizza crust has undoubtedly been one of the biggest innovations in the (pizza) industry. The crust you choose to make helps to dictate taste, texture, thickness and your selection of toppings.
Pizza has taken on many different forms since its original inception — especially when it comes to the crust. For example:
Thin Crust is characterized by its light, slightly crispy texture. This is the perfect crust for those who want an authentic Italian pizza.
Thick Crust is characterized by its buttery, pan fried taste and texture on the outside, with a soft chewy center.
Flatbread Crust – health conscious people feel less guilty about eating this pizza because it isn’t as filling as other crust types.
Focaccia is a thick, ‘bready’ dough infused with herbs and brushed with olive oil before baking, then covered with cheeses, herbs and spices and minimal toppings.
Wood Fired Crust – it’s characteristics are defined by their deep, smoky taste derived from using real wood to heat the baking oven.
There are endless ways you can create a custom crust for your pizza. Such as using pita bread, English muffins, rice cakes, tortillas, potato slices or chips. I experimented with making a yeast crust with mashed potatoes and sour cream in it. Without trying to sound boastful, it was probably the best pizza crust I had ever made to date. I think I nailed it!
Print Recipe
Potato Crusted Asiago Sausage Pizza
Votes: 1
Rating: 5
You:
Rate this recipe!
|
|
Votes: 1
Rating: 5
You:
Rate this recipe!
|
Instructions
Potato Pizza Crust
Prepare mashed potato. In a dish, combine yeast with lukewarm water; whisk until yeast is dissolved. Let stand about 3 minutes until foamy. In a large bowl, combine butter, salt, sour cream & mashed potato; mix well. Add yeast mixture & stir again.
Stir in flour, 1 cup at a time. When dough is completely blended, turn onto lightly floured surface. Knead dough about 10 minutes, until smooth & elastic. Place dough in a lightly greased bowl, cover with a tea towel & allow to rise in a warm place until doubled in size, about 1 hour.
Dijon Mustard Sauce
In a small saucepan, saute garlic in butter until tender but not brown. Stir in flour, mustard & crushed thyme. Season with salt & pepper; add broth & cook, stirring until thick & bubbly. Continue to cook 1 more minute the remove from heat & set aside to cool.
Pizza Fillings
In a skillet, saute red pepper & onion until soft; remove to a dish. In the same skillet, scramble fry sausage meat until cooked; drain on paper towel, set aside. Drain, sliced olives & grate cheese.
Assembly
Preheat oven to 375 F. Remove risen dough from bowl turning onto a large sheet of parchment paper. Press or roll dough into a 16-inch circle. Using some of the grated cheese, make a ring around the outer edge, & fold over to make a 'stuffed crust'.
Carefully spread mustard sauce over bottom of pizza, then sprinkle with another portion of grated cheese mixture. Layer with red peppers, onions, sausage meat & olives. Top with remaining cheese.
Bake for 20 minutes or until crust is golden. Remove from oven & slice.
Even if we are not quite at the peak of zucchini season, is no reason to forget about it. I love zucchini and because its such a mild flavored vegetable, you can find it in recipes from appetizers to dessert. Its versatility lets you steam, poach, saute and fry it but it also makes great cakes, bread, relish and sauce. In Canada, we use it extensively for just about anything you can imagine.
In Mexico, they prefer the flower to the zucchini bulb in soups and quesadillas.
In Italy, it is served in many ways, especially breaded and fried.
In France, it is the key ingredient in ratatouille or stuffed with meat, tomatoes and bell peppers.
In Turkey, zucchini is the main ingredient in pancakes or stuffed with ground meat, rice and herbs.
In Greece, there are numerous uses for zucchini such as fried, boiled, stuffed, hors d’oeuvers and main dishes. Sometimes the flowers are stuffed with white cheese or a mixture of rice, herbs and occasionally ground meat.
In Egypt, zucchini are cooked with tomato sauce, garlic and onions and the list goes on and on—
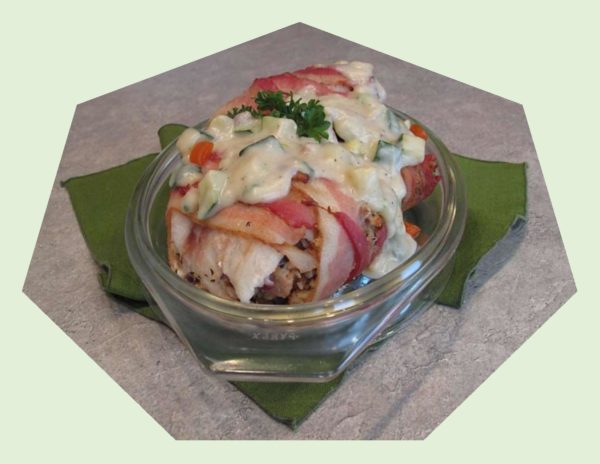
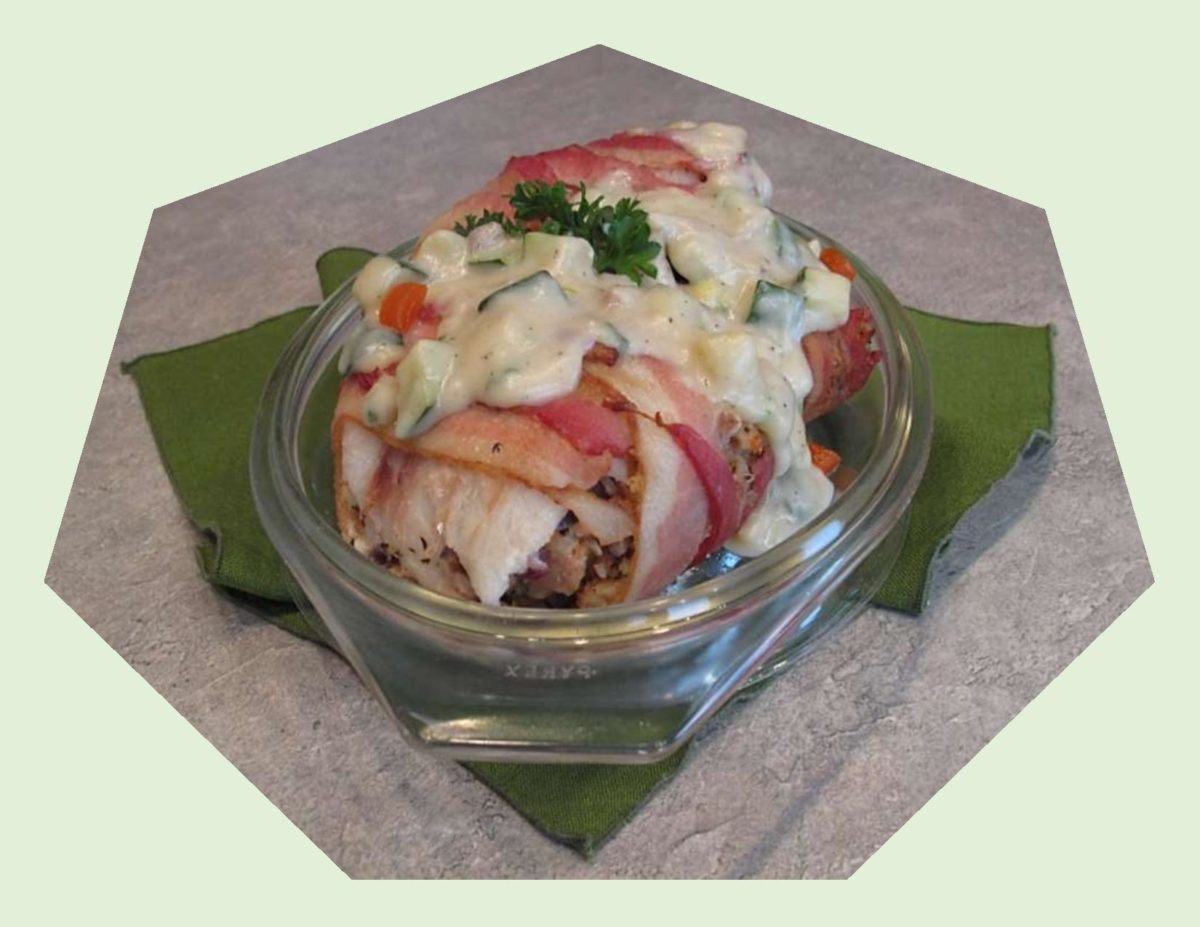
Today’s blog recipe uses a fresh zucchini sauce to compliment the cod fillets which have an herb and sunflower seed stuffing.
Print Recipe
Stuffed Cod Rolls with Fresh Zucchini Sauce
Votes: 1
Rating: 5
You:
Rate this recipe!
|
|
Votes: 1
Rating: 5
You:
Rate this recipe!
|
Instructions
Saute the garlic & onion in olive oil until softened but not browned. Remove from heat & toss together with the remaining stuffing ingredients. Prepare 6 fish portions in roughly 5 X 7-inch size rectangles. Overlap slightly if using two pieces of fish to prepare the portion.
Squeeze handfuls of the stuffing into sausage shaped portions the width of the fish fillet and place at one end, roll the fillet rectangle all the way around the stuffing.
Preheat oven to 400 F. Lay out bacon slices in 6 portions; place the prepared cod & stuffing at one end. Roll bacon tightly around the cod & place in a lightly oiled shallow baking dish. Do not crowd the portions; allow at least an inch or two between the portions for good air circulation in the oven.
Bake stuffed cod for about 25 minutes. Remove from oven & serve with warm fresh zucchini sauce.
Fresh Zucchini Sauce
In a skillet, saute zucchini, onion & mushrooms until tender crisp. Remove from heat; add flour & spices mixing well. Return to heat & slowly add milk & chicken broth. Cook until thickened & bubbly, stirring constantly. Remove from heat & serve over stuffed cod rolls.
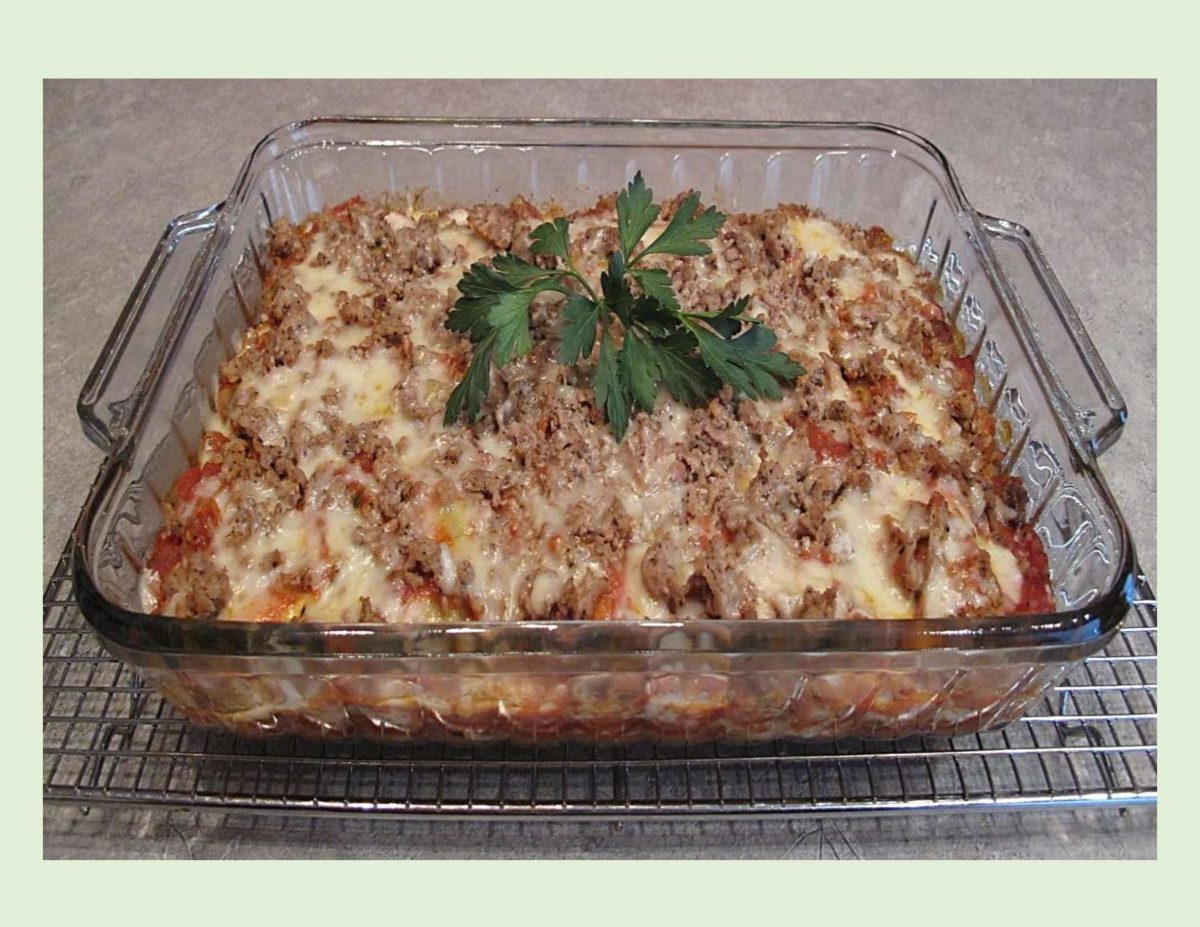
I guess its my German heritage that gives that love for anything that resembles a dumpling. Whether sweet or savory doesn’t seem to matter, filling between two thin layers of pasta or dough is just plain good to me.
Around the world, Italian ravioli has many culinary ‘sisters’ in other cultures. Kreplach, in Jewish cuisine, is a pocket of meat filling covered with pasta. In India, the dish Gujiya, has a sweet filling, rather than savory. There are many similarities between Italian ravioli and certain Chinese dumplings as well.
Although ravioli can come in many shapes, including circular and semi-circular, the traditional form is a square. The word ‘ravioli’ comes from the Italian riavvolgere, which means ‘to wrap’.
Not being someone who enjoys to eat ‘out’, its a rare occasion (when we do), for me to be really happy with my meal. I think it has a lot to do with the fact that I cooked a lot of ‘commercial’ meals in the food service industry years back. I guess I just got ‘burn out’ to that kind of cooking you might say.
Nevertheless, whenever we have chosen to go to the Olive Garden Restaurant, there is a meal I really do enjoy. It’s called ‘Ravioli di Portobello’. Today, I am re-creating those flavors in a casserole and adding some ground chicken to make it a little more interesting from Brion’s perspective.
Print Recipe
Ravioli di Portobello Casserole
Votes: 1
Rating: 5
You:
Rate this recipe!
Ingredients
Portobello Mushroom Filling
Ingredients
Portobello Mushroom Filling
|
Votes: 1
Rating: 5
You:
Rate this recipe!
|
Instructions
Ravioli Filling
In a saucepan, melt butter over medium heat. Saute onion until soft. Add mushrooms & saute for two minutes. Reduce heat & let simmer for 5 minutes or until liquid has evaporated & the mushrooms are fully cooked. Add seasonings. Set aside.
Ravioli Dough
In a bowl, combine dry ingredients with eggs. Add water a little at a time, while stirring, until it forms a soft dough. Dough should be soft but not sticky. Roll out the dough, on a floured surface, into a rectangle that is 1/4-inch thickness. Place 1 teaspoon of filling about an inch apart in even columns & rows to cover half of your dough rectangle.
Before adding the top layer of pasta to the ravioli, moisten the dough around the filling dollops. Carefully fold the dough (without any filling on it) over the half with the filling dollops. Using the side of your hand, press the dough together between the dollops, accentuating the pockets of filling in each ravioli. This is very important step to ensure your ravioli will not leak while cooking.
Using a pastry cutter (or a pizza cutter), cut straight lines through the pressed down sections between the filling dollops. In a large kettle of boiling water, drop ravioli in a few at a time, being careful that they do do touch the kettle. When the raviolis float to the top, boil for one minute & then remove them with a slotted spoon. Keep warm in a covered dish, drizzling a tiny bit of butter or oil over them to prevent sticking until you are ready for them.
Sun-Dried Tomato Sauce
In a skillet, melt butter & saute garlic, seasonings, sun-dried tomatoes for a few minutes. Add chicken broth & half & half; bring to a boil & continue to stir until thickened & creamy about 5-7 minutes. Remove from heat, set aside until ready to use in casserole.
Assemble Casserole
In a skillet, brown ground chicken until no longer pink; drain & place in a bowl. Add salt, garlic powder & pepper. In the skillet, melt butter, add onion & zucchini; saute until tender crisp. Stir in sun-dried tomato sauce.
Preheat oven to 350 F. In a buttered 9 X 13-inch baking dish, spread 1/4 of sauce, layer 1/2 of the ravioli, another 1/4 of the sauce, half of the chicken & half of the cheese.
Repeat again except OMIT cheese. Cover & bake for 35 minutes. Uncover & sprinkle with remaining cheese. Let stand 10 minutes before serving. If you wish to garnish, chopped green onion & diced tomato are nice.
-

From what I understand, the global dish called chicken parmigiana is a variation on the Italian entree known as eggplant parmigiana. Simply put, you deep fry eggplant, add cheese and tomato sauce and bake it. At some point in time, various regions in the world with large Italian immigrant populations, realized chicken would be an excellent alternative to the eggplant and chicken parmigiana evolved.
In America, the dish became popular around 1958. Often the name has been simplified to just ‘chicken parm‘. Usually composed of fried or breaded chicken fillets, smothered in mozzarella (or provolone), parmesan and tomato sauce all of which is then baked. Another version is using veal instead of chicken. Parmigiana is traditionally served over hot pasta as the main entree but it has also become a sandwich filling favored in subs, hoagies, etc.
In today’s recipe, I’m using parmesan cheese but omitting the mozzarella-tomato sauce. I wanted to accent the flavor with fresh basil in the sauce instead. We quite enjoyed it.
Print Recipe
Chicken Parmigiana with Basil Sauce
Votes: 1
Rating: 5
You:
Rate this recipe!
|
|
Votes: 1
Rating: 5
You:
Rate this recipe!
|
Instructions
Chicken
In a small bowl, combine breadcrumbs, cheese & parsley. Chop bacon finely & fry until crisp; drain. Add bacon to breadcrumb mixture.
Preheat oven to 350 F. In a saucepan, melt butter, add minced garlic, Worcestershire sauce & dry mustard. Mix well. Dip chicken fillets in butter mixture & place in a shallow ovenproof dish. Press crumb mixture on top of each fillet.
Bake, uncovered for 20 - 25 minutes.
Basil Sauce
In a saucepan, combine oil, vinegar, minced garlic, finely chopped basil leaves & cream; stir until heated through. Add egg yolk & stir until sauce thickens. Do not boil. Season with salt & pepper. Serve over chicken parmigiana.
