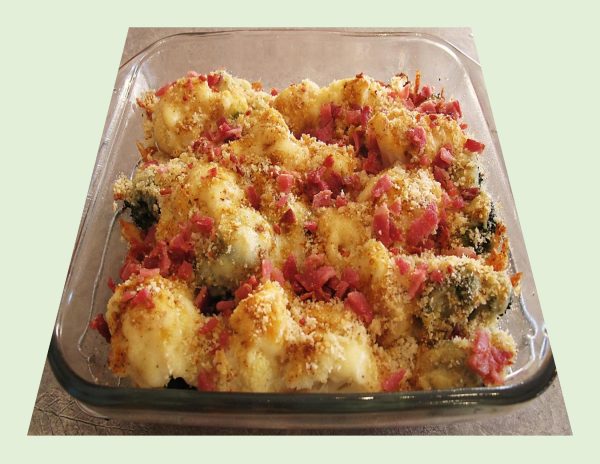
White Cheddar Broccoli/Cauliflower Gratin

Perfect veggies to roast together because they cook at the same rate and broccoli’s grassy, earthy and slight bitterness complements cauliflower’s sweet nutty flavor.

The same vegetable, however, they are not. For whatever reason, these two vegetables are often confused for one another, even though they are strikingly different in many ways.

Broccoli is green, except when it’s purple and its cauliflower. Cauliflower is usually white, except when it’s orange or green, and looks like broccoli, or when it’s purple, and it actually is broccoli.

The word ‘broccoli’ is derived from Italian and means, ‘flowering crest of a cabbage.’ The word ‘cauliflower,’ on the other hand, comes from Latin, and means, ‘the flowers of a cabbage’.

This is such a nice fall side dish. Broccoli and cauliflower coated with a rich, creamy, cheesy sauce, covered with Panko breadcrumbs, baked to perfection and garnished with bacon. How good is that!
Print Recipe
White Cheddar Broccoli/Cauliflower Gratin
Instructions
  1. Preheat oven to 375 F.
  2. Bring a pot of salted water to a boil. Cook florets until tender-firm, about 5-6 minutes. Drain well.
  3. In a saucepan, melt butter over medium heat. Add in onions & sauté until softened, about 4-5 minutes. Add in garlic & sauté 20 seconds longer. Add in flour & cook whisking constantly, 1 1/2 minutes.
  4. While whisking, slowly pour in milk & add nutmeg. Whisk constantly until mixture reaches a boil, then remove from heat & stir in 1 1/4 cups cheddar cheese & the parmesan. Season with salt & pepper to taste.
  5. Pour & spread 1/3 of the cheese sauce into a 9 x 9-inch baking dish. Top with drained broccoli/cauliflower combo then slowly & evenly pour remaining 2/3 of the cheese sauce over top.
  6. Sprinkle over remaining 1/4 cup white cheddar then sprinkle evenly with panko crumbs. Spray panko with olive oil cooking spray to lightly coat.
  7. Bake for 20 minutes, then broil for 1-2 minutes to help brown further as needed. Remove from oven, sprinkle with bacon & parsley & serve warm.

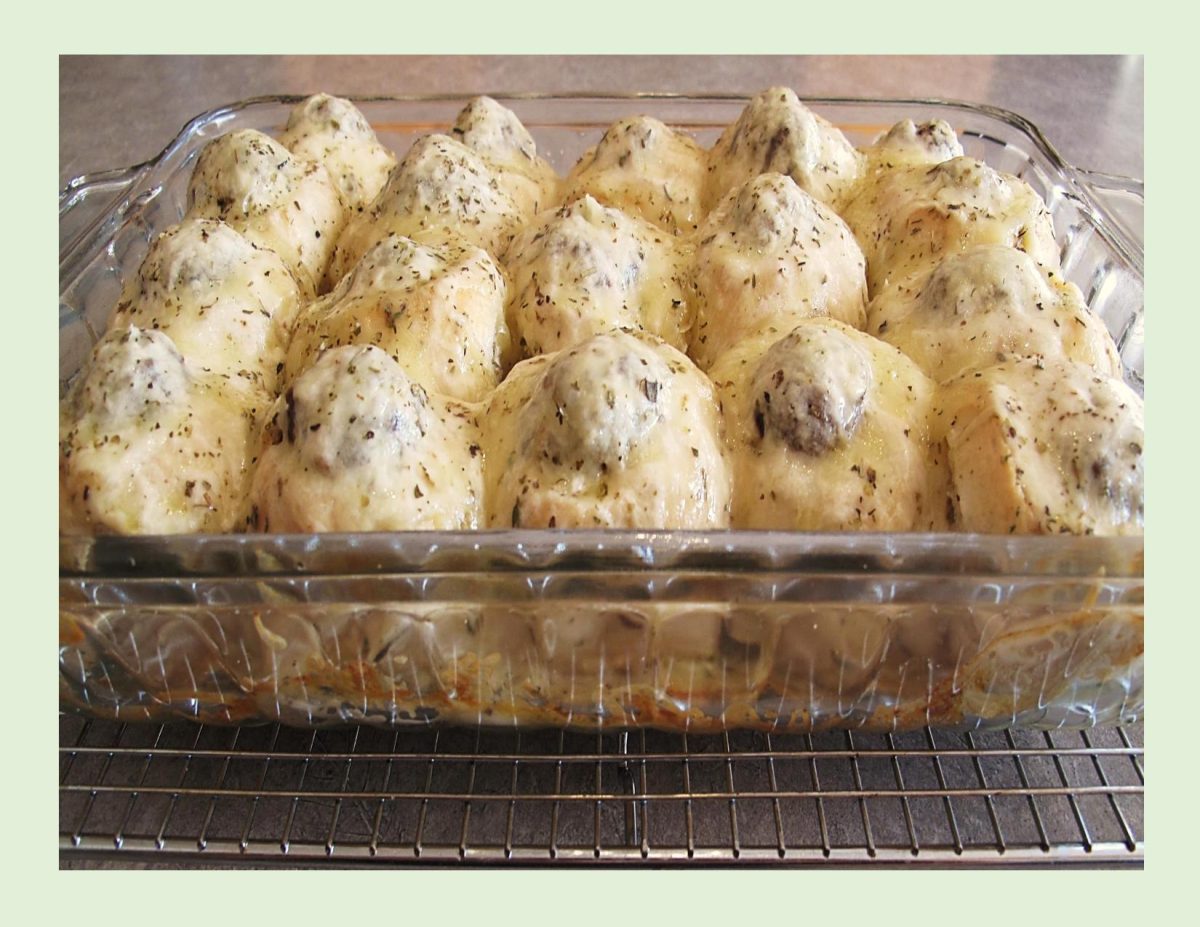
Garlic Bread Meatball Bombs

HAPPY LABOR DAY!

Although, we have not officially reached the first day of fall (Sept. 23), this part of the year often begins with a tinge of melancholy. Even so, there are many ways to appreciate Canada’s most sentimental season.

Part of our country’s appeal is its four season’s: Winter, Spring, Summer & Fall. We are entering the season of the fall harvest and the leaves on the trees begin their transformation to stunning shades of orange, red and yellow.

Labor day week-end gives us an opportunity to enjoy family and friends before summer is officially over. I remember as a kid, once we arrived at the Labor Day week-end all those ‘lazy, hazy, crazy days of summer were gone’. Back to school for another year. So, whatever your choice of relaxation is, you know good food will play a big part in the week-end gatherings.

Meatball bombs are a round homemade ‘hot pocket’. They have everything in them you need to make a great tasting meal. Serve two bombs per person. That means each person gets two meatballs, two dinner rolls, lots of sauce, and some gooey, cheesy goodness. Serve these with a simple side salad to round out the entire meal.

Speaking of Hot Pockets, I’m sure most everyone has tried them at some time since they have been around for over 40 years.

Probably the one lasting memory if you have,  is you know that the first bite of the microwavable, molten-in-the-middle meal will burn at least three layers clean off the roof of your mouth.

The frozen creations known as Hot Pockets were created by two Jewish Iranian brothers Paul and David Merage, who immigrated to the United States from Tehran. In 1977, the Merage brothers founded Chef America Inc. and set out to create a portable sandwich whose dough would actually retain its crispness after a few minutes in the microwave. Their creation, which debuted in 1980, was called the Tastywich, but it didn’t last long with its original name. By 1983, after some recipe tweaking, the Tastywich had a new name and Hot Pockets officially hit the market.

History aside, if you’re looking for some flavorful garlic bread meatball bombs, this is just the dish for you! And, you have the choice to use a lot of prepared ingredients from your grocery store, or you can make them all from scratch. There are options for both types in this recipe.

Print Recipe
Garlic Bread Meatball Bombs
Votes: 1
Rating: 5
You:
Rate this recipe!
Servings
Ingredients
Dinner Rolls
Garlic Butter
White Sauce
Servings
Ingredients
Dinner Rolls
Garlic Butter
White Sauce
Votes: 1
Rating: 5
You:
Rate this recipe!
Instructions
Dinner Rolls
  1. Dissolve yeast & sugar in lukewarm water & allow to sit a few minutes until frothy. Add oil, salt, & 2 1/2 cups flour, beat until smooth. Stir in enough remaining 1/2 cup flour to form a stiff dough..
  2. Turn onto a floured surface; knead until smooth and elastic, 6-8 minutes. Place in a greased bowl, turning to grease the top. Cover: let rise in a warm place until doubled, about an hour.
  3. Punch down the dough. Divide the dough into 18 pieces. Pinch the ends of each dough piece together in the center. Place seam side down. Use the palm of your hand to gently roll each dough ball until smooth and round.
  4. Place the dough balls in a parchment lined baking dish. Cover & allow rise until doubled in size, about 30 minutes.
  5. Preheat the oven to 350F.
  6. Lightly brush with egg wash. Bake until golden brown, 20-25 minutes. Remove rolls to a wire rack.
Meatballs
  1. Preheat oven to 350 F.
  2. In a large bowl, combine all ingredients for the meatballs & mix well. Divide mixture into 18 meatballs & place on a foil lined baking tray. Bake 35 minutes or until meatballs are cooked through. Remove from oven & set aside.
White Sauce
  1. In a saucepan, cook butter & flour until bubbly. Slowly add broth & cream; boil for a FEW minutes, add soy, salt & pepper. Set aside.
Assemble & Bake
  1. Hollow out the top of each roll with a sharp knife. The hole will need to be slightly bigger than the meatballs, but not so deep that you puncture the bottom.
  2. Set the rolls into a 9×13" baking pan which has been coated with non-stick cooking spray. Set aside.
  3. Whisk together garlic butter ingredients. Using the back of a teaspoon, liberally smear the holes of the dinner rolls with the garlic butter. Use all of the butter evenly into each dinner roll.
  4. Spoon about a tablespoon of the prepared sauce into each of the hollowed out dinner rolls. Place a cooked meatball into each hole. Top each meatball with the remaining sauce mixture. Evenly distribute the cheese over each of the dinner rolls. Sprinkle on the Italian seasoning.
  5. Bake for 10-12 minutes, or until the cheese is melted and bubbly. Remove from oven.
  6. Using a sharp knife, slice between each dinner roll. Garnish with parsley if you wish.
Recipe Notes
  • For a QUICK & EASY meal use:
  • 12 (store bought) dinner rolls
  • 12 frozen meatballs, cooked
  • FOR SAUCE: 
  • 1/2 cup dried tomato paste
  • 2 cups marinara sauce
  • 1 Tbsp olive oil
  • NOTE: I found for the original recipe it was easier to make the meatballs & sauce first, then the rolls. Just a suggestion!

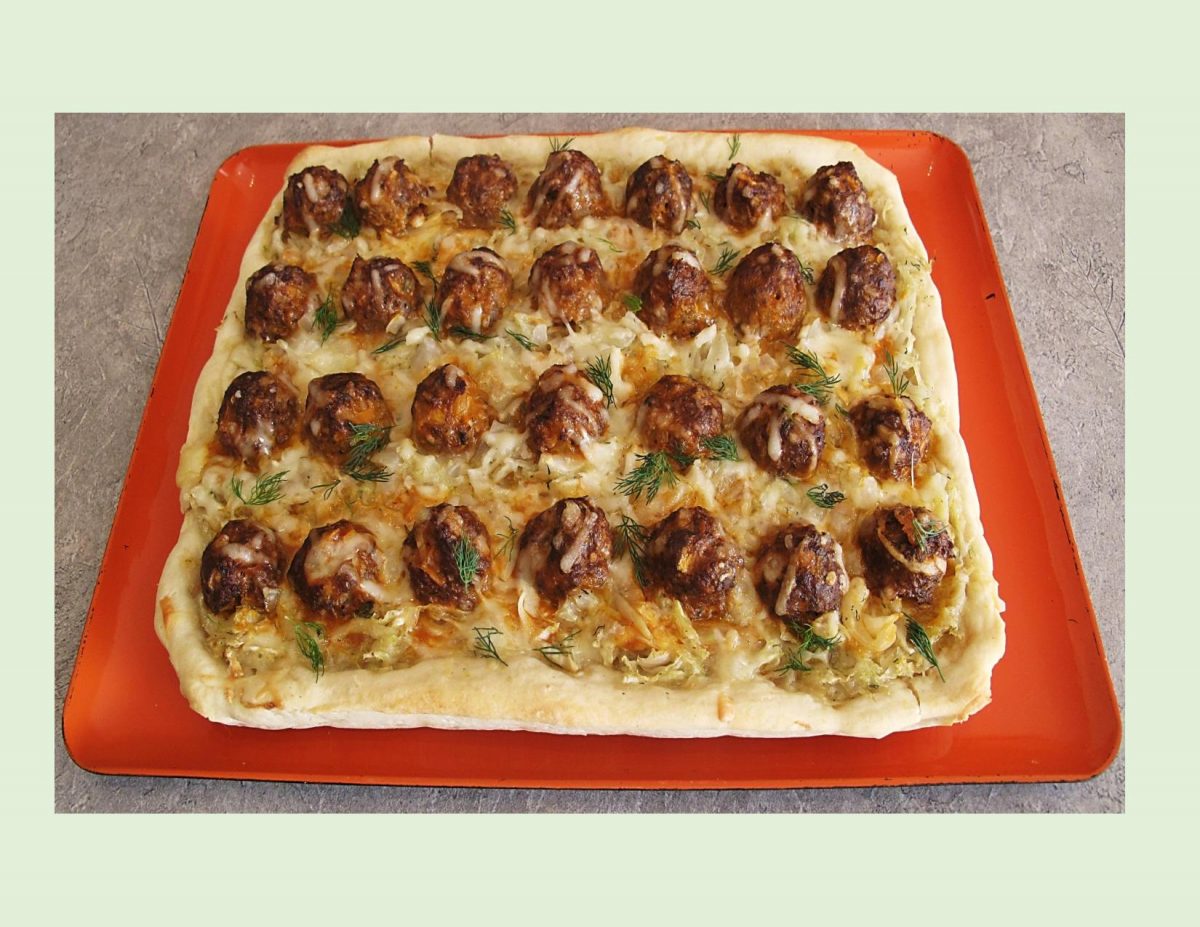
Pizza w/ Cabbage & Meatballs

Don’t think for a moment that cabbage doesn’t belong on pizza — it definitely does. When the days grow shorter, we start to crave heartier meals. Cabbage is good … meatballs are good … cabbage/meatball pizza is double good! Here’s a new spin on the classic pizza – topping a pizza crust base with meatballs, cabbage, spices & cheese.

People have been piling ‘stuff’ on dough, and then heating it up, for thousands of years. That includes the Chinese, who some believe gave Marco Polo scallion pancakes, leading to the theory that he introduced pizza to Italy.

Others point to the ancient Greeks, who covered their flatbreads with herbs, oil, and cheese. But no matter who is responsible for pizza, there is no denying that it has serious global appeal.

Cabbage is an unsung kitchen hero. It’s actually one of the most versatile veggies in your arsenal. If you’re just reserving it for slaws and salads, it’s time to broaden your horizons and discover some of the amazingly delicious things a simple head of cabbage can do.

While the dough is pretty critical, the toppings are just as important to get right. Specific toppings will come down to personal preference.

The duo of sautéed cabbage & meatballs makes for a hearty, satisfying topping perfectly suited for crisp autumn weather. 

Print Recipe
Pizza w/ Cabbage & Meatballs
Votes: 1
Rating: 5
You:
Rate this recipe!
Servings
Ingredients
Potato Pizza Crust
Cabbage
Cheese
Sauce
Servings
Ingredients
Potato Pizza Crust
Cabbage
Cheese
Sauce
Votes: 1
Rating: 5
You:
Rate this recipe!
Instructions
Pizza Crust
  1. Cook potato, peel & mash. In a bowl, combine yeast with lukewarm water. Allow to stand for about 3 minutes until foamy; add butter, salt, sour cream & potato & mix well. Stir in flour, one cup at a time. When dough is completely blended, turn onto a lightly floured work surface. Knead dough about 10 minutes, until smooth & elastic. Place dough in a greased bowl, cover with plastic wrap & allow to rise in a warm draft free place until doubled in bulk, about 1 hour.
Cabbage
  1. In a large pot, place thinly sliced cabbage, water, sugar & salt. Cover & simmer for a few minutes until cabbage is soft & has reduced in volume. Place cabbage in a dish. Melt butter & oil in pot then add flour & cumin to make a roux. Cook for 1-2 minutes, stirring so that there are no lumps as it thickens. Add cabbage to roux & cook for a couple of minutes. Remove from stove & stir in fresh dill & chives; set aside.
Meatballs
  1. Preheat oven to 350 F.
  2. In a bowl, combine all meatball ingredients & mix well. Form into 28 balls & place on foil lined baking sheet that has been lightly greased. Bake for about 10-15 minutes, until JUST cooked. do not OVERBAKE as they will bake some more when they are on the pizza.
Assembly
  1. Line a 9 x 11-inch baking pan with parchment paper. Press out pizza dough over the bottom & up the sides of the pan. Sprinkle a bit of the smoked cheese on the crust, then place a layer of half the cabbage mixture & lightly drizzle with a small amount of tomato soup (sauce). Repeat again with cheese, cabbage & sauce. Roll cooked meatballs in remaining tomato sauce. Place meatballs, in rows on top, then sprinkle with remaining cheese.
  2. Bake for 40 minutes or until crust is golden. Garnish with fresh dill, slice & serve.

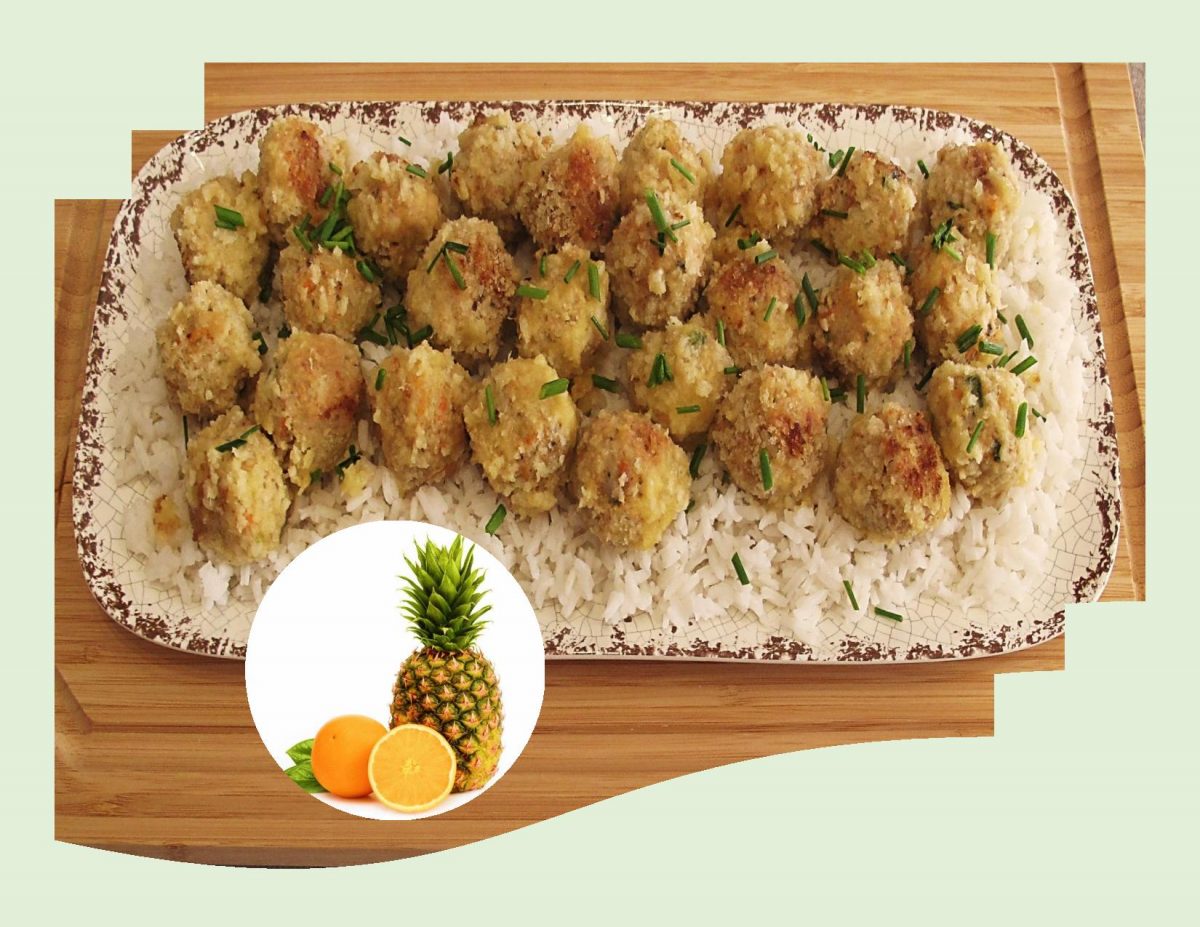
Baked Salmon Balls w/ Orange Pineapple Glaze

Salmon croquettes are basically a version of a salmon cake, salmon balls or patties and can be fried or baked. They were originally made of beef, probably leftovers that needed to be used up. Croquettes originated in France in about 1898 by the founder of classical French cuisine, Escoffier. As Escoffier’s chefs started to travel throughout the world, they took the recipe with them to other cultures where it was transformed based on local cuisines. From the original beef croquette, it branched out into salmon croquettes, chicken, vegetarian, and many other versions.

There are many variations of ‘croquettes‘ on the market, and just about every culture has developed their own recipe. Constantly, new recipes are formulated and something new is invented and created. With the input of different cultures, the original recipe has taken itself into many directions, different applications and ingredients. Very often salmon croquettes (cakes, balls or patties) are made with canned salmon though there are quite a few newer recipes that use fresh salmon that has been either chopped finely or ground to mold into the various shapes.

I think, using a zesty orange-pineapple glaze is the perfect compliment to these baked salmon balls.

Print Recipe
Baked Salmon Balls w/ Orange Pineapple Glaze
Instructions
Salmon Balls
  1. Preheat oven to 350 F.
  2. If using canned salmon, drain & flake well. If using fresh salmon, brush with olive oil and season lightly with salt and pepper. Grill for about 6 minutes or bake wrapped in foil at 350 F. for approximately 10 minutes. When cool, flake salmon. Add carrot, green onion, potatoes, tartar sauce, egg, lemon juice, Worcestershire sauce, cilantro paste, Old Bay Seasoning, salt & pepper. Combine well.
  3. Using a small scoop (about 1/2 oz size), measure salmon mixture out into palm of your hand & gently roll into balls. Mixture should make about 32 balls.
  4. Roll salmon balls in Panko crumbs & place on a well buttered or sprayed baking sheet. Lightly spray tops with spray as well.
  5. Bake about 30-40 minutes, turning halfway through. Remove from oven.
Glaze
  1. Place all glaze ingredients into a small saucepan over medium heat. Stir gently & simmer for 15-20 minutes or until liquid begins to thicken slightly & reduces by half.
  2. Drizzle over salmon balls or serve on the side. These salmon balls are nice served with rice & a steamed veggie.

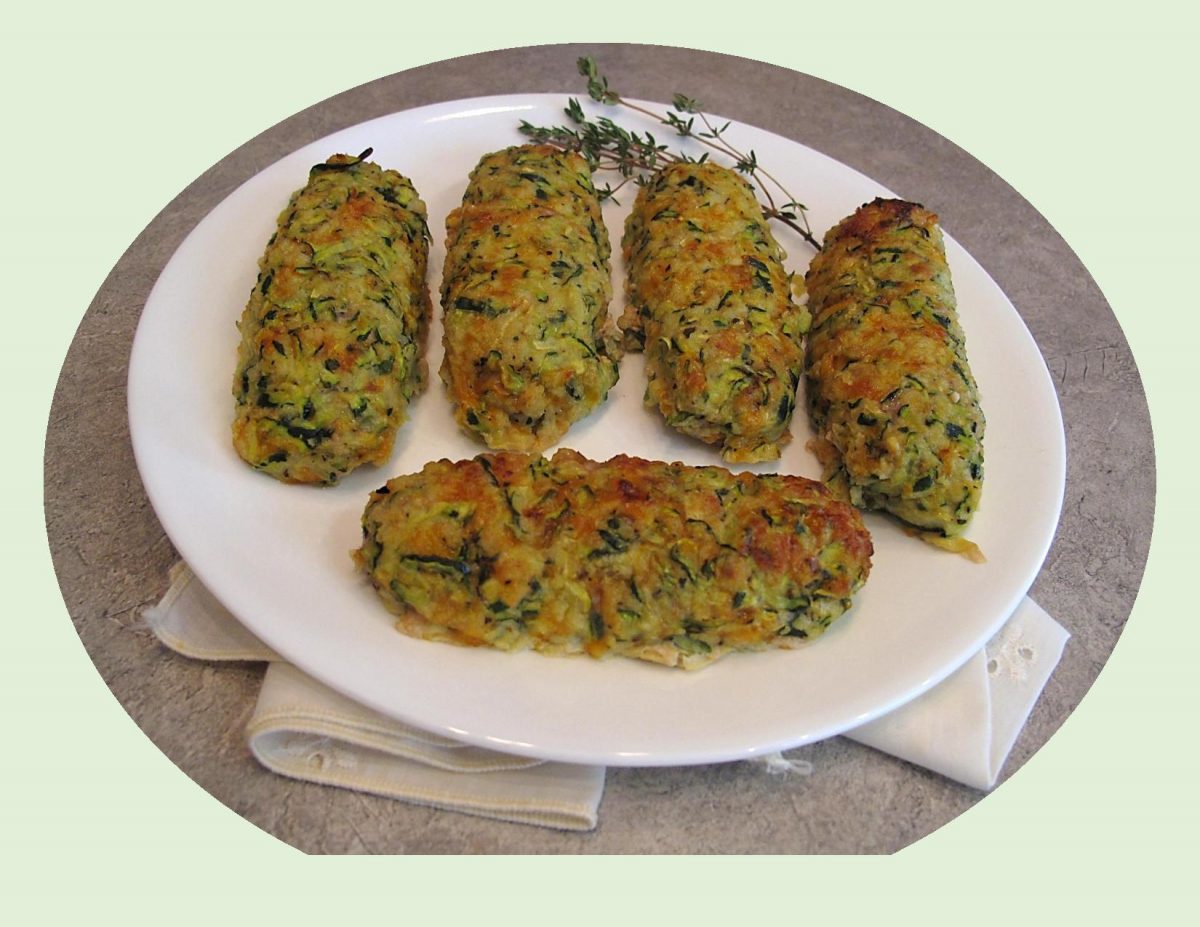
Zucchini Crusted Turkey Bratwurst

Versatile & plentiful, zucchini has endless applications. To mention a ‘few’, we’ve made zucchini bread & muffins, noodles, roasted it and put it on kabobs with chicken. It’s used in curry, ratatouille, stir fry and relish, etc. etc. etc. But just when I think there’s nothing I can do different with it, another idea pops into my head.

Among the family of sausages there is perhaps none so beloved in North America as the bratwurst. There are many interpretations of bratwurst, with variations on texture, flavor, size and cooking methods. Traditional bratwurst, which is German in origin, is made with pork & veal. Turkey bratwurst is a popular alternative to this traditional kind because of its low fat content.

For this recipe, I combine ground turkey with a combination of ‘German’ bratwurst spices and formed them into long sausage shapes. The shredded zucchini/cheese ‘crust’ is wrapped around each sausage and baked. All the flavors blended so well, creating yet one more use for zucchini!

Print Recipe
Zucchini Crusted Turkey Bratwurst
Votes: 1
Rating: 5
You:
Rate this recipe!
Servings
Ingredients
Zucchini Crust
Servings
Ingredients
Zucchini Crust
Votes: 1
Rating: 5
You:
Rate this recipe!
Instructions
Zucchini Crust
  1. Place the shredded zucchini on paper towel & sprinkle LIGHTLY with salt. Cover & blot with another piece of paper towel. Allow to sit for about an hour to release excess moisture.
  2. When zucchini is ready, place in a bowl & combine with remaining 'crust' ingredients.
Turkey Bratwurst
  1. Combine all ingredients & mix well. Divide mixture into 5 equal portions, shaping each into a 5-inch long sausage.
Assembly & Baking
  1. Preheat oven to 400 F.
  2. Divide zucchini mixture into 5 equal amounts. On a piece of plastic wrap, place a portion of the zucchini mixture & pat it into a small rectangle large enough to enclose a sausage in it. Lay a sausage on the zucchini; use the plastic wrap to help roll the sausage & enclose in the zucchini crust. Repeat with remaining sausage,
  3. Oil a piece of foil paper. Place foil on a baking sheet. Top with crusted sausages & bake for 30 minutes or until slightly browned.
  4. These are nice served with baked potatoes & corn.

Honeyed Saskatoon Balsamic Pork Tenderloin

Here on the Canadian prairies we have a native berry called a ‘Saskatoon’. These berries are very special …. the kind of special that only comes once a year.

Saskatoon berries look much like blueberries, but in fact are part of the rose family which includes apples, cherries, plums and of course roses. Saskatoons ripen in late June or early July. They grow in many conditions from sea level to mountain peaks and are less picky about soil conditions than blueberries. Trying to explain their flavor to anyone who has never tasted them is difficult and elusive. They’re sweet, dense, rich, seedy, slightly blueberryish, more almondish, a bit apple-y, dusky and deep. Like I said …. difficult to explain!

Throughout North America, saskatoon berries have a variety of names including: prairie berry, service berry, shadbush or juneberry.

Saskatoon berries work equally good in sweet treats as well as savory recipes. This pork tenderloin entrée is a good example of the latter.

Print Recipe
Honeyed Saskatoon Balsamic Pork Tenderloin
Votes: 3
Rating: 5
You:
Rate this recipe!
Servings
Votes: 3
Rating: 5
You:
Rate this recipe!
Instructions
Tenderloin/Stuffing
  1. In a small bowl, combine panko crumbs, Parmesan, thyme, oregano, garlic & pepper.
  2. Remove silverskin from tenderloin & 'butterfly'. Place meat between 2 sheets of plastic wrap & pound, making it all the same thickness. Spread mustard evenly on flattened cut side & top with 'stuffing'.
  3. Preheat oven to 375 F. Starting with the long side, carefully roll the tenderloin as opposed to just folding it over.
  4. Place a rack in a shallow roasting pan & lay a piece of foil on top creating sides for it. Lightly oil center of foil; place tenderloin on it & brush with Fig Balsamic Olive Oil Vinaigrette or just use olive oil. Roast for about 45 minutes until just a hint of pink remains.
Saskatoon Chutney
  1. In a small saucepan over low heat, add 1 tsp oil & sauté green onions & ginger for a couple of minutes. Add honey, water, cider vinegar, cornstarch & salt; mix well. Add saskatoons; bring to a simmer & cook until chutney thickens slightly.
  2. Slice roast tenderloin into medallions about 1-inch thickness. Pour some chutney onto serving platter; place sliced tenderloin medallions on top & drizzle with remaining chutney.

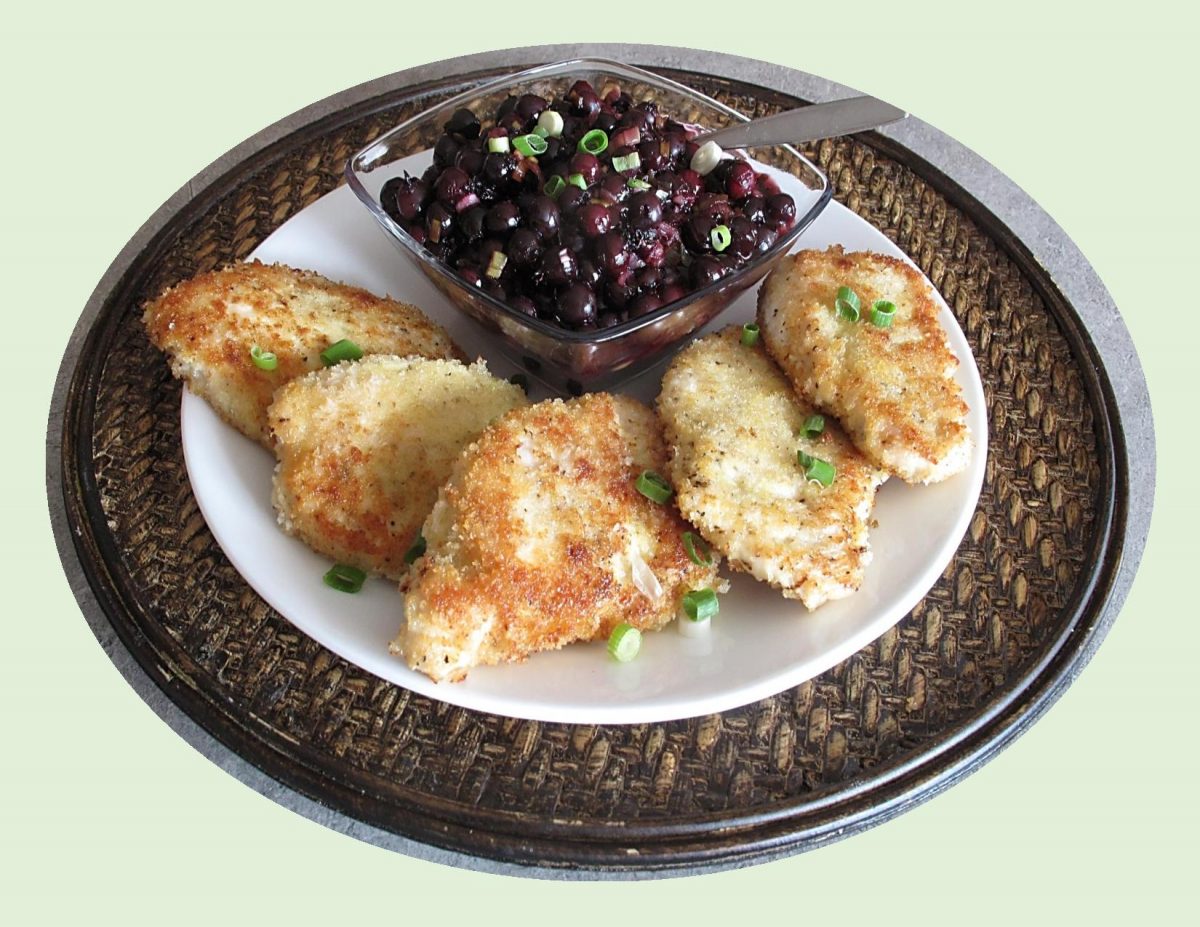
Chicken Katsu w/ Saskatoon Chutney

Chicken Katsu is simply a Japanese version of chicken cutlets. While it is great to enjoy a good dish, its worth knowing where the idea originated.

Katsu was first created in the late 1800’s by a restaurant in Tokyo that wanted to offer a European style meat cutlet. Now, katsu can be found everywhere from convenience store takeaway bento boxes to Western style Japanese food restaurants. The name ‘katsu’ comes from the English word ‘cutlet’. It is typically made from either chicken breasts or thighs coated in panko breadcrumbs.

Frying or baking chicken cutlets is simple, but its like cooking pasta, when you get it right, it changes everything. Breading helps to seal in moisture during the cooking time. Its a basic process that’s used for making everything from chicken to onion rings. Japanese panko crumbs are lighter and crispier, the secret to ultra-crunchiness which yields to the kind of crust that you can actually hear when you bite into it.

Since its ‘Saskatoon Berry‘ time here on the prairies, I wanted to make some saskatoon chutney to have with these crispy cutlets.

Print Recipe
Chicken Katsu w/ Saskatoon Chutney
Votes: 1
Rating: 5
You:
Rate this recipe!
Servings
Votes: 1
Rating: 5
You:
Rate this recipe!
Instructions
Saskatoon Chutney
  1. Combine all chutney ingredients in a large saucepan.
  2. Bring to a boil over medium heat, stirring frequently, cook until mixture is the consistency of runny jam, about 3-5 minutes. Remove from heat & cool completely.
Chicken Cutlets
  1. Place chicken breasts between plastic wrap & carefully pound to 1/4-inch thickness. Season with salt & pepper. Coat with flour then dip in beaten eggs & lastly coat with Panko crumbs. Cover with plastic wrap & place in fridge for 15 minutes to chill before cooking.
  2. In a large skillet, over medium heat, melt butter & add oil. Place cutlets in a single layer in skillet & fry on both sides. When no longer pink inside & golden on the outside remove from skillet & blot on paper towel.
  3. Serve immediately with Saskatoon Chutney.
Recipe Notes
  • The standard breading technique includes three steps: dredging in flour, moistening in egg wash, then coating in crispy panko crumbs. The flour helps the egg wash adhere & the egg helps the breadcrumbs adhere. 
  • Once you have all the food coated, you will want to place it in the refrigerator for about 15 minutes. This will ensure the breading actually sticks to the food instead of falling off in the hot oil.
  • If baking, put breaded food on a rack set over a baking sheet, drizzle with a little oil & place in the oven. Bake until golden brown & cooked through.

Gorgonzola & Bacon Turkey Burgers

CELEBRATING CANADA DAY!

Every year Canada celebrates its birthday on July 1st with parades, fireworks and other fun events. This year, due to the pandemic and out of respect for Canada’s Indigenous people, celebrations here in our city of Edmonton, Alberta will be virtual or be on a smaller scale.

No matter which way you decide to celebrate the day, we know good food will be an important part of it. Gorgonzola has been a favorite of Brion & I for many years. It’s actually kind of surprising as neither of us care for ‘blue’ cheese or Roquefort.

Gorgonzola is one of those classic Italian ingredients that’s more famous than understood here in North America. The name itself, refers to the little town in Lombardy, near Milan, where the cheese was invented.

There are two kinds of gorgonzola, Dolce (sweet) and Piccante (spicy). In Italian these terms mean fresh verses aged cheeses. Because dolce is softer and creamier, its great for spreading on bread or used in salad dressing, pasta sauce, pizza or burgers. Piccante is harder and tends to crumble.

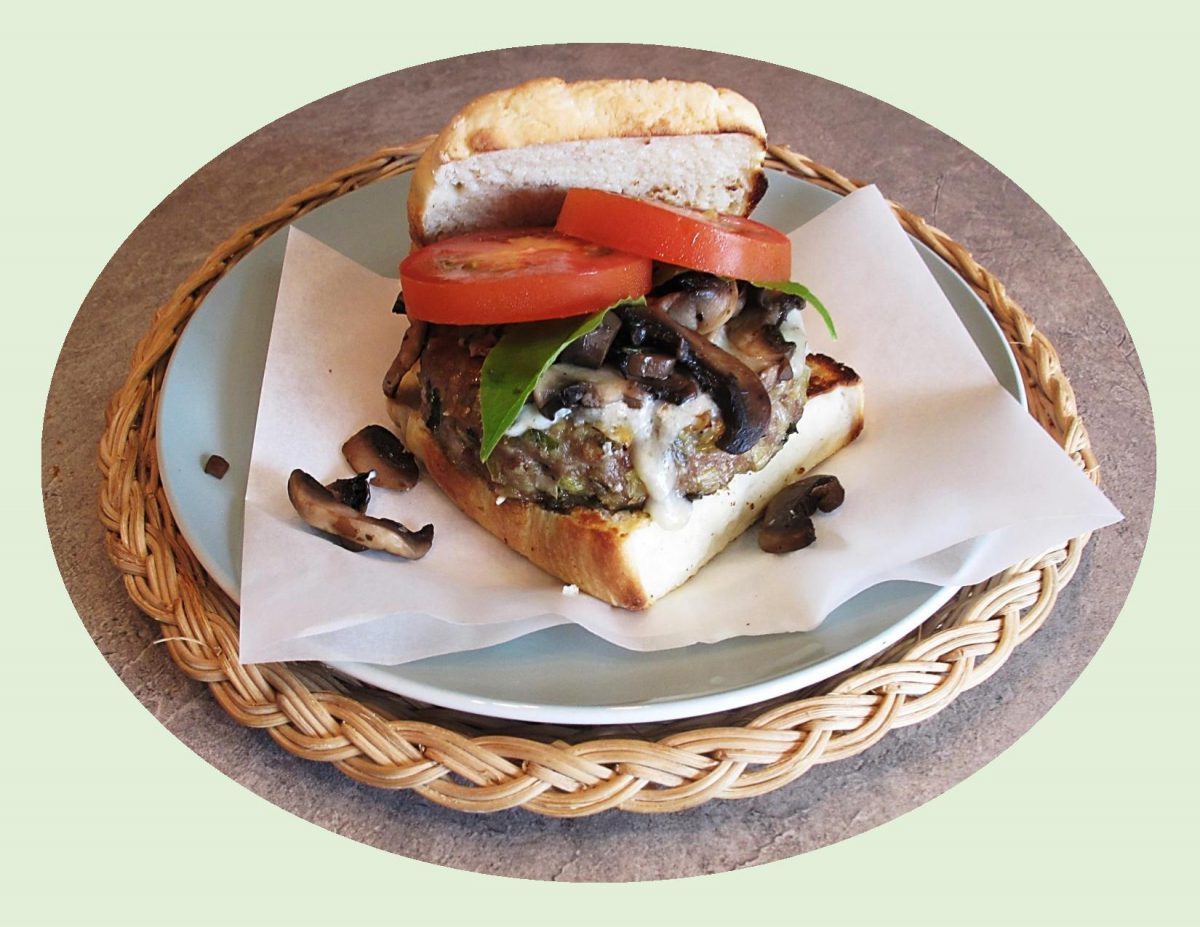
This turkey burger is made special with the combo of gorgonzola, bacon and guacamole. Just great for celebrating Canada Day!

Print Recipe
Gorgonzola & Bacon Turkey Burgers
Votes: 1
Rating: 5
You:
Rate this recipe!
Servings
Ingredients
Turkey Burgers
Servings
Ingredients
Turkey Burgers
Votes: 1
Rating: 5
You:
Rate this recipe!
Instructions
  1. In a skillet, fry bacon until soft cooked. Remove from pan & blot on paper towel. Chop & set aside.
  2. Using bacon drippings, saute finely chopped leeks & garlic until tender. Remove from skillet & cool.
  3. In a large bowl, combine ground turkey, sauteed leeks & garlic, panko, salt, pepper, sugar, coriander, sage & ginger. Mix well.
  4. Shape into (8) 1/2-inch thick patties. Place 1/8 (10 gm) of the crumbled Gorgonzola & 1/4 of chopped bacon on each of 4; top with another patty, pressing edges to seal, making (4) 1-inch thick patties.
  5. Place on a preheated grill over medium heat. Close lid & grill, turning once, until meat is no longer pink inside, about 12-14 minutes.
  6. Alternately, you can place them in a 375 F oven on a foil-lined tray & bake for about 20-25 minutes.
  7. When burgers are almost done, top each with remaining Gorgonzola.
  8. Serve in toasted ciabatta buns with your choice of toppings.

Scalloped Potato Turkey Rolls

The wonderful thing about potato casseroles is that you can dictate the flavor by the types of cheese used as well as the added ingredients and flavor aids like herbs, garlic and spices.

There are many versions and variations of potato ‘bakes’. It comes down to little more than a free form of how the potatoes are cut and layered. Other ingredients such as herbs and cured meats like ham or bacon as well as smoked fish and other vegetables can be added.

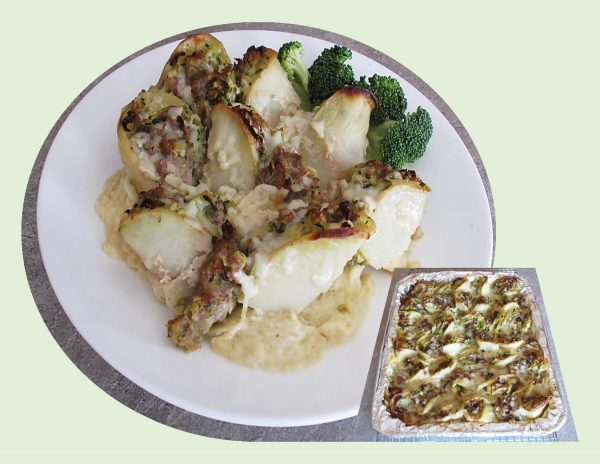
With this recipe you are combining the best of all variations; scalloped, au gratin and dauphinoise. Béchamel sauce, a variety of cheeses and the flavor of garlic result in an amazing taste as well as the dish makes for some interesting eye appeal.

Print Recipe
Scalloped Potato Turkey Rolls
Votes: 1
Rating: 5
You:
Rate this recipe!
Servings
Ingredients
Zucchini
Bechamel Sauce
Turkey Sausage
Servings
Ingredients
Zucchini
Bechamel Sauce
Turkey Sausage
Votes: 1
Rating: 5
You:
Rate this recipe!
Instructions
Zucchini
  1. Place the shredded zucchini on paper towel & sprinkle lightly with salt. Cover & blot with another piece of paper towel. Allow to sit for about an hour or until moisture is absorbed. Place zucchini in a bowl & combine with panko, cheese, egg & spices. Set aside in refrigerator.
Bechamel Sauce
  1. In a saucepan, melt butter, whisk in flour. Cook for about 2 minutes then turn off heat & slowly begin to add milk. Continue whisking until all milk has been added then turn on heat & bring sauce to a boil. Whisk constantly until thickened then add 3/4 of the Gruyere cheese & stir until cheese is melted. Spread the bechamel sauce evenly in a 9 x 13-inch baking dish.
Turkey Sausage
  1. In a saucepan, saute bacon, leeks & garlic until cooked & tender. Remove from heat & place in a bowl; allow to cool then add turkey & spices. Mix well.
Potatoes
  1. Slice potatoes into about 30 thin slices, keeping them in their original potato shape. Wrap each sliced potato in plastic wrap & bake in the microwave until almost cooked.
Assembly
  1. Preheat oven to 375 F. Lay the potato slices on your work surface, spread a small amount of the zucchini mixture on each one. Top with a layer of the turkey mixture. Roll each potato slice in a spiral shape then place in rows over the bechamel sauce.
  2. Cover pan with foil & bake for 45 minutes then remove the foil & sprinkle the remaining Gruyere cheese on top. Bake uncovered for another 15 minutes until top is golden.

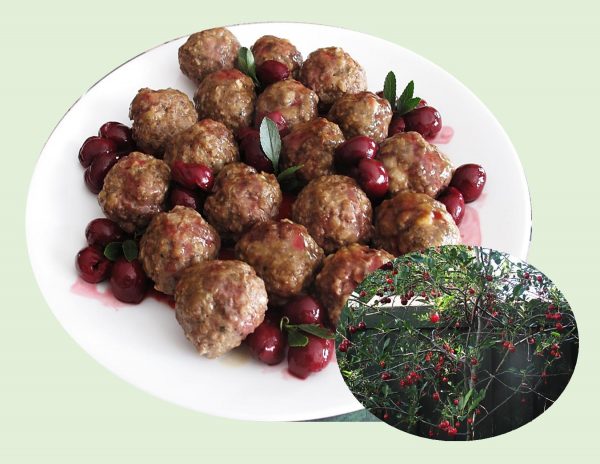
Belgium Meatballs w/ Sour Cherries

This is an example of great classic Belgium cuisine. Sweet, sour and savory all in one dish! It seems, in Europe alone, many countries have their own special version of meatball dishes, from Swedish and German meatballs in brown or white sauce to Italian meatballs with their classic red sauce.

Although meatballs are a staple of Belgium home cooking, you will find a variety of different recipes throughout the country.

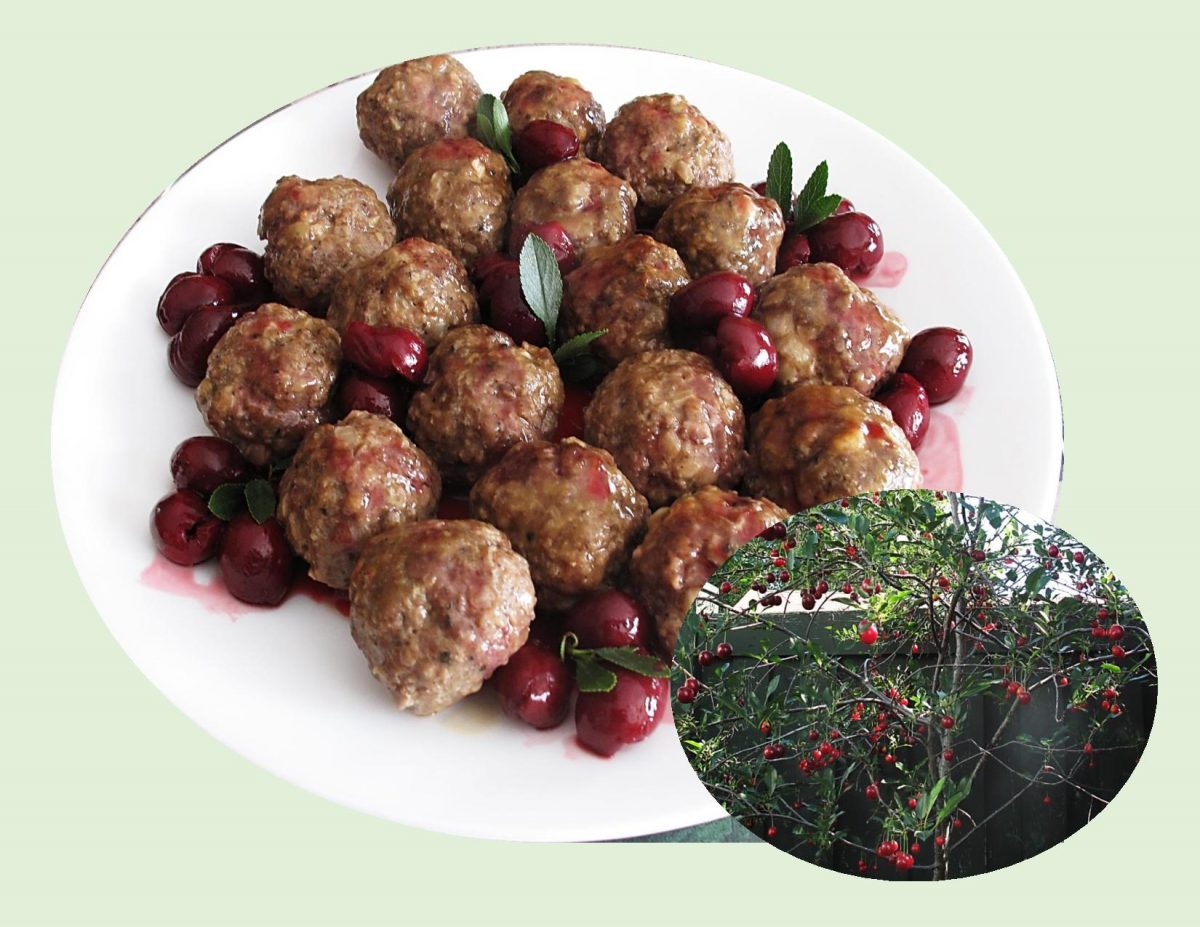
Boulets a la Liegeoise, (a traditional Belgium meatball originating from the city of Liege), are a blend of ground beef and pork, eggs, some bread crumbs, salt, pepper and a bit of nutmeg. That’s it …. no fusion cooking, bells and whistles. Just good, plain food made special with a tart cherry sauce.

I just couldn’t resist making a variation of these since Brion & I have our own little cherry tree in our back yard.

Print Recipe
Belgium Meatballs w/ Sour Cherries
Votes: 1
Rating: 5
You:
Rate this recipe!
Servings
Servings
Votes: 1
Rating: 5
You:
Rate this recipe!
Instructions
Meatballs
  1. Preheat oven to 350 F. Lightly grease a baking tray.
  2. In a large bowl, combine all meatball ingredients & mix well. Measure out 20 meatballs, approximately 40 gm each, & place on the baking tray.
  3. Bake for 35-40 minutes, or until meatballs are cooked through.
Cherry Sauce
  1. Measure cherry juice & cornstarch into a dish to combine.
  2. In a small saucepan, heat cherries & add cornstarch mixture. Stir until sauce thickens, add honey & stir again.
  3. Remove from heat. Drizzle over meatballs or serve on the side. Serve hot.
Brown Sauce
  1. In a saucepan, melt butter; add flour to make a roux. Cook, stirring constantly for 2-3 minutes.
  2. Slowly add beef broth, stirring until sauce thickens. Season to taste.
  3. Serve as an alternate to the cherry sauce with Belgium meatballs.