Bedfordshire Clangers w/ Variations

July is such a wonderful month. The weather’s warm, there’s still plenty of summer left, and the produce is literally amazing.

Midsummer means the farmer’s markets are brimming with great fruit & veggies. With such a colorful bounty of goods, we can settle into our summer cooking routines with tasty meals hot or cold.

But, even in summer, we sometimes crave ‘comfort food’ such as a ‘hand pie’. The humble hand pie goes by many different names: call it a pasty, a turnover, an empanada, or a ‘Bedfordshire clanger’….

A Bedfordshire Clanger dates back to at least the 19th century. It was typically made for agricultural workers to take with them to work as their lunch. The original pastry was made from suet and cooked by a boiling method. There is a theory that the pastry crust was not originally intended for consumption but as a vessel in which to protect the filling from the soiled hands of the workers.

The clanger originated from the county of Bedfordshire, a small, low-lying and predominantly agricultural county nestled in the east of England and adjacent counties, including Buckinghamshire and Hertfordshire. 

The name is as intriguing as the food itself. The word clanger, it had been suggested, referred to the mistake of mixing sweet and savory fillings. But a more likely explanation was that in nearby Northamptonshire dialect, ‘clang’ means to eat voraciously.

Knowing their husbands would need lots of protein and carbohydrate sustenance, homemakers came up with the brilliant idea of a doubled, loaf-shaped pie. One end contained a savory filling that used the famed pork of the area while the other end was filled with stewed apples (made from local apples) as dessert. So, the two fillings didn’t combine, there was a ‘pastry wall’ in between blocking any flavors from mixing. A ‘secret code’ denoted which end was meat, and which was dessert: two knife slits on one end of the pastry top means meat, three small holes on the other shows the sweet. This was brilliant, an entire meal for the field workers – handheld, portable and delicious.

The version we have today is not its beginnings but its evolution. Once you’ve nailed this basic Bedfordshire clanger recipe you can experiment with all sorts of flavor combos, there’s really no limit to what you can combine in this savory/sweet pastry.

Since Brion takes lunch to work, I became intrigued with the idea and decided to get creative with the fillings. That way I could make a variety and freeze them and use as needed. These tasty little ‘clangers’ can be served as the main course for a warm-weather picnic or for a hand-held, backyard meal with the addition of a nice fresh salad at home.

Print Recipe
Bedfordshire Clangers w/ Variations
Votes: 1
Rating: 5
You:
Rate this recipe!
Servings
Ingredients
Chicken w/ Caramelized Onions
Raspberry / Nectarine Filling
Blueberry Filling
Apple / Apricot Filling
Plum / Rhubarb Filling
Rhubarb / Apple Filling
Servings
Ingredients
Chicken w/ Caramelized Onions
Raspberry / Nectarine Filling
Blueberry Filling
Apple / Apricot Filling
Plum / Rhubarb Filling
Rhubarb / Apple Filling
Votes: 1
Rating: 5
You:
Rate this recipe!
Instructions
Pastry
  1. In a medium bowl, whisk together the flour, sage & salt. Sprinkle the butter cubes over the flour mixture & use your fingers to work them in. Alternately you could use a pastry cutter to do this.
  2. When the mixture resembles cornmeal with pea-sized bits of butter remaining, stir in cheese with a fork until evenly distributed. Sprinkle 6 Tbsp ice water over mixture & stir with a fork until dough begins to come together. If needed, add an additional Tbsp or two of ice water.
  3. Turn the dough out onto a lightly floured surface & knead for about three times. Gather the dough into a disk & wrap in plastic wrap. refrigerate for at least 30 minutes or overnight.
Pork Filling
  1. Bake potato in microwave, peel & cut into small cubes. Set aside.
  2. Heat oil in a skillet & sauté celery, onion, garlic & bacon together on medium heat until veggies are soft & bacon is cooked. Add ground pork, breaking it up well. Stir in dried herbs & spices. Cover & simmer for about 10 minutes. Remove from heat & stir in cooked potato & cheese. Set aside to cool.
Spiced Meat Combo
  1. In a saucepan, sauté onion & garlic. Add ground meat, basil, thyme, cardamom & salt & pepper. Scramble fry until cooked, remove from heat & add parmesan & potato. Place in a dish.
  2. In the saucepan, melt butter; add flour to make a roux. Cook, stirring constantly for 2-3 minutes. Slowly add beef broth, stirring until sauce thickens. Season to taste. Add to ground meat mixture & combine to form filling. Set aside until ready to use.
Turkey Filling
  1. In a skillet, cook bacon until just crisp, then remove to a paper towel lined plate to drain; chop when cooled. Remove all but 1 Tbsp of the bacon drippings from skillet.
  2. Add butter to the skillet, sauté onions, garlic & mushrooms with herbs & spices, scraping up any brown bits, until the onions have softened & mushrooms have lost most of their size & moisture. Stir in the bacon & shredded cooked turkey, taste for seasoning. Cook for another minute or two, then remove from heat & set aside.
  3. In a saucepan, combine Boursin, milk & spices (if using). Stir until Boursin has melted. Remove from heat. Add to turkey/veg mixture.
Chicken w/ Caramelized Onions
  1. Heat butter over medium low heat in a heavy ovenproof skillet. Add the onions cook for 20 minutes or so, stirring occasionally. When the onions are a deep golden color, remove them from the pan and set aside.
  2. Preheat oven to 350 F.
  3. Combine the flour, salt, chili powder, thyme, allspice, & black pepper. Dredge each piece of chicken in the flour mixture, shaking off the excess. In the same pan as the onions, heat the oil over medium high heat. Add each piece of chicken & fry for a few minutes until golden brown; flip & cook for a few more minutes. Transfer to a plate (it will not be fully cooked at this point, just browned – it will finish cooking in the oven).
  4. Turn the heat down & let the oil cool off a little bit. Make a roux with excess oil in skillet & dredging flour. Add chicken broth & cook until a sauce forms. Add the onions & chicken to the pan. Bake for about 20 minutes longer. When chicken/onion mixture is cooked, remove from oven. Allow to cool until ready to use.
Raspberry/Rhubarb Filling
  1. In a small saucepan, whisk together sugar, cornstarch, cardamom & salt. Add water & stir then add chopped nectarines. Simmer until nectarine is slightly soft & liquid is thickened. Remove from heat & carefully fold in raspberries. Set aside to cool.
Blueberry Filling
  1. In a small saucepan, combine all ingredients except blueberries. Cook until sauce starts to thicken then gently fold in blueberries & cook a couple of minutes more. Remove from heat & set aside to cool.
Apple/Apricot Filling
  1. Peel & dice apples. Drain canned apricot juice into a small saucepan. Add sugar, cornstarch, cinnamon & salt & combine. Add apples & cook until apples are tender. Cut canned apricot halves into quarters. When apples are cooked & sauce has thickened, remove from heat & add apricots. Gently combine & set aside to cool.
Plum/Rhubarb Filling
  1. In a small saucepan, combine sugar, cornstarch, salt & lemon zest. Add rhubarb & plums. Gently stir over a low heat. When enough juice has formed, allow to simmer until rhubarb is soft & juice has thickened. Remove from heat. Set aside to cool.
Sour Cherry Filling
  1. In a small saucepan, place sugar, cornstarch & salt. Add juice/water mixture & stir to thoroughly combine. Bring to a boil over medium-high heat, stirring frequently. Simmer until thickened, about 2 minutes. Immediately remove from heat. Gradually fold in cherries. Set aside to cool.
Rhubarb/Apple Filling
  1. In a small saucepan, add the rhubarb, apples, salt & sugar. Add a drizzle of water if necessary & heat on medium. The rhubarb will begin to release liquid & break down as the apples soften. Heat the mixture until the moisture has evaporated & begins to thicken. Once the mixture is thickened, add the lemon juice, lemon zest and cinnamon. Place it in a bowl & allow to cool.
Apple/Pear Filling
  1. Heat butter in a small skillet until melted, add apples & pears & cook until fruit begins to soften, about 5 minutes. Sprinkle sugar over mixture & continue to cook stirring often until fruit begins to lose its juices. Mix together cornstarch & lemon juice & add to pan. Simmer until mixture has thickened, about 4 minutes. Remove from heat & allow to cool.
Assembly/Baking
  1. Divide pastry into 5 equal pieces. On a lightly floured surface (or dry wax paper) roll out each piece of pastry into 14 x 7 1/2-inches. The excess trimmed from the sides will be used for little pastry ‘walls’ dividing the sweet & savory fillings. Roll excess pastry into a 3-inch length.
  2. Cut each piece of pastry in half horizontally so you have (2) 7-inch long pieces from each piece of pastry. From the top of each piece, LIGHTLY make a line across your pastry 4-inches from the outside edge. This will help to place your fillings properly.
  3. On the 3-inch wide section, place savory filling to cover 2/3 of the area. Place one of the rolled strips after that then place sweet filling on the remaining 1/3 to complete the 'clanger'. The little rolled piece of pastry divides the savory & sweet filling.
  4. On the sweet side make 3 holes for vents & on the savory side make 2 slashes. This is the 'code' to let the person eating the clanger which was savory or sweet.
  5. Preheat oven to 350 F.
  6. Brush the edges of each pastry with egg wash. Lift the pastry from the opposite side over the fillings & seal the edges with a fork.
  7. Brush clangers with remaining egg wash & bake for about 30-35 minutes or until golden.
Recipe Notes
  • Due to the length of this recipe, I found making the savory & fruit fillings on one day & the pastry, assembling & baking the next, worked out well for me. Although these pastries are VERY time consuming, believe me, the are well worth it in the end, especially if your freezing some to use later. I baked them all & then wrapped them well before freezing.
  • You will probably find there will be enough savory & sweet fillings left over to make about 10 more clangers.
  • All of them will freeze well which will be a time saver for your next batch. Just make a recipe of pastry & your ready to assemble & bake.
  • If your not interested in freezing the 'leftovers', the fruit combined will make a wonderful crisp & the savory fillings can be used in quiche or casseroles.

Manchester Tarts

The Manchester tart is an English baked treat with its roots tracing back to none other than the vibrant city of Manchester, England. This retro tart has a shortcrust pastry base that’s layered with raspberry preserves, custard, desiccated coconut and sometimes glace cherries. The combination of sweet preserves, creamy custard, and coconut creates a wonderful balance of flavors and textures.

The Manchester tart was a staple on school dinner menus until the mid-1980s and is now a staple in bakeries and home kitchens, cherished for its simplicity and delicious taste.

Over the years, the Manchester Tart has undergone numerous adaptations and variations, with some recipes incorporating different fruits, toppings, or pastry bases. However, its essence remains rooted in the tradition of British baking, symbolizing comfort and nostalgia for many who have enjoyed it throughout generations.

For my adaptation of these tarts I made a pastry cream to give a lightness and added some fresh raspberries to give some tang to balance the sweetness of the preserves. Instead of using the traditional glace cherry on top, I went with a few more fresh raspberries.


Print Recipe
Manchester Tarts
Votes: 1
Rating: 5
You:
Rate this recipe!
Course dessert
Servings
TARTLETS
Ingredients
Tart Base
Pastry Cream
Raspberry Preserves/Fruit
Topping
Course dessert
Servings
TARTLETS
Ingredients
Tart Base
Pastry Cream
Raspberry Preserves/Fruit
Topping
Votes: 1
Rating: 5
You:
Rate this recipe!
Instructions
Tart Base
  1. Combine the flour, powdered sugar, cornstarch, salt, & vanilla in a large bowl. Add the butter and mix with your hands until the butter is broken down into pieces the size of peas and the ingredients are well combined. Add the egg and mix with a spatula until the dough is smooth and the egg is fully incorporated. Don’t overmix.
  2. Turn the dough out onto a large piece of plastic wrap and gently shape it into a ball. Wrap the dough in the plastic wrap and flatten it into a disc. Refrigerate for at least 30 minutes or overnight, until cold but still pliable. It should have the texture of clay.
  3. When the dough has chilled, unwrap the dough and place it on a silicone baking mat on your work surface. Roll it out into a rectangle about 1⁄8 inch thick, using a second silicone sheet on top. The silicone mat makes it easier to lift the rolled-out dough onto the sheet pan later. Make sure to work quickly so the dough doesn’t get too warm.
  4. Place the silicone mat with the dough on a baking sheet.
  5. Using the tart rings, cut out 18 circles of dough. Remove the rest of the dough from around the rings.
  6. Reroll remaining dough between 2 sheets of parchment. Using a sharp knife, slice strips about 10 inches long & 1- inch thick. These strips will make the sides of each tartlet.
  7. Working with one at a time, transfer a strip of dough to one of the tart rings and press it to the sides. Use your fingers to slightly push the bottom of the sides to the dough circle (to seal it). Repeat with the remaining strips of dough. Use a small knife to cut the edge to the rim of the rings.
  8. Transfer the baking sheet containing the tartlet shells to the freezer & freeze for at least 20 minutes.
  9. Preheat oven to 350 F.
  10. Bake tart rings for about 15 minutes or until golden. Remove from oven & take off rings to allow them to cool.
Pastry Cream
  1. Heat the milk over medium high heat & bring it to a simmer, almost to a boil.
  2. While heating the milk, place the sugar, egg yolks, cornstarch, vanilla & salt in a bowl. Whisk until you have a thick, smooth mix then set aside until the milk comes almost to a boil.
  3. As soon as the milk starts to steam or simmer, remove it from the heat. Slowly pour about a half of the hot milk in a thin stream into the egg mix, WHILE WHISKING CONSTANTLY to temper the egg mix. When the eggs have been tempered, add the egg mix back into the hot milk in the saucepan.
  4. Heat the custard base, over medium heat, while whisking vigorously until it starts to thicken – this should take about 1 – 2 minutes. Make sure to reach the corners of the saucepan so that the custard does not stick to the bottom of the pan.
  5. While whisking, let the custard come to a boil (the custard will release bubbles). You may need to stop whisking from time to time for a few seconds to see if the custard is ‘bubbling’. Look for big bubbles breaking the surface of the custard.
  6. Lower the heat and cook for a further 1 – 2 minutes after you see the first bubbles break the surface, and make sure to whisk constantly.
  7. Remove from the heat & add the butter. Whisk in the butter, until it’s completely mixed in.
  8. Pour the custard into a bowl & immediately cover the surface with plastic wrap, making sure the plastic wrap is touching the whole surface. This is to prevent a custard ‘skin’ from forming on top. You can also choose to pass the custard through a sieve to remove any lumps.
  9. Let the custard cool down to room temperature & then let it chill in the fridge for a few hours, until it’s completely chilled.
  10. The custard will have ‘set’ after chilling. So, it is important to whisk the pastry cream to make it smooth before using.
Assembly
  1. Once the base & custard have cooled, spread raspberry preserve over the bottom of pastry cases. Spoon in the custard, then sprinkle with the coconut & chill. Decorate with raspberries and a final sprinkle of powdered sugar on the berries. Serve.
Recipe Notes
  • I used two sizes of tart rings - 2 1/4 + 2 1/2" for these.

Berry Custard Tart

Glazed fresh fruit tart looks so elegant and summer-ish. They are the perfect dessert, whether your meal is casual or formal. In some ways, I guess its a version of a fruit pizza.

Apart from the fresh fruit and glaze, pastry cream adds a nice base to the tart. A custard pudding hybrid, pastry cream is used for ‘filling’, in the cold form, not as a pudding. Widely used to fill desserts like napoleons, cakes, cream puffs, tarts, etc.

To define, pastry cream is basically custard thickened with cornstarch and has a higher stability as compared to custard puddings which use just eggs to achieve their creamy texture. Vanilla is the classic flavor because it has to complete other flavors of the dessert. Pure vanilla is always best as the artificial flavorings add bitter taste profiles. In addition, some alcoholic desserts use pastry cream mixed with rum.

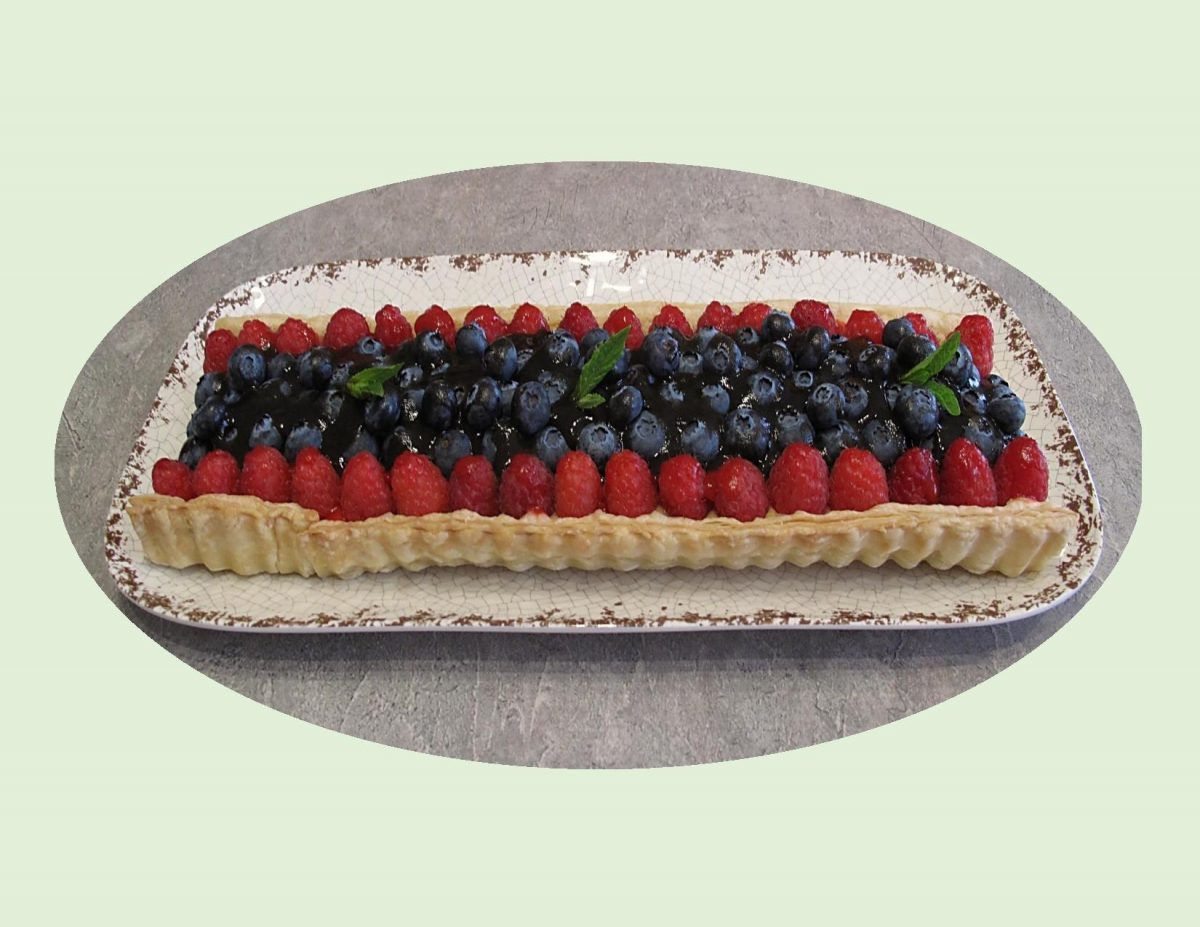
This tart has a layer of vanilla pastry cream, topped with raspberries and blueberries then brushed with an apricot glaze.

Print Recipe
Berry Custard Tart
Votes: 1
Rating: 5
You:
Rate this recipe!
Course dessert
Cuisine American, French
Servings
Course dessert
Cuisine American, French
Servings
Votes: 1
Rating: 5
You:
Rate this recipe!
Instructions
Pastry Cream
  1. In a heavy saucepan, stir together the milk & 1/4 cup sugar. Bring to a boil over medium heat.
  2. In a medium bowl, whisk together the egg yolks & egg. Stir together the remaining sugar & cornstarch; then stir them into the egg until smooth. When the milk comes to a boil, drizzle it into the bowl in a thin stream while mixing so that you don't cook the eggs. Return the mixture to the saucepan; slowly bring to a boil, stirring constantly so the eggs don't curdle or scorch on the bottom.
  3. When the mixture comes to a boil & thickens, remove from the heat. Stir the butter & vanilla, mixing until the butter is completely blended in. Pour into a heat proof container & place a piece of plastic wrap directly on the surface to prevent a skin from forming. Refrigerate until chilled then beat until smooth with an electric mixer before using.
Other Prep Work
  1. Preheat oven to 400°F.
  2. Line an oblong tart pan with thawed puff pastry. The short ends of the pastry should be even with the bottom of the pan but the long sides should come up to the top of pan sides. With a sharp knife, score the long sides where the sides meet the bottom of pan. Do not cut all the way through. Pierce the center of the pastry with a fork. Whisk together the egg and milk. Brush the edges of the pastry shell with the egg wash.
  3. Bake the pastry shell for 15-20 minutes or until puffed and golden brown. Remove to a rack to cool completely. If needed, press the center down lightly to create an indentation. Cool while preparing filling.
  4. Rinse & carefully dry fruit on paper towels. In a small blender, puree apricot preserves with water or liqueur until smooth.
Assembly
  1. Place smooth pastry cream in a piping bag with a large flat tip. Carefully pipe pastry cream in long strips to cover the bottom ONLY of the puff pastry shell.
  2. Arrange a row of raspberries down both sides of the tart; close to the edge & close to each other. Using a long straight edge helps to place the fruit in an even line.
  3. To 1/3 of the apricot glaze add some red food coloring to help accent the natural color of the raspberries. Apply a couple of light coats of the glaze carefully to the raspberries.
  4. Fill the center of the area with blueberries, being careful to distribute evenly in rows. Using the remainder of the un-colored apricot glaze, give several light coats to blueberries. Chill until ready to serve.

Oatmeal Fig ‘Drops’ w/ Variations

For many people, figs are a traditional part of Christmas food. When it comes to the best fruits to add to your recipes, figs are probably the most underrated of the group. Not only are these sweet fruits delicious, they’re also incredibly versatile. Their concentrated sweetness is balanced by a complex spicy flavor that makes dried figs exactly the right ingredient for those holiday desserts. Fresh off the tree, dried, stuffed or baked, the fig is a classic fruit, ancient in fact.

We are fast approaching the Christmas season and if you have a sweet tooth, the holiday season is basically synonymous with one thing: cookies! Chewy or crunchy, chocolaty or nutty, flat, round or twisted … a cookie is a cookie. In the most basic terms, a cookie is a sweet, baked, flour based finger food. But it can come in all shapes, sizes, flavors and textures.

Figs seem to always have a way of catching my attention at this time of year. I recall my mother making filled date cookies at Christmas. She would make them in advance of Christmas, tucking them away in an airtight cookie box. When Christmas holidays rolled around and we could nibble on them, the flavors had marinated and they tasted amazing!

The combination of flavors and textures in these oatmeal fig cookies should create some tasty little morsels along with giving variety without fuss.

Print Recipe
Oatmeal Fig Drops w/ Variations
Votes: 2
Rating: 5
You:
Rate this recipe!
Servings
Ingredients
Oatmeal Base
Raspberry-Fig Filling
Apricot-Fig Filling
Servings
Ingredients
Oatmeal Base
Raspberry-Fig Filling
Apricot-Fig Filling
Votes: 2
Rating: 5
You:
Rate this recipe!
Instructions
Oatmeal Base
  1. In a large bowl, cream together margarine & sugar; beat in sour cream & vanilla. In a separate bowl, combine oatmeal, flour, baking powder & salt; gradually stir into creamed mixture until blended. Cover with plastic wrap & refrigerate for at least 30 minutes or longer.
Raspberry-Fig Filling
  1. In a saucepan, combine figs, raspberries, water, apple juice & sugar; bring to a boil. Once mixture reaches a boil, reduce heat to low & simmer until figs are soft, stirring often.
  2. When figs are soft, the water/apple juice mixture will have cooked off & will be thick & sticky. Remove from heat, place in a bowl & cool to room temperature. If you wish, you can process in a blender to make a smooth paste/filling.
Date Fig Filling
  1. Snip off stem ends of figs & put the figs, dates & almonds into a food processor. Grind to a coarse paste. Stir in remaining date filling ingredients & process until mixed. Set aside.
Apricot Fig Filling
  1. Snip off stem ends of figs & put the figs & apricots into a food processor. Grind to a coarse paste. Stir in remaining apricot filling ingredients & process until mixed. Set aside.
Assembly & Baking
  1. Preheat oven to 350 F. Spray OR line with paper baking cups, 3 (12 cup capacity) MINI muffin pans.
  2. Remove oatmeal base from refrigerator & divide in thirds. Place one tiny scoop of oatmeal batter in each cup. Create an indentation in the center of each one.
  3. Place a dollop of filling in the center of each indentation, making 12 from each kind of filling. Place another tiny scoop on top of each cookie 'drop' & flatten with a fork.
  4. Bake cookie drops for about 15 minutes or just until they test done with a toothpick inserted.
  5. Place on a wire rack to cool. When cooled you can leave plain or dress up with a bit of icing drizzle if you wish.

Raspberry Sour Cream Pie

The perfect pie for a summer evening. First off, if your not accustomed to using sour cream in a sweet pie filling you will probably cringe. My first encounter with this idea was many years ago and I’m still addicted.

Sour Cream has worked its way into many facets of my baking and cooking, so for me its a basic fridge staple. I know for some people it happens all too often … you pick up a container of sour cream to have on some tacos and then what to do with the rest before it spoils??

This pie recipe makes an extra deep dessert. It works well in a spring-form pan or a deep pie dish. The crunchy, buttery brown sugar streusel on top is lightly accented with cardamom spice & fresh lemon zest. It is the perfect foil to the lush, rich sour cream and raspberry filling.

I should mention, its best not to use light or fat-free sour cream. Another thing, is to bake the pie until the filling is set THEN top with the streusel and bake until golden. This is a pie that is best served cold or just slightly warm as it will not be firm enough to slice if it is hot.

Raspberries lovers … this one is for you!!

Print Recipe
Raspberry Sour Cream Pie
Votes: 4
Rating: 2.25
You:
Rate this recipe!
Servings
Ingredients
Shortbread Crust
Raspberry Filling
Servings
Ingredients
Shortbread Crust
Raspberry Filling
Votes: 4
Rating: 2.25
You:
Rate this recipe!
Instructions
Shortbread Crust
  1. In a bowl, combine butter & sugar; beat until light & fluffy. Mix in flour & baking powder; blend together. Pat dough in a 9-inch spring form pan or a deep dish pie pan.
Raspberry Filling
  1. Preheat oven to 375 F.
  2. In a bowl, combine sugar, flour & salt; whisk in eggs, sour cream & vanilla until smooth. Place raspberries in pie shell & pour filling over top. Bake for 30-35 minutes OR UNTIL FILLING IS JUST SET.
Streusel
  1. In a bowl, combine all streusel ingredients until well blended. After the pie filling is set, remove from the oven & turn the heat down to 350 F. Squeeze the streusel between your fingers & palms to create clumps ranging in size from small to large grapes then top pie with it. Bake an additional 10-15 minutes OR until streusel is golden brown.
  2. Remove from oven & allow pie to cool completely on a wire rack to thicken further. Serve warm or at room temperature. Refrigerate any leftover pie.
Recipe Notes
  • Even though I mentioned you should use a full fat sour cream, I chose to use a fat free one too lighten up on the calories.
  • The only difference is, it will take longer to bake & the filling is not quite as firm in the end result.
  • As far as the taste goes, there is no difference. It's heavenly!!

Chicken & Pear Bundles

HAPPY THANKSGIVING!

Thanksgiving represents many things to me. I have wonderful memories of growing up on the farm and all the hustle and bustle of harvest time before winter came. Of watching the Autumn landscape transforming into a beautiful tapestry of reds, gold and yellows.

As the fall comes in, the days grow shorter and the mornings darker, we start to reflect on the year we have had with its inevitable highs and lows. The Autumn season gives us a little bit of extra time to make the most of what we have left in the year before the ‘grand finale’. It is so important to just take the time to be grateful and appreciate the blessings we are fortunate to have in our lives and make every day count.

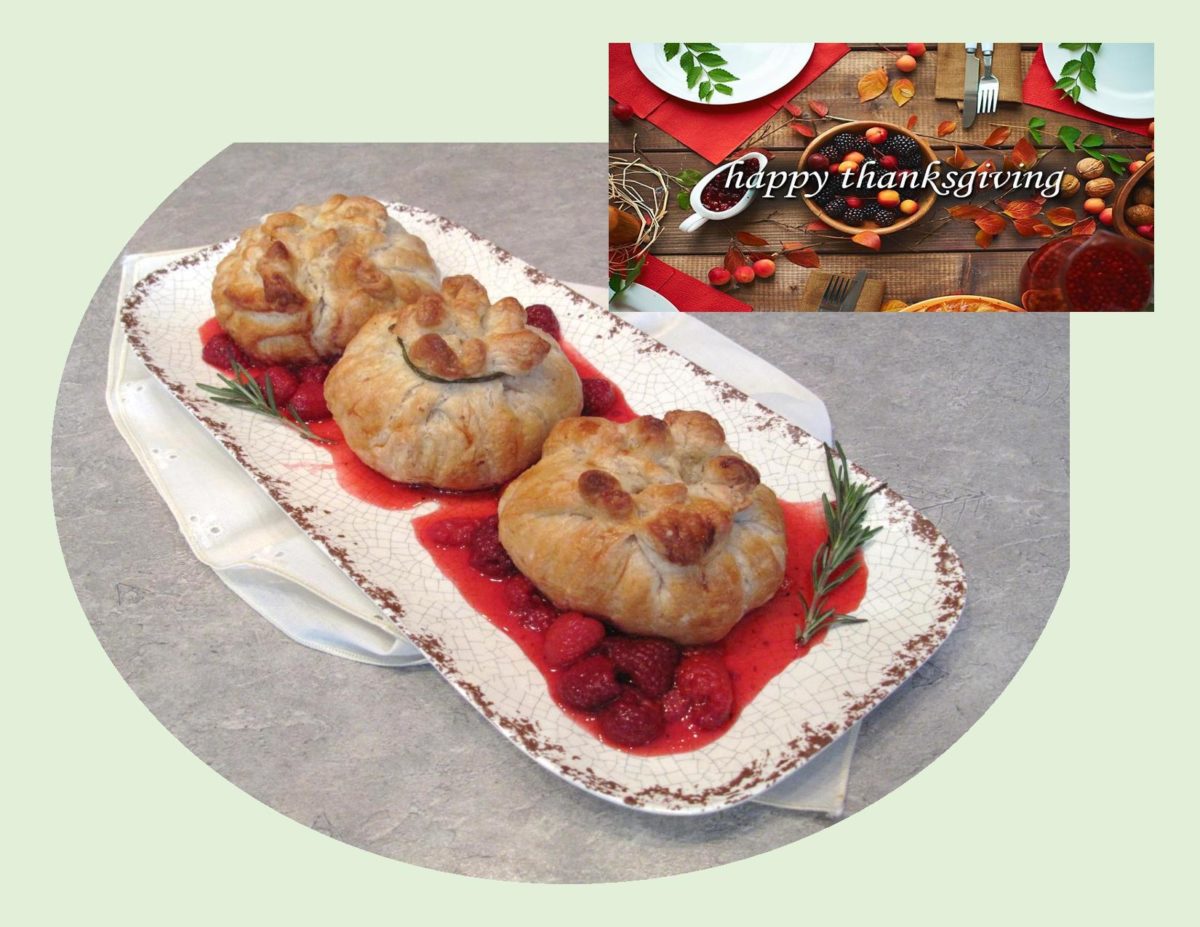
Since turkey is usually our Christmas meal, I’m making some chicken breast with pears and Gorgonzola cheese ‘bundled’ in puff pastry for our Thanksgiving dinner today.

Print Recipe
Chicken & Pear Bundles
Instructions
Raspberry Coulis
  1. In a small bowl, combine coulis ingredients well & set aside.
Chicken & Filling
  1. Peel, core & chop pear. Chop walnuts & crumble cheese. Slice breasts in about 1/4-inch thickness; sprinkle with salt & pepper.
  2. On parchment paper, roll thawed puff pastry to about 1/8-inch thickness. Cut 4 circles large enough to fit custard cups & have extra on top to gather & tie. Using the custard cup only as a form, place a circle of pastry in each. Line the pastry with thin sliced chicken breast, then sprinkle some walnuts & cheese in the bottom. Add some pear pieces, cheese, more walnuts. Top with another piece of chicken, cut to fit. Bring sides of pastry together in the center on top, pinch then tie with a chive green if you wish.
  3. Preheat oven to 375 F. Line a baking sheet with parchment paper. In a cup, beat together egg wash. Lift bundles out of custard cups & place on baking sheet. Lightly brush egg wash over each bundle. Bake about 30-40 minutes or until pastry is puffed & golden & chicken is done (I sliced into one of the bundles just enough to see if the chicken was cooked).
  4. Slightly warm coulis in microwave & pour some on the serving platter. Carefully lay bundles on top & garnish with fresh herbs if you wish.

German Pancake Bites

If you have never eaten a German pancake, think of it as a cross between a souffle and an omelette with undertones of French toast. Often called a Dutch baby pancake and not unlike a sweet Yorkshire pudding. ‘Eggier than your typical pancake, but sweeter and lighter than an omelette, with more pastry-like characteristics. The sides of the pancake rise high above the edges of the pan, creating a light, puffy crust with a tender, custard-like middle.

Story has it that the name ‘Dutch Baby’ was coined when a restaurant owner’s daughter (in the USA) could not pronounce ‘Deutsch’, the German word for German, and out of her mouth came ‘Dutch’. Originally served as three small German pancakes with powdered sugar and fresh squeezed lemon juice, the Dutch Baby, moniker was born.

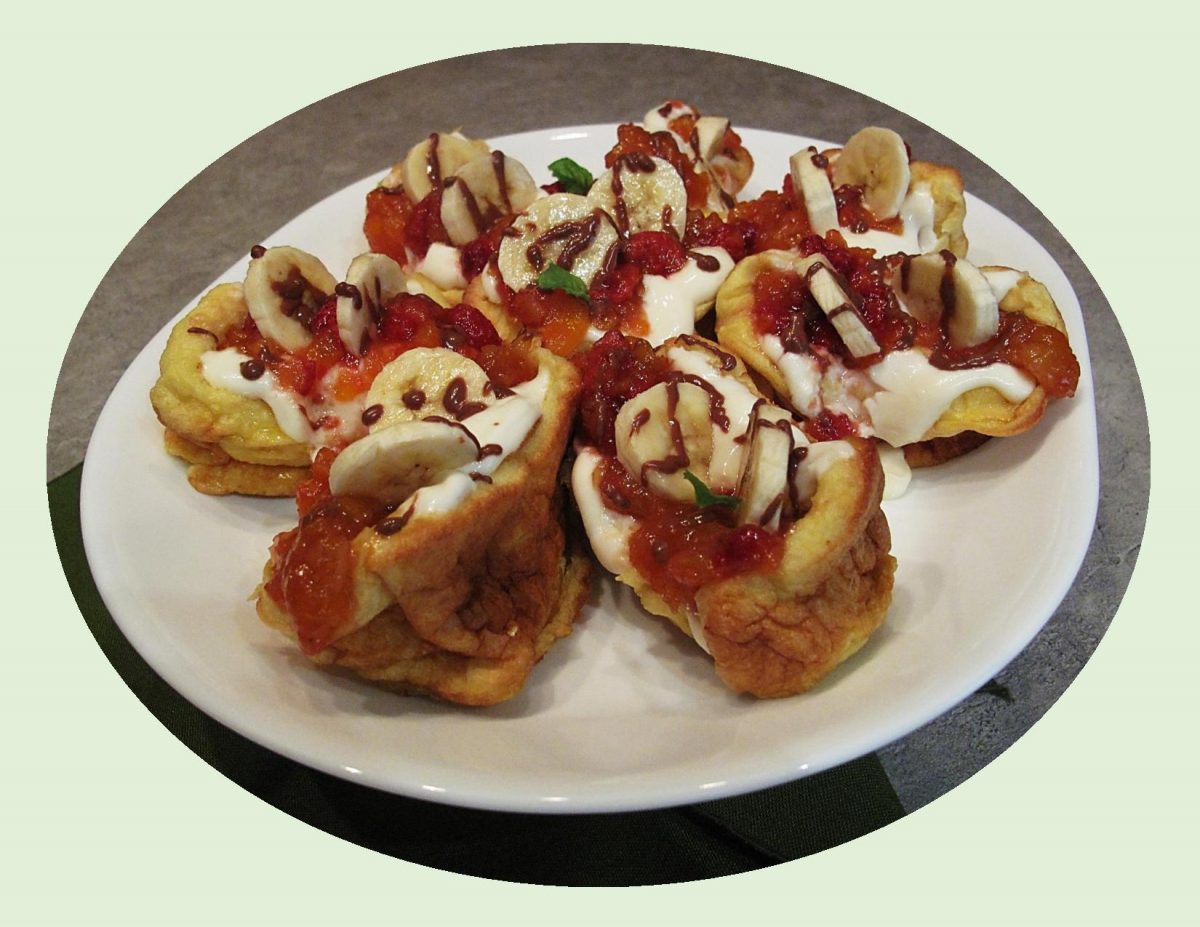
These German pancake ‘bites’ are kind of a fun spin on the classic Dutch baby pancakes. The fresh apricot/raspberry sauce along with the Greek yogurt filling, bananas and chocolate makes them such a decadent addition to brunch.

Print Recipe
German Pancake Bites
Votes: 1
Rating: 5
You:
Rate this recipe!
Servings
Ingredients
Pancake Batter
Greek Yogurt Filling
Apricot/Raspberry Sauce
Servings
Ingredients
Pancake Batter
Greek Yogurt Filling
Apricot/Raspberry Sauce
Votes: 1
Rating: 5
You:
Rate this recipe!
Instructions
Apricot/Raspberry Sauce
  1. In a food processor, place pitted apricots, lemon juice & sugar; pulse several times until the apricots are COARSELY chopped. Transfer mixture to a saucepan. Lightly boil over medium heat, uncovered for 10 minutes; stirring occasionally to prevent scorching. Add more sugar to taste depending on how sweet your apricots were. Add raspberries & simmer 1-2 minutes or until raspberries are heated through & softened. Set aside until ready to use.
Greek Yogurt Filling
  1. In a bowl, cream together cream cheese & sugar with a hand mixer. Add Greek yogurt & beat on medium-high until smooth & creamy. Set aside until ready to use. Refrigerate if not using right away.
Pancake Bites
  1. Preheat oven to 400 F. In a bowl, using a hand mixer, blend eggs, milk, vanilla, flour & salt until well mixed. Pour a small amount of the melted butter in 8 MINI loaf pans. Pour 1/3 cup of the mixture into each of the individual spaces.
  2. Bake for about 15 minutes. Remove from oven & invert on a cooling rack. Place 'bites' on a serving plate. Divide yogurt filling, placing some in the bottom of each individual pancake. Top each with some apricot/raspberry sauce & some banana slices. Drizzle with chocolate & sprinkle with powdered sugar. Serve immediately.

Baked Nectarines & Raspberry Dessert

Nectarines & peaches are both members of the stone fruit family and are so close, only one gene is responsible for their difference. This unique gene makes the peach fuzzy and the nectarine smooth. For most part, nectarines are sweeter and juicer — in essence more nectar. 

Nectarines originated in China and spread across the continents until they landed in America. They thrive in warmer climates, as a result, many of the nectarines we see in the grocery stores here are unripe, hard and tough.  They are often harvested too early and therefore do not develop the aroma they should have. Baking will concentrate their flavor, while lemon, almond and vanilla draw out their more elusive variations.

This dessert idea originated from Sweden. Quite similar to some of the other roasted fruit recipes I have posted except this dessert uses wine in the baking of it. If you don’t care for raspberries, blueberries or blackberries will work just as well.


Print Recipe


Baked Nectarines & Raspberries with Almond & Honey

Votes: 1
Rating: 5
You:
Rate this recipe!

Course Brunch, dessert

Servings

Votes: 1
Rating: 5
You:
Rate this recipe!


Instructions
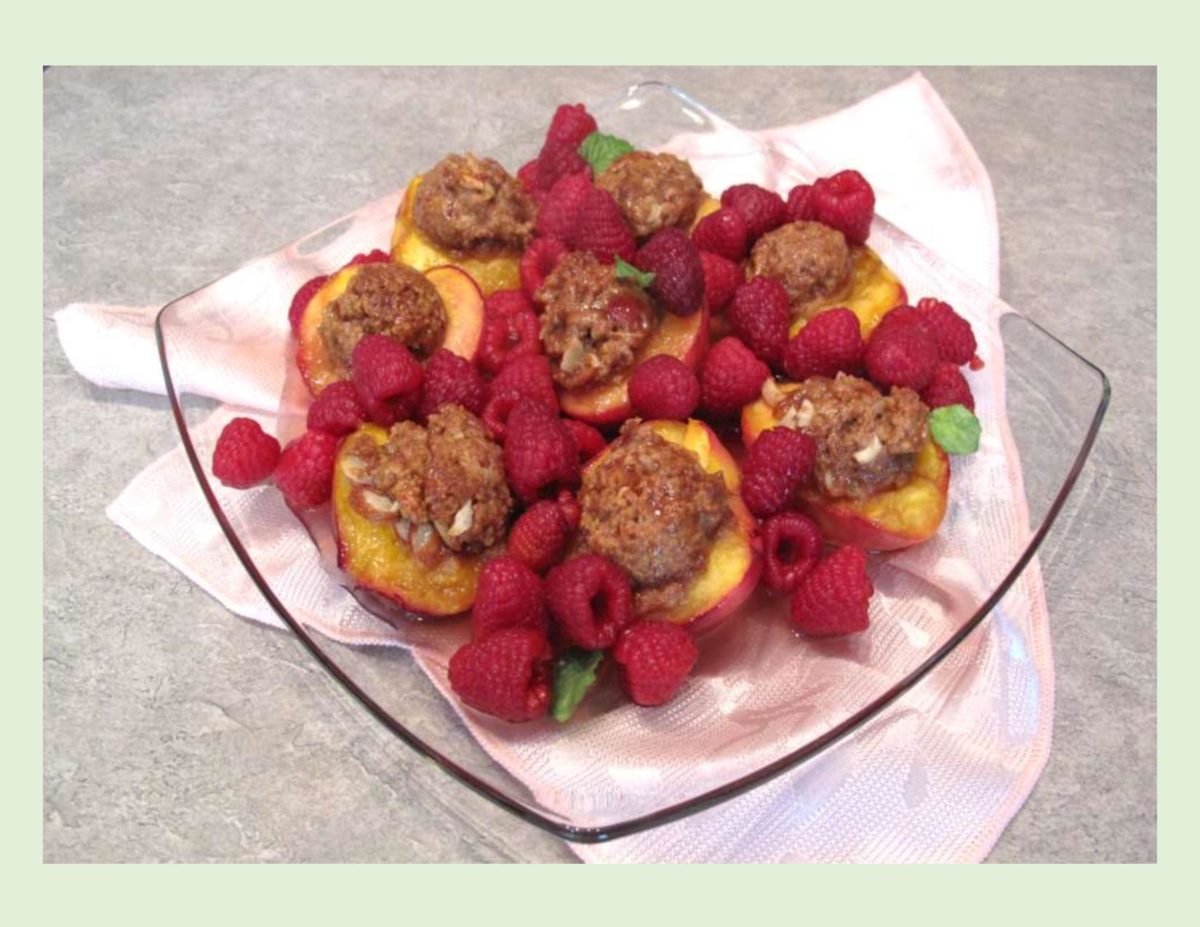
  1. In a small dish, combine wine & honey; stir to dissolve. Halve & stone nectarines, place them flesh-side up in a glass baking dish. Crush amaretti biscuits, add cardamom & mix well; add beaten egg yolk, 2 Tbsp of wine mixture & toasted almonds. Combine & divide mixture between nectarines, spooning into 'pit' holes.

  2. Sprinkle nectarines with brown sugar then top each with a bit of the butter. Pour remaining wine & honey AROUND but NOT over the fruit, add 1 Tbsp water & tuck in the vanilla pod.

  3. Preheat oven to 350 F. Bake the nectarines for 30 minutes or until fruit is soft & the biscuit filling is crisp & golden. Remove vanilla pod. Carefully stir the raspberries through the pan juices. Allow to cool for 15 minutes before serving. Meanwhile, whip cream; when ready to serve dessert, top each with a dollop.

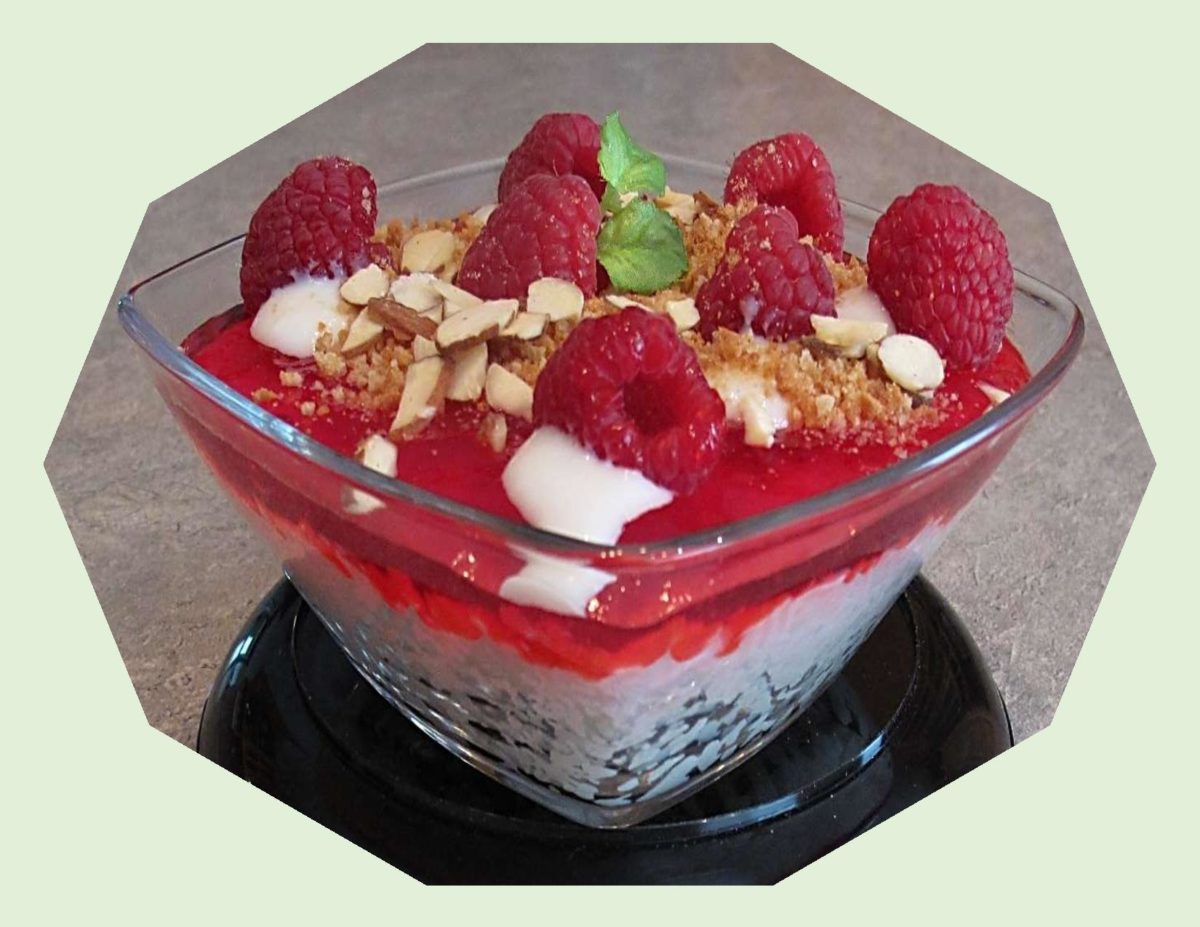
Raspberry Almond Summer Rice Pudding

From what I have read, today August 9th, is  national rice pudding day  in the USA. I’m not sure how these holidays are figured out but who needs a special date to have rice pudding?!  In Canada & the USA, most rice pudding recipes were brought by European immigrants. The basic version contained long grain rice, milk, sugar, raisins, cinnamon and nutmeg.

This food traces its roots to the grain pottage’s made by Middle Eastern cooks. Almost every region of the world has its own take on rice pudding. Some versions are sweet, while others are savory and some are thick while others are thin.

Summer rice puddings put a fresh twist on an this old classic comfort food. There is so much fresh summer fruit to choose from and combinations of flavors just waiting to be explored.

I remember my mother’s rice pudding with fondness. I wasn’t big on raisins at the time and always thought it would be perfect if they would be omitted, but it was still wonderful.

Today’s showy little dessert makes use of the season’s nice fresh raspberries. 

Print Recipe
Raspberry Almond Summer Rice Pudding
Instructions
  1. In a large saucepan, combine rice, sugar, milk & butter; bring to a boil. Reduce heat & simmer for 30-35 minutes until rice is cooked. While rice is cooking toast almonds in a skillet.
  2. When rice is cooked, allow to cool THEN add almonds & extract, lifting as you stir. Divide rice between dessert cups & refrigerate 30 minutes.
  3. Make raspberry jell-o according to package instructions. Once the jell-o is made allow to cool until slightly set. Top each dessert cup with 1/6 of the jello & refrigerate for at least 4 hours or until jell-o has set.
  4. Decorate desserts with fresh raspberries, crushed amaretti biscuits, sliced almonds & a sprig of mint if desired.

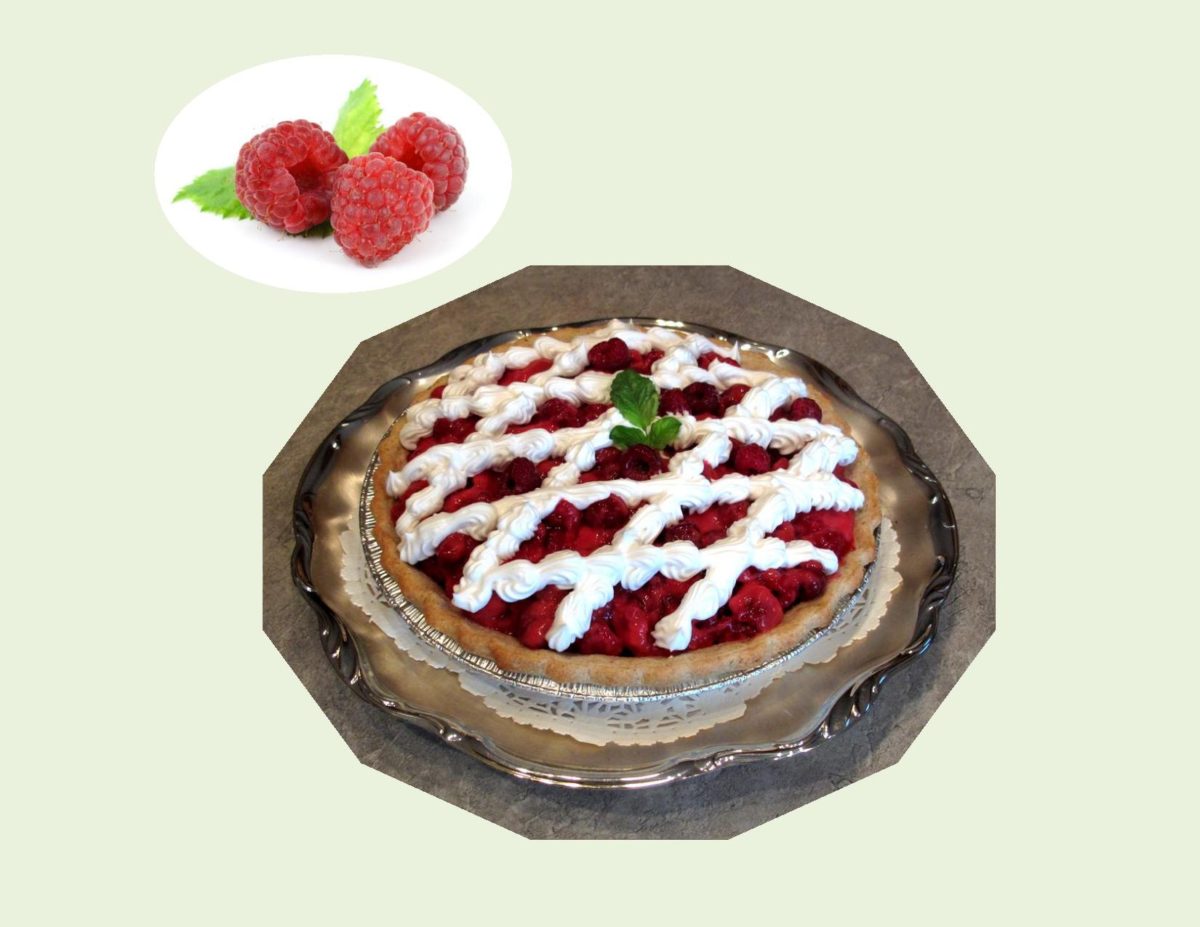
Raspberry Vanilla Cream Pie

Summer’s bounty of fresh fruit is so hard to resist. Raspberries for instance — vividly pink, exquisitely perfumed and very delicate. I think I’ve tried to use them in everything imaginable. For one company event some years ago, I was trying to come up with a sauce that would take my cream puffs to the ‘next level’. I decided to put some Chambord raspberry liqueur in it. Chambord is created using black and red raspberries, vanilla, citrus peel, honey and hints of fragrant herbs. I definitely could say I think I ‘nailed it’ with that raspberry drizzle.

Although the red raspberries seem to be the most popular and well known, I have tasted the gold ones as well. Fall Gold raspberries ripen in the late part of the season becoming very large and sweet. If you get a chance, they are certainly worth trying.

It seems strange that raspberries are actually a member of the rose ‘family’ and not considered a true berry. Irregardless, they are certainly delicious to eat and always give such great eye appeal to everything they are used in. Pie has become such a global favorite, you might say, it’s a work of art that comes easily. Today’s blog recipe for Raspberry Vanilla Cream Pie  has always been one of my favorites. 

Print Recipe
Raspberry Vanilla Cream Pie
Showy and delicious!
Votes: 1
Rating: 5
You:
Rate this recipe!
Course dessert
Servings
Ingredients
Oat Pie Crust
Raspberry Filling
Course dessert
Servings
Ingredients
Oat Pie Crust
Raspberry Filling
Votes: 1
Rating: 5
You:
Rate this recipe!
Instructions
Oat Pie Crust
  1. In a large bowl, combine the flour, oats, pecans, (sugar) & salt; bend in margarine until resembles coarse crumbs. Press onto the bottom & up the sides of a 9" pie pan. Bake at 400 F. for 12-15 minutes or until lightly browned. Cool on a wire rack.
Raspberry Filling
  1. In a large saucepan, heat water over medium heat. Whisk in pudding mix. Cook & stir for 5 minutes or until thickened & bubbly. Whisk in jell-o until completely dissolved. Remove from heat; cool slightly. Gently fold in raspberries. Spoon into cooled crust. Chill for at least 3 hours or overnight. Serve with a dollop of Cool Whip or Dessert Topping or decorate with a design.
Recipe Notes