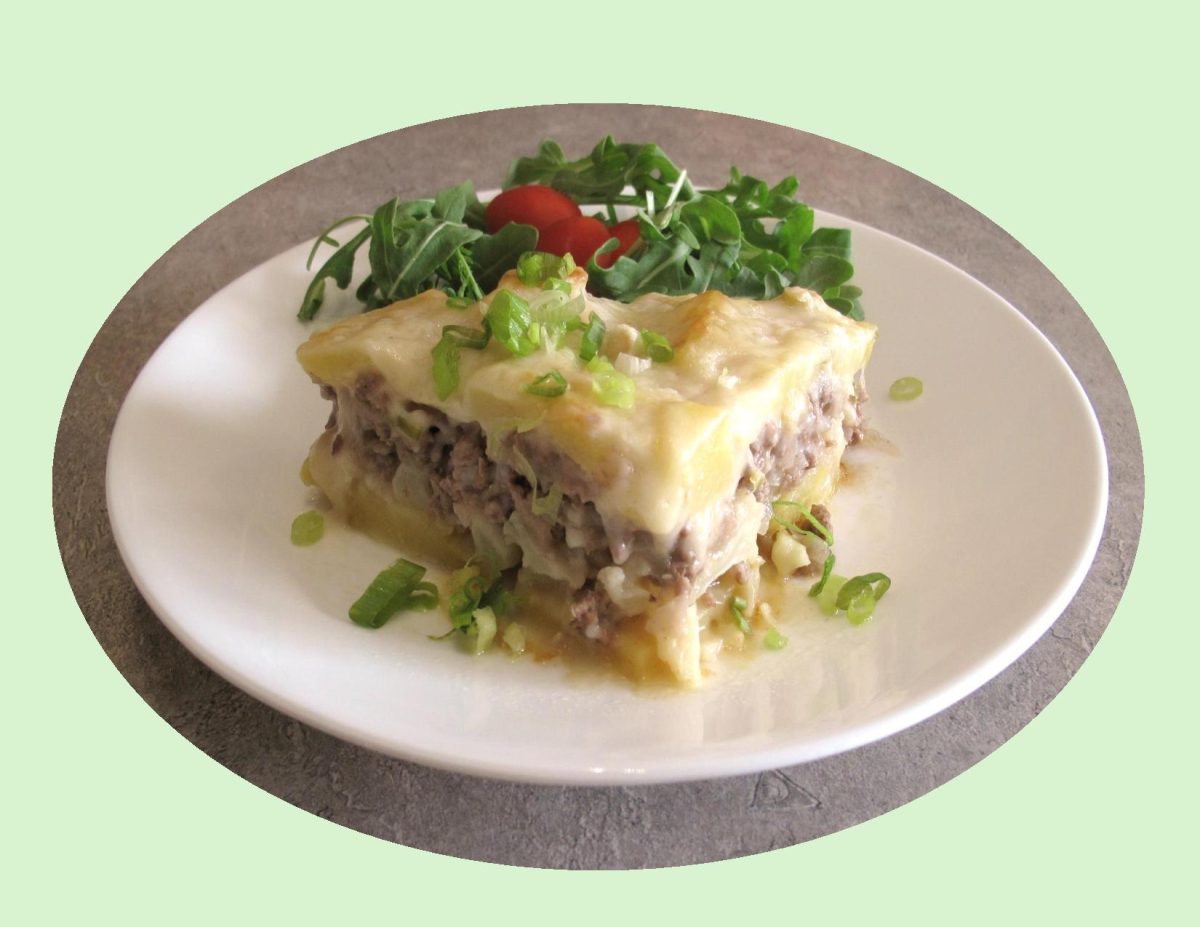
Canadian Salmon Pie

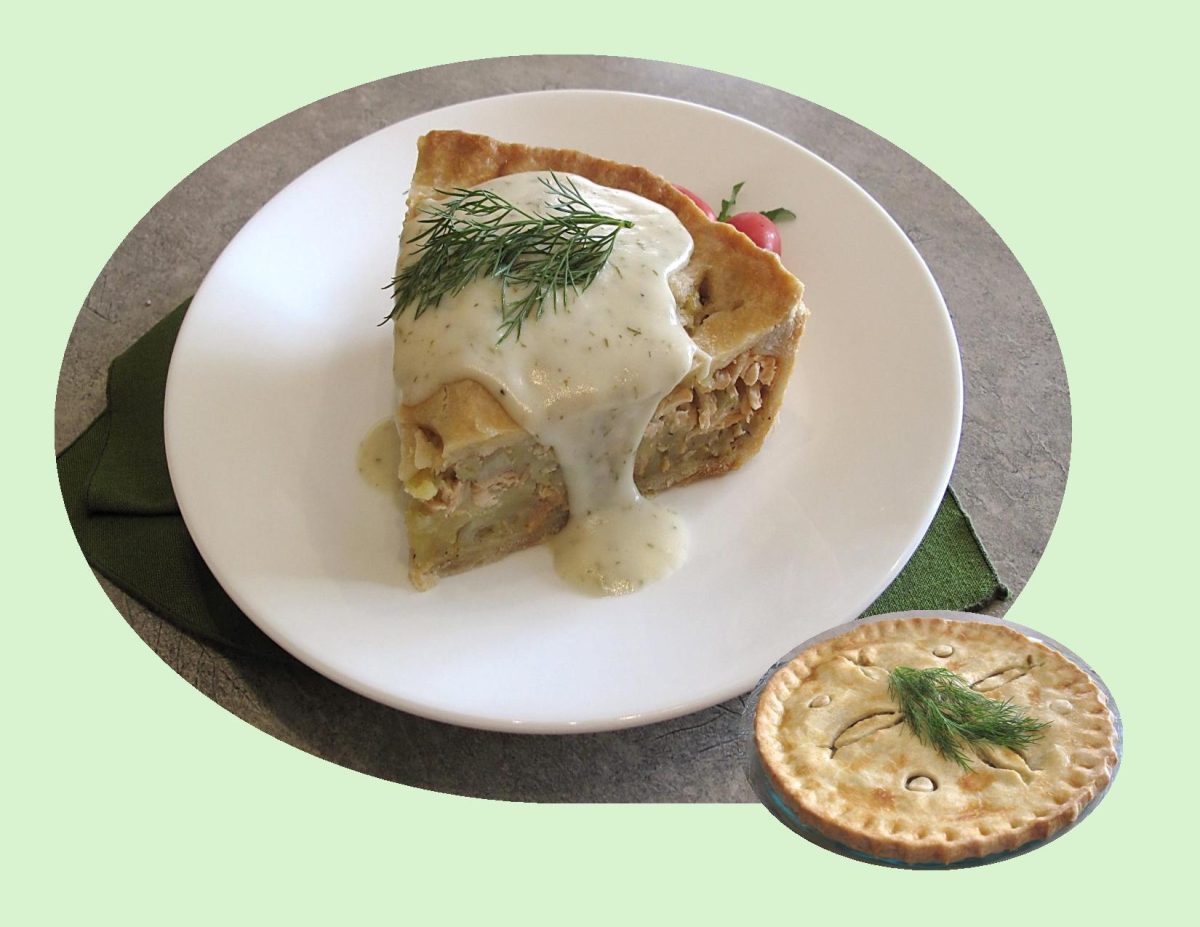
Salmon pie is a variation on a classic Canadian Christmas meat pie from Quebec called a ‘tourtiere’. Fundamentally, tourtiere is a pie that contains meat and spices baked in a flaky crust. The meat is generally diced or ground, including any or all of pork, veal, beef or wild game. No matter what the meats used, or the presence or absence of potato, bold seasoning is the rule for all varieties. The four original spices used in the classic tourtiere are cinnamon, cloves, allspice and nutmeg. Like so many of these recipes that have been ‘handed down’ over generations, each family alters it to suit their taste. 

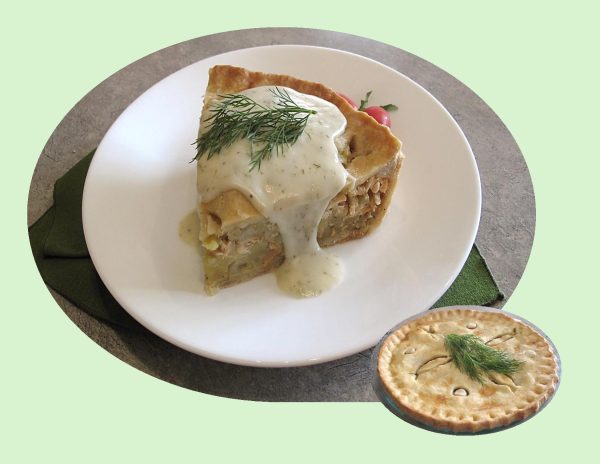
The salmon pie version takes the same meat pie concept, but uses flaked, cooked salmon that is seasoned and mixed with mashed potatoes.

I thought it would be nice to have some salmon pie before we get into all that Christmas turkey. The lemon dill sauce is such a nice condiment to go with it.
Print Recipe
Canadian Salmon Pie
Votes: 1
Rating: 5
You:
Rate this recipe!
Cuisine American
Servings
Ingredients
Pastry
Salmon Filling
Lemon Dill Béchamel Sauce
Cuisine American
Servings
Ingredients
Pastry
Salmon Filling
Lemon Dill Béchamel Sauce
Votes: 1
Rating: 5
You:
Rate this recipe!
Instructions
Pastry
  1. In a large bowl, combine flour & salt. Cut in butter until mixture is an even crumbly texture. Add cold water a Tbsp at a time & mix until dough comes together. Shape the dough into a disc, wrap & chill in the refrigerator. While pastry is chilling prepare filling.
Salmon Filling
  1. Wash & peel potatoes. Cut into chunks & boil in a medium size pot of water until tender, about 12 minutes. Drain, mash & set aside.
  2. Melt butter in a large skillet over medium heat. Add the onions & sauté until they are softened, about 5 minutes. Add 1/2 cup water, thyme & Old Bay seasoning to skillet.
  3. Season the salmon fillet with salt & pepper & place it into the skillet skin side down. Spoon liquid & onions over salmon, cover the skillet & cook until the salmon is opaque, about 5 minutes. Turn off the heat & let salmon cool slightly.
  4. Remove the skin & break salmon into pieces. Add the salmon, onions & poaching liquid to the mashed potatoes & mix to combine. Taste & adjust salt & pepper if needed. While the salmon pie is baking, make the dill béchamel sauce.
Lemon Dill Béchamel Sauce
  1. Melt the butter in a small saucepan over medium heat. Add flour & whisk until smooth. Gradually add milk, stirring constantly. When sauce begins to thicken, add the lemon juice, dill and salt & pepper to taste. Simmer for 2 minutes. Keep warm until ready to serve.
Serving
  1. Remove pie from oven & let it cool for at least 10 minutes before serving. Cut pie into wedges & drizzle with lemon dill sauce. Serve warm.

Cauliflower Casserole w/ Ground Beef & Potatoes

Cauliflower has had a millennial makeover and it’s never been more appealing. For years cauliflower has been a staple side, steamed or baked and smothered with cheese sauce, but there’s so much more to do with the humble cauliflower.

Cauliflower totally transforms into something new depending on how you cook it. Steam and puree it and it becomes very silky. Add the pureed cauliflower to soups, mashed potatoes or macaroni and cheese to thicken them and add flavor and creaminess without dairy. Bake it with cheese and cream for a hearty gratin that’ll top any potato casserole. You can pickle cauliflower and add it to salads, appetizer platters or sandwiches — it’s especially good on falafel. Deep fry cauliflower and eat it as a snack, like popcorn, or toss the crispy, fried florets into a salad. Roast it – on its own or with other vegetables like carrots — till it’s golden brown and tender and serve it as a side dish or add it to pasta to make a complete meal. With a simple blitz, cauliflower makes an ideal ‘dough’ for a healthier homemade pizza base. The possibilities are endless!

This comforting casserole consists not only of cauliflower but beef, potatoes and cheese. It’s the full meal deal!

Print Recipe
Cauliflower Casserole w/ Ground Beef & Potatoes
Votes: 1
Rating: 5
You:
Rate this recipe!
Servings
Votes: 1
Rating: 5
You:
Rate this recipe!
Instructions
  1. Boil potatoes with their skins in lightly salted water. Drain & peel immediately. Let cool then cut into 1/4-inch slices.
  2. Bring a large pan of lightly salted water to a boil & cook the cauliflower florets for about 6 minutes until al dente. Drain the cauliflower in a colander & reserve 2 3/4 cups of the cooking liquid. Drain cauliflower WELL.
  3. Heat a saucepan with a dash of oil & fry the onion & garlic until soft, but not colored. Add the ground beef & fry. Season with salt & pepper & stir in 1/2 of the green onion. Continue to cook until the released moisture has evaporated. Place in a dish & set aside.
  4. Preheat oven to 400 F. Butter a 9-inch pie plate or casserole dish. Set aside.
  5. Heat saucepan, add butter & allow to melt. Add the flour & stir well with a whisk for about a minute to allow the flour to cook. Stir in veg broth powder & add the reserved cooking liquid from the cauliflower. Keep stirring until you have a smooth & thickened sauce. Stir in 1/2 of the grated cheese until incorporated, then add the remaining green onion. Turn off heat.
  6. Cover the bottom of the baking dish with half of the potato slices, followed by the cauliflower & ground beef. Divide 1/2 of the sauce over it & cover with the remaining potato slices. Place the remaining sauce over potatoes & sprinkle with the remaining grated cheese.
  7. Bake for 40 minutes or until the top is golden brown. Allow to cool slightly before serving.

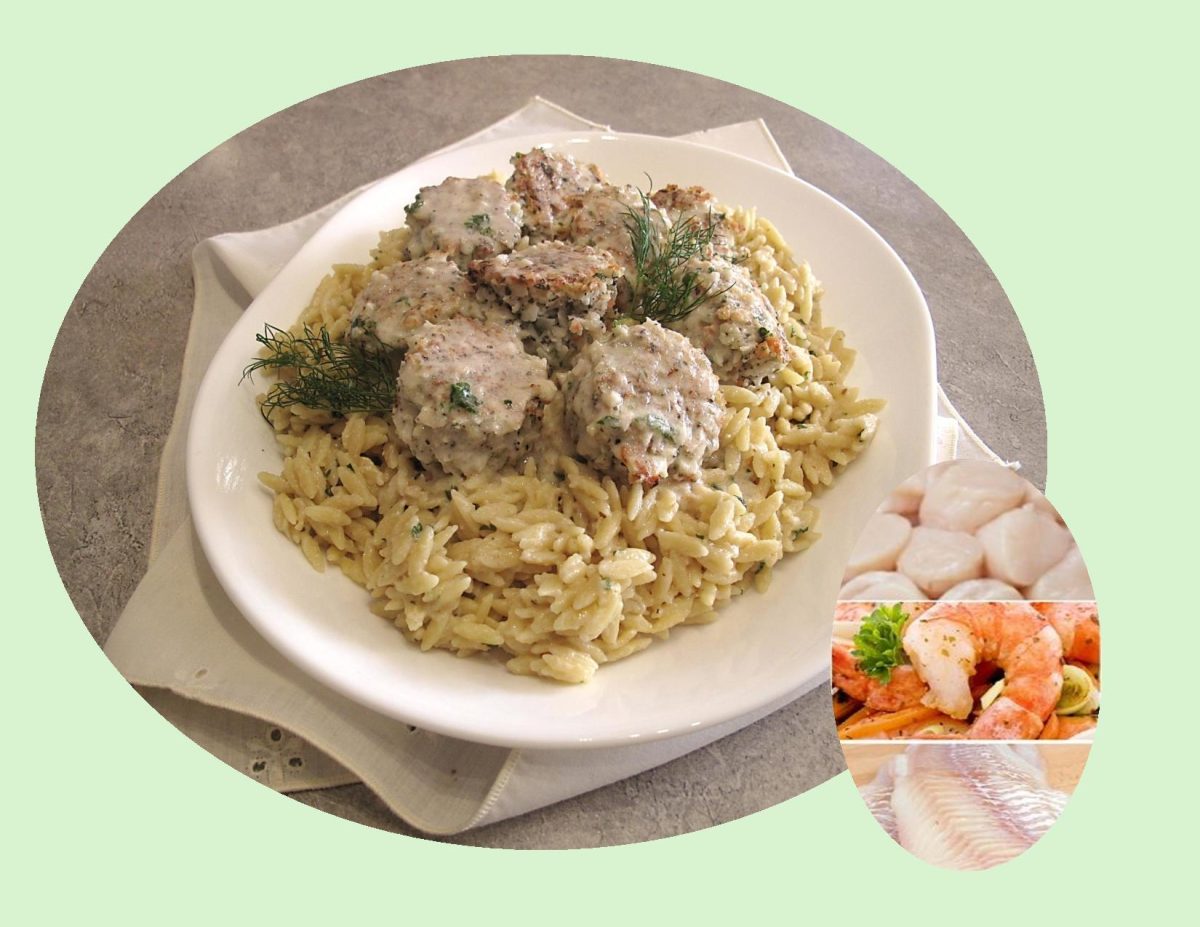
Seafood Meatballs w/ Orzo

Meatballs have become a beloved culinary delight in various cuisines around the world. The concept of combining ground meat with other ingredients to form compact balls can be traced back to ancient civilizations.

While commonly associated with Italian cuisine, the origin of meatballs is a tale that stretches across time and cultures.

Sweden has made its mark on the global meatball scene with its distinctive version, known as köttbullar. Swedish meatballs gained international recognition, thanks in part to the association with the popular furniture retailer, IKEA.

The Middle East boasts its own variation of meatballs, known as kofta. Kofta has a long history in the region and can be found in various Middle Eastern and Mediterranean countries, including Turkey, Lebanon, Egypt, and others.

Meatballs have traveled the world, adapting and evolving to suit different tastes and ingredients.

Asian cuisines have their own variations of meatballs. In Thailand, fish balls are popular street food made from a paste of minced fish, mixed with herbs, spices, and sometimes starch to achieve a firm texture. They are usually served in soups, stir-fries, or on skewers with dipping sauces.

As immigrants from various countries arrived in North America, they brought with them their culinary traditions, including their beloved meatball recipes.

In recent years, the popularity of global cuisine has further fueled the creativity and innovation around meatballs in North America. Food trucks and trendy restaurants offer inventive variations, such as fusion meatballs with a blend of different cultural flavors or vegetarian and vegan alternatives made with plant-based ingredients like lentils, mushrooms, or chickpeas.

Today, meatballs in North America can be found in a variety of forms and flavors, reflecting the country’s multicultural heritage.

Whether enjoyed in a tomato-based sauce with pasta, in a creamy gravy with lingonberry sauce, or alongside aromatic rice and fragrant spices, meatballs continue to satisfy appetites. The enduring popularity of meatballs is a testament to their versatility and the universal appeal of a simple, comforting dish.

Print Recipe
Seafood Meatballs w/ Orzo
Votes: 1
Rating: 5
You:
Rate this recipe!
Servings
MEATBALLS
Votes: 1
Rating: 5
You:
Rate this recipe!
Instructions
Orzo
  1. Bring 2 1/2 cups vegetable broth to a boil & cook orzo until tender. Drain excess vegetable broth from orzo & reserve. Set orzo & reserved water aside.
Sauce
  1. In a saucepan over medium heat, melt butter & add the garlic. Cook 3-4 minutes while stirring. Whish in remaining sauce ingredients. Simmer 4-5 minutes, stirring until sauce slightly thickens. Remove from heat.
Seafood Meatballs
  1. In a small bowl, mix the eggs & lemon juice. Place all meatball ingredients (except the olive oil) in the bowl of a food processor & pulse until combined.
  2. In a large saucepan, heat olive oil over medium-low heat. Scope seafood mixture (makes 20 balls) into saucepan. Using a large spoon, continuously turn the meatballs until all sides obtain a golden brown color. Place meatballs on a plate lined with paper towel.
Serving
  1. On a large platter, place orzo & top with seafood meatballs. Drizzle sauce over all. Place in the microwave for a couple of minutes just to ensure everything is hot for serving.

Cinnamon Bun Rice Krispie Treats

HAPPY HALLOWEEN!

Whether you’re hosting a Halloween party, attending a potluck, or simply craving something sweet, Halloween rice krispie treats are a classic choice. Loved for their crispy texture, chewy marshmallow consistency, and endless decorating possibilities.

Rice Krispie treats have been around for about 85 years. Snap, crackle, pop! These three words have become synonymous with Rice Krispies, the breakfast cereal made from pieces of crisped rice that, when combined with milk, emit a noise that you can probably imagine while reading this. Regardless of the last time you enjoyed a bowl of Rice Krispies in the morning, it’s clear that the beloved brand exudes childhood nostalgia. The iconic mascot trio, memory-stimulating sound, shape, and aroma are embedded into many memories. 

Rice Krispies Treats are a legendary confection with an undemanding recipe that has graced several generations. Not only are the possibilities endless with these delicious treats that kids and grown-ups can enjoy but they can bring a challenging cake shape to life while making the process so much more manageable. Intricately sculpted cakes often have a surprise inside: rice cereal treats. Swapping traditional batter for these crispy treats provides structure and strength to modeled cakes that you just can’t get with fondant and modeling chocolate alone. And the best part is, the method you use to sculpt the cake afterward isn’t that different than when you sculpt a traditional batter-filled cake.

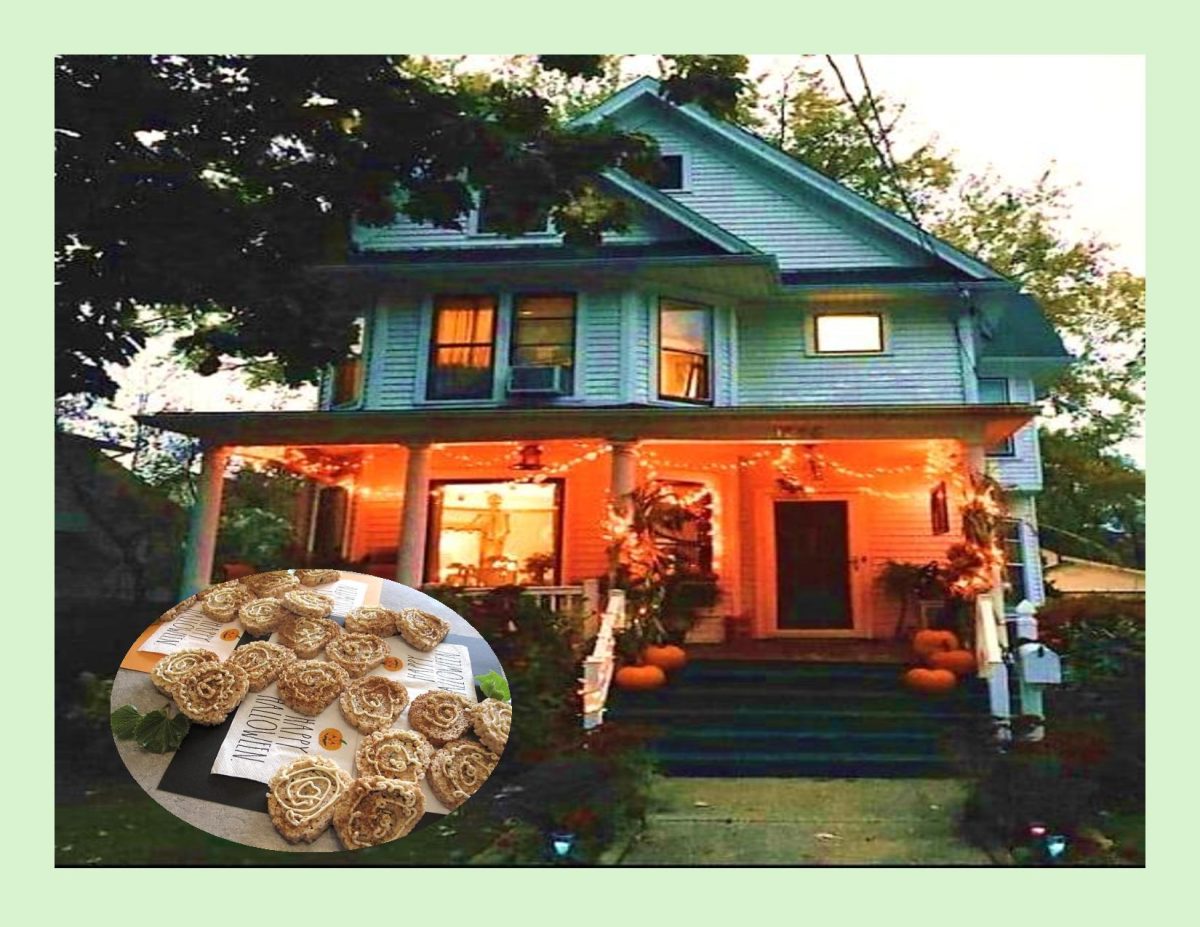
For some tasty little Halloween treats this year, I’m making some cinnamon bun rice krispie rolls with a cream cheese frosting. I can think of a few kids & adults who will enjoy these!

Print Recipe
Cinnamon Bun Rice Krispie Rolls w/ Cream Cheese Frosting
Votes: 1
Rating: 5
You:
Rate this recipe!
Servings
Ingredients
Rice Krispies
Filling
Servings
Ingredients
Rice Krispies
Filling
Votes: 1
Rating: 5
You:
Rate this recipe!
Instructions
Rice Krispies
  1. Line a 10 x 15-inch jelly roll pan with parchment paper. Spray well with cooking spray. Set aside
  2. In a large pot, melt marshmallows, butter, vanilla & cinnamon over low heat. Stir until melted & smooth. Remove from heat & stir in rice krispies. Scrape rice krispie mixture onto prepared pan. Using well buttered hands, press out evenly into pan. Let cool to room temperature.
Filling
  1. In a small bowl, stir together brown sugar, butter, cinnamon & flour until creamy.
Assembly
  1. Carefully spread filling onto the rice krispies. Sprinkle with pepita seeds. Roll up from the long side like a jelly roll while rice krispies are still flexible. Press firmly as you roll.
  2. Place in fridge for 15-20 minutes. When it feels FIRM, cut into 1/2-inch slices using a serrated blade & sawing motion. You should get approximately 24 slices.
Frosting
  1. Beat together cream cheese, vanilla & powdered sugar until smooth. Place in a piping bag & pipe a swirl onto each slice. Sprinkle with extra cinnamon if you wish. Keep in refrigerator.

Pumpkin Blueberry Muffins

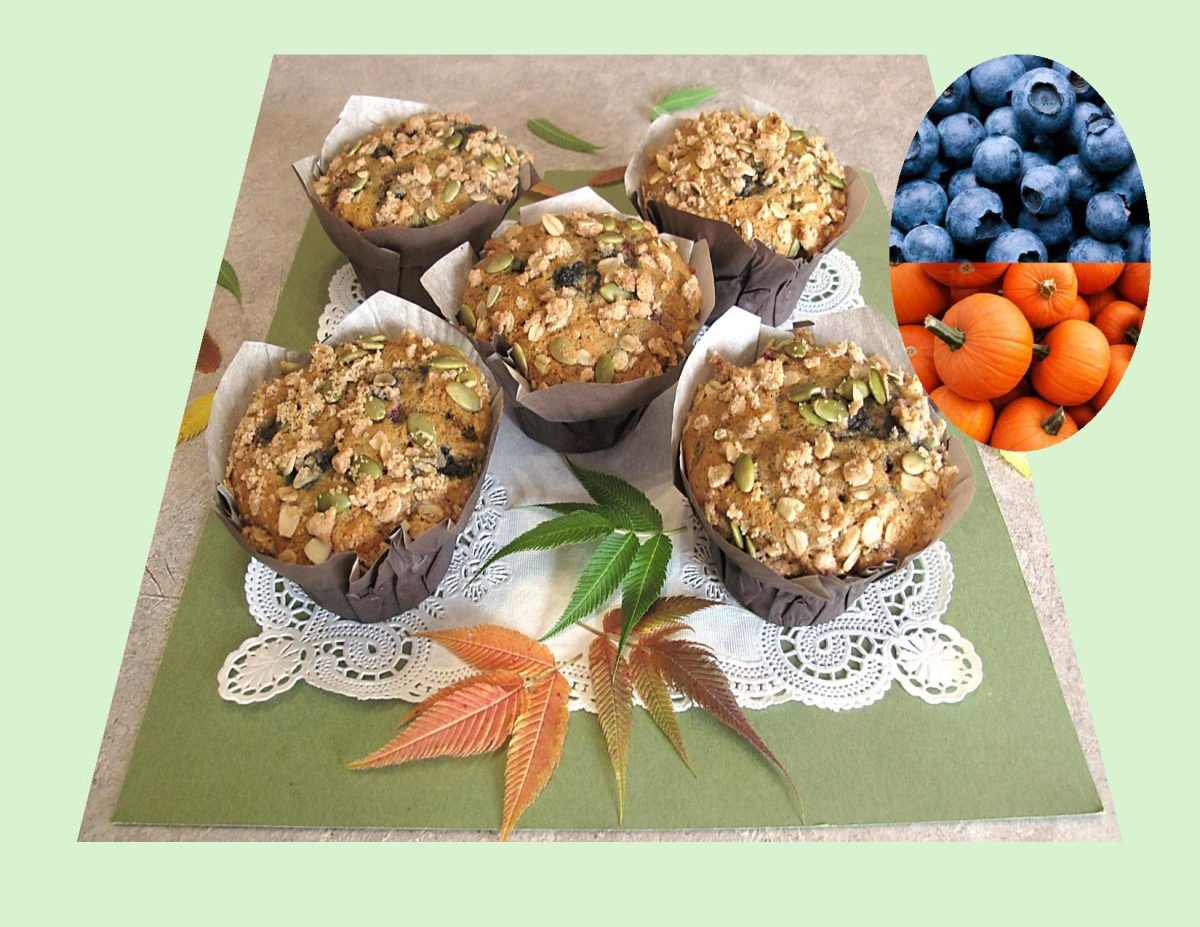
Fall is here and its pumpkin season!  It’s like a pumpkin explosion in the stores this time of year with pumpkin spice latte, pumpkin spice candles, pumpkin spice Oreos, pumpkin spice M&Ms, pumpkin spice Ramen noodles, Doritos and so many others.

Unlike pumpkins, however, blueberries have a flavor that knows no season or food type. They pair well with just about anything, and pumpkins are no exception. Blueberries have just enough sweetness to complement pumpkin-y flavors and stay juicy during the baking process.

These pumpkin blueberry muffins make for an ideal autumn indulgence.

Print Recipe
Pumpkin Blueberry Muffins
Votes: 1
Rating: 5
You:
Rate this recipe!
Course dessert
Cuisine American
Servings
LARGE MUFFINS
Ingredients
Muffins
Topping
Course dessert
Cuisine American
Servings
LARGE MUFFINS
Ingredients
Muffins
Topping
Votes: 1
Rating: 5
You:
Rate this recipe!
Instructions
Muffins
  1. Preheat oven to 350 F. Line an 8 cup large muffin tin with parchment papers/cups
  2. In a large bowl, whisk together 1 2/3 cups flour, baking soda, baking powder, salt, cinnamon & allspice. In a small bowl, combine pumpkin puree with milk.
  3. In a large bowl, using an electric mixer, beat butter & brown sugar until creamy. Add egg; beat until fluffy.
  4. Alternately add flour & pumpkin mixtures to butter mixture, stirring just until blended. Combine blueberries with 1 Tbsp flour in a small dish. Fold gently into mixture. Spoon batter carefully into prepared muffin cups.
Topping
  1. In a small bowl, combine oats, flour, brown sugar, cinnamon & salt. Using a fork, cut in butter until mixture is crumbly. Add pepitas & combine. Divide evenly over muffin batter.
Baking
  1. Bake for 45 minutes or until a wooden pick inserted in center comes out clean. Remove from oven, cool in pan for a few minutes then remove to a rack to finish cooling. Store muffins in a covered container.
Recipe Notes
  • If you would prefer smaller muffins, divide batter between 12 paper lined standard muffin cups. Bake for about 30-35 minutes or until a wooden pick inserted in center comes out clean.

Cheesy Onion & Chicken Turnovers

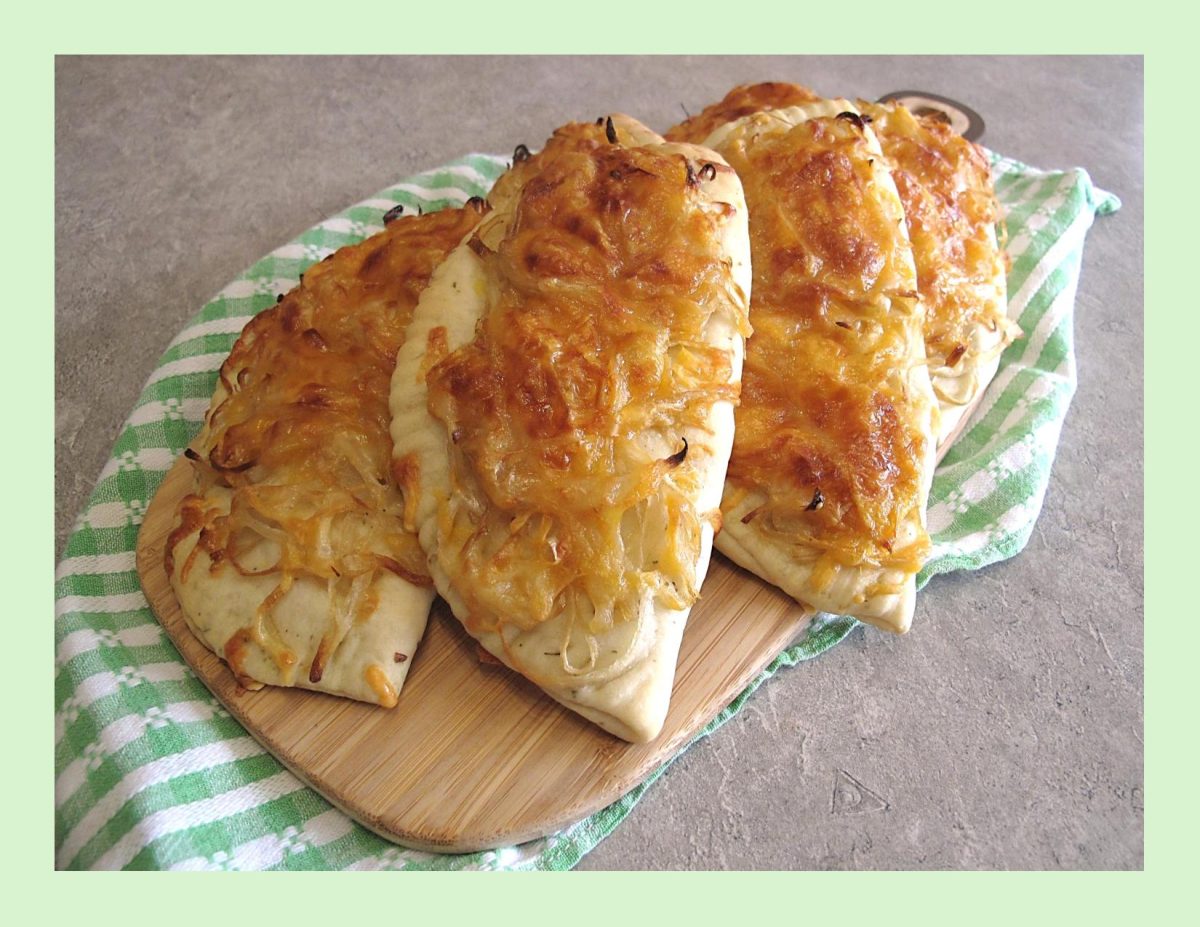
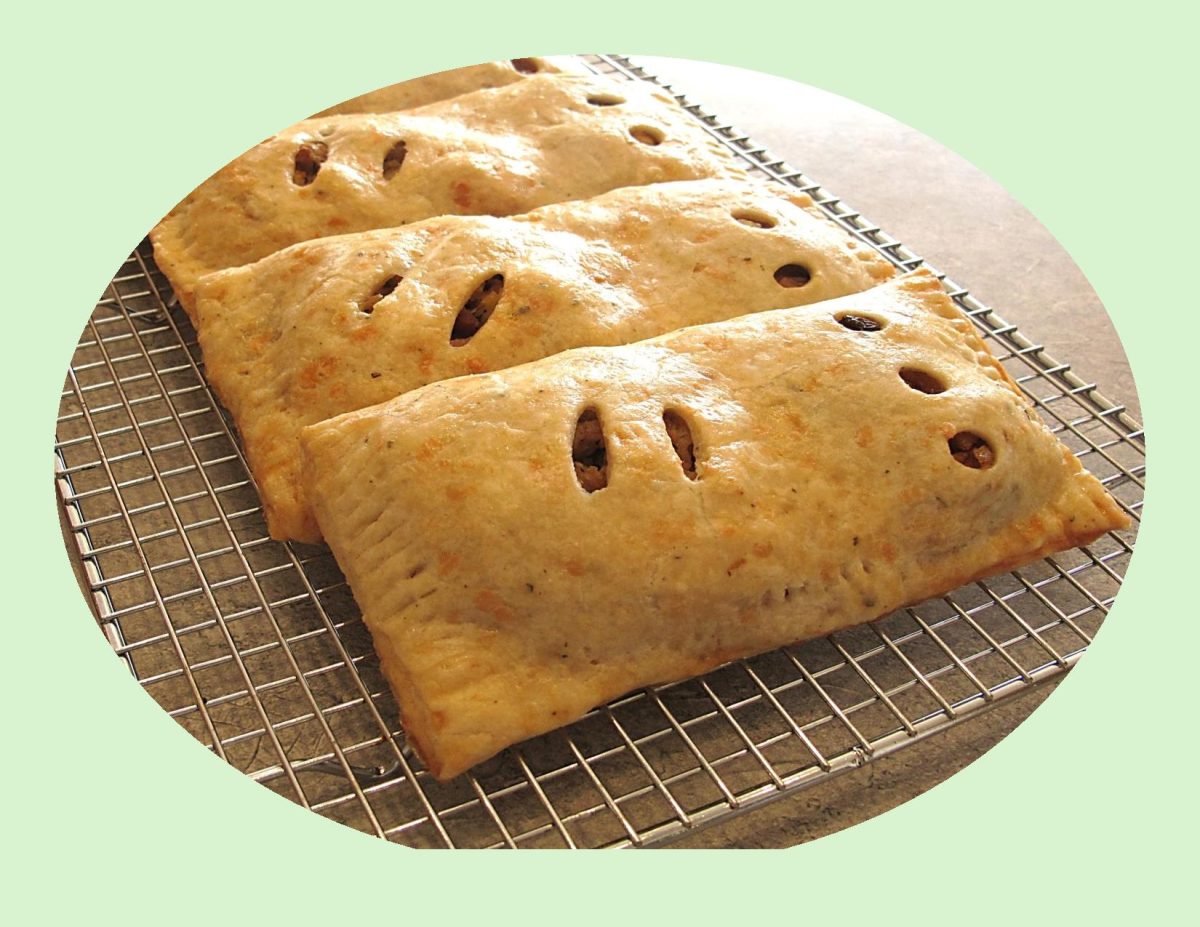
Turnovers are a tasty handheld pastry stuffed with a variety of sweet or savory fillings. Depending on where you are in the world, you might know turnovers by another name. It’s a calzone in Italy, an empanada in Latin America, a pasty in England, a patty in Jamaica and a hand pie in North America.

Whether they’re made with pastry or yeast dough, these tasty morsels get their name from the folding technique used to enclose the fillings. They can be fried or baked, and the result is a convenient self-contained meal or snack.

While store-bought turnovers are readily available, there’s something uniquely special about crafting your own savory ‘pies’ at home. The aroma that fills the kitchen as the turnovers bake in the oven, the satisfaction of creating a perfectly flaky crust, and the freedom to customize the fillings to suit your taste – these are the joys that make them truly special.

During the summer months I like to have a big variety of savory turnovers in the freezer (already baked). There are so many times when you are too busy to make lunch and there they are — ready to heat and eat!

These cheesy onion and chicken turnovers were inspired by some Boursin cheese with cranberries & pepper I had waiting to be used. The total result has made them keepers!

Print Recipe
Cheesy Onion & Chicken Turnovers
Votes: 1
Rating: 5
You:
Rate this recipe!
Servings
TURNOVERS
Ingredients
Servings
TURNOVERS
Ingredients
Votes: 1
Rating: 5
You:
Rate this recipe!
Instructions
Dough
  1. Cook potato, peel & mash. In a bowl, combine yeast with lukewarm water. Allow to stand for about 3 minutes until foamy; add butter, salt, Italian seasoning, sour cream & potato & mix well.
  2. Stir in flour, one cup at a time. When dough is completely blended, turn onto a lightly floured work surface. Knead dough about 10 minutes, until smooth & elastic.
  3. Place dough in a greased bowl, cover with plastic wrap & allow to rise in a draft free place until doubled in bulk, about 1 hour.
Topping & Fillings
  1. In a skillet, heat 1 Tbsp oil. Sauté onion until caramelized & tender. In a bowl, combine shredded chicken with 1/2 of the Boursin cheese. Grate cheddar cheese.
Assembly
  1. Divide dough into 6 equal pieces & shape each piece into a round ball. On a lightly oiled surface, flatten each ball with a rolling pin to a 6-inch diameter. Spread each piece of dough with some of the remaining Boursin cheese.
  2. Divide chicken/Boursin mixture between the 6 turnovers, laying it to one side leaving a half inch border. Fold each one in half to form turnovers.
  3. Line a baking sheet with parchment paper. Place turnovers on baking sheet giving them space to rise a bit. Top each one with some caramelized onions & cheese. Cover turnovers with a tea towel & place in a draft free place to rise for about 15 minutes.
  4. Preheat oven to 350 F.
  5. Bake turnovers until a nice golden brown color. Remove from oven & allow to cool on a wire rack.

Apple Crisp Snack Cake

In Canada, apples are available throughout the year. About 100 species of apples are grown in the country. With their bright colors, crisp texture and clean, slightly spicy flavor, apples are the perfect fall icon.

Today’s blog recipe is a bit of a different take on a beloved old classic. Apple crisp is a North American dessert which combines tender apples covered with a delectable crunchy topping. It is one of the common desserts that does not have the regular bottom crust and uses sliced or diced apples, generously doused in cinnamon and sugar, as the bottom layer.

The streusel which covers the apples can employ a wide variety of different flour types, nuts, and oats, commonly combined with butter and sugar. It results in a crumbly topping, which usually completely coats the apples, allowing them to release and cook inside the flavorful juices.

Apple crisp is believed to have stemmed from the British crumble, and today these two classics merely differ in their names. Even though the North American crisp was particularly made with oats, which resulted in a crunchier coating, nowadays both varieties can employ various ingredients.

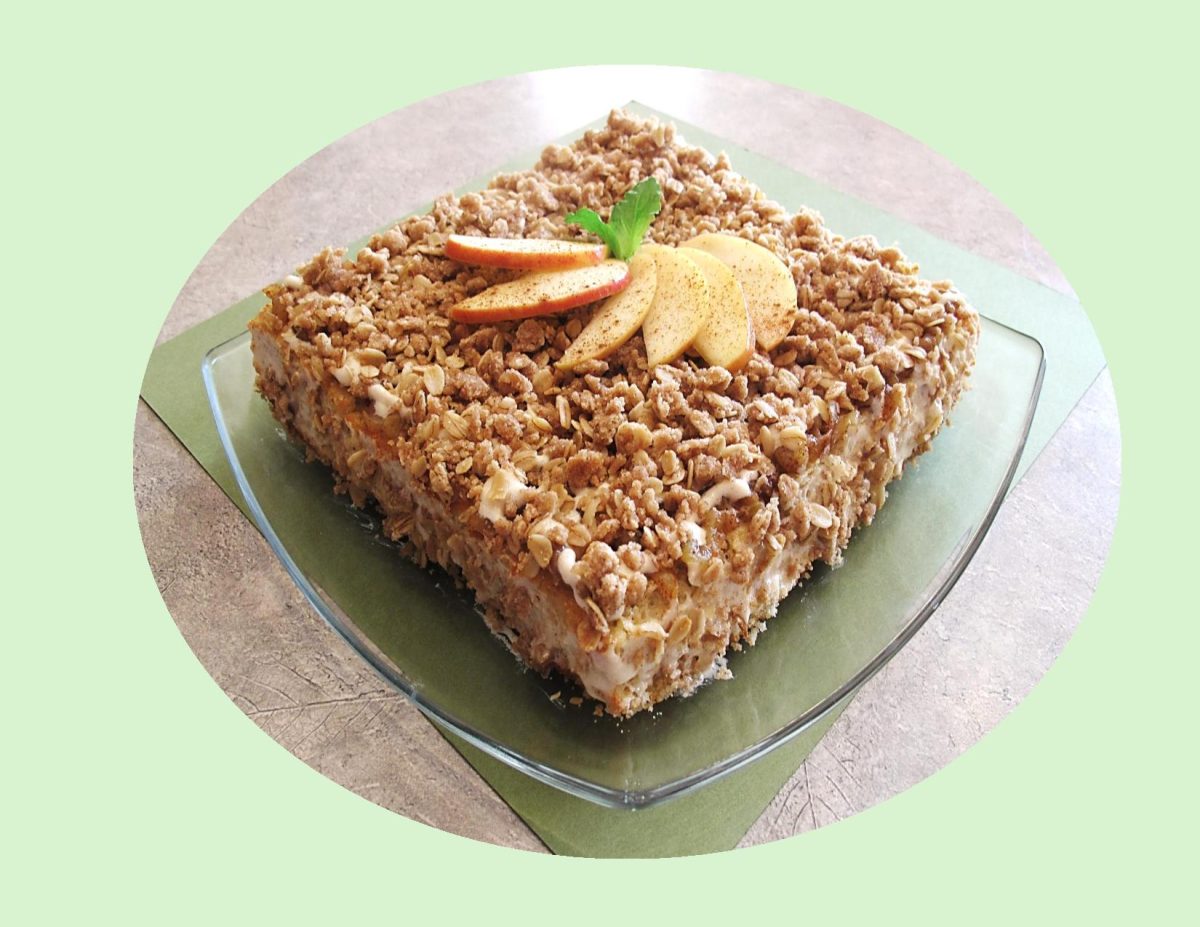
This warm and spicy ‘apple crisp snack cake’ is a comforting twist on the favorite fall dessert. Filled with apples and topped with more apples, cream cheese drizzle the perfect crispy streusel. Orange pumpkins might be more popular this month, but there’s no better time than now to take advantage of apple fresh season.

Print Recipe
Apple Crisp Snack Cake
Votes: 1
Rating: 5
You:
Rate this recipe!
Course dessert
Cuisine American
Servings
SERVINGS
Ingredients
Apple Topping
Baked Crisp Topping
Course dessert
Cuisine American
Servings
SERVINGS
Ingredients
Apple Topping
Baked Crisp Topping
Votes: 1
Rating: 5
You:
Rate this recipe!
Instructions
Cake
  1. Preheat oven to 350 F. Line an 8 x 8inch baking pan with parchment paper. Set aside.
  2. Peel, core & grate apples. Sift flour, cornstarch, baking powder, cinnamon, allspice, cardamom & salt together in a medium bowl & set aside.
  3. Using a mixer, cream butter & sugar until light. Scrape the bowl & add the whole egg, mixing on medium-high for about a minute. Scrape the bowl again & add the egg white & vanilla; mix for another 2 minutes.
  4. Alternately fold in flour mixture & buttermilk, then gently fold in grated apples.
  5. Pour/spread batter into prepared baking pan. Bake for about 30-40 minutes or until a cake tester comes out with just a few moist crumbs. Allow to cool in pan on a wire rack.
Baked Crisp Topping
  1. Line a cookie sheet with parchment paper. Place all ingredients except butter in a bowl. Combine well then add softened butter. Mix until the mixture begins to form pea-sized clusters. Spread mixture evenly on the parchment lined cookie sheet, then bake at 350 F. for 5 minutes. Stir the topping around a bit, then bake for another 5 minutes until it begins to turn golden brown. Let crisp topping cool completely to room temperature. If crisp mixture is too chunky break it up with your fingers slightly.
Apple Topping
  1. Place apples , lemon juice & water in a small saucepan. Cook over medium heat until softened, but not falling apart. Add brown sugar, cinnamon & salt. Cook for a minute to dissolve sugar. Remove & cool until cake is baked & ready to top.
Drizzle
  1. Sift powdered sugar with salt. Set aside. Cream softened cream cheese & butter with a mixer for about 2 minutes. Add vanilla & mix to combine. Add powdered sugar & slowly incorporate into wet mixture. Add milk & beat to create a drizzle consistency.
Assembly
  1. When cake is cool, carefully & evenly spread apple topping over top of cake. Using a small piping bag, drizzle icing over apples (using a spatula, lightly spread a bit of drizzle on sides). Next, top cake with baked crisp topping. Slice & serve.
Recipe Notes
  • To make your own buttermilk, place 2 tsp of white vinegar or lemon juice in your measuring cup & add milk to equal 2/3 cup, stir & let stand until room temperature.
  • If you prefer cupcakes over the snack cake, no problem. Same idea just a different shape. Your choice!


Chicken Madeira

Wine is not just a beverage with dinner, but can also be a key ingredient in dinner. Madeira wines are known for their versatility. Madeira perfectly complements all sorts of ingredients because of its vast range of wines. It not only adds flavors, but also dimension to the dishes. From soups to stews to desserts, it packs quite a punch and has an intense impact on the final product.

Madeira wine evolved on the island of the same name on the coast of Portugal. It presents different characteristics to all other types of fortified wine due to its specific winemaking process, since it is obtained by intentional heating, and characterized by a distinct ‘baked’ bouquet.

Madeira is classified according to several designations, including vintage, grapes used, and sweetness. There are a few variations on the production method, but Madeira must be oxidized and heated (a process called “maderization,” named after the wine). This makes for a fortified wine that can last for centuries.

Madeira has several taste profiles, but most will have flavors of caramel, walnut oil, peach, hazelnut, orange peel, and burnt sugar.

The first thing to check before cooking a Madeira based dish is what kind of wine does the dish require? It is always safe to use an average blended Madeira. Choose the safest- Finest or Rainwater type. These are packed with flavors and aromas and are typically inexpensive.

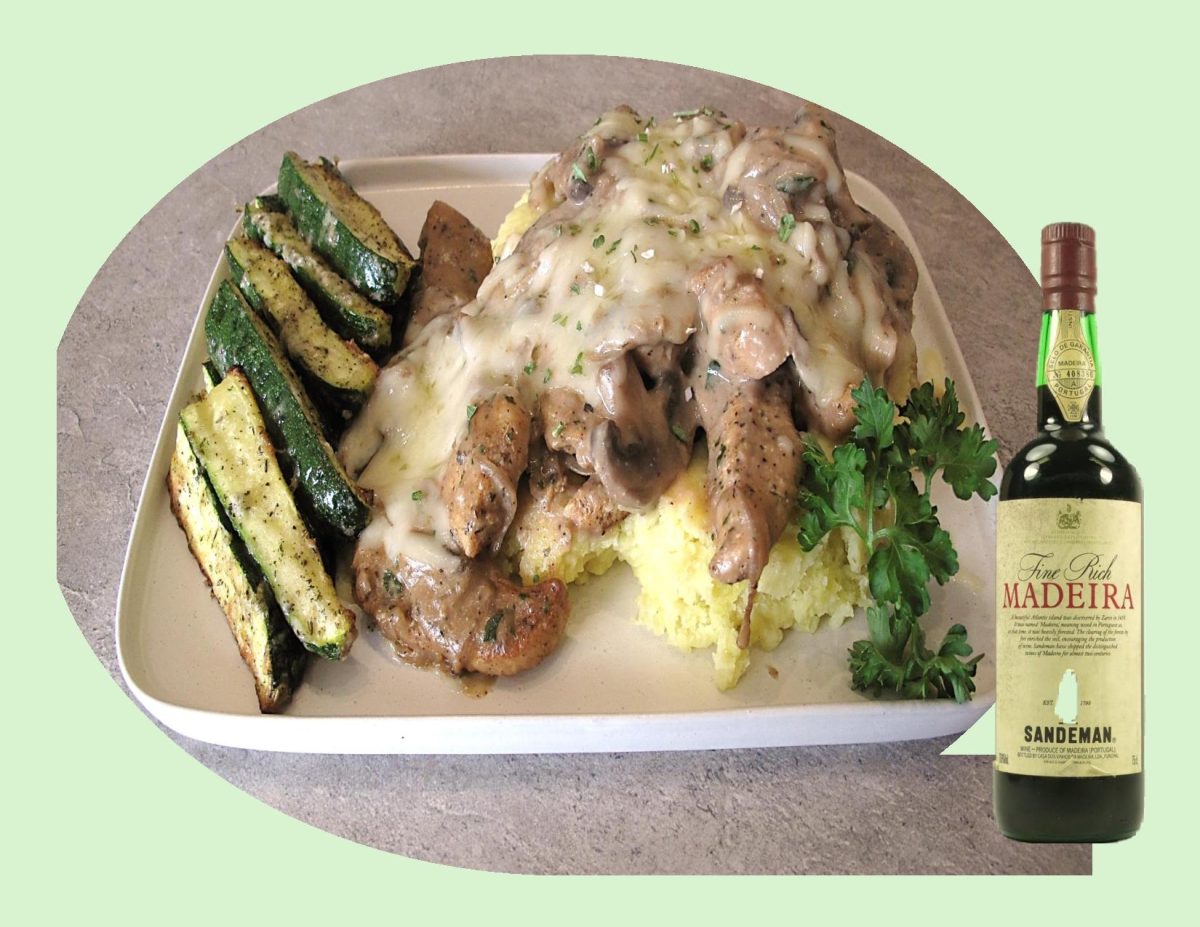
A good example is Sandeman Madeira Rainwater. It is light in body but full of flavor. It has a light amber color with golden highlights, as well as clean, nutty aromas. Its flavor is nutty and lightly complex, with a clean finish. This Madeira makes a wonderful accompaniment to a variety of foods and is also a fabulous cooking wine that can be used in various traditional dishes. ‘Rainwater Madeira’ was so named in the 18th century because it is as soft as rainwater and the color of straw, glistening after a shower of rain.

Print Recipe
Chicken Madeira
Votes: 1
Rating: 5
You:
Rate this recipe!
Course Main Dish
Cuisine American
Keyword chicken Madeira
Servings
Course Main Dish
Cuisine American
Keyword chicken Madeira
Servings
Votes: 1
Rating: 5
You:
Rate this recipe!
Instructions
  1. In a large saucepan melt 2 tablespoons of butter. Add 1 tablespoon of oil then add the mushrooms to the pan. Cook the mushrooms for about 5 minutes until they become soft.
  2. Add the onions to the pan & cook them along with the mushrooms for about 2-3 minutes. Add garlic & parsley to the pan & sauté them for a minute or two. Then, transfer this mixture to a plate.
  3. Slice the chicken breast in lengthwise strips. Season with garlic powder, Italian seasonings, paprika, salt & pepper.
  4. In the saucepan, melt a tablespoon of butter. Add a tablespoon of oil as well & let the butter foam. Add the chicken breast to the pan & cook it on both sides for 3-4 minutes each until golden brown. When it is cooked, transfer it to the plate with the mushrooms.
  5. In the same pan, pour in the Madeira wine & bring it to a boil. When it has reduced to almost half its volume, add the beef stock & boil it for about 10 minutes until only ¼ of the original volume remains.
  6. Add the heavy cream to the pan & simmer it for 2-3 minutes until it thickens. Sprinkle a pinch of salt & pepper into the pan to add flavor & stir.
  7. Return the cooked chicken to the pan along with the mushrooms. Top it with the shredded mozzarella cheese. Place the pan in the oven broiler and broil it for 2-3 minutes until the cheese has completely melted.
  8. Remove the pan from the oven. Place chicken on a serving platter & garnish with some parsley. Nice served with mashed potatoes.

Pork & Apple Bedfordshire Clanger w/ Cheddar-Sage Pastry

The Bedfordshire Clanger is a very unique and little-known meat pie recipe from England, specifically (not surprisingly) from the county of Bedfordshire, a small, low-lying and predominantly agricultural county nestled in the east of England.

In centuries past many of the working husbands of the area used to toil in the fields there. Their wives, knowing their husbands would need lots of protein and carbohydrate sustenance, came up with the brilliant idea of a doubled, loaf-shaped pie. One end contained a savory filling that used the famed pork of the area while the other end was filled with stewed apples (made from the famed local apples) as dessert. So, the two fillings didn’t combine, there was a ‘pastry wall’ in between blocking any flavors from mixing. A ‘secret code’ denoted which end was meat and which was dessert: two knife slits on one end of the pastry top means meat, three small holes on the other shows the sweet. This was brilliant, an entire meal for the hard-working man – handheld, portable and delicious

I guess you could say, the Bedfordshire clanger is not only a tasty treat but also a piece of culinary history that has stood the test of time!

Print Recipe
Pork & Apple Bedfordshire Clanger w/ Cheddar-Sage Pastry
Votes: 1
Rating: 5
You:
Rate this recipe!
Servings
CLANGERS
Votes: 1
Rating: 5
You:
Rate this recipe!
Instructions
Pastry
  1. In a medium bowl, whisk together the flour, sage & salt. Sprinkle the butter cubes over the flour mixture & use your fingers to work them in. Alternately you could use a pastry cutter to do this.
  2. When the mixture resembles cornmeal with pea-sized bits of butter remaining, stir in cheese with a fork until evenly distributed. Sprinkle 6 Tbsp ice water over mixture & stir with a fork until dough begins to come together. If needed, add an additional Tbsp or two of ice water.
  3. Turn the dough out onto a lightly floured surface & knead for about three times. Gather the dough into a disk & wrap in plastic wrap. refrigerate for at least 30 minutes or overnight.
Pork Filling
  1. Bake potato in microwave, peel & cut into small cubes. Set aside.
  2. Heat oil in a skillet & sauté celery, onion, garlic & bacon together on medium heat until veggies are soft & bacon is cooked. Add ground pork, breaking it up well. Stir in dried herbs & spices. Cover & simmer for about 10 minutes.
  3. Remove from heat & stir in cooked potato & cheese. Set aside to cool.
Apple Filling
  1. In a small saucepan, combine butter, water, cinnamon & brown sugar. Bring to a simmer then add diced apples, raisins, lemon zest & juice. Gently simmer for 5 minutes. Remove from heat & allow to cool.
Assembly/Baking
  1. Divide pastry into 5 equal pieces. On a lightly floured surface (or dry wax paper) roll out each piece of pastry into 7 x 7 1/2-inches. The excess trimmed from the sides will be used for little pastry ‘walls’ dividing the sweet & savory fillings. Roll the excess into a 3-inch length.
  2. From the top of each piece, LIGHTLY make a line across your pastry 4-inches from outside edge. This will help to place your fillings properly.
  3. On the 3-inch wide section of the pastry, place savory filling to cover 2/3 of the area. Place one of the rolled strips after that then place sweet filling on the remaining 1/3 to complete the 'clanger'. The little rolled piece of pastry divides the savory & sweet filling.
  4. On the sweet side make 3 holes for vents & on the savory side make 2 slashes. This is the 'code' to let the person eating the clanger which was savory or sweet.
  5. Preheat oven to 350 F.
  6. Brush the edges of each pastry with egg wash. Lift the pastry from the opposite side over the fillings & seal the edges with a fork.
  7. Brush clangers with remaining egg wash & bake for about 30-35 minutes or until golden.

Oktoberfest Roasted Half Chicken – Wiesn Hendl

CELEBRATING OKTOBERFEST (SEPT 21-OCT 6 /2024)

The first Oktoberfest took place in 1810 as part of the celebrations of the wedding between Crown Prince Ludwig, the later King Ludwig I. of Bavaria, and Therese of Sachsen-Hildburghausen.

On October 17 the five-day celebrations ended with a public horse race at a meadow between Munich and Sendling.

Due to the great success of this great conclusion of the ‘October Fest’ the formerly nameless meadow below the Sendling hill became the name ‘Theresens Wiese’ (Therese’s Meadow) in honor of the bride.

After 1815 this name was simplified as ‘Theresienwiese’. As it initially only served the Oktoberfest, besides some agricultural cultivation, the name of the event and its location merged.

As people from Munich like merging syllables just as they like to merge names, sometime later, they would simply go to ‘Wiesn’. Hence, in Munich you literally say, ‘I’m going out to the meadow’ (naus auf d’Wiesn), when you visit the Oktoberfest.

To many Munich locals the focus of the world-famous Oktoberfest isn’t the beer at all, but rather the huge number of rides, rollercoasters, ghost trains, and other funfair attractions that line the festival’s many avenues.

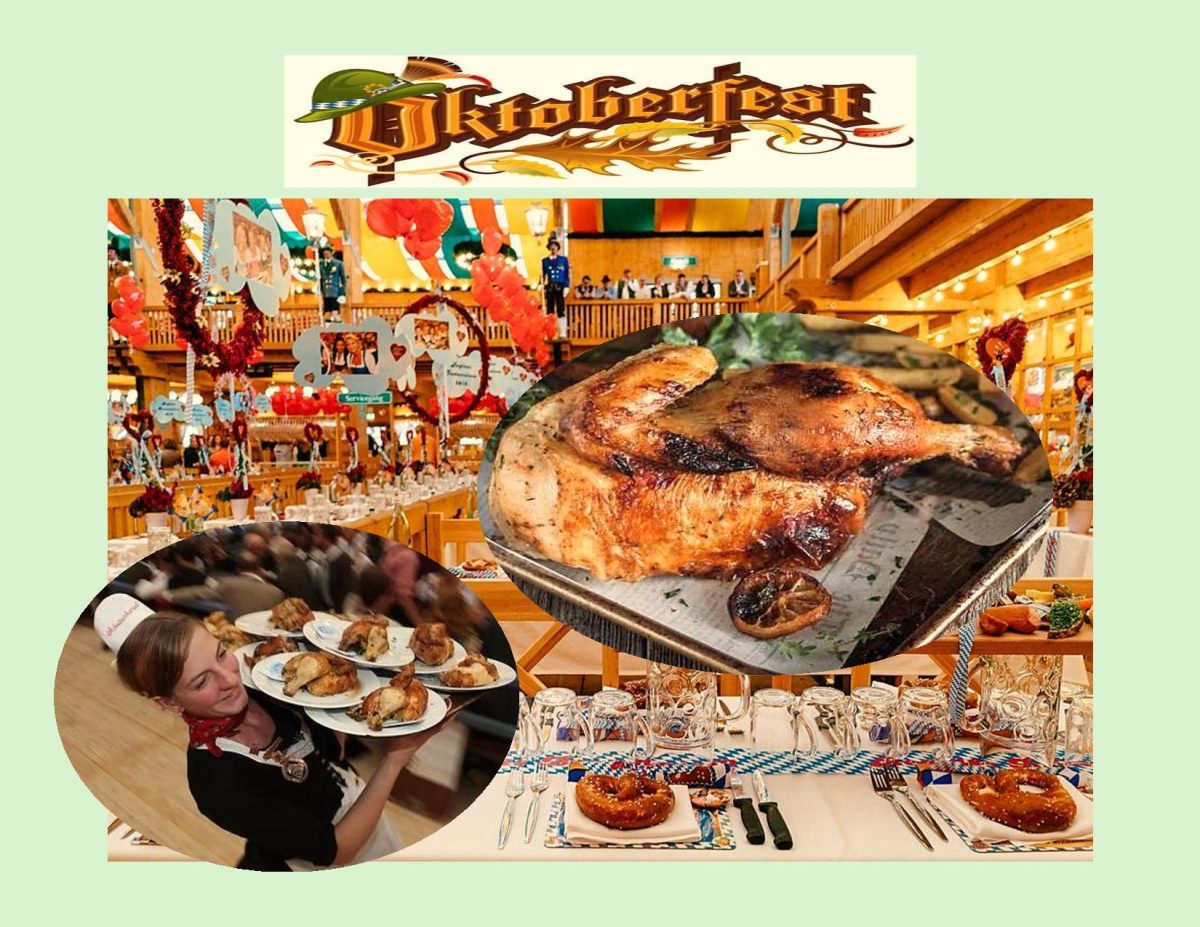
Certainly, of equal importance to the beer is the food, and most beloved of all is the recipe for the famous Oktoberfest Chicken.

Wiesnhendl’ means Wiesn chicken which is not a breed in itself. The name actually only indicates the ultimate fate of the chicken – for example to be eaten at the Wiesn.

Not every chicken can be a Wiesn chicken, as it must be born in the second week of August in order to reach the necessary weight for butchering. Only chickens whose star sign is Leo end up at Oktoberfest!  I understand, it’s reasonable to estimate that around 700,000 chickens will meet their golden-brown fate at the Wiesn.

The chicken makes a good choice: it’s easy to prepare in large quantities, can be served in seconds (chicken on the plate, moist towelette on the side) and the diner generally eats it with their fingers, saving on loads of washing up.

The chicken also contains a fairly generous proportion of fat, which helps to extend diners’ beer consumption time by slowing down the absorption of alcohol by the body. Another trick the hosts have is brushing the chicken skin with a salty brine solution to make the skin extra-crisp – as well as making guests extra-thirsty. So, everyone wins.

‘Hendl’, the Bavarian word for chicken, is non-gendered so can refer to a rooster or a hen. The right size and weight to feed two hungry people should be around 1300 grams (about 2.86 lbs.).

Another thing to keep in mind is that you can’t have Oktoberfest without pretzels. Large and soft, they’re the perfect accompaniment to chicken and beer.

Print Recipe
Oktoberfest Roasted Half Chicken - Wiesn Hendl
Votes: 1
Rating: 5
You:
Rate this recipe!
Servings
Ingredients
Chicken
Spiced Butter/Oil
Servings
Ingredients
Chicken
Spiced Butter/Oil
Votes: 1
Rating: 5
You:
Rate this recipe!
Instructions
  1. Preheat oven to 375 F.
  2. Wash chicken & pat dry with a paper towel. Stuff the cavity with thyme, parsley, garlic & lemon.
  3. Melt the butter, mix in the olive oil & the spices. Place the chicken breast side up onto the rack of a roasting pan. Brush it with the spiced butter/olive oil.
  4. Place in the oven & brush with spiced butter/olive oil again in about 20 minutes. (If the chicken is browning too quickly, tent it with aluminum oil.)
  5. In 40 minutes check the temperature with a meat thermometer. Brush with more spiced butter/olive oil.
  6. Continue cooking until the internal temperature reaches 165 F. If you want crisper skin, turn the heat up or broil for the final few minutes (keep an eye on it).
  7. Place the cooked chicken onto a cutting board with a lip of a cutting board inside a baking sheet (to contain the juices). Allow to rest 5-10 minutes. Cut across lengthwise with a heavy knife, pressing down firmly. Remove the herbs and lemon and serve.