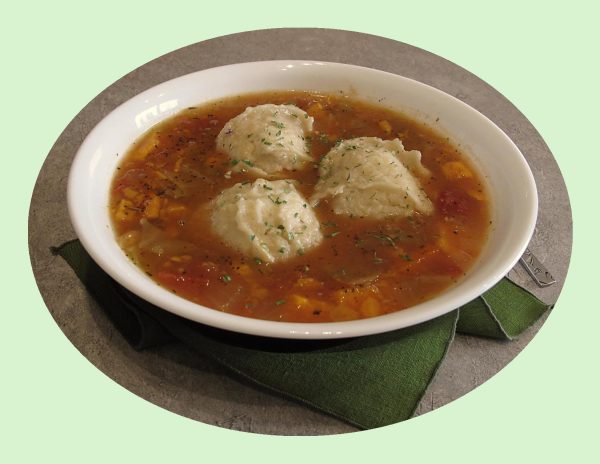
Soup season is officially here! This satisfying, hearty vegetable dumpling soup truly creates the perfect cozy vibes this winter.
The exact origin of vegetable dumpling soup is difficult to pinpoint, as dumplings and soups have been staples in many cultures for centuries. Dumplings themselves have a long history, with early versions appearing in China when a physician named Zhang Zhongjing created them to help villagers with frostbite.
Vegetable dumpling soup, as we know it today, likely evolved from these early dumpling recipes, with variations appearing in different cuisines around the world. Here are a few notable examples:
- Wonton Soup: A Chinese classic, wontons are typically filled with pork, shrimp or vegetables and served in a clear broth.
- Mandu-guk: A Korean soup featuring mandu (dumplings) filled with meat or vegetables, often served in a beef or anchovy broth.
- Tortellini in Brodo: An Italian dish where tortellini, small ring-shaped pasta filled with meat or cheese, are served in a rich broth.
- Xiaolongbao: Also known as soup dumplings, these Chinese dumplings are filled with pork and a gelatinous broth that turns into soup when steamed.
- Matzo Ball Soup: A traditional Jewish soup with matzo balls (dumplings made from matzo meal) served in a chicken broth.
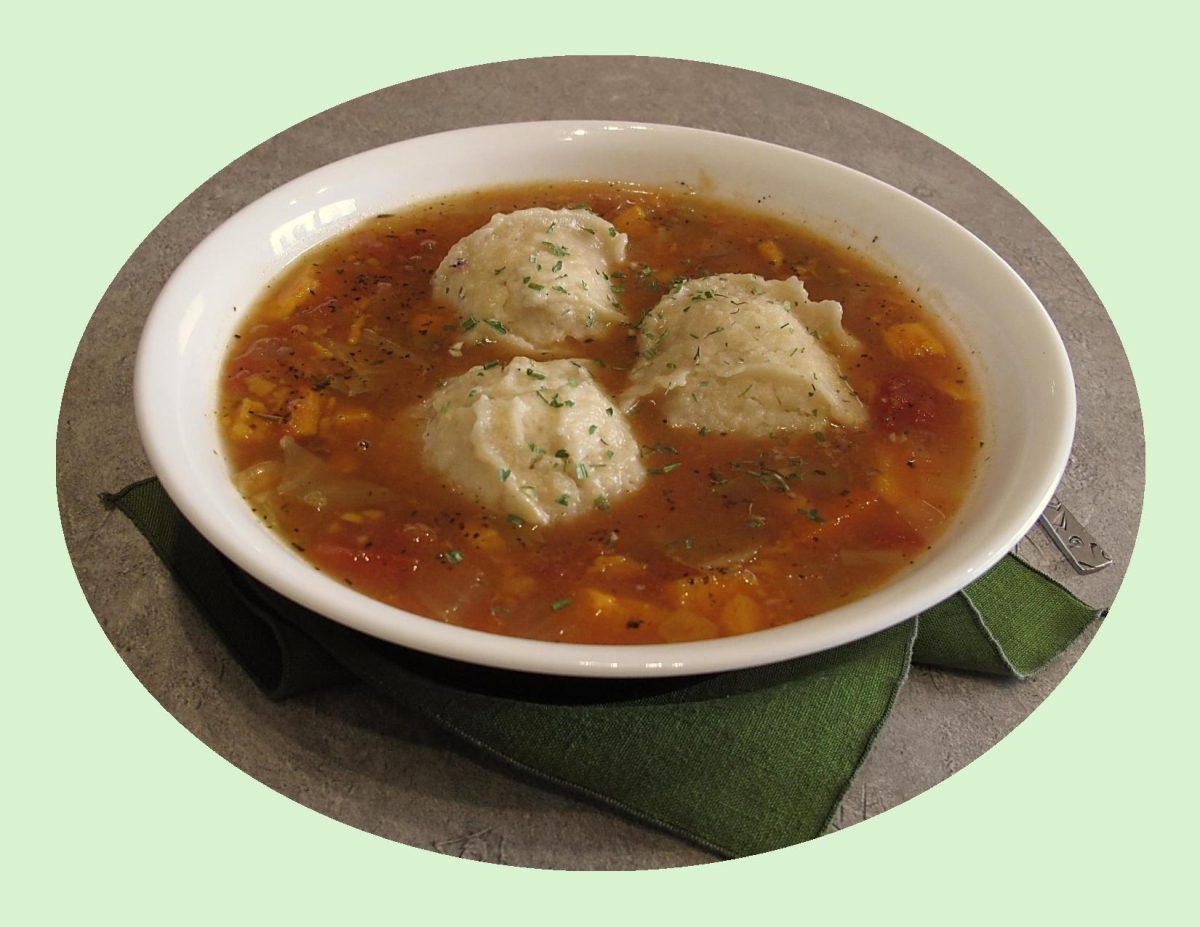
This vegetable dumpling soup has soft, fluffy, biscuit-like dumplings made with a mixture of flour, baking powder, salt & olive oil. The baking powder in these dumplings is what gives them their lift and results in a light and fluffy texture. The dough is cooked in the flavorful simmering soup, resulting in little balls of deliciousness.
Print Recipe
Vegetable Dumpling Soup
Votes: 1
Rating: 5
You:
Rate this recipe!
|
|
Votes: 1
Rating: 5
You:
Rate this recipe!
|
Instructions
Soup
Add all ingredients to a stock pot. Cover & simmer until the vegetables are tender, approximately 2 hours. Stir periodically during cooking time.
During the last ½ hour of the cooking time prepare dumpling dough.
Dumplings
In a small mixing bowl, combine flour, baking powder & salt with a spatula. Form a well in the middle of the dry mixture & add olive oil & warm water. Mix until dough forms into a sticky ball. Cover with a dish towel & set aside for about 10 minutes.
During the last 10 minutes of the soup’s cooking time carefully drop in dollops of the dumpling dough, about 1 inch (2-cm) in diameter.
Let dumplings simmer for about 10 minutes, or until chewy and cooked through.
Ladle soup into serving bowls & top with dumplings. Serve hot.
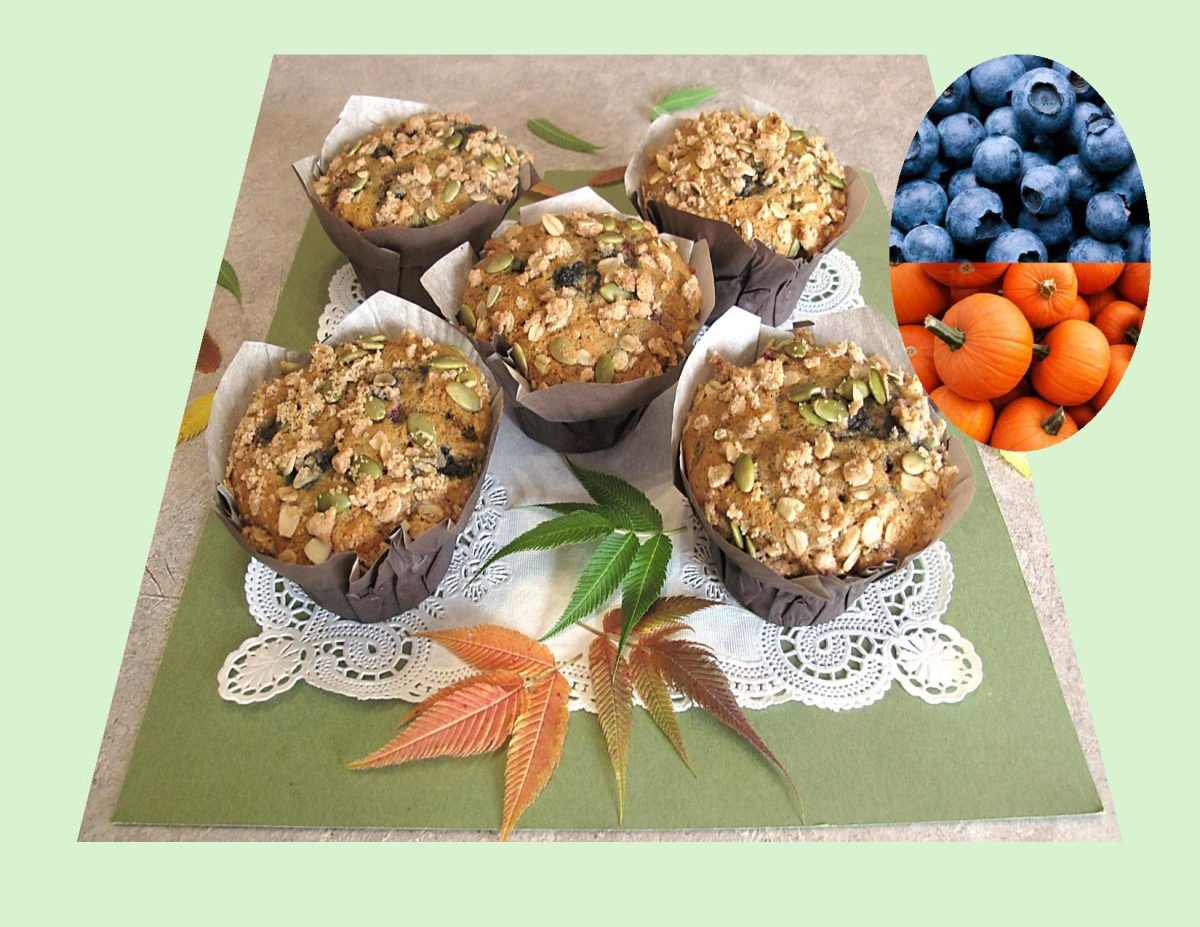
Fall is here and its pumpkin season! It’s like a pumpkin explosion in the stores this time of year with pumpkin spice latte, pumpkin spice candles, pumpkin spice Oreos, pumpkin spice M&Ms, pumpkin spice Ramen noodles, Doritos and so many others.
Unlike pumpkins, however, blueberries have a flavor that knows no season or food type. They pair well with just about anything, and pumpkins are no exception. Blueberries have just enough sweetness to complement pumpkin-y flavors and stay juicy during the baking process.
These pumpkin blueberry muffins make for an ideal autumn indulgence.
Print Recipe
Pumpkin Blueberry Muffins
Votes: 1
Rating: 5
You:
Rate this recipe!
|
|
Votes: 1
Rating: 5
You:
Rate this recipe!
|
Instructions
Muffins
Preheat oven to 350 F. Line an 8 cup large muffin tin with parchment papers/cups
In a large bowl, whisk together 1 2/3 cups flour, baking soda, baking powder, salt, cinnamon & allspice. In a small bowl, combine pumpkin puree with milk.
In a large bowl, using an electric mixer, beat butter & brown sugar until creamy. Add egg; beat until fluffy.
Alternately add flour & pumpkin mixtures to butter mixture, stirring just until blended. Combine blueberries with 1 Tbsp flour in a small dish. Fold gently into mixture. Spoon batter carefully into prepared muffin cups.
Topping
In a small bowl, combine oats, flour, brown sugar, cinnamon & salt. Using a fork, cut in butter until mixture is crumbly. Add pepitas & combine. Divide evenly over muffin batter.
Baking
Bake for 45 minutes or until a wooden pick inserted in center comes out clean. Remove from oven, cool in pan for a few minutes then remove to a rack to finish cooling. Store muffins in a covered container.
Recipe Notes
- If you would prefer smaller muffins, divide batter between 12 paper lined standard muffin cups. Bake for about 30-35 minutes or until a wooden pick inserted in center comes out clean.
It’s the fall season, so bring on the chai flavored recipes! Fall can encompass many different flavors including apple, pumpkin, maple, cranberry and ginger just to name a few. To me, baked goods and chai spices are a no-brainer. Traditionally, chai is made into a tea which consists of milk, spices, sweetener, and black tea. Chai spices can be used for so much more than just tea. Once you make your basic chai spice recipe, there are so many ways to utilize it.
Chai can include several different spices. Cardamom is the most common ingredient, followed by a mixture of cinnamon, ginger, star anise and cloves. Pepper and coriander, nutmeg and fennel are also used but they are slightly less common.
In the winter of 2011, Brion and I traveled Turkey for a month. We were meeting with the Trafalgar tour group in Istanbul. Arriving a day early gave us time to ‘snoop’ around a bit. Next to our hotel was a ‘Starbucks’, so we went in. When Brion ordered my coffee, they gave me a ‘Pumpkin Spice Chai Latte’ by mistake. That (pumpkin) chai flavor was just incredible. I have been addicted to it ever since.
A stay in Istanbul would not be complete without a traditional and unforgettable boat excursion up the Bosphorus, that winding strait that separates Europe and Asia. Its shores are a mixture of past and present, grand splendor and simple beauty. Modern hotels stand next to shore-front wooden villas, marble palaces in contrast to rustic stone fortresses and elegant compounds neighboring small fishing villages. Since Turkey actually straddles two separate continents, its culture features strong elements and traditions from both east and west. At that point in time, we found Turkey a relaxed country to travel in which made our time there very enjoyable.
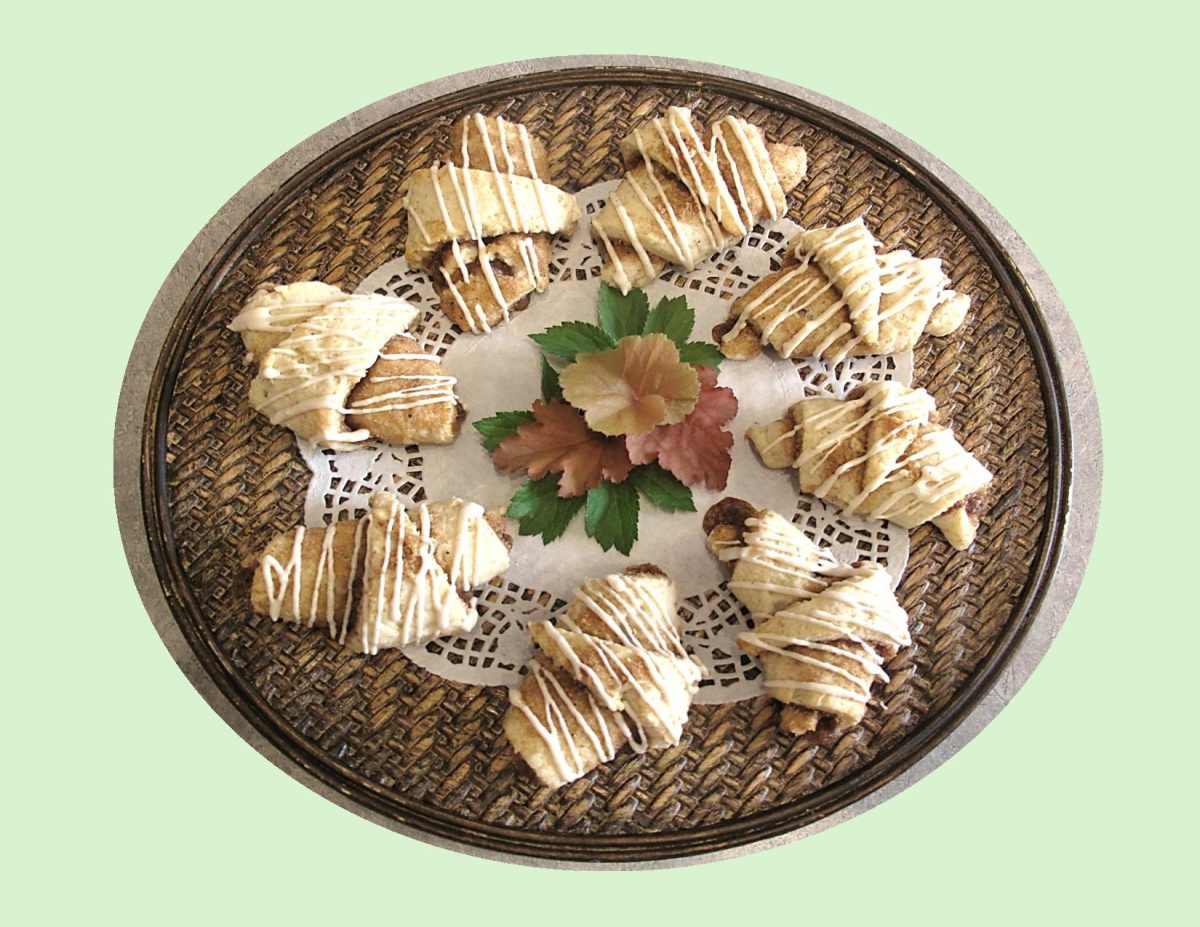
These crescent rolls are a shortcut to making the classic cinnamon rolls using cream cheese pastry and that incredible flavor of the chai spice. Yum!
Print Recipe
Chai Cinnamon Crescents
Votes: 1
Rating: 5
You:
Rate this recipe!
|
|
Votes: 1
Rating: 5
You:
Rate this recipe!
|
Instructions
Chai Spice Filling
Whisk together all chai spices with brown sugar. Set aside.
Crescents
Preheat oven to 350 F. Line a baking sheet with parchment paper.
In a bowl, whisk together flour, sugar, baking powder & salt. With a pastry blender, cut in cream cheese & shortening until mixture resembles coarse peas. Stir in milk. On a lightly floured work surface, knead dough gently about 20 times.
Form dough in a ball then roll out into a 14-inch circumference. Spread butter over the surface of dough then spread spice/sugar combo (all but 1 tsp needed for drizzle) evenly over the butter.
Cut circle into 12-14 equal wedges. Roll each wedge from the outside edge to form a crescent shape. Slightly curve each one & place on baking sheet.
Bake for about 20 minutes or until pastry is baked. Remove from oven & place on wire cooling rack.
Drizzle
In a small bowl, beat together cream cheese & butter until smooth. Add 1/2 tsp chai spice mix, powdered sugar, salt & vanilla. Beat until well combined then add enough milk to make a drizzle consistency. When crescents are cool, drizzle & serve.
The butter tart is probably the most recognizably Canadian dessert there is. But in order to understand the significance of the butter tart, you first need to know the confection’s history. While butter tarts are known around the world as the quintessential Canadian dish, the invention of this confection actually goes back to before Canada was even a country. During a ten-year period, from 1663 to 1673, at least 770 young women were sent to Quebec by Louis XIV to help with colonization. These single ladies were sent with dowries to help boost settlement in New France.
These King’s Daughters (or Filles du Roi) as they came to be known did what any resourceful baker would do: they made do with what they had. With the abundance of new food, they created the butter tart forerunner with baking ingredients readily available like maple sugar and dried fruit. This ancestral tart later led to variations like tarte au sucre and the butter tart.
The first documented recipe for butter tarts was published in The Women’s Auxiliary of the Royal Victoria Hospital Cookbook in 1900, in Barrie, Ontario. Mrs. Malcolm MacLeod’s recipe did not include raisins, but currants paired with that ooey-gooey filling we know and love today.
Throughout the early 1900s butter tarts gained popularity and variations were published in Toronto’s Daily News and included in the 1911 Canadian Farm Cookbook. Butter tarts became all the rage in the 1920s and 1930s, and by the 1980s readers were desperately writing The Vancouver Sun’s fictional baking expert, Edith Adams, for a copy of her recipe. Over the past 350 years, they have become ingrained in the Canadian culinary psyche.
The butter tart is evolving in response to diversifying tastes. At butter tart festivals across the country, you’ll find all sorts of spins on the treat — pumpkin cheesecake, chai spice, coconut, blueberry, saskatoon and even a Nanaimo bar butter tart to name a few.
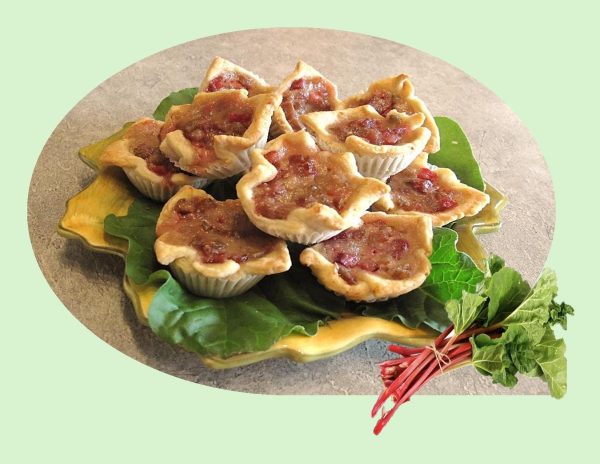
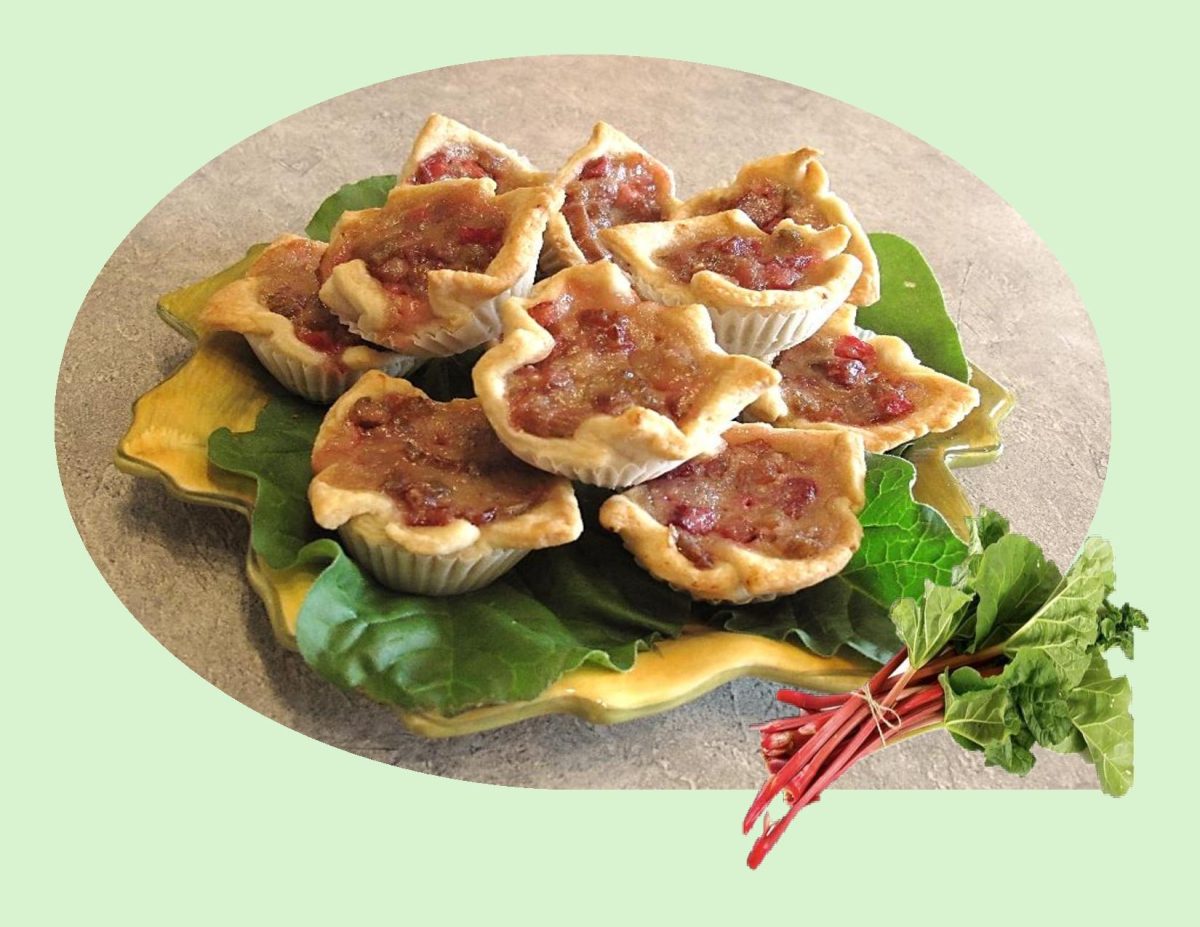
That brings us to today’s recipe – Rhubarb Butter Tarts! Canadian butter tart filling can be too sweet for some on its own but add some tart rhubarb and it becomes a well-balanced sweet and sour filling. Amazingly good!
Print Recipe
Rhubarb Butter Tarts
Votes: 1
Rating: 5
You:
Rate this recipe!
|
|
Votes: 1
Rating: 5
You:
Rate this recipe!
|
Instructions
Pastry
In a food processor, pulse flour, sugar, salt & baking powder to blend. Add butter & pulse about 3-4 times, until butter is in pea-size pieces. Sprinkle in the ice water; pulse another 4 times. Turn dough out on a lightly floured work surface & knead gently a few times to form a disk. Wrap in plastic wrap & refrigerate for at least an hour.
Filling
Pour boiling water over rhubarb; let stand for 5 minutes. Drain.
Add butter, sugar, salt & syrup to the rhubarb. Stir thoroughly until butter is melted & sugar is dissolved. Add egg & vanilla.
Assembly/Baking
-
On a lightly floured surface, roll out chilled pastry to an 1/8-inch thickness. Cut into 24 squares. Place pastry squares into 24 mini tart pan cups with corners hanging over the sides. Divide rhubarb filling between tart shells.
Bake for about 20 minutes or until slightly golden. Cover with foil if they start to brown too quickly.
Remove from oven & allow to cool to set up.
To the younger generation, the word ‘blackberry’ probably only brings to mind a variety of gadgets, but to those who remember when there were no mobile phones in sight or in hand, the blackberry is first and foremost that small, ripe, juicy fruit that makes excellent pies, jams, jellies and wines.
Over 12 species of blackberries grow in woods and clearings in Canada, mainly in eastern provinces and southern British Columbia. Worldwide, Mexico is the leading producer of blackberries, with nearly the entire crop being produced for export into the off-season fresh markets in North America and Europe.
Although nowadays blackberries are primarily used in cooking, they are known to be very beneficial to health. Having one of the highest antioxidant contents of all fruits, blackberries are good for lowering cholesterol levels, support oral health, strengthen bones, regenerate the skin and aid the digestive system.
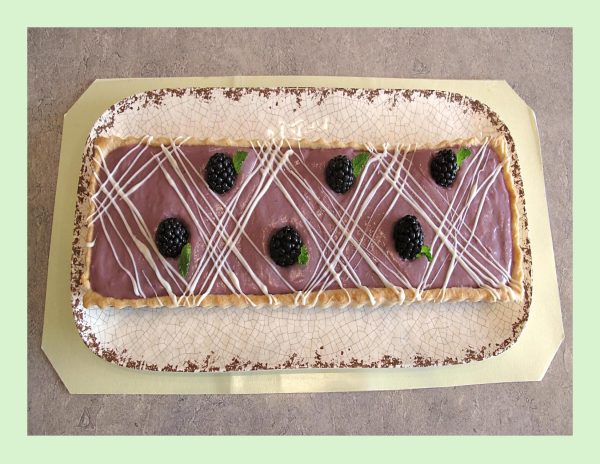
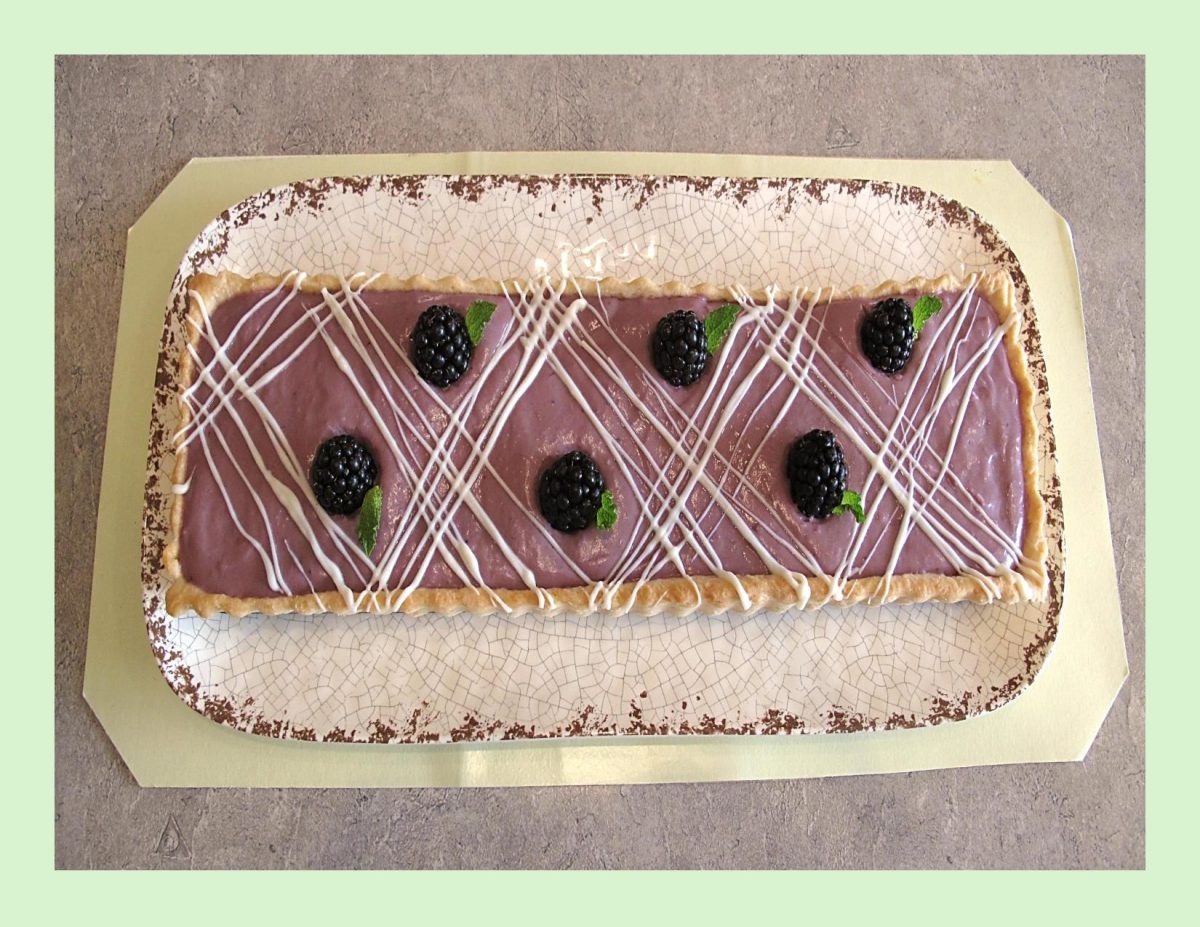
Today, I thought I’d incorporate them in a custard tart decorated with some white chocolate. The blackberries not only add color but with their deeper, darker, more complex tart/sweetness, add something very special.
Print Recipe
Blackberry White Chocolate Tart
Votes: 1
Rating: 5
You:
Rate this recipe!
|
|
Votes: 1
Rating: 5
You:
Rate this recipe!
|
Instructions
Pastry
In a food processor, pulse flour, sugar, salt & baking powder to blend. Add butter & pulse 3-4 times, until butter is in pea-size pieces. Sprinkle in the ice water; pulse another 4 times. Turn dough out on a lightly floured surface & knead gently a few times to form a disk. Wrap in plastic wrap & refrigerate for at least an hour.
Custard
In a saucepan, cook blackberries over low heat, stirring frequently, until berries break down & sauce begins to boil. Cook until sauce begins to thicken, 7-10 minutes. Remove from heat, strain through a fine mesh sieve, pressing on solids & discarding seeds & solids. Reserve blackberry juice.
In a small saucepan, whisk together 1/2 & 1/2 cream, sugar & salt. Bring to a boil over medium heat, stirring frequently.
In a medium bowl, whisk together egg yolks, cornstarch & cinnamon (or ginger). Slowly add half of the 1/2 & 1/2 mixture, whisking constantly. Add egg yolk mixture to remaining 1/2 & 1/2 mixture in saucepan & bring to a boil over medium heat. Cook, stirring constantly, until thickened, 2-3 minutes.
Remove from heat & whisk in butter & vanilla until butter is melted then whisk in reserved blackberry juice. Pour into a heatproof bowl, cover with plastic wrap, pressing wrap directly onto surface of custard to prevent a skin from forming. Allow to cool completely.
Baking
On a lightly floured surface, roll chilled pastry to 1/8-inch thickness. Transfer to a 14 x 4-inch rectangular tart pan. with a removeable bottom. Freeze for 15 minutes.
Top crust with a piece of parchment paper, letting ends extend over edge of pan. Add pie weights. Bake until lightly golden around edges. Carefully remove paper & pie weights. Bake until lightly golden & surface is set. Let cool completely.
Decorating
Whisk chilled blackberry custard then place into cooled prepared crust. Smooth with a spoon or an offset spatula. Melt white chocolate & place in a small plastic baggie. Snip off the tip of one corner of the bag. Drizzle the chocolate in parallel lines. Top with a few fresh blackberries & small mint leaves, then carefully place tart on a serving tray. Refrigerate until serving.

While I’ll never grow tired of the classic pairing of strawberries and rhubarb, I love rhubarb too much to let it simply be a sidekick to those sweet berries. Not only can it hold its own, but it also begs to be matched up with many other flavors that give it new life.
Eating seasonally doesn’t have to be difficult when it tastes so delicious. Finding inventive ways to incorporate locally grown, seasonal fruits and vegetables into breakfast, lunch, and dinner dishes is actually a very easy task.
When making desserts, chocolate and rhubarb bring very different flavors to the table. The result makes a perfect balance. High-cacao chocolate is rich, subtly sweet, and creamy. Fresh rhubarb, meanwhile, is tart and comes into its own when offset by a dash of sweetness.
Celebrate rhubarb season with a stellar dessert like fudgy rhubarb brownies.
Print Recipe
Chocolate Rhubarb Brownies
Votes: 1
Rating: 5
You:
Rate this recipe!
|
|
Votes: 1
Rating: 5
You:
Rate this recipe!
|
Instructions
Preheat oven to 375 F. Line an 8 x 8-inch baking pan with parchment paper.
In a medium-sized bowl, whisk sugar, butter, eggs & vanilla.
In a large bowl, whisk flour, cocoa powder, baking powder & sea salt.
Stir the wet ingredients into the dry ingredients & mix until they are just incorporated. Add the rhubarb, chocolate chips & nuts. Mix only until they are combined. The batter will be quite thick. Pour batter into baking pan & spread it out so that it is even.
Bake for 20-25 minutes or just until a toothpick inserted into the middle comes out clean. DO NOT OVERBAKE.
Remove brownies from the oven & allow to cool for at least 10 minutes. Slice into squares.

Since they were introduced in 1941, Cheerios have been a staple in households across North America. They remain one of the most popular breakfast cereals on the market and are now available worldwide.
Cheerios are primarily made from whole grain oats and come in an assortment of flavors. In fact, there are at least 15 varieties — with seasonal ones appearing on occasion.
A bowl of cereal is perfect for a quick breakfast. Or lunch. Or, let’s be honest, dinner. And while these are perfectly acceptable uses of cereal, there is so much more you can do with them from snacks and desserts to buttery casserole coatings that take the morning mainstay to new heights.
To enhance these cupcakes, the regular milk is switched out for ‘cereal milk’ (milk that’s been soaked in sweet cereal).
Cereal milk tastes like that dense, slightly sweet, starchy, oaty milk from the bottom of the cereal bowl, that everybody loves to enjoy at the end.
The nostalgic and comforting combination of milk and cereal combined in this cupcake recipe is really quite special. These seem like kind of a ‘kid’ thing but I’m sure it won’t take long for them to disappear.
Print Recipe
Breakfast Cereal Cupcakes
Votes: 1
Rating: 5
You:
Rate this recipe!
|
|
Votes: 1
Rating: 5
You:
Rate this recipe!
|
Instructions
Mini Cakes
Preheat oven to 350 F. Line a 24 cup mini muffin pan with cupcake liners. Set aside.
In a liquid measuring cup, stir together the milk & 1/4 cup Very Berry Cheerios. Microwave for 30 seconds, stir, & set aside while you prepare the batter.
In the bowl of a stand mixer, cream together the butter & sugar on medium speed until light & fluffy. Add in the eggs on at the time, scraping the bowl as necessary.
In a separate bowl, whisk together the flour, baking powder, & salt. Using a fork, remove the cereal from the milk. Discard the cereal. Make sure you still have 1/2 cup milk, add more if necessary. Add the honey & vanilla extract to the milk. Whisk together.
Gradually add 1/3 of the dry ingredients, mix to combine. Add 1/2 of the wet ingredients, mix. Repeat, ending with dry ingredients.
Divide the batter between 24 muffin cups. Bake for 8-10 minutes, or until a toothpick comes out clean. Let cool in the pan for 5 minutes, then remove to a wire rack to cool completely.
Frosting
In a bowl, whip cream cheese & butter. Beat on medium-low speed until smooth & combined, 1-2 minutes, scraping the sides of the bowl as needed.
Sift powdered sugar into the cream cheese mixture & add the vanilla, lemon juice & salt. Beat the frosting on a low speed to combine, then increase the speed to medium-high & beat until light & fluffy, 1-2 minutes, scraping down the sides of the bowl once or twice.
Add slightly crushed cheerios & FOLD into mixture gently. Top each COOLED mini cake with a dollop of frosting then sprinkle with extra cheerios.
Recipe Notes
- If you prefer, bake in 12 regular size muffin cups.

If there’s one berry most people have a fondness for, it’s strawberries. Even though available year-round, strawberries’ full flavor shines best beginning in May through late summer, the prime seasons for strawberries. Advances in transportation and refrigeration have allowed for strawberries to become a seasonless fruit.
Winter is done and we’re ready to embrace all things springtime! Spring is about rebirth, sunshine, new life, things in bloom, etc. With bright colors, fresh flavors, and interesting designs, spring cookies are the perfect way to welcome in the warmer weather and say goodbye to the winter blues.
Today I thought I would start with a crisp shortbread type cookie and add some ‘pizzazz‘ with some strawberries, white chocolate and a few pistachios. I think you will like these!
Print Recipe
Strawberry Cookies w/ Strawberry Chocolate Topping
Votes: 1
Rating: 5
You:
Rate this recipe!
|
|
Votes: 1
Rating: 5
You:
Rate this recipe!
|
Instructions
Cookies
In a large bowl, cream together butter & icing sugar. Add egg & strawberry extract & mix well.
In a separate bowl, sift together flour & baking powder. Add to the wet mixture a little at a time until well incorporated. Wait approximately 30 minutes before working with the dough as it will firm up slightly.
Roll the dough between baking paper & put it into the fridge for a few hours to help it from spreading. When dough is a bit firmer, take it out of the fridge & cut into butterfly shapes.
Place the cookies on a parchment lined baking sheet & return to fridge again for another 1-2 hours, this will also help prevent spreading.
-
Bake cookies for approximately 10 - 12 minutes or until lightly browned on bottoms.
Allow cookies to cool completely on a wire rack while you prepare the 'toppings'.
Strawberry Topping
Slice dried strawberries thinly. Place white chocolate chips in a small bowl. Heat heavy cream until simmering, then pour over chocolate chips. Let stand for 1-2 minutes, then add 1/4 tsp strawberry flavor & tiny bit of gel food color. Stir swiftly until all the chocolate chips are melted & smooth.
Using a piping bag, place about a teaspoon of strawberry flavored chocolate. Gently press a slice of strawberry on top.
Lemon Drizzle
In a small dish, stir together powdered sugar & fresh lemon juice until it reaches a drizzle consistency. Drizzle lines over half of the cookie then sprinkle with pistachio nuts or pepita seeds.
Recipe Notes
- LorAnn's Strawberry baking & flavoring emulsion tastes like fresh ripe berries. Great for cakes, cookies, frostings, fillings, and desserts. Add it instead of using strawberries or in addition to the fruit to add a punch of strawberry flavor. Use in any recipe you would a strawberry extract and get more robust strawberry flavor!
- 1 teaspoon baking extract = 1 teaspoon emulsion
