German Cheesecake-Swirl Plum Cake

Plum cake, a beloved dessert in Germany that spans the gap between summer and autumn. German plum cake, also known as ‘Zwetschgenkuchen’ is a culinary highlight in late summer and autumn in Germany. It is no secret that Germans love both seasonal fruit and streusel and when plum season is on, you will find all kinds of German plum recipes from plum dumplings to plum butter, and especially this cake.

Variations of the German specialty exist where some versions are made with a shortbread pastry verses a yeast dough, some have streusel – some do not – some are round, others are rectangular. One thing for sure is that they all use the plump, sweet, juicy European plums also known as Italian Prune Plums or Empress Plums. This variety is ideal for cooking not only because of their texture but also because their flavor becomes more complex through cooking.

When I was growing up and my mother used Italian Prune Plums in her canning or baking, I just thought it was because they were available at the time. I had no idea that they played such a special part in German baking until I was older.

This particular ‘elevated’ German zwetschgenkuchen features juicy plums baked over a creamy cheesecake layer and spiced cake base, topped with a crunchy pepita streusel. Yum!

Print Recipe
German Cheesecake-Swirl Plum Cake
Votes: 1
Rating: 5
You:
Rate this recipe!
Servings
Servings
Votes: 1
Rating: 5
You:
Rate this recipe!
Instructions
  1. Preheat oven to 350 F. Spray with cooking spray or lightly butter a 9-inch springform pan. Set aside. Cut plums into quarters & set aside.
Cheesecake
  1. In a separate medium bowl, beat the cream cheese, sugar, egg, vanilla extract & cornstarch together until completely smooth & free of lumps. Set aside in refrigerator.
Streusel
  1. In the bowl, using a mixer, combine the flour, chopped pepitas, sugar & cinnamon. Add the soft butter & beat until everything is combined & the crumbs have a coarse, distinctly textured crumble (about 30 seconds to 1 minute). Set aside.
Spiced Cake Batter
  1. In a large bowl, combine the flour, baking powder, ground cardamom & black pepper. Add sugar, vanilla, lemon zest, butter & eggs. Beat at a low speed with a mixer until combined, then increase speed to medium-high & beat until smooth, about 1-2 minutes.
Assembly/Baking
  1. Spread spiced cake batter evenly into the bottom of prepared pan. Top with cheesecake batter, spreading evenly over the cake batter leaving a narrow 1/2-inch border around the outside edge. Gently drag a butter knife through both layers in a fiqure-8 pattern to create a subtle marble effect.
  2. Gently place plum slices in a concentric pattern directly on top of the cheesecake layer. Push them skin side down so the juices pool in the plum skins.
  3. Using your fingers, sprinkle the pepita streusel evenly on top of the plums.
  4. Bake for 55 to 60 minutes or until the top of the cake is lightly golden & the center no longer jiggles. Test with a skewer in the center for doneness.
  5. Let the cake sit in the pan for about 10 minutes, then run a knife around the edge of the pan and remove the outer ring of the springform. Let cool to room temperature before serving so the cheesecake layer can fully set.
  6. Serves 12
Recipe Notes

• If you prefer, swap the pepita seeds for 1/4 cup of old-fashioned rolled oats to create a crisp, textured crumble.
• If using pepita seeds, toast seeds in a dry skillet over medium heat for 3 to 4 minutes until they are fragrant & lightly golden before chopping them. Let them cool completely before mixing them into the streusel so they do not melt other ingredients.

Cornbread Cinnamon French Toast

French toast is a breakfast staple for the ages. It has a long history and is eaten in many forms all over the world. It is often enjoyed much like we usually serve it, but many countries give it a local twist. In India, savory French toast with spices, green chili, chopped onions, and salt is popular. Scottish French toast is often served with sausage between two slices like a sandwich. In Hong Kong, French toast doubles as a decadent peanut butter sandwich. New Zealand French toast is enjoyed with bananas, bacon, cinnamon, and maple syrup. Creole French toast kicks it up a notch — the milk and egg soaking mixture is spiked with alcohol, often whiskey.

When you hear the word ‘cornbread,’ what comes to mind? The next question is ‘have you ever tried cornbread French toast’? Over the years I’ve made a lot of different versions of French toast and cornbread, but I’ve never combined the two.  Although cornbread might be considered simple and dated, it is the cornerstone of soul food. I’ve always been a cornbread fan. Undeniably, I love it! The smell and taste of fresh cornbread are definitely nostalgic for me.

Traditional cornbread is a quick bread leavened with baking powder, but this loaf is leavened with yeast. It works like all other yeast breads, mixed and kneaded by hand or a stand mixer, and left to rise and ferment before being shaped and eventually baked.

Unlike traditional quick bread, this yeast-based version rises beautifully, creating a light yet sturdy loaf with a golden crust.

Using cornbread for making French toast today, turned out to be amazing! There’s something so comforting about thick slices of egg-soaked bread cooked on a hot griddle, making the outside golden and crispy while its custard-like inside stays soft and rich. 

Whether you’re in the mood for a simple slice of toast or a sandwich loaded with your favorite meats and vegetables, this bread will elevate your meal, believe me.

Print Recipe
Cornbread French Toast
Votes: 1
Rating: 5
You:
Rate this recipe!
Servings
LOAF
Ingredients
Cornbread
French Toast
Servings
LOAF
Ingredients
Cornbread
French Toast
Votes: 1
Rating: 5
You:
Rate this recipe!
Instructions
Cornbread
  1. In a small saucepan, combine milk, 1 tablespoons butter & salt. Over medium heat, bring to a simmer. It's ok if the butter does not completely melt. Remove from heat. Slowly whisk in cornmeal, stirring until smooth. Stir in honey. Set this cornmeal mixture aside to cool.
  2. In the bowl of a stand mixer, combine brown sugar & yeast in water. Stir to dissolve. Let stand until foamy, 5 to 10 minutes. Add eggs, cooled cornmeal mixture & 1/2- 3/4 cup flour. Beat at medium speed for about 2 minutes. Stir in enough remaining flour to make a soft dough. As soon as the dough pulls away from the pan, stop adding flour.
  3. Turn out dough onto a lightly floured surface. Knead dough 8 to 10 minutes or until smooth & elastic. Place dough in greased bowl, turning to coat all sides. Cover with a slightly damp towel. Let rise in a warm place, free from drafts, until doubled in bulk, about 1 hour.
  4. When risen, punch down dough; knead 30 seconds. Grease a 9”x5” loaf pan. Sprinkle 1 1/2 tsp cornmeal over bottom and sides of each pan. Shape dough into a loaf & place in prepared pan. Allow to rise 30 to 45 minutes, or until doubled in size.
  5. Preheat oven to 375 F. Slash top of loaf as desired. Brush with melted butter; sprinkle with remaining cornmeal. Bake 30 to 35 minutes or until bread sounds hollow when tapped on bottom. Remove loaf from pan. Cool on a wire rack.
French Toast
  1. In a small bowl, combine the milk, eggs, cinnamon & brown sugar. Whisk until well combined. Slice cornbread
  2. Heat a non-stick griddle to a medium-low heat. Lightly butter the griddle. Carefully dip the cornbread into the egg mixture, gently shake off the excess & place on griddle. Don't allow the cornbread to soak in the mixture - just a quick dip.
  3. Cook for 3-4 minutes on each side, adjusting the temperature to keep it from burning. Repeat until all cornbread has been cooked, adding additional butter if necessary. Hold the other pieces in a warm oven to keep them warm.
  4. Serve with bacon & poached eggs or maple syrup, fresh berries & a sprinkling of powdered sugar.

Chocolate Sour Cherry Donuts w/ Amaretto Glaze

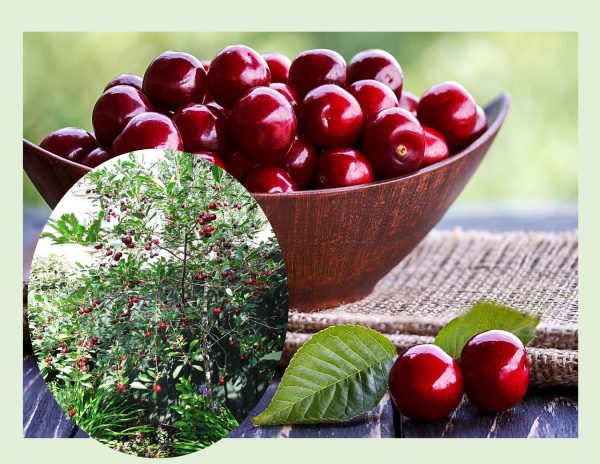
Fall is that time of year that we can enjoy some more of those wonderful cherries from our own little tree. The fact that we live in the northern part of Alberta, Canada and can eat cherries fresh from our tree is such a bonus.

Cherries are not native to North America, in fact both the sweet and sour varieties were brought to Canada and the U.S. in the 1600s by French and English settlers. The plants, especially the sour varieties, adapted well to our climate.
Sour cherries are a hardier plant than the sweet variety and are well-suited to growing in slightly cooler climates.
Even though these cherries are classed as a semi-sweet variety, there are still endless ways to enjoy them.

Unlike many fruits, which are at their best uncooked, sour cherries need a bit of sweetness and heat to reach their peak. Tart as vinegar, with a faint perfume of fresh fruit when raw, they need just a touch of sugar, then start them cooking and watch the tartness blossom. The aroma doesn’t fade, as one would expect; rather, the longer they cook the more it gains body and roundness, until the cherry fragrance becomes overwhelming, the fruit flavor more pronounced and the overall results unforgettable.

Most commercially produced cherry varieties, such as Bing do not cook well. These ‘sweet cherries’ may be wonderful eaten out of hand or tossed in a fruit salad, but they make bland preserves and flat, watery pies.

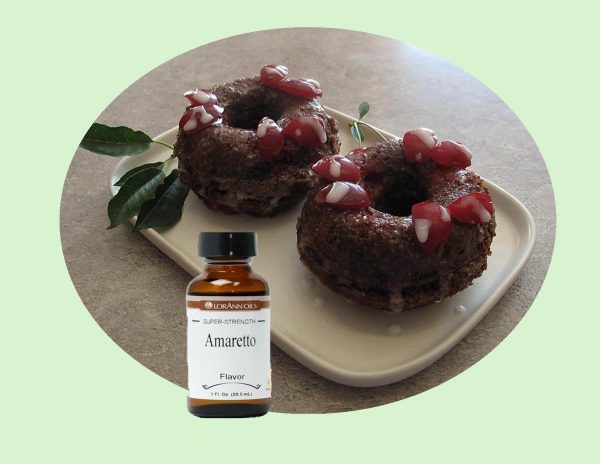
The tart bite of a sour cherry is glorified when transformed into any type of sweet preserve and can be used to good advantage in savory sauces where tartness is desirable. Chocolate and cherries are a classic marriage, so don’t hesitate to toss sour cherries into your favorite chocolate cake or brownie recipe as I did here.

Print Recipe
Chocolate Sour Cherry Donuts w/ Amaretto Glaze
Votes: 1
Rating: 5
You:
Rate this recipe!
Servings
Ingredients
Amaretto Glaze
Servings
Ingredients
Amaretto Glaze
Votes: 1
Rating: 5
You:
Rate this recipe!
Instructions
Donuts
  1. Preheat oven to 350 F. Spray a 6 cup donut pan with baking spray. Set aside
  2. In a large bowl, whisk the egg & sugars until well incorporated. Add in the milk, sour cream, melted butter & vanilla extract. Whisk until well combined.
  3. Using a sieve, sift in the flour, cocoa powder, baking soda & salt. Gently fold the dry ingredients into the wet mixture. The donut batter will be pretty thick at this point.
  4. Transfer the donut batter into a piping bag. Fill the donut cavities with chocolate cake batter about 1/4 full then top each with some cherries. Continue to pipe remaining cake batter on top of cherries on each donut. When baked, the donuts will have a cherry center.
  5. Bake the donuts for 17-20 minutes or until a toothpick inserted in the middle comes out clean. Let the baked donuts cool in the baking pan for 10 minutes then transfer them to a cooling rack. Let them cool completely before glazing.
Amaretto Glaze
  1. Whisk together glaze ingredients until smooth & pourable. Drizzle over cooled donuts & top with a few more cherry pieces if you wish.
Recipe Notes
  • Lor Ann  AMARETTO FLAVOR is sweet, with a slight cherry taste and a hint of almond that adds an extra layer of flavor to the donuts.


Strawberry Cookies w/ Strawberry Chocolate Topping

If there’s one berry most people have a fondness for, it’s strawberries. Even though available year-round, strawberries’ full flavor shines best beginning in May through late summer, the prime seasons for strawberries. Advances in transportation and refrigeration have allowed for strawberries to become a seasonless fruit.

Winter is done and we’re ready to embrace all things springtime! Spring is about rebirth, sunshine, new life, things in bloom, etc. With bright colors, fresh flavors, and interesting designs, spring cookies are the perfect way to welcome in the warmer weather and say goodbye to the winter blues. 

Today I thought I would start with a crisp shortbread type cookie and add some ‘pizzazz‘ with some strawberries, white chocolate and a few pistachios. I think you will like these!

Print Recipe
Strawberry Cookies w/ Strawberry Chocolate Topping
Votes: 1
Rating: 5
You:
Rate this recipe!
Servings
COOKIES
Ingredients
Garnish
Servings
COOKIES
Ingredients
Garnish
Votes: 1
Rating: 5
You:
Rate this recipe!
Instructions
Cookies
  1. In a large bowl, cream together butter & icing sugar. Add egg & strawberry extract & mix well.
  2. In a separate bowl, sift together flour & baking powder. Add to the wet mixture a little at a time until well incorporated. Wait approximately 30 minutes before working with the dough as it will firm up slightly.
  3. Roll the dough between baking paper & put it into the fridge for a few hours to help it from spreading. When dough is a bit firmer, take it out of the fridge & cut into butterfly shapes.
  4. Place the cookies on a parchment lined baking sheet & return to fridge again for another 1-2 hours, this will also help prevent spreading.
  5. Preheat oven to 350 F.
  6. Bake cookies for approximately 10 - 12 minutes or until lightly browned on bottoms.
  7. Allow cookies to cool completely on a wire rack while you prepare the 'toppings'.
Strawberry Topping
  1. Slice dried strawberries thinly. Place white chocolate chips in a small bowl. Heat heavy cream until simmering, then pour over chocolate chips. Let stand for 1-2 minutes, then add 1/4 tsp strawberry flavor & tiny bit of gel food color. Stir swiftly until all the chocolate chips are melted & smooth.
  2. Using a piping bag, place about a teaspoon of strawberry flavored chocolate. Gently press a slice of strawberry on top.
Lemon Drizzle
  1. In a small dish, stir together powdered sugar & fresh lemon juice until it reaches a drizzle consistency. Drizzle lines over half of the cookie then sprinkle with pistachio nuts or pepita seeds.
Recipe Notes
  • LorAnn's Strawberry baking & flavoring emulsion tastes like fresh ripe berries. Great for cakes, cookies, frostings, fillings, and desserts. Add it instead of using strawberries or in addition to the fruit to add a punch of strawberry flavor. Use in any recipe you would a strawberry extract and get more robust strawberry flavor!
  • 1 teaspoon baking extract = 1 teaspoon emulsion

Vanilla Butterflies

Spring, for many, is a symbol of new beginnings. When the first green emerges from the ground and the first bud opens, people the world over celebrate. The earth comes to life once more. The symbolic meaning of the butterfly is similar across most cultures, regardless of time, and is most commonly associated with the soul. Cultural myth and lore honor the butterfly as a symbol of transformation because of its impressive metamorphosis–from caterpillar to chrysalis and ultimately, the butterfly. Butterflies also symbolize spring, a celebratory time of year, and embody the beauty of symmetry, pattern, color and shape.

These colorful and vibrant, yet delicate creatures can imply freedom, endurance, inspiration, openness, change, joy, rebirth, patience, transformation and happiness. As Spring approaches, we can see trees and flowers starting to bud, birds beginning to sing, and bumblebees and butterflies returning to the landscape.

I have always loved butterflies… their beautiful colors, their presence in the outdoor landscape. The magnificent yet short life of butterflies serves to remind us that life is short and to make the most of each day we have.

When it comes to spring baking, butterfly cookies always seem to work their way into my kitchen each year. This is my creation for this season!

Print Recipe
Vanilla Butterflies
Votes: 1
Rating: 5
You:
Rate this recipe!
Servings
COOKIES
Ingredients
Servings
COOKIES
Ingredients
Votes: 1
Rating: 5
You:
Rate this recipe!
Instructions
  1. In a large bowl, cream together butter & icing sugar. Add egg & vanilla extract & mix well.
  2. In a separate bowl, sift together flour & baking powder. Add to the wet mixture a little at a time until well incorporated. Wait approximately 30 minutes before working with the dough as it will firm up slightly.
  3. Roll the dough between baking paper & put it into the fridge for a few hours to help it from spreading. When dough is a bit firmer, take it out of the fridge & cut into butterfly shapes.
  4. Place the cookies on a parchment lined baking sheet & return to fridge again for another 1-2 hours, this will also help prevent spreading.
  5. Preheat oven to 350 F.
  6. Bake cookies for approximately 10 - 12 minutes or until lightly browned on bottoms.
  7. When cookies are completely cooled, personalize them with your favorite icing, colors & design.
Recipe Notes
  • Allow cookies to cool overnight or at least four hours if you have to decorate right away.
  • If you can, it is a good idea to wait until the cookies are a day old before decorating them to reduce the chance of oil from the cookie leaching into the icing & causing icing spots or butter bleeds.

Krispy Chocolate ‘Eyeballs’/ Halloween Brownie Bites

HAPPY HALLOWEEN!

While trick-or-treating has been a tried and true modern Halloween tradition, historians say the origins of kids begging their neighbors for food may date back to ancient Celtic celebrations or even a long-lost Christmas custom. Halloween customs, such as wearing disguises to ward off ghosts and offering food to appease malevolent spirits, were brought to Canada in the mid-to-late 1800s by Irish and Scottish immigrants. North America’s first recorded instance of dressing in disguise on Halloween was in Vancouver, British Columbia, in 1898, while the first recorded use of the term trick or treat was in Lethbridge, Alberta, in 1927.

Every Halloween, children on the hunt for candy dress up in costumes, knock on doors and ask homeowners the infamous question: ‘Trick or Treat?’

Lethbridge historian Belinda Crowson said research has confirmed the term ‘Trick or Treat’ was first documented in the Lethbridge Herald on Nov. 4. 1927.

Hallowe’en provided an opportunity for real strenuous fun. No real damage was done except to the temper of some who had to hunt for wagon wheels, gates, wagons, barrels, etc., much of which decorated the front street. The youthful tormentors were at back door and front demanding edible plunder by the word ‘trick or treat’ to which the homeowners gladly responded and sent the robbers away rejoicing.

Crowson says Oct. 31 in Lethbridge used to be a big night of pranks, saying kids would take part in ‘gate night’ where they’d remove gates from yards and hide them around the city. The occasional outhouse was also moved on Halloween night, sometimes onto a streetcar track for it to be pushed down the route by the unknowing driver.

Alberta’s known for many things: the Rocky Mountains, the oil industry, the Calgary Stampede. But you wouldn’t think that it’s also home to one of the most beloved Halloween traditions, that is, trick-or-treating.

Having lived in Lethbridge years ago, for about 25 years, I was not aware that the term trick or treat had originated there until I stumbled on it when I was doing some research … who knew!!

Nevertheless, Halloween has rolled around again so here’s a few treats to enjoy.

Print Recipe
Krispy Chocolate 'Eyeballs'/ Halloween Brownie Bites
Votes: 1
Rating: 5
You:
Rate this recipe!
Servings
Ingredients
Shortbread Crumbs for 'Eyeballs'
Caramel / Chocolate & Rice Crispies
Halloween Brownie Bites
Servings
Ingredients
Shortbread Crumbs for 'Eyeballs'
Caramel / Chocolate & Rice Crispies
Halloween Brownie Bites
Votes: 1
Rating: 5
You:
Rate this recipe!
Instructions
Shortbread Crumbs
  1. Preheat the oven to 350 F. Line a 9-inch baking pan with parchment paper.
  2. In a bowl, cream together the butter & sugar until light and fluffy. Add the flour; using your fingers, work together to a crumbly but moist dough. Place mixture in baking pan and press down with the back of a spoon until firm and smooth. Bake shortbread until cooked but not browned, about 12 minutes. Remove from oven, lift out of pan with parchment paper & cool. When cooled, break into pieces & place in a food processor. Pulse to create shortbread crumbs. Set aside.
Caramel / Chocolate
  1. Place a heavy bottomed, non-stick pot, over a larger pot of boiling water. To the top pot add condensed milk, butter & brown sugar. Stir until combined, bring the mixture to a gentle boil, stirring continuously for a full 5 minutes. Add the milk & white chocolate & continue stirring until melted.
  2. Turn off heat under the boiling water. To the caramel/chocolate add shortbread crumbs & rice crispy cereal. With a rubber spatula, combine mixture.
  3. Keeping the pot over the hot water so the mixture doesn't harden to fast, scoop into small balls to form 'eyeballs. Place on a parchment paper lined tray. The scoop I used made about 44 balls. Press candy eyeballs into chocolate balls. If they aren't sticking well, dip them into a bit of white corn syrup first.
Halloween Brownie Bites
  1. Preheat oven to 325 F. Line 30 mini cupcake tins with paper liners.
  2. In a medium bowl, whisk together flour, cocoa powder, cornstarch & salt. Set aside.
  3. Using a mixer, beat sugar & eggs on high speed for 5 minutes, until it becomes light & pale in color. Melt the butter & add it along with oil & vanilla. Mix on low until combined. Slowly add dry ingredients, continuing to mix on low speed until combined. Put aside about a 1/4 of a cup of the brownie batter to use for decorating. Place a small scoop of brownie batter in each of the mini muffin cups.
Cheesecake Layer
  1. In a medium bowl, beat cream cheese, sugar & vanilla extract on high speed for 1 minute. Add the orange food gel & mix until desired color. Then add the egg & mix on low speed. Place a Tbsp of cheesecake batter on top of the brownie batter. Add the 1 1/2 Tbsp HOT water to the remaining 1/4 cup of brownie batter & whisk until combined.
  2. Drizzle the brownie batter over the cheesecake batter in 2 circles (per brownie). With a toothpick draw lines from the center to the outside edge, creating a spider web effect.
  3. Bake for about 20 minutes or until not a lot of batter remains on a toothpick when tested. Cool on a cooling rack completely. Decorate with Halloween spiders, cats, ladybugs etc. These are nice when wrapped in foil & chilled overnight.