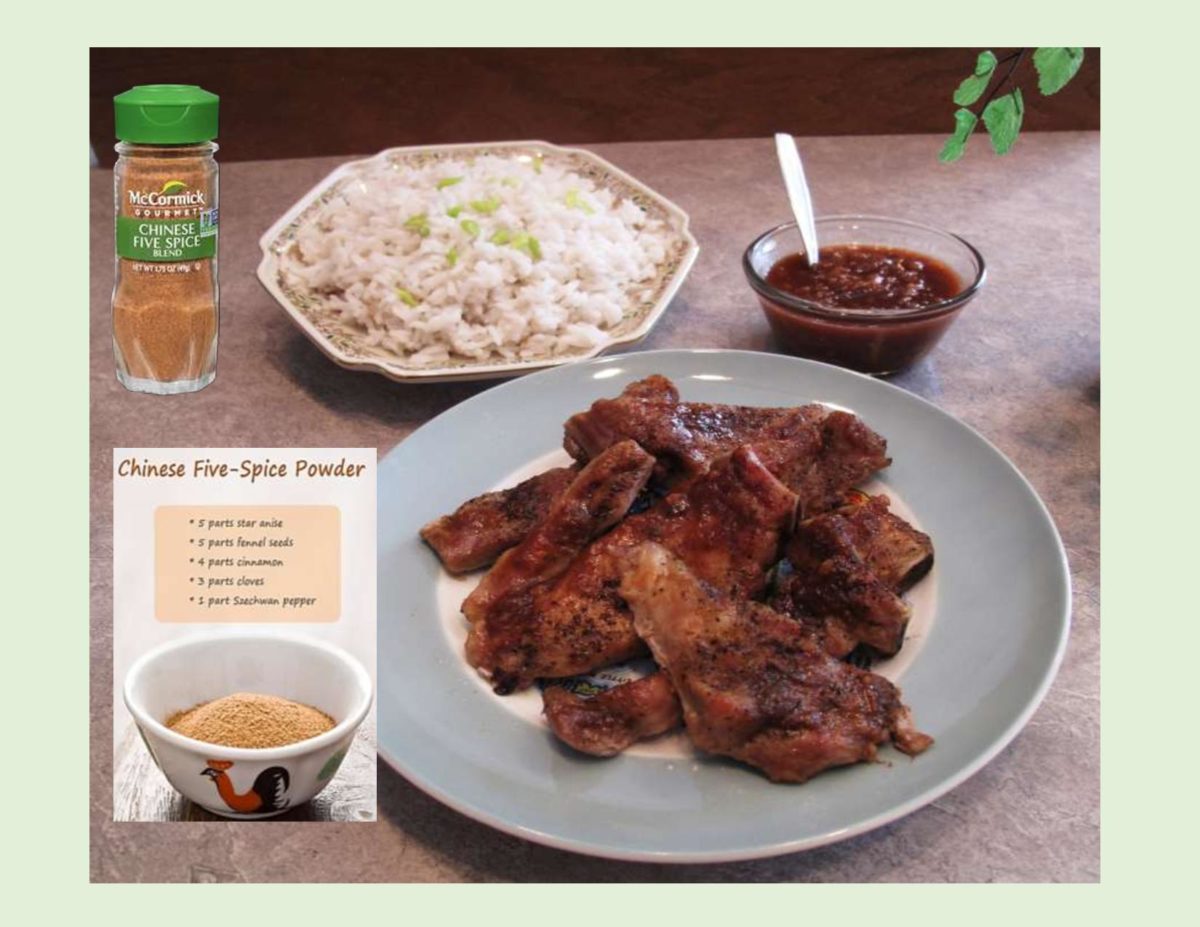
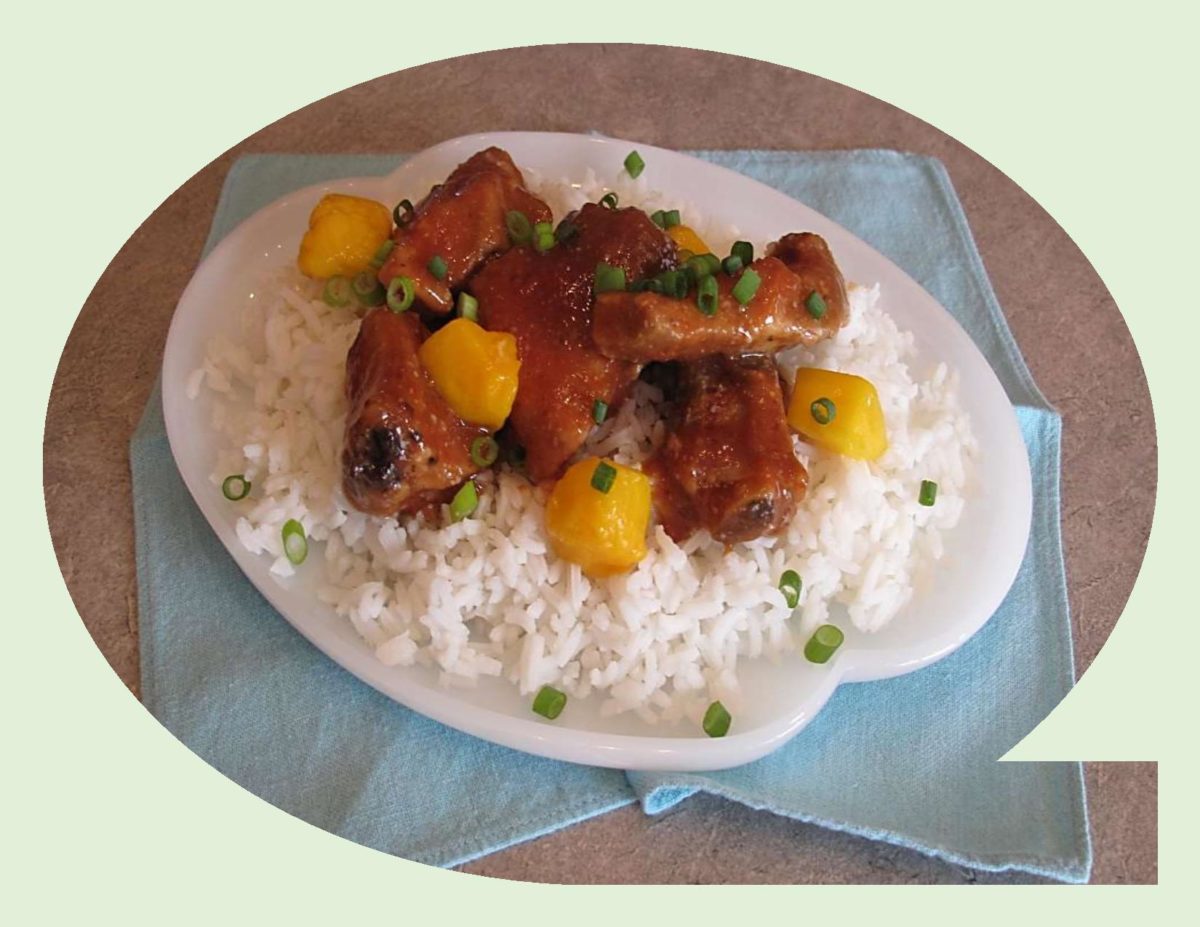
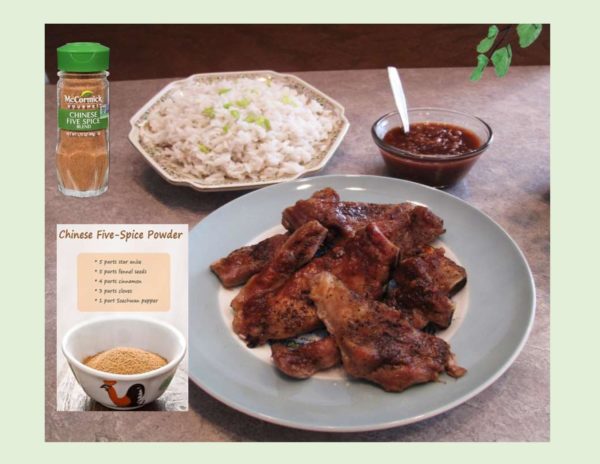
Chinese Pork Ribs with Spicy Rhubarb Sauce

It seems that the exact origin of five-spice powder is unknown but there is some speculation that the blend was created in traditional Chinese medicine. A very unique spice blend that represents a wide range of flavors from sweet, salty and bitter to pungent and sour. Rumor has it that the Chinese were trying to create a ‘miracle powder’ that was representative of all the five elements: wood, fire, earth, metal and water. Then again, its possible that a cook accidentally stumbled upon this particular combination of spices and realized its power to improve on a bland dish. In any case, it is very versatile and can be used not only in cooking but also adds a unique flavor to baked goods.

Many recipes for five-spice powder exist but there is no one traditional recipe. Often the ingredients and amounts can vary from region to region and are different depending on the household and individual tastes. The original blend contained star anise, Szechuan peppercorns, fennel seed, cinnamon and cloves. A staple in Chinese cuisine but has also found its way into other international cuisines such as Vietnamese and Hawaiian food.

This is an interesting recipe combining pork with a spicy rhubarb sauce. Definitely a keeper!

Print Recipe
Chinese Pork Ribs with Spicy Rhubarb Sauce
Votes: 1
Rating: 5
You:
Rate this recipe!
Servings
Servings
Votes: 1
Rating: 5
You:
Rate this recipe!
Instructions
Rhubarb Sauce
  1. In a saucepan, combine rhubarb, water, honey, hoisin, garlic, ginger, 5-spice powder & crushed red pepper. Bring to a simmer; cook, stirring occasionally, until slightly reduced & the rhubarb is very soft, about 10 minutes. Remove from heat & stir in soy sauce & lemon juice. Transfer 2 TABLESPOONS of the sauce to a saucer; set aside the remaining sauce until serving time.
Rib Marinade
  1. In a resealable large plastic bag, combine soy sauce, honey, oil, 5-spice powder, salt, pepper & the 2 Tbsp of reserved 'rhubarb sauce'. Place ribs in the bag; seal & marinate in refrigerator at least 2 hours or overnight.
  2. Preheat oven to 275 F. Place ribs & marinade in a baking dish. Place in oven to SLOW roast for about 1 1/2 hours until VERY tender. Remove from oven, garnish with sliced green onion & serve with remaining rhubarb sauce.

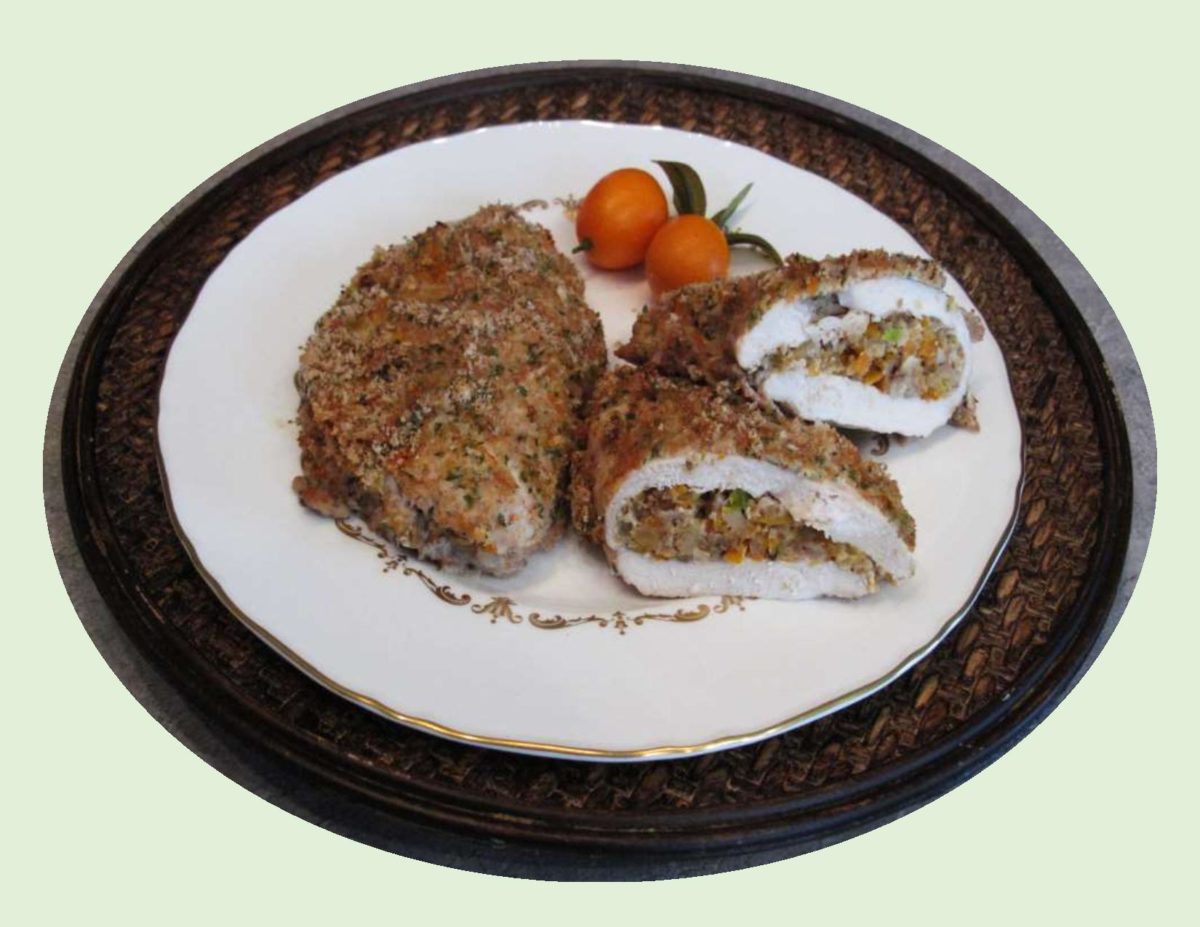
Kumquat & Walnut Stuffed Chicken Breast

Kumquats are believed to have originated in China with their earliest historical mention being around the 12th century. Orange in color, this small bite-sized fruit can be eaten skin and all. The peel is the sweetest part of the fruit and the sourness comes from the pulp, seeds and juice.

Unlike it’s citrus kin, kumquats are able to withstand low temperatures and frost. A small evergreen shrub that can also be hydrophytic, which means they can grow in aquatic environments, and the fruits will drift towards the shore during harvest season. Kumquats are in season January thru April.

Commonly cultivated in Asia, the Middle East, parts of Europe and the southern United States. They can be used in every imaginable combination including pies, cookies, smoothies, ice cream, marmalade, marinades, salsa and vinaigrette. My choice today is in a stuffing for chicken breast. The combination of kumquats and orange tastes very unique.

Print Recipe
Kumquat & Walnut Stuffed Chicken Breast
Votes: 1
Rating: 5
You:
Rate this recipe!
Servings
Votes: 1
Rating: 5
You:
Rate this recipe!
Instructions
  1. Wash & chop kumquats (do not peel). In a small bowl, combine with walnuts, onion & pepper.
  2. Between two pieces of plastic wrap, pound chicken breasts to an even thickness. Spoon half of the filling on each breast. Fold over to encase filling; secure with picks if necessary. Preheat oven to 350 F.
  3. Set out 3 shallow dishes. In one combine bread crumbs, orange zest & parsley; fill another with orange juice & in third beat the egg with water. Dip each stuffed breast carefully in orange juice, then in bread crumb mixture to coat, then in beaten egg & again in bread crumbs. Place coated breasts, seam side down, on a lightly buttered baking pan. Drizzle with melted butter.
  4. Bake, covered, 30 minutes. Uncover & bake 10 more minutes or until chicken is cooked through.

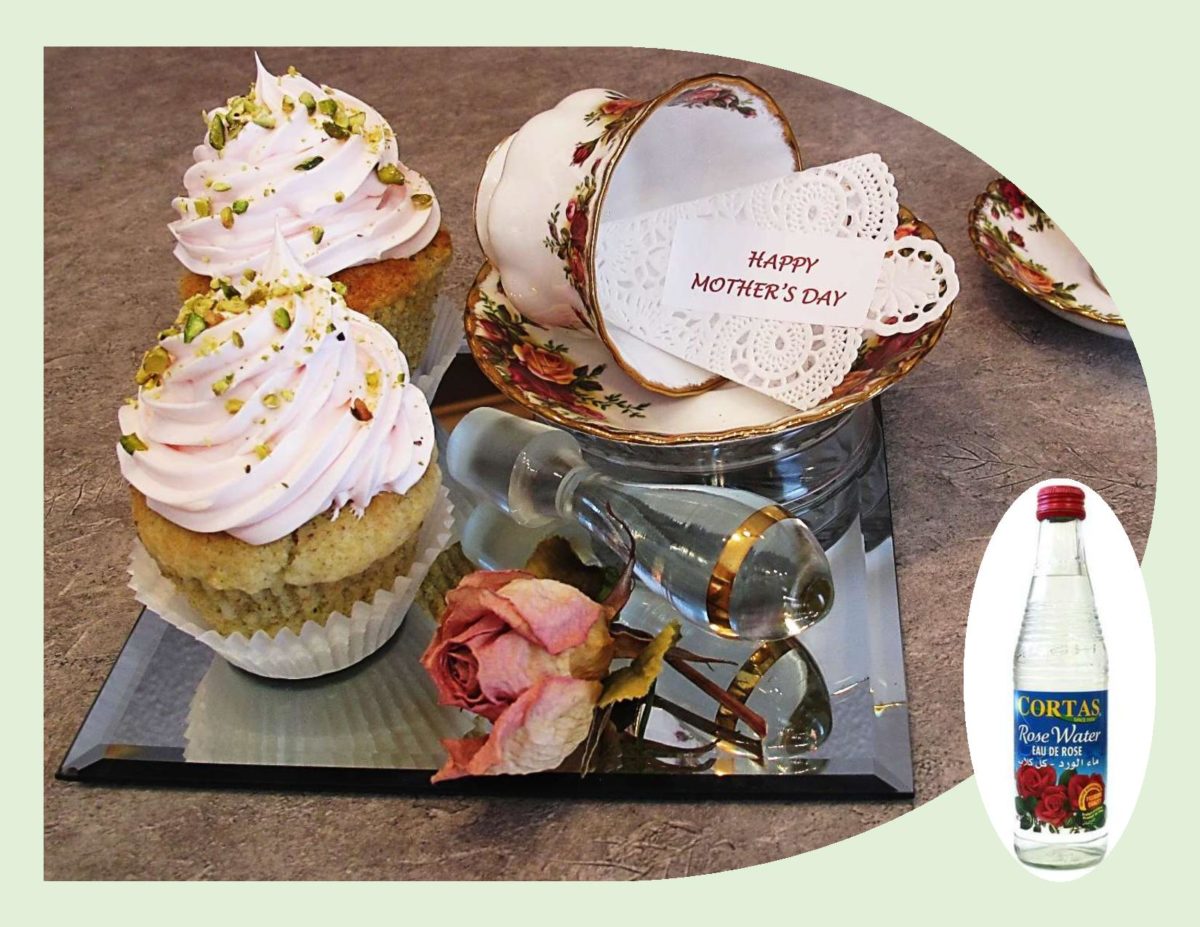
Pistachio Cardamom Cupcakes with Rosewater Frosting

HAPPY MOTHER’S DAY!

Many people believe Mother’s Day was developed as a commercial holiday to sell cards, candy and flowers or to celebrate the domestic role of women in the home and family. Really, this day is more about women’s commitment to the past, present and the future. Most often, mother’s take the lead in passing down family stories, life lessons and traditions.

Mother’s Day isn’t a new holiday with some of its earliest celebrations being traced back to ancient Greece and Rome. Here in Canada, we set aside the second Sunday in May to honor our mother’s with expressions of love and gratitude.

Although my mother is no longer on this earth, her wonderful memory will live on forever. It is also with love, Brion and I celebrate his mother, Dolores, for her loving and kind ways.

I was trying to come up with something special to bake for the blog recipe today. Lately I have enjoyed using rose & orange water in my cooking. Sweet and fragrant rose water is an elegant steam distillate of rose petals. The key is to use it sparingly as a little goes a long way. Used raw, the flavor is very floral and aromatic. When baked or roasted, that flowery essence mellows out, imparting notes similar to vanilla, with a fruity, more subtle aroma. There are a variety of ways to use rose water from cake and cookies to cocktails and even in roast chicken.

This flavor combination definitely takes the meaning of ‘special’ to a whole new level. Just what I was looking for. 


Print Recipe
Pistachio Cardamom Cupcakes with Rosewater Frosting
Votes: 8
Rating: 3.63
You:
Rate this recipe!
Servings
Ingredients
Pistachio Cardamom Cupcakes
Rosewater Buttercream Frosting
Servings
Ingredients
Pistachio Cardamom Cupcakes
Rosewater Buttercream Frosting
Votes: 8
Rating: 3.63
You:
Rate this recipe!
Instructions
Cupcakes
  1. Preheat oven to 325 F. Line muffin tin with paper liners & set aside.
  2. In a bowl, whisk together flour baking powder, soda, cardamom & salt. Set aside. In another bowl, beat together softened butter, oil & sugar; mix well. Add eggs, one at a time, mixing well after each egg is added. Slowly add sour cream & vanilla. Fold in flour mixture being careful not to over mix batter.
  3. Divide batter between the muffin cups. Bake 15-20 minutes or until a toothpick inserted into the center comes out clean. Remove from oven & place the individual muffins on a cooling rack.
Frosting
  1. In a large bowl, combine powdered sugar, butter & 1 Tbsp milk. With an electric mixer, beat on low until sugar is incorporated then move to medium-high speed. Add rosewater a 1/4 tsp at a time (taste to prevent it becoming to strong for your liking) then food color. If the icing is not the proper consistency add another Tbsp of milk.
  2. When the cupcakes are cool, frost each one using a large angled star tip. Top off each cupcake with a sprinkle of the reserved chopped pistachios.
Recipe Notes
  • To make your cupcakes real special, decorate with some dried rosebuds.
  • I was able to find rosewater easily in the ethnic section of the grocery store.

Mango Chutney Country Style Ribs

If you are not accustomed to using chutneys it is well worth revisiting the idea. Chutney is similar to salsa or a sweet ‘relish’. The perfect balance of sweet, sour and spicy are critical elements for most chutneys. The sweetness coming from fresh or dried fruits, the sour element from vinegar, lemon or lime and the spiciness from a variety of whole spices. 

There is no right or wrong recipe, just a preferred flavor or two. They can be cooked or fresh and are made from a wide variety of ingredient combinations of fruits and/ or vegetables and spices. Ground spices tend to make chutney cloudy so it is best to use whole ones.

In the majority of chutney recipes one ingredient tends to dominate the flavor. The sweet and sour ones work well with beef, pork and chicken, whereas sweeter versions are great on cheese and crackers, bagels and toast.

I have made numerous chutneys over the years. Some were served with warm Brie cheese but very often I’ve used mango chutney when cooking pork. This particular recipe can be made with either purchased chutney or just make a recipe of your own. It creates a unique flavor along with nice tender ribs.

Print Recipe
Mango Chutney Country Style Ribs
Votes: 1
Rating: 5
You:
Rate this recipe!
Servings
Votes: 1
Rating: 5
You:
Rate this recipe!
Instructions
Mango Chutney
  1. In a saucepan, combine honey & vinegar, Bring to a boil & simmer until honey dissolves. Add remaining ingredients & simmer, uncovered until mixture becomes slightly thickened. Pour into a glass dish & set aside until needed. Refrigerate any remaining chutney that you don't use in making ribs.
Ribs / Sauce
  1. In a saucepan, Brown ribs & set aside on a paper towel-lined plate. Add all 'sauce' ingredients to saucepan except for the 1 fresh mango. Bring to a boil, cooking for about 15 minutes, gently mashing tomatoes with a fork, until sauce is reduced to about 1 1/4 cups.
  2. Preheat oven to 300 F. Place ribs in a baking dish; pour sauce over ribs, cover & bake for about 1-1 1/2 hours until ribs are very tender. Serve with sauce & top with remaining diced fresh mango.

Almond Orange Blossom Cookies

A special memory that comes to mind at this time of year is the scent of orange blossoms. While it is still winter in our part of Canada, in Seville, Spain spring is in the air. Mid March to early April, for about three weeks in Spain’s sun-bleached region of Andalusia, there’s a soft intoxicating fragrance reminiscent of magnolia and wisteria flowers. The heady, powerful smell of orange blossom pervades the whole city.

Brion and I had the opportunity to spend a couple of days in Seville, in early spring one year. It was an amazing sight seeing all those beautiful orange trees. A number of our pictures in this blog show the abundance of the fruit that is produced.

These bitter orange trees from China were introduced to Spain by the Moors in the eighth century and were planted in the beautiful courtyards of the Alhambra  in Granada, and throughout the south of Spain. They have become known as Seville Oranges. Unique to citrus trees is the fact that fruit from the previous season can remain on the tree while the blossoms for the next season’s crop arrive. A flowering deciduous, evergreen that provides shade in the summer and thick swatches of lush green to line the streets in winter.

The fruit of the Sevillian orange tree is too bitter for fresh consumption. It has been put to good use in many other ways such as in the production of liqueurs and wine or for making confectionery like creams, pastries and chocolates. But above all for the well known Seville Orange Marmalade.

Orange Blossom Water is another product which is derived from the distillation of the orange tree flowers. This use of orange blossom water in cooking comes to the west from North Africa, the Middle East and the Mediterranean. The flavor of this distilled water is flowery but not too overpowering. The important thing is to use very little to give the merest hint of fragrance. Orange blossom pairs well with apricots, figs, strawberries, rhubarb, pears and dates. Add a few drops to fruit salads, stewed or poached fruit and fruit crepes.

The cookies in this blog are delicate like their namesake blossoms and lightly ‘perfumed’ with orange blossom water and orange zest. The almonds add an extra bonus in the flavor. I just love the ‘exotic’ touch fragrant water gives to baked goods.

The Plaza de Espana that Brion and I are standing in front of is a spectacular building, waterway and square. It was built as the centerpiece of the 1929 Ibero-American Expo. Colored ceramics feature heavily around the plaza. The provincial alcoves, walls, ornate bridges and balustrades are also covered in ‘azulejoz’. The plaza has been used over the decades as a location for filming several movies such as Star Wars and Lawrence of Arabia.

I hope you will enjoy the cookie recipe as well as my mental journey to Seville.


Print Recipe
Almond Orange Blossom Cookies
Votes: 2
Rating: 5
You:
Rate this recipe!
Servings
Votes: 2
Rating: 5
You:
Rate this recipe!
Instructions
  1. In a large bowl, beat butter & orange blossom water together until smooth & creamy. Add sugars & salt; continue beating for about 1 minute. Add egg yolks & zest; beat on low until well blended.
  2. In another bowl, whisk together flour & almond meal. Combine flour mixture with wet mixture, mixing only until combined. DO NOT OVER MIX.
  3. Using a rubber spatula, transfer this soft, sticky dough to a piece of plastic wrap & gently form into a disk. Wrap the disk & refrigerate for at least 3 hours or overnight.
  4. Preheat oven to 350 F. Line two baking sheets with parchment paper. Remove disk from refrigerator. On a lightly floured work surface or between two sheets of parchment paper, roll out dough to 1/2-inch thickness. Using a 2-inch round cookie cutter with a fluted edge, cut out cookies & place on baking sheets.
  5. Top cookies with sliced almonds. Bake for 12-15 minutes. When baked, cookies should have a light brown bottom, light golden edges & pale tops. Remove from oven, letting them rest on baking sheet for a couple of minutes before carefully sliding parchment paper with cookies onto a rack. DO NOT OVER BAKE! The cookies finish setting up as they cool.
Recipe Notes
  • If you would rather not cut them out with a cookie cutter,  just form a log when you wrap the dough in the plastic wrap. After refrigerating, unwrap, slice & bake.
Vintage Puffed Wheat & Rice Krispie Squares

I haven’t thought of puffed wheat cake in years. It’s probably been 15 or 20 years since I’ve even made any. So what happened to puffed wheat? I remember this cereal from my childhood, being sold in HUGE plastic bags. It seems that puffed wheat cake (or squares) was a distinctly rural Canadian phenomenon. Nearly anyone from the prairie provinces recalls the recipe from memory. When I looked through my mothers recipe file, she had a recipe for ‘puffed wheat brittle’. This was the forerunner to puffed wheat ‘squares’. It was made using sugar, water, vinegar, molasses, butter & salt.

The Rice Krispie cereal came on the market in North America in 1928. Food history states that similar recipes existed for Puffed Rice & Puffed Wheat  but neither used marshmallows, only molasses. Most inventions are built on what has come before and the ‘Rice Krispie Marshmallow Treats’ were no different.

Home economists, Mildred Day and her co-worker, Malitta Jensen, who worked for the Kellogg’s company in 1939 are credited with inventing ‘Rice Krispie Treats’. Originally they had been developed as a snack for an organization called Campfire Girls. They were having a fundraiser and needed something unique that the girls could sell door to door.

In 1940, the original recipe for Kellogg’s Rice Krispie Treats first appeared on the cereal box and continues to do so to this day. In 1995, the company began selling the pre-packaged ones. The fact that they are so quick and easy to make attributes to their continued popularity and of course there are no end to variations you can make from the original recipe.

Here are a couple of ideas you might enjoy to try.

Print Recipe
Chai Puffed Wheat Squares / Rice Krispie Treats
Votes: 4
Rating: 5
You:
Rate this recipe!
Course dessert
Servings
Ingredients
Chai Puffed Wheat Squares
Rice Krispie Treats
Course dessert
Servings
Ingredients
Chai Puffed Wheat Squares
Rice Krispie Treats
Votes: 4
Rating: 5
You:
Rate this recipe!
Instructions
Chai Puffed Wheat Squares
  1. In a large buttered bowl, measure out puffed wheat; set aside. In a saucepan, combine margarine, brown sugar, corn syrup & spices; bring to a boil. Remove from heat & add vanilla. Pour mixture over puffed wheat & stir quickly until completely coated. Pour immediately into prepared buttered pan (size will depend on how thick you like your squares to be) & press down firmly to flatten. When cool, cut into preferred size pieces.
Rice Krispie Treats
  1. Lightly butter a 9 x 13" pan. In a large bowl, measure rice krispies, flax flakes, cranberries, pumpkin seeds & flax seed. In a large saucepan, slowly melt margarine with marshmallows. Remove from heat, add vanilla. Add mixture from bowl & stir quickly to combine well. Pour into buttered pan & press down firmly. When cool, cut into preferred size pieces.

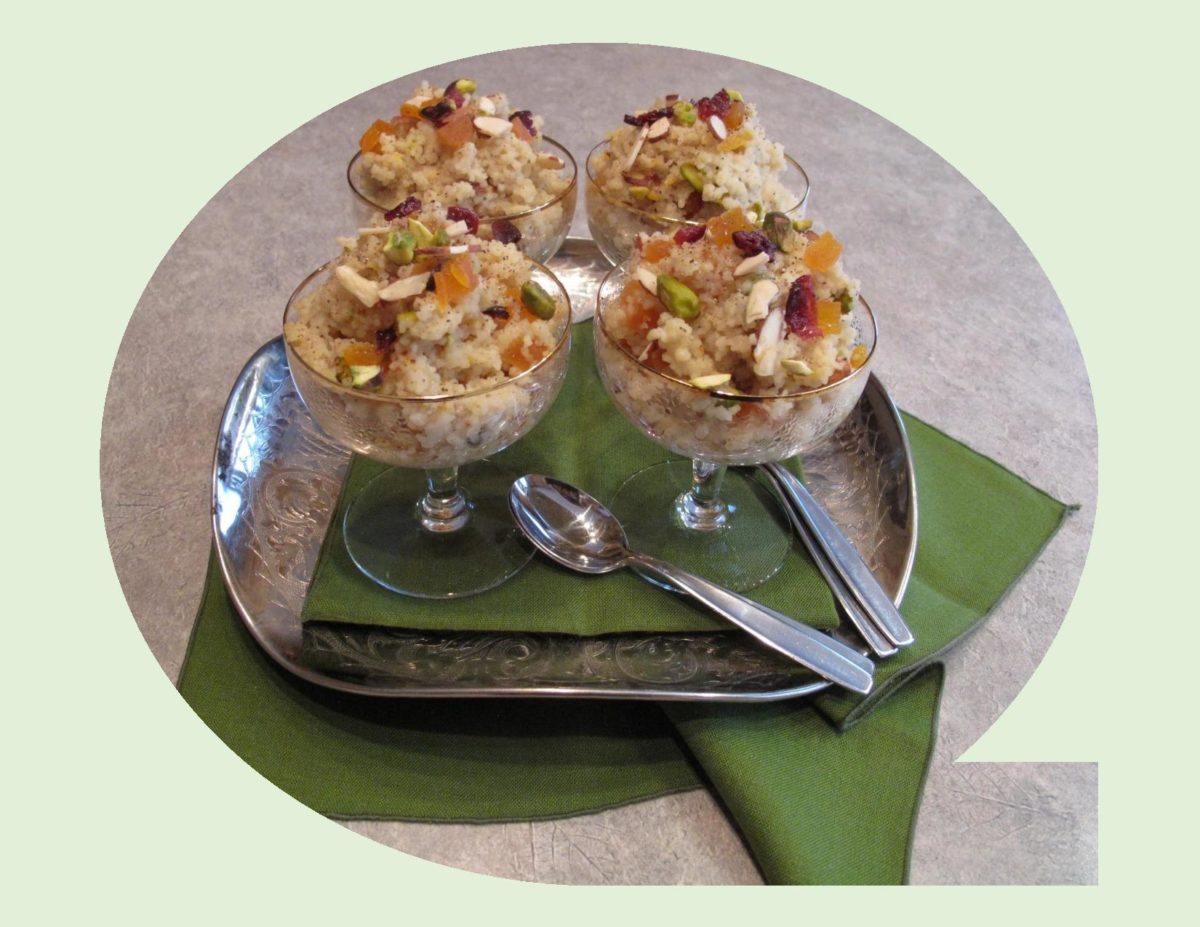
Sweet Almond Milk Couscous with Dried Fruit & Nuts

Couscous beyond lamb stew — sounds interesting! I never really paid much attention to couscous until we had traveled in the North African country of Morocco.

Traditional couscous is prepared with semolina. However, the name nowadays is used to refer to similar preparations made of different cereals, such as barley, millet, sorghum, rice or corn.

In Tunisia, Algeria, Morocco & Libya couscous is generally served with vegetables, cooked in a spicy broth or stew. However, in other countries, it is eaten more often as a dessert.

Couscous is made of tiny granules of various sizes. Traditional methods of preparing them are very labor intensive. The semolina is sprinkled with water and rolled by hand to form small pellets, sprinkled with dry flour to keep them separate, and then sieved. Any pellets which are too small to be finished granules of couscous and fall through the sieve will be rolled and sprinkled again with dry semolina. This process continues until all the semolina has been formed into tiny granules of couscous, which are then dried in the sun. In Western grocery stores, couscous has been pre-steamed and dried, becoming a quick food, ready in 5 minutes by adding boiling water to it.

The main ingredients found in Moroccan desserts are dried fruits with an assortment of nuts and sesame seeds. Spices such as cinnamon, cloves and cardamom along with orange blossom and rose water give that distinctive Middle Eastern taste. Rose water, a liquid distilled from rose petals with steam, dates back to ancient Greece and Persia. It was brought to Europe via treats like marzipan and Turkish delight in the Middle Ages, then later to the American colonies, where it was the most popular flavor before vanilla hit the market in the late 1800’s.

The key is to use rose water sparingly — a little goes a long way. This dessert is loosely based on ‘Moroccan Seffa’, essentially sweetened couscous sprinkled with rose water. It’s like a blank canvas, there are so many combinations you can create. One of my favorite versions starts with almond milk. You can make almond milk yourself with ground almonds and water or just purchase some in the natural section of the grocery store.

When couscous is cooked in this manner it gains a lovely, not-too-subtle almond flavor that takes to the other spices nicely. Not everyone likes rosewater but a sprinkling of it is ‘exotic’ and well worth trying.

I’ve added just a few more photos taken during our time spent in Morocco.

Print Recipe
Sweet Almond Milk Couscous with Dried Fruit & Nuts
Instructions
  1. In a saucepan, bring almond milk, sugar & salt to a boil; add couscous, zest & cardamom. Cover & cook for another minute, then turn off heat & let stand for 5 minutes.
  2. With a fork, fluff couscous & sprinkle with rose water. Add nuts & fruit, gently combining. Serve warm or at room temperature.

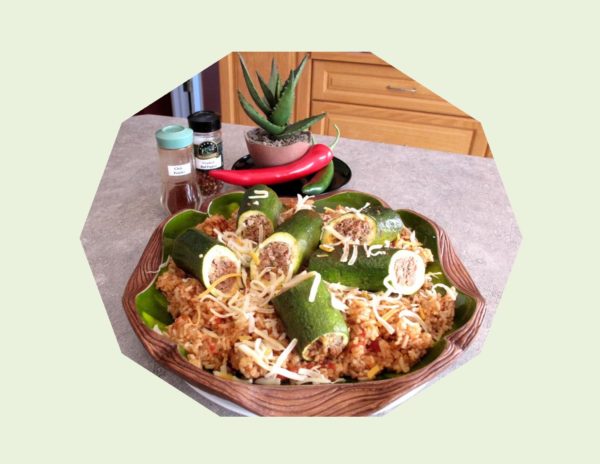
Stuffed Zucchini Rolls over Spanish Rice

This is a meal that is as much about the process as the final plate. Most everyone has made ‘zucchini boats’ at one time or another and this is a lovely rendition of them.

I have learned from travelling across cultures, that one thing can truly bring people together, no matter where in the world you are from, and that is food. 

No doubt, every culture has its own equivalent of ‘comfort food’. Stuffing vegetables is a Middle Eastern food trend that has been popular for thousands of years, combining spices and food groups in unique ways.

In truth, zucchini are simply immature cultivars of the squash family, eaten while the rind is still edible. Developed in Northern Italy, zucchini was not introduced to the rest of the world until the 1930’s.

‘Kousa Mahshi’ (Arabic for stuffed zucchini), is a type of yellow squash found in the Middle East which is hollowed out, stuffed with a meat/rice filling and steeped in a seasoned tomato broth. These were likely a reinvention of the ‘stuffed grape leaves’  common in the Mediterranean, Balkans and Persian Gulf.

I found the idea of hollowing out the small zucchini and stuffing them quite unique as opposed to just slicing them to make ‘boats’. Rather than using a meat/rice combo in my zucchini rolls, I used a ground turkey/mushroom stuffing and served them over a ‘simple’ Spanish Rice Pilaf.

This is not a difficult recipe, just one that takes a bit of time but is worth it in taste and eye appeal.

Print Recipe
Stuffed Zucchini Rolls over Spanish Rice
Votes: 1
Rating: 5
You:
Rate this recipe!
Servings
Votes: 1
Rating: 5
You:
Rate this recipe!
Instructions
Zucchini
  1. Wash zucchini & slice off stem end. Use a long narrow apple or vegetable corer to core zucchini, leaving 1/2-inch walls. Care should be taken not pierce the shell or the end. If you are cutting your zucchini in half, make sure to leave your cut end with a solid bottom. Gently remove all the pulp from the rolls & set aside. Reserve pulp for turkey filling.
Turkey Stuffing
  1. In a skillet, heat 1 Tbsp olive oil. Saute onion & garlic until soft. Add mushrooms & reserved zucchini pulp; saute about another 2 minutes. Remove from skillet & set aside.
  2. In the same skillet, heat 1 Tbsp olive oil; add ground turkey. Lightly brown, stirring occasionally, about 6 minutes. Stir in reserved onion & mushroom mixture. Add chicken broth; stir in tomato, basil & rosemary & cook 1 minute longer. Drain off any excess fat, remove mixture from heat & set aside. When mixture has cooled, add cheese, egg, salt & pepper. Fill zucchini rolls with mixture.
  3. Preheat oven to 375 F. In a Dutch oven, place stewed tomatoes & water. Arrange stuffed zucchini in the pot. Cover & bake for 25-30 or until zucchini is tender-crisp. With a slotted spoon lift rolls out of pot & serve on top of rice or serve in stewed tomatoes WITH rice, your choice!
'Simple' Spanish Rice
  1. In a large pot, heat oil. Stir in onion & saute until tender, about 5 minutes. Mix rice into pot & stir until it begins to brown. Stir in chicken broth & salsa. Reduce heat & simmer (covered) for 20 minutes until all the liquid has been absorbed & the rice is cooked.

Sweet & Sour Cabbage Casserole

Stuffed cabbage rolls are a unique blend of various flavors. The art of seasoning is about far more than adding a few grinds of salt and pepper. It’s more about sorting out the sweet, sour, savory and bitterness balance.

Food history tells us cabbage rolls have their roots in the ancient Middle East and spread to Eastern Europe as trade routes flourished with various ethnic groups migrating. Many countries lay claim to their origin, which accounts for the several interesting versions on the traditional recipe. For example:

Ukrainian holubtsi  are typically vegetarian, filling pickled cabbage leaves with either buckwheat and wild mushrooms or a mixture of whole grains and root vegetables, braised in tomato juice or vegetable stock served with perogies.

Poland’s golabki, translating to ‘little pigeon feet'(named after the French dish that wrapped cabbage around cooked pigeon), stuffs the leaves with pork, beef, rice or barley, accompanied by sour cream and sweet paprika.

Romanian sarmale combines ground pork, caramelized onions and rice nested in a pickled sauerkraut leaf, then smothered in dill and tomato sauce. It is often topped with bacon or smoked sausage.

The Asian variation wraps Chinese cabbage around seafood blends, tofu and shiitake mushrooms.

Egyptian mahshi kromb are simmered in an aromatic tomato-based sauce with mint, cumin and other Middle Eastern herbs and spices.

Jewish holishkls are a combination of ground beef, rice and raisins enveloped in cabbage leaves and simmered in a sauce of brown sugar, lemon and tomatoes.

Today’s blog recipe gives you some of those same traditional flavors without the fuss of rolling the cabbage and meat. Brion and I really enjoy this particular version. Of course, it’s a given that most recipes will always need tweaking to account for the different cooking conditions and personal tastes.

Print Recipe
Sweet & Sour Cabbage Casserole
Votes: 1
Rating: 5
You:
Rate this recipe!
Servings
Votes: 1
Rating: 5
You:
Rate this recipe!
Instructions
  1. Remove 5 large leaves from a head of cabbage; steam until tender. When cool enough to handle, roll up & cut into 1/2" slices; set aside.
  2. In a large bowl, combine beef, cooked rice, minced garlic, egg, breadcrumbs, salt, pepper & 2 Tbsp parsley.
  3. In a large saucepan, heat oil. Cook onion & chopped garlic for a couple of minutes until fragrant but not brown.
  4. Add sugar, lemon juice, tomatoes & pineapple juice; bring to a boil. Add 2 Tbsp parsley & cook for 15 minutes, breaking up tomatoes with spoon. Season with salt & pepper.
  5. Preheat oven to 350 F. Line a 2 L casserole with 1/3 of the cabbage slices. Spread with half of the meat mixture & 1/3 of the sauce. Repeat with cabbage, meat & sauce. Top with remaining cabbage & sauce.
  6. Bake for about 1 1/2 hours until a meat thermometer reads at least 160 F. Sprinkle with remaining 2 Tbsp parsley & allow to rest for 10 minutes before serving.

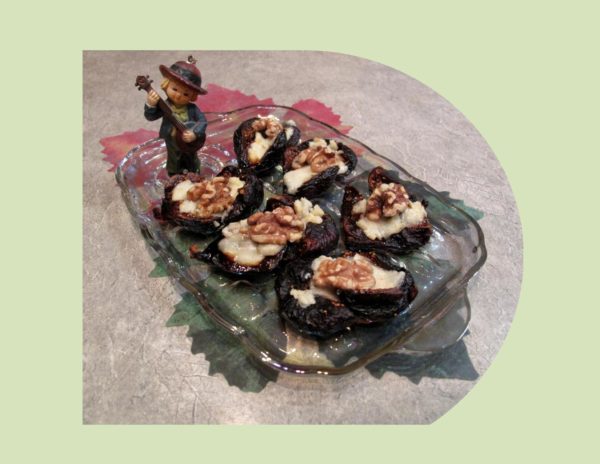
Dried Figs, with Gorgonzola & Walnuts

The flavor combination of deeply sweet figs and the nutty, creaminess of Gorgonzola dolce is one of those pairings where opposites attract.

Among the oldest fruits consumed by humans, figs tell a complex and symbolic story in culinary history. Spanish Franciscan missionaries brought the fig to southern California in 1520, leading to the variety known as Mission figs.

The deciduous fig tree can live as long as 100 years and grow to 50′ (15 m) tall, though they are more typically 10-30′ (3-9 m). Figs flourish in hot, dry climates where the fruit has all-day sun to ripen.

The Black Mission figs are extremely sweet — sometimes even oozing a bit of syrup. They have a blackish-purple skin and dark pink flesh. Figs are best to use when they are very ripe, a little soft rather than firm. If you have figs that aren’t quite ready, use the heating method as that will soften them and add a bit of caramelization.

I came across this recipe excerpted from Cook Like a Rock Star  by Anne Burrell. What a great and unbelievably simple hors d’ oeuver.

Print Recipe
Figs, Gorgonzola & Walnuts
Votes: 1
Rating: 5
You:
Rate this recipe!
Servings
Votes: 1
Rating: 5
You:
Rate this recipe!
Instructions
  1. Preheat oven to 350 F. Place fig halves sliced side up on a baking sheet. Using your finger, make a depression in the center of each. Place 2-3 drops of vinegar in each depression and sprinkle figs with salt.
  2. Fill each fig with a dollop of cheese & top with a walnut piece. Bake until cheese melts & is bubbly, about 5 minutes.