Sweet Almond Milk Couscous with Dried Fruit & Nuts

Couscous beyond lamb stew — sounds interesting! I never really paid much attention to couscous until we had traveled in the North African country of Morocco.

Traditional couscous is prepared with semolina. However, the name nowadays is used to refer to similar preparations made of different cereals, such as barley, millet, sorghum, rice or corn.

In Tunisia, Algeria, Morocco & Libya couscous is generally served with vegetables, cooked in a spicy broth or stew. However, in other countries, it is eaten more often as a dessert.

Couscous is made of tiny granules of various sizes. Traditional methods of preparing them are very labor intensive. The semolina is sprinkled with water and rolled by hand to form small pellets, sprinkled with dry flour to keep them separate, and then sieved. Any pellets which are too small to be finished granules of couscous and fall through the sieve will be rolled and sprinkled again with dry semolina. This process continues until all the semolina has been formed into tiny granules of couscous, which are then dried in the sun. In Western grocery stores, couscous has been pre-steamed and dried, becoming a quick food, ready in 5 minutes by adding boiling water to it.

The main ingredients found in Moroccan desserts are dried fruits with an assortment of nuts and sesame seeds. Spices such as cinnamon, cloves and cardamom along with orange blossom and rose water give that distinctive Middle Eastern taste. Rose water, a liquid distilled from rose petals with steam, dates back to ancient Greece and Persia. It was brought to Europe via treats like marzipan and Turkish delight in the Middle Ages, then later to the American colonies, where it was the most popular flavor before vanilla hit the market in the late 1800’s.

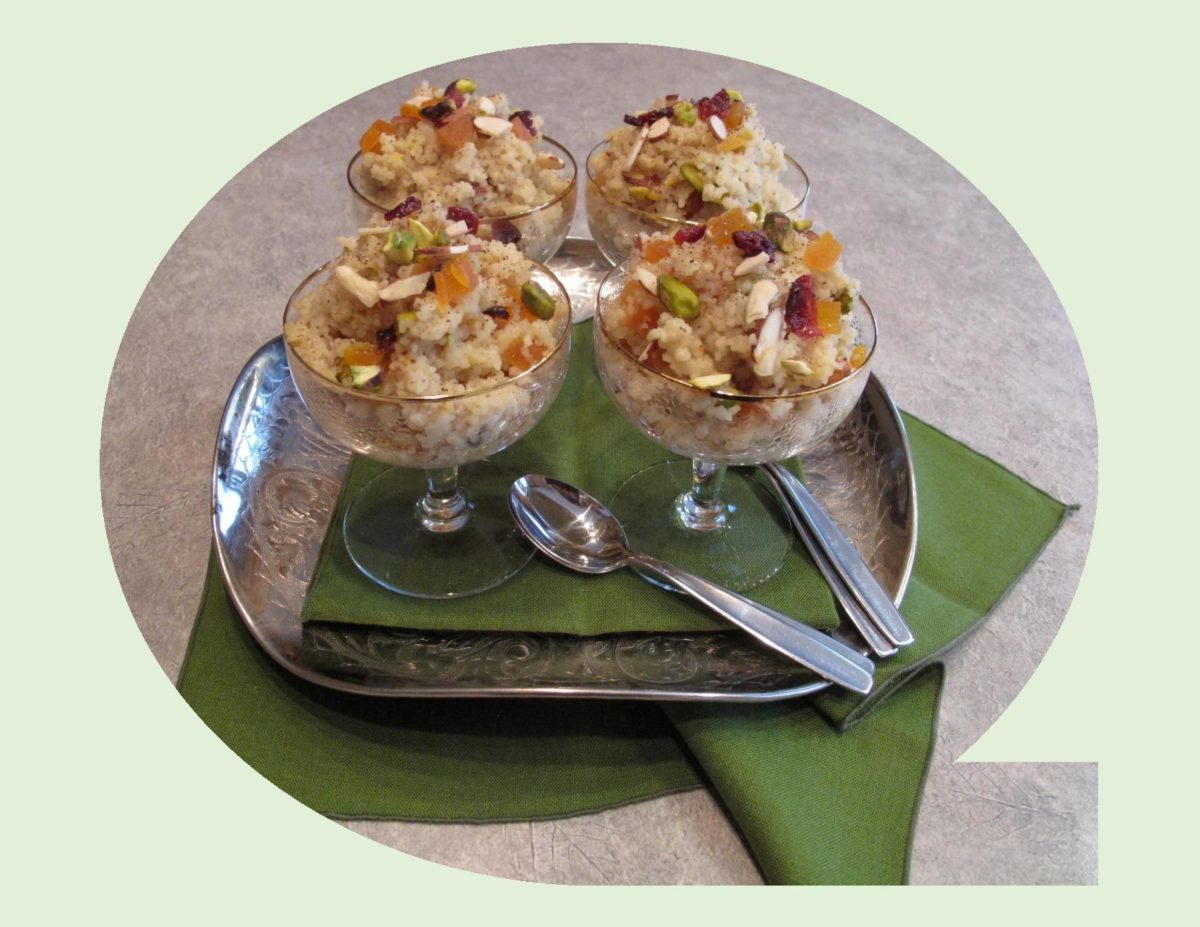
The key is to use rose water sparingly — a little goes a long way. This dessert is loosely based on ‘Moroccan Seffa’, essentially sweetened couscous sprinkled with rose water. It’s like a blank canvas, there are so many combinations you can create. One of my favorite versions starts with almond milk. You can make almond milk yourself with ground almonds and water or just purchase some in the natural section of the grocery store.

When couscous is cooked in this manner it gains a lovely, not-too-subtle almond flavor that takes to the other spices nicely. Not everyone likes rosewater but a sprinkling of it is ‘exotic’ and well worth trying.

I’ve added just a few more photos taken during our time spent in Morocco.

Print Recipe
Sweet Almond Milk Couscous with Dried Fruit & Nuts
Instructions
  1. In a saucepan, bring almond milk, sugar & salt to a boil; add couscous, zest & cardamom. Cover & cook for another minute, then turn off heat & let stand for 5 minutes.
  2. With a fork, fluff couscous & sprinkle with rose water. Add nuts & fruit, gently combining. Serve warm or at room temperature.

Stuffed Zucchini Rolls over Spanish Rice

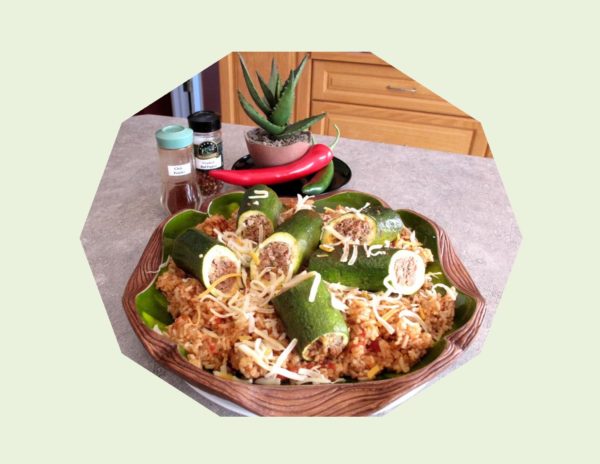
This is a meal that is as much about the process as the final plate. Most everyone has made ‘zucchini boats’ at one time or another and this is a lovely rendition of them.

I have learned from travelling across cultures, that one thing can truly bring people together, no matter where in the world you are from, and that is food. 

No doubt, every culture has its own equivalent of ‘comfort food’. Stuffing vegetables is a Middle Eastern food trend that has been popular for thousands of years, combining spices and food groups in unique ways.

In truth, zucchini are simply immature cultivars of the squash family, eaten while the rind is still edible. Developed in Northern Italy, zucchini was not introduced to the rest of the world until the 1930’s.

‘Kousa Mahshi’ (Arabic for stuffed zucchini), is a type of yellow squash found in the Middle East which is hollowed out, stuffed with a meat/rice filling and steeped in a seasoned tomato broth. These were likely a reinvention of the ‘stuffed grape leaves’  common in the Mediterranean, Balkans and Persian Gulf.

I found the idea of hollowing out the small zucchini and stuffing them quite unique as opposed to just slicing them to make ‘boats’. Rather than using a meat/rice combo in my zucchini rolls, I used a ground turkey/mushroom stuffing and served them over a ‘simple’ Spanish Rice Pilaf.

This is not a difficult recipe, just one that takes a bit of time but is worth it in taste and eye appeal.

Print Recipe
Stuffed Zucchini Rolls over Spanish Rice
Votes: 1
Rating: 5
You:
Rate this recipe!
Servings
Votes: 1
Rating: 5
You:
Rate this recipe!
Instructions
Zucchini
  1. Wash zucchini & slice off stem end. Use a long narrow apple or vegetable corer to core zucchini, leaving 1/2-inch walls. Care should be taken not pierce the shell or the end. If you are cutting your zucchini in half, make sure to leave your cut end with a solid bottom. Gently remove all the pulp from the rolls & set aside. Reserve pulp for turkey filling.
Turkey Stuffing
  1. In a skillet, heat 1 Tbsp olive oil. Saute onion & garlic until soft. Add mushrooms & reserved zucchini pulp; saute about another 2 minutes. Remove from skillet & set aside.
  2. In the same skillet, heat 1 Tbsp olive oil; add ground turkey. Lightly brown, stirring occasionally, about 6 minutes. Stir in reserved onion & mushroom mixture. Add chicken broth; stir in tomato, basil & rosemary & cook 1 minute longer. Drain off any excess fat, remove mixture from heat & set aside. When mixture has cooled, add cheese, egg, salt & pepper. Fill zucchini rolls with mixture.
  3. Preheat oven to 375 F. In a Dutch oven, place stewed tomatoes & water. Arrange stuffed zucchini in the pot. Cover & bake for 25-30 or until zucchini is tender-crisp. With a slotted spoon lift rolls out of pot & serve on top of rice or serve in stewed tomatoes WITH rice, your choice!
'Simple' Spanish Rice
  1. In a large pot, heat oil. Stir in onion & saute until tender, about 5 minutes. Mix rice into pot & stir until it begins to brown. Stir in chicken broth & salsa. Reduce heat & simmer (covered) for 20 minutes until all the liquid has been absorbed & the rice is cooked.

Sweet & Sour Cabbage Casserole

Stuffed cabbage rolls are a unique blend of various flavors. The art of seasoning is about far more than adding a few grinds of salt and pepper. It’s more about sorting out the sweet, sour, savory and bitterness balance.

Food history tells us cabbage rolls have their roots in the ancient Middle East and spread to Eastern Europe as trade routes flourished with various ethnic groups migrating. Many countries lay claim to their origin, which accounts for the several interesting versions on the traditional recipe. For example:

Ukrainian holubtsi  are typically vegetarian, filling pickled cabbage leaves with either buckwheat and wild mushrooms or a mixture of whole grains and root vegetables, braised in tomato juice or vegetable stock served with perogies.

Poland’s golabki, translating to ‘little pigeon feet'(named after the French dish that wrapped cabbage around cooked pigeon), stuffs the leaves with pork, beef, rice or barley, accompanied by sour cream and sweet paprika.

Romanian sarmale combines ground pork, caramelized onions and rice nested in a pickled sauerkraut leaf, then smothered in dill and tomato sauce. It is often topped with bacon or smoked sausage.

The Asian variation wraps Chinese cabbage around seafood blends, tofu and shiitake mushrooms.

Egyptian mahshi kromb are simmered in an aromatic tomato-based sauce with mint, cumin and other Middle Eastern herbs and spices.

Jewish holishkls are a combination of ground beef, rice and raisins enveloped in cabbage leaves and simmered in a sauce of brown sugar, lemon and tomatoes.

Today’s blog recipe gives you some of those same traditional flavors without the fuss of rolling the cabbage and meat. Brion and I really enjoy this particular version. Of course, it’s a given that most recipes will always need tweaking to account for the different cooking conditions and personal tastes.

Print Recipe
Sweet & Sour Cabbage Casserole
Votes: 1
Rating: 5
You:
Rate this recipe!
Servings
Votes: 1
Rating: 5
You:
Rate this recipe!
Instructions
  1. Remove 5 large leaves from a head of cabbage; steam until tender. When cool enough to handle, roll up & cut into 1/2" slices; set aside.
  2. In a large bowl, combine beef, cooked rice, minced garlic, egg, breadcrumbs, salt, pepper & 2 Tbsp parsley.
  3. In a large saucepan, heat oil. Cook onion & chopped garlic for a couple of minutes until fragrant but not brown.
  4. Add sugar, lemon juice, tomatoes & pineapple juice; bring to a boil. Add 2 Tbsp parsley & cook for 15 minutes, breaking up tomatoes with spoon. Season with salt & pepper.
  5. Preheat oven to 350 F. Line a 2 L casserole with 1/3 of the cabbage slices. Spread with half of the meat mixture & 1/3 of the sauce. Repeat with cabbage, meat & sauce. Top with remaining cabbage & sauce.
  6. Bake for about 1 1/2 hours until a meat thermometer reads at least 160 F. Sprinkle with remaining 2 Tbsp parsley & allow to rest for 10 minutes before serving.

Dried Figs, with Gorgonzola & Walnuts

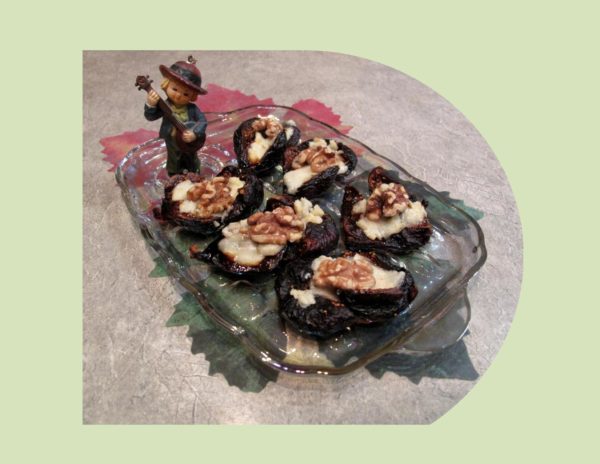
The flavor combination of deeply sweet figs and the nutty, creaminess of Gorgonzola dolce is one of those pairings where opposites attract.

Among the oldest fruits consumed by humans, figs tell a complex and symbolic story in culinary history. Spanish Franciscan missionaries brought the fig to southern California in 1520, leading to the variety known as Mission figs.

The deciduous fig tree can live as long as 100 years and grow to 50′ (15 m) tall, though they are more typically 10-30′ (3-9 m). Figs flourish in hot, dry climates where the fruit has all-day sun to ripen.

The Black Mission figs are extremely sweet — sometimes even oozing a bit of syrup. They have a blackish-purple skin and dark pink flesh. Figs are best to use when they are very ripe, a little soft rather than firm. If you have figs that aren’t quite ready, use the heating method as that will soften them and add a bit of caramelization.

I came across this recipe excerpted from Cook Like a Rock Star  by Anne Burrell. What a great and unbelievably simple hors d’ oeuver.

Print Recipe
Figs, Gorgonzola & Walnuts
Votes: 1
Rating: 5
You:
Rate this recipe!
Servings
Votes: 1
Rating: 5
You:
Rate this recipe!
Instructions
  1. Preheat oven to 350 F. Place fig halves sliced side up on a baking sheet. Using your finger, make a depression in the center of each. Place 2-3 drops of vinegar in each depression and sprinkle figs with salt.
  2. Fill each fig with a dollop of cheese & top with a walnut piece. Bake until cheese melts & is bubbly, about 5 minutes.

Swedish Meatballs

With New Years Eve gatherings fast approaching, these little gems come to mind in the form of  hors ‘d’ oeuvres. Of course, they are always great for a main dish as well.

The Swedish word for meatball, ‘Kottbullar’, first appeared in print around 1754. They are traditional Swedish ‘old-world’ fare at Smorgasbords and other festive occasions. Initially Swedish meatballs were only enjoyed by upper class Swedes but the increased availability of wood stoves and meat grinders in the 1850’s made meatballs accessible to the middle class as well. In northern Scandinavian countries beef was considered a luxury item, which meant meatballs were highly prized.

The meat content can vary based on geography. In southern Sweden, they are most often a 50/50 mix of beef and pork whereas further north in Sweden 70/30 of beef to pork is typical. Likely other options would be veal, venison, lamb or moose. Size-wise, they are smaller than those of Italy or Germany, typically not larger than a golf ball or smaller than  3/4″(2.5 cm) across.

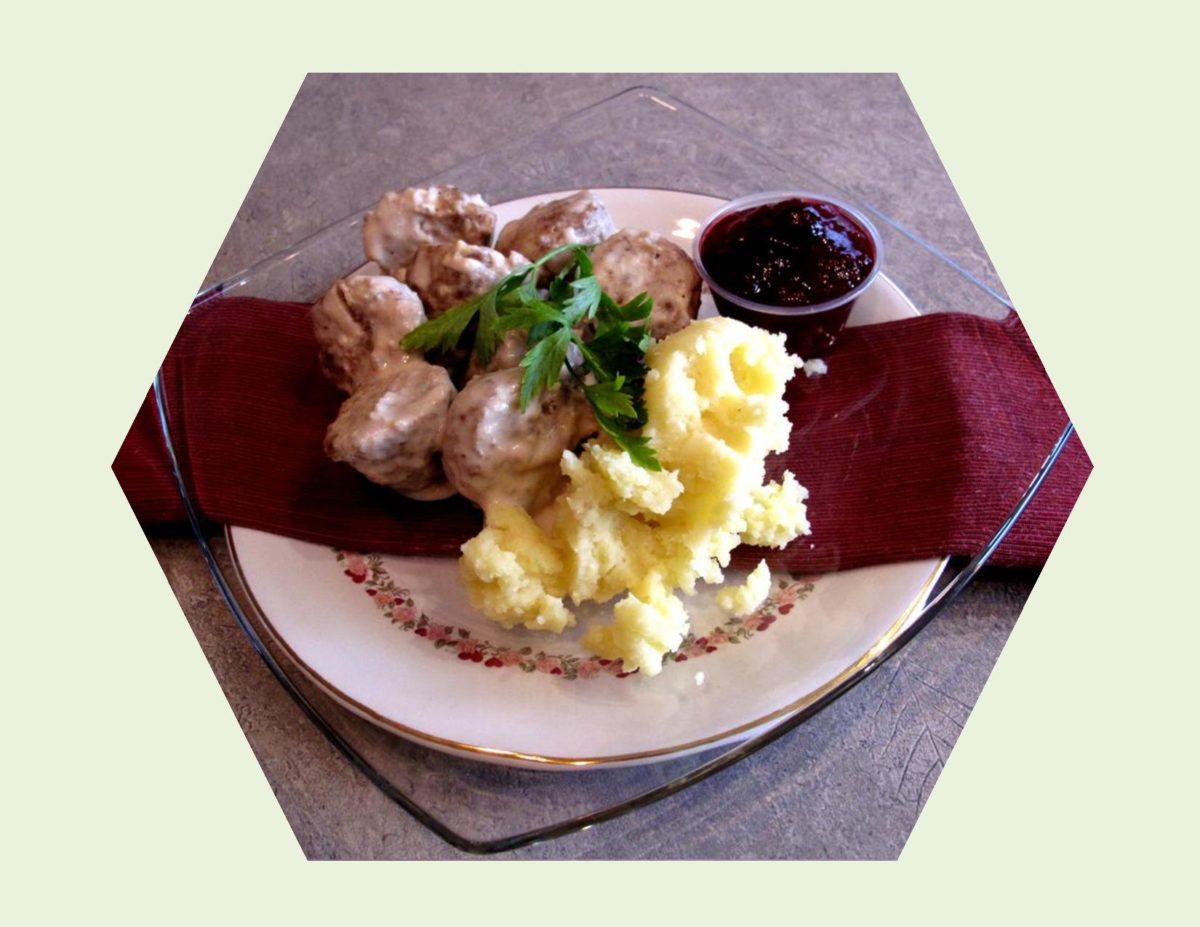
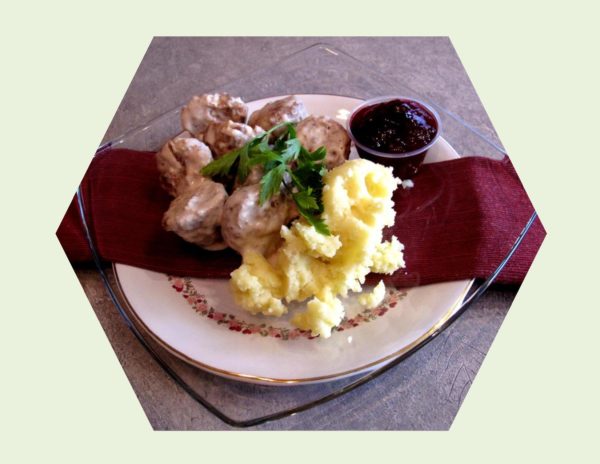
The cream gravy (sauce) and spices play a big part in the taste of this dish, traditionally served with lingonberry preserves, mashed potatoes and pickled cucumber salad. The ‘pressed cucumber’, as it is called, provides some crunch, saltiness and acidity to the sweet creaminess of the rest of the meal.

In America, Swedish meatballs were very popular in the beginning of the 20th century and again in the 1950’s-1960′.

Brion and I have always enjoyed these tasty little meatballs so we are having them as our main course meal today.

Print Recipe
Swedish Meatballs
Votes: 1
Rating: 5
You:
Rate this recipe!
Servings
depending on the size you make
Ingredients
Cream Sauce
Servings
depending on the size you make
Ingredients
Cream Sauce
Votes: 1
Rating: 5
You:
Rate this recipe!
Instructions
Meatballs
  1. Soak breadcrumbs in 2 cups of 1/2 & 1/2 cream. Fry onion in margarine. Combine all meatball ingredients & mix well. Shape into 1-inch balls. Preheat broiler to a high setting.
  2. Place meatballs in a large baking dish, allowing a bit of space in between each one. Broil about 4" (10 cm) from heat until the tops are browned nicely. Watch carefully to avoid burning. Set oven to bake & reduce temperature to 300 F. Bake until meatballs are cooked through, depending on their size. If it seems they are getting too brown, cover lightly with a piece of foil to finish baking.
Cream Sauce (Gravy)
  1. In a small saucepan, cook margarine & flour until bubbly. Slowly add broth & cream; boil for a FEW minutes, add soy, salt & pepper. Pour over hot meatballs.
Recipe Notes
  • This recipe can easily be made in whatever amount you need but I find making the whole thing & freezing them in various amounts works great for quick future meals. Freezing them without any sauce also gives you the option to adapt them to other types of meals.

Apricot-Spice Meatball Hors d’ Oeuvres

The humble meatball is one of the most versatile foods. They seem to exist in just about every culture and can be used in any number of ways, not only with pasta and rice but as a tasty little hors d’ oeuvres. 

I find apricots to be a good compliment to meatball hors d’ oeuvres. Using  Mediterranean (also known as Turkish) apricots is a good choice as their flesh is thicker and plumper as well as having great flavor.

Many people prefer to fry meatballs but it seems to me that usually ends up with a charred outside and they are still raw inside. Baking them in the oven will result in a much more even cooking. Personal choice I guess.

This recipe for  APRICOT-SPICE MEATBALLS  is one I’ve used many times over the years.    They work well at Christmas events when hot                      hors d’ oeuvres are in demand. Make the meatballs up, bake and freeze ahead of time — thaw when needed!  At serving time, make the spicy apricot nectar sauce and your ready to go.

Print Recipe
Apricot-Spice Meatball Hors d' Oeuvres
Votes: 1
Rating: 5
You:
Rate this recipe!
Servings
Ingredients
Spiced Apricot Sauce
Servings
Ingredients
Spiced Apricot Sauce
Votes: 1
Rating: 5
You:
Rate this recipe!
Instructions
Meatballs
  1. Preheat oven to 350 F. Line a 15 x 10 x 1-inch baking pan with foil; lightly grease. Set aside.
  2. In a bowl, combine bread crumbs & milk. Let stand for 5 minutes. Stir in egg white, onion, apricots, salt, garlic & chili powder. Add ground pork & turkey; mix well. Shape meat mixture into 30 meatballs. Place on prepared baking pan. Bake for 15-20 minutes or until meatballs are cooked. Remove meatballs from pan to paper towels.
Spiced Apricot Sauce
  1. In a small saucepan, combine sauce ingredients. Cook & stir over medium heat until thickened & bubbly.
  2. Place meatballs in a slow cooker. Add sauce, stirring gently to coat. Turn heat setting to low. This should keep meatballs warm, while being used by guests for about 2 hours.
Recipe Notes
  • If you find your sauce gets to thick or you prefer it thinner to begin with, just use a little more apricot nectar.
  • This meat combination makes a real flavorful meatball.

Apple-Anise Bread Pudding

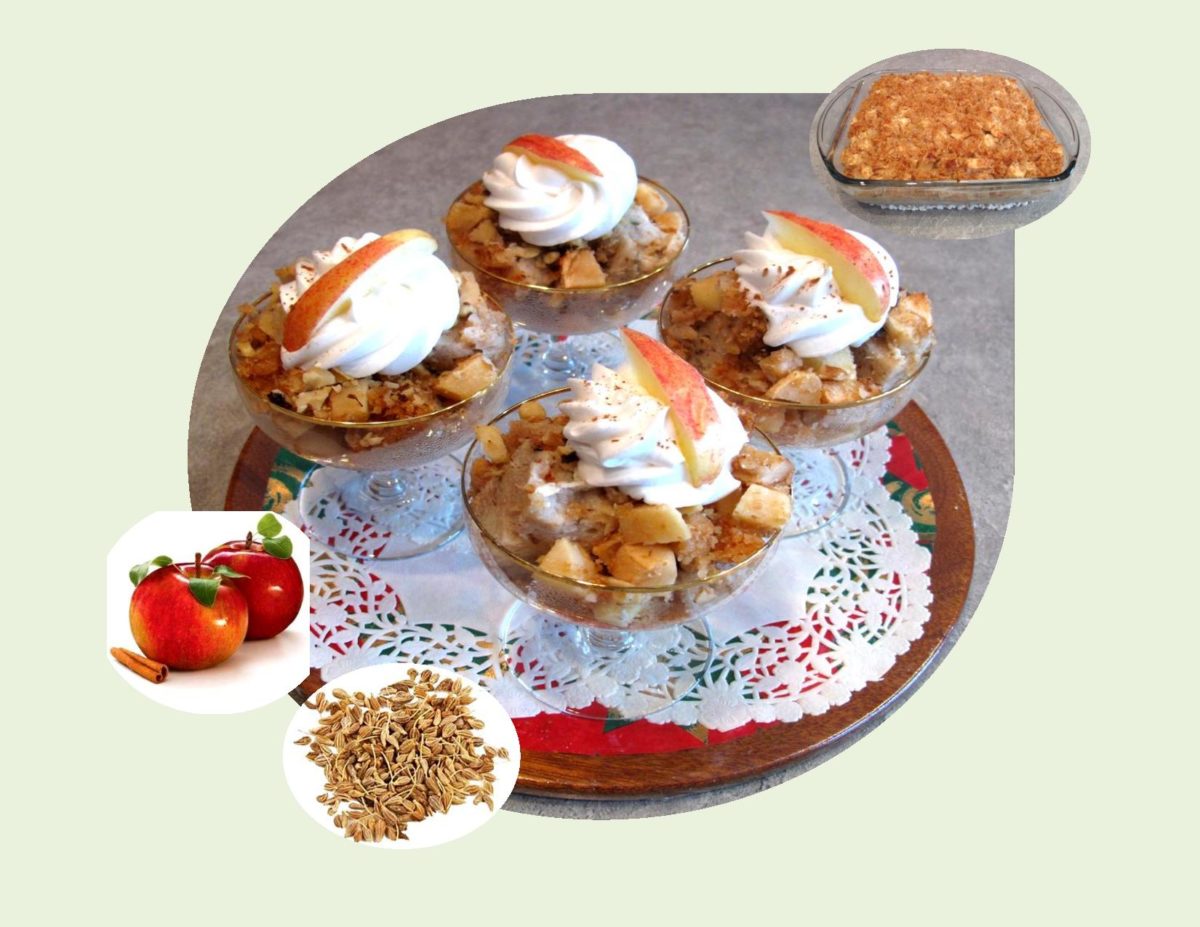
Bread pudding always gives me reason to remember good things. Why is it so beloved, aside from the extreme comfort food factor? It’s not that the dish was invented here — that honor likely goes to clever medieval or even ancient cooks in Europe and the Middle East who had a surplus of stale bread on their hands. The perfect embodiment of the virtues of frugality and indulgence: day old bread, too precious to waste, is bathed in a mixture of milk and eggs and made into either a sweet or savory bread pudding (with a few other additions) and baked into something sublime.

In 2015, ‘The Taste of a Memory’, a memorabilia/cookbook I wrote as a tribute to my wonderful parents, was published. It contained a compilation of stories, articles, recipes and reflections that evoke an intimate memory, special time period and fond emotion brought about by the aroma and taste of food. Writing them down not only puts them in print but allowed me to take a mental journey back to a gentler time. Hopefully this book will be enjoyed by future generations or just anyone choosing to read it. As with my other book endeavors, Brion’s strong support and technical savvy were invaluable.

For today’s blog, I chose a recipe from the book called  APPLE-ANISE BREAD PUDDING. The licorice flavor of anise is one we both enjoy.

Anise seed is native to the Mediterranean basin and has been used throughout history in both sweet and savory applications. Anise seeds are not botanically related to star anise, but have nearly identical flavors and in ground form can be substituted for each other. For most part, Europeans use anise in cakes, cookies and sweet breads where as the Middle East uses it in soups and stews.

I don’t particularly recall my mother using anise in her cooking or baking but for my sister Loretta and I, it’s definitely one of our favorite flavors.  I hope you enjoy this bread pudding recipe.

Print Recipe
Apple-Anise Bread Pudding
Votes: 1
Rating: 5
You:
Rate this recipe!
Servings
Votes: 1
Rating: 5
You:
Rate this recipe!
Instructions
  1. Preheat oven to 350 F. Pulse bread CRUSTS ONLY in a food processor to make bread crumbs. Reserve 1 cup for the topping. Butter an 8 x 8-inch baking dish & coat with 1-2 Tbsp of the remaining bread crumbs.
  2. With a mixer, beat eggs & then add the sugar. Mix in anise seeds, cinnamon, vanilla & milk until combined. Pour into a large bowl & add bread bread cubes. Fold together gently with a spatula then pour into prepared baking dish. Top with diced apples & chopped walnuts.
  3. In a small dish, combine reserved 1 cup bread crumbs with 2 Tbs melted butter & 1 Tbsp sugar. Sprinkle topping evenly over pudding.
  4. Prepare a 'hot water bath'. For this you will need another pan that's larger than & at least as deep as the bread pudding pan itself. When you set the bread pudding pan in it and add water it should go about halfway up the sides. This will ensure even, slow baking for a smooth velvety result.
  5. Bake about an hour or until it tests done. Pudding should be puffy & golden. Serve as is or with whipped cream, your choice!
Recipe Notes
  • ANISE SUGAR -    for tea, on top of cookies or over fruit.
  • In a blender, combine 1 cup sugar with 1 T. anise seed
  • Blend on high speed until mixture is thoroughly combined
  • Store in a moisture proof jar


Egyptian Kofta

Over the years, our travels have taken Brion and I to many interesting places in the world. Each has left us with amazing memories.

In November of 2009, before Egypt was in such disarray, we explored this ancient country. You could safely say that time has not lessened the mystique of the world’s oldest tourist attraction. No matter how many pictures you look at, or how much you read on the internet, there is just nothing as powerful as seeing the real thing. Brion’s ability to speak fluent Arabic was a huge bonus for us while in Egypt.

The flight from Edmonton, Alberta, Canada to Cairo, Egypt was a bit grueling at 16 hours long but we ‘recovered’ fairly fast. To make the most of our vacation, we divided it into four segments; – five days in Cairo, six days in Alexandria, eight days on a Nile River cruise and the last week at Sharm El Shiekh on the Red Sea.

The Nile River cruise was definitely the highlight of the vacation. We boarded the ‘Helio’ cruise ship in Luxor which took us to Aswan and back. Each day the ship would dock at various sites along the way and our personal guide would take us to explore temples, tombs, the high dam and the beautiful botanical gardens at Kitchener Island. It was such an incredible experience viewing the sights and sounds as you slowly sailed along. Travel is a good reality check to make us appreciate what we have in our own lives and so often take for granted.

Every evening, the supper buffet on the ship was created with a different theme. One of the items Brion really enjoyed was ‘EGYPTIAN KOFTA’. Egypt’s local and rich resources of fresh foods coming from the Nile Valley, has given the world some of the most coveted cuisines. Egyptian food is a mixture of all the different civilizations that came to Egypt in the history of its existence.

The word kofta (or kefta) has its origins in Persia. Although you can make meat, seafood or vegetarian kofta, the most popular in Egypt is a mixture of ground beef and lamb combined with onions, garlic, parsley and a ‘BAHARAT’ spice blend.

Along with my recipe today, I thought you may enjoy to look at some of the photos from our Nile River cruise. 


Print Recipe
Kofta
This is the burger meat of the Middle East.
Votes: 1
Rating: 5
You:
Rate this recipe!
Servings
skewers
Ingredients
Servings
skewers
Ingredients
Votes: 1
Rating: 5
You:
Rate this recipe!
Instructions
  1. Soak 16 wooden skewers in water for about 1 hour; remove from the water when you are ready to begin. Lightly oil grates of grill or BBQ & preheat to medium high temperature.
  2. In a large bowl, combine all ingredients thoroughly. Divide meat mixture into 16 portions. Mold each onto a wooden skewer to form a 'kofta kebab' about 1-inch thickness.
  3. Place kebabs on lightly oiled, heated grill or BBQ. Grill for 4 minutes on one side, turn over & grill for another 3-4 minutes. Serve immediately with mini pita breads, tahini, hummus or yogurt dip.