One of the many aspects of Mexican food that has been essential for so many years is chicken. Chicken has played a massive role in both Mexico’s food and culture for centuries. Today, it is still one of the most popularly consumed forms of protein across the country and can be added into any dish perfectly.
Today’s blog recipe is juicy, flavorful Mexican-inspired chicken smothered in a creamy, rich cheese sauce and served over Mexican rice. To say Mexican rice is simply just rice is an understatement. Mexican rice comes from a flavorful history and is served a number of different ways. For example, in Northern Mexico, Mexican rice is typically prepared with chicken broth and flavored with tomato. In Southern Mexico, white rice is more common as a side to many dishes. Common ingredients in Mexican rice typically include spices like cumin, cilantro, parsley, and tomato sauce or salsa.
Mexican rice is prepared by browning long-grain rice in cooking oil, then flavoring it with onion, garlic, and tomato sauce, salsa, or paste. Typically, parsley and cilantro are added to enhance the flavor and color of the rice. Often, Mexican rice is seasoned with cumin, chili powder, and other spices. Traditionally, vegetables like carrot and corn are added into the rice to add another layer of texture.
Mexican rice is more than just a side dish; it’s a symbol of the rich culinary heritage of Mexico. From its origins as a humble fusion of Spanish and indigenous ingredients to the diverse regional variations that exist today, Mexican rice is a dish that continues to evolve while remaining rooted in tradition.
Print Recipe
Mexican Chicken & Rice w/ Cheese Sauce
Votes: 1
Rating: 5
You:
Rate this recipe!
|
|
Votes: 1
Rating: 5
You:
Rate this recipe!
|
Instructions
Chicken
Mix together your seasonings & season both sides of the chicken breasts well. Heat a grill pan over medium to high heat & grill the chicken until done. Set aside.
Cheese Sauce
In a medium sized sauce pot, melt butter over medium heat. Whisk in flour & cook until it begins to just bubble around the edges.
Add in the milk, slowly, whisking to combine as you go. Continue to whisk until mix as heated through. It needs to be hot enough to melt the cheese, but not boiling.
When the mix is hot, start whisking in cheese in small amounts at a time until all of the cheese has been mixed in. Once the cheese is melted, stir in the paprika & cayenne pepper. Season with salt if needed. Serve hot over the chicken.
Rice
In a large saucepan, heat the oil over medium heat. Add the rice, stir to coat in the oil & cook until slightly golden. Stir in the garlic, salt & cumin.
Add the tomato sauce & chicken broth. Turn the heat to medium high heat & bring the mix to a boil.
Once boiling, reduce heat to low, cover with a lid & allow to simmer for 20 to 25 minutes. Remove from heat, toss in freshly chopped cilantro, stir to combine.
Serve under Mexican chicken topped with cheese sauce.
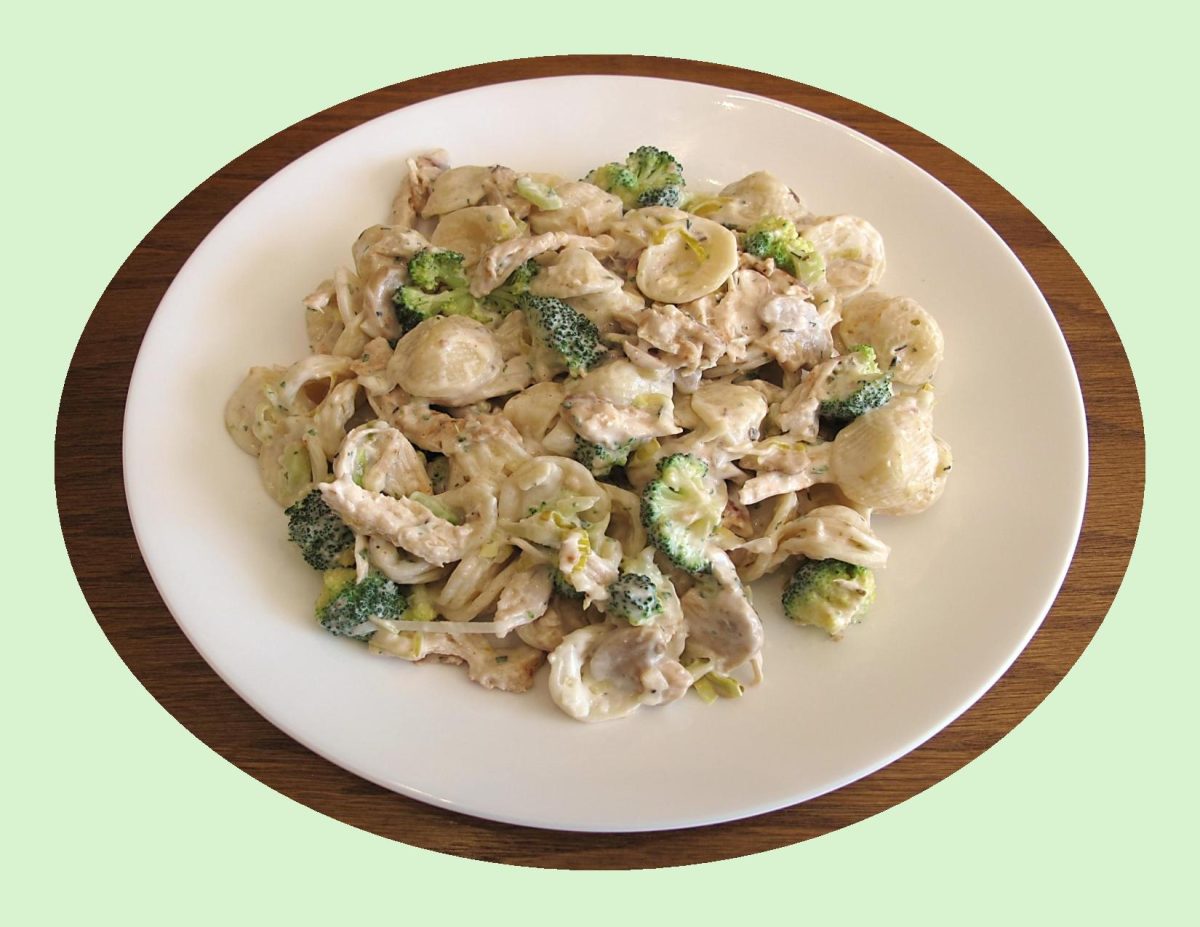
As far as vegetables are concerned, broccoli is a bit divisive, people either love it or hate it. Broccoli is native to the Mediterranean and has been considered a very valuable food by the Italians since the Roman Empire, but when first introduced in England in the mid-18th century, broccoli was referred to as ‘Italian asparagus’. There’s a misconception that Italians only eat pasta. While they do eat a lot of pasta, they also eat a ton of vegetables.
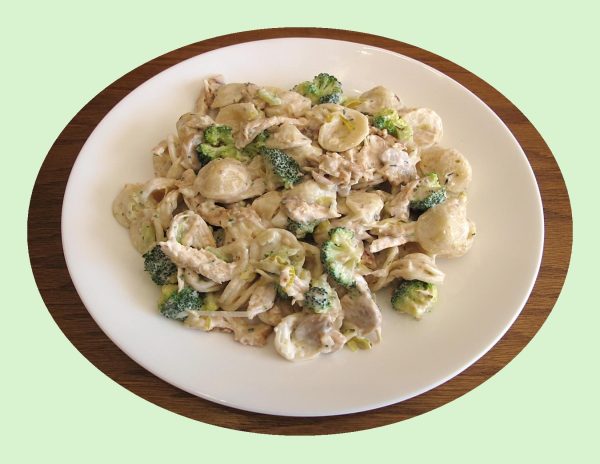
Orecchiette with broccoli is a wonderfully simple Italian comfort food. Stretched between the Adriatic and Ionian seas, Puglia’s sun-soaked landscape in southern Italy is where orecchiette pasta hails from. Meaning ‘little ears’ in Italian, the dish is made by flattening out dough and simply rolling your thumb like a fingerprint onto the dough. This creates an ear-shaped disc that resemble small bowls that have grooves from the fingerprint that are perfect at holding all types of sauces.
A classic combination for orecchiette is broccoli with sausage. Creamy sauces also go well with orecchiette, as do fresh tomato and pesto sauces. Orecchiette is also often served with tomato-based sauces such as marinara.
To make this a bit more of a hearty meal, I’m adding some chicken breast today. I think it should be really good!
Print Recipe
Chicken Broccoli Orecchiette
Votes: 1
Rating: 5
You:
Rate this recipe!
|
|
Votes: 1
Rating: 5
You:
Rate this recipe!
|
Instructions
Bring a medium pot of salted water to boil. Pour the dry orecchiette pasta into the water, stir with a wooden spoon & bring the water back to a boil. Boil the pasta until it is just barely tender, between 10 -15 minutes. Pull one piece of orecchiette out of the water with the wooden spoon after 10 minutes to check for doneness. Orecchiette should be cooked al dente, tender but firm.
When the pasta is done, carefully scoop 2 cups cooking water out of the pot with a measuring cup & set aside. Set a strainer over the sink & pour the orecchiette into the strainer to drain the remaining water. Do not rinse. Return to pasta pot.
Place fresh broccoli in a microwave steamer dish & cook for a couple of minutes until tender crisp. Drain & add to pasta pot with orecchiette.
Heat the oil in a large skillet over medium-high until sizzling. Pat the chicken breasts very dry with paper towels & season the tops generously with salt & pepper. Add the chicken to the pan, seasoned side down (season the sides facing up once you place them in the pan); do not disturb the chicken once it is in the skillet. Once you can see a bit of golden color forming around the sides, after about 2 minutes or so, take a peek — the goal is to achieve a deep golden brown shade.
Once you flip the chicken, take its temperature with an instant-read thermometer. Pull it from the pan when the temperature is between 155°F & 160°F. If the chicken is very thin, it may be almost done. If it's on the thicker side, it may need a few more minutes. Checking early allows you to gauge the remaining cooking time. Once the chicken is done, slice into thin strips & add to pasta pot.
Add the butter to the skillet. Once melted, add the mushrooms. Sprinkle with salt & cook, stirring occasionally, until tender & golden, 7 to 10 minutes. Add the garlic & cook for 20 to 30 seconds. Add the cream cheese & stir until melted & smooth. Whisk in 1 cup of the reserved pasta water, a little at time, until smooth, followed by the parmesan. Pour the sauce over the noodles, broccoli & chicken, toss to coat. If it's not quite creamy enough, add a little of the remaining pasta water. Taste & adjust seasoning.
Garnish with additional Parmesan.

It’s easy to fall into predictable patterns when preparing food, and you may just end up roasting it and eating it the same way every time.
Take for instance stuffed chicken breast … stuffing doesn’t always have to start with bread or rice. Chicken is a blank canvas for flavors, and its protein-rich nature provides a satisfying base for creamy brie. It’s the stuffing that makes this roasted chicken breast outstanding. The combination of chicken and brie is delicious because the creamy, mild, and slightly nutty flavor of brie complements the savory, tender, and versatile nature of chicken, creating a satisfying and flavorful dish. The cherries add a splash of color while keeping the chicken moist.
Unique flavors combined together. So Good!
Print Recipe
Dark Sweet Cherries & Brie Stuffed Chicken
Votes: 1
Rating: 5
You:
Rate this recipe!
|
|
Votes: 1
Rating: 5
You:
Rate this recipe!
|
Instructions
-
Drain cherries & set aside; slice brie into long 1/2-inch strips. Coarsely chop basil.
Using a meat mallet, flatten chicken breasts to be uniform in width. Salt & pepper each side. Make a slit in the center of each breast, lengthwise, making sure to not cut all the way through.
Divide brie slices evenly between the 4 breasts the top with drained whole cherries. Sprinkle with a bit of fresh chopped basil.
Melt butter on a plate. Place panko crumbs on another plate. Carefully dip both sides of each chicken breast in butter then coat each with panko crumbs.
Line a baking sheet with foil paper & spray with baking spray. Carefully lay the chicken breasts on it then spray chicken breasts with baking spray as well.
Bake for 30-35 minutes or until cooked but not dry. Remove from oven, place on serving dish & drizzle with balsamic glaze if you wish or serve as is.

The classic Italian potato dumplings or gnocchi as their called, make for a hearty meal no matter how you serve them: baked with creamy cheeses, sautéed with veggies, dressed in a tangy tomato sauce… you name it. The most common way to serve them in Italy is with a light butter sauce and fresh sage.
Gnocchi go back to Roman times when they were made of semolina dough mixed with eggs, but they have evolved into many different variations since then. At first, they existed with different ingredients such as squash and breadcrumbs, made of ordinary wheat flour or cornmeal. Then came the cheese and potatoes. But they didn’t become the potato dumplings we know today until the 16th century when potatoes were introduced to Europe. The potato gnocchi originated in Northern Italy, where the cooler climate was better suited for growing potatoes rather than grain. These potatoes are starchier and make the light, airy dough which produces the soft, pillowy texture and more ‘potatoey’ flavor of the gnocchi.
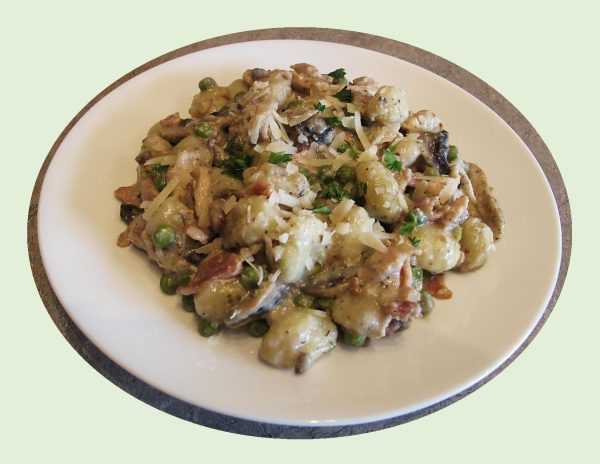
Being a dumpling lover, I absolutely love gnocchi any way they are served. This recipe boasts all the winning attributes of a well-balanced meal. The creamy sauce softens and flavors the pillowy potato gnocchi – a perfect base for the tender seasoned chicken breast.
From their humble beginnings, the gnocchi are now a world cuisine.
Print Recipe
Gnocchi w/ Chicken & Veggies
Votes: 1
Rating: 5
You:
Rate this recipe!
|
|
Votes: 1
Rating: 5
You:
Rate this recipe!
|
Instructions
In a skillet over medium-high heat, cook bacon until crisp, 5-7 minutes, stirring occasionally. Remove bacon with a slotted spoon & set aside.
Season chicken breast with salt, pepper & 1 tsp of the Italian seasoning. Add the chicken to the skillet & cook 5-7 minutes per side. Remove chicken from the pan & set aside.
Reduce heat to medium, add garlic & mushrooms; cook until fragrant. Add the milk, gnocchi, cheese, bacon & remaining Italian seasoning. Bring to a boil, reduce heat & cook, stirring frequently, until the milk has reduced slightly & started to thicken, about 3-5 minutes.
Stir in peas. Add the cooked chicken & simmer until peas are cooked & sauce thickens a bit more. Place in a serving dish & sprinkle with extra parmesan if you wish.
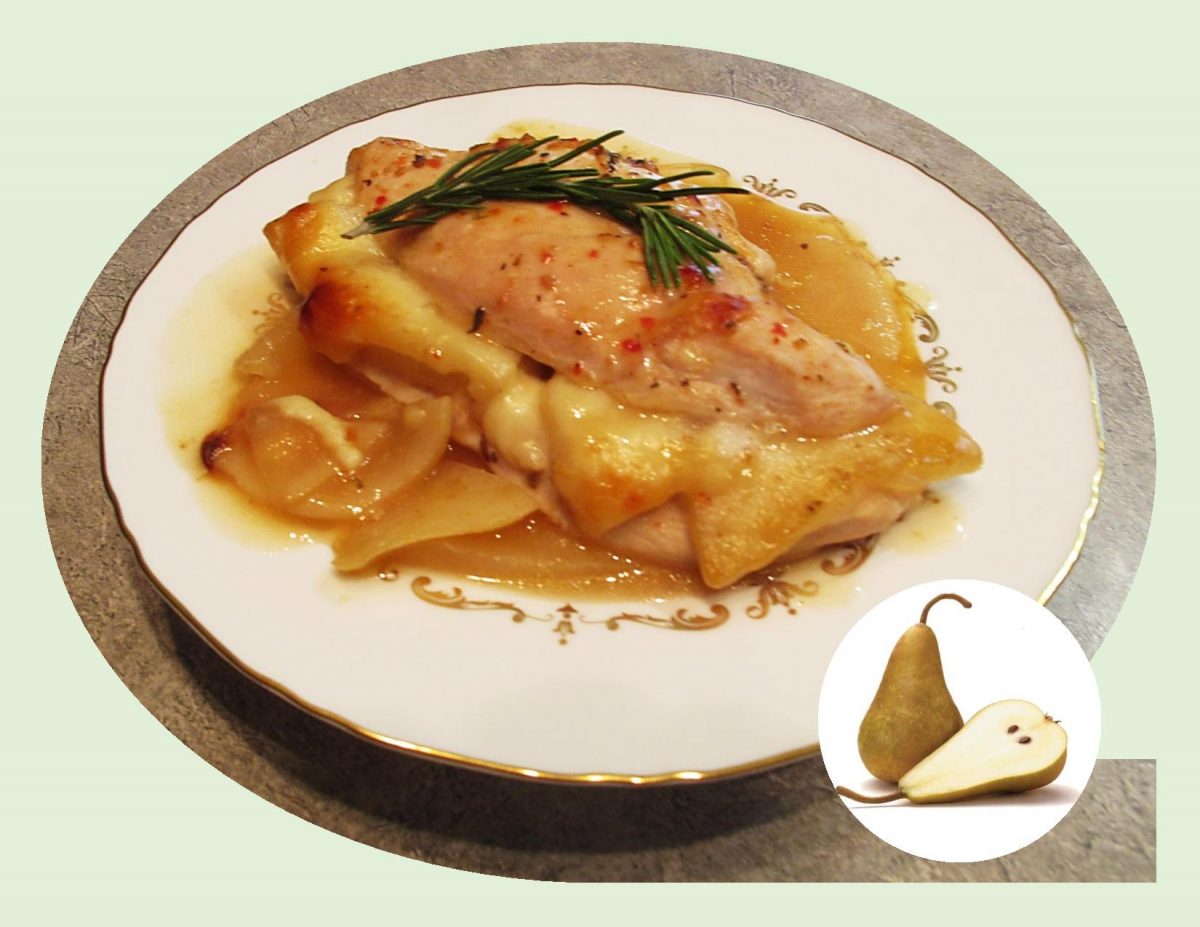
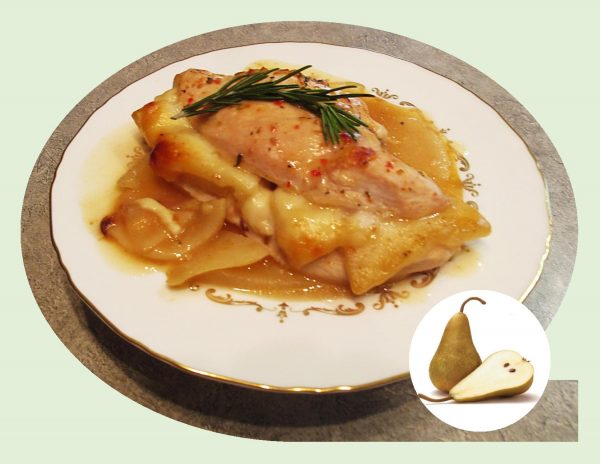
Normally, you would think any meal with Cordon Bleu in its name has ham and cheese in it. Not this time, how about a fall fruit inspired meal using some sweet and spicy Bosc pears.
Bosc pears stand out in a crowd for many reasons. Their long, curved stem and elegant elongated neck widens gradually to a full rounded base. Bosc is unique for their color: a warm cinnamon brown with russeting over the surface of the skin.
Bosc pears have an interesting, (and as yet) not completely resolved history. It remains a matter of contention whether Bosc are of Belgium or French origin.
Fall is prime time for the Bosc pear. They are ideal for cooking and baking, hold their shape and don’t get mushy when poached. The Bosc pear’s flavor is almost floral with hints of cinnamon and honey …. quite complex.
This meal is so simple to prepare but the flavor is absolutely wonderful.
Print Recipe
Pear Stuffed Chicken Cordon Bleu
Votes: 1
Rating: 5
You:
Rate this recipe!
|
|
Votes: 1
Rating: 5
You:
Rate this recipe!
|
Instructions
Preheat oven to 375 F. Spray an 8-inch baking dish with cooking spray; set aside.
Using a sharp knife, make a lengthwise cut in the thickest side of the chicken breasts, being careful not to cut all the way through.
Divide cheese & pear slices between the 4 chicken breasts to fill the pocket in each. Any remaining pear slices can be laid on the bottom of baking dish. Arrange stuffed chicken breasts over extra pear slices then top with gravy.
Bake 25-30 minutes or until chicken is cooked. Sprinkle with sage or thyme.
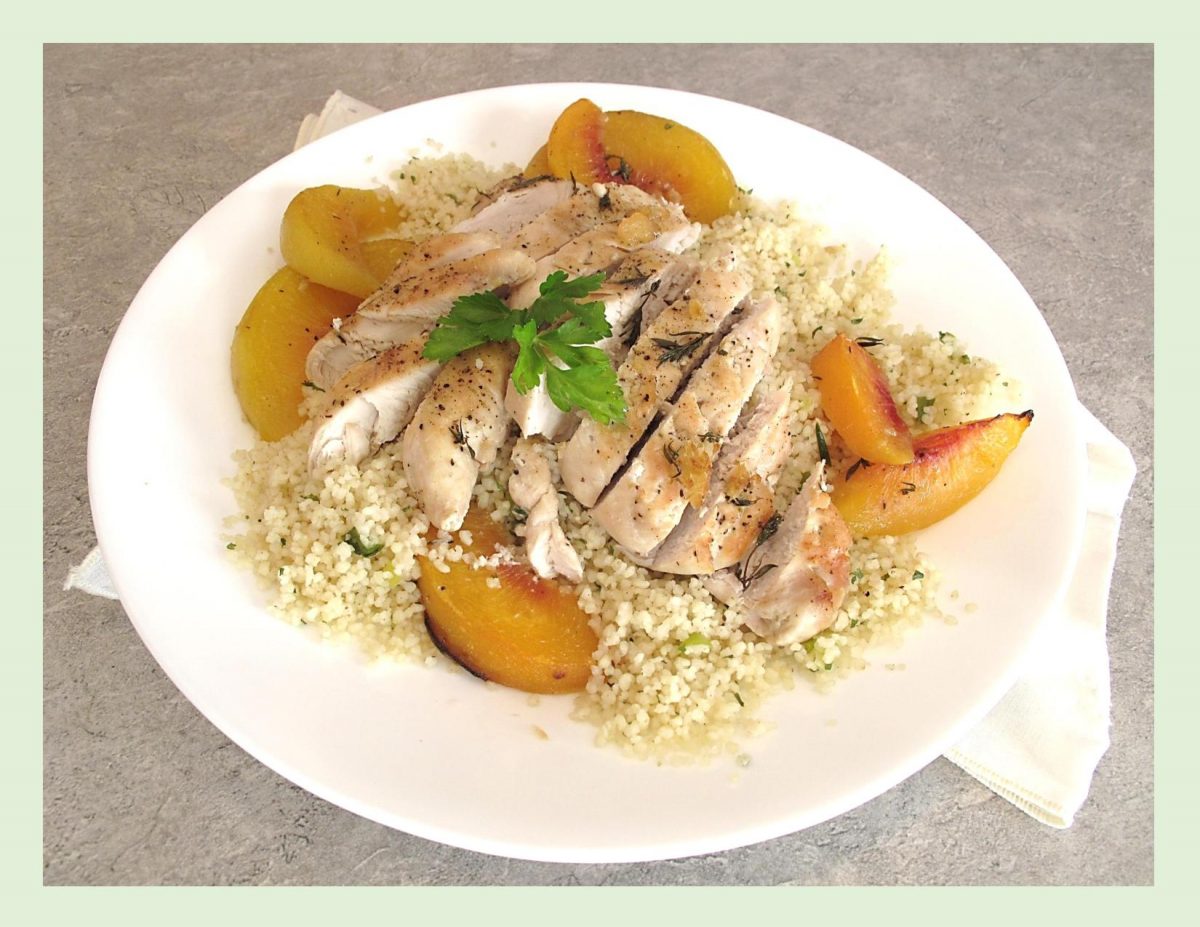
Meat and fruit pairings are delicious, yet the idea of using both fruit and meat in the same dish is undoubtedly a little controversial.
One of the things I enjoy about cooking is combining flavors to create a wholesome dish. Sometimes, its interesting just to combine ingredients and flavors that don’t seem like they should go together.
Chicken is a good match for a wide variety of fruits with peaches being one of them. Whether fresh or frozen, nothing partners better with peaches than fresh ginger. To enhance the flavor just a bit more, I’m making a fluffy, golden couscous, speckled with green onion and fresh parsley. Subtle cumin and ginger spices add a heady fragrance and warm flavor. Nothing fancy, just a great taste!
Print Recipe
Chicken w/ Peaches & Ginger
Votes: 1
Rating: 5
You:
Rate this recipe!
|
|
Votes: 1
Rating: 5
You:
Rate this recipe!
|
Instructions
Chicken
-
Heat oil in a large skillet over medium heat. Season the chicken with salt & pepper & cook on one side until golden, about 4-6 minutes. Flip, cook for 1 minute then transfer chicken to a 9x13-inch baking pan.
Place peaches, sugar, thyme & ginger over & around chicken. Add the chicken broth & bake for about 45 minutes or until chicken is cooked through. While chicken is baking prepare couscous.
Couscous
Heat 1 teaspoon of olive oil in medium saucepan over medium heat. Add green onion, cumin, ginger & garlic clove. Cook & stir for about 3 minutes until green onion is softened.
Add honey. Heat & stir for about 30 seconds until green onion is coated.
Add broth. Bring to a boil. Add couscous & 2 teaspoons oil. Stir. Cover. Remove from heat. Let stand for 5 minutes without lifting lid. Fluff with fork. Stir in chopped parsley & season with salt & pepper to taste.
Serve the chicken & peaches over couscous with any ginger sauce from baking pan.
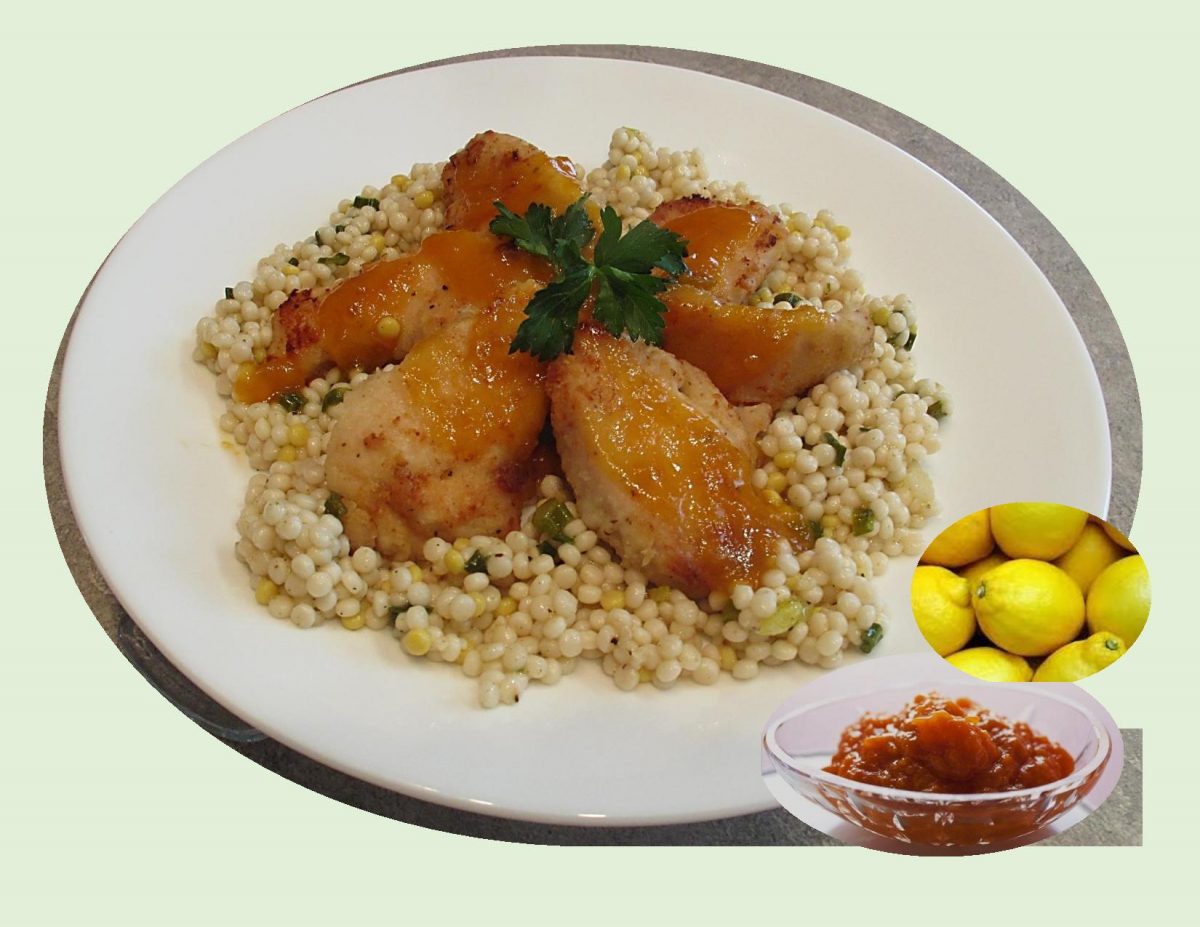
The flavors of the meal hint of Moroccan cuisine to me. It wasn’t until Brion & I visited Morocco on a holiday one year, that I realized how many of their spices appealed to me.
Moroccan cuisine is very refined because of its interactions and exchanges with other cultures and nations over the centuries. Its dishes are layered with sweet and spicy, earthy and bright flavors that reflect the vast array of spices available in their local markets.
Often referred to as the national dish of Morocco, couscous is made of tiny balls of wheat semolina, steamed so they’re are soft and fluffy. Subtle cumin and ginger spices add an exotic flavor to it.
Pairing apricot and lemon flavors with the chicken breast and serving it over couscous makes this simple meal quite special.
Print Recipe
Apricot Lemon Chicken Breast w/ Couscous
Votes: 1
Rating: 5
You:
Rate this recipe!
|
|
Votes: 1
Rating: 5
You:
Rate this recipe!
|
Instructions
Chicken
Preheat oven to 425 F. Spray a baking sheet with cooking spray.
Beat egg & water slightly. Stir together baking mix, lemon pepper & garlic powder. Pound chicken breasts gently to achieve uniform thickness. Dip chicken into egg mixture, then coat with baking mix mixture. Place on baking sheet & drizzle with melted butter.
Bake uncovered 20 minutes; turn chicken. Bake about 10 minutes longer until no longer pink inside. While chicken is baking prepare couscous & sauce.
Couscous
In a saucepan, heat 1 tsp oil; add green onion, cumin, ginger & garlic. Cook & stir for about 3 minutes until green onion is softened.
Add honey. Heat & stir for about 30 seconds until green onion is coated. Add broth. Bring to a boil. Add couscous & second amount of oil. Stir. Cover & remove from heat. Allow to stand for 5 minutes without lifting lid. Fluff with a fork & stir in remaining 3 ingredients.
Apricot Lemon Sauce
In a small saucepan over low heat, combine sauce ingredients, stirring occasionally, until warm.
To Serve
Place couscous on a serving platter. Top with chicken breasts & drizzle with apricot lemon sauce. Serve.

This week we celebrate my husband, Brion’s birthday. Since we have never felt the need to mark such occasions by giving gifts, we would rather just make some memories together. In January of this year (2019), we enjoyed a wonderful vacation in Merida, Mexico. Known for its rich history in Maya culture and tradition, Merida is also the capital of the Yucatan.
Although referred to as a colonial city, Merida has distinguished itself from other cities in Mexico by having something that can only be seen in its originality in the state of Yucatan, even more in Merida. The ‘you & me’ chairs or the ‘sillas tu y yo’, bring unique quality to this beautiful city. These chairs can be seen all around Merida. When you sit down you are facing the other person. The origin of these chairs is unclear. Popular legend has it that an over-protective father in Merida created this chair design so when his daughter was with her boyfriend they could talk comfortably without having to sit next to each other. The chairs have become part of the city’s culture and individuality.
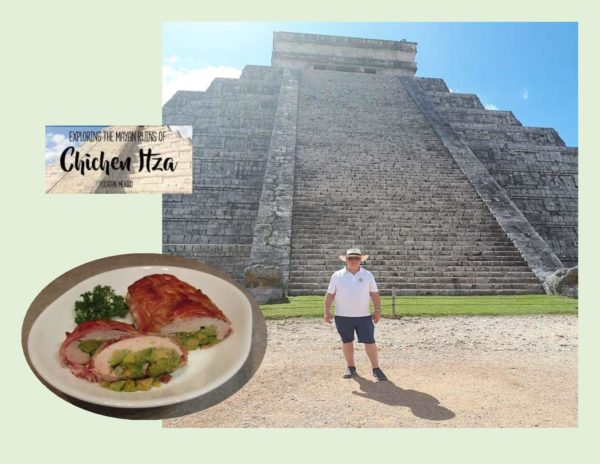
We had such a great time and felt wonderfully safe during our stay. As I mentioned in a blog from February (2019), one of Brion’s ‘bucket list’ items was to visit Chichen Itza. It was amazing!
As always, Brion had done a great deal of research on the area before we went. I am always grateful for the ‘flawless’ vacations we have enjoyed over the years due to his careful planning.
THANKS FOR BEING THE SPECIAL PERSON YOU ARE!
BIRTHDAY WISHES, TO THE LOVE OF MY LIFE
Print Recipe
Bacon Weave Stuffed Chicken Breast
Votes: 1
Rating: 5
You:
Rate this recipe!
|
|
Votes: 1
Rating: 5
You:
Rate this recipe!
|
Instructions
Avocado Filling
In a small bowl, combine avocado filling ingredients. Set aside until chicken is ready to stuff.
Meat Preparation
Place the chicken breasts between 2 pieces of plastic wrap. Using a meat mallet, carefully pound chicken breasts until an even 1/2-inch thickness. On 2 large sheets of plastic wrap, prepare a bacon 'weave' square for each chicken breast. Place 3 strips of bacon perpendicular to you. Weave 3 more strips parallel to you by folding down alternating strips (no different than a lattice weave pastry crust).
Divide avocado filling between the 2 flattened chicken breasts. Using plastic wrap, roll both bacon & chicken together to form a 'parcel'. Tuck in any loose bacon ends & secure with toothpicks.
Preheat oven to 400 F. In a heavy oven-safe skillet, heat 1-2 Tbsp olive oil over medium heat. Sear the bacon wrapped chicken on both sides for a few minutes. Cover pan with foil & place in oven for 20-30 minutes or until internal temperature reaches 165 F on an oven thermometer.
-
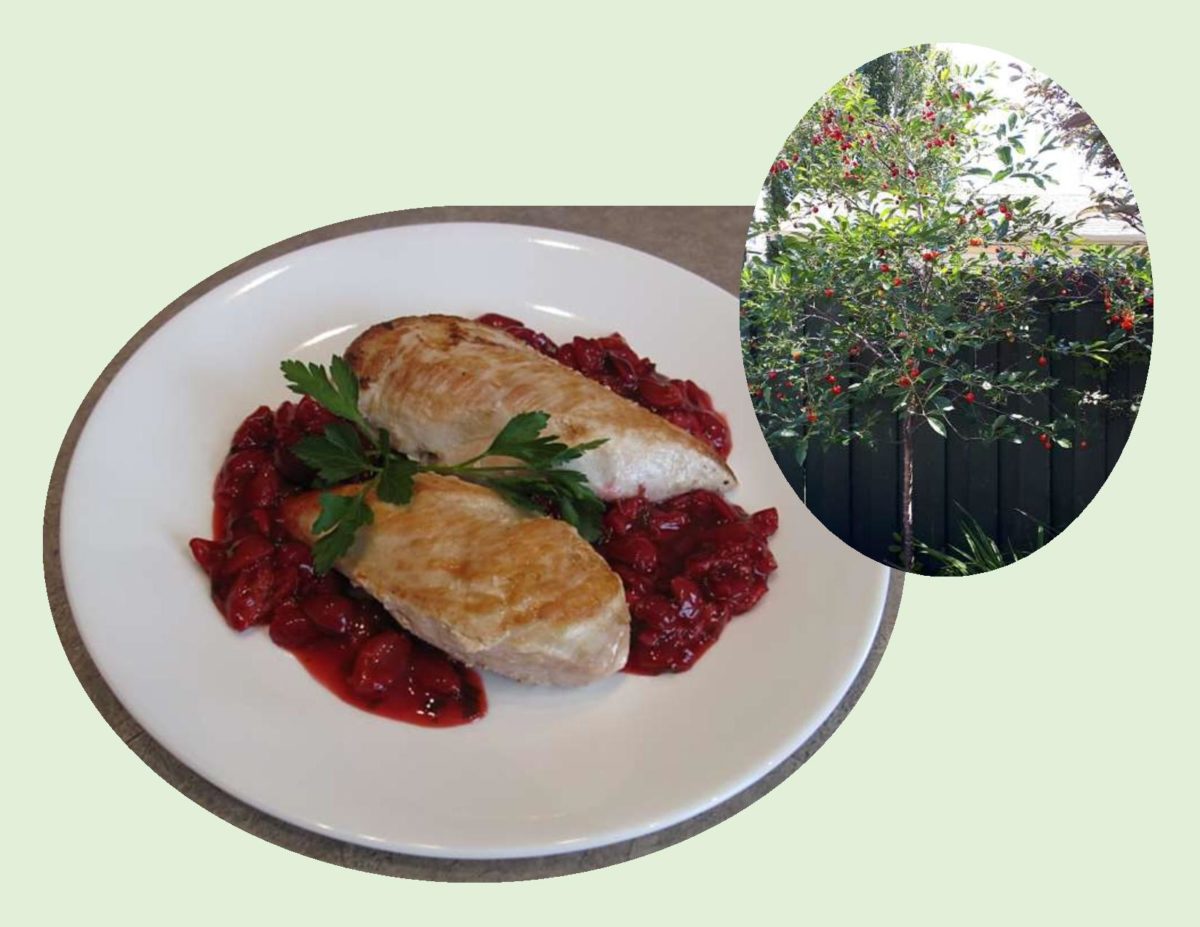
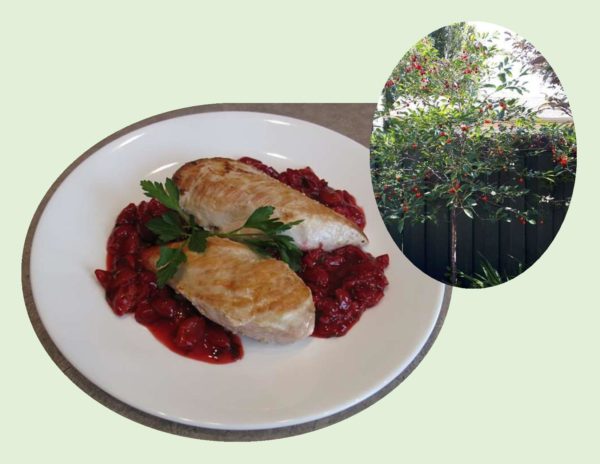
That great little cherry tree of ours just keeps on giving. Since we have a water fountain in our yard, the birds are definitely around but there seems to be well enough cherries for them and us. As I’ve mentioned in earlier blogs, this fruit is not the sweetness of the well-known Bing cherry but more a semi-sweet flavor. It is just perfect for baking, jams, jellies or in a cherry liqueur.
Over the years, I have come to really enjoy the flavor of chutneys. I realize it gets a little murky when you bring up the subject of salsa, relish or chutneys. Here’s a mini clarification just for interest.
Salsa is usually mixtures of raw vegetables and/or fruits. Sometimes they contain onions, herbs and chili peppers or with just fruit and various seasonings.
Relish has the ingredients usually cut finer and are cooked with a good quantity of sweetness.
Chutney is almost always cooked and can contain fruit and vegetables. They most often are made with aromatics like ginger root, cinnamon, cloves, chilies and herbs.
All are served cold or at room temperature. Their uses are endless such as an accompaniment to grilled foods, fillings in burritos, toppings for salads or served with cheese, corn chips, pitas or crisp breads.
The flavor and gorgeous color of the cherries made a real nice chutney for these grilled chicken breasts.
We thought it might be nice to share some of the seasonal beauty we enjoyed in our yard this season. I hope you will enjoy looking at our pics. You can also view them in a larger size by going to our Facebook site: Good Food And Treasured Memories.
Print Recipe
Grilled Chicken Breast with Fresh Cherry Chutney
Votes: 1
Rating: 5
You:
Rate this recipe!
|
|
Votes: 1
Rating: 5
You:
Rate this recipe!
|
Instructions
-
In a saucepan, combine cherries, red onion, basil, balsamic vinegar, honey & salt. Bring to a gentle simmer & cook for about 3-5 minutes. Stir in cornstarch/juice mixture & simmer until slightly thickened. Remove from heat & set aside.
-
Between 2 sheets of plastic wrap, gently pound chicken breasts to uniform thickness. Brush both sides of breasts with olive oil; season with salt & pepper. Grill on BBQ or in a saucepan on the stove until nicely browned on each side & cooked through. Serve with Cherry Chutney.
-

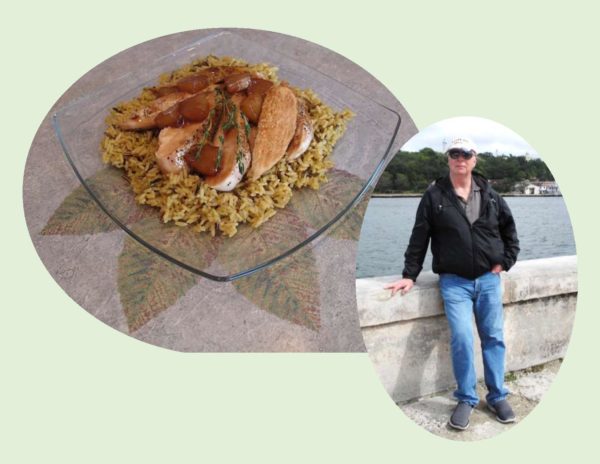
This week we are celebrating Brion’s birthday. We have never felt the need to give gifts on ‘occasions’ but rather just enjoy another holiday travelling together or ‘gift’ each other at random. As we grow older, it comes clearer everyday, the special privilege it is to simply have each other to share life with. I appreciate the fact that Brion has always believed in me and supported my endeavors and I’ll be forever grateful for the love we share. This picture of Brion was taken in Havana, Cuba this year along the beautiful seawall.
THANK YOU FOR BEING THE SPECIAL PERSON YOU ARE!
BIRTHDAY WISHES, WITH LOVE
Print Recipe
Pineapple Chicken over Wild Rice
Votes: 1
Rating: 5
You:
Rate this recipe!
|
|
Votes: 1
Rating: 5
You:
Rate this recipe!
|
Instructions
Preheat oven to 450 F. Lightly spray a 9 x 13-inch baking pan.
Trim chicken, rinse & pat dry; season with salt & pepper. Place the chicken in pan, not overlapping.
Drain pineapple chunks, reserving 1/2 cup of the juice. In a saucepan, whisk together juice, honey, ginger, vinegar & soy sauce. Place over medium heat & simmer, whisking often until slightly thickened, about 8 minutes. In a small bowl, dissolve cornstarch in the water; whisk into the pineapple/honey sauce.
Place the pineapple chunks on top of chicken; pour pineapple/honey sauce over all & sprinkle with the almonds. Bake for 15-20 minutes or until chicken registers 165 F.