The other day Brion & I were in a ‘Winners’ store and were looking through the gourmet food section. A couple of Pol’s Gourmet Preserves caught our attention. One was the Strawberry Chia Preserve. The preserve combines ripe strawberries with chia seeds, date juice, and lemon juice, cooked in vacuum boilers. It is marketed as a healthy and natural product with a focus on natural flavor and consistency. Pol’s utilizes vacuum technology to maintain the strawberries’ natural qualities during the cooking process. They also emphasize the use of natural base ingredients and the absence of additives beyond the natural components.
We purchased a jar even though I wasn’t sure at the time what I would use it for since neither of us use a lot of preserves on toast. Of course, it didn’t take long to find a way to incorporate it into a recipe.
I have childhood memories of my mother making an orange bread loaf. I always thought it was so unique because it used the fresh orange zest from two whole oranges. The flavor was so distinct along with the bread being wonderfully moist. This recipe was one that has remained with me over the years, long after I had left my parents’ home. I used it numerous times over the years in my food service career in different applications.
Today I decided to swirl some of this interesting preserve into my mother’s orange bread loaf and the flavor was even better than I thought it would be. This orange loaf recipe is perfect for when you need a make-ahead dessert. I like it even more on the second day because the orange aroma (and flavor) becomes even more vibrant.
Print Recipe
Orange Bread w/ Strawberry Chia Preserves
Votes: 1
Rating: 5
You:
Rate this recipe!
|
|
Votes: 1
Rating: 5
You:
Rate this recipe!
|
Instructions
Preheat oven to 350 F. Butter or line an 8" x 4" x 3-inch loaf pan with parchment paper. Set aside.
Peel oranges thinly & finely chop peel. Boil with sugar & water for 10 minutes: cool. Pour into a large bowl & add egg & butter.
In a small bowl, combine flour, salt & baking powder. Add dry mixture to wet mixture alternately with milk.
Pour batter into prepared loaf pan. Top with dollops of strawberry preserve. Using the handle of a wooden spoon, swirl preserve into batter making sure not to over stir so it creates a marbled effect.
Bake for about 45 minutes or until bread tests done. Remove from oven & cool on wire rack. As I mentioned in the blog, the bread tastes better the second day if you can wait that long to try it.

Many cultures have embraced the apple pie and put their own spin on it, so why is it known as the quintessential American dessert. German immigrants brought over the modern hamburger and Italians were the first to combine cheese with macaroni. Apple pie—a dish that commonly follows the words ‘American as’ —has a reputation for being one of the rare dishes the country can fully claim. But as it turns out, the history of the iconic American dessert isn’t so simple.
The phrase ‘as American as apple pie’ emerged in the early 20th century. It gained widespread popularity during World War II, when soldiers were asked what they were fighting for. The response often included apple pie, alongside other symbols of American life like mom and baseball. This association cemented apple pie’s status as a quintessential American food.
For some cooks, grated apple pie was a practical alternative to the traditional sliced version. Grating or shredding the apples creates a pie with a tender, uniform, and almost custard-like filling, unlike the chunkier texture of a standard pie. Shredding the fruit reduces the cooking time required to soften the apples, which was an advantage for home bakers. As shown in some historic recipes, eggs and melted butter were often mixed into the grated apples, creating a richer filling.
This pie reminds me of an experience I had that seems quite comical when I think of it now. Before I had ever studied in the commercial food industry or made any number of pies, a friend gave me a recipe for a ‘Swiss’ apple pie. Her instructions were to place the shredded apple in a pastry lined pie pan. Next, pour vanilla pudding over the apples and bake. It sounded great! I purchased a box of Jell-O brand vanilla pudding & pie filling, made a crust and filled it with shredded apples. I assumed you were supposed to cook the pudding before covering the apples with it for some reason. Wrong!! What resulted was apples baked in a pastry shell with a ‘rubber top’. I guess we all have to start somewhere, right?!
Today, I wanted to revisit the grated apple pie idea being fall with all the wonderful apples that are in season right now.
Print Recipe
Grated Apple Pie w/ Salted Carmel Topping
Votes: 1
Rating: 5
You:
Rate this recipe!
|
|
Votes: 1
Rating: 5
You:
Rate this recipe!
|
Instructions
Pastry
Sift flour, sugar & baking powder into a bowl. Add salt & rub butter into flour with fingertips until it resembles breadcrumbs. In a small bowl, whisk together the egg, vinegar & water. Sprinkle the egg/water mixture over the flour mixture & combine ONLY until dough comes together. DO NOT OVERMIX. Wrap the dough in plastic wrap & refrigerate for 30 minutes.
Apple Pie
-
Grate apples & combine with lemon juice.
Line a 9-inch pie plate with chilled pastry. In a bowl, mix together the sugar, flour, cinnamon, nutmeg & salt. Sprinkle 3 Tbsp evenly in the bottom of the crust & set the rest aside.
In a mixing bowl, beat the butter until creamy. Add the remaining sugar mixture & beat until incorporated. Add the vanilla & eggs. Beat until mixed well & the mixture turns lighter. Stir in the apples.
Pour the filling mixture into the crust & spread out evenly. Place a pie ring or one made out of aluminum foil around the edges of the crust.
Bake at 450 F. for 15 minutes then reduce heat to 350 F. & bake for an additional 30-35 minutes. If the crust is not brown enough, remove the pie ring for the last 10 minutes of the cooking time.
Salted Caramel Sauce
Place the sugar & water into a large heavy bottomed saucepan. Cook, stirring, over a low heat until sugar has dissolved. Increase heat & bring to a boil for 5-7 minutes, stirring occasionally, until you get a deep amber color.
Remove from heat & immediately add the heavy cream & stir. Be careful as it will bubble up quite a lot. Once the caramel has dissolved into the cream, add the butter & salt. Place in a small blender & blend for a few seconds until mixture comes together nicely. Place into a small container & cool.
Finish
Once pie is at room temperature, brush or drizzle sauce over the apple filling. Chill further & serve.
Recipe Notes
The purpose of putting some of the sugar mixture into the bottom of the pie crust is to absorb some of the liquid that forms when sugar & fruit are mixed together.
If the apples produce a lot of juice, drain them BEFORE adding them to the batter. If you pour off the juice after adding the apples to the batter, you will lose a lot of the spice flavor.
Using a deep dish will help avoid it from running over in the oven.

Oktoberfest is an annual festival which began in Munich. It actually begins in September, ending on the first Sunday in October.
The festival originated on October 12, 1810, in celebration of the marriage of the crown prince of Bavaria, who later became King Louis I, to Princess Therese von Sachsen-Hildburghausen.
Of course, as with any celebration, there are many foods associated with the occasion, ‘spätzle’ being one of them. The first name that comes to the mind when one thinks of pasta is Italy, however, the Germans too love pastas. Spätzle is a cross between pasta, an egg noodle and a dumpling, a kind of ‘German mac & cheese,’. It originates from the Baden-Württemberg region of southwest Germany and is a common dish at any beer hall or beer tent during Oktoberfest.
Celebrating Oktoberfest doesn’t have to be all about the German beer. So I thought, why not take the spätzle idea one step further and make it into lasagna?! Classic German staples come together in this lasagna to make a very unique version of the classic dish.
There are six main ingredients in this recipe. The first is spätzle. The second is onion. By caramelizing the diced pieces you turn it into little velvety pieces of heaven that add incredible depth and sweetness to the dish. Third is Bratwurst, a fresh link sausage characterized by its many different spices and seasonings. Fourth is sauerkraut, bratwurst’s classic sidekick. Fifth is bacon and the crowning touch and grand finale is the Emmentaler cheese.
Compared to traditional pasta dough, spätzle is softer and quite moist. The dough is quite basic, made from flour, eggs, water and salt. Although these little ‘dumplings’ can be eaten with almost anything, I thought they added something real special to this German lasagna.
Print Recipe
Oktoberfest German Spätzle Lasagna
Votes: 1
Rating: 5
You:
Rate this recipe!
|
|
Votes: 1
Rating: 5
You:
Rate this recipe!
|
Instructions
Spätzle
1. In a large bowl, mix the flour with salt & make a well in the center. Add eggs to the well & whisk the flour into the eggs. Gradually whisk in the water until a very thick batter forms. Cover with a damp cloth & allow to rest for 30 minutes.
Bring a large pot of salted water to a boil. Place spätzle dough maker above the pot with the water. Load with dough & slide back & forth or press to squeeze the dough through & form the spätzle noodles.
Once the spätzle begins to float to the surface, scoop with a large, slotted spoon & transfer to a colander placed inside a bowl for the drained water to collect. Continue the process until all of the dough is used.
Caramelized Onions
Heat oil in saucepan, add onion & sprinkle with salt. Cook & stir about 15 minutes or until moisture is evaporated & onion is soft. Reduce heat, sprinkle with cider vinegar. Cook & stir until golden. Stir in brown sugar; cook & stir until caramel brown in color. Set it aside.
Sauce
In the saucepan, melt butter. Stir in flour, bouillon, garlic powder & salt until smooth. Gradually stir in milk & broth. Bring to a boil; cook & stir for 2 minutes or until thickened. Remove from heat to a bowl & set aside.
In the saucepan, cook bacon (not too crisp); remove to a cutting board to coarsely chop. Add bratwurst sausage meat (which has been removed from casings) to saucepan & scramble fry until cooked. Drain on paper towel. Add chopped bacon, bratwurst & caramelized onions to your prepared sauce.
Cotage Cheese & Other Ingredients
In a small bowl, beat eggs; add cottage cheese & pepper. Set aside. Drain sauerkraut & rinse. Squeeze dry. Grate cheese
Assembly
Preheat oven to 350 F. Grease a 13 x 9-inch baking pan.
Spread 1 cup sauce mixture over bottom of pan. Layer with 1/3 of the spätzle noodles, 1/3 of sauce mixture, 1/2 of the cottage cheese mixture, 1/2 of the sauerkraut & 3/4 cup grated cheese. Repeat layers (spätzle, sauce, cottage cheese, sauerkraut, spätzle, sauce). Save grated cheese for the last 5 minutes of baking.
Cover & bake for 50-60 minutes. Sprinkle with remaining GRATED CHEESE; bake 5 minutes longer until cheese is melted. Allow to stand 15 minutes before cutting.
Recipe Notes
- If you do not have a spätzle dough maker, just drop spoonsful of dough into the boiling water to form spätzle noodles. Dip your spoon into water to prevent it from sticking on the spoon.

Porcupine meatballs are an North American casserole dish of ground beef and rice meatballs cooked in tomato sauce. This recipe, that appealed to cooks in the 1930s, appears to have been developed during World War I when rice was affordable and readily available, but meat was pricey. The recipe appeared as ‘rice meat balls’ in the 1918 cookbook ‘Conservation Recipes’, a clear forerunner of the recipe from the Better Homes and Gardens Cookbook (1939). The name comes from the appearance of the meatballs, which appear prickly when the rice pokes out of them as they cook, resembling a porcupine.
Meat, even something as mundane as ground beef, was expensive and home cooks used innovation and imaginative ways to make a small amount of protein stretch to feed a large and hungry family. Porcupine meatballs were one of the answers to the problem. It’s great that generations later we are still enjoying them!
Of course, this simple recipe is very customizable. Other ingredients could be added to the meatballs like green pepper, mustard, celery, horseradish, Worcestershire sauce, ketchup, or other seasonings. The simple tomato sauce made with canned soup could be enriched with molasses and seasoned with chili powder and cumin. A later recipe from 1969 for ‘porcupine meatballs paprika’ replaces tomato soup with cream of mushroom, and adds other ingredients like mustard, or sour cream and paprika. ‘Porcupine meatballs Chinois’ was a variation influenced by Chinese cooking techniques and ingredients. Served with peach sauce, the Chinois meatballs are made with ground pork, shrimp, rice and green onion, seasoned with soy sauce and sherry, and steamed instead of being cooked in sauce.
Ground turkey can also be substituted for the ground beef, just add 1/4 cup oatmeal to the mix to compensate for the extra moisture in the turkey.
I recall my mother making these meatballs numerous times when I was growing up. They tasted great then and still do today. I decided to make some with the tomato sauce and some with mushroom sauce since Brion was not familiar with this meal. I think he will enjoy them.
Print Recipe
Retro Porcupine Meatballs
Votes: 1
Rating: 5
You:
Rate this recipe!
Ingredients
Alternative Brown Mushroom Sauce
Ingredients
Alternative Brown Mushroom Sauce
|
Votes: 1
Rating: 5
You:
Rate this recipe!
|
Instructions
Meatballs/Sauce
-
In a medium bowl, lightly mix together all meatball ingredients. Form mixture into 12 meatballs & place in an 11 x 7-inch baking dish.
In a small bowl, whisk together sauce ingredients; pour over meatballs. Cover & bake 1 1/4 hours or until rice is tender.
These meatballs are nice served over rice, egg noodles, mashed or baked potatoes. Simple but tasty!
Alternative Tomato Sauce
In a saucepan, heat oil over medium heat. Sauté onion until tender crisp. Add crushed tomatoes & simmer for about 5 minutes. Add seasoning to taste & sour cream; combine then whisk in chicken broth. Pour over meatballs & bake.
Alternative Brown Mushroom Sauce
In a skillet, heat oil & sauté onion & mushrooms. Add beef base, pepper, garlic powder & 2 cups of the water. Bring to a boil. Combine cornstarch with remaining 1/2 cup water. Gradually add cornstarch mixture to pan & stir as you are pouring. Cook, stirring often, until thoroughly mixed. Pour over meatballs & bake.
Recipe Notes
- The advertisement picture on the blog was from life magazine in 1948.

July in Canada is the ‘everything goes better with corn’ season, and that includes seafood.
Scallops, those sweet and tender ocean gems, have a flavor profile that’s both briny and subtly sweet but never too fishy. Then there’s corn, that sunny yellow kernel-packed treasure. It’s like summer in vegetable form, with a satisfying crunch and natural sweetness.
This is an easy summer dish, perfect for any night of the week, but make no mistake, it’s also worthy of a weekend dinner with friends. Pair it with some small, boiled new potatoes tossed in parsley and butter. Yum!
Brion & I love both seafood and corn, so this kind of meal certainly works for us.
Print Recipe
Baked Scallops w/ Creamy Corn, Tomatoes & Chives
Votes: 1
Rating: 5
You:
Rate this recipe!
|
|
Votes: 1
Rating: 5
You:
Rate this recipe!
|
Instructions
Corn, Tomatoes & Chives
In a large skillet, heat oil. Add corn kernels & season with 1/4 tsp salt. Cook until just about tender, 2-3 minutes. Add Boursin cheese & water; cook 1-2 minutes more while stirring. Remove from heat, stir in the halved tomatoes. Keep warm while scallops are baking.
Scallops
-
Pour melted butter into an 11 X 7-inch baking dish; add scallops & spread to form an even layer. In a small bowl, combine breadcrumbs, parmesan cheese, minced garlic, onion powder, paprika & dried parsley. Sprinkle over scallops. Bake scallops about 15-20 minutes.
Serving
Divide corn/tomato mixture on 4 serving plates. Top with scallops & fresh chives or green onions for garnish.

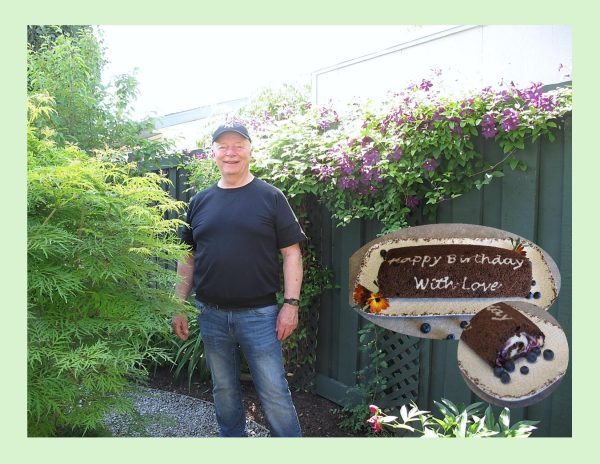
Today we are celebrating my husband Brion’s birthday. Family birthdays forever bring me back to my childhood days. My mother always made the birthday person’s favorite meal on their day along with a cake. Although she excelled at cooking in general, her creative talent was put to good use when she decorated our birthday cakes. As I follow her tradition, I wanted to bake something that was unique for Brion’s birthday.
One of the easiest ways to dress up a basic roll cake is with a design. This technique is one that originated in Japan. The cake rolls are also known as ‘deco rolls’, as the cake rolls are decorated with patterns and baked. Rather than decorating the cake after it’s been baked, this technique pipes it directly onto the cake with batter.
In Japan, the roll cake tradition has continued, with unique flavors like matcha (green tea) and various cream fillings. The use of ‘inlay’ design creates an artistic presentation. The incorporation of unique flavors and decorative techniques continues to evolve and expands the appeal of this iconic dessert.
With summer in full swing, our backyard is bursting with all its glorious flowers and foliage and even though he would rather I didn’t add his picture to my blog today, I wanted to share this garden view with you. I think it’s a great backdrop for a birthday picture, right!
HAPPY BIRTHDAY, MY LOVE … YOU’RE THE BEST
Print Recipe
Chocolate Blueberry/Lemon Inlay Roll Cake
Votes: 1
Rating: 5
You:
Rate this recipe!
Ingredients
Whipped Cream Cheese Filling
Ingredients
Whipped Cream Cheese Filling
|
Votes: 1
Rating: 5
You:
Rate this recipe!
|
Instructions
Lemon Curd
Combine sugar & lemon zest in a saucepan. Either with the back of a spoon or your finger tips rub the zest into the sugar. This will coat the sugar crystals with fragrant oils from the lemon peel, adding a whole new dimension of intense lemon flavor to the curd.
Add the whole egg & extra egg yolks to the saucepan with the lemony sugar & whisk until smooth. Mix in lemon juice.
Add butter then place the saucepan over medium heat. Whisk gently & continuously for 6-9 minutes until thick enough to coat the back of a spoon. Do not walk away because it will transform very quickly. Once you see a bubble emerge from the surface, this indicates that it is thick enough. Do not let it boil.
Immediately pour the hot curd through a fine mesh sieve to remove any pieces of lemon zest or cooked egg white into a dish. Place a piece of plastic wrap directly in contact with the surface & refrigerate until thoroughly chilled & ready to use.
Blueberry Filling
Place all blueberry filling ingredients in a small saucepan. Heat on medium high until blueberries soften & mixture thicken, about 5 minutes. Remove from heat & allow to cool for 5 minutes or so then place in a blender & puree until smooth. This makes it easier when slicing the cake roll. Place in a small dish & cool until ready to use.
Whipped Cream Cheese Filling
For best results, place bowl of the electric mixer & whisks in the freezer for a few minutes to make them real cold. When chilled, place cream cheese & powdered sugar in the bowl & beat together until smooth. Scrape down the bowl as needed. With mixer running on low, add the vanilla & stream in the whipping cream. Turn the speed up & whip until stiff peaks form. Refrigerate until ready to use.
Roll Cake Pattern
Cream together butter, flour, sugar & egg white with a whisk until smooth. Place batter into a piping bag. Trace or free hand your pattern onto a piece of parchment paper. If you want a specific part of the image to appear on the top of the roll cake, place that part of your pattern about 3/4 of the way down the paper.
Before putting the template onto a 10" x 15" jelly roll pan , using a pastry brush (or your fingers), grease the bottom (but not the sides) with vegetable oil. Line the bottom of the greased pan with the template, pressing down to remove any air bubbles. Set aside. By NOT greasing or covering the sides of the pan, the cake sticks to the sides of the pan, helping the cake to rise while baking.
Pipe out your design, keeping in mind that the cake will be viewed in reverse. Place the pan in the freezer until the batter is frozen solid, for about 20 minutes.
Chocolate Cake
-
In a small bowl, combine flour, cocoa, baking powder & salt. Set aside.
In another bowl, whip egg whites until foamy, gradually adding HALF of the sugar. Beat until stiff peaks form. In a third large bowl, beat egg yolks until thick. Add remaining sugar, vanilla & water; beat until very thick. Gradually fold in flour mixture then egg whites gently folding JUST until fully incorporated so as not to deflate the eggs.
Remove the jelly roll pan from the freezer & pour the cake batter over the frozen design. Gently tap the sheet against the counter to make sure that the batter gets down into all the little nooks & crannies of your design.
Bake in the center of the oven until cake for about 15 minutes or until it tests done with a toothpick. Loosen edges & immediately turn cake onto a piece of parchment paper. REMOVE the parchment that was on the bottom of the cake (while it was baking). Starting at the narrow end, roll up cake in the parchment (you just turned the cake out on to) & cool completely.
Assembling the Cake Roll
Once fully cooled, gently unroll the cake & separate it from the parchment paper.
Spread an even layer of lemon curd onto the cake, leaving about an inch of space around the edges so the filling doesn't ooze out. Next, drizzle a wavy line of blueberry filling over the lemon curd. Then lastly, pipe some of the cream cheese filling in between your blueberry lines. Try to not OVERFILL the cake roll BUT giving it as generous amount of filling as possible.
Very gently roll the cake back into its spiral shape. Set the cake on a platter with your design on top. Cover with plastic wrap & chill in refrigerator for at least 30 minutes or longer.
-

Quesadillas but with crepes instead of tortillas. A quesadilla (kay-suh-dee-yuh) is a popular savory Mexican turnover that consists of a heated, filled, and folded tortilla. Quesadillas originated in central and southern Mexico, where they were first made with corn tortillas and filled with Oaxaca cheese. (The name quesadilla is a combination of tortilla and queso, which means cheese in Spanish). Over the years, other fillings, such as cooked meats and vegetables, found their way into quesadilla.
Quesadillas have gone through various transformations over time, especially as they became more popular. What started as a simple combination of tortillas and fillings evolved with new ingredients and techniques. Regional differences also influenced how the dish is prepared.
Corn tortillas are the traditional option for quesadillas, though nowadays, you’re just as likely to find them made with whatever you wish. Try subbing your tortilla for something else entirely, like thin crepes. Crepe style pancakes are one of those simple culinary treasures, just some eggs, milk, butter, flour and you’ve got it.
The tortilla vs crepe debate ultimately comes down to personal preference. Both flatbreads offer unique culinary experiences and can be enjoyed in countless ways. Whether you prefer the earthy flavor and versatility of a tortilla or the delicate charm and versatility of a crepe, there’s no denying the allure of these culinary masterpieces.
If you’re accustomed to enjoying crepes when they’re soft, you’ll also love them when they’re hot and crispy! While you can make these crispy crepe-adillas with just cheese, if you’re going to get creative with the ingredients, stay away from anything that’s too chunky or watery that the crepe won’t be able to hold up. Roasting the vegetables is such a nice option.
Print Recipe
Ratatouille Crepe-adillas
Votes: 1
Rating: 5
You:
Rate this recipe!
|
|
Votes: 1
Rating: 5
You:
Rate this recipe!
|
Instructions
Crepe Batter
Place all the ingredients for the crepe batter into a medium/large bowl. Mix with a hand (immersion) blender or in a stand blender until smooth. You can also just whisk it by hand. Cover the bowl with a kitchen towel and let stand for 30 minutes. While the batter is resting, prepare the filling.
Roasted Veggies/Cheese
-
Combine all vegetables in a large bowl, toss with olive oil, salt & pepper.
Line 2 cookie sheets with foil, spray foil with non-stick cooking spray. Spread vegetables in a single layer over prepared cookie sheets.
Place in the oven & roast for 15-20 min, or until veggies are tender & have a bit of char on them.
-
Cooking the Crepes
Whisk the crepe batter before using.
Using a large nonstick skillet or crepe pan, add a small amount of butter over medium-high heat. Pour about 1/4 cup crepe batter onto skillet & form a circle with the bottom of cup or swirl it around the crepe pan so it flattens out. Cook for 30 seconds on the first side or until it firms up, then carefully flip the crepe & cook for another 15-20 seconds. Repeat until all batter is used.
Assemble/Grilling
Spoon 2 Tablespoons of cottage cheese over one half of each crepe; top with 2-3 tablespoons of roasted vegetables & sprinkle with some grated cheddar cheese. Fold the crepe in half then again in half creating a triangle.
Heat a small amount of butter on the griddle, add the filled crepes and cook on both sides until golden and crispy and the cheese is melted.
Recipe Notes
• For a heartier crepe-adilla, add some cooked, shredded chicken or pulled pork.
• Serve with a zesty tomato sauce if you wish.

Pairing beets with chocolate might seem unusual at first glance, but it works beautifully in a cake. It gives an extra bit of complexity to something that’s already amazing. The beets add earthiness and make the cake dense and moist.
This idea is particularly associated with wartime rationing, when sugar and flour were scarce. While historically a frugal option, chocolate beet cake has become more of a novelty or trend in recent years, with modern bakers experimenting with the flavor profile and incorporating it into more elaborate recipes.
It’s impossible to pinpoint exactly who ‘first’ paired saskatoons with beet cake, as such recipes are often developed over time and evolve through various culinary traditions.
Saskatoon berries, or serviceberries, are a staple ingredient in Canadian baking, particularly in pies, cakes, and jams. They are known for their sweet and nutty flavor. Given the historical context, it’s likely that the pairing of saskatoon berries with chocolate beet cake emerged organically in regions where both ingredients were readily available and used in baking. Bakers in these areas may have naturally incorporated saskatoon berries into their beet cake recipes, either as a topping, filling, or as part of the batter.
These little Bundt cakes with their saskatoon berry topping make a very special summertime dessert when those precious berries arrive.
Print Recipe
Chocolate Beet Bundt Cakes w/ Saskatoon Berry Sauce
Votes: 2
Rating: 3.5
You:
Rate this recipe!
|
|
Votes: 2
Rating: 3.5
You:
Rate this recipe!
|
Instructions
Beet Puree
Remove beet stems & peel. Rinse beets & chop into small cubes. Place beets in a small saucepan & add water. Cook for about 10 minutes or until fork tender. Remove from heat & allow to cool. Once cool, puree beets with a small amount of the cooking water in a blender or food processor.
Cake
-
In a large bowl, place first 6 liquid ingredients & combine well. Add remaining ingredients & mix well.
Scoop into 8 mini Bundt pans (or large cupcake pan), filling about 3/4 full. You can butter the pans or use silicon cups.
For mini Bundt cakes bake only about 9 minutes or until they test done with a toothpick.
Remove from oven & allow to cool slightly.
Saskatoon Berry Sauce
In a small saucepan, combine cornstarch, sugar & salt. Add water & saskatoons. Stir while cooking until 'clear' & bubbling. Add margarine & lemon juice, stir then remove from heat.
Serving
Place individual little Bundt cakes on dessert plates. Top with whipped topping & saskatoon berry sauce. Serve.

Is it a crostata or a galette? There’re actually two different names for the same thing. A galette and a crostata are essentially the same type of dessert (one comes from France and one comes from Italy). Crostatas and galettes are typically free-form and rustic, with the dough edges folded up around the filling.
When it comes to pastries and cakes, the French have given the world more techniques, recipes and methods than anyone else. No other country has taken the simple combination of flour, dairy and heat to create such a varied range of delicious dishes, both sweet and savory.
Blackberries are sometimes forgotten, unlike their more popular cousins’ strawberries and blueberries. Even if you don’t love them raw, baked blackberries are something special.
Blackberries are cherished for their enticing flavor, nutritional value, and versatility in recipes. Whether enjoyed as a fresh snack or incorporated into mouthwatering dishes, blackberries remain a beloved fruit that connects us to a rich tapestry of history and nature.
Today I’m making a blackberry cheesecake galette. The combination of buttery pastry and juicy, plump blackberries with cream cheese is simply heavenly.
Print Recipe
Blackberry Cheesecake Galette
Votes: 1
Rating: 5
You:
Rate this recipe!
|
|
Votes: 1
Rating: 5
You:
Rate this recipe!
|
Instructions
Pastry
In a small bowl, combine sour cream & ice water; set aside. In a large bowl, whisk together flour, cornmeal, sugar & salt. Using a pastry blender or finger tips, cut in the butter until mixture resembles BOTH coarse crumbs & small peas. Sprinkle the cold sour cream mixture over dough, 1 Tbsp at a time, tossing with a fork to evenly distribute it. After you have added all the sour cream mixture, dough should be moist enough to stick together when pressed; if not, add additional cold water, 1 tsp at a time. Do not overwork dough.
Press dough into a disk shape & wrap in plastic wrap. Refrigerate for at least 2 hours. The dough can be kept in the refrigerator for a day or two or it can be wrapped airtight & frozen for a month. Thaw, still wrapped in refrigerator.
Filling
In a small bowl, combine 1 Tbsp sugar with 1 Tbsp cornstarch. Sprinkle over blackberries with a squeeze of lime juice. Set aside.
In a medium bowl, beat softened cream cheese with whole egg & egg white until light & fluffy. Beat in 7 Tbsp sugar, zest, vanilla & a pinch of salt.
Assembly
-
Remove pastry from refrigerator. On a large sheet of parchment paper, roll out pastry dough into a 12-inch circle. Spread cream cheese mixture evenly over dough, leaving a 1 1/2-inch border. Spoon the blackberry mixture over cream cheese, leaving any excess juice in bowl. Gently fold outside edges of pastry over, pleating to hold filling in. Brush with egg wash & sprinkle with coarse sugar.
Bake 45 minutes or until filling bubbles up & crust is golden. test with knife to see that the cream cheese is set. Cool for at least 20 minutes on a wire rack before serving.

Baked stuffed shrimp is just as perfect served as an hors d’oeuvre on special occasions and holiday parties as it is for family dinners. Stuffed shrimp may seem like a dine-out-only kind of dish, but rest assured, it’s not. Preparing it at home is not that big of a deal.
Shrimp, one of the most popular seafoods in North America, can be stashed in the freezer and thawed in the fridge the night before or in minutes under cold water to create a quick weeknight meal that the whole family will love. Add a few spices, some veggies, or pasta and you can have dinner on the table in minutes. Some like it sautéed with lemon and butter. Others prefer it coated in a crispy breading and fried to a golden brown. Shrimp is quite a versatile seafood that can be prepared in a variety of ways, drawing people in with its tender texture and mildly sweet, salty flavor.
A seasoning Brion & I have really come to enjoy especially with shrimp is the Old Bay Seasoning. With savory, salty, spicy, and herby notes, Old Bay Seasoning is something truly special in the culinary world. It was originally meant for seafood, but quickly became a beloved seasoning for everything from crab and shrimp to veggies, meats, and even popcorn!
If you are a seafood lover, crab-stuffed shrimp has an amazing flavor combination you will really enjoy.
Print Recipe
Crab Stuffed Shrimp
Votes: 1
Rating: 5
You:
Rate this recipe!
|
|
Votes: 1
Rating: 5
You:
Rate this recipe!
|
Instructions
Stuffing
In a saucepan over medium heat, add butter & allow to melt. Add onions, celery, garlic, green onions & seasoning & sauté for 6-8 minutes. Transfer mixture to a mixing bowl, add panko crumbs & drained crab meat. Fold in with a spatula until blended.
Shrimp
Clean, devein & butterfly shrimp. Set aside in refrigerator.
Lemon Pepper Butter
In a small saucepan, combine water, lemon juice, flour & seasonings. Whisk until mixture thickens. Remove from heat; add softened butter & blend in well.
Assembly
-
In a round glass pie dish, place opened butterflied shrimp. Top each with a small scoop of stuffing. Next, place a tsp of lemon butter on each shrimp.
Bake 20-25 minutes or until crab meat filling begins to get golden brown. Serve hot fresh broccoli.