This dish likely evolved from rustic Italian North American home cooking, where ‘dump and bake’ meals became popular in the 1970s and 80s for their minimal cleanup. It combines affordable proteins (chicken) with pantry staples (potatoes, canned or frozen green beans) and a fat source (butter or olive oil) to create a savory, tender meal.
The ‘Italian’ moniker comes primarily from the Italian herb seasoning used to coat the ingredients, rather than from traditional Italian culinary techniques. Dry herb blends became widely available in the mid-20th century, allowing home cooks to easily create Italian flavors without needing an extensive spice rack.
Soldiers returning from WWII brought home a taste for Italian flavors—specifically oregano on pizza—which paved the way for a market for Italian flavored products.
You generally won’t find this pre-mixed blend in Italy; Italian cooks typically use fresh herbs (like basil, parsley, or rosemary) individually or in regional combinations rather than a single ‘all-purpose’ dried mix.
The classic blend typically includes dried oregano, basil, thyme, rosemary, sage, and marjoram.
The Italian chicken, potato and green bean casserole is enjoyed for its ability to transform simple, humble ingredients into a comforting, nutritious, and versatile dish.
Print Recipe
Italian Chicken, Potato & Green Bean Bake
Votes: 1
Rating: 5
You:
Rate this recipe!
|
|
Votes: 1
Rating: 5
You:
Rate this recipe!
|
Instructions
Preheat the oven to 400 F.
In a large mixing bowl, add the chicken, potatoes & green beans. Drizzle the olive oil over the ingredients in the bowl. Add Italian seasoning, garlic powder, onion powder, rosemary, basil, salt & pepper. Toss everything together until the chicken, potatoes & green beans are evenly coated with oil & seasoning.
Transfer the mixture into a 9 x 13-inch baking dish, placing the chicken breasts in the center. Arrange the potatoes around the chicken & place the green beans on top. Cover the dish with aluminum foil (optional for a softer finish) or leave uncovered for a bit more crispiness.
Bake for 35-40 minutes or until the chicken is cooked through & the potatoes are tender. If desired, sprinkle grated Parmesan cheese over the chicken & vegetables during the last 5 minutes of baking for a cheesy finish.
EASTER GREETINGS!
Easter is synonymous with spring; it represents a time of renewal. The winter months are now in our rear-view mirrors, and we can look forward to those wonderful summer days. Fresh new buds are on the trees, just waiting to burst out as the season unfolds. Everything speaks of new life and fresh hope. Spring is so unique (even if we still have snow on the ground in our part of the country).
Whether or not you’re religious, Easter has some pretty magical facets to it. I remember as a kid the ‘secret bunny’ leaving colorful eggs and little baskets filled with a few goodies. My sisters and I always got a new Easter dress and ‘straw bonnet’ to wear to the church service. Then of course, the wonderful Easter meal itself.
According to legend, the Cornish game hen was actually ‘invented’. The original breeder was a woman by the name of ‘Tea’ Makowsky. At the age of 15, she moved to Paris, France finding work at both a milliner’s shop and a cheese shop. It was here she met her husband, and they married in 1933. Fleeing from the Nazis, they settled in the USA. After a fire destroyed their farm in 1949, the Makowskis, began experimenting and came up with a cross breed of Cornish game cocks and Plymouth Rock hens. The result was a plump little bird that matured quickly with all-white meat. In less than 5 weeks, the chicken was ready to be sold.
By the 1950’s, the Cornish Game Hen was fabulously popular. The usual weight is about 500-700 grams, which makes it ample for an individual serving. I remember in the 1970’s, Cornish game hens were considered to be a very upscale or exotic dinner and quite expensive.
I haven’t made any of these little ‘birds’ for a long time so I though they would make a nice Easter meal for Brion & I this year.
Print Recipe
Roasted Cornish Hens w/ Mushroom Barley Pilaf
Votes: 1
Rating: 5
You:
Rate this recipe!
|
|
Votes: 1
Rating: 5
You:
Rate this recipe!
|
Instructions
Remove the giblet packet (if present) from the cavity of the game hens. Carefully rinse the game hens under cold water. Thoroughly pat dry with paper toweling. Let sit at room temperature for 30 minutes.
-
Make sure that the hens are completely dry: if not, pat dry again with paper toweling. Cover each hen with garlic mayo. Combine spice mixture in a small cup then sprinkle over hens. Set hens aside.
Set a large, heavy-bottomed, oven-safe skillet or Dutch oven over medium heat & add the olive oil. Add the shallots, fresh mushrooms, barley, salt, & pepper. Sauté until the vegetables have softened slightly & the barley begins to give off a nutty, toasted fragrance, 5–7 minutes. Bring the heat to high while stirring & add the wine. Continue stirring until about half of the wine has been absorbed/reduced. Stir in the vegetable broth & rehydrated mushrooms. Remove from the heat.
Set a small rack into the bottom of the pot. Place the hens on top of the rack (balance them against the sides of the pot, if necessary).
Place the pot on the oven's middle rack & roast for 50 minutes, turning the pot a half turn once during the roast.
Check the temperature of the hens by inserting an instant-read thermometer into the meatiest part of the thigh: the final temperature must reach 165 F. Continue roasting as needed. Also take note of the degree of browning: if the hens are browning too much, cover them with a piece of foil. If they are not browning enough, turn the broiler on high for the last ~5 minutes of cooking (estimate based on the temperature of the thigh meat). Watch carefully to prevent burning and give the pot a half-turn once during the broil.
Remove the hens to a cutting board & rest for 10 minutes. Remove the rack from the pot & fluff the mushroom-barley pilaf with a fork. Before serving pilaf, sprinkle with finely grated parmesan if you wish.
Recipe Notes
- To rehydrate the mushrooms, bring 3 ½ cups of water to a boil in a saucepan. Add the mushrooms, turn off the heat, and lid the saucepan. Let sit for 45 minutes. Remove the rehydrated mushrooms (reserve the liquid in the saucepan!). Rinse well, then pat dry with paper toweling before mincing. Strain the rehydrating liquid through a strainer lined with a layer of paper toweling. Keep this liquid to use for the vegetable broth.
- The game hens should be sitting slightly above the level of the liquid. The rack insert from a pressure cooker/instant pot will work well to set the hens on top, balanced against the sides of the pot.
With origins dating back to ancient times, gnocchi hold a prominent place in Italian culinary history, where it has been passed down through generations as a cherished comfort food. Today, it continues to be an essential part of Italian cuisine, adopting different names depending on the origin.
Gnocchi (pronounced no-kee) are soft dumplings that may be made from wheat flour, rice, semolina, ricotta cheese, potatoes, or breadcrumbs. Gnocchi are made throughout Italy, but the stuffed version is made mainly in the Piedmont region. The key to making delicate potato gnocchi is to add as little flour as possible but enough to keep the dough together. The filling should have a robust flavor so that it stands out from the potato dough.
For our stuffed gnocchi today, I’m making an Asiago/ricotta filling served in a meaty Bolognese sauce. Yum!
Print Recipe
Stuffed Gnocchi Bolognese
Votes: 1
Rating: 5
You:
Rate this recipe!
|
|
Votes: 1
Rating: 5
You:
Rate this recipe!
|
Instructions
Stuffed Gnocchi
Boil the whole potatoes with their skins until you can easily pierce them all the way through (about 20-25 minutes, depending on the dimension of the potatoes), then wash them with cold water & remove the skin when they are still warm.
Mash the potatoes while they are still warm & make sure there are no chunks; add a pinch of salt and ¾ of the flour. Mix well with your hands until a nice soft dough forms (but not sticky); if necessary, add some more flour. When the dough is ready, wrap it in plastic wrap and let it rest & cool for about 10-15 minutes. In a small dish, combine finely grated Asiago with ricotta cheese.
Cut the dough into 3 or 4 parts, take 1 part and cover the rest with plastic wrap so it doesn't dry. Dust the cutting board with flour & roll the dough with your palm to make a long thick cord about 2 cm in diameter, then cut chunks 2 cm long.
Roll each cube between your palms to make balls then press them on your palm to make a disc. With a teaspoon, place a small amount of cheese in the center of the disc and close it on itself (make sure to cover the cheese well and close all the holes), roll it again between your palm to make the ball smooth & set it aside on a clean cloth.
Bring to boil a large pot of salted water then slowly drop the gnocchi in & cook until they float on the surface. Drain, reserving 1 cup of starchy water. In a pan melt the butter and carefully add the drained gnocchi to sauté a little bit. Remove from pan, place in a dish until Bolognese sauce is ready.
Bolognese
Heat olive oil over medium heat in a large skillet. Add diced celery, carrot & onion. Cook until veggies are soft tender. Add ground beef & let cook, breaking it apart until fully browned. Season with Italian seasoning, salt, and pepper. Stir in garlic & cook until fragrant.
Stir in tomato paste, crushed tomatoes, water or stock, bay leaves & crushed red pepper flakes. Bring to a simmer & cook for about 10 minutes, stirring occasionally. Remove bay leaves.
Add cooked gnocchi to Bolognese sauce & stream in reserved gnocchi water as needed if the mixture is too thick. Cook for an additional minute or so, taste and adjust seasoning, if needed.
Serve with freshly grated Parmesan.
There’s nothing earth shattering or insanely unique about a frittata. It’s not trendy or cool but if you master the art of this versatile throw together dish it can help make your life a whole lot easier. That’s because there is virtually no time of day that this eggy filled, no-advance-planning-necessary, favorite doesn’t work.
Frittatas are great because they’re a little less fussy than omelets – no delicate folding required. Unlike its cousin, the strata (which typically includes layers of bread and gets all puffed up like a soufflé), a frittata is rustic, hearty and simple to prepare. A good comparison would be a crustless quiche, with the inclusion of potatoes to make it extra satisfying.
When we eat it for breakfast, we call it a baked omelet, when we eat it for dinner, we call it frittata. But either way, it’s perfect in the way that you can vary the vegetables and meat in this dish to use up whatever you have on hand.
The sweetness of the apples and onions nicely complements the ground pork and bacon in this frittata.
Print Recipe
Pork, Apple & Cheddar Baked Frittata
Votes: 1
Rating: 5
You:
Rate this recipe!
|
|
Votes: 1
Rating: 5
You:
Rate this recipe!
|
Instructions
Cook potatoes & dice; set aside.
In a large skillet, fry bacon until slightly crispy. Drain the bacon on paper towels & set aside, reserving one Tbsp. of the bacon drippings.
Add onion to skillet with bacon drippings. Sauté until tender then add ground pork & Italian seasoning. Cook until pork is no longer pink & most of the moisture has evaporated. Add grated apple, bacon and salt & pepper to taste. Cook for another 5 minutes.
-
Spray a 9 x 9-inch square baking dish with cooking spray. Spread the bottom of the dish with the cooked, diced potatoes.
In a medium bowl, whisk eggs & add sautéed mixture along with half of the cheese. Pour the mixture into the baking dish & sprinkle evenly with the rest of the cheese.
Place the baking dish in the oven & bake until the eggs are golden & puffy & a fork comes out clean when inserted into the center, about 25-30 minutes.
Let frittata cool for 5-10 minutes & then cut into squares. Serve immediately or at room temperature.
Chicken parmesan, also known as chicken parmigiana, originated from Italian immigrants in the US in the 1950s. The original version made with eggplant was adapted to use chicken breast instead.
The dish has become a ubiquitous mainstay in Italian American cuisine. Variations exist, but the core ingredients remain the same: chicken breast, breadcrumbs, Italian seasonings, tomato sauce, and mozzarella cheese.
Chicken Parmesan Meatloaf combines the best of both worlds—the comforting appeal of meatloaf with the irresistible flavors of Chicken Parmesan.
Meatloaf is elemental. It’s enduring, served without undue fuss or expensive implements …. comfort food without a doubt. I think an easy meatloaf recipe is something every home ‘chef’ should have in their arsenal. This particular one consists of seasoned coarsely chopped chicken thighs nestled under a zesty tomato sauce and cheese topping. I find chicken thighs make such a nice tasting option as opposed to regular ground chicken.
Print Recipe
Chicken Parmesan Meatloaf
Votes: 1
Rating: 5
You:
Rate this recipe!
|
|
Votes: 1
Rating: 5
You:
Rate this recipe!
|
Instructions
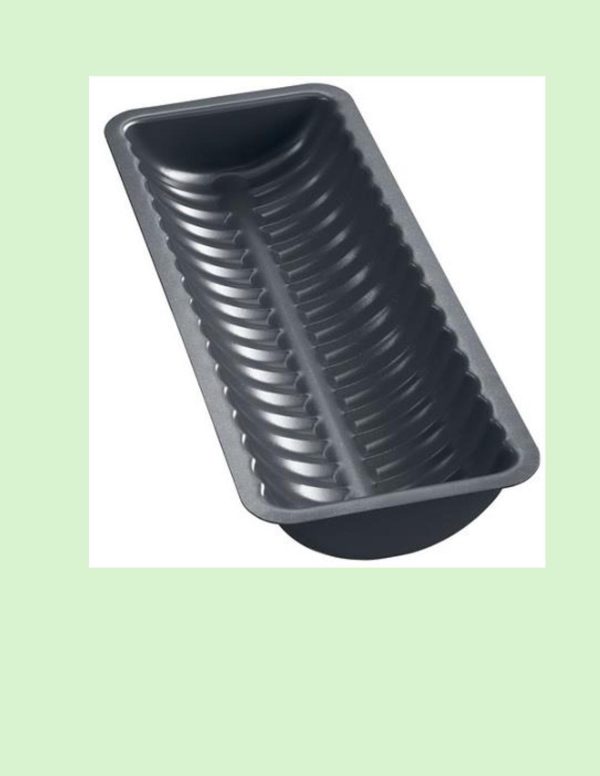
Preheat oven to 400 F. Line a 8 x 4-inch loaf pan with foil & spray with cooking spray.
In a saucepan, sauté onion & garlic in olive oil until softened. Cool completely.
In a large bowl, mix all meatloaf ingredients just until combined. Place mixture in loaf pan. Using a fork flatten then top with marinara sauce.
-
Combine topping ingredients. Top meatloaf with mozzarella & bread crumb topping. Bake an additional 15 minutes or until center reaches 165 F.
Cool 10 minutes before slicing.
There are countless variations of lasagna across Italy and beyond. Entire cookbooks have been dedicated to this beloved dish, showcasing its multifarious nature.
Potato slices absorb sauce and moisture so using them in place of lasagna noodles is a creative twist that can yield a delicious and hearty dish. Along with potato slices there are a variety of alternatives to traditional lasagna noodles that you can use in your recipes. From zucchini strips and eggplant slices to portobello mushrooms and butternut squash, these alternatives offer flavorful and healthy ways to enjoy the classic Italian staple.
This beef potato lasagna combines layers of tender potato slices with creamy cheese and ground beef. Nothing but pure comfort food!
Print Recipe
Scalloped Potato & Beef Lasagna
Votes: 1
Rating: 5
You:
Rate this recipe!
|
|
Votes: 1
Rating: 5
You:
Rate this recipe!
|
Instructions
Preheat oven to 350 F. Butter a 9 x 9-inch baking dish. Set aside.
Microwave washed potatoes (with skins) for a few minutes to partially cook. Slice in 1/8 -inch slices & place half of them in a layer on bottom of baking dish.
In a saucepan, sauté onions & garlic in oil until soft then add beef, salt, pepper & Italian seasoning. Add a layer of the meat mixture over the layer of potatoes.
In a small saucepan, melt butter then add flour. Cook for a few minutes until bubbly then add 2/3 cup milk & 23 gm parmesan cheese. With a wire whisk combine into a smooth sauce.
Spoon half of the butter/cheese mixture over the ground beef. Sprinkle with half of the mozzarella cheese.
Repeat with remaining ingredients, layering in the same sequence. If using the cream, pour over all.
Bake for 1 hour, covered with aluminum foil. Remove the foil for the last 10 minutes. Test to be sure the potatoes are soft.
Remove from oven, cool for a few minutes then sprinkle with chives.
Porcupine meatballs are an North American casserole dish of ground beef and rice meatballs cooked in tomato sauce. This recipe, that appealed to cooks in the 1930s, appears to have been developed during World War I when rice was affordable and readily available, but meat was pricey. The recipe appeared as ‘rice meat balls’ in the 1918 cookbook ‘Conservation Recipes’, a clear forerunner of the recipe from the Better Homes and Gardens Cookbook (1939). The name comes from the appearance of the meatballs, which appear prickly when the rice pokes out of them as they cook, resembling a porcupine.
Meat, even something as mundane as ground beef, was expensive and home cooks used innovation and imaginative ways to make a small amount of protein stretch to feed a large and hungry family. Porcupine meatballs were one of the answers to the problem. It’s great that generations later we are still enjoying them!
Of course, this simple recipe is very customizable. Other ingredients could be added to the meatballs like green pepper, mustard, celery, horseradish, Worcestershire sauce, ketchup, or other seasonings. The simple tomato sauce made with canned soup could be enriched with molasses and seasoned with chili powder and cumin. A later recipe from 1969 for ‘porcupine meatballs paprika’ replaces tomato soup with cream of mushroom, and adds other ingredients like mustard, or sour cream and paprika. ‘Porcupine meatballs Chinois’ was a variation influenced by Chinese cooking techniques and ingredients. Served with peach sauce, the Chinois meatballs are made with ground pork, shrimp, rice and green onion, seasoned with soy sauce and sherry, and steamed instead of being cooked in sauce.
Ground turkey can also be substituted for the ground beef, just add 1/4 cup oatmeal to the mix to compensate for the extra moisture in the turkey.
I recall my mother making these meatballs numerous times when I was growing up. They tasted great then and still do today. I decided to make some with the tomato sauce and some with mushroom sauce since Brion was not familiar with this meal. I think he will enjoy them.
Print Recipe
Retro Porcupine Meatballs
Votes: 1
Rating: 5
You:
Rate this recipe!
Ingredients
Alternative Brown Mushroom Sauce
Ingredients
Alternative Brown Mushroom Sauce
|
Votes: 1
Rating: 5
You:
Rate this recipe!
|
Instructions
Meatballs/Sauce
-
In a medium bowl, lightly mix together all meatball ingredients. Form mixture into 12 meatballs & place in an 11 x 7-inch baking dish.
In a small bowl, whisk together sauce ingredients; pour over meatballs. Cover & bake 1 1/4 hours or until rice is tender.
These meatballs are nice served over rice, egg noodles, mashed or baked potatoes. Simple but tasty!
Alternative Tomato Sauce
In a saucepan, heat oil over medium heat. Sauté onion until tender crisp. Add crushed tomatoes & simmer for about 5 minutes. Add seasoning to taste & sour cream; combine then whisk in chicken broth. Pour over meatballs & bake.
Alternative Brown Mushroom Sauce
In a skillet, heat oil & sauté onion & mushrooms. Add beef base, pepper, garlic powder & 2 cups of the water. Bring to a boil. Combine cornstarch with remaining 1/2 cup water. Gradually add cornstarch mixture to pan & stir as you are pouring. Cook, stirring often, until thoroughly mixed. Pour over meatballs & bake.
Recipe Notes
- The advertisement picture on the blog was from life magazine in 1948.
Of course, you can eat casseroles all year long, but they hold a special spot in our hearts when the crisp days of fall roll around. A longtime staple in North America’s cuisine, these baked concoctions appear at family reunions, holiday gatherings, potlucks, and more.
In terms of comfort food, casseroles are high on the list of our favorite autumn dishes. Double points if they have a good amount of cheese, and triple points if they also contain veggies. There are plenty more reasons to love them. They’re hearty, super-easy to prepare, the perfect dish for freezing and keeping in stock as well as being adjustable to whatever size you need.
This chicken zucchini bake is a great combination of cheesy chicken and vegetables that can be baked individually or as one casserole.
Print Recipe
Chicken Zucchini Casserole
Votes: 1
Rating: 5
You:
Rate this recipe!
|
|
Votes: 1
Rating: 5
You:
Rate this recipe!
|
Instructions
-
Slice chicken into thin strips.
Slice green onions & mushrooms. Mince garlic & julienne zucchini. Melt butter in a large saucepan over medium heat.
Add the chicken, mushrooms, zucchini, garlic, half of the green onions & salt & pepper to the saucepan. Cook & stir often, until tender, about 5 minutes. Drain in a colander.
In a bowl, mix together the cheese, sour cream, remaining green onions, beaten eggs, Italian seasoning & red pepper flakes until well combined.
Stir in the chicken/ veg mixture until well coated.
Spray two individual baking dishes (or an 8 x 8-inch baking pan) with non-stick spray.
Pour the chicken/cheese mixture into the two dishes, divided evenly.
-
Allow to cool 5 minutes. Top with sliced green onions for garnish if you wish & serve.
Quesadillas but with crepes instead of tortillas. A quesadilla (kay-suh-dee-yuh) is a popular savory Mexican turnover that consists of a heated, filled, and folded tortilla. Quesadillas originated in central and southern Mexico, where they were first made with corn tortillas and filled with Oaxaca cheese. (The name quesadilla is a combination of tortilla and queso, which means cheese in Spanish). Over the years, other fillings, such as cooked meats and vegetables, found their way into quesadilla.
Quesadillas have gone through various transformations over time, especially as they became more popular. What started as a simple combination of tortillas and fillings evolved with new ingredients and techniques. Regional differences also influenced how the dish is prepared.
Corn tortillas are the traditional option for quesadillas, though nowadays, you’re just as likely to find them made with whatever you wish. Try subbing your tortilla for something else entirely, like thin crepes. Crepe style pancakes are one of those simple culinary treasures, just some eggs, milk, butter, flour and you’ve got it.
The tortilla vs crepe debate ultimately comes down to personal preference. Both flatbreads offer unique culinary experiences and can be enjoyed in countless ways. Whether you prefer the earthy flavor and versatility of a tortilla or the delicate charm and versatility of a crepe, there’s no denying the allure of these culinary masterpieces.
If you’re accustomed to enjoying crepes when they’re soft, you’ll also love them when they’re hot and crispy! While you can make these crispy crepe-adillas with just cheese, if you’re going to get creative with the ingredients, stay away from anything that’s too chunky or watery that the crepe won’t be able to hold up. Roasting the vegetables is such a nice option.
Print Recipe
Ratatouille Crepe-adillas
Votes: 1
Rating: 5
You:
Rate this recipe!
|
|
Votes: 1
Rating: 5
You:
Rate this recipe!
|
Instructions
Crepe Batter
Place all the ingredients for the crepe batter into a medium/large bowl. Mix with a hand (immersion) blender or in a stand blender until smooth. You can also just whisk it by hand. Cover the bowl with a kitchen towel and let stand for 30 minutes. While the batter is resting, prepare the filling.
Roasted Veggies/Cheese
-
Combine all vegetables in a large bowl, toss with olive oil, salt & pepper.
Line 2 cookie sheets with foil, spray foil with non-stick cooking spray. Spread vegetables in a single layer over prepared cookie sheets.
Place in the oven & roast for 15-20 min, or until veggies are tender & have a bit of char on them.
-
Cooking the Crepes
Whisk the crepe batter before using.
Using a large nonstick skillet or crepe pan, add a small amount of butter over medium-high heat. Pour about 1/4 cup crepe batter onto skillet & form a circle with the bottom of cup or swirl it around the crepe pan so it flattens out. Cook for 30 seconds on the first side or until it firms up, then carefully flip the crepe & cook for another 15-20 seconds. Repeat until all batter is used.
Assemble/Grilling
Spoon 2 Tablespoons of cottage cheese over one half of each crepe; top with 2-3 tablespoons of roasted vegetables & sprinkle with some grated cheddar cheese. Fold the crepe in half then again in half creating a triangle.
Heat a small amount of butter on the griddle, add the filled crepes and cook on both sides until golden and crispy and the cheese is melted.
Recipe Notes
• For a heartier crepe-adilla, add some cooked, shredded chicken or pulled pork.
• Serve with a zesty tomato sauce if you wish.
PORK, stuffed with PORK and wrapped in PORK bacon = a total delight for meat lovers!
Pork tenderloin is a wonderful cut of pork that when cooked well, produces a tender meal full of flavor. Wrapping the pork in bacon simply enhances the flavor as, let’s face it – bacon makes everything taste great!!
Bacon wrapped sausage stuffed pork tenderloin is made with a lean pork tenderloin stuffed with spicy Italian pork sausages and herbs, wrapped in pieces of crispy bacon and a spicy pepper crust.
Although there were certain small differences in original Italian sausages, most consist of ground pork seasoned with some combination of fennel, anise, red bell peppers, paprika, garlic, and red pepper flakes. The red pepper flakes are what give the spicy varieties of Italian sausage their signature kick, while fennel is the hallmark flavor that makes Italian sausage distinct from other kinds of sausage.
This sausage typically comes as one of the following three kinds: hot, mild and sweet. The main difference between hot and mild is the addition of cayenne pepper or hot red pepper flakes. The difference between sweet and mild is the addition of sweet basil to the recipe.
All things considered, this combo should make a super good meal!
Print Recipe
Pork Tenderloin w/ Italian Sausage & Herb Stuffing
Votes: 1
Rating: 5
You:
Rate this recipe!
|
|
Votes: 1
Rating: 5
You:
Rate this recipe!
|
Instructions
Butterfly pork tenderloin & pound flat with a meat mallet.
In a saucepan, heat oil & add onion & garlic. Sauté until aromatic. Add Italian seasoning, sage & sausage meat. Cook until browned then add panko crumbs & vegetable broth. Season with salt & pepper to taste. Remove from heat & allow to cool.
Place the sausage mixture on top of the pork tenderloin, leaving about 1-inch around the sides. Tightly wrap the tenderloin into a roll.
Starting at one side, wrap the bacon around the stuffed tenderloin. Overlap, using the bacon to secure the tenderloin from coming apart.
-
In a skillet over medium heat, sear the pork tenderloin roll in a pan on the stove top on all sides.
Transfer bacon wrapped tenderloin into the oven & roast for about 25-30 minutes or until internal thermometer reads 145-150 F.
Allow meat to rest under foil for about 10 minutes before carving.