Quesadillas but with crepes instead of tortillas. A quesadilla (kay-suh-dee-yuh) is a popular savory Mexican turnover that consists of a heated, filled, and folded tortilla. Quesadillas originated in central and southern Mexico, where they were first made with corn tortillas and filled with Oaxaca cheese. (The name quesadilla is a combination of tortilla and queso, which means cheese in Spanish). Over the years, other fillings, such as cooked meats and vegetables, found their way into quesadilla.
Quesadillas have gone through various transformations over time, especially as they became more popular. What started as a simple combination of tortillas and fillings evolved with new ingredients and techniques. Regional differences also influenced how the dish is prepared.
Corn tortillas are the traditional option for quesadillas, though nowadays, you’re just as likely to find them made with whatever you wish. Try subbing your tortilla for something else entirely, like thin crepes. Crepe style pancakes are one of those simple culinary treasures, just some eggs, milk, butter, flour and you’ve got it.
The tortilla vs crepe debate ultimately comes down to personal preference. Both flatbreads offer unique culinary experiences and can be enjoyed in countless ways. Whether you prefer the earthy flavor and versatility of a tortilla or the delicate charm and versatility of a crepe, there’s no denying the allure of these culinary masterpieces.
If you’re accustomed to enjoying crepes when they’re soft, you’ll also love them when they’re hot and crispy! While you can make these crispy crepe-adillas with just cheese, if you’re going to get creative with the ingredients, stay away from anything that’s too chunky or watery that the crepe won’t be able to hold up. Roasting the vegetables is such a nice option.
Print Recipe
Ratatouille Crepe-adillas
Votes: 1
Rating: 5
You:
Rate this recipe!
|
|
Votes: 1
Rating: 5
You:
Rate this recipe!
|
Instructions
Crepe Batter
Place all the ingredients for the crepe batter into a medium/large bowl. Mix with a hand (immersion) blender or in a stand blender until smooth. You can also just whisk it by hand. Cover the bowl with a kitchen towel and let stand for 30 minutes. While the batter is resting, prepare the filling.
Roasted Veggies/Cheese
-
Combine all vegetables in a large bowl, toss with olive oil, salt & pepper.
Line 2 cookie sheets with foil, spray foil with non-stick cooking spray. Spread vegetables in a single layer over prepared cookie sheets.
Place in the oven & roast for 15-20 min, or until veggies are tender & have a bit of char on them.
-
Cooking the Crepes
Whisk the crepe batter before using.
Using a large nonstick skillet or crepe pan, add a small amount of butter over medium-high heat. Pour about 1/4 cup crepe batter onto skillet & form a circle with the bottom of cup or swirl it around the crepe pan so it flattens out. Cook for 30 seconds on the first side or until it firms up, then carefully flip the crepe & cook for another 15-20 seconds. Repeat until all batter is used.
Assemble/Grilling
Spoon 2 Tablespoons of cottage cheese over one half of each crepe; top with 2-3 tablespoons of roasted vegetables & sprinkle with some grated cheddar cheese. Fold the crepe in half then again in half creating a triangle.
Heat a small amount of butter on the griddle, add the filled crepes and cook on both sides until golden and crispy and the cheese is melted.
Recipe Notes
• For a heartier crepe-adilla, add some cooked, shredded chicken or pulled pork.
• Serve with a zesty tomato sauce if you wish.

It’s spring and with warm weather on the horizon, it’s time to trade in decadent, comforting desserts for some light and airy cheesecakes. Bright springtime days seem to call for a change of flavors as we leave winter behind and rush headlong into the season of renewal. It doesn’t get much better than classic cheesecake. Smooth, creamy, and incredibly rich, it’s one of the few desserts we can eat with different fillings, and anything piled on top.
It has ‘cake’ in its name, but in many ways, it is more like a pie. It can be made with ricotta, mascarpone, cream cheese, or quark. It can have a crust or not, be topped with fresh fruit or jam; spend time in the oven or be no-bake and turn out anywhere from very sweet and creamy to dense and only slightly sweet. Cheesecake is a dessert beloved the world over.
When I think spring baking, I instantly think of lemon and blueberries! These mini desserts feature a light lemon cream cheese filling, ginger cookie crumb crusts and are topped with a homemade blueberry sauce. Yum!
Print Recipe
Lemon Blueberry Cheesecake Minis
Votes: 1
Rating: 5
You:
Rate this recipe!
|
|
Votes: 1
Rating: 5
You:
Rate this recipe!
|
Instructions
Lemon Cheesecake Filling
Dissolve the Jell-O powder in boiling water. Set aside to cool. Combine cream cheese, sugar & vanilla in a mixer bowl. Beat until well combined. Stir in the cooled lemon Jell-O, until well combined. Place in refrigerator until slightly starting to gel.
Gingersnap Crust
-
In a small bowl combine gingersnap crumbs & sugar (if using) & mix well. Add melted butter & mix until it is well blended. Using a mini cheesecake pan, divide crumb mixture evenly between the 12 cups. Bake for about 5 minutes. Cool completely.
Blueberry Topping
In a small saucepan, mix together cornstarch, sugar & salt. Add water & blueberries & cook until 'clear' & bubbling.
Assembly
Place slightly thickened lemon filling in a pastry bag with an open nozzle. On top of the cooled crumb base in each cup, divide the lemon filling evenly. Cover lightly with plastic wrap & refrigerate for at least 2 hours or more.
When firm enough, remove cheesecakes from the pan. Place on a serving dish & top each one with some blueberry topping. Garnish with lemon zest if desired.
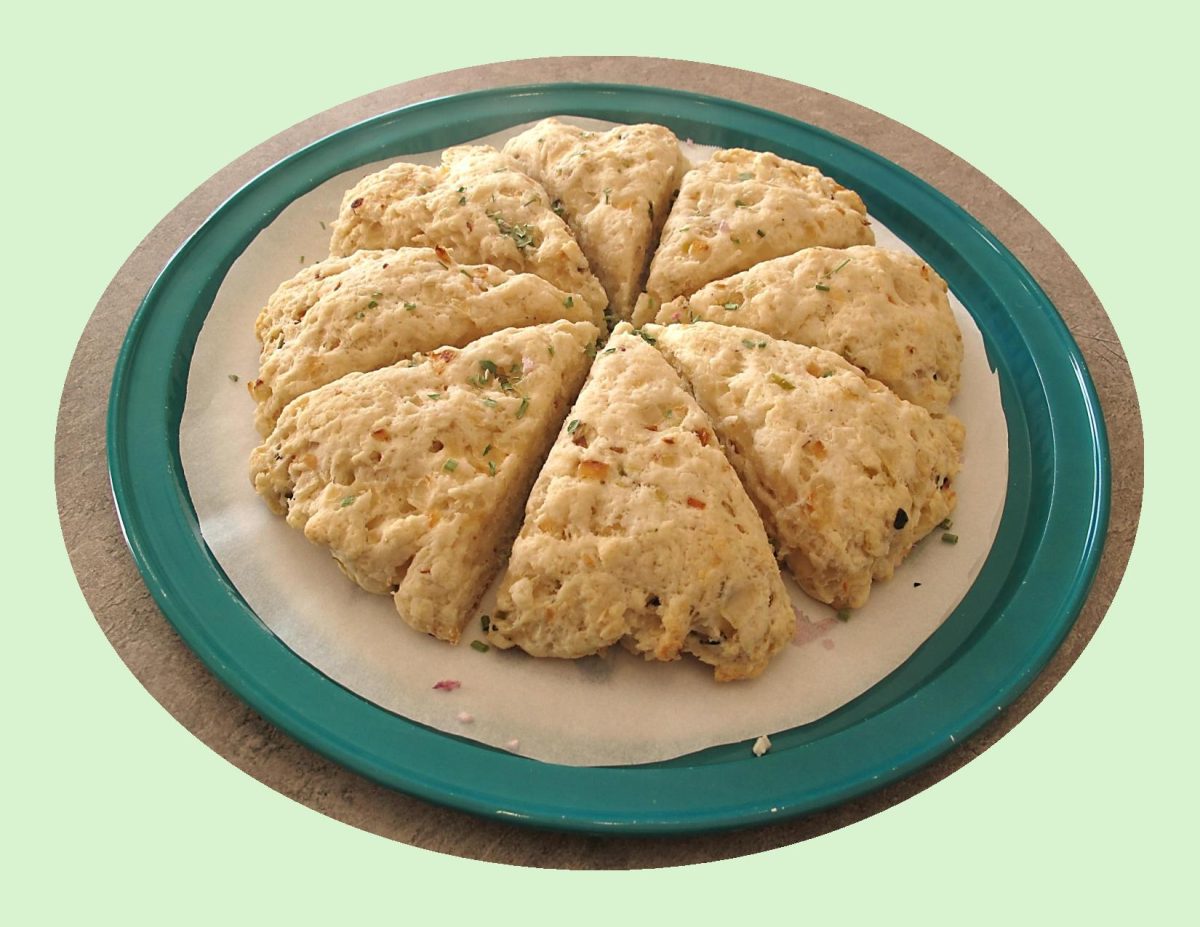
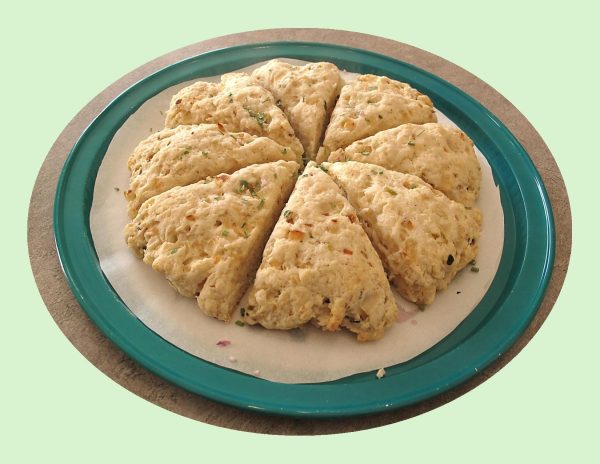
You might imagine scones as a food that is only served with jam and cream, but there are many variations on this classic tea cake. This flaky treat can also come in a savory scone version with add-ins like cheese and chopped bacon or sun-dried tomato & basil etc. A scone is closer to a pastry than it is to bread mainly because it doesn’t include any yeast and has almost identical ingredients to a short crust with different fat to flour ratios.
So why not onion scones?? Because onions really form the foundation of our cooking, they are often the first thing that goes in the pan, and they are the flavor base for everything from chicken soup to a quick skillet pasta. Cooked onions give dishes a rich savory flavor and a subtle sweetness — you don’t always know onions are there once the dish has been spiced and sauced, but you’d definitely miss them if they weren’t.
Scone ingredients prefer to be cold. All your starting components need to be kept as cool as possible – this will help to guarantee the soft, light and well-risen qualities of your next batch of scones.
North American or British scones – what’s the difference? British scones are served with butter/cream whereas North American scones or ‘biscuits’ are far butterier and are typically served alongside meat and veg style savory dishes.
These onion scones make such a nice addition to a beef stew meal.
Print Recipe
Onion Scones
Votes: 1
Rating: 5
You:
Rate this recipe!
|
|
Votes: 1
Rating: 5
You:
Rate this recipe!
|
Instructions
-
In a microwave-safe bowl, combine the yellow onion, green onions, garlic & butter. Microwave on high for 2 minutes, then stir. Microwave for another 1-2 minutes or until the vegetables are tender. Remove bowl from microwave & let the vegetables cool for 10 minutes.
In a large bowl, combine the flour, cheese, sugar, baking powder, pepper & salt.
Add the sautéed onion mixture to the flour mixture along with the light cream & egg. Stir JUST until combined.
Gently press the dough together with your hands to form a ball.
On an ungreased baking sheet, press the dough into an 8-inch circle. Cut the circle into 8 wedges. Separate the wedges slightly.
Bake for 12-15 minutes or until scones are lightly browned. Brush with more melted butter & serve immediately.
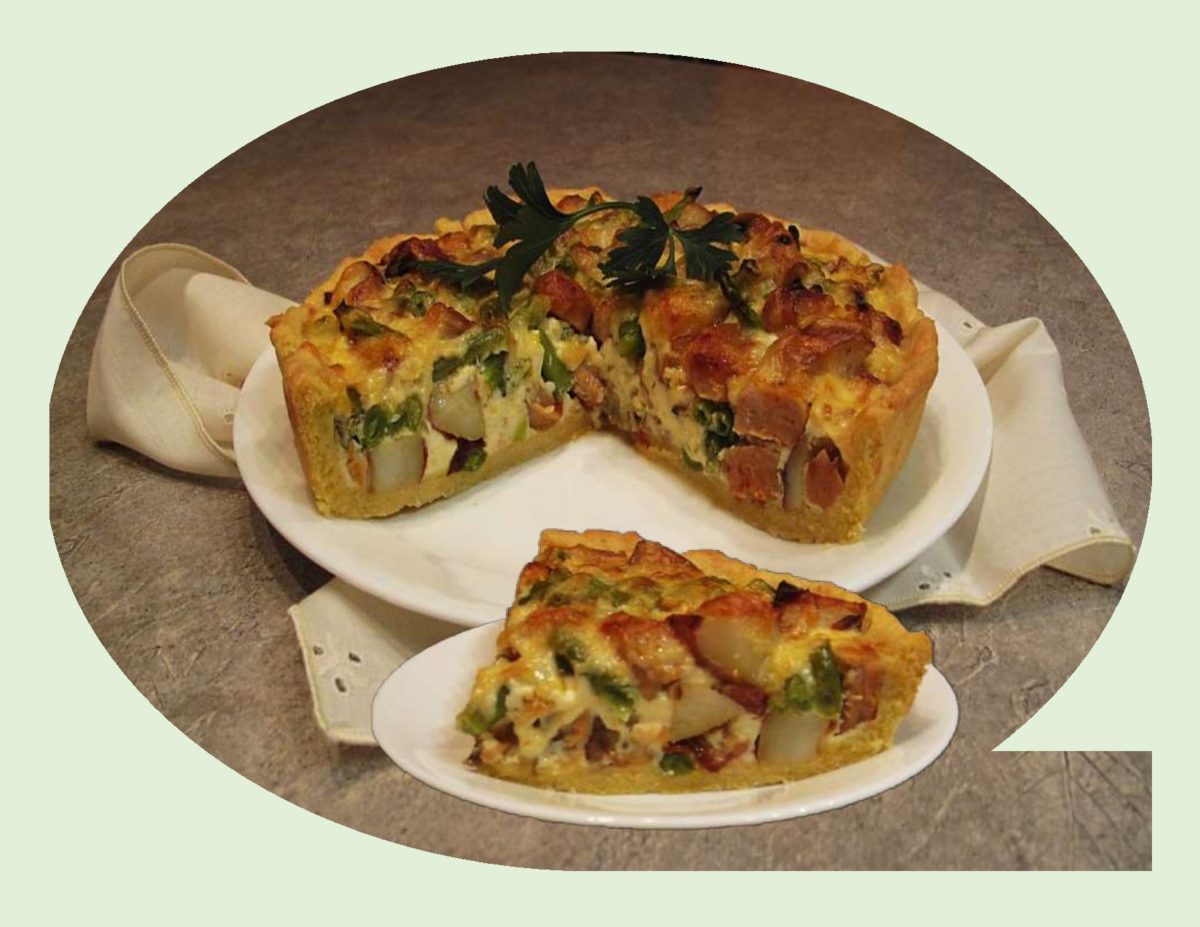
Quiche always sounds fancy or ‘gourmet-ish’ but the truth is, its one of the easiest meals to prepare. The same filling can be used in any size quiche recipe. Once you have a good basic format the possibilities are endless.
Start with the pan size — for a large quiche, use a 9-10-inch pie pan. For individuals, use muffin tins and for mini appetizers, use mini muffin tins.
EGGS: – A ratio of one large egg per half cup of dairy is a good rule to create a fluffy filling. DAIRY: – Heavy cream or a blend of half & half plus cream produces a rich but calorie laden filling. One or two percent milk works just as well but needs a bit longer to set. Using a mixer or a whisk to whip egg mixture until frothy results in a stable filling with a lighter texture. ADD-INS: – Vegetables, greens and meat need to be pre-cooked before adding to egg mixture to prevent the filling from becoming runny. Tomatoes and herbs are the exception. BLIND BAKING CRUST: – This is entirely personal preference. Pre-baking your crust a bit helps to prevent filling from leaking through. I have found that putting the cheese in the crust first, add-ins second and filling last will do the same thing. A blind baked crust will always be crispier if that’s what you want to achieve. OVEN POSITION: – For a large quiche use the bottom rack. For individual or mini quiche use middle rack.
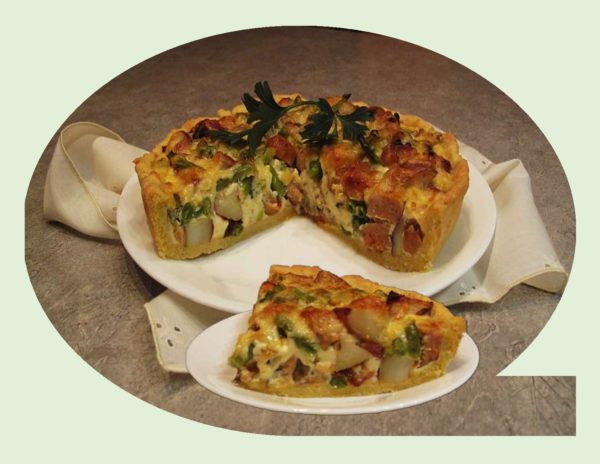
In my quiche today, I started with my favorite, simple cornmeal crust. You can either roast your own potatoes and green beans or purchase a package of the Green Giant steamers version. Use your own sausage choice. As you have probably noticed, I love the red pepper/ Asiago sausage made in-store at Save-On foods. Quiche of whatever kind, is always in my regular meal rotation.
Print Recipe
Roasted Potato with Red Pepper/Asiago Sausage Quiche
Votes: 1
Rating: 5
You:
Rate this recipe!
|
|
Votes: 1
Rating: 5
You:
Rate this recipe!
|
Instructions
Pastry
In a small bowl, combine sour cream & ice water; set aside. In a large bowl, whisk together flour, cornmeal, sugar & salt. Using a pastry blender or finger tips, cut in the butter until mixture resembles BOTH coarse crumbs & small peas. Sprinkle the cold sour cream mixture over dough, 1 Tbsp at a time, tossing with a fork to evenly distribute it. After you have added all the sour cream mixture, dough should be moist enough to stick together when pressed. If not add additional ice water, 1 tsp at a time. Do NOT over work the pastry.
I am using an 8-inch deep dish pan for my quiche. Cut out a circle of parchment about 12-inches in diameter. Roll or pat pastry evenly over paper leaving 1/2-inch border. Lift paper with pastry into pan carefully helping it to conform to the pan shape. Place in refrigerator until filling is prepared.
Filling
Preheat oven to 400 F. Rinse & pare baby potatoes & green beans (cut in to bite size pieces). Place in a plastic bag with some oil & shake well. On a foil lined baking pan, spread veggies out, season with dried rosemary, garlic powder, salt & pepper. Roast until tender. Remove from oven & cool slightly. If using frozen, cook as directed on bag for minimum time. Pour into a dish & cut up large pieces of potatoes. Adjust oven to 350 F. for quiche.
In a skillet, crumble sausage; add mushrooms. Cook over medium-high heat, stirring occasionally, until sausage is cooked; drain. Add sausage/mushroom mixture to roast veggies; stir to combine.
In a pitcher, whisk together eggs, cream & pepper until blended. Remove pastry from refrigerator; sprinkle cheese over bottom. Spoon filling mixture over cheese then carefully pour egg/cream combo over all.
Bake 35 minutes or until eggs are set in center. If necessary, cover edge of crust with strips of foil during the last 15 minutes of baking to prevent excessive browning. If you like, sprinkle with some fresh parsley.
Recipe Notes
- The extra border you left on the parchment when patting out the pastry will make it easy to lift the quiche out of the pan when cooled. I find you can make nice clean cuts that way.
Summer’s bounty of fresh fruit is so hard to resist. Raspberries for instance — vividly pink, exquisitely perfumed and very delicate. I think I’ve tried to use them in everything imaginable. For one company event some years ago, I was trying to come up with a sauce that would take my cream puffs to the ‘next level’. I decided to put some Chambord raspberry liqueur in it. Chambord is created using black and red raspberries, vanilla, citrus peel, honey and hints of fragrant herbs. I definitely could say I think I ‘nailed it’ with that raspberry drizzle.
Although the red raspberries seem to be the most popular and well known, I have tasted the gold ones as well. Fall Gold raspberries ripen in the late part of the season becoming very large and sweet. If you get a chance, they are certainly worth trying.
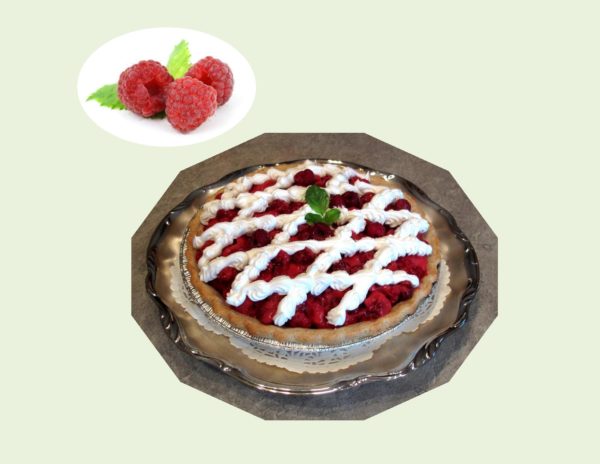
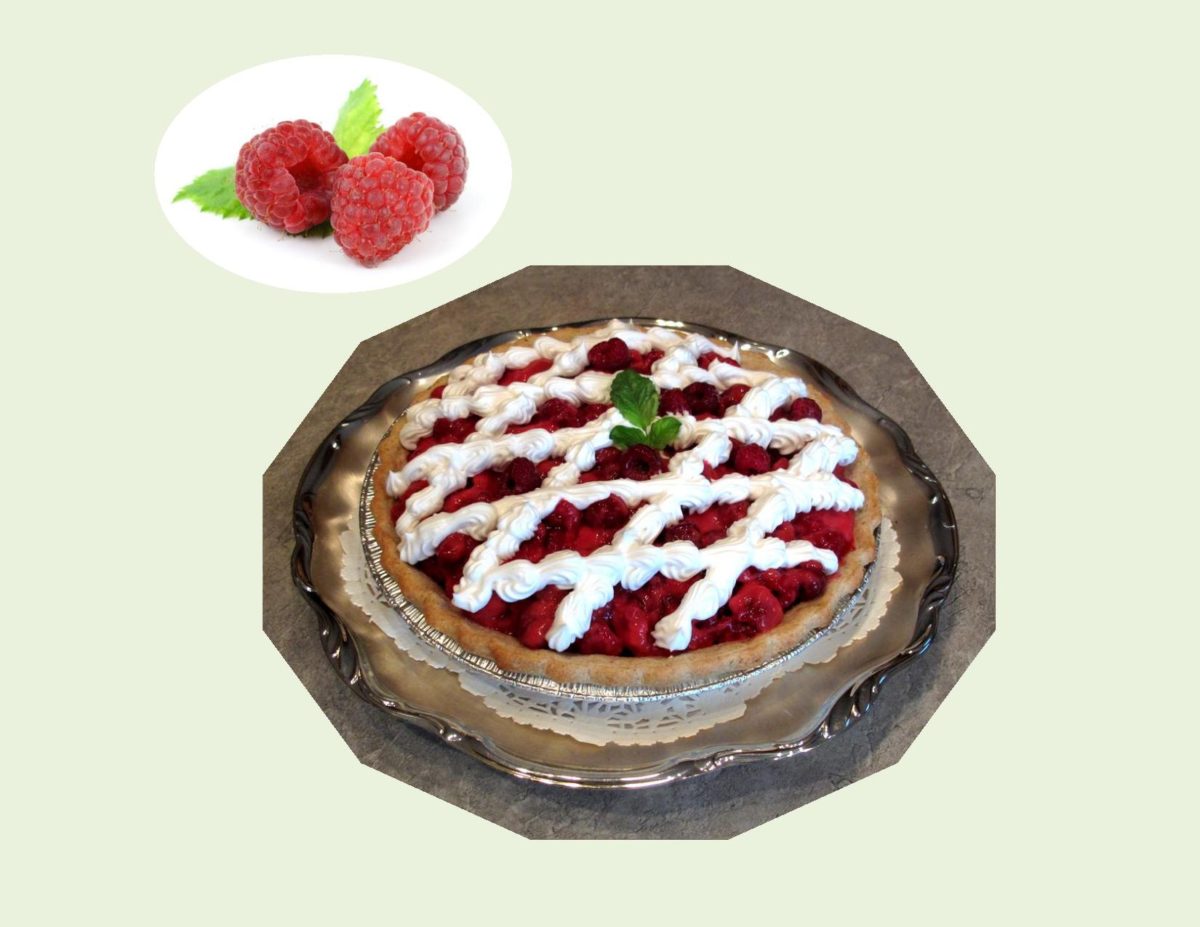
It seems strange that raspberries are actually a member of the rose ‘family’ and not considered a true berry. Irregardless, they are certainly delicious to eat and always give such great eye appeal to everything they are used in. Pie has become such a global favorite, you might say, it’s a work of art that comes easily. Today’s blog recipe for Raspberry Vanilla Cream Pie has always been one of my favorites.
Print Recipe
Raspberry Vanilla Cream Pie
Showy and delicious!
Votes: 1
Rating: 5
You:
Rate this recipe!
|
|
Votes: 1
Rating: 5
You:
Rate this recipe!
|
Instructions
Oat Pie Crust
-
In a large bowl, combine the flour, oats, pecans, (sugar) & salt; bend in margarine until resembles coarse crumbs. Press onto the bottom & up the sides of a 9" pie pan. Bake at 400 F. for 12-15 minutes or until lightly browned. Cool on a wire rack.
Raspberry Filling
-
In a large saucepan, heat water over medium heat. Whisk in pudding mix. Cook & stir for 5 minutes or until thickened & bubbly. Whisk in jell-o until completely dissolved. Remove from heat; cool slightly. Gently fold in raspberries. Spoon into cooled crust. Chill for at least 3 hours or overnight. Serve with a dollop of Cool Whip or Dessert Topping or decorate with a design.