Sour Cherry Crisp

Cherries are one of the quintessential fruits of summer. Sour cherries have a unique tartness, giving them an added dimension of cherry flavor wherever you use them. And, unlike their sweet counterparts, they come in a variety of different shades. Sour cherries hold their authentic cherry flavor throughout a high heat cooking process, making them the ideal choice for baked goods or jams.

Pies, crumbles and crisps are the perfect canvas for fresh sour cherries—the buttery pastry and/or oat topping helps cut the fruit’s pungent acidity.

Sour cherries have less sugar than sweet cherries and that’s a good thing because their high acidity brings a bright, vivid flavor while their sugars will concentrate as you cook them. Once cooked, they’ll taste sweeter. When you bake with sweet cherries, the sugar is so high without acidity to balance it out, so the flavor is one-note, and sometimes too sweet.

The bright, vivid flavor of sour cherries complements many other flavors, including vanilla, chocolate, and cinnamon. 

This sour cherry crisp is an easy way to let this fleeting seasonal ingredient shine.

Print Recipe
Sour Cherry Crisp
Votes: 1
Rating: 5
You:
Rate this recipe!
Course dessert
Cuisine Canadian
Servings
Ingredients
Filling
Oat Topping
Course dessert
Cuisine Canadian
Servings
Ingredients
Filling
Oat Topping
Votes: 1
Rating: 5
You:
Rate this recipe!
Instructions
Filling
  1. Preheat oven to 350 F.
  2. In a saucepan, combine the cherries, sugar, juice & cornstarch. Make sure the cornstarch is well dispersed. Place saucepan over medium heat, stirring occasionally until bubbly & thickened. Pour the cherry filling into a greased 8 X 8-inch baking dish.
Topping
  1. In a bowl, combine oats, flour & brown sugar. Using a fork, mix in the softened butter until crumbly.
Assembly
  1. Sprinkle the oat topping over the cherries & bake 30 minutes or until topping is a golden color.
  2. Serve at room temperature with whipped topping or vanilla ice cream if you wish.

Roasted Salmon w/ Honey-Tart Cherry Salsa

Roasted salmon with honey-tart cherry salsa is popular because it perfectly balances the naturally bold, rich flavor of salmon with a vibrant, sweet-and-sour glaze. The sweet honey, zesty fruit, and savory roasted fish offer a gourmet-quality restaurant feel that is incredibly easy to make at home.

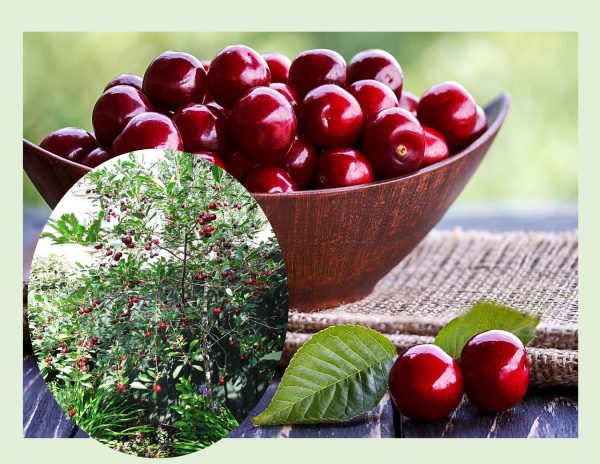
About 13 years ago, Brion and I planted a ‘Cupid’ cherry tree in our back yard. I don’t know if you have ever heard about these ‘prairie’ cherry trees. They were developed here in Canada at the University of Saskatchewan for colder climates. A sour cherry was cross pollinated with a Mongolian cherry. This resulted in a variety of very hardy, smaller trees with a tart-sweet cherry about the size of the well-known ‘Bing’ variety. A group of five cherry trees were developed and became known as the ‘Romance’ series.

We chose this particular one because it is an early bloomer with large, dark red cherries that are both sweet and slightly astringent. The fruit matures in late August -early September with about a three-week harvest period. The tree size is perfect as it matures to around eight feet tall. In the fall its glossy green leaves turn into a beautiful yellow orange.

I personally like using these cherries for cooking and baking as opposed to eating them fresh. The sweet/tart flavor lends itself so well to numerous recipes. Over the years, I have come to really enjoy the flavor of chutneys. The flavor and gorgeous color of the cherries made a real nice ‘chutney’ for this roasted salmon.

Since this year’s crop is not ready yet I see no reason not to use some of the frozen ones I have left from last year.

Print Recipe
Roasted Salmon w/ Honey-Tart Cherry Salsa
Votes: 1
Rating: 5
You:
Rate this recipe!
Servings
Servings
Votes: 1
Rating: 5
You:
Rate this recipe!
Instructions
Salsa
  1. In a medium bowl, stir together the ingredients for the salsa until well combined. Cover and chill until ready to serve.
Salmon
  1. Preheat oven to 350 F. Line a baking sheet with nonstick aluminum foil.
  2. Rinse the salmon filets under cool water & pat dry with a paper towel. Arrange on the baking sheet.
  3. In a small bowl, whisk together the cherry juice & honey. Spread half of the mixture over the salmon filets, reserving the second half.
  4. Bake for 15-17 minutes until just about cooked through. Drizzle the second half of the tart cherry-honey mixture over the filets & bake for an additional 2-3 minutes until slightly golden at the edges.
  5. Serve the salmon filets with roasted potatoes & a green salad, if you wish, with the tart cherry salsa on top.

Roasted Grape Pizza w/ Ground Meat & Arugula

Gone are the days when the only association with grapes was a glass of wine.

The origin of grapes on pizza is unclear but is presumably related to the Tuscan dish, ‘schiacciata all’uva’ (flattened bread or focaccia with grapes). During the harvest season in Italy, grapes (with seeds) are baked into flatbreads to create a slightly sweet snack or dessert. The crunch and tartness of the grapes add a layer of complexity to the dough.

Today’s blog recipe is for a gourmet-style pizza that features roasted red grapes with 2 different cheeses, a ground meat combo & arugula which make it quite unique and irresistible.

Grapes have an extremely high natural sugar content, so roasting causes the skin of the grapes to burst a bit in the oven and become lightly blistered and caramelized. The inside is juicy, with a jam-like consistency (a bit like a wine flavored jam). Roasted grapes are amazing over grilled meats, easy-yet-elegant desserts, next-level salads and toasts, cheese boards, roast meat, or…pizza.

In Alberta, Canada, where we live, the colder climate historically posed challenges to grape ‘farming’. However, with the advent of cold-hardy grape varieties and innovative farming techniques, the Alberta grape and wine industry, though niche, is showing promising growth and resilience.

Fresh grapes are wonderful on their own, but their culinary versatility is broad. When roasted it concentrates their sweetness. When frozen, grapes turn into bite-sized sorbets, a cool treat for summer. Grape juice, with its sweet and tart profile, is a base for many beverages and sauces. And of course, grapes are paramount in winemaking.

Brion & I have been growing Valiant grapes in our back yard for about thirteen years now. I have featured various savory recipes using grapes before but today I thought it was a good time for another Roasted Grape Pizza .

Print Recipe
Roasted Grape Pizza w/ Ground Meat & Arugula
Instructions
  1. Preheat oven to 400 F.
  2. Toss the grapes with 1 Tbsp olive oil & salt & place on a parchment lined baking sheet. Roast 20-25 minutes until the skins start to burst & the juices begin to caramelize. Set aside to cool slightly.
  3. In a saucepan over medium heat, cook the ground meat until fully browned. Break meat into small pieces as it cooks. Drain any excess fat to prevent a soggy crust. Stir in the garlic powder & herbs during the last minute of cooking.
  4. Spread ricotta evenly over Naan breads & season with salt & pepper. Add a thin layer of shredded cheese followed by the cooked meat & onion. Scatter roasted grapes & fresh thyme over the top
  5. Bake at 400 F. for 8-12 minutes until filling is hot & melty.
  6. Immediately after removing the pizza from the oven scatter fresh arugula over the top[ for a peppery bite. The residual heat will slightly wilt the greens. Drizzle with honey for an extra layer of flavor.

Pork Tenderloin in Mushroom Sauce w/ Pasta

Pork tenderloin has always been one of my favorite cuts of meat. One of the easiest ways to transform everyday pork into a special occasion main dish. It’s the best part of a pork chop without bone or fat and has that melt-in-your-mouth tenderness.

While the tenderloin is highly valued for its gentle texture, they are often sold with a stretch of membrane called the silver skin as well as some extra fat. It can be helpful to leave some of the fat on this extra-lean cut of meat for flavor, but the silver skin is going to be nothing but trouble.

Not only will this membrane remain tough after it’s cooked and ruin the tenderloin’s texture, but it will also cause it to buckle and cook unevenly. That buckling occurs when fat, or in this case tissue, cooks and shrinks at a different rate than the meat causing it to become oddly shaped. The best way to deal with this is to simply slip a thin-bladed knife under the membrane and gently slice it away from the meat. Repeat this until every bit of the silver skin is removed completely from the meat.

Serving pork with pasta is a comforting and simple dish perfect for any night of the week.

Print Recipe
Pork Tenderloin in Mushroom Sauce w/ Pasta
Instructions
Pork Tenderloin
  1. Slice pork tenderloin into several medallions, about 1-inch thick. On a large plate or use a zip lock bag, mix flour, garlic powder, onion powder, paprika, & salt/pepper. Dredge pork medallions in seasoned flour & sear them in light olive oil on medium-high heat until golden brown. Set aside to a warm place.
Mushroom Sauce
  1. Reduce heat to medium, add butter & light olive oil. Add sliced onion & mushrooms to the pan. Sauté until mushrooms are browned & onions are caramelized.
  2. Add garlic & cook for a minute. Add 2 tablespoons of flour & mix well. Add vegetable broth, ­scraping up all the bits in the bottom of the pan. Stir in cream cheese (or your choice of dairy).
  3. Return cooked pork to the pan & simmer for 1 – 2 minutes until the sauce thickens into a gravy consistency (it will thicken more as you serve). Adjust salt & pepper, to taste.
  4. Cook your choice of pasta according to the directions on the package. Add to the pan & mix with creamy mushroom sauce.
  5. Garnish with chives, thyme, dill, or fresh parsley if you wish. Serve.

Hot Roast Beef Sandwiches w/ Onion Jam

CELEBRATING MAY LONG WEEK-END!

This distinctly Canadian holiday serves as the official marker to end winter. Even if the date marks the informal start of summer, you could be planning for a backyard barbecue or an impromptu indoor shut-in due to an array of snow, sleet, rain or hail.

But for Canadians, it is a good excuse to celebrate the beginning of the summer season. Canadians jokingly refer to ‘Victoria Day’ as May ‘two-four’ day. This is an inside joke which refers to a case of beer, containing 24 cans. For most Canadians, this is the first warm-ish long weekend since Easter, so they head to campsites armed with a 24 case of beer. Although we hang on to the Victoria Day name for old times’ sake, somehow it seems we are really celebrating the beginning of the summer season.  May ‘two-four’ is probably the more accurate moniker.

Hot roast beef sandwiches with onion jam are perfect for today. They will work if you are outside or indoors. Layers of shaved roast beef are piled on top of garlic rolls and topped with melted mozzarella and a homemade sticky-sweet onion jam. The onion jam used for this roast beef sandwich just takes it to the next level!

Onion jam is an extremely versatile condiment that can be used in many ways such as a spread on crackers or crostini, as a pizza topping, in salad dressings, or as a complement to roasted vegetables. You can also add it to mini tarts and puff pastry appetizers, your favorite burger patty, a cheese board, or as a topping for both a tart and focaccia or swirl it into macaroni and cheese. 

Its unique flavor can be sweet and savory and can include a variety of flavors like red wine vinegar, balsamic vinegar, black pepper, lemon juice, and lemon zest. In terms of consistency, it is not unlike a fruit preserve, as the pieces of diced onion are intact and still look like an onion and it is spoon able just like a fruit preserve.

Enjoy your holiday weekend to the fullest!

Print Recipe
Hot Roast Beef Sandwiches w/ Onion Jam
Votes: 1
Rating: 5
You:
Rate this recipe!
Servings
Ingredients
Servings
Ingredients
Votes: 1
Rating: 5
You:
Rate this recipe!
Instructions
Garlic/Cheese 'Bread'
  1. Sauté the garlic in the butter & oil for 2-3 minutes over medium-low heat or until fragrant. Turn off the heat & add in the crushed red pepper flakes & parsley along with a pinch of salt (to taste).
  2. Lay bread slices out on work surface & distribute the garlic butter over all. Sprinkle with the Pecorino. Set aside.
Onion Jam
  1. Sauté the onions in olive oil over medium heat until golden (about 15 minutes). Add the salt, sugar, balsamic vinegar & thyme. Cook for another 10 minutes or until the jam has thickened. Taste & adjust salt, pepper & sugar levels to taste. Pour the jam into a bowl & set aside.
Sandwich Assembly
  1. Preheat panini grill to 350 F.
  2. Divide roast beef into 4 portions & place on 4 of the slices of garlic bread then top with mozzarella, dividing evenly.
  3. Spread the onion jam on top of the mozzarella then place the remaining 4 slices of garlic bread on top of the sandwich. Grill on a panini grill until golden & slightly crispy.
Recipe Notes

• 3/4 cup of sugar will yield a moderately sweet onion jam. Feel free to use more or less sugar to taste.

Rhubarb Carrot Cake

CELEBRATING MOTHER’S DAY!

Here in Canada, we set aside the second Sunday in May to honor our mother’s with expressions of love and gratitude.

As I grow older, I realize how many ways I unconsciously emulate my mother. I loved everything about her and as a kid I could never imagine life without her. But in the natural sequence of events, that’s not how it works. I guess along with many other things, I’m grateful for the fact that she was there through my childhood. She passed away at the age of sixty and although she is no longer on this earth, her wonderful memory will live on in our hearts forever.

We are fortunate to still have Brion’s mother, Dolores. We have been able to spend a bit of time with her recently, which was so precious.

This blog is especially to honor: the special memories of my mother for her endless giving of selfless love – my mother-in-law, Dolores, for her kind ways and raising that ‘special’ man I love sharing my life with –my sister Loretta who passed away 3 years ago and to my sisters, Marilyn & Rita, who give so much of themselves to be the great mom’s they are.

In honor of these special women, I’d like to post something to ‘celebrate’ this day. My choice this year is a rhubarb carrot cake with rhubarb cream cheese frosting.

Rhubarb has been a staple in Canadian history since the days of early European settlement, valued for its hardiness, versatility, and medicinal properties. Rhubarb was a reliable perennial for homesteaders and pioneers due to its ability to thrive in Canada’s cold climate. When the homesteaders moved on, and their farms crumbled back into the ground, the rhubarb patch often persisted. The same is true of modern-day cities; every time a house in an older neighborhood is demolished, the rhubarb often remains. The distinctive plants that remain on abandoned farmsteads across the country are a testament to this hardy heritage.

I recall with fond memory, my mother having at least six huge rhubarb plants that bordered her large produce garden on our family farm. At that time I really didn’t take a lot of interest in them, they were just always there and grew huge without anything more than rain and sunshine. Now, of course I love using rhubarb in everything I can think of, sweet or savory.

Vegetable cakes are great for making the most of the seasons. This recipe for rhubarb carrot cake is a recent, modern fusion of two older dessert traditions: carrot cake and rhubarb cake. The combination likely emerged in the late 20th or early 21st century as bakers experimented with popular seasonal flavors. What makes this rhubarb carrot cake so appealing is how the sweet, earthy carrots balance out the sharp tartness of fresh rhubarb. The carrots add this incredible moisture and natural sweetness, while the rhubarb provides these amazing tangy bursts that keep every bite interesting.

This ‘sophisticated’ cake features winter carrots and the first rhubarb of the year in a marvelous merging of two seasons. Of course, the rhubarb cream cheese frosting is truly ‘the icing on the cake’.

I hope anyone trying this recipe enjoys it as much as Brion & I did.

Print Recipe
Rhubarb Carrot Cake
Votes: 1
Rating: 5
You:
Rate this recipe!
Course dessert
Cuisine Canadian
Servings
Ingredients
Cake
Rhubarb Cream Cheese Frosting
Course dessert
Cuisine Canadian
Servings
Ingredients
Cake
Rhubarb Cream Cheese Frosting
Votes: 1
Rating: 5
You:
Rate this recipe!
Instructions
Rhubarb Frosting
  1. Combine chopped rhubarb, sugar & a splash of water in a saucepan on medium low heat. Stir regularly until rhubarb reduces. Adjust heat to low & continue stirring for 20 minutes until rhubarb thickens into a jam. Transfer rhubarb jam to a glass bowl & cool in the refrigerator.
  2. Whip butter & cream cheese on high until creamy. Add the rhubarb jam & vanilla to cream cheese mixture. Beat until combined. Add powdered sugar 1/2 a cup at a time & beat until smooth. Refrigerate until ready to use.
Cake
  1. Preheat the oven to 350 F. Butter either a 9 x 13-inch baking pan or 2 round 8-inch cake pans.
  2. In a large bowl, whisk together the eggs, melted butter, sugar, brown sugar & buttermilk.
  3. In a medium bowl, whisk together the flour, baking powder, cinnamon, cardamom, ginger & salt. Add to the egg mixture & blend well. Add the carrots & rhubarb, gently fold until evenly incorporated into the batter. Pour the batter into the prepared pan(s) & bake for 25 to 30 minutes or until a toothpick inserted in the center comes out clean. Set aside to cool.
Assembly
  1. If baking cake in the 2 layer version, spread the bottom of one cake with a bit of the frosting then top it with the other layer. Frost entire cake with remaining rhubarb frosting & decorate as you wish.
Recipe Notes

• Since there is only the two of us, I only used one layer & froze the other one for another time.

Coho Salmon & Leeks Baked in Mustard Sauce

Leeks are an edible plant used in many different cuisines. Closely related to onions, garlic, and scallions, the edible parts of leeks are the tightly bound leaf sheaths that form stalk-like bases, which transition into flat leaves. Leeks are quite mild which makes them perfect to pair with simple veggies in the spring like asparagus and peas, and heartier veggies in the fall like winter squash and potatoes.

When leeks are grown, soil is piled up around them, so that more of the leek is hidden from the sun, and therefore lighter in color and more tender. What produces a beautiful leek, a long pale body, also results in sand and dirt being lodged deep inside the leek.

Leeks straddle the line between aromatic and fresh vegetables, with the seasoning qualities of ‘the gourmet’s onion’ and the delicate flavor and texture of ‘the poor man’s asparagus’.

Leeks can be used interchangeably with onions in most recipes for soups, casseroles, and stews to add a subtle, more complex flavor. One way to showcase this flavorful onion is to make it the star of the show as I’ve done here in this leek dish with salmon in mustard sauce.

Print Recipe
Coho Salmon & Leeks Baked In Mustard Sauce
Votes: 1
Rating: 5
You:
Rate this recipe!
Servings
Votes: 1
Rating: 5
You:
Rate this recipe!
Instructions
Salmon / Leeks
  1. Clean & remove skin from salmon fillet. Wash leeks & remove thicker outer layer, which can remain a bit tough. Cut the leeks into pieces approximately 1 1/2-inches in length. In the microwave steam dish, cook leek for 8 minutes until al dente. Drain & set aside.
  2. Whisk all sauce ingredients together in a small saucepan over low heat. Warm through for 2-3 minutes, but do not boil.
Sauce
  1. Whisk all sauce ingredients together in a small saucepan over low heat. Warm through for 2-3 minutes, but do not boil.
Assembly / Baking
  1. Place salmon fillet in the center of a large baking dish. Surround with pre-cooked leeks & spread mustard sauce carefully over all.
  2. Bake for about 20 minutes or until salmon flakes easily. Serve with orzo or mashed potatoes.

Bacon & Egg Hot Cross Buns

CELEBRATING GOOD FRIDAY!

Here’s a savory twist on the classic Easter hot cross bun you might enjoy!

One of the food items I love most about the Easter season is . . .  Hot Cross Buns!   Although they are generally available all year round now it seems, Brion & I prefer to reserve them for an Easter treat. I think when something becomes an everyday thing it loses its ‘specialness’.

The tradition of marking buns with a cross on the top goes a long way back in time. Pagon Saxons baked cross buns at this time of year to mark the beginning of spring, in honor of their god Eostre. The cross was representative of the four seasons along with the four quarters of the moon, the wheel of life and a rebirth of the earth after the long winter. Christians adapted the cross when an Anglican monk baked the buns and marked them with a cross in honor of Good Friday.  The buns were usually served on Good Friday, marking the end of Lent and the spices are said to represent the spices used to embalm the Savior after his crucifixion.

Every year at this time, I enjoy making some version of hot cross buns or bread. Generally, I stick to the sweet kinds but this year I thought I’d take it to the savory side. These avocado, bacon & egg hot cross buns are just the thing to kick off an excellent Easter brunch.

Print Recipe
Bacon & Egg Hot Cross Buns
Votes: 1
Rating: 5
You:
Rate this recipe!
Course Brunch
Cuisine Canadian
Servings
Votes: 1
Rating: 5
You:
Rate this recipe!
Instructions
Buns
  1. In a small bowl, combine warm milk, sugar & yeast. Let it sit for 5 minutes until foamy.
  2. In a large mixing bowl, combine flour, salt, garlic powder & dried herbs. Mix well.
  3. Add the yeast mixture, melted butter & beaten egg to the dry ingredients. Mix until a dough forms. Knead the dough on a lightly floured surface for about 5 minutes until smooth and elastic. Place the dough in a greased bowl, cover with a kitchen towel & let it rise in a warm place for 1-2 hours until doubled in size.
  4. Punch down the dough & divide it into 8 equal portions. Flatten each portion & place a cube of cheese in the center. Fold the dough over the cheese & shape into a ball. Place the buns on a baking sheet lined with parchment paper. Cover with a kitchen towel & let them rise for another 30 minutes.
  5. Preheat oven to 375 F.
  6. In a small bowl, mix flour & water to make a paste. Transfer the paste to a piping bag or a plastic bag with a small corner cut off. Pipe a cross shape on top of each bun with the flour paste.
  7. Bake the buns for 15-20 minutes until golden brown. Remove from the oven & brush buns with melted butter. Allow the buns to cool for a few minutes before serving.
Assemble Bacon & Egg Buns
  1. Grate cheese & slice tomato or ready tomato sauce.
  2. On a griddle, fry bacon until it is beginning to crisp. Blot bacon on paper towels then set aside to keep warm.
  3. Slice buns in half & LIGHTLY butter cut sides. Wipe excess bacon drippings off griddle then place buns on it to toast lightly. Remove to serving platter & keep warm. Place 8 eggs on the griddle & cook just until whites are set.
  4. Top each toasted bun base with an egg, bacon, cheese, sauce (or tomato slice) & avocado slices. Season with salt & pepper. Sandwich with bun tops & serve.
Recipe Notes

• Alternately, if there is no time for making the savory hot cross buns from scratch, purchased ones will work just as well.

Pineapple Carrot Cake

Today, March 28th, marks the date of my mother’s birth. Although she left this earth 48 years ago, her memory remains crystal clear. She was a wonderful mother who made our lives so much better in ways we never realized. She set a good example just by the way she lived the ‘best version of herself’.

When this date rolls around each year, I like to post something on the blog that I think she would have enjoyed making. Baking was a ‘job’ she really seemed to enjoy, and our family certainly reaped the benefits of that.

Carrot cake is considered a spring dessert primarily due to its strong association with Easter celebrations, the bright, vibrant color of carrots representing the season. With Easter being just a week away I thought it would be a fitting recipe for today’s blog.

While it’s difficult to pinpoint the exact first instance of carrot cake being made in Canada, it’s likely that it became popular in the mid-20th century, alongside its rise in popularity in the United States. In the 1970’s, carrot cake was perceived as being ‘healthy’ due to the fact that carrots, raisins and nuts are all ‘good for us.’ Then along came that glorious cream cheese frosting that forever bonded the pair. While raisins are undoubtedly the oldest compliment to carrots, pineapple, apples or applesauce as well as walnuts have all become modern day add-ins of choice.

Today’s blog recipe for layered pineapple carrot cake is moist, not too sweet and filled with crushed pineapple and pecans. I’ve used a fluffy, pineapple cream cheese frosting for the filling as well as topping for this decadent dessert.

Print Recipe
Pineapple Carrot Cake
Votes: 1
Rating: 5
You:
Rate this recipe!
Course dessert
Cuisine Canadian
Servings
Course dessert
Cuisine Canadian
Servings
Votes: 1
Rating: 5
You:
Rate this recipe!
Instructions
Cake
  1. Place crushed pineapple in a fine mesh sieve over a bowl & push down on pineapple with a spoon to eliminate excess moisture. Set aside.
  2. Preheat oven to 325 F. Line three 8” round cake pans with parchment paper then spray with nonstick cooking spray WITH FLOUR or grease and flour pans.
  3. In a large bowl, mix all of the dry ingredients together. In a separate bowl, gently whisk eggs then stir in remaining wet ingredients, including drained pineapple, just until combined. DON'T OVERMIX.
  4. Stir wet ingredients into dry ingredients just until moistened, then stir in 2 ½ cups grated carrots until evenly combined, being careful NOT TO OVERMIX.
  5. Divide batter equally between prepared pans. Gently tap the pans a few times on the counter to get rid of air bubbles. Bake for 30-40 minutes, or until toothpick inserted into center comes out clean & the cakes begin to pull away from sides of pans.
  6. Let cakes cool in pans on wire racks for 15 minutes then invert onto wire racks to cool completely.
Pineapple Cream Cheese Frosting
  1. Using an electric mixer, beat the cream cheese & butter until creamy. Beat in the sour cream, vanilla & salt. Gradually beat in powdered sugar until the desired consistency is reached. Mix in pineapple preserves.
Assembly
  1. Place a small dollop of frosting in the center of the cake stand to keep the cake from moving and top with one leveled cake.
  2. Top cake with ¾ cup frosting & spread evenly. Top with a second cake & spread evenly with ¾ cup frosting. Top with remaining cake.
  3. Create Crumb Layer by scooping 1 cup of frosting into a smaller bowl. Frost cake starting with the top and working down until the cake is evenly frosted, removing any excess frosting. Refrigerate cake 30 minutes or until crumb layer has set. Refrigerate remaining frosting until ready to use.
  4. Frost the outside of cake with the remaining frosting. Decorate as you wish. Serve cake cold or at room temperature.
Recipe Notes

As you may have noticed in the blog picture, I divided the batter into thirds. We gifted a friend with a 2 layer cake & Brion & I kept 1 layer for us.
For the decorations, I simmered some dried apricots in the extra pineapple juice for a few minutes then sliced them & added some pepita seeds as well as black sesame.

Cheddar Bay Biscuit Shrimp & Lobster Pot Pie

The Red Lobster Cheddar Bay Biscuit Shrimp & Lobster Pot Pie was first introduced as a limited-time menu item by the restaurant chain in May 2013. The pot pie was part of its ‘Seaside Mix & Match’ promotion. This marked the first time the iconic biscuits were used as a topping for a main dish in the restaurant’s history. The dish featured a creamy sauce with shrimp, lobster, peas, and carrots, topped with the biscuit dough, then baked until golden brown.

The specific Red Lobster menu item was a unique, promotional creation designed to leverage the immense popularity of their free, unlimited biscuits. It has inspired numerous copycat recipes and variations that circulate online, allowing fans to recreate the dish at home using the store-bought Red Lobster biscuit mix.

The biscuits are made with a blend of medium cheddar cheese, garlic, and herbs, finished with a melted butter topping. This rich, savory flavor profile makes them highly addictive and distinct from typical bread or rolls. Being a ‘drop biscuit,’ it gives them a light, fluffy, and airy texture, as opposed to the denser, rolled biscuits. This unique consistency makes them melt-in-your-mouth delicious when served warm.

This copycat recipe checks all the boxes for Brion & I so I had to try it.

Print Recipe
Cheddar Bay Biscuit Shrimp & Lobster Pot Pie
Votes: 1
Rating: 5
You:
Rate this recipe!
Servings
RAMEKINS
Ingredients
Servings
RAMEKINS
Ingredients
Votes: 1
Rating: 5
You:
Rate this recipe!
Instructions
Pot Pie Filling
  1. Preheat oven to 400 F.
  2. In a saucepan over medium heat, melt butter. Add garlic, onion, & celery. Cook until soft, about 5 minutes. Stir in flour & cook 1 minute, forming a roux.
  3. Slowly whisk in seafood broth & cream. Stir until smooth & slightly thickened, 5–7 minutes. Season with Old Bay, salt & pepper.
  4. Add shrimp & cook 2–3 minutes until pink. Stir in lobster parsley. Remove from heat.
Biscuits
  1. In a bowl, whisk together flour, baking powder, garlic powder & salt. Cut in the grated cold butter until crumbly. Stir in cheddar & herbs. Add milk & mix until just combined. The dough will be sticky.
Assembly
  1. Spoon seafood mixture into 4-12 oz. ramekins or a baking dish. Drop biscuit dough over the top, spreading gently. Bake 20–25 minutes, until biscuits are golden & cooked through. Let rest 5–10 minutes before serving.