Rice Pudding Tarts w/ Port Pears

A sure sign of summer leaving us is the arrival of the pear season, stretching from now until the end of December.

These rice pudding tarts with port pears are a combination of textures and flavors. Bosc pears are beautiful; they have a crisp, dense, slightly grainy texture with a sweet flavor and subtle hints of fall spices. Port wine is a sweet, red, fortified wine that pairs wonderfully with pears. What’s not to like??

Budino di riso: a kind of soft rice cupcake or vanilla-scented rice pudding baked in short pastry and sprinkled with icing sugar. Named after the principal ingredient used in the filling, budini di riso is a typical pastry coming from Siena, a medieval city in the region of Tuscany, located in the north of Italy.

Every summer, from May to July, until the 1960’s (and even 1970’s in some places), thousands of female seasonal workers would make their way to the Po Valley in northern Italy. Here, in the rice fields, they went to work as ‘mondine’. Their task was to remove weeds that could stunt the growth of the rice plants.

The compensation of these women consisted not only in money but also 1 kg of rice for each day of work. Hence the widespread use of rice throughout the region in both savory and sweet preparations.

This rice custard tart is a combination of a creamy, vanilla scented rice pudding with a caramelized top, all baked in a crisp shortbread pastry crust. There are many variations for this Italian classic. Some like to make it with a crust, others prefer it without. Other recipes may also add fresh squeezed lemon juice for a citrus flavor.

Today, rice is the world’s most widely consumed cereal grain, which means that virtually every culture has a rice pudding they call their own.

Part pie … part rice pudding, these little tarts can be eaten for (an elegant) breakfast, as an afternoon snack or for dessert, they are just plain good anytime.

Print Recipe
Rice Pudding Tarts w/ Port Pears
Votes: 1
Rating: 5
You:
Rate this recipe!
Servings
Ingredients
Pastry
Rice Pudding Filling
Poached Pears
Servings
Ingredients
Pastry
Rice Pudding Filling
Poached Pears
Votes: 1
Rating: 5
You:
Rate this recipe!
Instructions
Pastry
  1. In a bowl, sift together flour, rice flour, powdered sugar, salt & baking powder. Add butter & rub together with fingertips to make soft crumbles.
  2. In a small bowl, beat egg; add to flour mixture & work into a smooth ball of dough. DO NOT OVERMIX. Flatten dough ball & wrap in plastic wrap; chill in refrigerator.
Rice Pudding Filling
  1. Place rice in a saucepot. Cover with water & bring to a boil. Rinse rice; return blanched rice back in saucepot & cover with milk. Add cinnamon stick & lemon zest. Cook over low heat, stirring often until rice has absorbed most of the milk & rice mixture becomes soupy.
  2. Remove rice/milk mixture from heat & add butter; stir well. Place rice mixture in a bowl to cool. Stir & cool for about 20 minutes. In a bowl, whisk together eggs, sugar & vanilla; add to cooled rice mixture.
Assembly
  1. Preheat oven to 350 F.
  2. Remove pastry from refrigerator & divide evenly into 8 pieces. Form into balls & roll each one lightly in flour then using a rolling pin flatten into a small circles. Line 8 paper cups with pastry & place them in a muffin pan.
  3. Spoon the rice pudding into the pastry shells & bake about 30 minutes or until golden brown on the edges & they test done with the tip of a knife. Do NOT OVERBAKE as they will become quite dry. Prepare poached pears.
Poached Pears
  1. Peel, halve & core pears.
  2. Place wine & cinnamon in a skillet. Bring to a boil over high heat; add pears. Reduce heat to low; cover & poach for 10 minutes. Turn pears; poach 5 more minutes or until tender. Remove pears from wine & set aside. When cooled, place cut side down on a cutting board & slice lengthwise into 1/4-inch slices Then into pieces to fit tart tops. RESERVE POACHING WINE for sauce.
Port Wine Sauce
  1. In a small saucepan, place reserved cooled poaching wine PLUS enough extra port wine to make 2 cups. Whisk in sugar to taste & cornstarch. Heat to a gentle boil, whisking constantly until mixture forms a nice gel consistency. Remove from heat. Cool slightly.
Serving
  1. Top each rice tart with a small fan of poached pears then spoon wine sauce over each. Nothing says you can't add a dollop of whipped topping as well!
Recipe Notes

You will probably have some of the pears left over. I just diced them up & added them to the sauce.

Chocolate Blueberry/Lemon Inlay Roll Cake

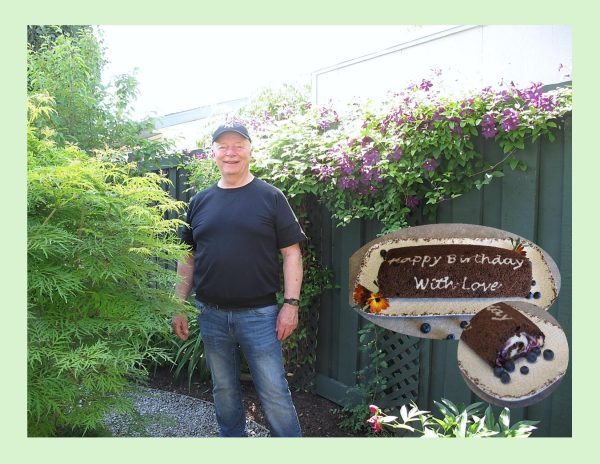
Today we are celebrating my husband Brion’s birthday. Family birthdays forever bring me back to my childhood days. My mother always made the birthday person’s favorite meal on their day along with a cake. Although she excelled at cooking in general, her creative talent was put to good use when she decorated our birthday cakes. As I follow her tradition, I wanted to bake something that was unique for Brion’s birthday.

One of the easiest ways to dress up a basic roll cake is with a design. This technique is one that originated in Japan. The cake rolls are also known as deco rolls’, as the cake rolls are decorated with patterns and baked. Rather than decorating the cake after it’s been baked, this technique pipes it directly onto the cake with batter.

In Japan, the roll cake tradition has continued, with unique flavors like matcha (green tea) and various cream fillings. The use of ‘inlay’ design creates an artistic presentation. The incorporation of unique flavors and decorative techniques continues to evolve and expands the appeal of this iconic dessert. 

With summer in full swing, our backyard is bursting with all its glorious flowers and foliage and even though he would rather I didn’t add his picture to my blog today, I wanted to share this garden view with you. I think it’s a great backdrop for a birthday picture, right!

HAPPY BIRTHDAY, MY LOVE … YOU’RE THE BEST

Print Recipe
Chocolate Blueberry/Lemon Inlay Roll Cake
Votes: 1
Rating: 5
You:
Rate this recipe!
Servings
Ingredients
Lemon Curd
Blueberry Filling
Whipped Cream Cheese Filling
Pattern Batter
Cake Batter
Servings
Ingredients
Lemon Curd
Blueberry Filling
Whipped Cream Cheese Filling
Pattern Batter
Cake Batter
Votes: 1
Rating: 5
You:
Rate this recipe!
Instructions
Lemon Curd
  1. Combine sugar & lemon zest in a saucepan. Either with the back of a spoon or your finger tips rub the zest into the sugar. This will coat the sugar crystals with fragrant oils from the lemon peel, adding a whole new dimension of intense lemon flavor to the curd.
  2. Add the whole egg & extra egg yolks to the saucepan with the lemony sugar & whisk until smooth. Mix in lemon juice.
  3. Add butter then place the saucepan over medium heat. Whisk gently & continuously for 6-9 minutes until thick enough to coat the back of a spoon. Do not walk away because it will transform very quickly. Once you see a bubble emerge from the surface, this indicates that it is thick enough. Do not let it boil.
  4. Immediately pour the hot curd through a fine mesh sieve to remove any pieces of lemon zest or cooked egg white into a dish. Place a piece of plastic wrap directly in contact with the surface & refrigerate until thoroughly chilled & ready to use.
Blueberry Filling
  1. Place all blueberry filling ingredients in a small saucepan. Heat on medium high until blueberries soften & mixture thicken, about 5 minutes. Remove from heat & allow to cool for 5 minutes or so then place in a blender & puree until smooth. This makes it easier when slicing the cake roll. Place in a small dish & cool until ready to use.
Whipped Cream Cheese Filling
  1. For best results, place bowl of the electric mixer & whisks in the freezer for a few minutes to make them real cold. When chilled, place cream cheese & powdered sugar in the bowl & beat together until smooth. Scrape down the bowl as needed. With mixer running on low, add the vanilla & stream in the whipping cream. Turn the speed up & whip until stiff peaks form. Refrigerate until ready to use.
Roll Cake Pattern
  1. Cream together butter, flour, sugar & egg white with a whisk until smooth. Place batter into a piping bag. Trace or free hand your pattern onto a piece of parchment paper. If you want a specific part of the image to appear on the top of the roll cake, place that part of your pattern about 3/4 of the way down the paper.
  2. Before putting the template onto a 10" x 15" jelly roll pan , using a pastry brush (or your fingers), grease the bottom (but not the sides) with vegetable oil. Line the bottom of the greased pan with the template, pressing down to remove any air bubbles. Set aside. By NOT greasing or covering the sides of the pan, the cake sticks to the sides of the pan, helping the cake to rise while baking.
  3. Pipe out your design, keeping in mind that the cake will be viewed in reverse. Place the pan in the freezer until the batter is frozen solid, for about 20 minutes.
Chocolate Cake
  1. Preheat oven to 350 F.
  2. In a small bowl, combine flour, cocoa, baking powder & salt. Set aside.
  3. In another bowl, whip egg whites until foamy, gradually adding HALF of the sugar. Beat until stiff peaks form. In a third large bowl, beat egg yolks until thick. Add remaining sugar, vanilla & water; beat until very thick. Gradually fold in flour mixture then egg whites gently folding JUST until fully incorporated so as not to deflate the eggs.
  4. Remove the jelly roll pan from the freezer & pour the cake batter over the frozen design. Gently tap the sheet against the counter to make sure that the batter gets down into all the little nooks & crannies of your design.
  5. Bake in the center of the oven until cake for about 15 minutes or until it tests done with a toothpick. Loosen edges & immediately turn cake onto a piece of parchment paper. REMOVE the parchment that was on the bottom of the cake (while it was baking). Starting at the narrow end, roll up cake in the parchment (you just turned the cake out on to) & cool completely.
Assembling the Cake Roll
  1. Once fully cooled, gently unroll the cake & separate it from the parchment paper.
  2. Spread an even layer of lemon curd onto the cake, leaving about an inch of space around the edges so the filling doesn't ooze out. Next, drizzle a wavy line of blueberry filling over the lemon curd. Then lastly, pipe some of the cream cheese filling in between your blueberry lines. Try to not OVERFILL the cake roll BUT giving it as generous amount of filling as possible.
  3. Very gently roll the cake back into its spiral shape. Set the cake on a platter with your design on top. Cover with plastic wrap & chill in refrigerator for at least 30 minutes or longer.
  4. Slice & serve.

Black Forest Streuseltaler

The name of today’s pastry was inspired by the round shape of the ‘taler’, a silver coin used throughout Europe for almost four hundred years. Its name lives on in the currency called ‘dollar’.

Taler is a German word for ‘coin’, so the name of the dessert literally translates to ‘streusel coin’. Basically, a free form tart made with a yeast dough topped with a huge amount of streusel, sometimes filled with custard and often with a sugar glaze.

A traditional German streusel (streusel meaning something ‘strewn or scattered’ in German) bakes up into shortbread balls. It makes a crunchy, cookie-like top but is soft on the bottom where it meets the bread/cake or fruit.

Streusel was first popularized in Germany. In its simplest form, it consists of flour, sugar and butter but gets even better with the addition of oatmeal, cinnamon and nuts …. just my opinion of course!

While the origins of the black forest cake aren’t all that clear, some historians believe that its origins can be traced back to the Black Forest Region of Germany. This part of Germany is well known for its sour cherries and ‘Kirschwasser‘ … a clear cherry brandy.

This iconic creation is a layered confection of a liqueur ‘soaked’ chocolate cake with rich whipped cream and sour cherries between its layers. The liqueur and cherries give the cake an intense and unique fruity flavor. It’s these sour cherries which gave it its German name: Schwarzwald Kirsch Kuchen or Black Forest Cherry Cake.

There are many origin stories about the cake. Some sources claim that the name of the cake is inspired by the traditional custom of the women of the Black Forest region, with a characteristic hat with big red pom-poms on top called a ‘Bollenhut’. The earliest published written record of black forest cake was in 1934, by a German confectioner. Today, the cake is well known worldwide and probably one of the most popular cakes in Germany.

This black forest streuseltaler is a fusion recipe I developed combining a chocolate yeast bun with some sour cherries and streusel topping. Since we just happen to have a nice little sour cherry tree growing in our garden, why not put some of them to good use in a German dessert?!

Print Recipe
Black Forest Streuseltaler
Votes: 1
Rating: 5
You:
Rate this recipe!
Course dessert
Cuisine German
Servings
Ingredients
Sour Cherry Filling
Streusel Topping
Glaze
Course dessert
Cuisine German
Servings
Ingredients
Sour Cherry Filling
Streusel Topping
Glaze
Votes: 1
Rating: 5
You:
Rate this recipe!
Instructions
Sour Cherry Filling
  1. In a saucepan, place & stir together sugar, cornstarch & salt. Add the water mixture & stir to thoroughly combine. Bring to a boil over medium-high heat, Stirring frequently, & simmer until thickened, about 2 minutes. Gradually fold in cherries. Set aside to cool.
Streusel
  1. In a bowl, place COLD butter. Add flour, sugar & Kirsch if using. With your finger tips work streusel until crumbles form. Spread out on a large tray & set aside in freezer until ready to use.
Dough
  1. In a small dish, combine yeast with lukewarm water & 1 teaspoon of the sugar. Allow to sit for a few minutes until frothy.
  2. In a large bowl, slightly melt butter; cool a couple of minutes then whisk in egg. In another bowl, whisk together flour, cocoa, salt & remaining sugar. Add yeast mixture to butter mixture, whisking together. Add flour mixture, combine then turn on a floured work surface & knead for about 5 minutes. Dough will be soft but not sticky.
  3. Lightly grease bowl, place dough ball in it & cover with a towel. Place in a draft-free place & allow to rise for about 20 minutes.
  4. Line a baking sheet with parchment paper.
  5. Place dough on a work surface, & divide into 12 pieces. Form each piece into a ball & allow to rest for about 5 minutes.
  6. Space out the balls on parchment lined baking sheet. With fingertips, press out each ball to about 3-4-inch diameter. Add about 1 Tbsp of cherry filling to the center of each dough piece, leaving a border around the outside.
  7. Divide streusel topping evenly between the pastries & allow to rise for about 15-20 minutes.
  8. Preheat oven to 350 F.
  9. Bake for about 10-15 minutes. Allow to cool completely on a wire rack. In the meantime, you can prepare the glaze.
Glaze
  1. In a small dish, whisk powdered sugar & Kirsch into a thick glaze. When streuseltaler are cooled, drizzle with glaze.
Recipe Notes
  • Kirschwasser is German for 'Cherry Water', and while it may be as clear as water, it packs quite a punch.  This double distilled brandy made from the sour Morello cherries is, more often than not, simply referred to as Kirsch. This 'not too sweet with a subtle cherry/almond flavored' liqueur is a vitally necessary ingredient to make a traditional Black Forest Cake; for that is where both the cake and Kirschwasser hail from...  The Black Forest, or Schwarzwald, in southwestern Germany. 
  • Pomegranate juice: A rich and slightly tangy juice can act as a kirsch substitute, particularly in recipes requiring a deep red color. It offers a unique flavor that can add complexity to your dish.


Raspberry Curd Tart Cases

HAPPY MOTHER’S DAY!

Today as we celebrate Mother’s Day, many special memories come to mind. My mother passed away in 1978 but even after 47 years, time has changed nothing. I still miss the sound of her voice, the wisdom in her advice, the stories of her life and just being in her presence. I miss her today as much as the day she left us, and I always will.

It is also with very loving thoughts, Brion & I celebrate my mother-in-law, Dolores, for her loving and kind ways and for raising that ‘special’ man I love sharing my life with. Love to my sisters, who gave so much of themselves to be the great mom’s they are.

In honor of these two precious women who prepared so many wonderful meals for us years ago, I like to post something special on this day. My choice this year are these unique looking raspberry curd tart cases.

 I think tart rings  give these little tarts more of an upscale look, fitting for the occasion. Using rings instead of tart pans gives such a clean look. Being perforated allows for the ring to heat up quicker (along with it being very thin), which allows for better baking. This also allows steam to escape from the crust, which keeps your crust nice and crispy.

I became interested in making curds a number of years ago. Curds differ from pie fillings or custards in that they contain a higher proportion of juice and zest, which gives them a bolder, fruitier taste.  Also, curds containing butter have a smoother and creamier texture than both pie fillings and custards, which contain little or no butter and use cornstarch or flour for thickening. Additionally, unlike custards, curds are not usually eaten on their own. It seems fruit curds continue to gain popularity as evidenced by the wide array of recipes available today.

I think these should taste as good as they look.

LOVE TO ALL THE MOM’S OUT THERE READING MY BLOG TODAY!

Print Recipe
Raspberry Curd Tart Cases
Votes: 1
Rating: 5
You:
Rate this recipe!
Servings
Ingredients
Pastry
Raspberry Curd
Servings
Ingredients
Pastry
Raspberry Curd
Votes: 1
Rating: 5
You:
Rate this recipe!
Instructions
Pastry
  1. Combine the flour, powdered sugar, cornstarch, salt, & vanilla in a large bowl. Add the butter & mix with your hands until the butter is broken down into pieces the size of peas & the ingredients are well combined. Add the beaten egg & mix with a spatula until the dough is smooth & the egg is fully incorporated. Don’t overmix.
  2. Turn the dough out onto a large piece of plastic wrap & gently shape it into a ball. Wrap the dough in the plastic wrap & flatten it into a disc. Refrigerate for at least 30 minutes or overnight, until cold but still pliable. It should have the texture of clay. While the dough chills is a good time to make the filling.
  3. When the dough has chilled, unwrap the dough and place it on a silicone baking mat (or parchment paper) on your work surface. Roll it out into a rectangle about 1⁄8 inch thick, using a second silicone sheet on top. The silicone mat makes it easier to lift the rolled-out dough onto the sheet pan later. Make sure to work quickly so the dough doesn’t get too warm.
  4. Place the silicone mat with the dough on a baking sheet.
  5. Using the tart rings, cut out 12 circles of dough. Remove the rest of the dough from around the rings.
  6. Reroll remaining dough between 2 sheets of parchment. Using a sharp knife, slice strips about 10 inches long & 3/4- inch thick (or the thickness of your pastry rings). These strips will make the sides of each tartlet. At this point you may want to place the sheet of strips in the freezer for about 5-10 minutes so they will be easier to work with.
  7. Working with one at a time, transfer a strip of dough to one of the tart rings and press it to the sides. Use your fingers to slightly push the bottom of the sides to the dough circle (to seal it). Repeat with the remaining strips of dough.
  8. On another sheet of silicone or parchment, roll out any leftover dough & cut 12 tartlet case tops. Cut round holes in various sizes in them for decoration. Remove excess dough from around & in tops. Place on a separate baking sheet as they will bake faster than the tartlet cases.
  9. Transfer the baking sheets containing the tartlet shells & tops to the freezer & freeze for at least 20 minutes.
  10. Preheat oven to 350 F.
  11. Bake tart rings for about 20 minutes or until golden. Bake tops until they are just slightly golden (they bake fast so you need to keep a close eye on them). Remove from oven.
Raspberry Curd
  1. Combine raspberries, sugar, lemon zest, lemon juice & water in a saucepan over medium-high heat. Bring mixture to a boil (about 5 minutes); reduce heat & simmer 5 minutes. Remove mixture from heat & let stand 5 minutes. Place in a food processor or blender; process until smooth. Strain mixture through a fine-mesh sieve into a bowl & discard solids.
  2. Wipe pan clean & return strained mixture to pan. Whisk together egg yolks & cornstarch in a small bowl until smooth. Stir yolk mixture into raspberry mixture; bring to a boil over medium-low heat (about 5 minutes). Cook for 1 minute, stirring constantly, then remove from heat (the mixture should coat the back of a spoon). Add salt & butter, stirring until smooth. You may need to return the mixture to processor at this point if your curd doesn't seem smooth enough.
  3. Place curd into a bowl; cover with plastic wrap, pressing it directly onto the surface of the curd to prevent a skin from forming. Chill curd in the refrigerator at least 2 hours, or up to 1 week if making in advance.
Assembly
  1. Place tartlet tops on a wire rack & dust with powdered sugar. Spoon raspberry curd into cooled tart shell & spread into an even layer with an offset spatula. Arrange pastry lid on top of each filled tartlet. Decorate with fresh raspberries. Best eaten when they have chilled OVERNIGHT or a minimum of 2 hours.
Recipe Notes

If you find the dough is to soft to work with just add a small amount of flour, just enough to make it easier to handle.
This is a real nice crispy pastry dough. When its baked it would give the impression of being real hard but instead its crisp and so nice to bite into.

Dried Blueberry Lemon Hot Cross Buns

I find the aroma of the hot cross buns baking so intoxicating. Brion & I have always loved these soft, spicy little buns. Each year, at Easter time, I really enjoy making some version of Easter bread or buns (of course, trying to make it just a bit better than the year past). While I was giving this some thought, I read a comment where someone was complaining that they had too many hot cross buns leftover from Easter. Is there really such a thing as having too many hot cross buns … seriously!

While hot cross buns are now sold and enjoyed throughout the year, they were once reserved for Good Friday alone. There is no one clear explanation … some theories rest in Christian symbolism while there are also more than a few stories that indicate hot cross buns were baked on Good Friday for superstitious reasons.

Every year I like to try and make a different version of these traditional, seasonal treats. This year I’m going with some dried blueberry lemon hot cross buns. Should be good!

Print Recipe
Dried Blueberry Lemon Hot Cross Buns
Votes: 1
Rating: 5
You:
Rate this recipe!
Servings
Ingredients
Servings
Ingredients
Votes: 1
Rating: 5
You:
Rate this recipe!
Instructions
Buns
  1. In a small dish, dissolve 1 Tbsp sugar in lukewarm water. Sprinkle yeast over the surface. Do not stir. Let stand for 15 minutes.
  2. In a large bowl, mix together 1/2 cup sugar & lemon zest with fingers. Add flour, salt & cinnamon & mix well. Add prepared yeast along with melted butter, egg & egg white. Combine with a fork then add blueberries & citron.
  3. On a lightly floured surface, knead dough for about 10 minutes. If dough is quite sticky add a LITTLE more flour.
  4. Cover & allow to sit in a draft-free, warm place for 30-40 minutes.
  5. Line pan with parchment paper or butter a 7x11-inch baking dish. Divide the dough into 12 equal parts & form into balls. Place them in the prepared pan & let rise for about an hour or until doubled in size.
  6. Whisk together egg wash & lightly brush over buns before baking.
  7. Before buns are finished rising, preheat oven to 350 F. Bake buns for about 30-35 minutes.
  8. Remove from pan & let rest on a wire rack for about 15-20 minutes before piping on the glaze crosses.
Glaze
  1. Mix together powdered sugar, milk & vanilla (if using) until smooth. You will want this to be quite a stiff glaze so only add enough milk to bring it to a thick consistency. Pipe crosses onto the tops of the slightly warm buns. A Ziploc bag with a corner snipped off works well for this small job.

Artichoke Cupcakes

HAPPY ST. PATRICK’S DAY!

St. Patrick’s Day is a funny thing here in Canada. It’s the one time each year that people seek out green food and drinks, everything from shamrock shakes, a green bagel, or green beer are part of our version of this holiday.

Green food has been getting more and more ‘creative’ on this particular holiday. Clean eating, green foods like spinach, avocado and broccoli for example. A walk through the grocery store produce section will provide a variety of examples of just how many green foods are available to use in meals and snacks.

In the spirit of St. Patrick’s Day, I wanted to incorporate some green food in some desserts. What better excuse could I have to make some artichoke cupcakes!

Over the years, Brion and I have vacationed many times in the Carmel / Monterey area on the Central Coast of California. As a rule, we make Pacific Grove ‘home base’ and from there do numerous day trips. About a 20-minute drive inland from Monterey Bay is the tiny agricultural town of Castroville. When you enter into the town you will see a sign that says, ‘Artichoke Center of the World’.  Where the rich, fertile soil of the Salinas Valley meets the sands of Monterey Bay, these fog-shrouded fields prove to be the ideal location for the commercial cultivation of Heirloom artichokes.

About another 20-minute drive further north you come to another agricultural town called Watsonville. Just before we reached the town, I spotted a sign advertising ‘artichoke cupcakes’ from Pezzini Farms. We have never eaten anything sweet associated with artichokes before now. This charming roadside market goes deep into the crop that made this chunk of California famous.

Now, Watsonville might not be the self-proclaimed Artichoke Center of the World like its neighbor, Castroville. But it still ranks right up there in growing this distinctive plant that’s actually an herb.

Pezzini Farms is family-owned and has been growing and selling Heirloom Green Globe artichokes since 1929. The family immigrated to the United States from Italy bringing with them their family’s artichoke root stalk. 

The market offers a great selection of fresh produce that includes artichokes sold individually or in bulk. The store also has a wide selection of artichoke products that featured jarred artichoke hearts, artichoke dip mix, and artichoke marinara sauce, among others. By the register, customers were enticed by an array of sweet pastries displayed under glass dessert domes. Among them were decadent artichoke cupcakes topped with thick frosting.

It inspired me to think of artichokes in a whole new way. Brion & I purchased a cupcake to see how it would taste. The dense cake wasn’t overly sweet, with chunks of artichoke heart adding an almost earthy quality. The frosting was velvety with a little cream cheese bounce. A good comparison would be like a zucchini bread or a carrot cake.

Of course, as soon as we came home, I couldn’t wait to try to recreate this interesting little cupcake and what a better time than today. Think artichoke green for St. Patrick’s day!

I’ve added a few pictures I hope you will enjoy.

  • Pezzini store pics x 2
  • Artichokes growing in the fields
  • Production line
  • Store cupcakes
  • Life-size signage
Print Recipe
Artichoke Cupcakes
Votes: 1
Rating: 5
You:
Rate this recipe!
Course dessert
Cuisine Canadian
Servings
LARGE CUPCAKES
Ingredients
Cupcake Batter
Cream Cheese Frosting
Course dessert
Cuisine Canadian
Servings
LARGE CUPCAKES
Ingredients
Cupcake Batter
Cream Cheese Frosting
Votes: 1
Rating: 5
You:
Rate this recipe!
Instructions
Cupcakes
  1. Preheat oven to 350 F. Line a 6-cup muffin pan with large paper liners (or 12 small paper liners).
  2. Drain artichoke hearts well & mince into very small uniform pieces. Set aside.
  3. In a large bowl, whisk together eggs, vanilla, lemon zest, lemon juice, water & oil.
  4. In another bowl, sift together flour, white & brown sugars, baking powder, baking soda, salt, cinnamon, cardamom & ginger.
  5. Combine wet ingredients with dry ingredients, then gently fold in the minced artichokes with a spatula until they are completely incorporated into the batter.
  6. Fill the prepared muffin tins with the batter & bake about 30 minutes for the large size (20-25 minutes for small size).
  7. Once the cupcakes are baked through, transfer them to a wire rack to cool completely.
Frosting
  1. With an electric mixer, beat butter & cream cheese until creamy & well combined & lump free.
  2. Add vanilla & salt, mix to combine. With mixer on low, gradually add the powdered sugar until completely combined.
  3. Frost cupcakes as desired.

Spiced Persimmon & Cranberry Linzer Torte

Originating from Linz, Austria, the Linzer torte is one of the oldest tortes in the world, found in an Austrian abbey in the early 1700s.

It is made with a buttery pastry dough with a significant amount of ground nuts, typically hazelnuts, but often with almonds or walnuts. With a lattice design on the top, it is traditionally filled with red currant jam; but raspberry, apricot and plum are quite popular too.

Linzer cookies employ the same recipe as the Linzer torte but instead the dough is cut into cookies and two of them form a sandwich around the preserves.  Moreover, the top cookie has a small cutout in its center (known as Linzer eyes), thus exposing the underlying jam and adding to the visual appeal. 

When Linzer torte was brought to North America in the 19th century, it became very popular. Today the Linzer cookie is still very commonly used in celebrating Christmas and other holidays as well.

There are countless versions of Linzer tortes around showcasing different nuts, different preserves, and so on such as tahini and sesame Linzer, beets Linzer, a lemon curd Linzer and a chestnut apple Linzer just to name a few.

With my passion for ‘recipe development’, I wanted to come up with a ‘Linzer torte’ that showcased persimmons and cranberries for Christmas. This is what developed!

Print Recipe
Spiced Persimmon & Cranberry Linzer Torte
Votes: 1
Rating: 5
You:
Rate this recipe!
Servings
Ingredients
Spiced Cranberries
Cheesecake Filling
Servings
Ingredients
Spiced Cranberries
Cheesecake Filling
Votes: 1
Rating: 5
You:
Rate this recipe!
Instructions
Crust
  1. In a bowl, sift together flour & salt. Set aside. In a large bowl, cream butter, sugar & vanilla until light & fluffy. Beat in as much flour mixture as possible. Mix in the rest & gently knead till dough comes together. Form into a disk & wrap in plastic wrap. Chill for at least 30 minutes.
Cranberries
  1. In a saucepan, combine whole berry sauce, raspberries, sugar, orange zest & cinnamon. Cook over medium heat, stirring often, until the sauce thickens & is bubbly. Remove from heat & allow to cool. The sauce will thicken slightly as it cools.
Persimmons
  1. Place the melted butter in a large bowl & stir in the honey & spices. Stir well, then add persimmon slices. Toss to coat each slice well.
Cheesecake Filling
  1. Using a mixer, beat cream cheese until smooth then add sugar & blend well. Add eggs & vanilla, beat until smooth.
Baking
  1. Preheat oven to 350 F.
  2. Between 2 sheets of parchment paper, roll out 2/3 of pastry into a 10-inch circle. Place in an 8-inch springform pan. From the remaining 1/3 of the pastry cut a 5-inch circle. In the center of this circle cut a 3-inch circle (this should resemble a Linzer cookie). If you wish you can cut out a few 'stars' for decorations. Lay pastry ring & stars on parchment paper & place on a baking sheet. Blind bake pastry in the springform pan for 8 minutes or until barely set. Bake the ring & stars until golden.
  3. Remove springform pan from oven & pour cream cheese mixture over warm crust. Bake for 20 minutes or until crust is lightly golden & cheesecake tests done. Set aside to cool.
Assembly
  1. When cheesecake has cooled, place the slices of persimmon, overlapping each other to form 2 circles around the outer edge. Spoon spiced cranberries in the middle of the persimmons.
  2. Sprinkle baked pastry ring & stars with powdered sugar & place on top of cranberries. Press down slightly. Your torte should resemble a large Linzer cookie when finished.
Recipe Notes
  • You will have extra cranberry sauce which can be easily used over the holiday season I found. Brion & I liked them so much we added extra to our slices of torte.

Nanaimo Truffles

The Nanaimo bar, a decadent Canadian treat, has a fascinating history. It is named after Nanaimo, a delightful city in British Columbia. When Prince Harry and Meghan Markle visited British Columbia in 2020, their interest in these treats caused a media frenzy in the U.K. and the U.S., prompting questions about what the square was and where it came from. It is a dessert bar that requires no baking and generally consists of three layers: a graham wafer crumb and shredded coconut base, custard-flavored butter icing in the middle, and a layer of chocolate ganache on top.

The dessert was popularized in the years following WWII and subsequently rose to wider prominence after Expo ’86. Susan Mendelson is perhaps most responsible for commercializing the Nanaimo bar. She sold the bar during the 1970s to help pay her tuition, and in 1979 founded The Lazy Gourmet, a café and catering company in Vancouver, which claims to be the first business to sell the dessert. Mendelson wrote the official cookbook for Expo ’86, held in Vancouver, and included the Nanaimo bar.

After that, the Nanaimo bar began to be sold on BC Ferries and spread in popularity across Canada. It can now be found in Costco, Starbucks and countless cafes in Canada and the United States. There can be some variations with each of these layers — e.g., adding mint, mocha or other flavoring, as well as food coloring, to the icing center, or various nuts to the base — but a classic Nanaimo follows the traditional trio.

In a bid to take advantage of the bar’s popularity, the city of Nanaimo launched a tasting trail much like Ontario has done for the butter tart. The Nanaimo Bar Trail features an array of establishments that proudly showcase their unique interpretations of the classic Nanaimo Bar. As of now, there are more than 39 businesses participating in this sweet adventure. These establishments offer a variety of Nanaimo Bar-inspired treats, from traditional bars to ice creams, macarons, cheesecakes, lattes, and even spring rolls.

All that being said, instead of the traditional rum balls at Christmas, here’s my version of Nanaimo truffles!

Print Recipe
Nanaimo Truffles
Votes: 1
Rating: 5
You:
Rate this recipe!
Course dessert
Cuisine Canadian
Servings
TRUFFLES
Course dessert
Cuisine Canadian
Servings
TRUFFLES
Votes: 1
Rating: 5
You:
Rate this recipe!
Instructions
Filling/Centers
  1. Cream butter, custard powder & powdered sugar together well. Divide mixture into 22 pieces & roll each into a ball. Freeze for at least 30 minutes.
Base
  1. Melt the first 3 ingredients in the top of a double boiler. Add beaten egg & stir to cook & thicken. Remove from heat. Stir in graham crumbs, cheerios, cocoanut & corn syrup. Set aside to cool.
  2. When base mixture has cooled, divide mixture into 22 portions. Place 1 portion in the palm of your hand & press to flatten into a large circle. Put one custard ball into the center & wrap the circle around the custard so it totally covers it. Squeeze gently to form a ball. Repeat until you have made all the truffles. Freeze for 30-60 minutes.
Coating
  1. Melt chocolate slowly in a double boiler until smooth. Without allowing the chocolate to cool down, take a frozen ball & carefully stick a toothpick or skewer into it & dip into the melted chocolate to cover. Remove the stick & allow the truffles to set on parchment paper.
  2. Store in refrigerator. Allow the truffles to come back up to room temperature to serve if you wish.
Recipe Notes
  • I have a nut allergy, so I replaced the nuts that are usually used in the base with crushed cheerios. I found it did not alter the flavor at all. Their still just as irresistible as ever!
  • The size & amount depends on your preference. Just divide the filling & base components into whatever you wish.

Eggnog Chai Cookies w/ Spiced Rum Glaze

Eggnog, which is actually a drinkable form of custard, began in England, where eggnog was the trademark drink of the upper class. There was no refrigeration, and the farms belonged to the big estates.  Those who could get milk and eggs to make eggnog mixed it with brandy or Madeira or even sherry.  But it became most popular in North America, where farms and dairy products were plentiful, as was rum.  The name, ‘eggnog,’ is a combination of ‘noggin,’ a wooden cup, and ‘grog,’ a strong beer.

Throughout Canada, the United States and some European countries, eggnog is traditionally consumed over the Christmas season, from late October until the end of the holiday season. 

The eggnog tradition kind of reminds me of the fall ‘pumpkin spice’ craze. What started out as a drink is now added to ice cream, cookies, cake, coffee, protein powder, latte, etc. etc.…

These cookies are soft and pillow-y, filled with chai spices and topped with a spiced rum glaze. The warmth of the cinnamon and nutmeg brings out the eggnog flavor in the cookies, making the traditional holiday drink the main flavor.

The holidays are a time for tradition. For a lot of people, that tradition consists of baking …. baking cookies…. lots and lots of cookies!!

Print Recipe
Eggnog Chai Cookies w/ Spiced Rum Glaze
Votes: 1
Rating: 5
You:
Rate this recipe!
Servings
Ingredients
Cookies
Glaze
Servings
Ingredients
Cookies
Glaze
Votes: 1
Rating: 5
You:
Rate this recipe!
Instructions
Cookies
  1. Preheat oven to 325 F. Line cookie sheets with parchment paper.
  2. In a large bowl, whisk together flour, baking powder, salt, cinnamon, nutmeg, ginger, cloves, cardamom & black pepper. Set aside.
  3. In another bowl, using a mixer, cream together butter & sugars. Add egg yolks & vanilla. Beat until creamy. Carefully beat in eggnog.
  4. Add dry ingredients to wet ingredients & beat until just combined.
  5. Fit a piping bag with a large star tip nozzle & fill with cookie dough. Make 30 cookie swirls on parchment paper. Bake for 15-20 minutes or until the bottoms just start to turn golden brown.
  6. Immediately transfer cookies to a paper towel covered flat surface. Allow to cool.
Glaze
  1. Whisk together powdered sugar & cinnamon. Add vanilla, eggnog & spiced rum. Whisk until smooth.
  2. Drizzle over cooled cookies & serve.

Cinnamon Bun Rice Krispie Treats

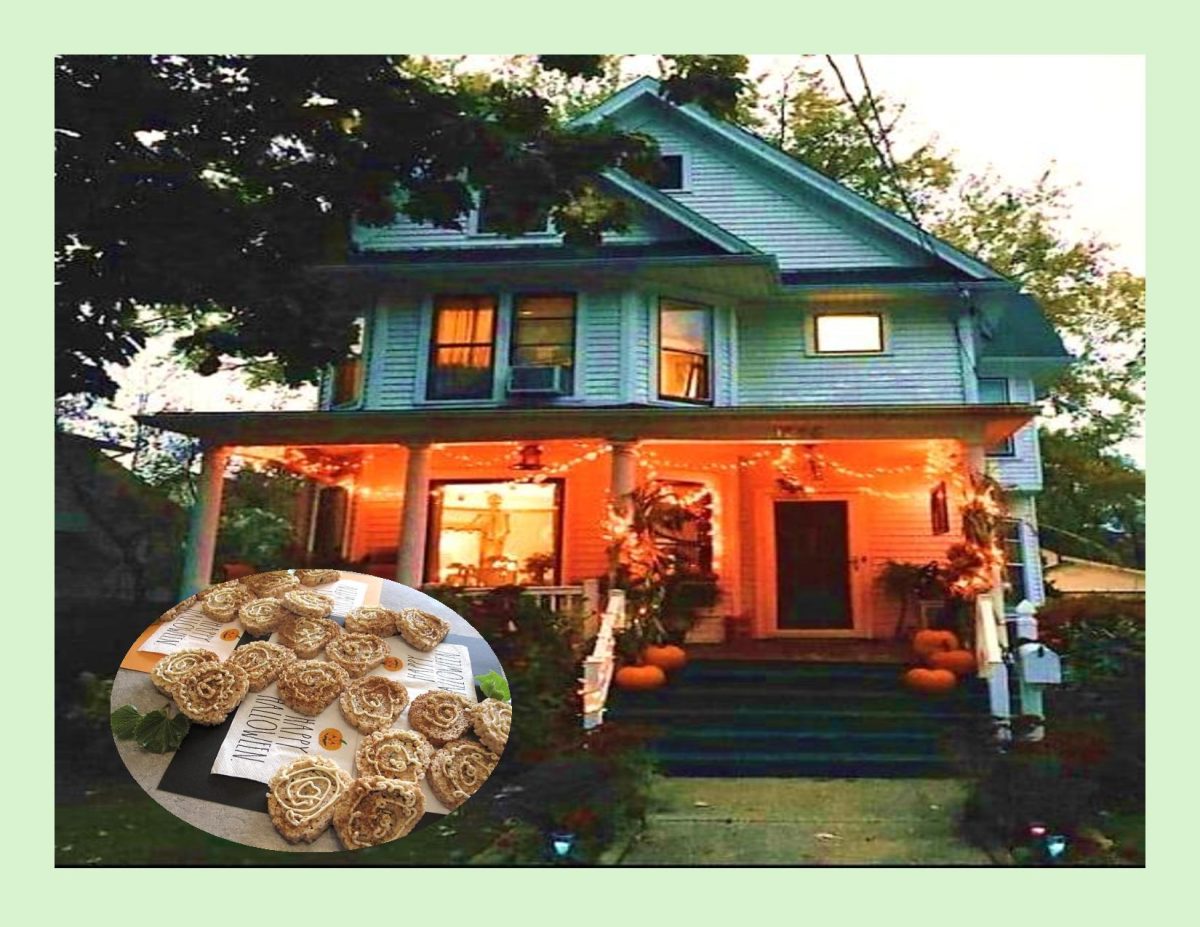
HAPPY HALLOWEEN!

Whether you’re hosting a Halloween party, attending a potluck, or simply craving something sweet, Halloween rice krispie treats are a classic choice. Loved for their crispy texture, chewy marshmallow consistency, and endless decorating possibilities.

Rice Krispie treats have been around for about 85 years. Snap, crackle, pop! These three words have become synonymous with Rice Krispies, the breakfast cereal made from pieces of crisped rice that, when combined with milk, emit a noise that you can probably imagine while reading this. Regardless of the last time you enjoyed a bowl of Rice Krispies in the morning, it’s clear that the beloved brand exudes childhood nostalgia. The iconic mascot trio, memory-stimulating sound, shape, and aroma are embedded into many memories. 

Rice Krispies Treats are a legendary confection with an undemanding recipe that has graced several generations. Not only are the possibilities endless with these delicious treats that kids and grown-ups can enjoy but they can bring a challenging cake shape to life while making the process so much more manageable. Intricately sculpted cakes often have a surprise inside: rice cereal treats. Swapping traditional batter for these crispy treats provides structure and strength to modeled cakes that you just can’t get with fondant and modeling chocolate alone. And the best part is, the method you use to sculpt the cake afterward isn’t that different than when you sculpt a traditional batter-filled cake.

For some tasty little Halloween treats this year, I’m making some cinnamon bun rice krispie rolls with a cream cheese frosting. I can think of a few kids & adults who will enjoy these!

Print Recipe
Cinnamon Bun Rice Krispie Rolls w/ Cream Cheese Frosting
Votes: 1
Rating: 5
You:
Rate this recipe!
Servings
Ingredients
Rice Krispies
Filling
Servings
Ingredients
Rice Krispies
Filling
Votes: 1
Rating: 5
You:
Rate this recipe!
Instructions
Rice Krispies
  1. Line a 10 x 15-inch jelly roll pan with parchment paper. Spray well with cooking spray. Set aside
  2. In a large pot, melt marshmallows, butter, vanilla & cinnamon over low heat. Stir until melted & smooth. Remove from heat & stir in rice krispies. Scrape rice krispie mixture onto prepared pan. Using well buttered hands, press out evenly into pan. Let cool to room temperature.
Filling
  1. In a small bowl, stir together brown sugar, butter, cinnamon & flour until creamy.
Assembly
  1. Carefully spread filling onto the rice krispies. Sprinkle with pepita seeds. Roll up from the long side like a jelly roll while rice krispies are still flexible. Press firmly as you roll.
  2. Place in fridge for 15-20 minutes. When it feels FIRM, cut into 1/2-inch slices using a serrated blade & sawing motion. You should get approximately 24 slices.
Frosting
  1. Beat together cream cheese, vanilla & powdered sugar until smooth. Place in a piping bag & pipe a swirl onto each slice. Sprinkle with extra cinnamon if you wish. Keep in refrigerator.