Pumpkin Angel Food Mini Bundt Cakes

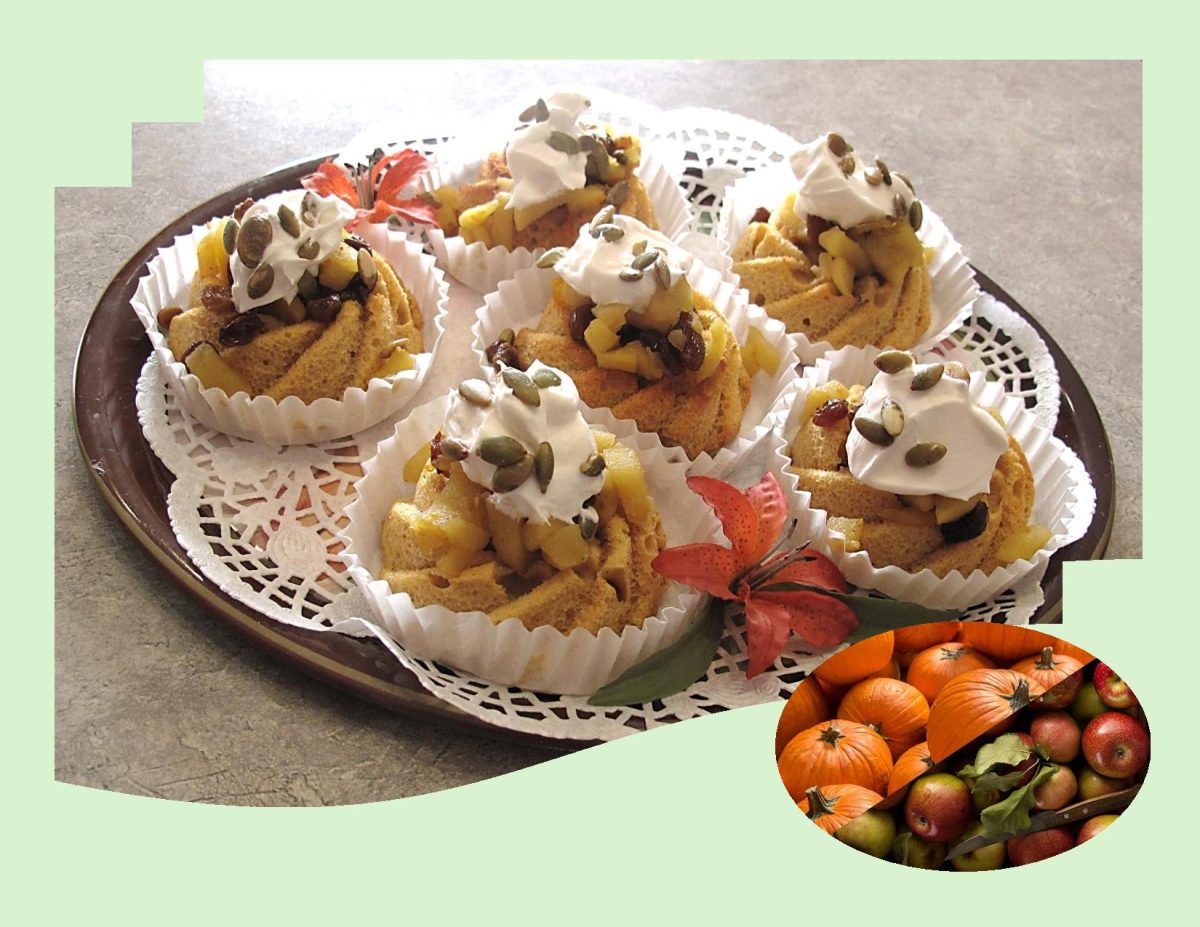
Pumpkin angel food?! That’s probably not what you’d expect when you think of angel food cake or pumpkin, but this recipe is actually a very tasty combo. 

Of course, pumpkin-based desserts are a traditional fall dessert, so I am sure that you will be surprised that I am posting this pumpkin angel food cake recipe in April. It seems I have some pumpkin puree that’s in the freezer just waiting to be used before we get too far into the spring and summer season.

Brion has always loved angel food, so I thought why not add the pumpkin puree to kick it up a notch. Pairing it with the right fruits can also enhance its flavors. Instead of frosting or a whipped topping I am making some caramelized apples and raisins spiced with anise and cardamom.

  • Anise has a distinct licorice-like flavor. It adds depth and enhances the overall aromatic profile of the compote.
  • Cardamom is a fragrant spice with citrusy and herbal notes. It adds warmth and sophistication and complements pumpkin beautifully.

For a cake that’s quite sweet, some salted pepita seeds sprinkled on top are a bit of necessary and delicious balance.

Simply put, it’s an easy cake mix recipe dressed up with warm spices and pumpkin purée served with caramelized apples, raisins and salted pepita seeds. Yum!

Print Recipe
Pumpkin Angel Food Mini Bundt Cakes
Votes: 1
Rating: 5
You:
Rate this recipe!
Servings
MINI BUNDT CAKES
Ingredients
Pumpkin Angel Food Mini Bundt Cakes
Caramelized Apples & Raisins
Servings
MINI BUNDT CAKES
Ingredients
Pumpkin Angel Food Mini Bundt Cakes
Caramelized Apples & Raisins
Votes: 1
Rating: 5
You:
Rate this recipe!
Instructions
Cake
  1. Preheat oven to 350 F.
  2. In a large mixing bowl combine everything except the Angel Food Cake mix and ingredients to prepare cake. Mix until combined. Set aside.
  3. In a different bowl combine the Angel Food Cake mix and ingredients required to make the cake. Carefully fold in 1/4 of the batter into the pumpkin mixture. Then gently fold in the rest of the batter.
  4. Carefully pour or spoon into an 24 ungreased mini bunt cake pans. Place pans in oven on the middle rack.
  5. Bake for 15 -20 minutes or until cake is golden brown and springs back. Immediately invert pans onto a wire rack.
  6. Cool for 10 minutes.
  7. Serve with caramelized apples & raisins & a dollop of whipped topping. Sprinkle with salted pepita seeds.
Apples & Raisin Compote
  1. In a medium saucepan, melt butter then add water & sugar. When the caramel is golden brown, add the raisins, swirling them into the caramel.
  2. When raisins begin to plump, add apples & orange zest, then sprinkle with spices. Lower heat & simmer 5-10 minutes to thicken.
  3. Do not overcook compote as it will thicken when cooled.

Chicken, Veal & Shrimp Pastetli (Vol-Au-Vent)

Pastetli were invented in the early 1800s in Antonin Carême’s pastry store in Paris, France where they’re called vol-au-vent, French for ‘windblown’ to describe its lightness. While they’re served as an appetizer in France, they’re eaten as a main meal not only in Switzerland but also in Belgium and the Netherlands. It is also from the Netherlands where the Swiss name Pastetli origins from. The Dutch call them pasteitje (little pastry). From there it came to the German Pastete. Just to add a little complication though, a Pastete in Switzerland is rectangle cake shaped puff pastry pie filled with sausage meat, mushrooms in a creamy sauce.

A vol-au-vent is a light puff pastry shell that resembles a bowl with a lid. The shell is generally filled with a creamy sauce (most often a velouté sauce) containing vegetables, chicken, meat or fish. The lid is placed on the filled shell and the pastry is then served as an appetizer, also known as bouchée à la Reine, or as the main course of a meal. When prepared, the pastry dough is flattened and cut into two circles. A smaller circle is cut out of the center of one of the circles, which then will be used as the lid. The circle without the center cut and the circle with the center cut are then joined together around the edges so as the pastry bakes, it rises into a shell with a hole in the top. The lid, which is baked separately, is added later. The pastry shell may be made the size of an individual serving, or it can be made in several different sizes to become a main serving for one or a larger size to be served for more than one.

Vol-au-vents rose to prominence in Paris in the 19th century. In post-war Britain, they were a mainstay of any self-respecting buffet, served to suitably impressed guests alongside welcome drinks at dinner parties. By the 1990s, they had become unfashionable and remained so for decades. Updated vol-au-vents started reappearing in chic restaurants a year or two before the covid pandemic (2020) erupted and have become the retro appetizer or main course to have.

You can even adapt them to make some elegant desserts. Fill with cream and fresh fruit or melt a chocolate orange with a dash of Grand Marnier and orange zest then spoon this quick-fix mousse into the cases and top with sweetened Chantilly cream and chocolate shavings.

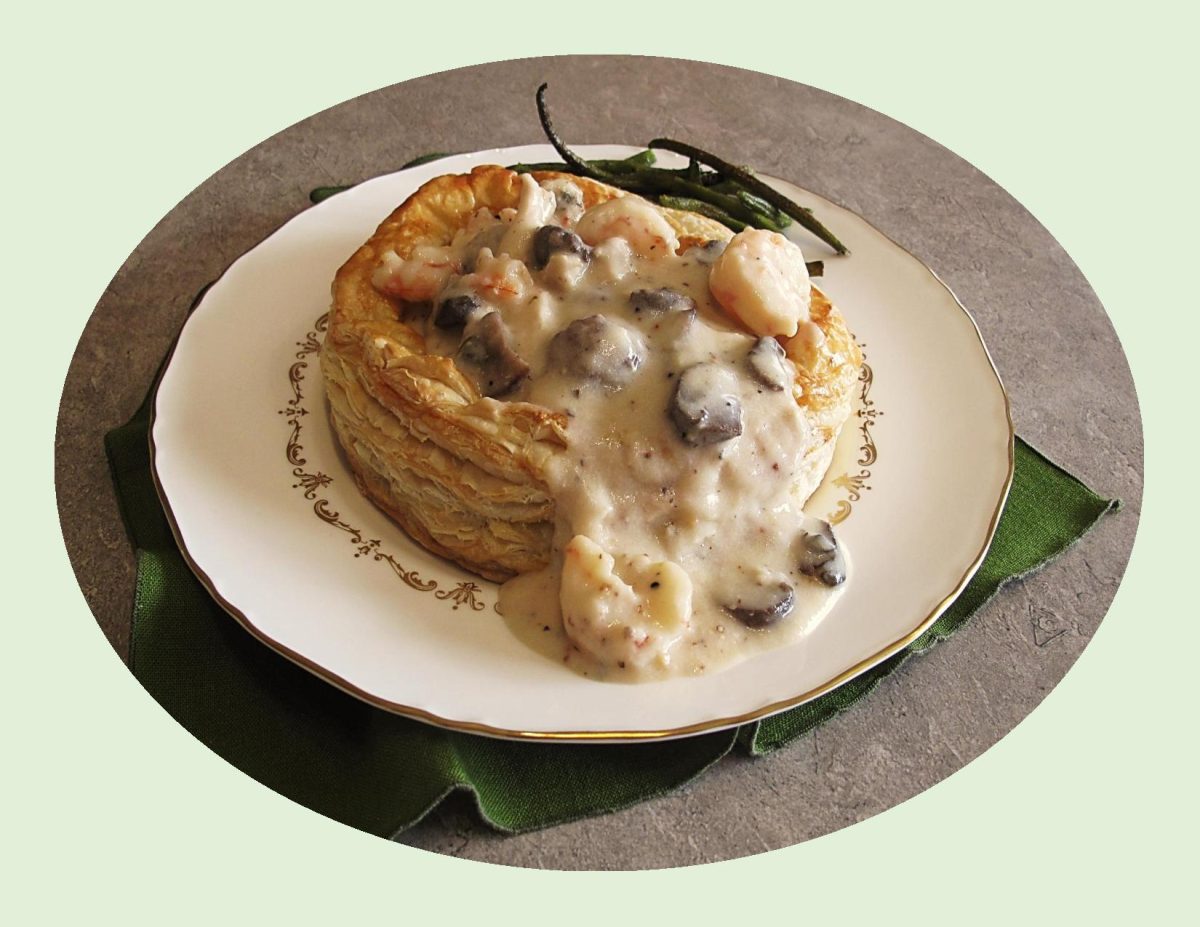
For our main course vol-au-vents, I am making an interesting filling which includes, chicken, shrimp, mushrooms and tiny meatballs. Sounds a little odd but is packed with flavor.

Print Recipe
Chicken, Veal & Shrimp Pastetli (Vol-Au-Vent)
Votes: 1
Rating: 5
You:
Rate this recipe!
Servings
Votes: 1
Rating: 5
You:
Rate this recipe!
Instructions
Chicken/Broth
  1. Add the rosemary, garlic, bay leaves, cloves, chopped celery, carrot and onion to a stock pot. Season generously with pepper and salt. Cut the chicken up: legs, wings and breasts. Also chop up the remaining carcass. Add it all to the pot. Then fill it with water (about 7 cups) until the chicken is fully submerged.
  2. Place the pot over high heat until boiling, then leave it there for 10 minutes. Turn the heat lower and gently cook the chicken for about 30 minutes. Remove the chicken from the heat and let it cool down for another 45 minutes.
Mushrooms/ Shrimp/ Cheese
  1. Chop the mushrooms into bite-size pieces. Peel & devein shrimp. Grate parmesan cheese.
Puff Pastry Shells
  1. Preheat oven to 375 F.
  2. Cut (4) 5-inch circles from puff pastry. Beat the egg & prick holes in the large circles with a fork & brush with egg. Cut 12 more RINGS from pastry about an inch wide. Lay a ring on each of the 4 circles & brush with egg wash. Repeat this until there are 3 rings on each large circle. Bake the puff pastry shells for 25 minutes.
Finish the Broth
  1. Remove the cooked chicken from the hot stock. Reserve stock for later. Remove any chicken skin, bones, veins, cartilage, or sinew (discard all this) & pick the cooked meat from the bones. Shred the larger bits up roughly. Then transfer the chicken meat to a large saucepan.
  2. Strain the chicken stock in a fine sieve or colander over a large pan. You should end up with about 6 cups (1,4 l) of chicken stock. Discard the cooked vegetables.
Meatballs
  1. In a bowl, combine ground veal (pork), salt & pepper, egg & breadcrumbs. Mix well and make tiny balls of ½ oz (15 g) each. You should end up with about 20 of them. Cover the meatballs with cling film and store them in the fridge until later.
  2. Bring the stock to a gentle boil again. Once warm, add the meatballs, shrimp & mushrooms. Poach them for about 5 minutes. Then remove the meatballs, shrimp & mushrooms using a slotted spoon. Add them to the shredded chicken in the large saucepan.
Béchamel Sauce
  1. Take the chicken stock off the heat now. In a large saucepan melt the butter over medium heat. Add the flour and whisk well until you get a wet crumble. Gently cook this over medium-low heat for about a minute. Then gradually add splashes of the warm chicken stock until you get a sticky flour paste. Keep stirring. Don't add too much at once or the sauce will become lumpy.
  2. Whisk well. Gradually add more chicken stock (about 3 to 4 cups) until you get a pretty runny sauce. Bring the sauce to a low simmer & cook for 3-4 minutes or until thickened. whisk in Montreal Steak Spice, onion salt, garlic powder, mustard & grated parmesan.
  3. Add the béchamel sauce to the chicken, meatballs, shrimp & mushrooms. Stir carefully. Cover the pan for another 5 minutes and let the vol au vent filling warm through or place it back over very low heat.
  4. Put the vol au vent puff pastry casings onto 4 serving plates. Top with the chicken, meatball, shrimp & mushroom filling. Garnish with chopped fresh parsley if desired. Serve the vol au vents hot.

Spicy Apricot Mango Stilton Galette


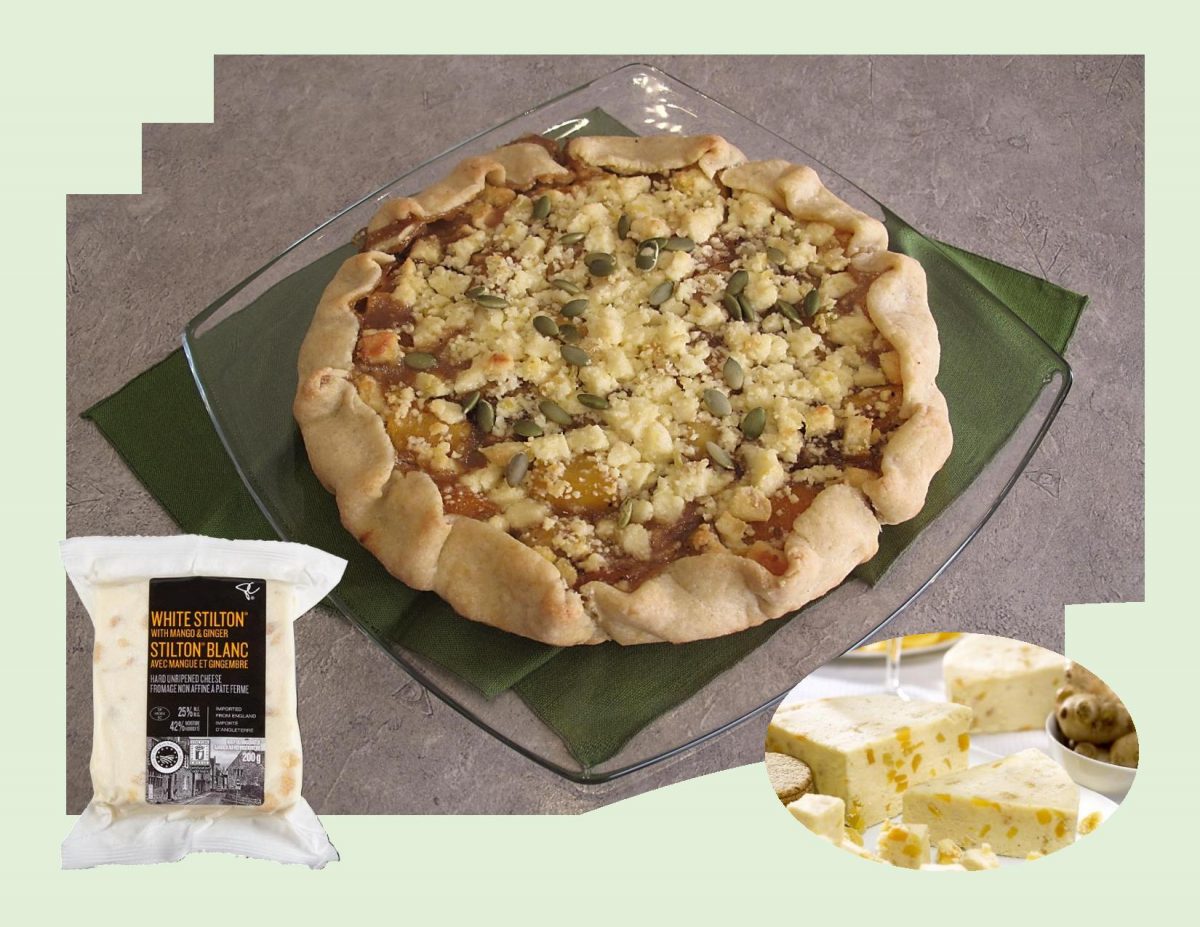
This spicy galette makes an interesting dessert with the sweetness of mango and apricot fruit, as well as savory with the creaminess of stilton, crunchy pepitas, and the perfection of a cornmeal pastry crust.

Stilton cheese takes its name from the village of Stilton, in the east of England. White Stilton has a light, fresh, slightly acidic flavor that makes it a perfect partner for fruit.

White Stilton with mango & ginger is a blended cheese which incorporates mango and ginger to impart a sweet, savory intense flavor to the traditional Stilton cheese. Stilton on its own is extremely creamy and delicious but the addition of fruit accords the cheese a new dimension. As it melts, the unusual combination of the mango adding a fruity flavor and the ginger adding a mildly warming, spiced overtone. White Stilton with mango & ginger is perfect for a breakfast or dessert cheese.

Print Recipe
Spicy Apricot Mango Stilton Galette
Votes: 1
Rating: 5
You:
Rate this recipe!
Servings
Servings
Votes: 1
Rating: 5
You:
Rate this recipe!
Instructions
Pastry
  1. In a small bowl, combine sour cream & ice water; set aside. In a large bowl, whisk together flour, cornmeal, sugar & salt. Using a pastry blender or fingertips, cut in the butter until mixture resembles BOTH coarse crumbs & small peas. Sprinkle the cold sour cream mixture over dough, 1 Tbsp at a time, tossing with a fork to evenly distribute it. After you have added all the sour cream mixture, dough should be moist enough to stick together when pressed; if not, add additional cold water, 1 tsp at a time. Do not overwork dough.
  2. Press dough into a disk shape & wrap in plastic wrap. Refrigerate for at least 2 hours. The dough can be kept in the refrigerator for a day or two or it can be wrapped airtight & frozen for a month. Thaw, still wrapped in refrigerator.
Filling
  1. In a saucepan over medium heat, add apple cider vinegar, brown sugar, ginger, anise seeds, cloves, pepper, cardamom, cinnamon & sea salt. When mixture starts to bubble, add dried apricots & mangoes. Cook, stirring often, until fruit is soft. Set aside to cool.
  2. Preheat the oven to 425 F.
  3. On a large sheet of parchment paper, roll or press out chilled pastry into a 13-inch circle. Spread mixture evenly over dough, leaving about a 1 1/2-inch border. Gently fold pastry over filling, pleating to hold it in. Sprinkle with crumbled Stilton cheese. Brush with egg wash (if using).
  4. Bake 35-45 minutes until filling bubbles up & crust is golden. Remove from oven & sprinkle with pepita seeds. Serve.
Recipe Notes
  • If filling seems too dry, add a bit of water or apple juice.

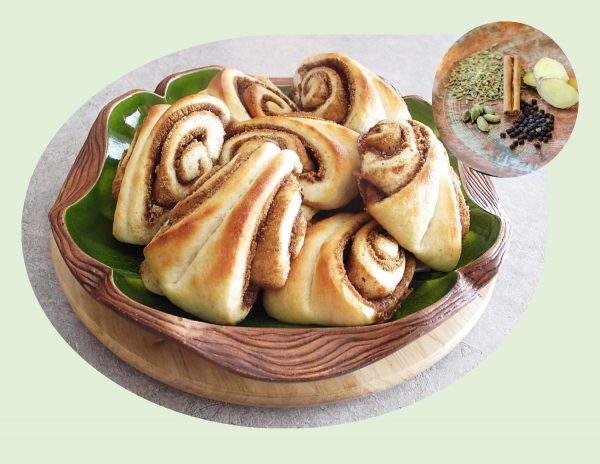
Chai Spiced Sweet Rolls

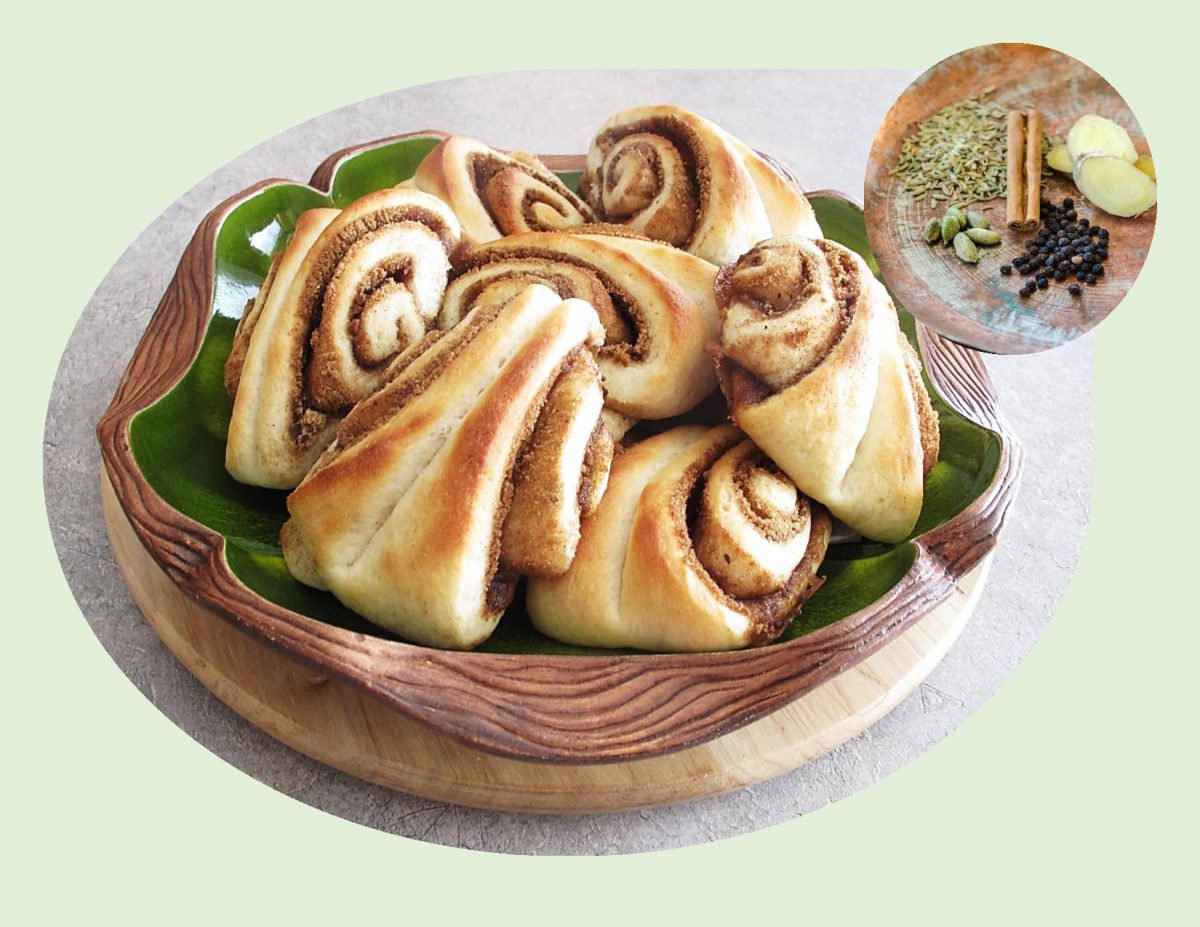
Its the fall season, so bring on the chai flavored recipes! Fall can encompass many different flavors including apple, pumpkin, maple, cranberry and ginger just to name a few. To me, baked goods and chai spices are a no-brainer. Traditionally, chai is made into a tea which consists of milk, spices, sweetener and black tea. Chai spices can be used for so much more than just tea. Once you make your basic chai spice recipe, there are so many different ways to utilize it.

Chai can include a number of different spices. Cardamom is the most common ingredient, followed by some mixture of cinnamon, ginger, star anise and cloves. Pepper and coriander, nutmeg and fennel are also used but they are slightly less common.

In the winter of 2011, Brion & I traveled to Turkey for a month. That trip we were meeting up with a Trafalgar tour group in Istanbul. Arriving a day early gave us time to ‘snoop’ around a bit. Next to our hotel was a Starbucks, so we went in. When Brion ordered my coffee, they gave me a ‘Pumpkin Spice Chai Latte’ by mistake. The flavor was so incredible, I have been addicted to it ever since.

A stay in Istanbul would not be complete without a traditional and unforgettable boat excursion up the Bosphorus, that winding strait that separates Europe and Asia. Its shores are a mixture of past and present, grand splendor and simple beauty. Modern hotels stand next to shore-front wooden villas, marble palaces in contrast to rustic stone fortresses and elegant compounds neighbor small fishing villages. Since Turkey actually straddles two separate continents, its culture features strong elements and traditions from both east and west. At that point in time we found Turkey a relaxed country to travel in which made our time there very enjoyable.

This bread is literally like the food version of your favorite chai drink.

Print Recipe
Chai Spiced Sweet Rolls
Votes: 1
Rating: 5
You:
Rate this recipe!
Servings
Ingredients
Dough
Glaze
Servings
Ingredients
Dough
Glaze
Votes: 1
Rating: 5
You:
Rate this recipe!
Instructions
Dough
  1. In a small dish, combine yeast with lukewarm milk (or water) & 1 tsp of the sugar. Allow to sit for a few minutes until frothy.
  2. In a large bowl, slightly melt butter; cool a couple of minutes then whisk in egg. In another bowl, whisk together flour, salt & remaining sugar. Combine yeast mixture with butter mixture; then add flour mixture. Combine then turn onto a floured work surface & knead for about 5 minutes. Dough will be very soft but not sticky.
  3. Lightly grease bowl, place dough ball in it & cover with a tea towel. Place in a draft-free place to rise for about 20 minutes.
  4. Line a baking sheet with parchment paper. In a bowl, combine brown sugar & chai spices to make filling.
  5. When dough has risen, place on a lightly floured work surface & roll out into a rectangle about 12 x 16 inches in size. Spread with softened butter & sprinkle with brown sugar/spice mix.
  6. Beginning with one of the long edges, roll the dough up, pulling it first up & over the filling & working it carefully until you've created a tight log. Press/pinch along the seam to seal.
  7. Using a sharp knife, cut roll in a zig-zag fashion about 2-inches apart. Place wedges on prepared baking sheet, spacing to allow room for the buns to spread a bit. With a wooden skewer, press each wedge down across the center to form their unique shape. Cover & allow to rise until oven is ready. If you wish , make a bit of egg wash & gently brush over buns before baking.
  8. Preheat oven to 350 F. Bake rolls for about 20 minutes or until golden brown. Place on a wire rack to cool.
Glaze
  1. In a small bowl, combine the powdered sugar, milk & vanilla. Stir to create a smooth glaze. Once the rolls have cooled for about 10 minutes, drizzle with glaze.

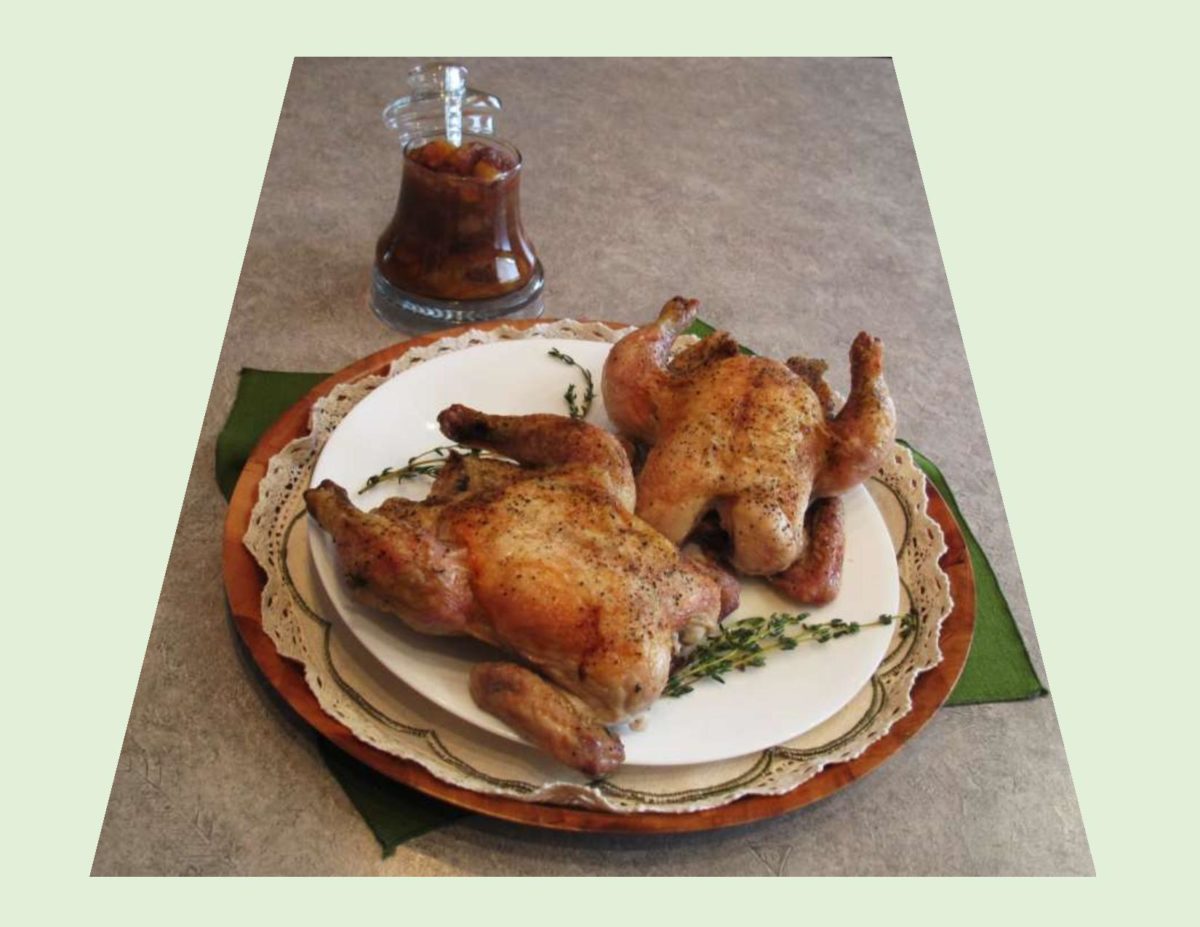
Herb Roasted Game Hens with Rhubarb-Date Chutney

According to legend, the Cornish game hen was actually ‘invented’. The original breeder was a woman by the name of  ‘Tea’ Makowsky.  At the age of 15, she moved to Paris, France finding work at both a milliner’s shop and a cheese shop. It was here she met her husband and they married in 1933. Fleeing from the Nazis, they settled in the USA. After fire destroyed their farm in 1949. the Makowskis, began experimenting and came up with a cross breed of Cornish game cocks and Plymouth Rock hens. The result was a plump little bird that matured quickly with all-white meat. In less than 5 weeks, the chicken was ready to be sold.

By the 1950’s, the Cornish Game Hen was fabulously popular. The usual weight is about 500-700 grams, which makes it ample for an individual serving. I remember in the 1970’s, Cornish game hens were considered to be a very upscale or exotic dinner and quite expensive.

I haven’t made any of these little ‘birds’ for a long time. Since its that time of year for that wonderful rhubarb, I’m pairing some Cornish hens with a rhubarb chutney. Yum!


Print Recipe


Herb Roasted Game Hens with Rhubarb-Date Chutney

Votes: 1
Rating: 5
You:
Rate this recipe!

Servings


Ingredients

Servings


Ingredients

Votes: 1
Rating: 5
You:
Rate this recipe!


Instructions
Cornish Hens
  1. Preheat oven to 400 F. Wash & dry hens thoroughly, Divide herb pkg between hens & place inside. Rub each hen with butter or mayo. Place breast side up in a roasting pan. Roast until juices run clear & meat thermometer reads 165 F. when inserted into the thickest part of the chicken, about an hour. Allow to rest for 5 minutes before serving.

Fruit Chutney
  1. In a small, heavy saucepan, combine all ingredients. Bring to a boil, reduce heat, cover & simmer 30 minutes, stirring occasionally, until thick but still has a small amount of liquid. Serve warm or cold with Cornish game hens.

Vintage Puffed Wheat & Rice Krispie Squares

I haven’t thought of puffed wheat cake in years. It’s probably been 15 or 20 years since I’ve even made any. So what happened to puffed wheat? I remember this cereal from my childhood, being sold in HUGE plastic bags. It seems that puffed wheat cake (or squares) was a distinctly rural Canadian phenomenon. Nearly anyone from the prairie provinces recalls the recipe from memory. When I looked through my mothers recipe file, she had a recipe for ‘puffed wheat brittle’. This was the forerunner to puffed wheat ‘squares’. It was made using sugar, water, vinegar, molasses, butter & salt.

The Rice Krispie cereal came on the market in North America in 1928. Food history states that similar recipes existed for Puffed Rice & Puffed Wheat  but neither used marshmallows, only molasses. Most inventions are built on what has come before and the ‘Rice Krispie Marshmallow Treats’ were no different.

Home economists, Mildred Day and her co-worker, Malitta Jensen, who worked for the Kellogg’s company in 1939 are credited with inventing ‘Rice Krispie Treats’. Originally they had been developed as a snack for an organization called Campfire Girls. They were having a fundraiser and needed something unique that the girls could sell door to door.

In 1940, the original recipe for Kellogg’s Rice Krispie Treats first appeared on the cereal box and continues to do so to this day. In 1995, the company began selling the pre-packaged ones. The fact that they are so quick and easy to make attributes to their continued popularity and of course there are no end to variations you can make from the original recipe.

Here are a couple of ideas you might enjoy to try.

Print Recipe
Chai Puffed Wheat Squares / Rice Krispie Treats
Votes: 4
Rating: 5
You:
Rate this recipe!
Course dessert
Servings
Ingredients
Chai Puffed Wheat Squares
Rice Krispie Treats
Course dessert
Servings
Ingredients
Chai Puffed Wheat Squares
Rice Krispie Treats
Votes: 4
Rating: 5
You:
Rate this recipe!
Instructions
Chai Puffed Wheat Squares
  1. In a large buttered bowl, measure out puffed wheat; set aside. In a saucepan, combine margarine, brown sugar, corn syrup & spices; bring to a boil. Remove from heat & add vanilla. Pour mixture over puffed wheat & stir quickly until completely coated. Pour immediately into prepared buttered pan (size will depend on how thick you like your squares to be) & press down firmly to flatten. When cool, cut into preferred size pieces.
Rice Krispie Treats
  1. Lightly butter a 9 x 13" pan. In a large bowl, measure rice krispies, flax flakes, cranberries, pumpkin seeds & flax seed. In a large saucepan, slowly melt margarine with marshmallows. Remove from heat, add vanilla. Add mixture from bowl & stir quickly to combine well. Pour into buttered pan & press down firmly. When cool, cut into preferred size pieces.

Egyptian Kofta

Over the years, our travels have taken Brion and I to many interesting places in the world. Each has left us with amazing memories.

In November of 2009, before Egypt was in such disarray, we explored this ancient country. You could safely say that time has not lessened the mystique of the world’s oldest tourist attraction. No matter how many pictures you look at, or how much you read on the internet, there is just nothing as powerful as seeing the real thing. Brion’s ability to speak fluent Arabic was a huge bonus for us while in Egypt.

The flight from Edmonton, Alberta, Canada to Cairo, Egypt was a bit grueling at 16 hours long but we ‘recovered’ fairly fast. To make the most of our vacation, we divided it into four segments; – five days in Cairo, six days in Alexandria, eight days on a Nile River cruise and the last week at Sharm El Shiekh on the Red Sea.

The Nile River cruise was definitely the highlight of the vacation. We boarded the ‘Helio’ cruise ship in Luxor which took us to Aswan and back. Each day the ship would dock at various sites along the way and our personal guide would take us to explore temples, tombs, the high dam and the beautiful botanical gardens at Kitchener Island. It was such an incredible experience viewing the sights and sounds as you slowly sailed along. Travel is a good reality check to make us appreciate what we have in our own lives and so often take for granted.

Every evening, the supper buffet on the ship was created with a different theme. One of the items Brion really enjoyed was ‘EGYPTIAN KOFTA’. Egypt’s local and rich resources of fresh foods coming from the Nile Valley, has given the world some of the most coveted cuisines. Egyptian food is a mixture of all the different civilizations that came to Egypt in the history of its existence.

The word kofta (or kefta) has its origins in Persia. Although you can make meat, seafood or vegetarian kofta, the most popular in Egypt is a mixture of ground beef and lamb combined with onions, garlic, parsley and a ‘BAHARAT’ spice blend.

Along with my recipe today, I thought you may enjoy to look at some of the photos from our Nile River cruise. 


Print Recipe
Kofta
This is the burger meat of the Middle East.
Votes: 1
Rating: 5
You:
Rate this recipe!
Servings
skewers
Ingredients
Servings
skewers
Ingredients
Votes: 1
Rating: 5
You:
Rate this recipe!
Instructions
  1. Soak 16 wooden skewers in water for about 1 hour; remove from the water when you are ready to begin. Lightly oil grates of grill or BBQ & preheat to medium high temperature.
  2. In a large bowl, combine all ingredients thoroughly. Divide meat mixture into 16 portions. Mold each onto a wooden skewer to form a 'kofta kebab' about 1-inch thickness.
  3. Place kebabs on lightly oiled, heated grill or BBQ. Grill for 4 minutes on one side, turn over & grill for another 3-4 minutes. Serve immediately with mini pita breads, tahini, hummus or yogurt dip.

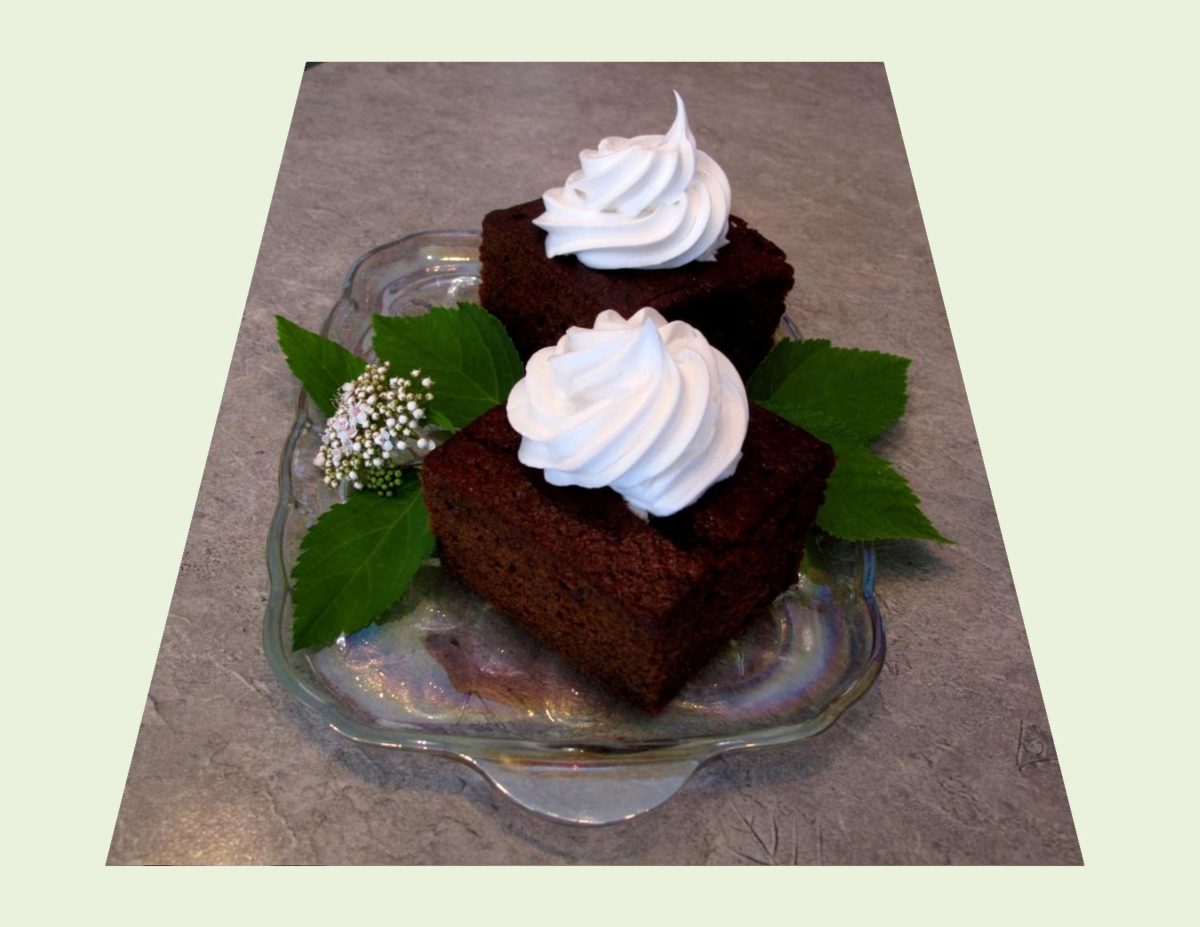
Classic Gingerbread Cake

Gingerbread (cake) is the perfect sweet/spicy dessert for fall and winter, flavored by a ‘strange lumpy little root’. I recall my mother baking gingerbread cake for our supper dessert. She would serve it warm with farm fresh whipped cream. For lack of a better expression, ‘it was to die for’. Strangely enough, I was never fond of molasses but certainly enjoyed that warm gingerbread cake!?

Gingerbread has been baked in Europe for centuries. In some places it was soft, delicately spiced cake, in others, a crisp, flat cookie. Then in other places, warm, thick, dark squares of bread served with lemon sauce or whipped cream.

At first, gingerbread was made with breadcrumbs and sweetened with honey, but as it made its way throughout the world it has been adapted to meet the taste of different cultures. In North America, along with the ground ginger we usually like to add cinnamon, and cloves. Molasses is usually labeled as ‘sulphured’ or ‘unsulphured’ depending on whether sulphur was used in the processing. The unsulphured molasses is lighter in color and tends to have a nicer flavor.

Brion does not remember ever eating gingerbread cake?? I’m going to try to bring back the taste of a memory  with this classic little cake and see what he thinks.

Print Recipe
Classic Gingerbread Cake
Applesauce is such a great addition in that it adds to the cake moistness.
Votes: 1
Rating: 5
You:
Rate this recipe!
Course Brunch, dessert
Servings
Ingredients
Course Brunch, dessert
Servings
Ingredients
Votes: 1
Rating: 5
You:
Rate this recipe!
Instructions
  1. Preheat oven to 350 F. Line a 9-inch square baking dish with parchment paper.
  2. In a medium bowl, cream together sugar & butter until lightened in color & fluffy. Beat in egg, molasses, applesauce & hot water until fully combined.
  3. In a small bowl, whisk together flour, baking soda, salt, cinnamon, ginger & cloves. Whisk into wet ingredients, mixing ONLY until blended.
  4. Bake for 30-35 minutes until cake springs back when touched or a knife inserted comes our clean.
Recipe Notes

Rhubarb Orange Pork Country Ribs

There is definitely more to rhubarb than just dessert. While rhubarb is generally treated as a fruit, it has also made many popular appearances in recipes of the day as a savory ingredient.

Braised in chicken stock with a little brown sugar makes a nice side dish for pork, lamb or fish. In sauces, it teams well with onion, sugar and star anise and tarragon for salmon or trout. If your serving pork, onion, sugar, cinnamon, allspice and cloves all pair well with rhubarb.

In September, 2016, I posted a recipe for Spiced Pork Tenderloin with Rhubarb Chutney. It became real popular with my blog followers so I thought I would share another pork/rhubarb idea. This recipe was one of those newspaper clippings from yesteryear that is still in my ‘file’ today.

Print Recipe
Rhubarb Orange Pork Country Ribs
Votes: 1
Rating: 5
You:
Rate this recipe!
Course Main Dish
Servings
Ingredients
Course Main Dish
Servings
Ingredients
Votes: 1
Rating: 5
You:
Rate this recipe!
Instructions
  1. Preheat oven to 375 F. Trim excess fat from short ribs; cut into serving size pieces. Place some of the fat in a heavy skillet & heat until skillet is well greased. Discard any remaining pieces.
  2. Combine flour, salt & pepper in a plastic bag. Place short ribs in bag & shake to coat evenly; reserve any extra flour. Place ribs in skillet & brown slowly on both sides. Transfer to a shallow baking dish, making a single layer.
  3. Top ribs with slices of onion, orange & celery. Toss rhubarb, sugar, reserved flour mixture & cloves together & sprinkle over all. Add water to the baking pan. Cover tightly with foil. Bake 35 minutes or until ribs are tender. Uncover & continue baking 10 minutes longer.
Recipe Notes
  • The original recipe used pork chops but our preference is with pork country style ribs instead.

Thanksgiving Day in Canada

The second Monday of October has been the day Canada has celebrated Thanksgiving since 1957. We have now entered into our Autumn season with all it’s breathtaking fabulous fall foliage. Part of Canada’s appeal is it’s four seasons that offer changing landscapes and temperatures. 

I, for one, have always loved the changing seasons. That’s not to say that I like freezing cold and slippery roads but that I have come to understand the important role each one plays in the ‘big picture’. When Brion and I initially landscaped our property, careful consideration was given to what plants were planted. Over the years it has developed into a beautiful tapestry of color through our growing season.

Growing up on the farm, Fall was an especially busy time with the grain crops being harvested, garden vegetables being canned, frozen or just stored for use over the coming months. So much needed to be done before winter would set in. As a teenager it all just seemed like a lot of work. Even as hard as my parents worked at making a living from farming, I think they felt a real sense of satisfaction in what they were able to achieve. I realize now that even without being aware of it the visual beauty of the farmland at harvest was imprinted on me forever.

Thanksgiving Day in Canada is linked to the European tradition of harvest festivals. A common image seen at this time of year is a cornucopia, or horn, filled with seasonal fruit and vegetables. The cornucopia, which means ‘Horn of Plenty’ in Latin, was a symbol of bounty and plenty in ancient Greece. Turkeys, pumpkins, ears of corn and large displays of food are also used to symbolize Thanksgiving Day.

Over the years, Brion and I have chose to have a variety of different meats for our Thanksgiving meal. Turkey is always the tradition for our Christmas dinner and since the two holidays come fairly close together, why not! All that being said though, we decided this year to roast just the turkey breast with stuffing. I also incorporated some of that wonderful Butternut squash with cranberries into the meal as well. For dessert we are having some pumpkin chiffon tarts. As a ‘kid’, I remember having a great dislike for the regular pumpkin pie — you know the kind –‘solid’. Then one year my mother made pumpkin  ‘CHIFFON‘  pie. Well, now that was glorious and I have loved it ever since.

Today in my recipes I have only included the Butternut Squash with Cranberries and Pumpkin Chiffon Tarts. I thought I’d get into the turkey and stuffing recipes later in the season.

Happy Thanksgiving Day!

Print Recipe
Butternut Squash with Cranberries / Pumpkin Chiffon Tarts
Votes: 1
Rating: 5
You:
Rate this recipe!
Course dessert, Main Dish
Servings
Ingredients
Butternut Squash with Cranberries
Pumpkin Chiffon Tart Filling
Pastry
Course dessert, Main Dish
Servings
Ingredients
Butternut Squash with Cranberries
Pumpkin Chiffon Tart Filling
Pastry
Votes: 1
Rating: 5
You:
Rate this recipe!
Instructions
Butternut Squash with Cranberries
  1. Preheat oven to 375 F. Split squash in half; place hollow side down on a lightly buttered baking sheet. Bake for about 45 minutes or until completely soft to the touch.
  2. In a small skillet, saute celery & onion in margarine until tender. Add the apple, salt, lemon juice & pepper. Cook, uncovered, over medium-low heat until apple is tender, stirring occasionally. Stir in cranberries, sugar & water. Cook & stir until berries pop & liquid is syrupy. If you prefer, you could process this mixture for a couple of seconds in a food processor.
  3. Remove seeds & membrane from cooked squash; mash well. Add cinnamon, nutmeg, balsamic vinegar & maple syrup. Place some squash in individual custard dishes. Make a hollow in the center for the cranberry 'filling'. Add cranberries & serve.
Pumpkin Chiffon Tart Filling
  1. In a medium saucepan, combine first 7 ingredients; mix well. Add pumpkin, evaporated milk, regular milk & egg yolks; combine well. Cook, stirring constantly, until mixture thickens to a heavy custard. Boil 2 minutes, add 1 Tbsp margarine. Place wax paper over custard to prevent a 'skin' from forming. Let custard become cold (it can be refrigerated overnite at this point, finishing it the following day) then stir in 1/4 cup orange juice.
  2. Whip envelope of dessert topping with 1/2 cup milk & 1/2 tsp vanilla until stiff peaks form. It should yield about 2 cups. Put aside the amount you need to garnish tarts with. Fold remaining whipped dessert topping into custard. Spoon custard into a large pastry bag with a large 'star' tip. Fill baked mini tart shells. Decorate with a small dollop of dessert topping.
Pastry
  1. Sift together flour, baking soda, baking powder & salt. Cut in white & yellow Crisco shortening. In a 1 cup measuring cup place egg & vinegar; beat well. Add enough COLD water to fill cup. Pour all at once over flour mixture, mixing until pastry pulls away from sides of bowl. This should only take a couple of minutes, making sure not to over mix pastry. Roll out on floured surface. Using the bottom side of tart pans, cut pastry circles & place over each 'cup'. Bake at 350 F. until golden. Cool on wire rack before filling with pumpkin custard. If your using purchased shells follow baking instructions & cool before filling as well.
Recipe Notes
  • This pastry & pumpkin chiffon custard recipe was one I started using many years ago while working in the food industry. They were some of my favorites because they were pretty much 'fail proof'. If you want to make a double batch of each it will give you 4 - 9-inch pies. You can make them up to the point of decorating. Freeze until needed then just bring them out & thaw, decorate and you got a nice little homemade dessert just like that!