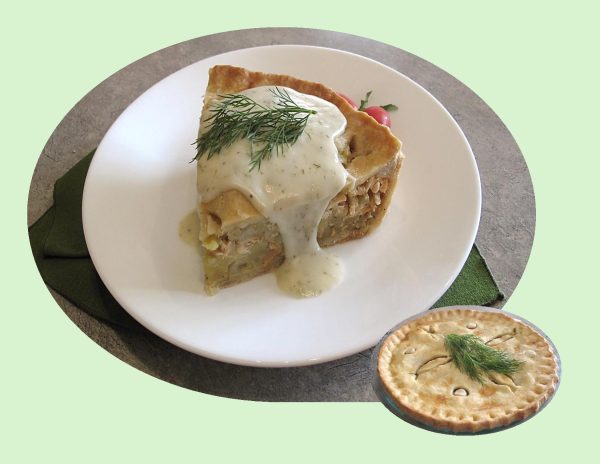
Canadian Salmon Pie

Salmon pie is a variation on a classic Canadian Christmas meat pie from Quebec called a ‘tourtiere’. Fundamentally, tourtiere is a pie that contains meat and spices baked in a flaky crust. The meat is generally diced or ground, including any or all of pork, veal, beef or wild game. No matter what the meats used, or the presence or absence of potato, bold seasoning is the rule for all varieties. The four original spices used in the classic tourtiere are cinnamon, cloves, allspice and nutmeg. Like so many of these recipes that have been ‘handed down’ over generations, each family alters it to suit their taste. 

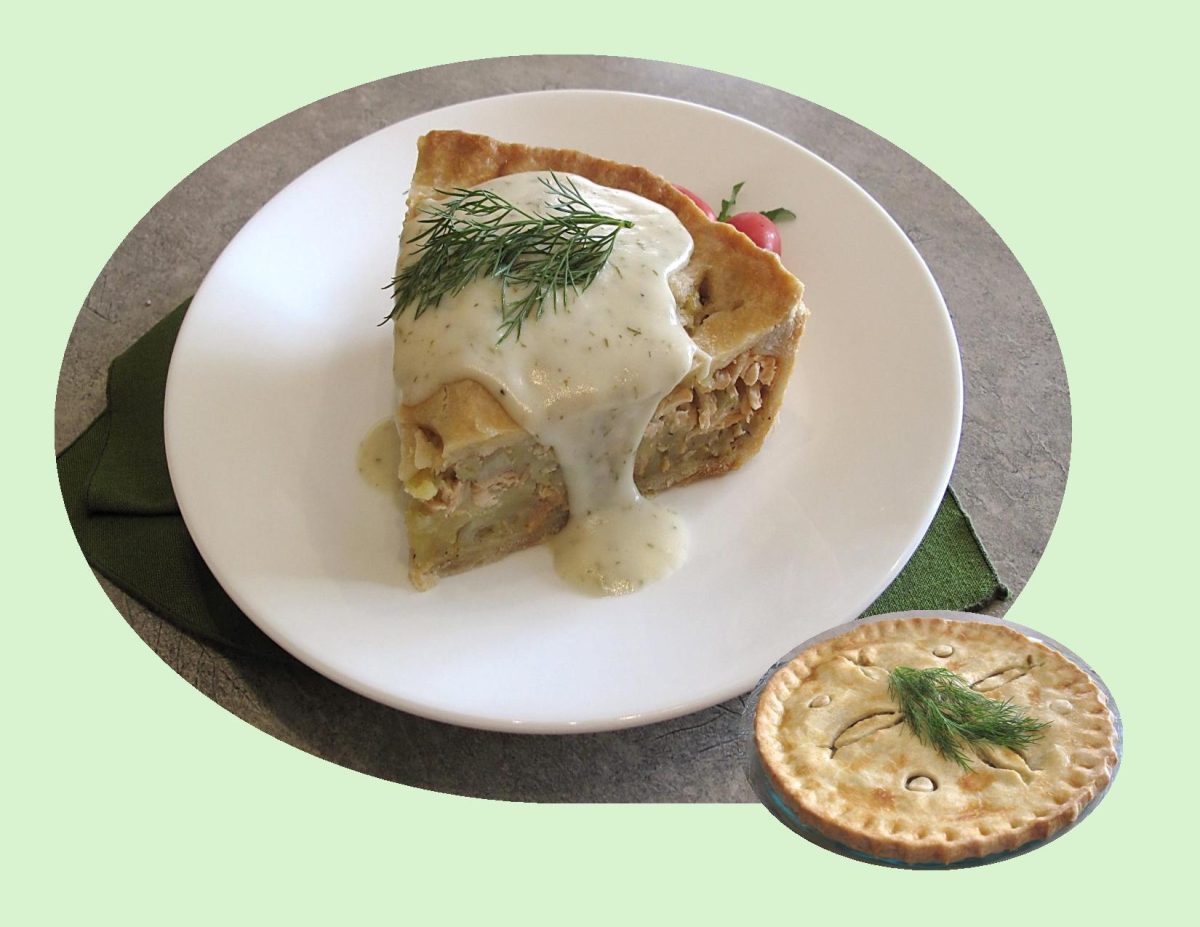
The salmon pie version takes the same meat pie concept, but uses flaked, cooked salmon that is seasoned and mixed with mashed potatoes.

I thought it would be nice to have some salmon pie before we get into all that Christmas turkey. The lemon dill sauce is such a nice condiment to go with it.

Print Recipe
Canadian Salmon Pie
Votes: 1
Rating: 5
You:
Rate this recipe!
Cuisine American
Servings
Ingredients
Pastry
Salmon Filling
Lemon Dill Béchamel Sauce
Cuisine American
Servings
Ingredients
Pastry
Salmon Filling
Lemon Dill Béchamel Sauce
Votes: 1
Rating: 5
You:
Rate this recipe!
Instructions
Pastry
  1. In a large bowl, combine flour & salt. Cut in butter until mixture is an even crumbly texture. Add cold water a Tbsp at a time & mix until dough comes together. Shape the dough into a disc, wrap & chill in the refrigerator. While pastry is chilling prepare filling.
Salmon Filling
  1. Wash & peel potatoes. Cut into chunks & boil in a medium size pot of water until tender, about 12 minutes. Drain, mash & set aside.
  2. Melt butter in a large skillet over medium heat. Add the onions & sauté until they are softened, about 5 minutes. Add 1/2 cup water, thyme & Old Bay seasoning to skillet.
  3. Season the salmon fillet with salt & pepper & place it into the skillet skin side down. Spoon liquid & onions over salmon, cover the skillet & cook until the salmon is opaque, about 5 minutes. Turn off the heat & let salmon cool slightly.
  4. Remove the skin & break salmon into pieces. Add the salmon, onions & poaching liquid to the mashed potatoes & mix to combine. Taste & adjust salt & pepper if needed. While the salmon pie is baking, make the dill béchamel sauce.
Lemon Dill Béchamel Sauce
  1. Melt the butter in a small saucepan over medium heat. Add flour & whisk until smooth. Gradually add milk, stirring constantly. When sauce begins to thicken, add the lemon juice, dill and salt & pepper to taste. Simmer for 2 minutes. Keep warm until ready to serve.
Serving
  1. Remove pie from oven & let it cool for at least 10 minutes before serving. Cut pie into wedges & drizzle with lemon dill sauce. Serve warm.
Orange Cardamom Shortbread Cookies w/ Chocolate & Sea Salt

Probably, considered to be a bit of old-fashioned mentality, to me there is something deeply comforting about traditional Christmas baking. As I stock up on particular ingredients that can only mean December festivities are soon to begin, I get a nostalgic feeling deep inside. I am transported back to childhood to my mother’s kitchen.

Fragrant, aromatic spices like cinnamon, ginger, cardamom, allspice, and black pepper are traditional flavor profiles in holiday recipes. They have a beautiful grounding effect, along with the nuts and dried fruits that were introduced into Europe during the Middle Ages and quickly became the cornerstone of so many festive baked goods.

Shortbread cookies, a Christmas classic, can be made plain with only the essential butter, flour and sugar. Other varieties can include chopped nuts, chocolate or flavoring such as citrus or spices.

If you have never had cardamom, you are missing out. Few flavors in this world stack up to the aromatic complexity of cardamom. Nicknamed the ‘queen of spices’, it has a light peppery flavor with hints of lemon and mint which means it pairs well with citrus of all kinds.

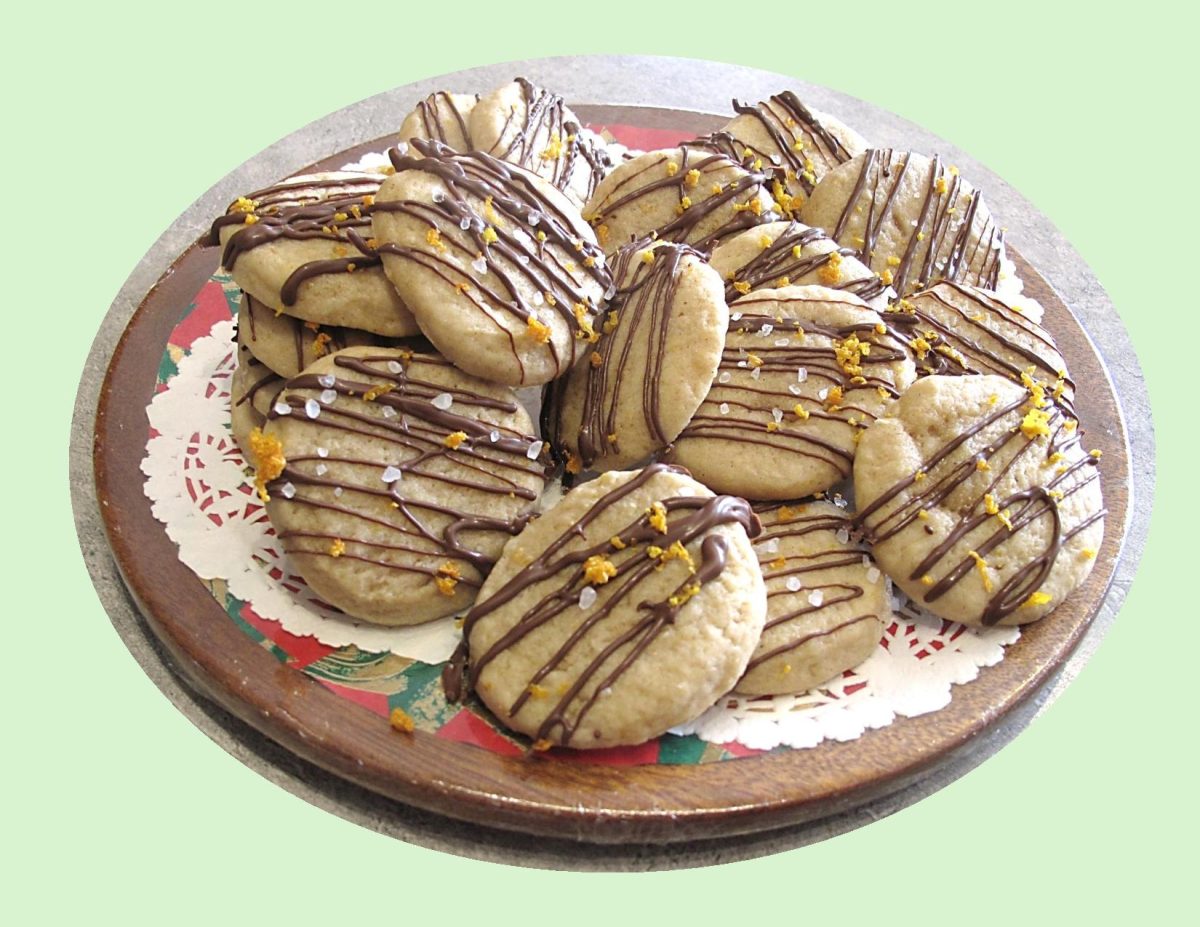
These orange cardamom shortbread cookies with chocolate & sea salt are a perfect harmony of zesty, spicy, sweet and salty flavors. Is it even Christmas without cookies?

Print Recipe
Orange Cardamom Shortbread Cookies w/ Chocolate & Sea Salt
Instructions
  1. In a medium bowl, whisk flour, cardamom, cinnamon & salt. Set aside.
  2. Mix the softened butter & brown sugar in a stand mixer with the paddle attachment until fluffy. Scrape down the sides of the bowl as needed. Then add the egg & the vanilla extract until fully combined.
  3. On low speed, gradually add the dry ingredients to the wet ingredients until combined. Now, mix 1 1/2 Tbsp of orange zest & the orange juice into the dough.
  4. Turn the dough out onto a floured work surface & divide into two. Shape divided dough into logs (about 2 1/2-inches in diameter), wrap in plastic wrap, and chill for at least 2 hours or overnight (recommended).
  5. Preheat oven to 350 F. Line two baking sheets with parchment paper. Set aside.
  6. Remove cookie dough logs from the refrigerator & slice each log into 12 equal sized cookies. Place cookies, about 2 inches apart, on lined baking sheets & bake for 12-14 minutes.
  7. Allow cookies to cool for 5 minutes on the cookie sheets, then transfer to a wire cooling rack to cool completely.
  8. Once the cookies are cooled, melt the chopped chocolate in a microwave-safe bowl in 15-second increments (stir after each increment) until completely melted & smooth.
  9. Drizzle the chocolate over the cookies & sprinkle with sea salt & the remaining ½ tablespoon orange zest. Let chocolate set before serving.

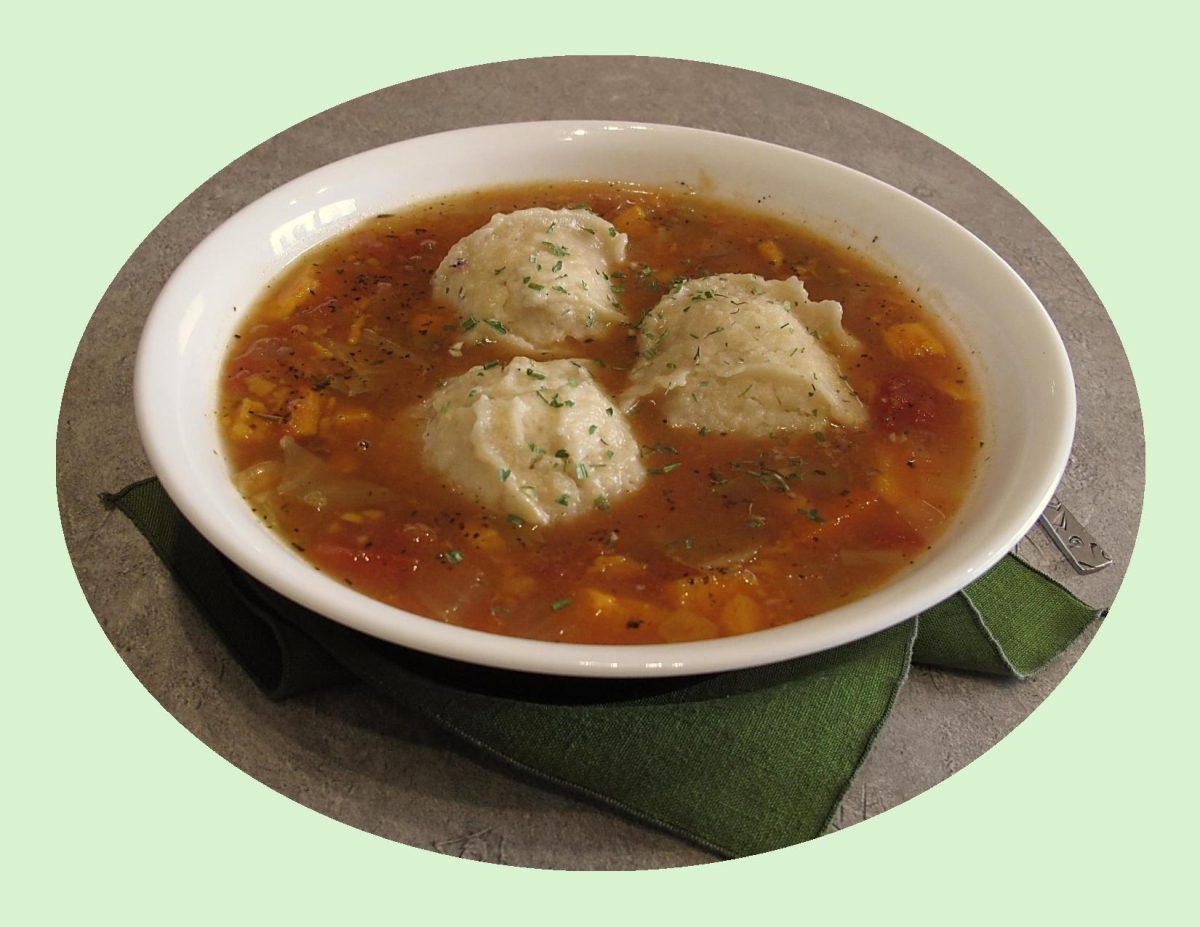
Vegetable Dumpling Soup

Soup season is officially here! This satisfying, hearty vegetable dumpling soup truly creates the perfect cozy vibes this winter.

The exact origin of vegetable dumpling soup is difficult to pinpoint, as dumplings and soups have been staples in many cultures for centuries. Dumplings themselves have a long history, with early versions appearing in China when a physician named Zhang Zhongjing created them to help villagers with frostbite.

Vegetable dumpling soup, as we know it today, likely evolved from these early dumpling recipes, with variations appearing in different cuisines around the world. Here are a few notable examples:

  • Wonton Soup: A Chinese classic, wontons are typically filled with pork, shrimp or vegetables and served in a clear broth.
  • Mandu-guk: A Korean soup featuring mandu (dumplings) filled with meat or vegetables, often served in a beef or anchovy broth.
  • Tortellini in Brodo: An Italian dish where tortellini, small ring-shaped pasta filled with meat or cheese, are served in a rich broth.
  • Xiaolongbao: Also known as soup dumplings, these Chinese dumplings are filled with pork and a gelatinous broth that turns into soup when steamed.
  • Matzo Ball Soup: A traditional Jewish soup with matzo balls (dumplings made from matzo meal) served in a chicken broth.

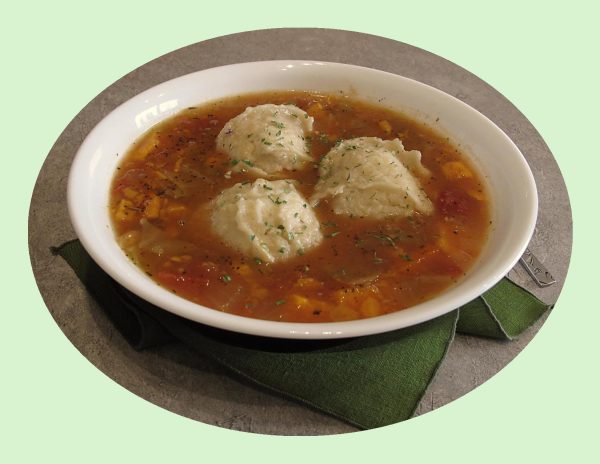
This vegetable dumpling soup has soft, fluffy, biscuit-like dumplings made with a mixture of flour, baking powder, salt & olive oil. The baking powder in these dumplings is what gives them their lift and results in a light and fluffy texture. The dough is cooked in the flavorful simmering soup, resulting in little balls of deliciousness.

Print Recipe
Vegetable Dumpling Soup
Votes: 1
Rating: 5
You:
Rate this recipe!
Course Main Dish
Cuisine American
Servings
SERVINGS
Course Main Dish
Cuisine American
Servings
SERVINGS
Votes: 1
Rating: 5
You:
Rate this recipe!
Instructions
Soup
  1. Add all ingredients to a stock pot. Cover & simmer until the vegetables are tender, approximately 2 hours. Stir periodically during cooking time.
  2. During the last ½ hour of the cooking time prepare dumpling dough.
Dumplings
  1. In a small mixing bowl, combine flour, baking powder & salt with a spatula. Form a well in the middle of the dry mixture & add olive oil & warm water. Mix until dough forms into a sticky ball. Cover with a dish towel & set aside for about 10 minutes.
  2. During the last 10 minutes of the soup’s cooking time carefully drop in dollops of the dumpling dough, about 1 inch (2-cm) in diameter.
  3. Let dumplings simmer for about 10 minutes, or until chewy and cooked through.
  4. Ladle soup into serving bowls & top with dumplings. Serve hot.
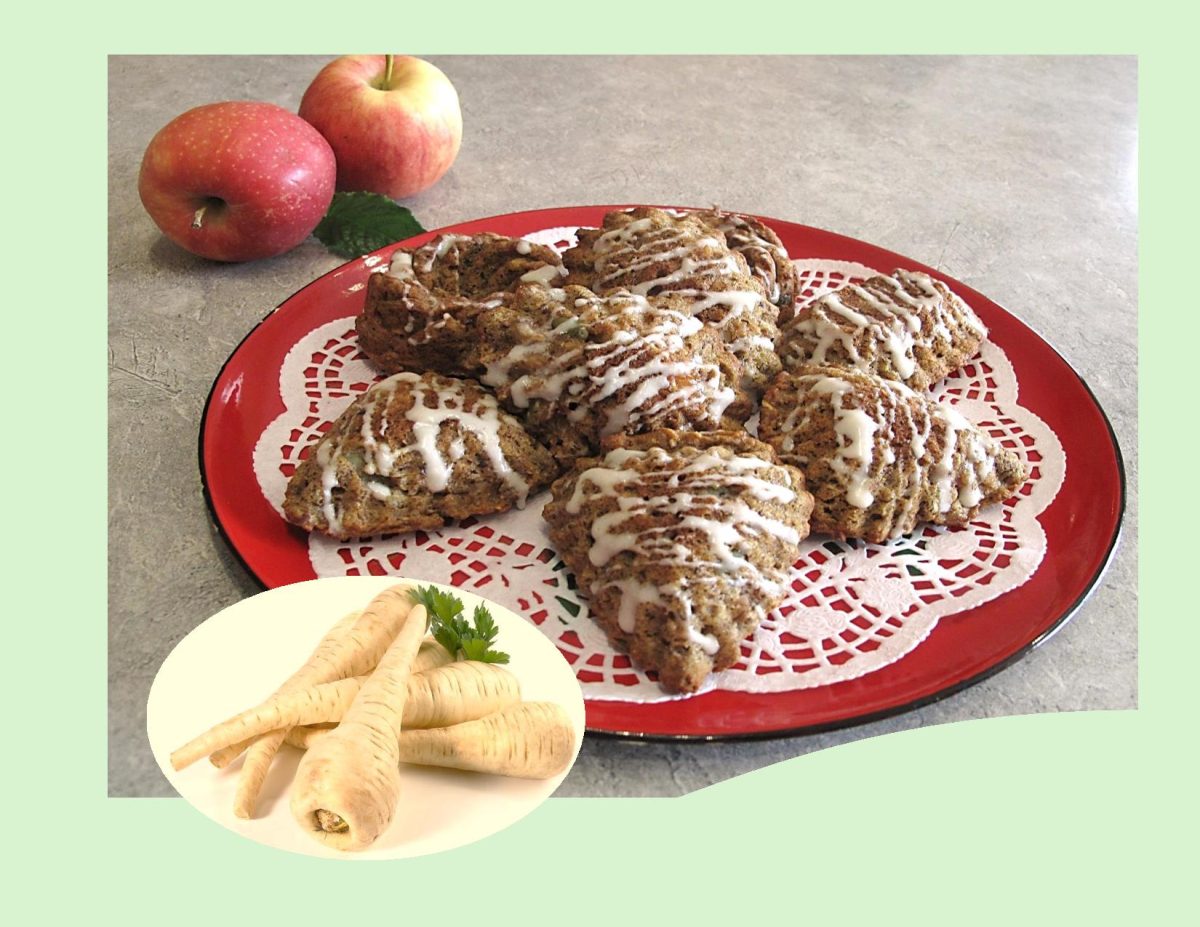
Spiced Parsnip Apple Scones

A fall frost warning announces the end of the road for most of the garden vegetables we’ve enjoyed over the summer. Happily, there are a few vegetables that reach their pinnacle of deliciousness when the cold weather arrives. Winter sweetening is a phenomenon that enhances the flavor of crops such as kale, collards and Brussels sprouts, along with root vegetables such as carrots, turnips, beets and parsnips.

Over the course of the growing season, these vegetables store up energy in the form of starches. When the temperatures start to drop, these starches are converted into sugars, which act as a natural antifreeze. Winter sweetening is especially profound with the humble, underappreciated parsnip.

Before sugar was widely available, vegetables were used to sweeten dishes such as cakes and jams. Carrot cake has stood the test of time, but parsnips add similar flavor and sweetness.

These vegetable/fruit scones mimic the spice and texture of a carrot cake, adding a mysterious subtle sweetness with the nutty flavor of grated parsnips.

Print Recipe
Spiced Parsnip Apple Scones
Votes: 1
Rating: 5
You:
Rate this recipe!
Servings
Servings
Votes: 1
Rating: 5
You:
Rate this recipe!
Instructions
  1. Preheat oven to 350 F. Lightly butter 12 scone tins or line a baking sheet with parchment paper.
  2. In a food processor, pulse oatmeal for a few seconds then transfer to a large bowl. Whisk oatmeal, flour, baking soda, spices, salt, flax & pecans together until well combined. Set aside.
  3. In a medium bowl, whisk egg, brown sugar, butter, mashed banana, orange zest, orange juice & vanilla together until well combined.
  4. Pour wet ingredients into dry ingredients, stir a few times, then add raisins, parsnips & apple. Fold together gently just until blended.
  5. Scoop into scone tins or onto parchment lined baking sheet. Bake about 15 minutes or until scones test done with a toothpick in the center.
  6. Remove from oven & place on a cooling rack to cool. Top with a simple powdered sugar/lemon juice drizzle if you wish or just serve as is.

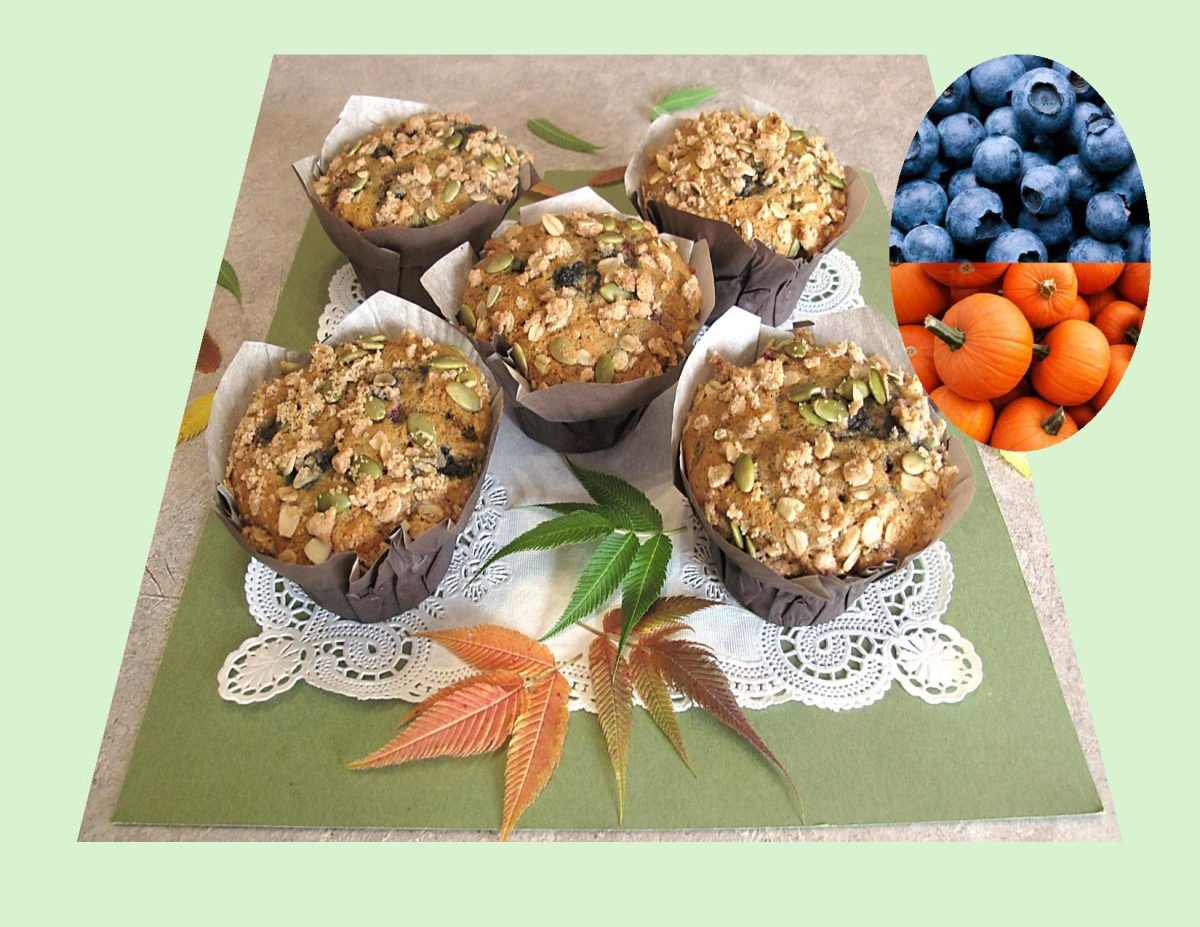
Pumpkin Blueberry Muffins

Fall is here and its pumpkin season!  It’s like a pumpkin explosion in the stores this time of year with pumpkin spice latte, pumpkin spice candles, pumpkin spice Oreos, pumpkin spice M&Ms, pumpkin spice Ramen noodles, Doritos and so many others.

Unlike pumpkins, however, blueberries have a flavor that knows no season or food type. They pair well with just about anything, and pumpkins are no exception. Blueberries have just enough sweetness to complement pumpkin-y flavors and stay juicy during the baking process.

These pumpkin blueberry muffins make for an ideal autumn indulgence.

Print Recipe
Pumpkin Blueberry Muffins
Votes: 1
Rating: 5
You:
Rate this recipe!
Course dessert
Cuisine American
Servings
LARGE MUFFINS
Ingredients
Muffins
Topping
Course dessert
Cuisine American
Servings
LARGE MUFFINS
Ingredients
Muffins
Topping
Votes: 1
Rating: 5
You:
Rate this recipe!
Instructions
Muffins
  1. Preheat oven to 350 F. Line an 8 cup large muffin tin with parchment papers/cups
  2. In a large bowl, whisk together 1 2/3 cups flour, baking soda, baking powder, salt, cinnamon & allspice. In a small bowl, combine pumpkin puree with milk.
  3. In a large bowl, using an electric mixer, beat butter & brown sugar until creamy. Add egg; beat until fluffy.
  4. Alternately add flour & pumpkin mixtures to butter mixture, stirring just until blended. Combine blueberries with 1 Tbsp flour in a small dish. Fold gently into mixture. Spoon batter carefully into prepared muffin cups.
Topping
  1. In a small bowl, combine oats, flour, brown sugar, cinnamon & salt. Using a fork, cut in butter until mixture is crumbly. Add pepitas & combine. Divide evenly over muffin batter.
Baking
  1. Bake for 45 minutes or until a wooden pick inserted in center comes out clean. Remove from oven, cool in pan for a few minutes then remove to a rack to finish cooling. Store muffins in a covered container.
Recipe Notes
  • If you would prefer smaller muffins, divide batter between 12 paper lined standard muffin cups. Bake for about 30-35 minutes or until a wooden pick inserted in center comes out clean.
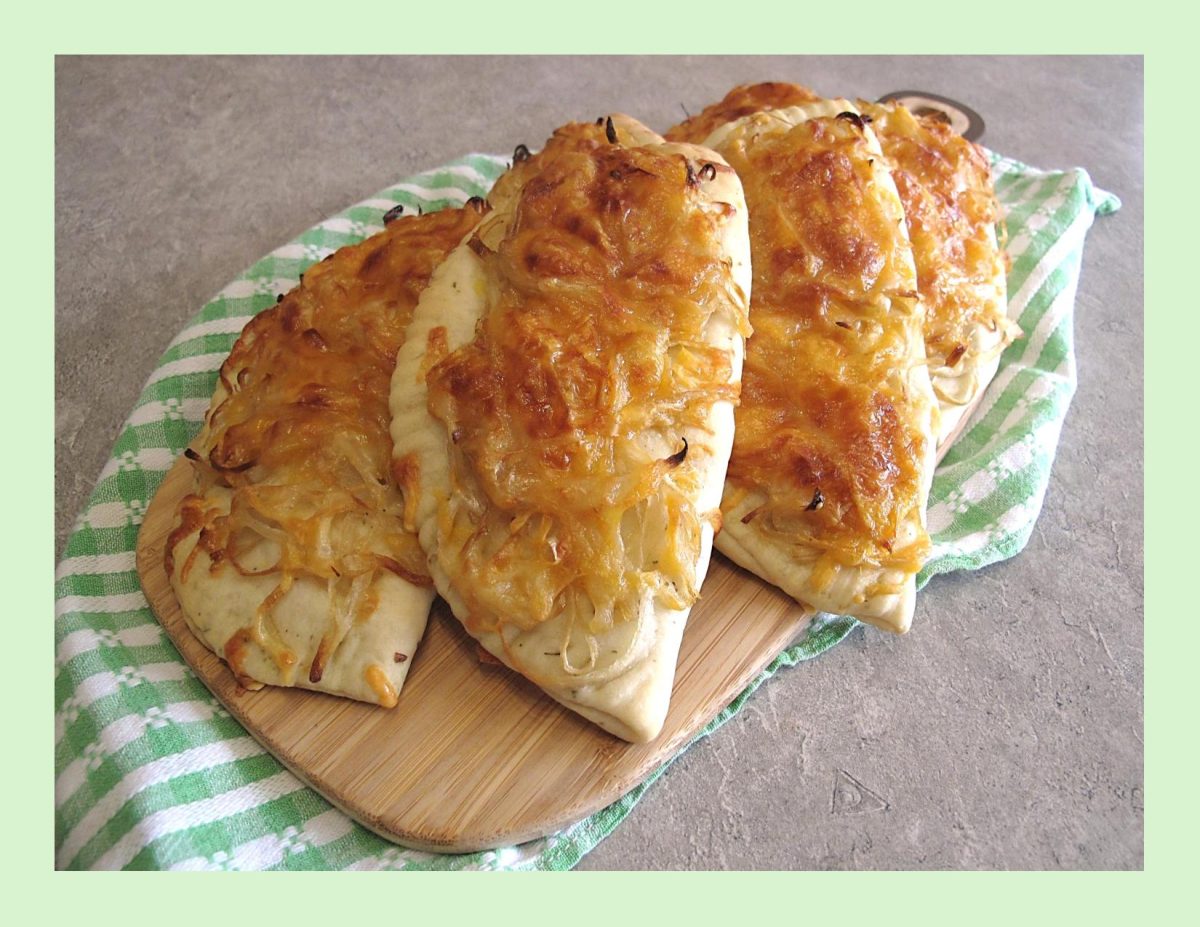
Cheesy Onion & Chicken Turnovers

Turnovers are a tasty handheld pastry stuffed with a variety of sweet or savory fillings. Depending on where you are in the world, you might know turnovers by another name. It’s a calzone in Italy, an empanada in Latin America, a pasty in England, a patty in Jamaica and a hand pie in North America.

Whether they’re made with pastry or yeast dough, these tasty morsels get their name from the folding technique used to enclose the fillings. They can be fried or baked, and the result is a convenient self-contained meal or snack.

While store-bought turnovers are readily available, there’s something uniquely special about crafting your own savory ‘pies’ at home. The aroma that fills the kitchen as the turnovers bake in the oven, the satisfaction of creating a perfectly flaky crust, and the freedom to customize the fillings to suit your taste – these are the joys that make them truly special.

During the summer months I like to have a big variety of savory turnovers in the freezer (already baked). There are so many times when you are too busy to make lunch and there they are — ready to heat and eat!

These cheesy onion and chicken turnovers were inspired by some Boursin cheese with cranberries & pepper I had waiting to be used. The total result has made them keepers!

Print Recipe
Cheesy Onion & Chicken Turnovers
Votes: 1
Rating: 5
You:
Rate this recipe!
Servings
TURNOVERS
Ingredients
Servings
TURNOVERS
Ingredients
Votes: 1
Rating: 5
You:
Rate this recipe!
Instructions
Dough
  1. Cook potato, peel & mash. In a bowl, combine yeast with lukewarm water. Allow to stand for about 3 minutes until foamy; add butter, salt, Italian seasoning, sour cream & potato & mix well.
  2. Stir in flour, one cup at a time. When dough is completely blended, turn onto a lightly floured work surface. Knead dough about 10 minutes, until smooth & elastic.
  3. Place dough in a greased bowl, cover with plastic wrap & allow to rise in a draft free place until doubled in bulk, about 1 hour.
Topping & Fillings
  1. In a skillet, heat 1 Tbsp oil. Sauté onion until caramelized & tender. In a bowl, combine shredded chicken with 1/2 of the Boursin cheese. Grate cheddar cheese.
Assembly
  1. Divide dough into 6 equal pieces & shape each piece into a round ball. On a lightly oiled surface, flatten each ball with a rolling pin to a 6-inch diameter. Spread each piece of dough with some of the remaining Boursin cheese.
  2. Divide chicken/Boursin mixture between the 6 turnovers, laying it to one side leaving a half inch border. Fold each one in half to form turnovers.
  3. Line a baking sheet with parchment paper. Place turnovers on baking sheet giving them space to rise a bit. Top each one with some caramelized onions & cheese. Cover turnovers with a tea towel & place in a draft free place to rise for about 15 minutes.
  4. Preheat oven to 350 F.
  5. Bake turnovers until a nice golden brown color. Remove from oven & allow to cool on a wire rack.

Apple Crisp Snack Cake

In Canada, apples are available throughout the year. About 100 species of apples are grown in the country. With their bright colors, crisp texture and clean, slightly spicy flavor, apples are the perfect fall icon.

Today’s blog recipe is a bit of a different take on a beloved old classic. Apple crisp is a North American dessert which combines tender apples covered with a delectable crunchy topping. It is one of the common desserts that does not have the regular bottom crust and uses sliced or diced apples, generously doused in cinnamon and sugar, as the bottom layer.

The streusel which covers the apples can employ a wide variety of different flour types, nuts, and oats, commonly combined with butter and sugar. It results in a crumbly topping, which usually completely coats the apples, allowing them to release and cook inside the flavorful juices.

Apple crisp is believed to have stemmed from the British crumble, and today these two classics merely differ in their names. Even though the North American crisp was particularly made with oats, which resulted in a crunchier coating, nowadays both varieties can employ various ingredients.

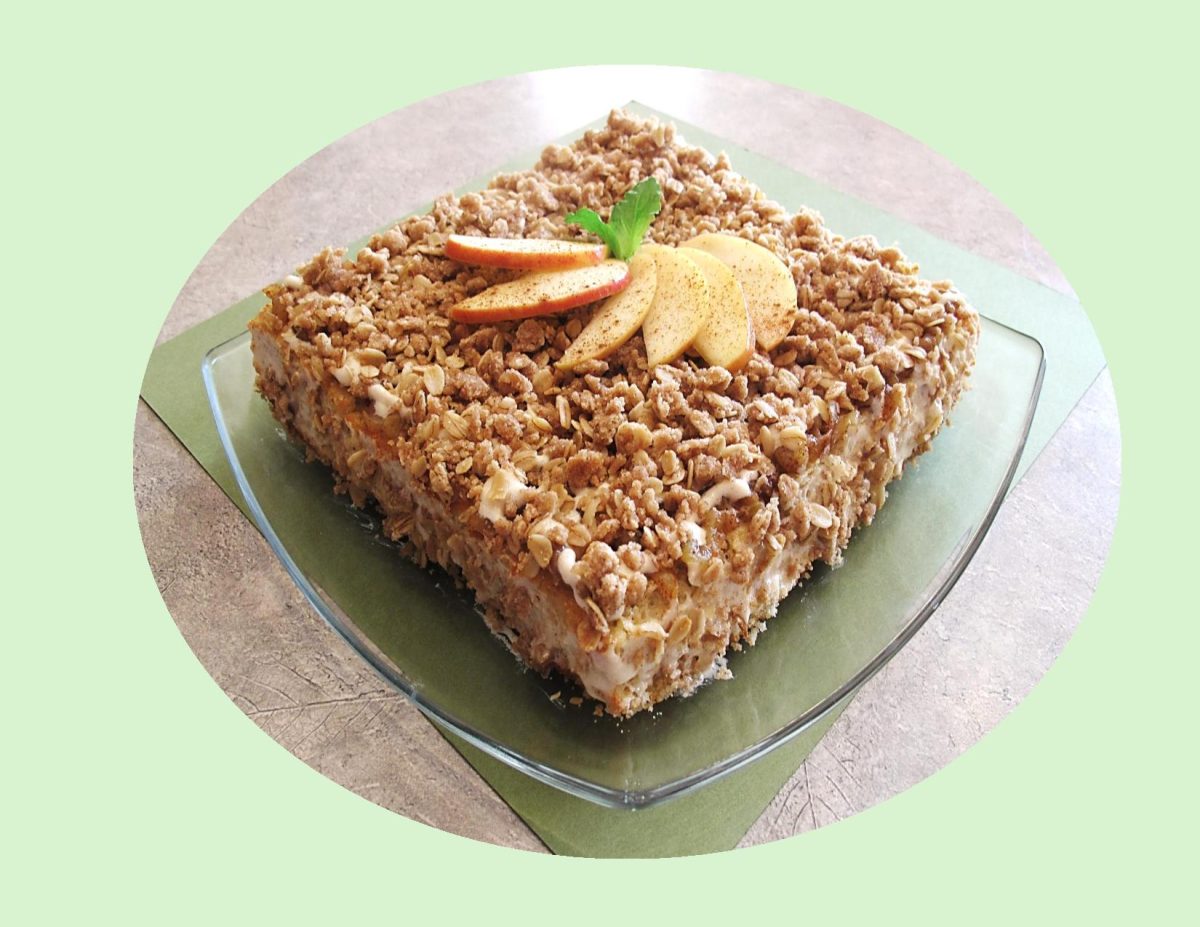
This warm and spicy ‘apple crisp snack cake’ is a comforting twist on the favorite fall dessert. Filled with apples and topped with more apples, cream cheese drizzle the perfect crispy streusel. Orange pumpkins might be more popular this month, but there’s no better time than now to take advantage of apple fresh season.

Print Recipe
Apple Crisp Snack Cake
Votes: 1
Rating: 5
You:
Rate this recipe!
Course dessert
Cuisine American
Servings
SERVINGS
Ingredients
Apple Topping
Baked Crisp Topping
Course dessert
Cuisine American
Servings
SERVINGS
Ingredients
Apple Topping
Baked Crisp Topping
Votes: 1
Rating: 5
You:
Rate this recipe!
Instructions
Cake
  1. Preheat oven to 350 F. Line an 8 x 8inch baking pan with parchment paper. Set aside.
  2. Peel, core & grate apples. Sift flour, cornstarch, baking powder, cinnamon, allspice, cardamom & salt together in a medium bowl & set aside.
  3. Using a mixer, cream butter & sugar until light. Scrape the bowl & add the whole egg, mixing on medium-high for about a minute. Scrape the bowl again & add the egg white & vanilla; mix for another 2 minutes.
  4. Alternately fold in flour mixture & buttermilk, then gently fold in grated apples.
  5. Pour/spread batter into prepared baking pan. Bake for about 30-40 minutes or until a cake tester comes out with just a few moist crumbs. Allow to cool in pan on a wire rack.
Baked Crisp Topping
  1. Line a cookie sheet with parchment paper. Place all ingredients except butter in a bowl. Combine well then add softened butter. Mix until the mixture begins to form pea-sized clusters. Spread mixture evenly on the parchment lined cookie sheet, then bake at 350 F. for 5 minutes. Stir the topping around a bit, then bake for another 5 minutes until it begins to turn golden brown. Let crisp topping cool completely to room temperature. If crisp mixture is too chunky break it up with your fingers slightly.
Apple Topping
  1. Place apples , lemon juice & water in a small saucepan. Cook over medium heat until softened, but not falling apart. Add brown sugar, cinnamon & salt. Cook for a minute to dissolve sugar. Remove & cool until cake is baked & ready to top.
Drizzle
  1. Sift powdered sugar with salt. Set aside. Cream softened cream cheese & butter with a mixer for about 2 minutes. Add vanilla & mix to combine. Add powdered sugar & slowly incorporate into wet mixture. Add milk & beat to create a drizzle consistency.
Assembly
  1. When cake is cool, carefully & evenly spread apple topping over top of cake. Using a small piping bag, drizzle icing over apples (using a spatula, lightly spread a bit of drizzle on sides). Next, top cake with baked crisp topping. Slice & serve.
Recipe Notes
  • To make your own buttermilk, place 2 tsp of white vinegar or lemon juice in your measuring cup & add milk to equal 2/3 cup, stir & let stand until room temperature.
  • If you prefer cupcakes over the snack cake, no problem. Same idea just a different shape. Your choice!


Everything Bagel Pull-Apart Bread

Pull-Apart Bread …. an interesting concept that has been called many names such as bubble bread or loaf, jumble bread, monkey bread etc. Initially it was formed pieces of yeast dough dipped in butter and baked in a loaf to be served with jam or preserves. In 1942, General Mills (Betty Crocker) promoted ‘Hungarian Coffee Cake’, which consisted of balls of yeast dough dipped in melted butter, then in sugar frequently mixed with cinnamon and/or chopped nuts. It was baked in a ring pan because the central tube helped prevent the center from being under baked and sinking due to all the butter. ‘Betty Crocker’ had a real way of turning unknown recipes into mainstream ideas.

By the 1990’s, General Mills promotions began entitling this sugar-coated treat as ‘Monkey Bread’. However, it may have been silent-screen movie star, ‘Zasu Pitts’, who provided this whimsical name. The term and recipe initially appeared in the Thursday, February 8th, 1945 edition of the Winnipeg Free Press (Canada) in the column ‘Culinary Clinic’. Zasu was most often remembered for her extraordinary name, huge eyes and fluttering fingers. Besides acting, she had a passion for cooking and published a 93-page cookbook in 1963.

Most of the early recipes called for rolling out the dough and cutting it into diamond shapes instead of forming balls. The widespread popularization of money bread corresponded to the advent of the commercial refrigerated biscuit dough in the 1950’s. One of the later innovations is to insert a little cinnamon-sugar coated cube of cream cheese in the center of each dough ball or drizzle with a cream cheese glaze.

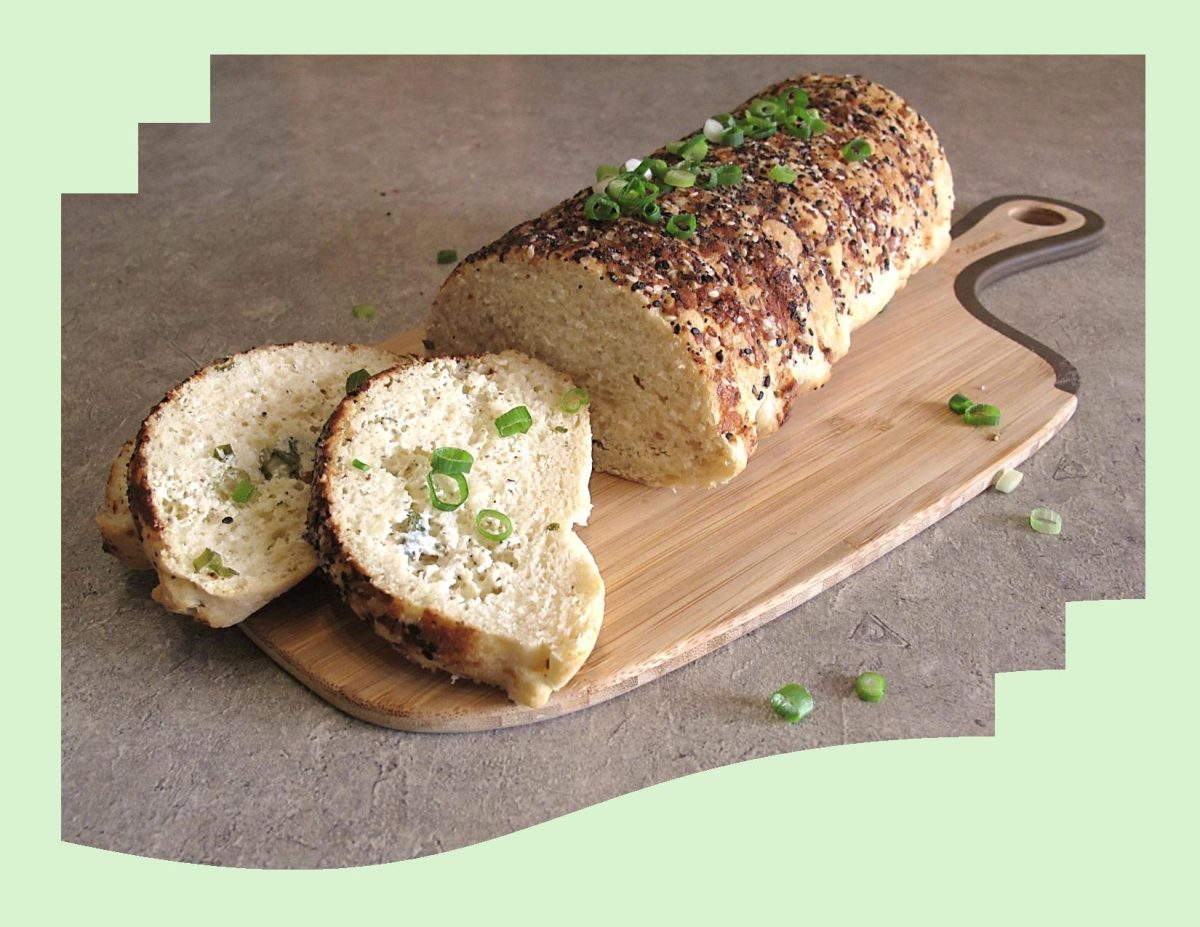
Today, I’m taking the idea in a savory direction, combining buttery homemade dough, garlic herb cream cheese filling and my ‘go-to’ favorite – everything bagel seasoning!

Print Recipe
Everything Bagel Pull-Apart Bread
Votes: 1
Rating: 5
You:
Rate this recipe!
Servings
LOAF
Servings
LOAF
Votes: 1
Rating: 5
You:
Rate this recipe!
Instructions
Dough
  1. In a large bowl, combine lukewarm milk with sugar & yeast. Allow to sit for 5-10 minutes until frothy.
  2. Add butter, egg, flour & salt. With an electric mixer, beat on low for about 3 minutes. Dough will be soft. Transfer to a lightly floured work surface. Using lightly floured hands, knead for 1 minute then shape into a ball.
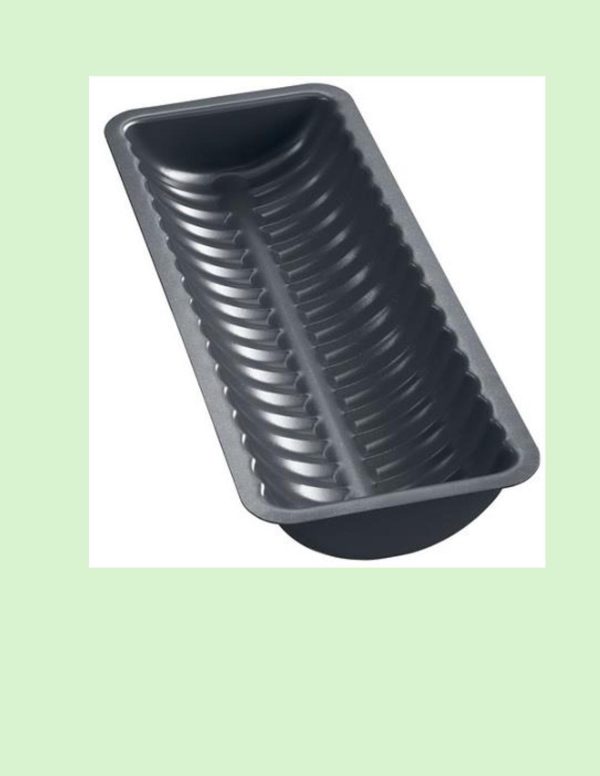
  3. Place the dough in a greased bowl & cover with plastic wrap. Place in a draft-free area to rise until doubled in size about 1 1/2 hours. As dough rises, prepare filling. Butter a 11 3/4 x 4-inch ribbed semi-circle bread pan. Sprinkle with everything bagel seasoning making sure to get the seasoning up the sides & on the ends of the pan. Set aside.
Filling
  1. In a small bowl, using a hand mixer, beat all of the filling ingredients together until combined. Set aside but don't refrigerate unless making well in advance.
Assembly
  1. Flip dough on a lightly floured work surface & with a rolling pin, roll out the dough until it is 1/4-inch thick. Spread cream cheese filling on top & sprinkle with sliced green onions. Using a 3 1/2-inch circle cookie cutter, cut into circles. Fold circles in half & line prepared pan, round side down fitting into the 'ribs' of the pan. Tuck the remaining pieces that are leftover into the crevice's between the folded circles.
  2. Cover with oiled plastic wrap & allow to rise once again in a draft-free area until puffy, about 30 minutes.
  3. Preheat oven to 350 F. when bread is nearly finished rising.
  4. Bake until golden brown, about 30-35 minutes. Remove from oven & place on wire cooling rack. Cool for 10 minutes in the pan then remove from pan, slice or pull apart & serve.
Recipe Notes
  • If you prefer, you can make your own everything bagel seasoning with 1 Tbsp each poppy & sesame seeds, 1 1/2 tsp each dried minced onion & garlic flakes & 1 tsp coarse salt.
  • For this pull-apart loaf I used a European ribbed semi-circle bread/cake pan. The size is bigger than a 9 x5-inch loaf pan so it is quite easy to fit all the dough into it.
  • Brion & I really enjoyed this bread made into a savory French toast for brunch.

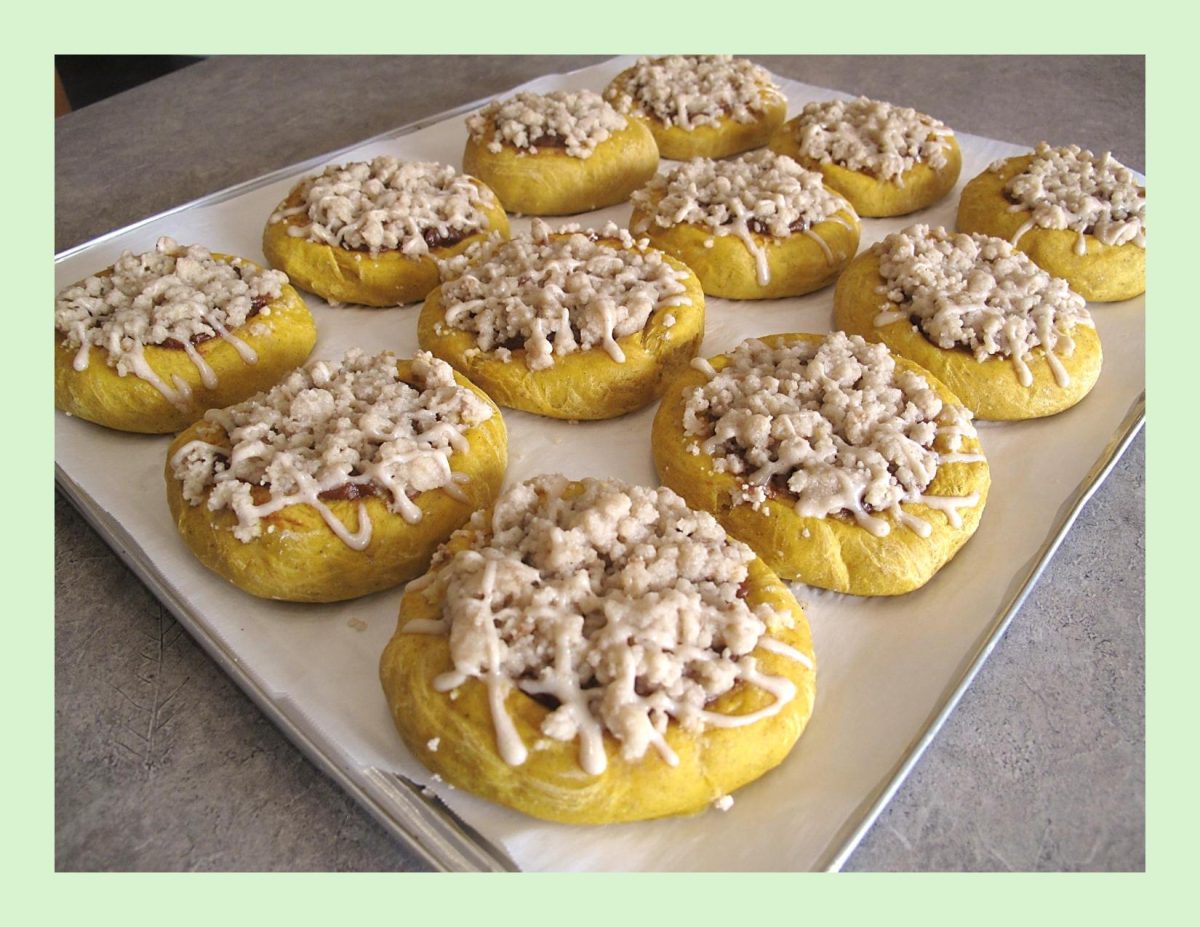
Pumpkin Streuseltaler

Nothing tastes more like fall than fresh baked pumpkin goods. I love just about anything with pumpkin in it. It definitely wasn’t always that way but it’s amazing how your taste buds change as time passes.

My original thoughts were to make some German pumpkin plachinda. It was one of those wonderful things my mother used to make that got pushed into the back of my memory.

It seems most recipes you find on the internet make plachinda as individual pastry turnovers with a pumpkin filling. I think I recall my mother making it in a rectangle casserole dish with the pastry on the bottom and up the sides and the filling showing.

I decided to do some ‘recipe development’ and try making some German streuseltaler and top it with a sweet pumpkin (plachinda) filling.

Streuseltaler was inspired by the round shape of the taler, a silver coin used throughout Europe for almost four hundred years. Its name lives on in the currency called dollar.

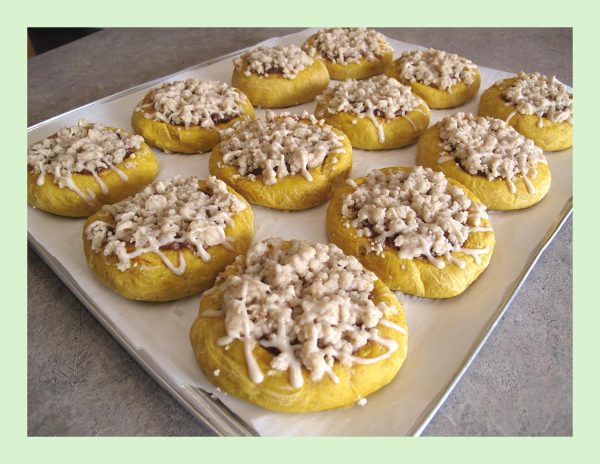
Taler is a German word for coin, so the name of the dessert literally translates to streusel coin. Basically, a free form tart made with a yeast dough topped with a huge amount of streusel, sometimes filled with custard and often with a sugar glaze.

A traditional German streusel (streusel meaning something ‘strewn or scattered’ in German) bakes up into shortbread balls. It makes a crunchy, cookie-like top but is soft on the bottom where it meets the bread or fruit compote.

Streusel was first popularized in Germany. In its simplest form, it consists of flour, sugar and butter but gets even better with the addition of oatmeal, cinnamon and nuts …. just my opinion of course!

In the history of cooking, one could find recipes that have constantly changed and could be seen as a connecting link between modern times and our past. I guess this is my contribution to the evolution of plachinda.

For all of you who love pumpkin, here’s a treat you don’t want to miss!

Print Recipe
Pumpkin Streuseltaler
Votes: 1
Rating: 5
You:
Rate this recipe!
Course dessert
Cuisine German
Servings
SERVINGS
Ingredients
Pumpkin Dough
Pumpkin Filling
Glaze
Course dessert
Cuisine German
Servings
SERVINGS
Ingredients
Pumpkin Dough
Pumpkin Filling
Glaze
Votes: 1
Rating: 5
You:
Rate this recipe!
Instructions
Dough
  1. In a small bowl, add yeast, lukewarm water & 1 tsp sugar. Allow to sit about 10 minutes until frothy.
  2. In a large bowl, combine yeast mixture, butter, salt, cinnamon, eggs & pumpkin puree. Mix well. Add flour, one cup at a time, until well combined. Knead dough for about 8-10 minutes or until smooth & soft. Place dough in a greased bowl, cover with a tea towel & allow to rise for about 1 hour or until double in size.
Filling
  1. In a small dish, combine the filling ingredients, set aside.
Streusel Topping
  1. In a small bowl, combine flour, sugar, vanilla, cinnamon & salt. With a pastry blender, cut in butter until mixture resembles coarse crumbs. Set aside.
Assembly & Baking
  1. Line a baking sheet with parchment paper. Place dough on a lightly floured work surface & divide into 12 pieces. Form each piece into a ball & allow it to rest for about 5 minutes.
  2. Space out the balls on parchment lined baking sheet. With fingertips or the back of a Tbsp., press out center of each ball to about 4-inch diameter. Add about a Tbsp of pumpkin filling to each dough piece & spread leaving a border around the outside.
  3. Divide streusel topping evenly between the pastries. Allow to rise for about 15-20 minutes.
  4. Preheat oven to 350 F.
  5. Bake for about 10-12 minutes. Allow to cool completely on a wire rack. In the meantime, you can prepare the glaze.
Glaze
  1. In a small dish, whisk powdered sugar & lemon juice to a thick glaze. When streuseltaler are cooled, drizzle with glaze.
Recipe Notes
  • The picture at the bottom of the recipe is MY version of my mother's plachinda. I had posted it on a blog in October 2016. She used to serve this wonderful pastry when she made a white bean soup. At the time I thought it was an odd combination but it works! Another one of those 'taste of a memory' kind of comfort foods.
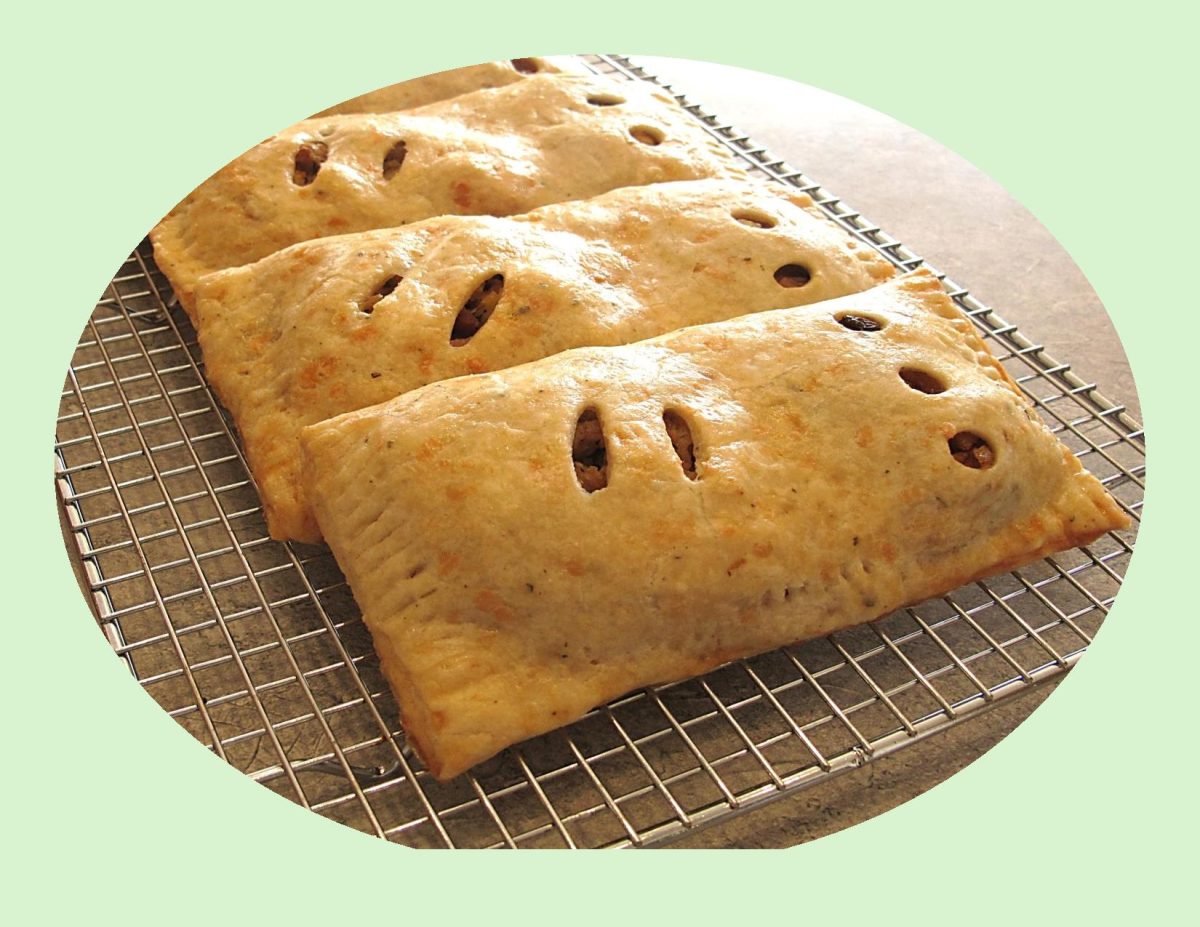
Pork & Apple Bedfordshire Clanger w/ Cheddar-Sage Pastry

The Bedfordshire Clanger is a very unique and little-known meat pie recipe from England, specifically (not surprisingly) from the county of Bedfordshire, a small, low-lying and predominantly agricultural county nestled in the east of England.

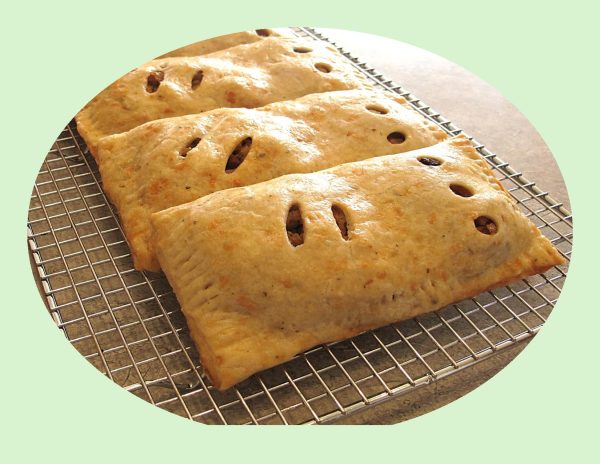
In centuries past many of the working husbands of the area used to toil in the fields there. Their wives, knowing their husbands would need lots of protein and carbohydrate sustenance, came up with the brilliant idea of a doubled, loaf-shaped pie. One end contained a savory filling that used the famed pork of the area while the other end was filled with stewed apples (made from the famed local apples) as dessert. So, the two fillings didn’t combine, there was a ‘pastry wall’ in between blocking any flavors from mixing. A ‘secret code’ denoted which end was meat and which was dessert: two knife slits on one end of the pastry top means meat, three small holes on the other shows the sweet. This was brilliant, an entire meal for the hard-working man – handheld, portable and delicious

I guess you could say, the Bedfordshire clanger is not only a tasty treat but also a piece of culinary history that has stood the test of time!

Print Recipe
Pork & Apple Bedfordshire Clanger w/ Cheddar-Sage Pastry
Votes: 1
Rating: 5
You:
Rate this recipe!
Servings
CLANGERS
Votes: 1
Rating: 5
You:
Rate this recipe!
Instructions
Pastry
  1. In a medium bowl, whisk together the flour, sage & salt. Sprinkle the butter cubes over the flour mixture & use your fingers to work them in. Alternately you could use a pastry cutter to do this.
  2. When the mixture resembles cornmeal with pea-sized bits of butter remaining, stir in cheese with a fork until evenly distributed. Sprinkle 6 Tbsp ice water over mixture & stir with a fork until dough begins to come together. If needed, add an additional Tbsp or two of ice water.
  3. Turn the dough out onto a lightly floured surface & knead for about three times. Gather the dough into a disk & wrap in plastic wrap. refrigerate for at least 30 minutes or overnight.
Pork Filling
  1. Bake potato in microwave, peel & cut into small cubes. Set aside.
  2. Heat oil in a skillet & sauté celery, onion, garlic & bacon together on medium heat until veggies are soft & bacon is cooked. Add ground pork, breaking it up well. Stir in dried herbs & spices. Cover & simmer for about 10 minutes.
  3. Remove from heat & stir in cooked potato & cheese. Set aside to cool.
Apple Filling
  1. In a small saucepan, combine butter, water, cinnamon & brown sugar. Bring to a simmer then add diced apples, raisins, lemon zest & juice. Gently simmer for 5 minutes. Remove from heat & allow to cool.
Assembly/Baking
  1. Divide pastry into 5 equal pieces. On a lightly floured surface (or dry wax paper) roll out each piece of pastry into 7 x 7 1/2-inches. The excess trimmed from the sides will be used for little pastry ‘walls’ dividing the sweet & savory fillings. Roll the excess into a 3-inch length.
  2. From the top of each piece, LIGHTLY make a line across your pastry 4-inches from outside edge. This will help to place your fillings properly.
  3. On the 3-inch wide section of the pastry, place savory filling to cover 2/3 of the area. Place one of the rolled strips after that then place sweet filling on the remaining 1/3 to complete the 'clanger'. The little rolled piece of pastry divides the savory & sweet filling.
  4. On the sweet side make 3 holes for vents & on the savory side make 2 slashes. This is the 'code' to let the person eating the clanger which was savory or sweet.
  5. Preheat oven to 350 F.
  6. Brush the edges of each pastry with egg wash. Lift the pastry from the opposite side over the fillings & seal the edges with a fork.
  7. Brush clangers with remaining egg wash & bake for about 30-35 minutes or until golden.