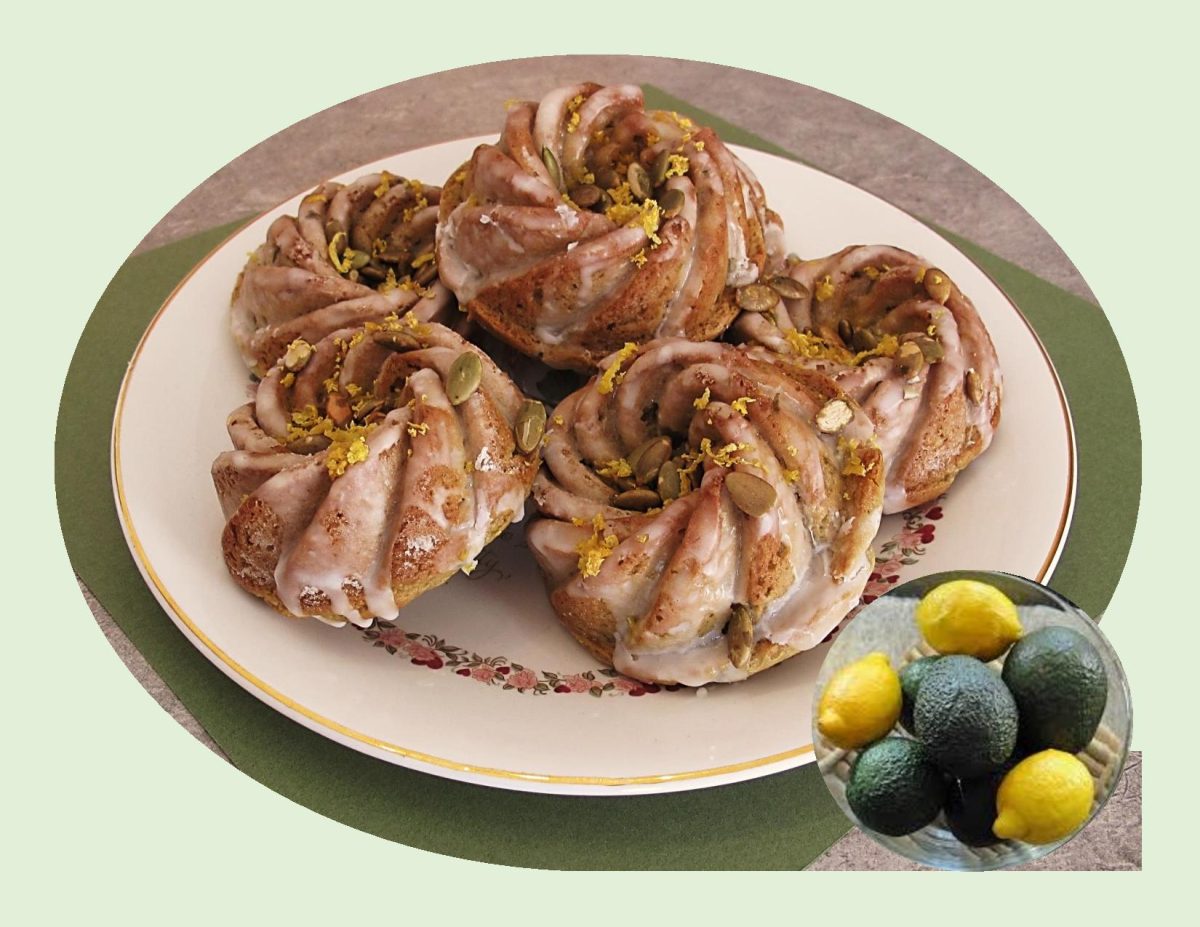
Avocado Lemon Cakes

Avocados are a gift of Mother Nature! It’s no secret we love avocados, I’ve lost count of how many ways I have found to use avocados over the years. I’m always surprised how versatile avocados are for cooking and baking.

If you want to reduce the amount of fat used in baking, there is no better product substitute than the avocado fruit. Avocados can replace butter and eggs but be aware that the dough will be slightly green in color even after baking. The texture of avocado is soft and creamy like butter and can simply be substituted cup for cup with butter. Unlike butter, avocados won’t melt so it might be beneficial to slightly increase some of the liquids being used. As an egg substitute, use up to ⅓ cup of avocado pulp for each egg. If you find that your cake is browning too quickly, just reduce the heat and increase the baking time.

These avocado lemon cakes serve as the perfect base for numerous different combinations such as blueberries, or maybe some chopped nuts, or a handful of toasted coconut.

Print Recipe
Avocado Lemon Cakes
Instructions
Cakes
  1. Preheat oven to 325 F. Spray a 6-cup mini Bundt pan with baking spray.
  2. Sift together flour, baking powder, baking soda & salt in a bowl.
  3. In the bowl of a stand mixer, beat the pureed avocado & butter with the sugar until completely combined. Beat in egg. With the mixer on low speed, beat in lemon juice/milk mixture until just combined.
  4. Add flour mixture in 3 additions, mixing each addition until just combined. Once the flour mixture is incorporated, increase speed to medium & beat for 20 seconds longer. Be careful to not overmix. Divide batter between the 6 mini cups.
  5. Bake until a wooden pick inserted in center comes out clean, about 25 minutes. Cool cakes in pan on a rack for 10 minutes before inverting to cool completely.
Lemon Glaze
  1. In a small bowl, combine enough fresh lemon juice with powdered sugar to make a glaze consistency. Drizzle over cooled cakes. Garnish with pepita seeds or pistachios & lemon zest.

Millet Tea Cake

Millet is not just a key ingredient in bird seed and animal feed.  While it is used for these purposes, millet has been an important food source for a large part of the world’s human population dating back to prehistoric times!

It’s a primary ingredient in flatbreads, beer and other fermented beverages, and porridges. Though technically a seed, millet functions like a whole grain, and you can cook with it like you would other whole grains such as rice or quinoa.

The name ‘millet’ refers to several different varieties of a cereal grass, the most common in North America being the proso variety, while ‘pearl millet’ is the most common variety cultivated worldwide. India and parts of Africa are where millet is thought to have evolved.

Millet falls on the sweeter end of the whole grain scale; some people liken the flavor to corn. It also readily takes on the flavor characteristics of the ingredients in a sauce or a dressing. The small, butter-yellow grains cook up light and fluffy, similar to couscous. When ground to a flour, millet’s soft, starchy consistency makes it ideal for gluten-free baking. On its own, millet can taste somewhat bitter, which is why it’s best blended with other mild flours; doing so allows millet’s other flavor notes (buttery, nutty, grassy) to shine. 

Millet is available pearled or hulled: opt for hulled, which is the true whole-grain variety (hulled still retains plentiful fiber, as only the outermost layer is removed). Out of the hull, millet seeds look like tiny yellow beads with dark dots on the side where the plant’s stem was attached. 

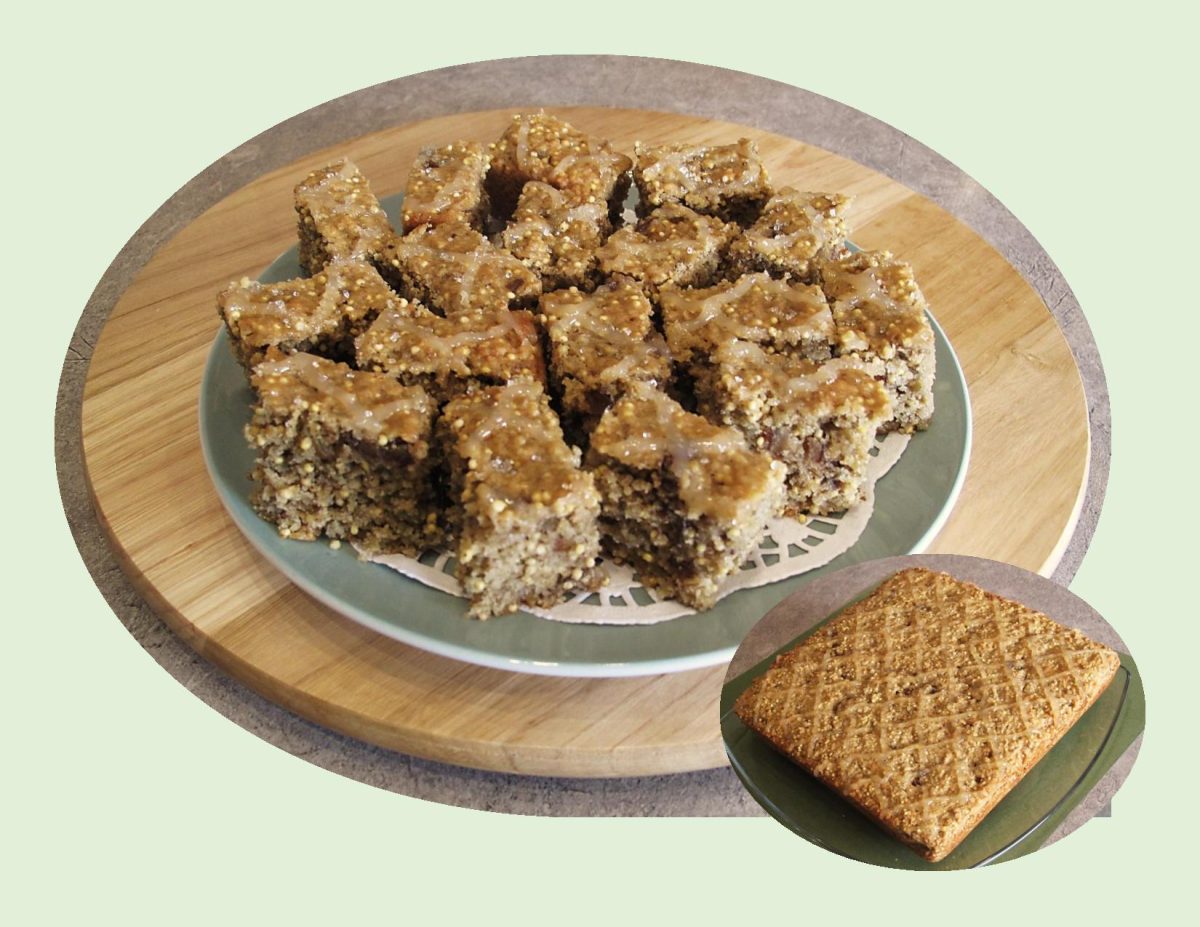
Millet is one of the ways in which you can add the perfect gentle crunch to baked goods such as this millet tea cake.

Print Recipe
Millet Tea Cake
Votes: 1
Rating: 5
You:
Rate this recipe!
Course Brunch
Cuisine American
Keyword millet tea cake
Servings
Ingredients
Course Brunch
Cuisine American
Keyword millet tea cake
Servings
Ingredients
Votes: 1
Rating: 5
You:
Rate this recipe!
Instructions
  1. Preheat oven to 375 F. Line a 9 x 9-inch baking pan with parchment paper making sure to have overlap on the sides for easy removal from the pan.
  2. Whisk oats, flour, sugars, baking soda & salt together. Add buttermilk, oil, egg, vanilla, millet & dates. Whisk to blend. Stir in 1/3 cup boiling water & let stand for 5 minutes. Scrape into baking pan & level out with a fork.
  3. Bake cake 25-30 minutes or until tester inserted into center comes out clean. Cool 10 minutes on a wire rack. During the cooling stage drizzle cake with lemon curd if you wish. Slice & serve warm or at room temperature.

Apricot Orange Newtons

Do you recall the iconic Fig Newton? For some, fig newtons were the loser cookie – the one you would only eat out of pure desperation if there was nothing else resembling dessert in sight. What could be worse than mysterious, brown fruit ‘goo’ wrapped up in flavorless, dry ‘cake’? They felt that it was not a treat, it was a healthy breakfast disguised as a cookie.

I really don’t remember eating any amount of fig newton cookies myself, probably because my mother always baked. When I did finally taste them as an adult, I actually liked them. Maybe that had something to do with my love for figs or maybe I just like cookies…not sure!

The ‘fig newton’ was one of the earliest commercially baked products in North America. Introduced by the Kennedy Biscuit Company in 1891, fig newtons were named after the town of Newton, Massachusetts, which was near the factory that first produced the cookie commercially. Kennedy Biscuit eventually merged with several other bakeries to form the National Biscuit Company, now known as Nabisco.

The recipe for the fig filling was the brainchild of Charles M. Roser, a cookie maker born in Ohio, USA. Roser worked for a bakery in Philadelphia who sold his recipe to the Kennedy Biscuit company.

The manufacture of fig newtons was made possible by the creation of Florida inventor James Henry Mitchell, who revolutionized the packaged cookie business by building an apparatus that could make a hollow cookie crust and fill it with fruit preserves. His machine worked like funnel within a funnel; the inside funnel supplied jam, while the outside funnel pumped out the dough. This produced an endless length of filled cookie, which could then be cut into smaller pieces. 

Original fig newtons were the only variety available until the 1980s and as of 2012, Nabisco now makes several varieties of the ‘newton’, which, in addition to the original fig filling, include versions filled with apple cinnamon, strawberry, raspberry, blueberry and mixed berry.

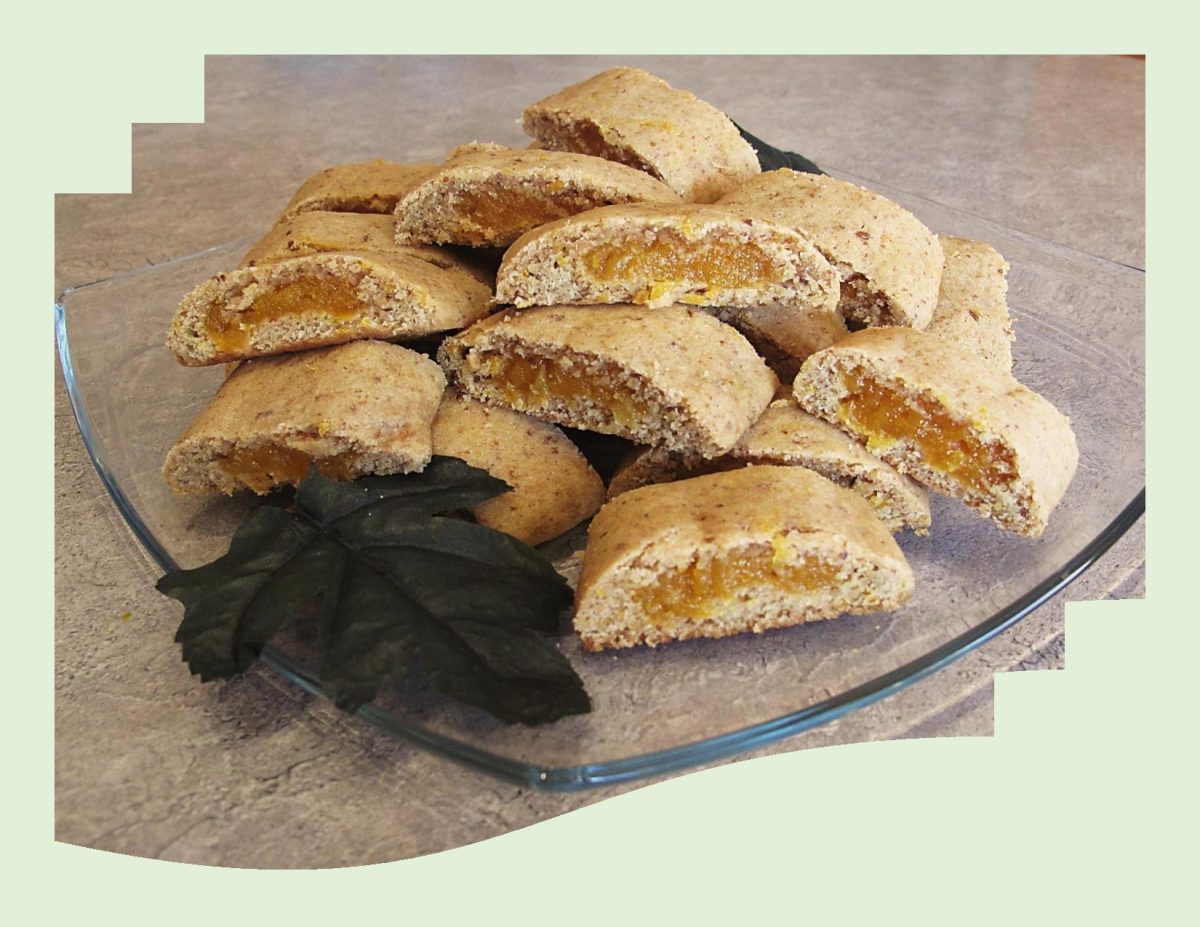
As Nabisco likes to remind us, ‘newtons aren’t just cookies’, they’re fruit and cake. Bringing me to the idea of apricot newtons. There seems to be numerous versions of them around so we shall see how these one turn out.

Print Recipe
Apricot Orange Newtons
Votes: 1
Rating: 5
You:
Rate this recipe!
Course dessert
Cuisine American
Servings
Ingredients
Dough
Filling
Course dessert
Cuisine American
Servings
Ingredients
Dough
Filling
Votes: 1
Rating: 5
You:
Rate this recipe!
Instructions
Dough
  1. Whisk the flours, baking powder, cardamom & salt together in a medium bowl.
  2. Beat the butter & brown sugar in the bowl of a stand mixer fitted with the paddle attachment on medium speed until light & fluffy, about 3 minutes. Stop the mixer & add the egg & vanilla. Finely grate the zest of the orange into the bowl (save the zested orange for the filling). Beat on medium speed until incorporated. Stop the mixer & scrape down the sides of the bowl & the paddle with a rubber spatula.
  3. Return the mixer to low speed, gradually add the flour; mix until just combined (the dough will be very soft and sticky). Scrape the dough onto a sheet of plastic wrap & press into a disk about 1-inch thick. Wrap the disk tightly in the plastic wrap & refrigerate until firm, but still pliable, about 2 hours. Meanwhile, make the filling.
Filling
  1. Place the apricots in the bowl of a food processor fitted with the blade attachment & process until finely chopped, about 30 seconds. Transfer the mixture to a small saucepan. (No need to wash out the food processor; you will use it again.)
  2. Juice the zested orange and add 2 tablespoons of the juice to the pan. Add the water & honey. Heat the mixture over medium heat, stirring occasionally, until the apricots plump up and all the liquid is absorbed, about 4 minutes.
  3. Transfer the mixture back to the food processor and process into a smooth paste, about 1 minute. Let the mixture cool completely.
Assembly
  1. Line a baking sheet with parchment paper & set aside. Transfer the cooled apricot mixture to a piping bag or resealable plastic bag.
  2. Dust a work surface generously with flour. Unwrap the disk of dough and cut it into 3 equal pieces (about 6 1/2 oz (185 gm) each). Place one piece on the work surface, rewrap the other 2 pieces back in plastic wrap; refrigerate those 2 pieces.
  3. Reshape the remaining piece of dough into a log about 2 inches wide and 4 inches long. Place the log with the short side facing you, generously dust the top with flour, and roll into a 1/2-inch-thick rectangle about 4 inches wide and 12 inches long.
  4. Using kitchen shears, snip off a bottom corner of the plastic bag or piping bag. Pipe enough filling down the center of the piece of dough so that it is 1-inch wide and 1/4-inch thick.
  5. Using a bench scraper, scrape up the right side of the dough & gently fold it over the center so it reaches the middle of the filling. Repeat with the left side of the dough. Gently pat the top of the dough down with your hands, pinching it together as needed, so that it completely covers the filling and flattens slightly. (It should now be in a Fig Newton shape.)
  6. Cut the filled dough in half crosswise. Using the bench scraper, carefully flip each piece over & transfer to the baking sheet so that it is seam-side down. Repeat with the rolling & filling of the remaining 2 pieces of dough, using flour as needed to prevent the dough from sticking. You will end up with 6 filled & shaped pieces of dough on the baking sheet, so space them in 2 rows of 3 each, about 2 inches apart.
  7. Chill the logs for at least 30 minutes or up to 1 hour. Meanwhile, arrange a rack in the middle of the oven and heat to 350 F.
  8. Bake until just lightly browned around the edges, 15 to 17 minutes. Cut each bar crosswise into 5 pieces and let cool completely. Store in an airtight container for up to 5 days.

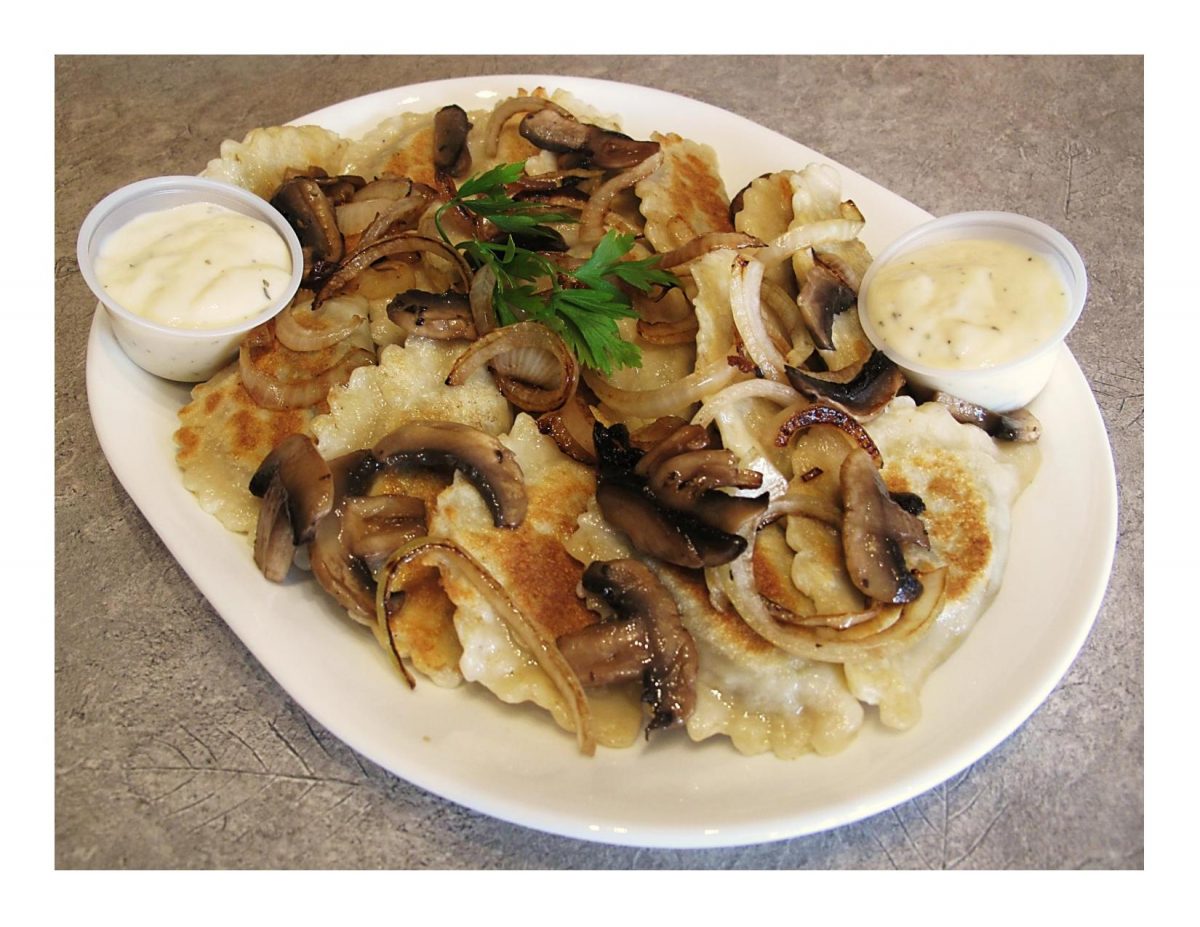
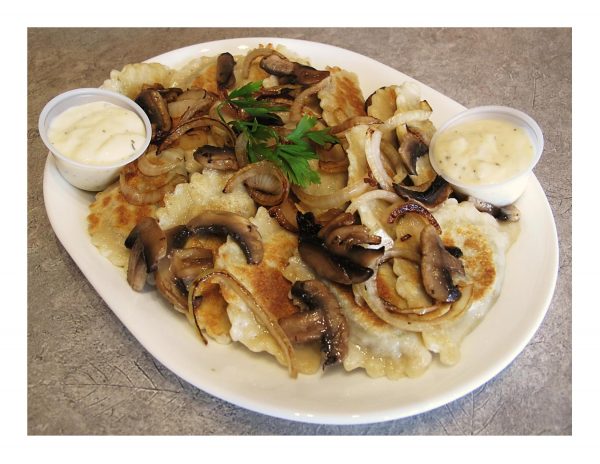
Potato, Mushroom & Caramelized Onion Perogies

As the days get shorter, darker and colder in the winter, many turn to food as a source of internal warmth and comfort. Besides being essential for life, food brings people together and generally just makes us feel good. This is especially true during the chilly winter months we get here in Canada, where tasty comfort food is more than welcome.

 In 1966 when the term ‘comfort food’  was first used, one would turn to foods that were prepared in a traditional way and reminds the person of their childhood, home, family and friends.

Commonly eaten in the Canadian prairie provinces, perogies, pierogi, perogy – (however you spell it) are a delicious filled dumpling with origins from Central and Eastern Europe. They can be stuffed with potato, cheese, bacon, and more, and they taste absolutely perfect with their typical sour cream topping. There’s also a giant perogy statue in Glendon, Alberta, showing you exactly how important the food is viewed in Canada.

The ultimate in comfort, peasant food or gourmet cuisine, as a main event or side, perogies can do no wrong.

Print Recipe
Potato, Mushroom & Caramelized Onion Perogies
Votes: 1
Rating: 5
You:
Rate this recipe!
Servings
Votes: 1
Rating: 5
You:
Rate this recipe!
Instructions
Perogy Dough
  1. In a bowl, beat egg, soft butter & sour cream together. Add flour & salt, combining until smooth. Scrape dough out of bowl onto a lightly floured work surface & knead dough for 5 - 8 minutes. Wrap dough in plastic wrap & refrigerate until ready to use.
Filling
  1. Chop onions. Melt 2 Tbsp butter in a large skillet & sauté onions until caramelized. Remove from skillet & set aside.
  2. In the same skillet, melt another 2 Tbsp butter & add the chopped mushrooms. Salt & pepper the mushrooms & sauté until they are tender & all the liquid excluded by the mushrooms has evaporated, 5 minutes. Remove from heat.
  3. While you are cooking the onions & mushrooms, peel & quarter the potatoes & place in a small pot. Cover with cold water, bring to a boil, then lower heat & simmer until soft enough to mash, 15-20 minutes. Drain & place in a large mixing bowl.
  4. Mash & whip potatoes with grated cheddar cheese until smooth & fluffy. Fold in the cooked mushrooms & caramelized onions until well blended. Salt & pepper to taste.
Assembly
  1. Remove perogy dough from refrigerator & cut into 24 equal pieces. Roll each piece into about a 3-inch round. Place a heaping Tbsp of filling in the middle of pierogi. Dip your finger in a bowl of water & run it along the edge of the dough. Fold perogy in half, carefully pinching together edges to seal it completely.
Cook & Serve
  1. Bring a large pot of salted water to a boil. Carefully drop perogies in & boil until all the perogies float to the surface & dough becomes somewhat translucent, about 3-5 minutes. Remove perogies with a slotted spoon, making sure to let as much of the excess water drip off as possible. In a large skillet, heat a Tbsp of butter. Place drained pierogis in skillet. Do not over-crowd so that they can all lightly brown on both sides.
  2. If you wish , you can make a few extra onions & mushrooms for a garnish. Serve with either sour cream or Ranch dressing.
Recipe Notes
  • When making the pierogis, nothing wrong with rolling out all the dough at the same time & cutting your circles with a cookie cutter. I just personally like dividing the dough so I don't have to do any re-rolling with the scraps. Just personal preference.

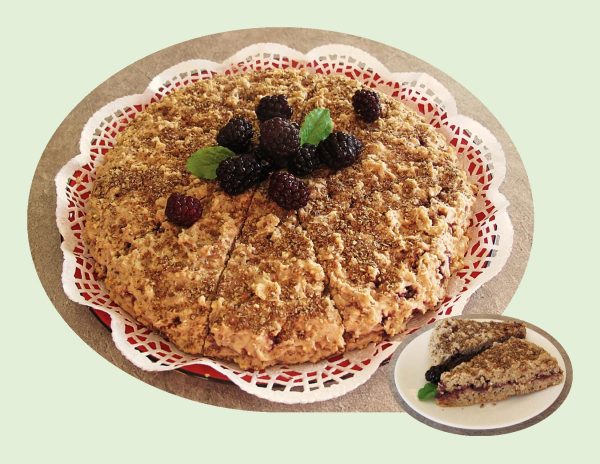
Barley Flour Multigrain Scones

It’s a wonderful thing when you find ingredients that truly marry well together. Like a good relationship this melding of flavors is a partnership of sorts, where each player complements the other, bringing out the best in its partner without losing any of its own shine. Cooking is full of classic flavor pairings, caramel & sea salt, cinnamon & apple, cranberry & camembert, vine ripened tomatoes & creamy mozzarella cheese, and a springtime favorite – sweet strawberries and tangy rhubarb.

It’s this simultaneous transformation and showcasing of raw ingredients that inspires us, to experiment with flavors in the kitchen. The idea of partnering jam and scones by sandwiching a tangy or sweet layer of jam between two buttery rounds of barley based dough works perfect.

The scone itself has so little sugar that it is not too sweet– making it an excellent accompaniment for your choice of apricot, blueberry, raspberry, fig, plum or blackberry jam.

Print Recipe
Barley Flour Multigrain Scones
Votes: 1
Rating: 5
You:
Rate this recipe!
Course Brunch
Cuisine American
Servings
Course Brunch
Cuisine American
Servings
Votes: 1
Rating: 5
You:
Rate this recipe!
Instructions
  1. Preheat oven to 375 F.
  2. In a bowl, combine milk with apple cider vinegar. Add multigrain cereal & allow to sit for about 30 minutes.
  3. In a large bowl, whisk together oatmeal, barley & white flour, brown sugar, cardamom, baking powder & salt. Cut in cold butter with a pastry cutter until it resembles small peas.
  4. Add egg & vanilla to multigrain/ milk mixture; lightly beat. Using a fork, carefully combine wet & dry mixtures.
  5. On a work surface, sprinkle a bit of oatmeal & flour, place dough on it & with a spatula roll dough a few times until a rough ball forms. Divide the dough in half.
  6. On a sheet of parchment paper, pat out 1/2 of the dough into an 8-inch circle. Carefully spread jam over dough, leaving a 1/2-inch border. Since the dough is quite soft, using a spoon, drop remaining dough in dollops over jam. With a fork, carefully spread the dollops out as evenly as you can to cover the whole scone. Sprinkle whole or ground flax seeds over scone.
  7. Place parchment with scone on a flat baking sheet & bake for about 25 minutes or until it tests done with a toothpick. Remove from oven & allow to cool slightly. Cut into 10 wedges & serve.

Nanaimo Bar Thumbprint Cookies

Much like the butter tart and date square, the Nanaimo bar fits Canada’s apparent fondness for rich, decadent sweets. It is a dessert bar that requires no baking and generally consists of three layers: a graham wafer crumb and shredded coconut base, custard-flavored butter icing in the middle, and a layer of chocolate ganache on top. It is named after Nanaimo, British Columbia, where it was popularized in the years following WWII. It subsequently rose to wider prominence after Expo ’86.

Susan Mendelson is perhaps most responsible for commercializing the Nanaimo bar. She sold the bar during the 1970s to help pay her tuition, and in 1979 founded The Lazy Gourmet, a café and catering company in Vancouver, which claims to be the first business to sell the dessert. Mendelson wrote the official cookbook for Expo ’86, held in Vancouver, and included the Nanaimo bar.

After that, the Nanaimo bar began to be sold on BC Ferries and spread in popularity across Canada. It can now be found in Costco, Starbucks and countless cafes in Canada and the United States. There can be some variations with each of these layers — e.g., adding mint, mocha or other flavoring, as well as food coloring, to the icing center, or various nuts to the base — but a classic Nanaimo follows the traditional trio.

In a bid to take advantage of the bar’s popularity, the city of Nanaimo launched a tasting trail much like Ontario has done for the butter tart. Different locations in and around Nanaimo serve different variations on the classic dessert, from flavors such as maple bacon and peanut butter to deep-fried Nanaimo bars, Nanaimo bar spring rolls, Nanaimo bar waffles and cheesecake and Nanaimo bar coffee and cocktails.

All that being said , here’s my Christmas version of a Nanaimo thumbprint cookie.

Print Recipe
Nanaimo Bar Thumbprint Cookies
Votes: 1
Rating: 5
You:
Rate this recipe!
Servings
Ingredients
Filling
Drizzle
Servings
Ingredients
Filling
Drizzle
Votes: 1
Rating: 5
You:
Rate this recipe!
Instructions
Cookies
  1. Preheat oven to 350 F.
  2. In a medium bowl, whisk together the flour, graham crumbs, cocoa, baking powder & salt.
  3. In a large bowl, beat the butter & sugar for 3-4 minutes, until fluffy. Beat in the egg & vanilla. On low speed or using a spatula, stir in the dry ingredients, along with the coconut and walnuts.
  4. Roll dough into 1 1/2-inch size balls & place a couple inches apart on a parchment-lined baking sheet. Use your thumb to create an indentation in each cookie.
  5. Bake for 14 minutes, until just set. Remove & use the back of a small spoon to gently reform the indentations. Transfer to a rack to cool completely.
Filling
  1. In a bowl, beat the butter, powdered sugar, custard powder, cream and vanilla until smooth and fluffy, adding a bit more cream or powdered sugar as needed to create a spreadable frosting. Place the filling in a piping bag fitted with a 1/2-inch plain tip, or in a zip-lock bag; seal and and cut off one corner.
Assembly
  1. Pipe some frosting into each cooled cookie. In a small bowl, melt the chocolate & butter in the microwave in 10 second increments, stirring in between, until smooth. Drizzle the cookies with a fork. Set back on the cooled baking sheets to allow them to set.
Recipe Notes

Substitute for Bird's Custard Powder:

  • For each Tbsp of custard powder that's called for in the recipe, you can make your own custard mix with 1 Tbsp of cornstarch plus 1 tsp of vanilla extract & a pinch of salt.


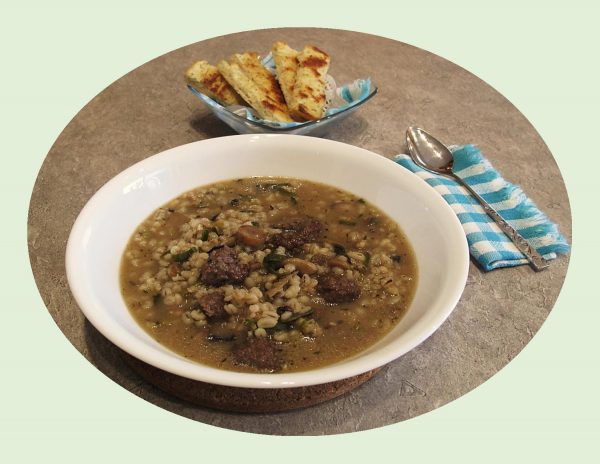
Mushroom Barley Soup w/ Mini Meatballs

Beef barley soup is a classic old-world dish, and it’s been simmering away in pots for centuries, probably as long as people have been making soup. It just makes sense ~ the little white pearls of barley add lovely texture, as well as extra nutrition and satisfying bulk, all important things when you’re trying to make dinner out of a pot of soup. For an added bonus, barley’s natural starch thickens the soup as it cooks.

Beef Barley Soup is classic comfort food that you can make on the stove or in the crock pot. The soup has roots in the Jewish communities of Eastern Europe. Mushrooms were popular in these cold-weather countries because they could be harvested, dried, and stored for later use.

Barley was also plentiful and easy to grow in the Eastern European climate, making it a common addition to hearty winter dishes like soup. Barley’s history goes back even further; in fact, it is arguably the world’s first and most ancient, cultivated grain.

As far as the meatballs, texture can be an issue. If the meatball is too wet, it will disintegrate when cooking in soups. If it is too dry, it will lose its flavor and potentially break up into pieces. Using the right amount of liquid or eggs for the mix to keep them moist, but equally so, enough breadcrumbs or flour to bind them adequately. Remember, you can never get enough seasoning, so don’t be gentle with it, and use spices and herbs liberally.

One of Brion’s favorite soups has always been mushroom beef barley, so now seems a good time to make some.

Print Recipe
Mushroom Barley Soup w/ Mini Meatballs
Votes: 1
Rating: 5
You:
Rate this recipe!
Servings
Votes: 1
Rating: 5
You:
Rate this recipe!
Instructions
  1. In a large saucepan, combine the broth, water, barley & thyme. Season with salt & pepper; bring to a boil. Cover & cook over low heat until the barley is nearly tender, about 18 minutes.
  2. In a large skillet, heat oil. Add the mushrooms & shallot, season with salt & pepper; cook over high heat until tender and browned, about 8 minutes.
  3. In a medium bowl, combine the ground beef, egg, bread crumbs, cheese, 1/2 teaspoon of salt & 1/4 teaspoon of pepper. Knead the mixture until blended, then roll it into sixteen 1-inch balls.
  4. Add the meatballs & mushrooms to the soup. Simmer over moderate heat until the meatballs are cooked through & the barley is tender, about 8 minutes. Discard the thyme. Stir the parsley into the soup & serve in bowls with sour cream.

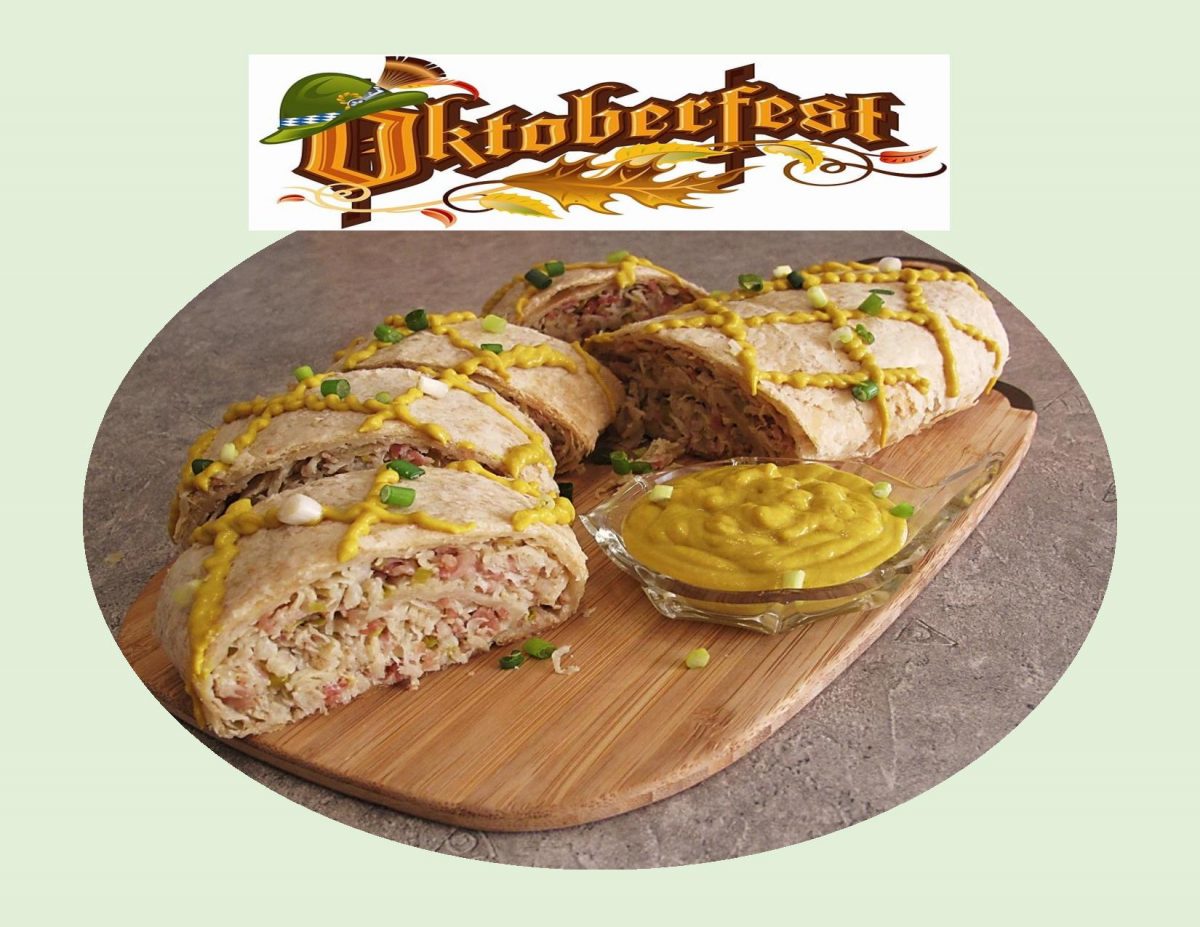
German Krautstrudel w/ Bacon

CELEBRATING OKTOBERFEST!

Sauerkraut strudel is a popular savory strudel version in beer gardens and during Oktoberfest which is the German fall folk fest celebrated during and after the harvest season.

A tradition dates back to 1810 in Munich, Germany. Originally a celebration of the marriage of the King of Bavaria and Princess Therese. Everybody had so much fun that it was resolved to repeat the celebration, which has been done, every year since. In 2022 it runs from September 17-October 3.

Oktoberfest is not only about the beer, singing, dancing and fair attractions. Many of the best known and most loved Bavarian specialties are enjoyed during the festival.

German strudels are not limited to the classic fruit fillings for the pastry. Savory examples are very common and this simplified sauerkraut strudel with soft sautéed strands of cabbage, the smoky flavor of bacon, and a savory crunch of caraway seeds; all wrapped in a delicate, flaky crust is a good representative. 

Print Recipe
German Krautstrudel w/ Bacon
Instructions
  1. Preheat oven to 350 F.
  2. Dice the bacon & cook in a pan over medium heat until it renders the fat but is not yet crispy. Drain on paper towel & sauté the diced onion in the rendered bacon fat. Cool down. In a bowl combine the drained sauerkraut, bacon, onion, egg, bread crumbs & seasonings. Mix well together.
  3. Roll out the puff pastry sheets, brush with half the melted butter. Reserve the rest. Spread half of the sauerkraut mixture over each sheet, roll & pinch to tuck in the ends. Place each strudel seam side down onto a parchment paper lined baking sheet & brush with melted butter.
  4. Bake for 35 minutes or until nicely golden brown. Allow to cool slightly before slicing with a serrated knife.
  5. Serve with sour cream, sliced green onions or mustard as a dip.
Recipe Notes
  • To make a STRUDEL DOUGH from scratch:
  • Sift 2 cups of all-purpose flour into a bowl. Mix with 1 tsp of salt. Add a beaten egg, 2 tablespoons of vegetable oil and 2/3 cup lukewarm water. 
  • Mix well together and knead into a dough. Cover with plastic and let rest 30 minutes.
  • Flour work surface and knead dough for a few minutes. Roll it out very thin.
  • Flour one side of a large, kitchen towel, spread it out. Place the rolled out dough on top and using your hands stretch it out, aim for a rectangle shape, roughly 16 by 24 inches.
  • Proceed as above and use the towel to help you roll the dough over the sauerkraut filling. 

Carrot Cake Cookies

‘Tis the season for fall flavors! Nature is offering an abundance of root vegetables such as carrots, parsnips, sweet potatoes and fruits to make use of in our fall baking.

Thinking about autumn can bring about some pleasant thoughts. While it is common to think about cozy scarves and pumpkin lattes, the symbolic meanings of autumn are more profound than you think. Ancient cultures, science and astrology have associated many aspects of this beautiful season to human life. These symbolic associations are powerful reminders that Mother Nature has an incredible influence on our lives.

These fall cookies are full of green zucchinis, deep orange carrots and bright red apples, colorful representations of the changing season ahead.

Print Recipe
Carrot Cake Cookies
Votes: 1
Rating: 5
You:
Rate this recipe!
Course dessert
Cuisine American
Servings
Course dessert
Cuisine American
Servings
Votes: 1
Rating: 5
You:
Rate this recipe!
Instructions
  1. Preheat oven to 350 F. Line baking sheets with parchment paper.
  2. In a large bowl, stir together oats, flour, flaxseed, cinnamon, cardamom, baking soda & salt.
  3. In a medium bowl or liquid measuring cup, whisk together applesauce, honey (or maple syrup), egg & vanilla. Mix in the melted butter.
  4. Pour the wet ingredients into the dry and stir until just combined. Gently fold in the nuts/seeds, grated zucchini, carrot & apple.
  5. Use a large scoop or measuring cup to drop 1/4-cup portions of dough onto the prepared baking sheets. Use your fingers to gently shape the cookies and flatten slightly, as they won't flatten on their own during baking.
  6. Bake 14-15 minutes, until set and lightly golden. (If baking more than one pan at a time, be sure to rotate the pans halfway through the baking time.)
  7. Let cookies cool on the baking sheet for a few minutes before removing to a wire rack to cool completely.

Sweet & Sour Pineapple Chicken Balls

Chicken balls aren’t authentic Chinese food but they were probably inspired by Chinese sweet and sour pork. The pork is replaced with chicken, it’s battered instead of breaded and the sauce is sweeter but its in the same ball park. These sweet and sour pineapple chicken balls are a type of modern Chinese food served in Canada, Ireland, United States and the UK as a staple of Chinese take-out. Due to their vast popularity among the masses, they have become linked unwilling to Chinese cuisine, for better or worse. They are largely unheard of in China, depending on the recipe and referred name.

Here in Canada, in our province of Alberta, many of the Chinese dishes that are served in small-town Chinese restaurants have a distinctly Canadian twist. Chinese Canadian food evolved over the decades and has developed into a its own unique cuisine. Some dishes that are unique to Canada and Alberta include ginger beef, cabbage chow mein & sweet and sour chicken balls. Across Canada, Chinese Canadian food has evolved from recipes that were created using the ingredients that were available to the restauranteurs decades ago.

The chicken balls we prefer are dipped in a light batter then baked in the oven as opposed to deep frying them. Brion & I enjoy them served over rice with the tangy pineapple sauce.

Print Recipe
Sweet & Sour Pineapple Chicken Balls
Votes: 2
Rating: 5
You:
Rate this recipe!
Servings
Ingredients
Chicken Batter
Pineapple Sauce
Servings
Ingredients
Chicken Batter
Pineapple Sauce
Votes: 2
Rating: 5
You:
Rate this recipe!
Instructions
Chicken
  1. Preheat oven to 400 F. In a food processor, chop chicken meat with seasoning, JUST until it is a roughly ground texture. Divide into 12-16 portions. Wet hands & roll into balls. Bake for 15-20 minutes. Do not overbake. Remove from oven & cool slightly on paper towels until batter is ready.
Sauce
  1. In a medium saucepan, combine brown sugar & cornstarch. Stir in pineapple with juice, Zesty Italian dressing, (soy sauce), & minced garlic. Cook & stir over low heat until thickened. Set aside & keep warm.
Batter
  1. In a bowl, combine all batter ingredients; beat until smooth. Add chicken balls; stir until covered well with batter.
Baking or Frying
  1. Line a baking sheet with parchment paper & place a wire cooling rack over it. Lift chicken balls out of batter with a fork & place on wire rack. Bake at 400 F. for about 10-15 minutes. Remove from oven to a serving plate. Alternately, you could cook battered chicken on a griddle with oil or deep fry it in a pot of oil.
Serving
  1. When chicken balls are cooked in your preferred choice; pour pineapple sauce over them & serve with steamed rice.