
It’s autumn and that means it’s grape season. Grapes come in a variety of colors and types such as seedless or with seeds, table grapes or wine grapes. One thing I’ve noticed on the internet is that there are unlimited recipes for everything imaginable using grapes except cookie recipes.
Red grape and gouda cheese cookies are a gourmet twist on traditional baking that transforms classic charcuterie elements into portable, sweet and savory pastry.
I have been doing a bit of recipe development to come up with a cookie recipe that used grapes without ending up with a soggy mess due to the water content of grapes. The approach I took was to first make a thick jelly from the grapes for the filling keeping it slightly tart. To give the cookie some texture, I used oatmeal and pepita seeds in the dough. By forming it into the classic ‘thumbprint’ shape gives you a nice depression for the jelly, gouda and fresh grapes. The experiment worked out quite well giving a very unique seasonal cookie.
Grape based baking such as crisp, tarts, cake, galette or pie strictly aligns with the fall grape harvest but since grapes are available all year long its nice to have lots of choices to make use of them, right?!
Print Recipe
Grape & Gouda Cookies
Votes: 1
Rating: 5
You:
Rate this recipe!
|
|
Votes: 1
Rating: 5
You:
Rate this recipe!
|
Instructions
Grape Jelly Filling
Wash & halve the grapes. In a small saucepan, combine all filling ingredients. Stir everything together & bring it to a gentle simmer over medium heat. Allow mixture to simmer for about 5-7 minutes until grapes soften & mixture thickens. When cooked, pour through a fine mesh strainer to extract the grape skins. Set aside until ready to use.
Cookie Dough
In a bowl, combine flour, oatmeal, baking soda, salt & pepita seeds. Set aside.
In a large bowl, cream the butter & sugars until light & fluffy. This should take about 3 minutes.
Beat in eggs & vanilla until fully combined. Gradually add dry mixture to wet ingredients, mixing until JUST combined. Place dough in refrigerator for about 30 minutes.
Assembly/Baking
Preheat oven to 350 F. Line a baking sheet with parchment paper. If you prefer a bit of a fancier look for the cookies, use large paper muffin cups and just set them directly on the baking sheet.
Halve the 42 grapes needed for topping the cookies. Cut gouda cheese into 1/2-inch cubes.
Using a cookie scoop, scoop dough either directly on the parchment paper or into the paper cups. In the center of each cookie make a fairly deep depression. Place grape jelly filling in the depression (don’t be afraid to use a generous amount of grape jelly in each cookie. Since the ‘jelly’ is very thick it adds flavor but doesn’t run out during baking). Top it with a cube of gouda cheese. Next place 3 grape halves over the cheese.
Bake cookies for about 12-15 minutes or until the edges are slightly browned. Remove the cookies from the oven & allow to cook on the baking sheet for about 5 minutes before transferring them to a wire rack. Remove paper cups (if using) to show the fluted edge.
Recipe Notes
• Cookies containing grapes soften after a few days due to moisture migration. Water inside the fruit slowly moves out into the drier cookie dough. Sugar in the cookies then traps this extra water, making the whole cookie soft and moist. Make sure to store cookies in the refrigerator & it is best to use them within a couple of days due to the softening of the cookie.
Millet is not just a key ingredient in bird seed and animal feed. While it is used for these purposes, millet has been an important food source for a large part of the world’s human population dating back to prehistoric times!
It’s a primary ingredient in flatbreads, beer and other fermented beverages, and porridges. Though technically a seed, millet functions like a whole grain, and you can cook with it like you would other whole grains such as rice or quinoa.
The name ‘millet’ refers to several different varieties of a cereal grass, the most common in North America being the proso variety, while ‘pearl millet’ is the most common variety cultivated worldwide. India and parts of Africa are where millet is thought to have evolved.
Millet falls on the sweeter end of the whole grain scale; some people liken the flavor to corn. It also readily takes on the flavor characteristics of the ingredients in a sauce or a dressing. The small, butter-yellow grains cook up light and fluffy, similar to couscous. When ground to a flour, millet’s soft, starchy consistency makes it ideal for gluten-free baking. On its own, millet can taste somewhat bitter, which is why it’s best blended with other mild flours; doing so allows millet’s other flavor notes (buttery, nutty, grassy) to shine.
Millet is available pearled or hulled: opt for hulled, which is the true whole-grain variety (hulled still retains plentiful fiber, as only the outermost layer is removed). Out of the hull, millet seeds look like tiny yellow beads with dark dots on the side where the plant’s stem was attached.
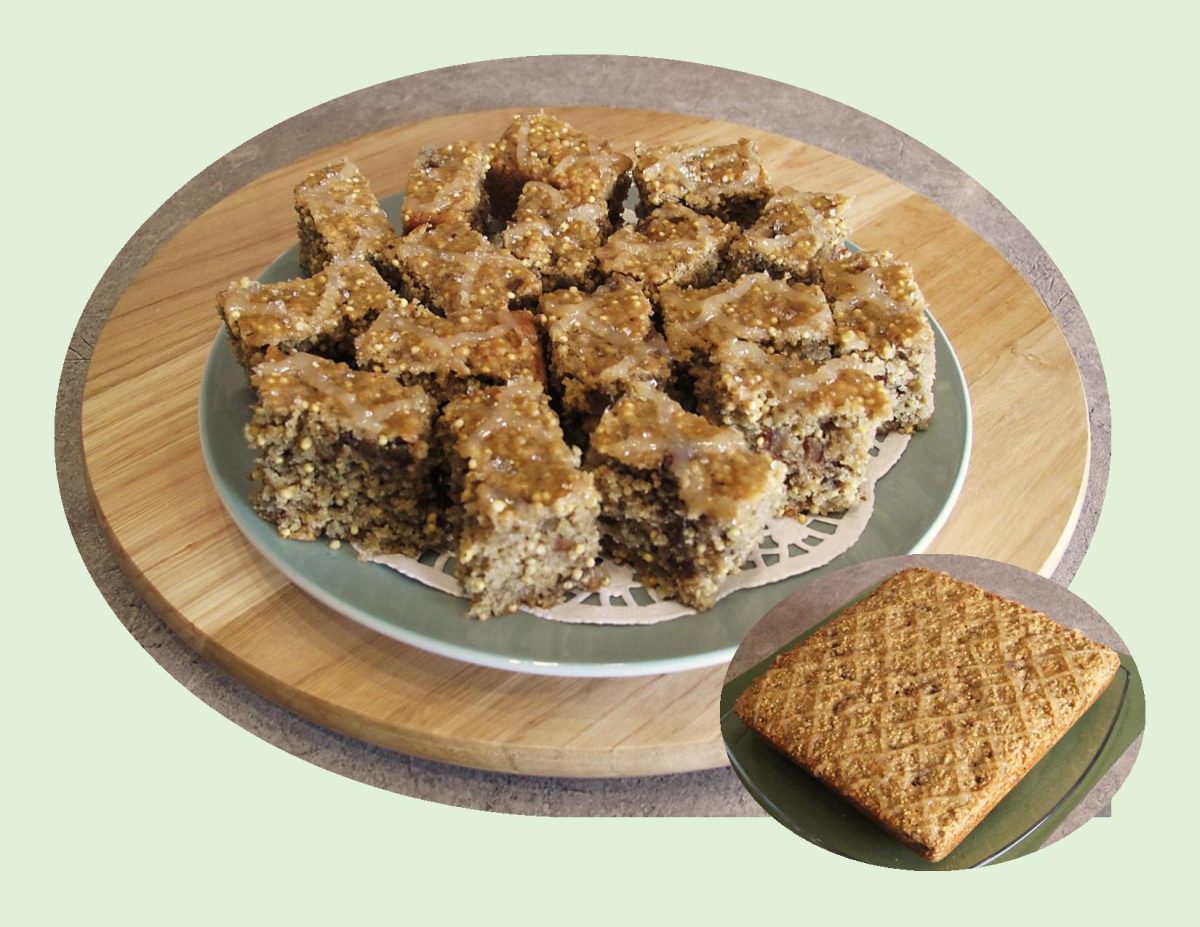
Millet is one of the ways in which you can add the perfect gentle crunch to baked goods such as this millet tea cake.
Print Recipe
Millet Tea Cake
Votes: 1
Rating: 5
You:
Rate this recipe!
|
|
Votes: 1
Rating: 5
You:
Rate this recipe!
|
Instructions
Preheat oven to 375 F. Line a 9 x 9-inch baking pan with parchment paper making sure to have overlap on the sides for easy removal from the pan.
Whisk oats, flour, sugars, baking soda & salt together. Add buttermilk, oil, egg, vanilla, millet & dates. Whisk to blend. Stir in 1/3 cup boiling water & let stand for 5 minutes. Scrape into baking pan & level out with a fork.
Bake cake 25-30 minutes or until tester inserted into center comes out clean. Cool 10 minutes on a wire rack. During the cooling stage drizzle cake with lemon curd if you wish. Slice & serve warm or at room temperature.
When I was growing up, cornbread was one of my favorites. My mother always called it ‘Johnny Cake’. Because it is a little sweeter than most dinner breads, it seemed like we were having dessert along with our soup, chili or whatever our main course was. That’s the nice thing about cornbread — it can be whatever you want it to be from breakfast to dessert.
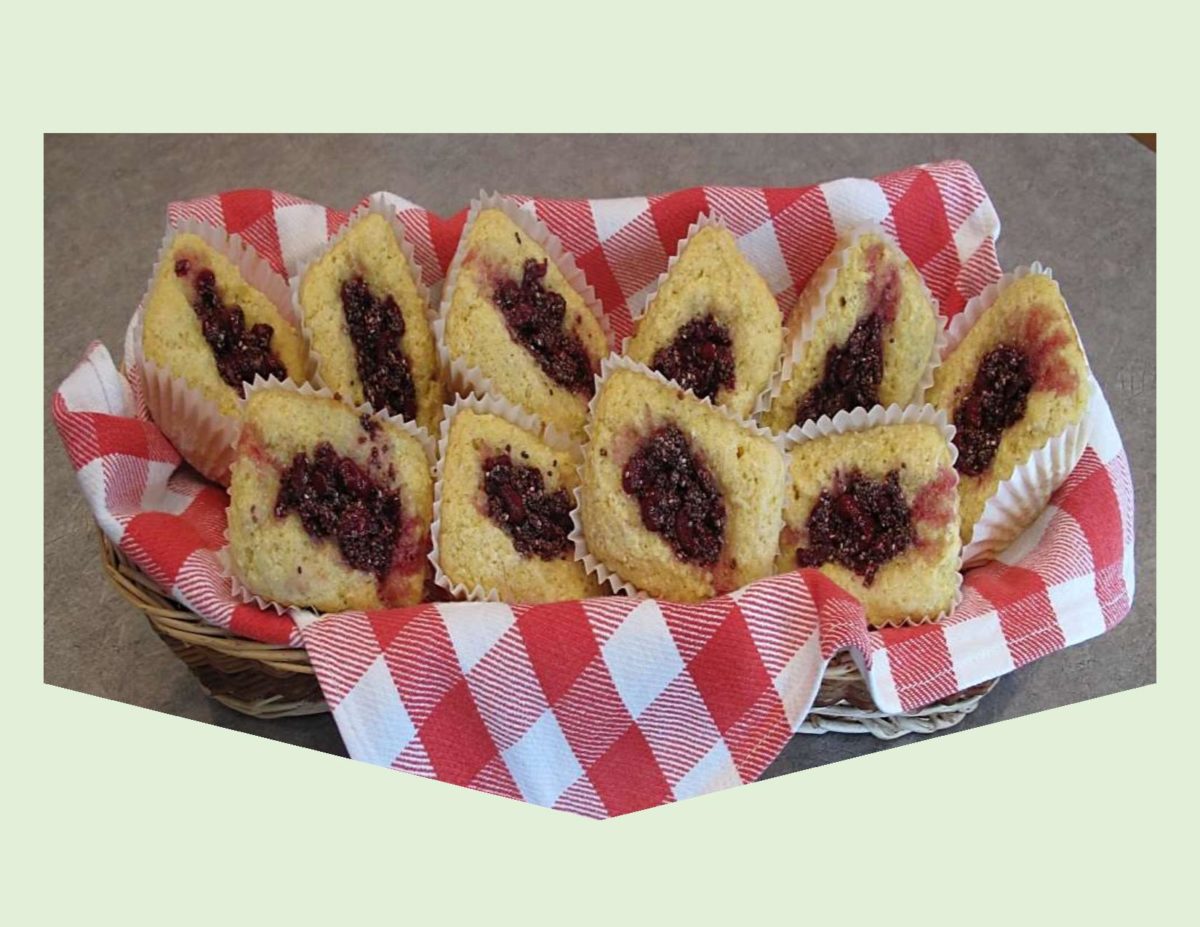
Tucked away in the freezer, I have a little stash of sour cherries. On this occasion I’ve decided to make a bit of ‘sour cherry chia jam’ and add a dollop to the center of some cornbread scones.
Chia seeds used to be a niche ingredient you could only come up with at health food stores. Then all of a sudden they began appearing at the grocery store in the bulk department. As time has passed, the price is becoming a little better as well as the availability of them.
Chia seeds are harvested from a flowering plant in the mint family, which is native to parts of Mexico and Guatemala. Good quality seeds are naturally black or white in color, not brown. The brown chia seeds are immature ones which haven’t had a chance to mature properly, resulting in a bitter taste. Having a long shelf life, chia seeds will keep for several years when stored in a cool, dry place.
These scones may seem a bit unusual, but are well worth trying. I always enjoy to incorporate a bit of oatmeal for some extra flavor.
Print Recipe
Cornbread Scones with Sour Cherry Chia Jam
Votes: 2
Rating: 5
You:
Rate this recipe!
|
|
Votes: 2
Rating: 5
You:
Rate this recipe!
|
Instructions
Sour Cherry Chia Jam
-
In a saucepan, bring cherries to a boil, stirring frequently. Reduce heat to low & simmer until the cherries soften, about 5 minutes. Remove from heat & stir in honey & chia seeds. Continue stirring for about 5 minutes until mixture thickens. Use in making the cornbread scones. Store any leftovers in a glass jar in the refrigerator. The jam will keep in the fridge for up to a week.
Scones
-
Preheat oven to 350 F. Lightly butter mini loaf pans or whatever choice of pan is preferred. In a food processor, pulse oatmeal for a few seconds then add flour, cornmeal, salt, baking powder, baking soda & sugar. Pulse for a few more seconds to evenly mix. Add cold butter & pulse just slightly to cut in; do not over mix. Place in a bowl, add buttermilk & combine ONLY until just mixed.
-
Divide dough into 10 mini loaf cups. Place a dollop of cherry chia jam in the center of each scone. Bake 15-20 minutes or until they test done with a toothpick. Nice to serve warm.


