Ube Cream Puffs w/ Craqueline Topping

Ube (pronounced OO-bay), is a purple yam native to the Philippines and other areas of Southeast Asia. Ube is a very versatile ingredient. It is not a purple sweet potato or taro, it is a purple yam. Its special taste reminds one of vanilla, pistachios or chestnuts. The vibrant purple color inside and out is uniquely photogenic.

Ube has been used for decades in Filipino cuisine and has now caught on in North America, especially in the form of desserts. In fact, one of the world’s top 10 food and beverage flavor manufacturers has identified the official 2024 Flavor of the Year as Ube. The 2024 Food and Beverage Flavor Trends Report is an annual summary by California-based T. Hasegawa USA.

Globally recognized for its innovation and expertise in flavor development and proprietary flavor enhancing technologies, T. Hasegawa remains at the forefront of consumer trends and shares these developments and research findings throughout the food and beverage industry.

Today, I’m making some ube cream puffs with a craquelin topping. Cream puffs start with choux pastry, a heady mixture of butter, milk, water, eggs & flour. When you combine these ingredients, they become so dense and sticky that it seems impossible they’ll come together as soft, puffy, light, tender. Heat is what initiates the expansion of the dense paste. Steam from the milk and water expands the pastry’s edges, puffing up its capacity until the oven heat provides just enough crispness and structure to hold the puffs’ boundaries. A cream puff expands so dramatically in the oven that it creates a cavern inside to hold any number of things—whipped cream, pastry cream, ice cream or savory fillings.

Cream puff pastry (or choux pastry) is the base for profiteroles (smaller puffs filled with ice cream), éclairs (elongated puffs filled with pastry cream and glazed), croquembouche (a tower of cream puffs held together and drizzled with caramel) and savory appetizer puffs called gougeres with cheese and herbs.

Craquelin (pronounced kra-ke-lan) is a thin biscuit layer that can be added over choux pastries before baking them. It is used to create a crackly appearance, crunchy texture and a buttery sweet taste as well as helping the choux pastry bake evenly to form hollow rounds. It certainly dresses up ordinary cream puffs and the taste is so unique.

Print Recipe
Ube Cream Puffs w/ Craqueline Topping
Votes: 1
Rating: 5
You:
Rate this recipe!
Servings
CREAM PUFFS
Ingredients
Ube Pastry Cream
Craquelin Topping
Choux Pastry
Servings
CREAM PUFFS
Ingredients
Ube Pastry Cream
Craquelin Topping
Choux Pastry
Votes: 1
Rating: 5
You:
Rate this recipe!
Instructions
Ube Pastry Cream
  1. In a medium saucepan whisk together sugar, cornstarch & salt. Pour the milk & egg yolks into a bowl & whisk until combined then add liquid mixture to the saucepan slowly & whisk together.
  2. Add butter, bring mixture to a boil whisking constantly for one minute before removing from heat then mix in the ube extract.
  3. Transfer the pastry cream to a separate container (optional: first strain it through a mesh sieve to ensure the cream has a really smooth consistency) Cover the pastry cream with plastic wrap, ensuring that the plastic wrap touches the top of the pastry cream to discourage the formation of a skin on top of it.
  4. Place in refrigerator & chill for at least 2 hours before using.
Ube Craquelin
  1. Soften the butter then mix the ube extract into it. Add in the flour, brown sugar & salt. Mix together until thoroughly combined. Place the dough between two sheets of parchment paper & flatten until the dough reaches about 1/4 inch thickness. Freeze the dough until ready to use.
Choux Pastry
  1. Pour the water, sugar, salt & butter into a saucepan & heat over medium heat. Stir the mixture together until the water is boiling & the butter is melted. Remove the saucepan from the heat & add the flour.
  2. Vigorously mix the flour into the butter/water mixture so that all the water is absorbed. Once the dough is formed, return the saucepan to the heat. Continue to mix & cook down the dough until it pulls away from the sides of the saucepan, about 2-5 minutes. You should be able to place a spoon into it & have it stand straight up.
  3. Transfer the dough to a bowl & allow it cool down for a couple minutes. Crack in the eggs one at a time, ensuring the previous egg is fully incorporated into the dough before adding in the next egg.
  4. Transfer the dough into a piping bag.
Assembly
  1. Preheat the oven to 375 F. Line a baking sheet with parchment paper.
  2. Remove the craqueline topping from the freezer & cut out disks of a desired size to put on top of the choux pastry.
  3. Pipe out mounds of choux pastry onto the prepared baking tray & top each mound with a craqueline disk.
  4. Bake for 30-40 minutes depending on the size of the choux mounds. DO NOT open the oven for the first 25 minutes of the baking process of the steam will release & the choux won't puff up properly.
  5. After about 25 minutes, open the oven & prick each choux with a toothpick, then return to the oven to cook for another 5-10 minutes depending on the choux size (this helps to dry out the insides to maintain a firm choux).
  6. Remove from oven once the choux is nice & golden brown. Prick each choux again with a toothpick to allow them to dry out even further while they cool.
  7. Remove the pastry cream from the fridge & fill a piping bag with it. Slice each choux pastry in half keeping them connected slightly on one side. Divide ube pastry cream between the 'cream puffs'.

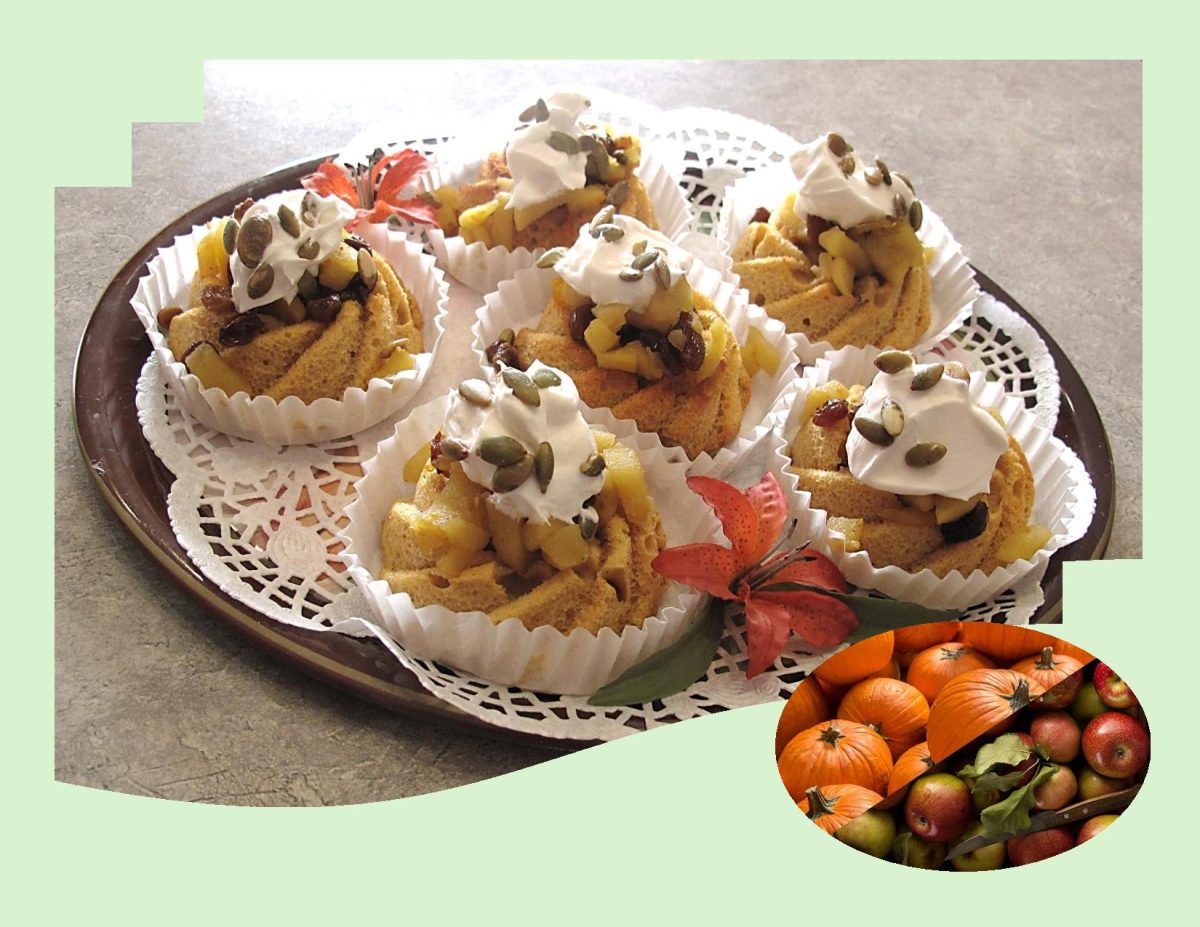
Pumpkin Angel Food Mini Bundt Cakes

Pumpkin angel food?! That’s probably not what you’d expect when you think of angel food cake or pumpkin, but this recipe is actually a very tasty combo. 

Of course, pumpkin-based desserts are a traditional fall dessert, so I am sure that you will be surprised that I am posting this pumpkin angel food cake recipe in April. It seems I have some pumpkin puree that’s in the freezer just waiting to be used before we get too far into the spring and summer season.

Brion has always loved angel food, so I thought why not add the pumpkin puree to kick it up a notch. Pairing it with the right fruits can also enhance its flavors. Instead of frosting or a whipped topping I am making some caramelized apples and raisins spiced with anise and cardamom.

  • Anise has a distinct licorice-like flavor. It adds depth and enhances the overall aromatic profile of the compote.
  • Cardamom is a fragrant spice with citrusy and herbal notes. It adds warmth and sophistication and complements pumpkin beautifully.

For a cake that’s quite sweet, some salted pepita seeds sprinkled on top are a bit of necessary and delicious balance.

Simply put, it’s an easy cake mix recipe dressed up with warm spices and pumpkin purée served with caramelized apples, raisins and salted pepita seeds. Yum!

Print Recipe
Pumpkin Angel Food Mini Bundt Cakes
Votes: 1
Rating: 5
You:
Rate this recipe!
Servings
MINI BUNDT CAKES
Ingredients
Pumpkin Angel Food Mini Bundt Cakes
Caramelized Apples & Raisins
Servings
MINI BUNDT CAKES
Ingredients
Pumpkin Angel Food Mini Bundt Cakes
Caramelized Apples & Raisins
Votes: 1
Rating: 5
You:
Rate this recipe!
Instructions
Cake
  1. Preheat oven to 350 F.
  2. In a large mixing bowl combine everything except the Angel Food Cake mix and ingredients to prepare cake. Mix until combined. Set aside.
  3. In a different bowl combine the Angel Food Cake mix and ingredients required to make the cake. Carefully fold in 1/4 of the batter into the pumpkin mixture. Then gently fold in the rest of the batter.
  4. Carefully pour or spoon into an 24 ungreased mini bunt cake pans. Place pans in oven on the middle rack.
  5. Bake for 15 -20 minutes or until cake is golden brown and springs back. Immediately invert pans onto a wire rack.
  6. Cool for 10 minutes.
  7. Serve with caramelized apples & raisins & a dollop of whipped topping. Sprinkle with salted pepita seeds.
Apples & Raisin Compote
  1. In a medium saucepan, melt butter then add water & sugar. When the caramel is golden brown, add the raisins, swirling them into the caramel.
  2. When raisins begin to plump, add apples & orange zest, then sprinkle with spices. Lower heat & simmer 5-10 minutes to thicken.
  3. Do not overcook compote as it will thicken when cooled.

Potato Lefse

From a traditional homemade staple to a quick on-the-go snack from a gas station to ferries or even a fancy dish at a wedding, the story of lefse is intertwined with Norwegian history.

The first lefse didn’t contain potatoes, they were made from flour. Women would travel from house to house, village to village to make lefse to last the winter months. The flour lefse would cook up like a cracker and be able to last through the season. Many households stored their lefse is wooden boxes covered in cloth or just stacked on shelves. When you were ready to enjoy some lefse it was dipped in water and soaked between damp cloth until softened.

Then came the introduction of potatoes, abundant and easy to grow. The potato was incorporated into many Norwegian foods. Like Ireland, Norway suffered from the effects of the potato famine in the mid-1800’s, which is about the time that many Norwegians came to North America. They brought their knowledge and rolling pins. The result is a Norwegian ‘potato bread’ delicacy that is part of a special tradition replicated in many Norwegian-American homes for more than 150 years.

In Norway, the lefse is sweet or savory, thick or thin, can be made from wheat or potatoes, and can be served with a wide variety of accompaniments. Recipes and even names vary considerably across Norway. 

In many parts of western, eastern and central Norway, lefse are used as an alternative to bread. They are eaten with savory, salty foods or with sweet foods.

Common savory fillings include cured ham and cheese. They can also be served as wraps, with fillings such as smoked salmon and cream cheese. Common sweet fillings are sugar and cinnamon. These are often served folded or rolled into tubes. As with waffles, the combination of brown cheese (or ‘brunost’ is a tan-colored ‘whey cheese’ with a distinctive caramel flavor) and jam is another sweet option.

There is no one best lefse recipe. You can choose to make thick, sweet lefse, or thin ones for savory wraps, with potato or without. There are so many options, not to mention the countless ‘secret’ family recipes handed down through generations.

I recall the first time I ever had the opportunity to try Norwegian lefse. I was in grade school and my friend asked me to come to her house for lunch. At the time, I wasn’t really sure what to make of it, but I remember it tasted good … just like a thin potato pancake!

Brion & I decided to use our lefsa as a wrap and make fish ‘tacos’ out of them. It turned out to be a great choice!

Print Recipe
Potato Lefse
Votes: 1
Rating: 5
You:
Rate this recipe!
Course Main Dish
Cuisine Norwegian
Keyword potato lefse
Servings
Ingredients
Course Main Dish
Cuisine Norwegian
Keyword potato lefse
Servings
Ingredients
Votes: 1
Rating: 5
You:
Rate this recipe!
Instructions
  1. In a pot, place potatoes & cover with cold water. Put a lid on the pot & bring to a boil. Reduce heat to a simmer & cook until soft. Drain & put potatoes through a ricer (or grate fine) while still hot. Combine with butter & refrigerate until cool.
  2. Combine potatoes with the rest of the ingredients. Mix just until blended. Add milk only if needed to combine dough. Cover & chill thoroughly.
  3. Divide dough into 8 equal pieces & roll into balls. Between 2 sheets of dry waxed paper roll each ball to a 6-inch diameter.
  4. Heat a flat griddle to 400 F.
  5. Grill lefsa, flipping mid-way through, about 60 seconds on each side, or until freckled.
  6. Serve warm or at room temperature as is or with topping or 'filling' of choice.
Recipe Notes
  • The yield will vary depending on how much dough you use for each one.
  • SOME FILLING SUGGESTIONS:
  • Spread with butter & a sprinkle of brown sugar
  • Spread with mustard & wrap around sausage, brats or hot dogs
  • Spread with butter or cream cheese & wrap around leftover chicken, turkey, pot roast or your favorite deli meat. Eat hot or cold.
  • Use as a wrap for salads such as egg, tuna, chicken & salmon.
  • Spread with cranberry sauce, applesauce or Nutella.
  • Wrap around warm meatballs.
  • Wrap around scrambled eggs with or without crumbled sausage or bacon.

Onion Scones

You might imagine scones as a food that is only served with jam and cream, but there are many variations on this classic tea cake. This flaky treat can also come in a savory scone version with add-ins like cheese and chopped bacon or sun-dried tomato & basil etc.  A scone is closer to a pastry than it is to bread mainly because it doesn’t include any yeast and has almost identical ingredients to a short crust with different fat to flour ratios.

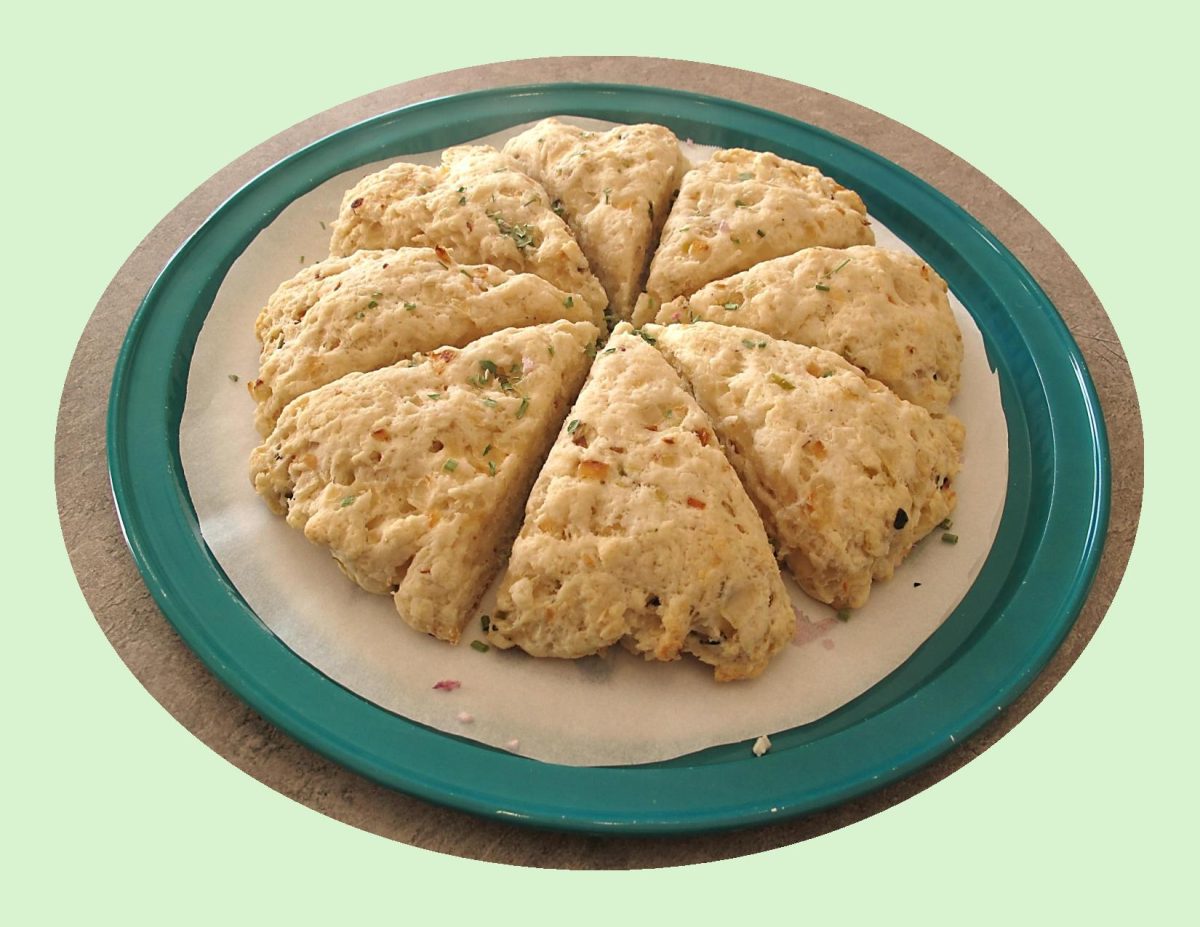
So why not onion scones?? Because onions really form the foundation of our cooking, they are often the first thing that goes in the pan, and they are the flavor base for everything from chicken soup to a quick skillet pasta. Cooked onions give dishes a rich savory flavor and a subtle sweetness — you don’t always know onions are there once the dish has been spiced and sauced, but you’d definitely miss them if they weren’t.

Scone ingredients prefer to be cold. All your starting components need to be kept as cool as possible – this will help to guarantee the soft, light and well-risen qualities of your next batch of scones.

North American or British scones – what’s the difference? British scones are served with butter/cream whereas North American scones or ‘biscuits’ are far butterier and are typically served alongside meat and veg style savory dishes.

These onion scones make such a nice addition to a beef stew meal.

Print Recipe
Onion Scones
Votes: 1
Rating: 5
You:
Rate this recipe!
Course Main Dish
Keyword onion scones
Servings
Course Main Dish
Keyword onion scones
Servings
Votes: 1
Rating: 5
You:
Rate this recipe!
Instructions
  1. Preheat oven to 375 F.
  2. In a microwave-safe bowl, combine the yellow onion, green onions, garlic & butter. Microwave on high for 2 minutes, then stir. Microwave for another 1-2 minutes or until the vegetables are tender. Remove bowl from microwave & let the vegetables cool for 10 minutes.
  3. In a large bowl, combine the flour, cheese, sugar, baking powder, pepper & salt.
  4. Add the sautéed onion mixture to the flour mixture along with the light cream & egg. Stir JUST until combined.
  5. Gently press the dough together with your hands to form a ball.
  6. On an ungreased baking sheet, press the dough into an 8-inch circle. Cut the circle into 8 wedges. Separate the wedges slightly.
  7. Bake for 12-15 minutes or until scones are lightly browned. Brush with more melted butter & serve immediately.

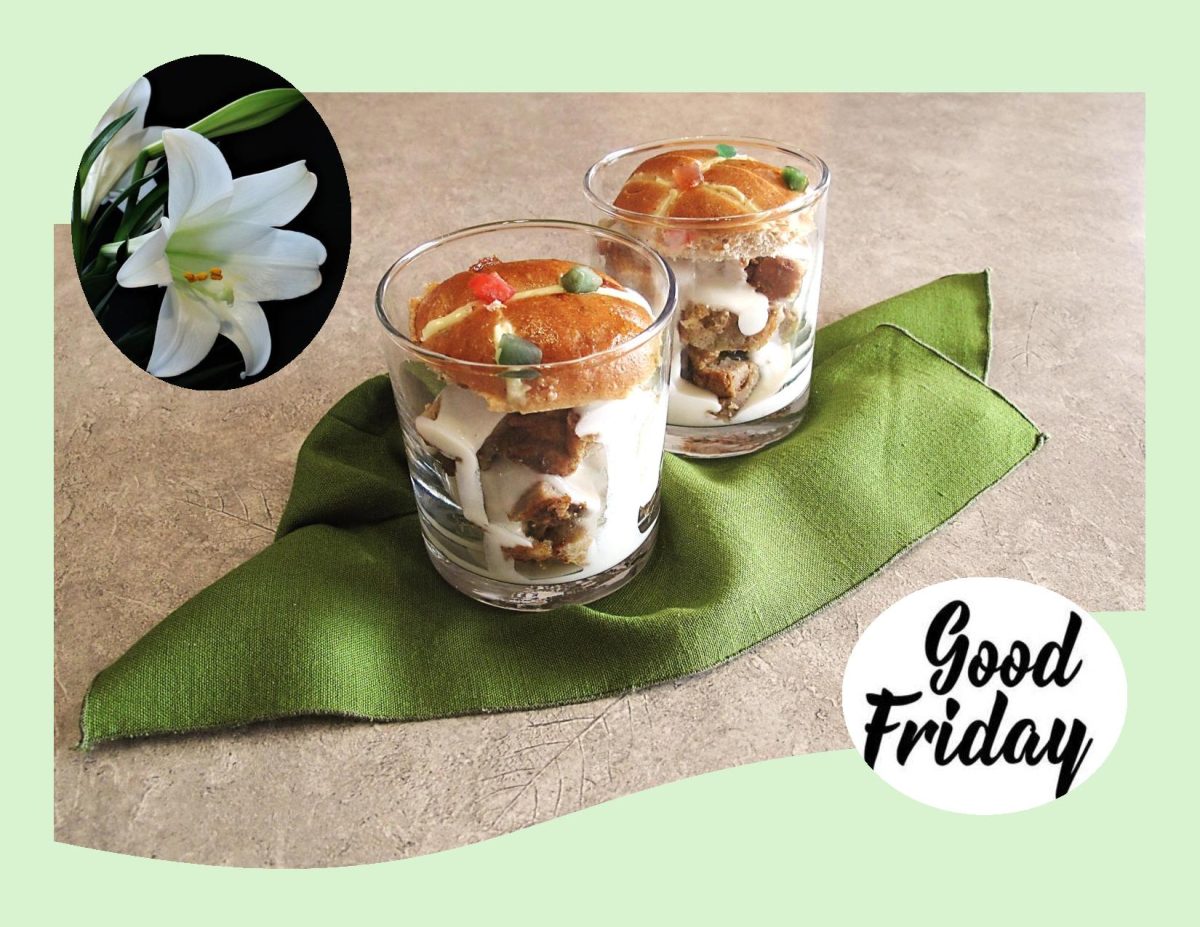
Chai Spiced Hot Cross Bread Pudding w/ Vanilla Sauce

CELEBRATING GOOD FRIDAY!

Bread pudding always gives me reason to remember good things. Truly a comfort food for those of us that recall it from childhood days. It’s not that the dish was invented here — that honor likely goes to clever medieval or even ancient cooks in Europe and the Middle East who had a surplus of stale bread on their hands. The perfect embodiment of the virtues of frugality and indulgence: day old bread, too precious to waste, is bathed in a mixture of milk and eggs and made into either a sweet or savory bread pudding (with a few other additions) and baked into something sublime. What makes it special is the blend of spices mixed into it and the sauce.

The chai spice baking blend, which is sometimes overlooked, adds a distinct warm flavor and depth. It can include a number of different spices. Cardamom is the most common ingredient, followed by some mixture of cinnamon, ginger, star anise and cloves. Pepper, coriander, nutmeg and fennel are also used but they are slightly less common.

This bread pudding combines hot cross buns with spices inspired by the world’s love affair with Indian chai. The origins of hot cross buns may go back as far as the 12th century. According to the story, an Anglican monk baked the buns and marked them with a cross in honor of Good Friday. Over time they gained popularity, and eventually became a symbol of Easter weekend.

Bread pudding, when done right, should have the perfect balance of gooey goodness and chewy texture. That’s why stale bread/buns are important. The bread needs a degree of crunch otherwise you will have ‘mush pudding’. For additional flavor, the pudding is served with a vanilla sauce. Who says bread pudding has to be boring!

Print Recipe
Chai Spiced Hot Cross Bread Pudding w/ Vanilla Sauce
Votes: 1
Rating: 5
You:
Rate this recipe!
Servings
Ingredients
Bread Pudding
Vanilla Sauce
Servings
Ingredients
Bread Pudding
Vanilla Sauce
Votes: 1
Rating: 5
You:
Rate this recipe!
Instructions
Bread Pudding
  1. Place cubed hot cross buns in a greased 9 x 9-inch baking dish.
  2. In a large bowl, combine the milk, brown sugar, eggs, vanilla, spices & salt. Pour over buns, making sure that the bread is completely covered by the milk mixture.
  3. Cover & refrigerate for at least an hour or overnight.
  4. Set out the chilled bread pudding while you preheat the oven to 350 F.
  5. Bake 40 - 45 minutes, or until a knife inserted into the center of the pudding comes out clean. Remove from oven & serve with vanilla sauce.
Vanilla Sauce
  1. In a small saucepan, melt butter & add flour. Stir until mixture has a nutty aroma.
  2. Add salt, cream & sugar; stir until mixture becomes thick. Remove from heat & stir in vanilla.
  3. Spoon over servings of warm bread pudding.
Recipe Notes
  • You will notice I have only used 2 Tbsp sugar in the vanilla sauce to offset the sweetness of the pudding.

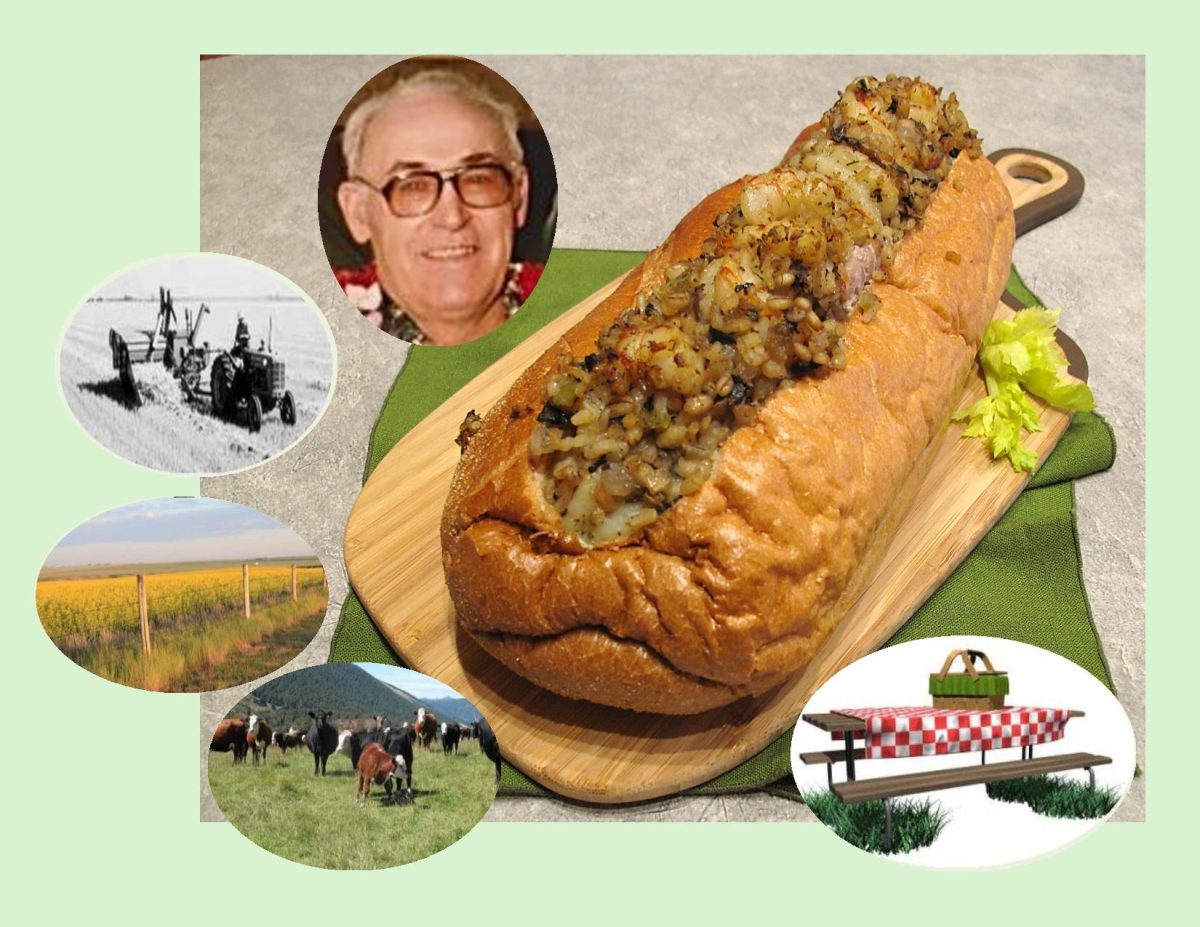
Boursin French Bread w/ Pork & Shrimp Stuffing

Today, March 21, our family celebrates the birth date of my father. Although he left this earth many years ago, I have so many memories of the wonderful childhood I enjoyed due to the parents I had. As my life unfolds, I realize more each day the impact having had a strong role model has made on my life. The word ‘thank you’ is so inadequate.

In the early 1950’s, my father was able to purchase another piece of land about 4 miles from our home place. Between the two farms it became the equivalent of a ‘section’. Before this time, the cattle had to be moved to a community pasture in the foothills where they would have enough grass to graze on over the summer. At that time to transport them, you had no choice but to herd them down the road allowance for approximately 20-30 miles on foot. To say the least it was a long grueling event for both the cattle and family members.

The ‘other farm’, as we referred to it, had originally been a slaughter house for the town meat market. It consisted of one large building, corals and a few other buildings. There was a slough on the land which dad had converted to a ‘dug out’ where the cattle could go and drink freely. The land was used for grain crops where in turn the cattle could be pastured on.

One of my fondest memories about the other farm was our picnic lunches. In the summer when dad would be working on the land, instead of my mother just packing a lunch for him that he could take in the morning, she would fix a wonderful ‘picnic lunch’. At about 11:30 in the morning, mom would pack up the lunch she had prepared, complete with plates, silverware, a tablecloth, etc., and we would drive to the ‘other farm’. There was just the right amount of space between two grain buildings to set up a make-shift table and stools. We would put the table cloth down and spread out our little picnic ‘feast’. Dad would be so surprised and we would all enjoy our lunch immensely. Mom always knew how to make the most simple things fun for us.

Lunch was always different from the usual lunch box meal and my mother never seemed to be short on tasty ideas. Today’s stuffed French bread meal is definitely a more elevated version of a picnic meal but it did bring me back to those wonderful cherished memories from childhood.

This meal seems so fitting to have today in honor of my father’s birthday. He loved bread, pork & seafood so I’ve got it covered.

Print Recipe
Boursin French Bread w/ Pork & Shrimp Stuffing
Votes: 1
Rating: 5
You:
Rate this recipe!
Servings
Servings
Votes: 1
Rating: 5
You:
Rate this recipe!
Instructions
Shrimp Stuffing
  1. In a saucepan, cook rice & barley in vegetable broth until tender. Drain (you can use this broth elsewhere) & transfer to a large bowl.
  2. Sauté celery, onion & mushrooms in 2 Tbsp butter until tender-crisp. Combine sautéed vegetables with rice/barley mixture. Stir in shrimp & seasonings & cook for a few more minutes until shrimp is just cooked. Remove from saucepan & set aside.
Boursin Cheese Sauce
  1. In a saucepan, melt the butter over low heat. Stir in the spices. Add the milk & adjust heat to steaming -- do not simmer or boil. Add Boursin to the milk mixture, break it up into pieces with the side of a large spoon & stir until Boursin has melted into the mixture. Remove from heat & cool.
Tenderloin
  1. Remove silver skin & butterfly tenderloin. Using a meat mallet, pound out the tenderloin to about 3/4-inch thickness. Heat a griddle & sear meat on both sides. Set aside.
Assembly /Baking
  1. Preheat oven to 375 F.
  2. Cut the French bread in half lengthwise & scoop out the soft insides. Remove only just enough to be able to fit the tenderloin in the cavity. Spread the hollowed out cavity with the Boursin cheese sauce (save some for inside the butterflied tenderloin). Cover bottom & sides completely.
  3. Spread remaining cheese sauce over inside of butterflied tenderloin. Close the tenderloin so you can fit it inside the bread cavity. Once you have it in there, open it as much as possible & fill it with the shrimp stuffing. It will be slightly mounded.
  4. Using a large piece of foil paper, place the bread 'boat' in the center & pull the foil up around it. Lightly cover the top just to keep the stuffing from drying out until the rest is cooked.
  5. Bake for 1 1/2 hours in a baking pan with a wire rack in the bottom to prevent the bottom of the bread from burning.
  6. Remove from oven & allow to sit for about 5 minutes then remove foil & place on cutting board & slice.

Reuben Naan Pizza w/ Corned Beef & Dijon Béchamel Sauce

The ‘Reuben’ is a deeply early 20th century American Midwestern creation. Not everyone agrees on the exact recipe for a Reuben, but there are a couple of key components that most seem to agree upon: sauerkraut and Swiss cheese. The meat can be either corned beef or pastrami, the bread can be rye or otherwise, and dill pickle slices can be either added or omitted. The spread is also a point of contention, with some choosing Russian dressing, another choosing Thousand Island dressing and yet another Dijon mustard. 

Enter Dijon béchamel sauce! This Reuben Naan bread pizza is similar to the sandwich except that the spread is Dijon béchamel sauce rather than a dressing. It’s topped with sauerkraut, provolone, Swiss cheese and corned beef. 

Béchamel is a standard white sauce and one of the five ‘mother’ sauces of classical cuisine. Dijon béchamel makes a great alternative to pizza sauce.

Dijon mustard is a traditional mustard of France, named after the town of Dijon in Burgundy, France. When you think of Burgundy you probably think of its world-famous wine, and the region’s wine is part of the reason Dijon mustard was born. Mustard-making became an industry in France’s wine regions because mustard seeds provide essential nutrients to grapevines, so they were planted as a complementary crop. The condiment was then produced in these areas by mixing mustard seeds with wine must, a wine byproduct.

Dijon mustard has always felt like the fanciest mustard for some reason. That’s not to say Dijon is better than other mustards; everyone has their tastes, but compared to yellow mustard or a spicy brown, Dijon has always carried an air of refinement and complexity. Honey mustard is the party crowd-pleaser, and whole grain mustard is the rustic workman, but Dijon is as cosmopolitan at home in a vinaigrette as it is atop a sausage.

By most culinary standards, mustard is an ancient condiment. Before it was made in France, it was grown and used as a spice in Egypt and the ancient Middle East, dating back to almost 3000 B.C.

Still, it took 500 more years for true Dijon mustard to be born. Mustard was made in a variety of ways around France, and over time, vinegar replaced grape must as the common additive. Then in 1856, a citizen of Dijon named Jean Naigeon started using yet another wine product, verjus, (translates to ‘green juice’ in French. It is a middle ground between vinegar and grape juice, made from the juice of unripened wine grapes) in place of vinegar, which gives Dijon mustard its unique heat.

Since July 15, 2009, eighty percent of the mustard seeds used in the manufacture of contemporary Dijon mustard come from Canada. Due to smaller than usual Canadian crop of mustard seeds in 2021, a shortage of Dijon mustard began in France in 2022. The shortfall in Canadian production was caused by a heatwave, attributable to climate change. The shortage has been exacerbated by customers stockpiling.

Nevertheless, I managed to secure some for this unique Rueben pizza!

Print Recipe
Reuben Naan Pizza w/ Corned Beef & Dijon Béchamel Sauce
Votes: 1
Rating: 5
You:
Rate this recipe!
Servings
Votes: 1
Rating: 5
You:
Rate this recipe!
Instructions
Dijon Béchamel Sauce
  1. In a large saucepan over medium heat, melt butter. Add the flour & whisk for 1 minute. Add 1/2 of the milk & whisk until smooth. Whisk in remaining milk. Bring to a boil. Add salt, pepper & nutmeg. Reduce heat & simmer for 10 minutes, stirring occasionally. Whisk in Dijon mustard until combined. Remove from heat & set aside.
Assembly & Baking
  1. Preheat oven to 350 F.
  2. Lay out Naan breads on a baking sheet. Spread sauce over each one liberally.
  3. Arrange corned beef on top of sauce. Sprinkle pizzas evenly with Swiss & provolone.
  4. Bake for 12-15 minutes or until the crust is crispy. Remove from oven & top with caraway seeds & red pepper flakes if you wish.

Adzuki Bean Bolognese Lasagna

Ordering a lasagna Bolognese in Italy might leave some North Americans a bit surprised by the dish placed before them. The traditional recipe layers lasagna noodles with a meaty ragù and creamy, white béchamel sauce, a very different recipe than the lasagna Bolognese served in North America where the layers of noodles alternate with tomato sauce, meat, mozzarella, and ricotta cheese. 

A while back Brion and I were in an Asian Supermarket, and I became very interested in some of the desserts made with sweet red adzuki bean paste. In October (2023), I used it in some ‘Anpan Buns’ that I posted on the blog. We really enjoyed them so I wanted to explore the savory side of this bean.

Adzuki beans have a unique and distinct taste that can be described as mildly sweet and nutty with a slightly earthy undertone. The flavor is not overpowering and is often described as more delicate compared to other beans like black beans or kidney beans. The sweetness is subtle, making adzuki beans particularly suitable for both sweet and savory dishes.

In North America they often are put to savory use, mixed into salads, cooked with rice and dropped into soups. Like other beans, adzuki are a good source of protein. Unlike many other dried legumes, they don’t have to be soaked before cooking.

Getting back to today’s lasagna, I thought if I added some cooked adzuki beans to the Bolognese sauce might just make this classic dish even better.

Print Recipe
Beef & Adzuki Bean Lasagna
Votes: 1
Rating: 5
You:
Rate this recipe!
Course Main Dish
Cuisine Asia
Servings
Ingredients
Bolognese Sauce
Béchamel Sauce
Other Ingredients
Course Main Dish
Cuisine Asia
Servings
Ingredients
Bolognese Sauce
Béchamel Sauce
Other Ingredients
Votes: 1
Rating: 5
You:
Rate this recipe!
Instructions
Bolognese Sauce
  1. Heat a large pot over medium heat. Add oil, garlic & onions. Sauté until fragrant, for a minute or two, avoid browning. Then add ground meat.
  2. Sauté the ground meat until it is no longer pink. Add carrot & celery & sauté for about one minute.
  3. Add the liquids – seasoned, diced tomatoes & tomato paste & cooked adzuki beans. Stir to combine. Heat it on medium high heat & let it come to a boil.
  4. Add the rest of the seasonings – basil, oregano, beef bouillon, salt & pepper. Stir to combine. Lower heat to medium heat & let it cook for another ~10 minutes, or until sauce thickens.
  5. Remove from heat & set aside.
Béchamel Sauce
  1. Add butter to a medium pot & heat over medium heat. Once butter is melted (avoid browning butter), add flour to pot. Using a whisk, whisk to combine. Mixture will be slightly clumpy.
  2. Immediately add milk into the pot and bring to medium high heat so that it comes to a boil. Whisk continuously until mixture is smooth & thickens.
  3. Once mixture reaches desired thick consistency, add salt & pepper. Stir to combine, then remove from heat.
Assembly/Bake
  1. Preheat oven to 375 F.
  2. Place a thin layer of Bolognese sauce on the bottom of a deep 9 x 13-inch baking dish.
  3. Start layering with 2 of the rectangular lasagna sheets, then add 1/4 of the Bolognese sauce, and then 1/4 of the béchamel sauce & cheese.
  4. Repeat 3 more times. There should be a total of four sets of lasagna sheets/Bolognese sauce/béchamel sauce & cheese layers. Sprinkle it with remaining cheese to top it off.
  5. Place casserole dish in the oven & place a cookie sheet under the casserole dish to catch any potential drippings. Bake for 45 minutes, then (optional) broil for 2 minutes to brown the top.
  6. Remove dish from oven and let it sit for 20 minutes before cutting into lasagna. Garnish with parsley & serve!
Recipe Notes
  • This recipe will easily serve 8-10 people. With just 2 of us, I still like to make the full recipe so I can freeze the rest for future meals.
  • On the other hand, the recipe can be easily halved if you wish.
  • To cook the adzuki beans:
  • Use a strainer to rinse the dried beans under cold water. Remove any debris, stones or deformed beans from the mix and thoroughly drain the beans afterward.
  • Fill a pot with water, add the beans and bring it to a boil. After the water has started to boil, reduce the heat to a simmer, and continue cooking the beans for about 45-60 minutes. The adzuki beans will be ready once the beans are fork tender. Drain.

Banana Cream Pie Cookie Cups

It’s hard to pin down the origin of banana cream pie, but it seems adding bananas to the pie happened around the end of the 19th century, when bananas went from exotic to commonplace. Until then, most North Americans have never seen, never mind eaten, a banana.

The turning point in the banana business came with technological advances in transportation and refrigeration. Steamships and railroad cars brought the fruit to market faster, and refrigeration slowed the ripening process. The combination was a bonanza for the industry.

One of the earliest known published recipes for banana cream pie called for sliced bananas and powdered sugar placed in a pre-baked pie shell. The ‘Woman’s Exchange Cook Book’ from 1901 advises cooks to then put the filled pie in the oven for a few minutes and then remove it once the bananas have been softened. After the pie is removed from the oven, the cookbook instructs the cook to cover the filling with whipped cream and to flavor it with lemon juice.

A recipe published just five years later in ‘The Blue-Ribbon Cookbook’ provided a banana and custard filling, but the two were not blended together into today’s familiar, creamy banana filling. Instead, sliced bananas lined the bottom of the crust, and the custard was poured over it. By 1950 we get a version covered with whipped cream and toasted coconut.

An old fashioned dessert , but one of the most comforting treats, banana cream pie offers a rich, sweet and velvety filling. If you like bananas like I do, it’s one of those desserts where you put a spoonful in your mouth and can’t help but lean back and close your eyes as you savor the buttery crust and creamy filling.

Print Recipe
Banana Cream Pie Cookie Cups
Votes: 1
Rating: 5
You:
Rate this recipe!
Servings
Ingredients
Banana Cream Mousse Filling
Servings
Ingredients
Banana Cream Mousse Filling
Votes: 1
Rating: 5
You:
Rate this recipe!
Instructions
Base
  1. Preheat oven to 350° F. Line 12 muffin tins with paper cups.
  2. Use a food processor to grind gingersnap cookies into a fine crumb. Melt butter in a microwave-safe bowl until melted. Combine melted butter with cookie crumbs and stir until there are no dry crumbs left. Divide ginger snap crumbs between the 12 muffin cups. Press down with a spoon or tart shaper.
Banana Cream Mousse Filling
  1. While the cookie cups are cooling, prepare the banana cream mousse filling. Whisk together the box of dry pudding mix and the milk. Add in the whipped topping and stir GENTLY until combined. Transfer to a pastry bag or a zip lock bag and store in the fridge until the cookies are fully cool.
  2. Take cookie cups out of muffin tin. Pipe banana cream mousse into each cup and top with a slice of banana. Sprinkle with a small amount of gingersnap cookie crumbles.
  3. Store in the refrigerator.

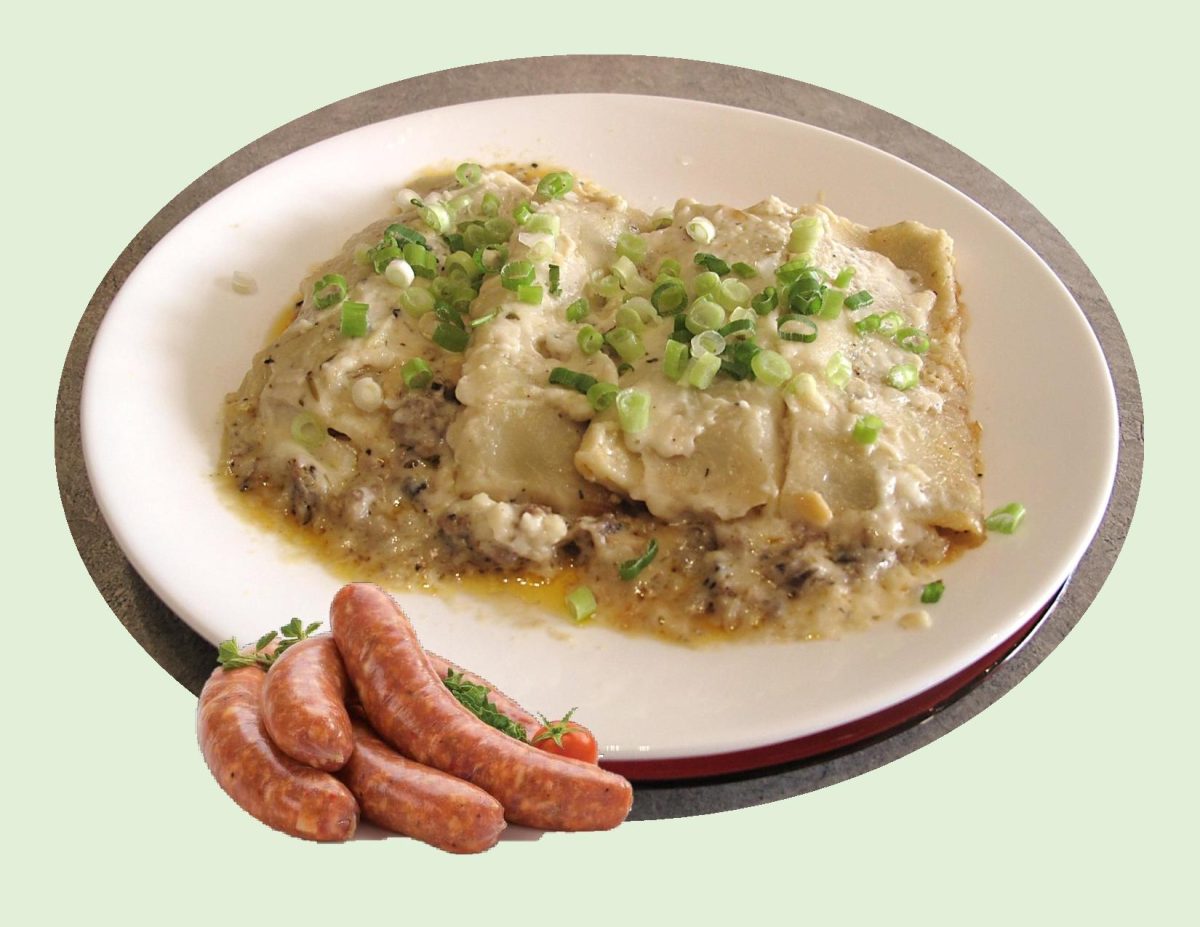
Italian Sausage Cannelloni

Although it might seem that cannelloni have been eaten since ancient times, this is a recent custom. You could not find it in any Catalan cookbook until the start of the 20th century. Cannelloni originally came from Italy, brought to Catalonia at the end of the 18th century by foreign chefs working in hotels.

There is a basic difference between Catalan and Italian cannelloni. With Catalan, the meat is cooked first, then ground, whereas the Italians put the ground meat straight into the cannelloni tubes.

Manicotti is the Italian American version of cannelloni. Both are pasta tubes, but the difference between the two is fairly minimal: Manicotti tubes are ridged, larger and slightly thicker. Cannelloni tubes are smooth, a touch smaller and slightly thinner.

Over the years, no-boil (also called oven-ready) cannelloni tubes have become a permanent fixture on supermarket shelves. Much like ‘instant rice’, no-boil pasta is precooked at the factory. The pasta tubes are run through a water bath and then dehydrated mechanically. During baking, the moisture from the sauce softens, or rehydrates, the pasta, especially when the pan is covered as the cannelloni bakes.

This baked pasta can be stuffed with a myriad of fillings that suit any taste, from chicken with asparagus to shrimp and lentils. Whether you make a meat sauce, a mixture of herbs and ricotta cheese, or fish accompanied by a tomato sauce, the filling can be made the day before. In fact, this will make it even tastier. 

Print Recipe
Italian Sausage Cannelloni
Instructions
Filling
  1. In a large skillet over medium heat, add oil, onion & mushrooms. Cook for 5-10 minutes allowing the onion to soften & mushrooms to release their liquid.
  2. Once most of the liquid has dissipated, add sausage crumbling it with a wooden spoon into small pieces as it cooks. Stir & cook all ingredients until the onion is softened & the sausage is no longer pink & is starting to brown. Set aside.
Béchamel Sauce
  1. Melt butter in a medium saucepan over medium heat. Add flour, paprika & Italian seasoning & stir until well incorporated. Slowly, add milk & whisk together until smooth. Continue whisking until sauce comes to a slow boil & starts to thicken. Stir 1/3 of the sauce into the sausage mixture. (Reserve the other two thirds to pour under & over the cannelloni.) Add 340 gm shredded mozzarella to the sausage & sauce mixture & mix to combine.
Assembly/Baking
  1. Preheat oven to 350 F.
  2. Spread a bit of sauce over the bottom of (2) 13 X 9-inch baking pans. Using a large pastry tube with a star tip, fill (oven ready) cannelloni shells. Nestle the cannelloni in the sauce & cover with remaining sauce.
  3. Top with a combo of 50 gm shredded mozzarella & 25 gm shredded Parmesan. Cover with foil.
  4. Bake for 45 minutes, remove foil & bake another 5 minutes or until cheese starts to turn golden. Remove from oven, let stand 5 minutes then serve.
Recipe Notes
  • As far as the cheese goes in this recipe, use whatever kind you prefer or have on hand. You know it will always be great because 'cheese makes it better' right!
  • This meal freezes well so if it is to big for your family in one setting just freeze the rest for another time.