It’s the fall season, so bring on the chai flavored recipes! Fall can encompass many different flavors including apple, pumpkin, maple, cranberry and ginger just to name a few. To me, baked goods and chai spices are a no-brainer. Traditionally, chai is made into a tea which consists of milk, spices, sweetener, and black tea. Chai spices can be used for so much more than just tea. Once you make your basic chai spice recipe, there are so many ways to utilize it.
Chai can include several different spices. Cardamom is the most common ingredient, followed by a mixture of cinnamon, ginger, star anise and cloves. Pepper and coriander, nutmeg and fennel are also used but they are slightly less common.
In the winter of 2011, Brion and I traveled Turkey for a month. We were meeting with the Trafalgar tour group in Istanbul. Arriving a day early gave us time to ‘snoop’ around a bit. Next to our hotel was a ‘Starbucks’, so we went in. When Brion ordered my coffee, they gave me a ‘Pumpkin Spice Chai Latte’ by mistake. That (pumpkin) chai flavor was just incredible. I have been addicted to it ever since.
A stay in Istanbul would not be complete without a traditional and unforgettable boat excursion up the Bosphorus, that winding strait that separates Europe and Asia. Its shores are a mixture of past and present, grand splendor and simple beauty. Modern hotels stand next to shore-front wooden villas, marble palaces in contrast to rustic stone fortresses and elegant compounds neighboring small fishing villages. Since Turkey actually straddles two separate continents, its culture features strong elements and traditions from both east and west. At that point in time, we found Turkey a relaxed country to travel in which made our time there very enjoyable.
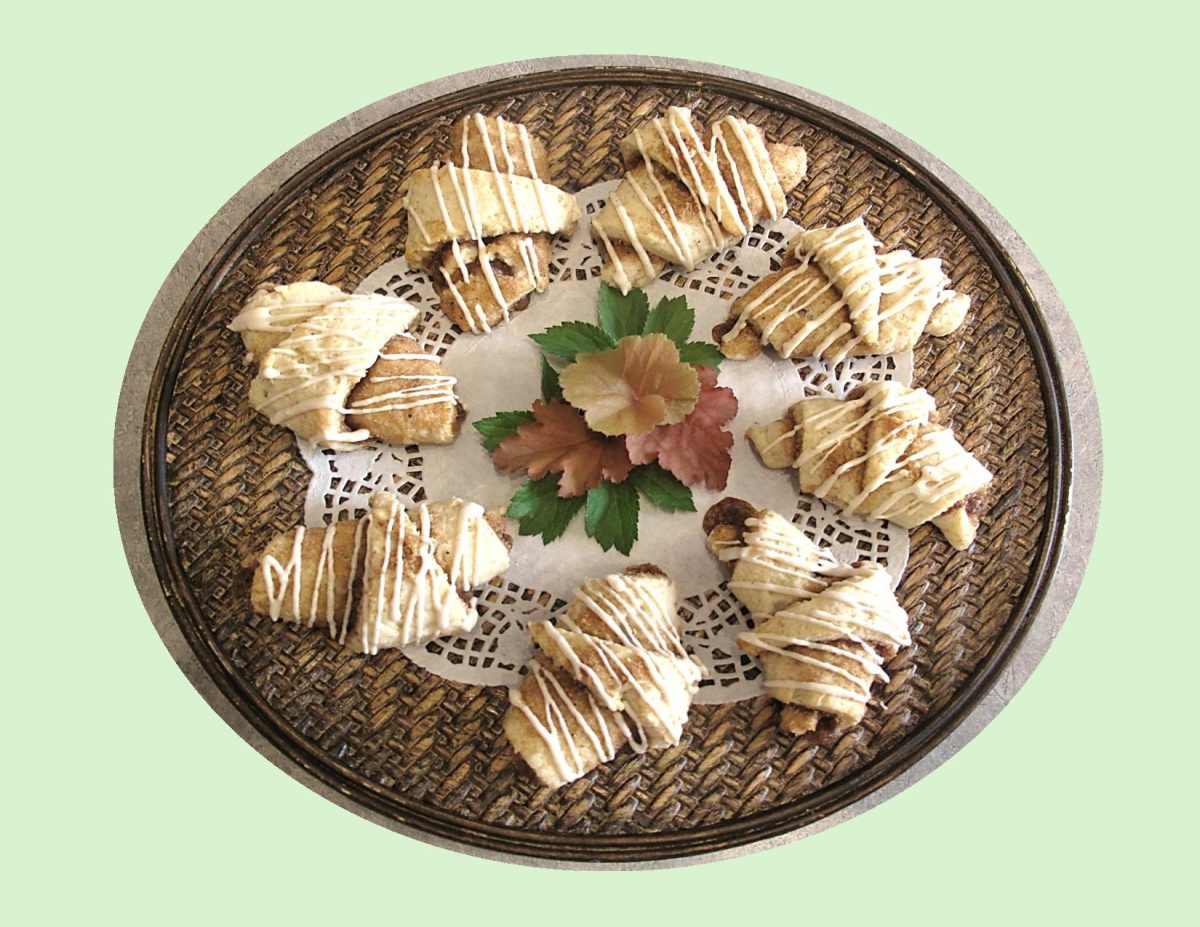
These crescent rolls are a shortcut to making the classic cinnamon rolls using cream cheese pastry and that incredible flavor of the chai spice. Yum!
Print Recipe
Chai Cinnamon Crescents
Votes: 1
Rating: 5
You:
Rate this recipe!
|
|
Votes: 1
Rating: 5
You:
Rate this recipe!
|
Instructions
Chai Spice Filling
Whisk together all chai spices with brown sugar. Set aside.
Crescents
Preheat oven to 350 F. Line a baking sheet with parchment paper.
In a bowl, whisk together flour, sugar, baking powder & salt. With a pastry blender, cut in cream cheese & shortening until mixture resembles coarse peas. Stir in milk. On a lightly floured work surface, knead dough gently about 20 times.
Form dough in a ball then roll out into a 14-inch circumference. Spread butter over the surface of dough then spread spice/sugar combo (all but 1 tsp needed for drizzle) evenly over the butter.
Cut circle into 12-14 equal wedges. Roll each wedge from the outside edge to form a crescent shape. Slightly curve each one & place on baking sheet.
Bake for about 20 minutes or until pastry is baked. Remove from oven & place on wire cooling rack.
Drizzle
In a small bowl, beat together cream cheese & butter until smooth. Add 1/2 tsp chai spice mix, powdered sugar, salt & vanilla. Beat until well combined then add enough milk to make a drizzle consistency. When crescents are cool, drizzle & serve.
September is the bridge between summer and fall. The beginning of the fall season is just around the corner so it’s time to transition meals between the summer and fall. Turn the oven back on to embrace the changing season. For many, this means baking, but there’s also sautéing and slow roasting, braising and boiling.
It’s National Chicken Month which gives Canadians from coast to coast another reason to celebrate their favorite protein. It’s the time to cook and eat all sorts of chicken dishes in salute of all the hard-working Canadian farm families that raise the chicken we love.
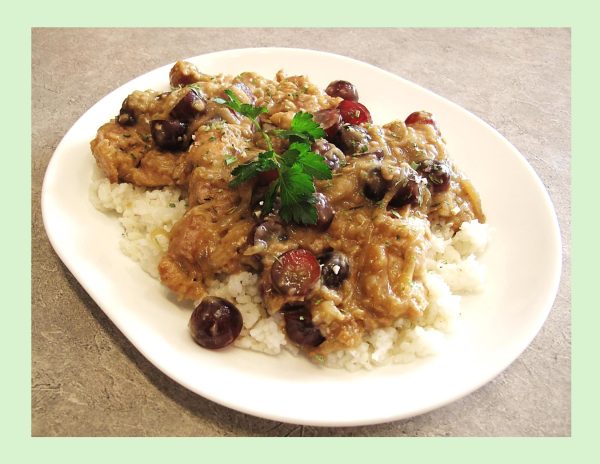
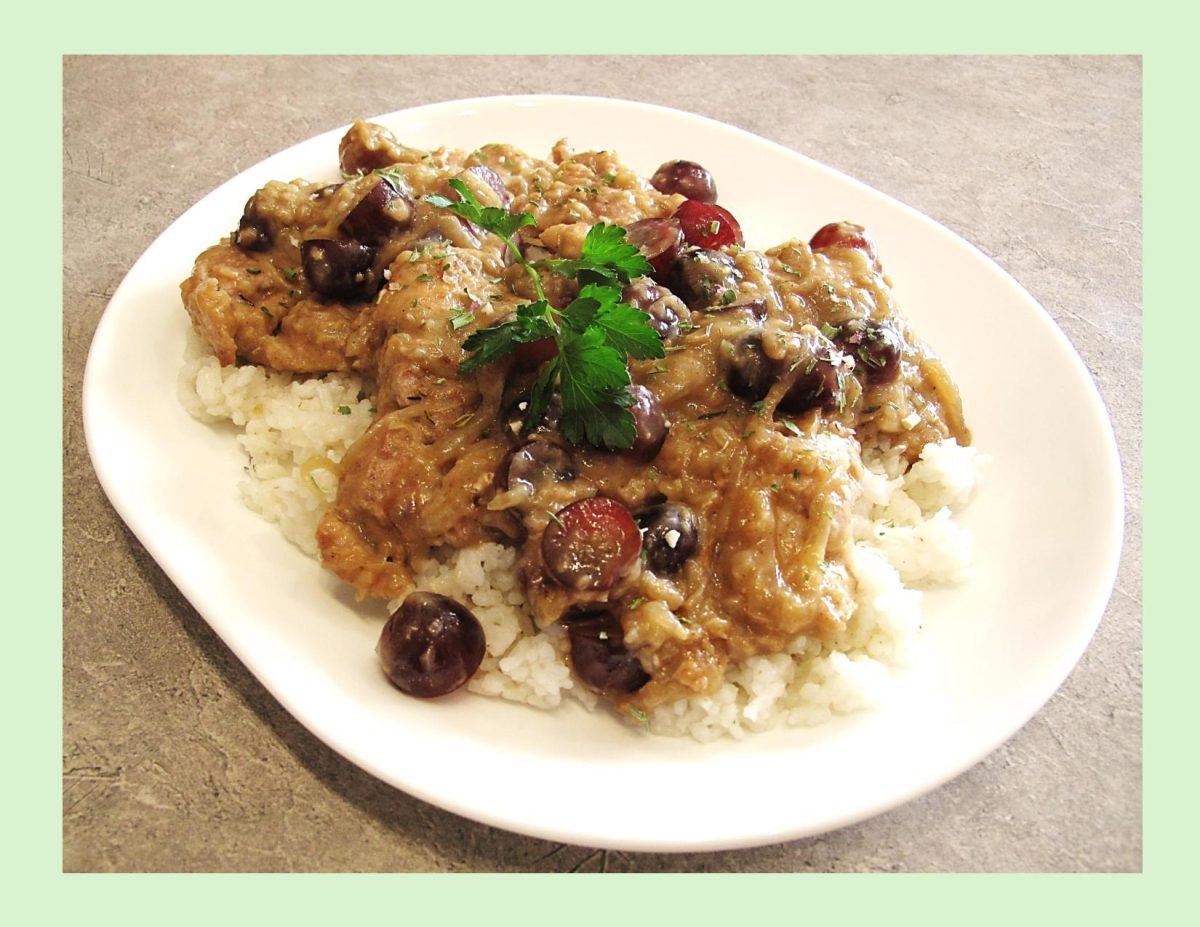
This recipe for skillet chicken with grapes and caramelized onions is an easy recipe that makes a perfect pair for a crisp green salad, quinoa, or fresh bread. Quinoa is still very much a small niche crop in Canada. The search for seed to produce quinoa varieties that can reliably flourish in Canada continues, and it is entrepreneurs as well as research scientists who are leading these efforts. Quinoa is a cool-season crop and is particularly sensitive to heat, which limits the areas of potential commercial production in Canada.
Its popularity skyrocketed in 2006/7 when restaurants began featuring this ancient grain on their menus, and it quickly won over people’s taste buds with its unique flavor and texture profile.
Serving quinoa with this chicken meal really makes it special.
Print Recipe
Skillet Chicken w/ Grapes & Caramelized Onions
Votes: 1
Rating: 5
You:
Rate this recipe!
|
|
Votes: 1
Rating: 5
You:
Rate this recipe!
|
Instructions
Caramelized Onions
Heat butter over medium low heat in a heavy ovenproof skillet. Add the onions cook for 20 minutes or so, stirring occasionally. When the onions are a deep golden color, remove from the pan and set aside.
Chicken Thighs
-
Combine the flour, salt, chili powder, thyme, allspice, & black pepper. Dredge each piece of chicken in the flour mixture, shaking off the excess.
In the same pan as the onions, heat the oil over medium high heat. Add each piece of chicken & fry for a few minutes until golden brown; flip & cook for a few more minutes. Transfer to a plate (it will not be fully cooked at this point, just browned – it will finish cooking in the oven).
Turn the heat down & let the oil cool off a little bit. Add the wine – this will definitely bubble & sizzle! Add the broth & simmer until the mixture is thickened slightly. Add the onions & chicken to the pan. Bake for about 20 minutes.
Remove from the oven, add the grapes, baste with the sauce & bake for another 5-10 minutes. Garnish with parsley and serve.
Recipe Notes
- To make without using wine:
- Use 3/4 cup chicken broth (instead of the 1/3 cup wine & 1/4 cup broth). Add remaining flour (leftover from dredging chicken).
- Make a roux with excess oil in skillet & dredging flour.
- Add chicken broth & cook until a sauce forms.
- Add the onions & chicken to the pan & bake as directed above.
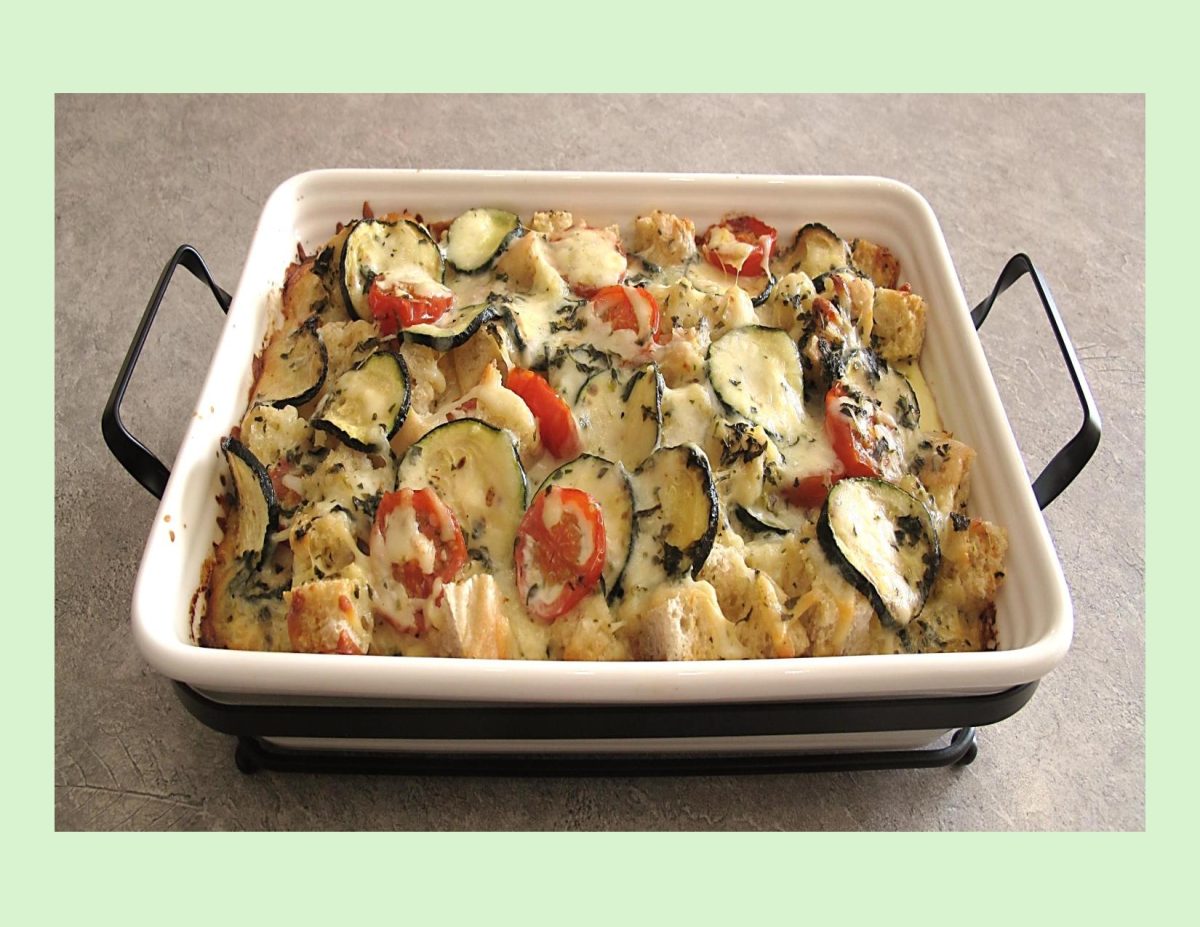
CELEBRATING LABOR DAY!
It’s hard to believe Labor Day weekend is here already! In our part of the world, it signals the last of those coveted summer days. Celebrated in Canada as a national statuary holiday weekend. Labor Day weekend gives us an opportunity to enjoy family & friends before summer is officially over.
Part of Canada’s appeal is its four seasons: Winter, Spring, Summer & Fall. We are entering the season of the fall harvest and the leaves on the trees begin their transformation to stunning shades of orange, red and yellow.
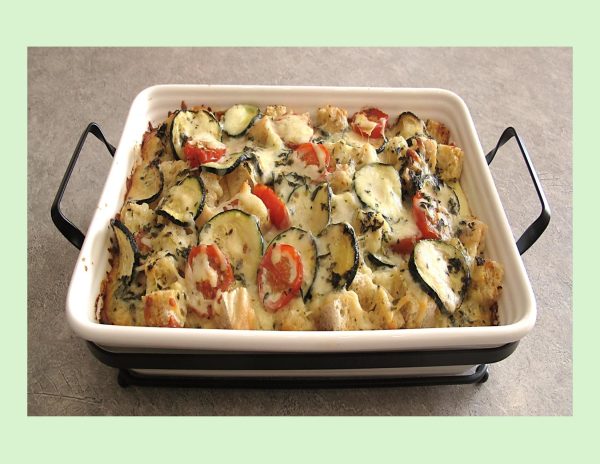
When I was giving thought to food for this day, a nice seasonal vegetable strata came to mind. For most families there’s ‘places to be and things to see’ on this day so why not start it with a breakfast dish that can be prepared the day before and baked in the morning.
Unlike quiche and frittata, strata originated in North America. The first known recipe, the cheese strata, dates back to 1902 and contains bread, white sauce and cheese.
A strata is usually a savory egg-bread casserole that’s baked in the oven or microwaved. Strata’s can be made with a variety of fillings including meats, cheese, vegetables or fruits. Usually, the bread and fillings are layered in a casserole dish with the egg mixture poured over top. The dish can be prepared the night before (or at least 2 hours before cooking) to allow time for the bread to soak up some of the egg mixture. What you’re left with is a fluffy, bread-pudding-like meal that’s completely customizable using your favorite ingredients.
Hopefully this strata will be a good choice for your family on this holiday.
Print Recipe
Tomato Zucchini Strata
Votes: 1
Rating: 5
You:
Rate this recipe!
|
|
Votes: 1
Rating: 5
You:
Rate this recipe!
|
Instructions
In an extra-large skillet, melt butter over low heat. Add tomatoes & zucchini. Cook for 5 to 7 minutes, stirring occasionally, or until tomatoes begin to lose their firm round shape; remove from heat.
Place half of the bread cubes in a greased 2-quart baking dish. Top with half of the zucchini mixture & half of the cheese. Repeat layers with remaining bread cubes, zucchini mixture & cheese.
In a large bowl, whisk together eggs, milk, parsley, basil, chives, garlic salt & pepper. Carefully pour egg mixture evenly over bread mixture in dish. Using the back of a spoon, gently press down on layers. Cover and chill at least 2 hours or up to 24 hours.
-
Remove casserole from fridge. Bake for 60 minutes or until puffed, golden & set. Let stand for 10 minutes before serving.
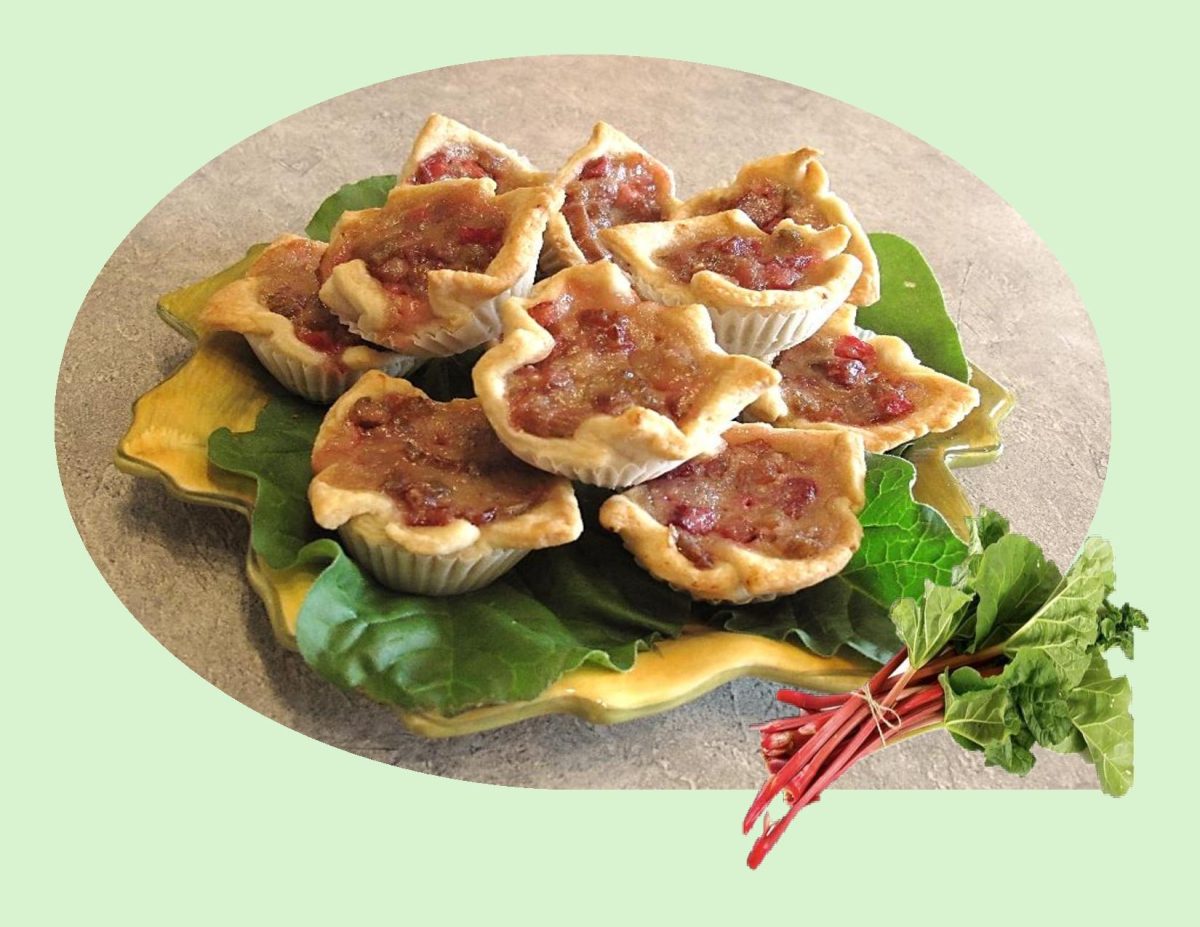
The butter tart is probably the most recognizably Canadian dessert there is. But in order to understand the significance of the butter tart, you first need to know the confection’s history. While butter tarts are known around the world as the quintessential Canadian dish, the invention of this confection actually goes back to before Canada was even a country. During a ten-year period, from 1663 to 1673, at least 770 young women were sent to Quebec by Louis XIV to help with colonization. These single ladies were sent with dowries to help boost settlement in New France.
These King’s Daughters (or Filles du Roi) as they came to be known did what any resourceful baker would do: they made do with what they had. With the abundance of new food, they created the butter tart forerunner with baking ingredients readily available like maple sugar and dried fruit. This ancestral tart later led to variations like tarte au sucre and the butter tart.
The first documented recipe for butter tarts was published in The Women’s Auxiliary of the Royal Victoria Hospital Cookbook in 1900, in Barrie, Ontario. Mrs. Malcolm MacLeod’s recipe did not include raisins, but currants paired with that ooey-gooey filling we know and love today.
Throughout the early 1900s butter tarts gained popularity and variations were published in Toronto’s Daily News and included in the 1911 Canadian Farm Cookbook. Butter tarts became all the rage in the 1920s and 1930s, and by the 1980s readers were desperately writing The Vancouver Sun’s fictional baking expert, Edith Adams, for a copy of her recipe. Over the past 350 years, they have become ingrained in the Canadian culinary psyche.
The butter tart is evolving in response to diversifying tastes. At butter tart festivals across the country, you’ll find all sorts of spins on the treat — pumpkin cheesecake, chai spice, coconut, blueberry, saskatoon and even a Nanaimo bar butter tart to name a few.
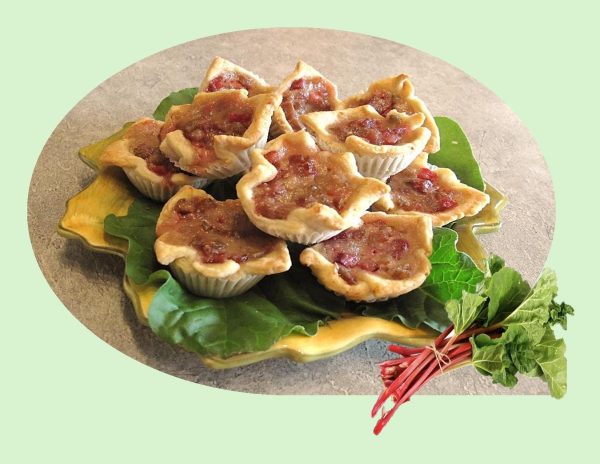
That brings us to today’s recipe – Rhubarb Butter Tarts! Canadian butter tart filling can be too sweet for some on its own but add some tart rhubarb and it becomes a well-balanced sweet and sour filling. Amazingly good!
Print Recipe
Rhubarb Butter Tarts
Votes: 1
Rating: 5
You:
Rate this recipe!
|
|
Votes: 1
Rating: 5
You:
Rate this recipe!
|
Instructions
Pastry
In a food processor, pulse flour, sugar, salt & baking powder to blend. Add butter & pulse about 3-4 times, until butter is in pea-size pieces. Sprinkle in the ice water; pulse another 4 times. Turn dough out on a lightly floured work surface & knead gently a few times to form a disk. Wrap in plastic wrap & refrigerate for at least an hour.
Filling
Pour boiling water over rhubarb; let stand for 5 minutes. Drain.
Add butter, sugar, salt & syrup to the rhubarb. Stir thoroughly until butter is melted & sugar is dissolved. Add egg & vanilla.
Assembly/Baking
-
On a lightly floured surface, roll out chilled pastry to an 1/8-inch thickness. Cut into 24 squares. Place pastry squares into 24 mini tart pan cups with corners hanging over the sides. Divide rhubarb filling between tart shells.
Bake for about 20 minutes or until slightly golden. Cover with foil if they start to brown too quickly.
Remove from oven & allow to cool to set up.
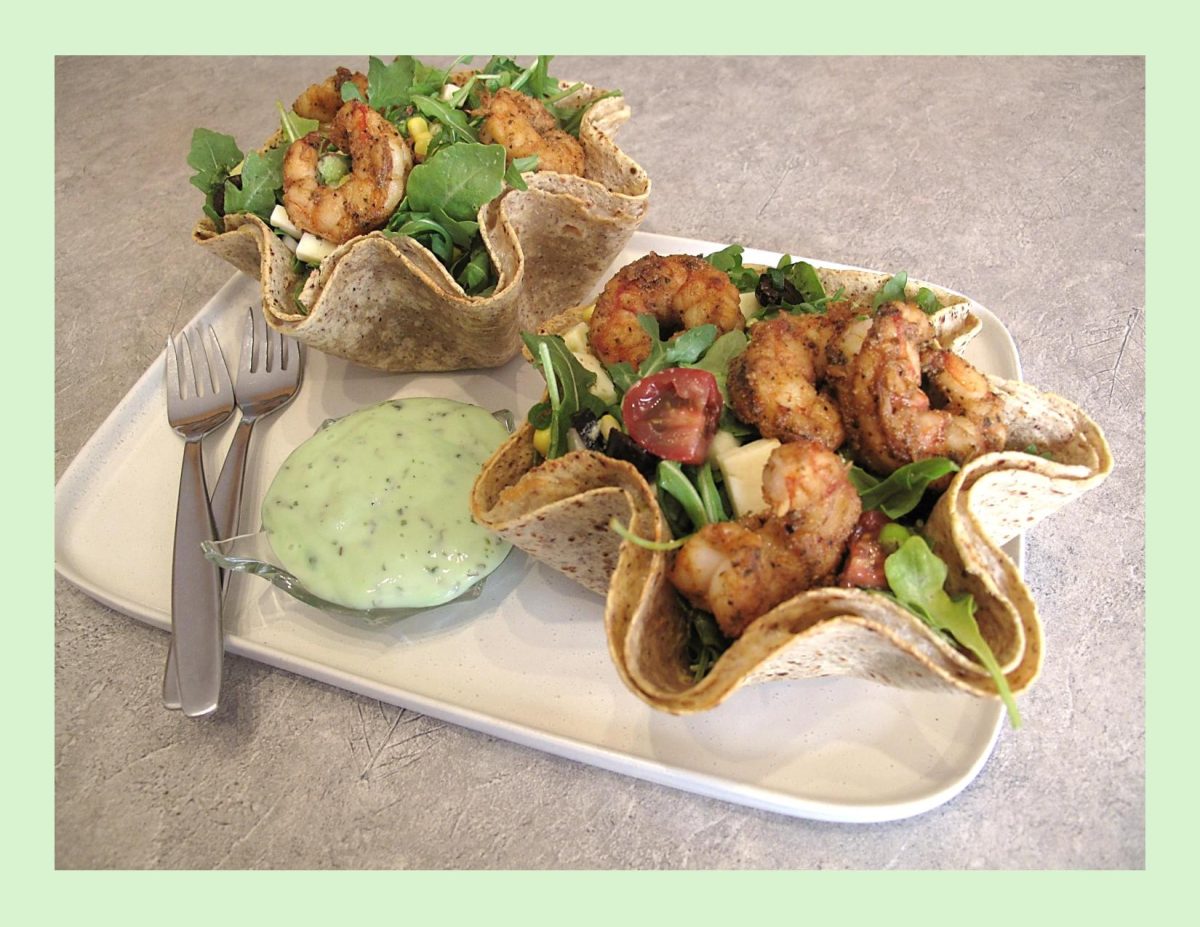
When you think of Mexican food you probably think of the standard burritos, nachos and quesadillas. While those dishes are definitely tasty why not do the summer ‘thing’ and incorporate these ingredients in a salad.
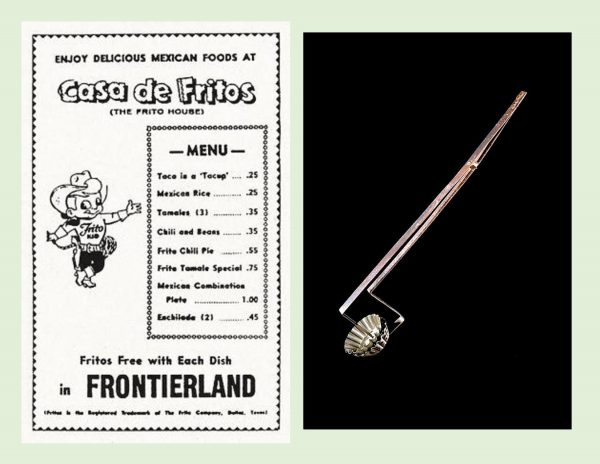
The idea of a full meal salad has always appealed to me. Of course, there are many of these using a variety of ingredients. Probably one of the most popular was the taco salad. The earliest record of it dates back to the 1960’s with its predecessor being the small teacup sized ‘Tacup’. It consisted of beef, beans, sour cream and cheese, served in a small ‘bowl’ made entirely of a Fritos tortilla.
The taco in a Tacup was invented by Charles Elmer Doolin, the founder of Fritos (tortilla chips). He created a device that looked like tongs but with two tart molds at the end of each tong. One mold would fit within the other mold with a tortilla sandwiched between them. The scalloped-edged shell was dipped into hot oil. Holes in the bottom mold exposed the tortilla to the hot oil, enabling it to cook evenly.
Tacups were first served in Dallas, Texas in the early 1950’s and by 1955, he was selling them in Fritos’ flagship restaurant, ‘Casa de Fritos’, at Disneyland in Anaheim, California. It became popular enough that the Tacup was made bigger and served as a full, main-dish sized salad bowl.
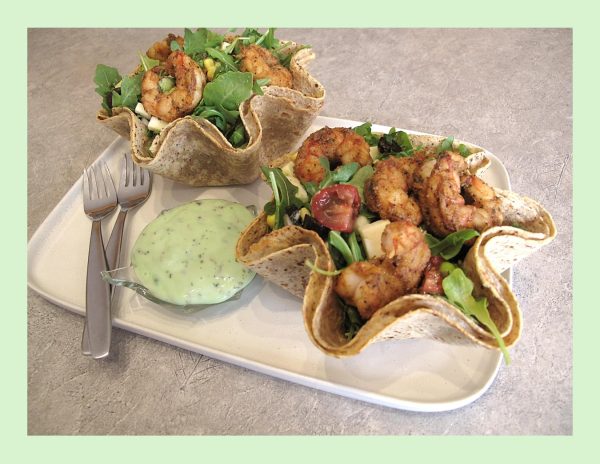
Today’s salad is a satisfying meal, a seriously feel-good dinner salad that’s crisp, spicy, and fresh all at once. Tacos de camarones (‘shrimp tacos’) originated in Baja California in Mexico. But these shrimp tacos in salad form gives you that full meal deal. All the very best elements —seasoned shrimp, healthy fresh veggies, in an edible tortilla bowl with a homemade cilantro lime dressing.
Print Recipe
Shrimp Taco Salad
Votes: 1
Rating: 5
You:
Rate this recipe!
Ingredients
Creamy Cilantro Lime Dressing
Ingredients
Creamy Cilantro Lime Dressing
|
Votes: 1
Rating: 5
You:
Rate this recipe!
|
Instructions
Cilantro Dressing
In a food processor, place the cilantro, garlic, avocado, lime juice, honey, coriander & salt. Pulse to combine. With the machine is running, pour in the olive oil & process until smooth.
Shrimp
In a medium bowl, add all marinade ingredients (except shrimp) & blend well. Add shrimp tossing well to coat. Set aside to marinate for 15 minutes. In a saucepan, melt a Tbsp butter then sauté shrimp over medium-high heat for 5 minutes or just until shrimp is cooked.
Salad Ingredients
In a saucepan, fry bacon until cooked but not too crisp, drain on paper towel & chop. Drain canned or cook fresh corn on the cob & remove kernels from cob. Peel, pit & cube avocado. Sprinkle a bit of lime juice on it to keep it from going brown. Halve grape tomatoes. Slice green onions, chives & dill. Drain sliced black olives. Cube cheese.
Tortilla Bowls
-
Brush inside of 2 heat resistant glass bowls with oil. Place one tortilla in each bowl so that the shape more or less adheres to the bowl. Line each tortilla with cheese slices then place a second tortilla on top.
Place the bowls with the layered tortillas in the oven & bake for 7 minutes. Remove the bowls from the oven & allow to cool before removing the 'edible tortilla bowls'.
Assembly
Place tortilla bowls on serving plates. In a large mixing bowl place shrimp & all salad ingredients. Toss gently, then divide between tortilla bowls. Drizzle with cilantro dressing (or dressing of choice) & serve.
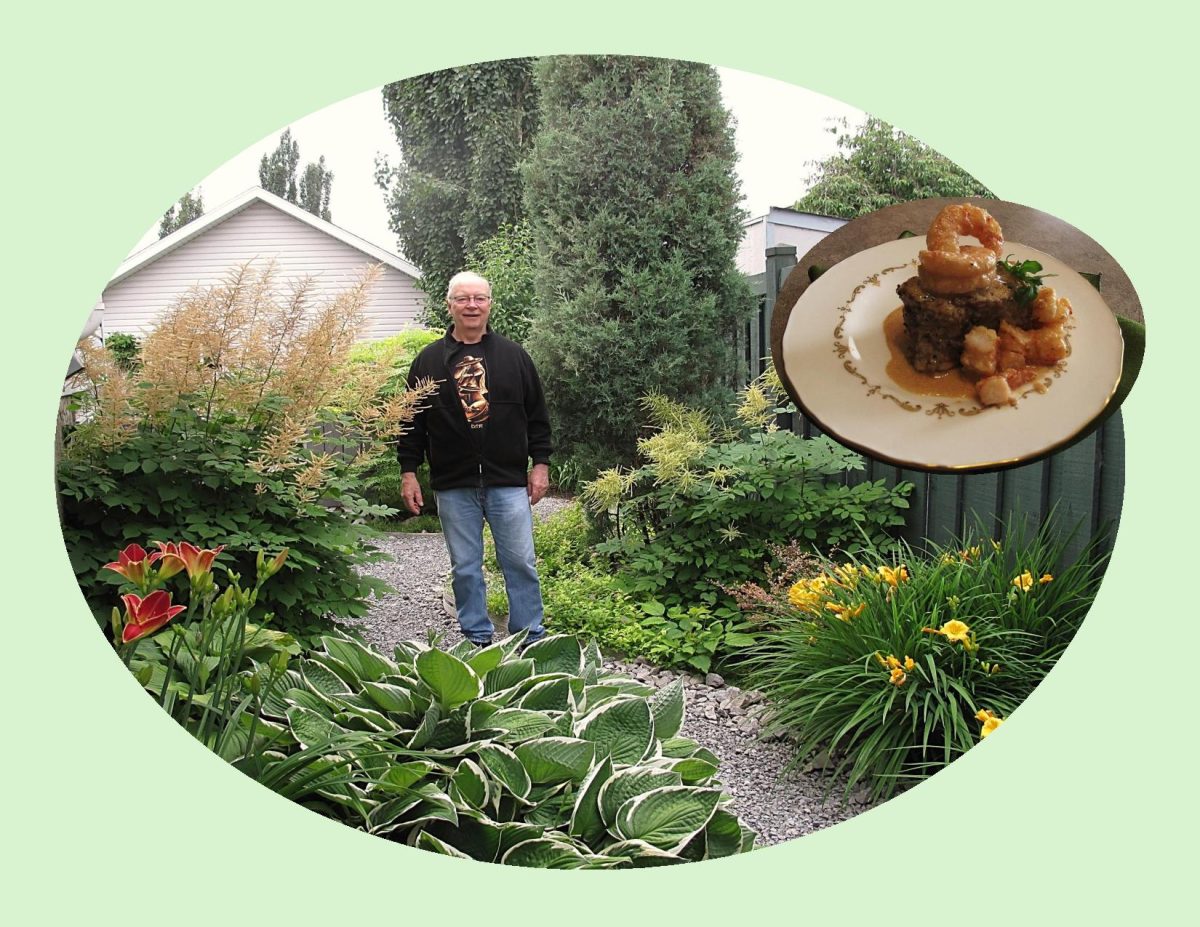
Today, I have a couple of things I’d like to share with you. First of all, it’s my husband Brion’s birthday. With summer in full swing, our back yard is bursting with all its glorious flowers and foliage and even though he would rather I didn’t add his picture to my blog today, I wanted to share this garden view with you. I think it’s a great backdrop for a birthday picture, right!
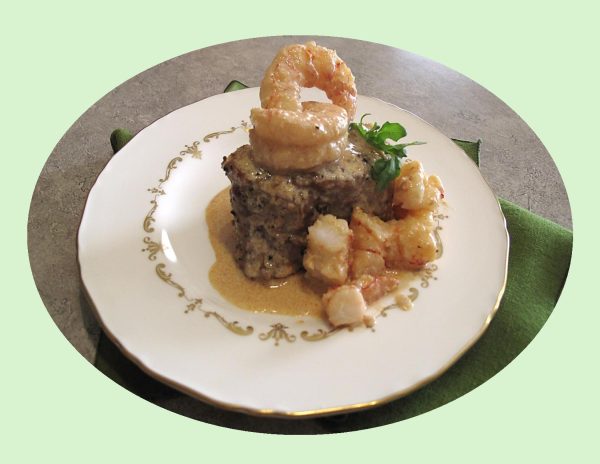
Going ‘out’ to a restaurant for a special occasion has never been something that really appealed to us, especially me since my life’s work was in the food service industry. I find it is so nice to just have a specially prepared meal at home on these occasions. This year I decided to surprise Brion with an old favorite – surf & turf!
Sometimes affectionately known as ‘reef and beef,’ surf and turf is a main course that brings together the best of both worlds: seafood and red meat. While the classic combo features lobster and filet mignon, modern variations found on steakhouse menus might include prawns, shrimp, squid, or scallops.
Back in late 19th-century America, there existed glamorous establishments known as ‘lobster palaces.’ These were the go-to spots for the nouveau riche—those newly wealthy individuals eager to flaunt their prosperity. At these lobster palaces, patrons reveled in large portions of both lobster and steak, creating a decadent dining experience. However, like all trends, this one eventually waned, and by the 1920s, the lobster-steak combo had fallen out of favor. Fast-forward to the early 1960s, and surf ‘n’ turf made a triumphant comeback. Suddenly, the middle-class ‘continental cuisine’ of the ’60s and ’70s embraced this luxurious pairing, with frozen lobster and steak taking center stage.
As we grow older, it becomes clearer every day what a special privilege it is to simply have each other to share life with. The little everyday things seem to take on a much greater importance. Maybe it’s the state of our world at this time that has made it very clear not to take anything for granted. Throughout our married life Brion has always gone above and beyond to look after us. I am grateful to have the privilege of such a loving and caring husband.
HAPPY BIRTHDAY, MY LOVE … YOU’RE THE BEST!
Print Recipe
Filet Mignon w/ Shrimp & Lobster Cream Sauce
Votes: 1
Rating: 5
You:
Rate this recipe!
|
|
Votes: 1
Rating: 5
You:
Rate this recipe!
|
Instructions
Steak
In a zip-lock plastic bag, place oil, steaks & Montreal steak spice. Close bag & shake to combine contents well. Set aside to marinate while preparing the sauce.
Lobster & Shrimp
In a skillet, heat butter & olive oil over medium heat. Sear prepared shrimp for 2 minutes on one side, then flip & sear for 1 minute more. Remove & set aside. Add 1 more Tbsp butter to the skillet, then add prepared lobster tails. Sauté lobster until it turns pink in color. This shouldn't take any longer than 3 minutes. Remove & set aside.
Cream Sauce
Add 6 Tbsp of butter to skillet. When butter starts to melt, add white wine & clam juice. Stir in salt, pepper, garlic & onion powder & smoked paprika. Reduce heat to medium-low. Simmer for 10 minutes, stirring occasionally to prevent boiling over. Sauce will reduce & thicken. Taste & add more salt if you feel it needs it.
Stir in shrimp & lobster & let simmer for an additional 1-2 minutes. Keep hot while you cook the steaks.
Cooking/Serving
Turn on the broiler. Heat a cast iron pan to a very hot temperature. Once the pan is hot add marinated steaks & sear for approximately 3-5 minutes on each side depending on the thickness of steaks.
Once steaks have seared, place under the broiler for approximately 4-5 minutes per side or to your desired level of doneness. Transfer steaks to serving plates & generously spoon the shrimp/lobster cream sauce over each filet mignon steak, allowing the flavors to meld together.
Garnish with a sprig of fresh herbs & serve immediately. We enjoyed our steaks with mashed potatoes & roasted asparagus.

These chicken and mushroom crepes are a fantastic summer recipe to serve for lunch or a fancy brunch. The best part about it is most of it can be made the day ahead, leaving just the bechamel sauce, assembly, and baking to the day of your event.
Béchamel sauce is a key ingredient in hundreds of recipes, from simple dishes like creamed peas to elegant cheese soufflés. At one time considered a sauce reserved for the well-do-to, Béchamel today is probably the most frequently made sauce in the Western world.
Also known as white sauce, Béchamel is an ‘ingredient’ sauce – a sauce made to use in another dish or as a foundation for a more complex sauce. It is composed of whole milk heated and thickened with a roux.
The popularity of Béchamel sauce has spread far and wide, and today there are many variations of this sauce found throughout the world.
Print Recipe
Chicken & Mushroom Crepes
Votes: 1
Rating: 5
You:
Rate this recipe!
|
|
Votes: 1
Rating: 5
You:
Rate this recipe!
|
Instructions
Chicken
Preheat oven to 375 F. Place chicken on a rimmed baking sheet fitted with a rack & roast for 35-40 mins or until the chicken is cooked through. Set aside to cool. Then shred of meat with forks & transfer to a bowl. Set aside until ready to use. This can be done in advance.
Crepes
Combine flour & salt together in a large bowl then add the milk slowly, whisking until combined. Add the beaten eggs, whisking until smooth. Then whisk in the melted butter & the dill.
Heat a non-stick 12-inch skillet on medium-high heat. Grease the pan with a paper towel with canola or vegetable oil. Once hot pour 1 ladle full of batter into the pan & swirl the batter around until it covers the bottom of the pan. Allow to cook until set and edges start to turn golden brown.
Slide a thin spatula under the crepe enough to grab hold of it & flip it quickly with your hands. Cook on the other side for 30 seconds more. Slide the crepe off the pan onto a cutting board. Repeat the process until all batter is used. Allow the crepes to cool while you prepare the filling.
Filling
In a large skillet melt the butter, add the leeks & cook until they are soft & fragrant. Then add the mushrooms, Worcestershire sauce, salt & pepper to taste & freshly chopped parsley. Transfer mixture to a bowl & set aside to cool.
Béchamel Sauce
Melt the butter in a deep skillet. Once foamy add the flour, whisking together until a paste is formed. Slowly add the milk, whisking until combined. Simmer mixture until thickened, then add 1 minced garlic clove & season with salt & pepper to taste.
Assembly
-
Place crepe over a small gratin dish, fill with 2 Tbsp of the mushroom mixture, top with ¼ cup of shredded chicken. Ladle 2 Tbsp of béchamel sauce on top. Roll crepe & drizzle more béchamel on top. Sprinkle with gruyere cheese & paprika.
Bake for 10-12 mins. Then place under the broiler for another 1-2 minutes. Garnish with fresh parsley.

While I’ll never grow tired of the classic pairing of strawberries and rhubarb, I love rhubarb too much to let it simply be a sidekick to those sweet berries. Not only can it hold its own, but it also begs to be matched up with many other flavors that give it new life.
Eating seasonally doesn’t have to be difficult when it tastes so delicious. Finding inventive ways to incorporate locally grown, seasonal fruits and vegetables into breakfast, lunch, and dinner dishes is actually a very easy task.
When making desserts, chocolate and rhubarb bring very different flavors to the table. The result makes a perfect balance. High-cacao chocolate is rich, subtly sweet, and creamy. Fresh rhubarb, meanwhile, is tart and comes into its own when offset by a dash of sweetness.
Celebrate rhubarb season with a stellar dessert like fudgy rhubarb brownies.
Print Recipe
Chocolate Rhubarb Brownies
Votes: 1
Rating: 5
You:
Rate this recipe!
|
|
Votes: 1
Rating: 5
You:
Rate this recipe!
|
Instructions
Preheat oven to 375 F. Line an 8 x 8-inch baking pan with parchment paper.
In a medium-sized bowl, whisk sugar, butter, eggs & vanilla.
In a large bowl, whisk flour, cocoa powder, baking powder & sea salt.
Stir the wet ingredients into the dry ingredients & mix until they are just incorporated. Add the rhubarb, chocolate chips & nuts. Mix only until they are combined. The batter will be quite thick. Pour batter into baking pan & spread it out so that it is even.
Bake for 20-25 minutes or just until a toothpick inserted into the middle comes out clean. DO NOT OVERBAKE.
Remove brownies from the oven & allow to cool for at least 10 minutes. Slice into squares.


