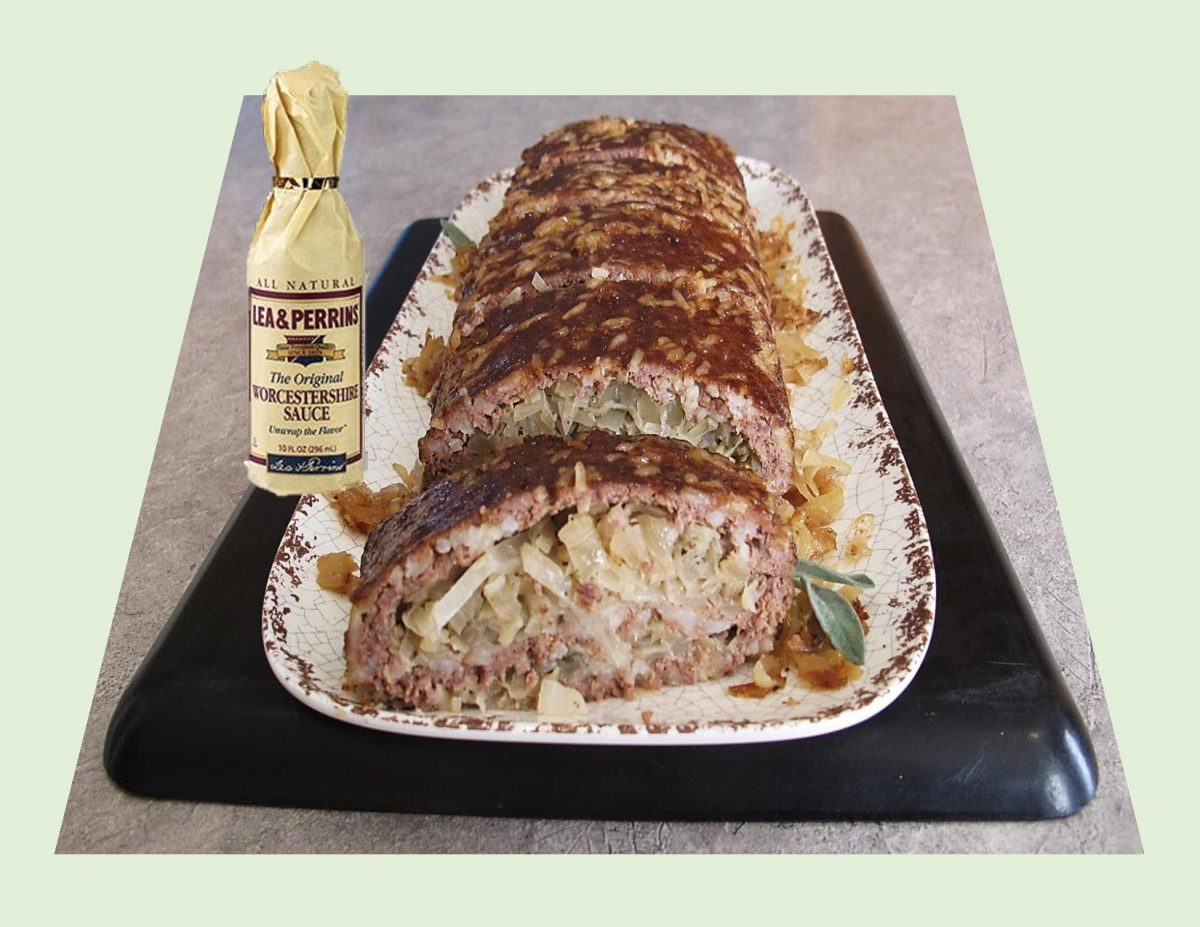
Some years ago I acquired a great little book from the Lea & Perrins Company. The main focus of the book was to promote their Worcestershire Sauce.
Worcestershire sauce was created in the heyday of the great English table sauces. In 1838, the commercial Worcestershire sauce was ‘born’. The story of the origins of the recipe for the sauce is entangled in a web of legends, but the common thread is that its place of origin was India. Versions of how the recipe came to England usually credit a member or members of the prominent Sandys and/or Grey families. Typically the stories indicate an effort to reproduce a Bengali recipe for a sauce with the assistance of chemists (pharmacists) John Wheeley Lea & William Henry Perrins of Worcester. In most editions of the tale, the first attempt is a failure, but the results are stored away; fermentation occurs and a later tasting reveals the delightful concoction now enjoyed all over the world.
The exact recipe is ‘secret’, but it is known to include both common and exotic ingredients: anchovies, shallots, chilies, cloves, tamarinds (brown pods from a tropical tree), garlic, sugar, molasses, vinegar and salt. There are about as many ways to incorrectly pronounce Worcestershire as there are ingredients in the sauce. The tremendous depth of flavor of the sauce is the result of many different ingredients being fermented individually, blended and fermented again.
Worcestershire sauce contains something for everyone …. sweetness, acidity and saltiness. This probably explains the reason we still see it on our grocery shelves 184 years after it was first created.
I’ve used this simple little recipe from the Lea & Perrins book numerous times and it always tastes great.
Print Recipe
Beef Cabbage Rolls - Reconstructed
Votes: 1
Rating: 5
You:
Rate this recipe!
|
|
Votes: 1
Rating: 5
You:
Rate this recipe!
|
Instructions
Cook cabbage & rice: set aside. Sauté chopped onions; set aside.
In a large bowl, combine beef, cooked rice, salt, Worcestershire sauce, egg & catsup (or BBQ sauce).
-
Roll out meat mixture between 2 sheets of parchment or foil paper into an oblong 1/2-inch thick. Spread meat with cabbage & onions & sprinkle with Italian seasoning.
Using the help of the bottom sheet of paper, roll up in jelly-roll fashion. Place on greased shallow baking pan.
Bake for 40-50 minutes. Slice & serve as is or with a sauce of your own choice.
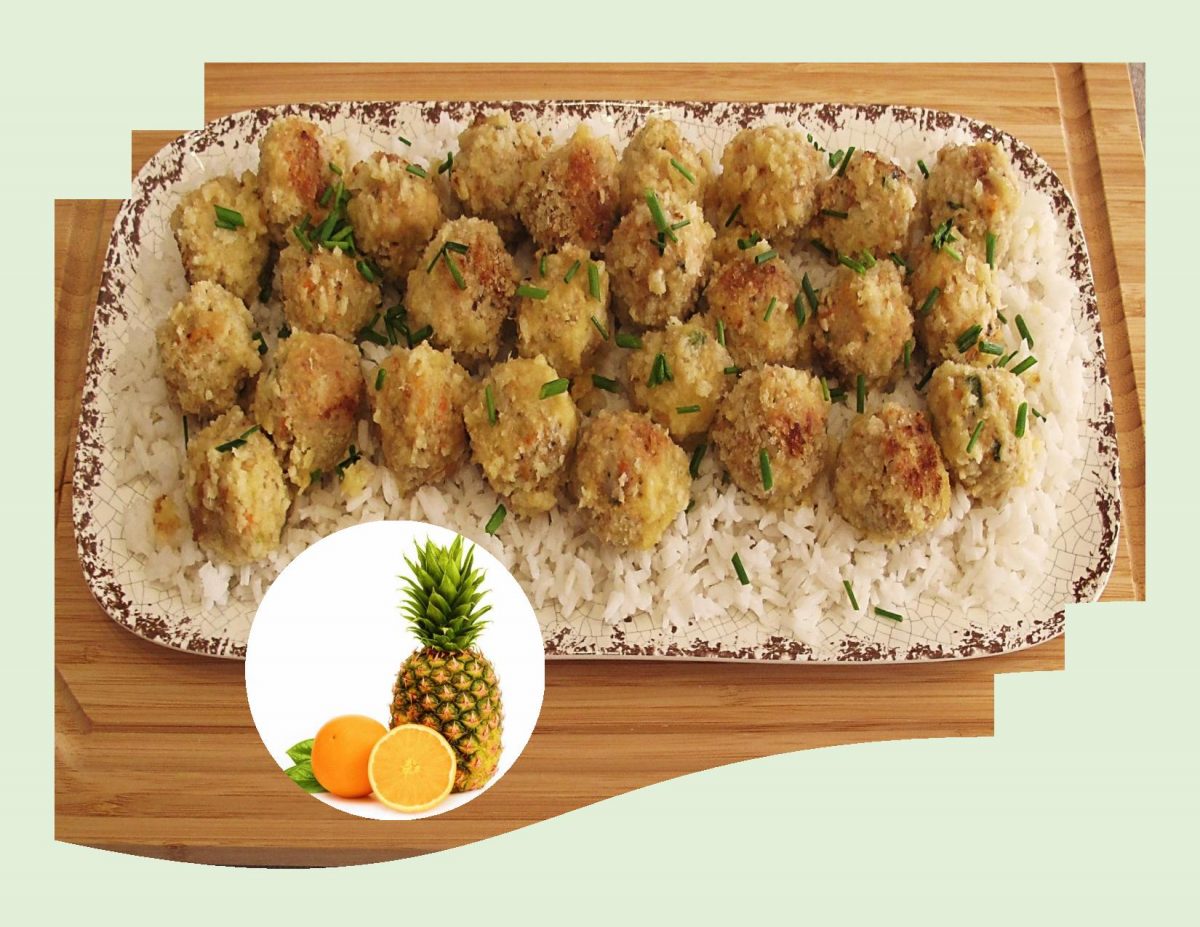
Salmon croquettes are basically a version of a salmon cake, salmon balls or patties and can be fried or baked. They were originally made of beef, probably leftovers that needed to be used up. Croquettes originated in France in about 1898 by the founder of classical French cuisine, Escoffier. As Escoffier’s chefs started to travel throughout the world, they took the recipe with them to other cultures where it was transformed based on local cuisines. From the original beef croquette, it branched out into salmon croquettes, chicken, vegetarian, and many other versions.
There are many variations of ‘croquettes‘ on the market, and just about every culture has developed their own recipe. Constantly, new recipes are formulated and something new is invented and created. With the input of different cultures, the original recipe has taken itself into many directions, different applications and ingredients. Very often salmon croquettes (cakes, balls or patties) are made with canned salmon though there are quite a few newer recipes that use fresh salmon that has been either chopped finely or ground to mold into the various shapes.
I think, using a zesty orange-pineapple glaze is the perfect compliment to these baked salmon balls.
Print Recipe
Baked Salmon Balls w/ Orange Pineapple Glaze
Votes: 1
Rating: 5
You:
Rate this recipe!
|
|
Votes: 1
Rating: 5
You:
Rate this recipe!
|
Instructions
Salmon Balls
-
If using canned salmon, drain & flake well. If using fresh salmon, brush with olive oil and season lightly with salt and pepper. Grill for about 6 minutes or bake wrapped in foil at 350 F. for approximately 10 minutes. When cool, flake salmon. Add carrot, green onion, potatoes, tartar sauce, egg, lemon juice, Worcestershire sauce, cilantro paste, Old Bay Seasoning, salt & pepper. Combine well.
Using a small scoop (about 1/2 oz size), measure salmon mixture out into palm of your hand & gently roll into balls. Mixture should make about 32 balls.
Roll salmon balls in Panko crumbs & place on a well buttered or sprayed baking sheet. Lightly spray tops with spray as well.
Bake about 30-40 minutes, turning halfway through. Remove from oven.
Glaze
Place all glaze ingredients into a small saucepan over medium heat. Stir gently & simmer for 15-20 minutes or until liquid begins to thicken slightly & reduces by half.
Drizzle over salmon balls or serve on the side. These salmon balls are nice served with rice & a steamed veggie.
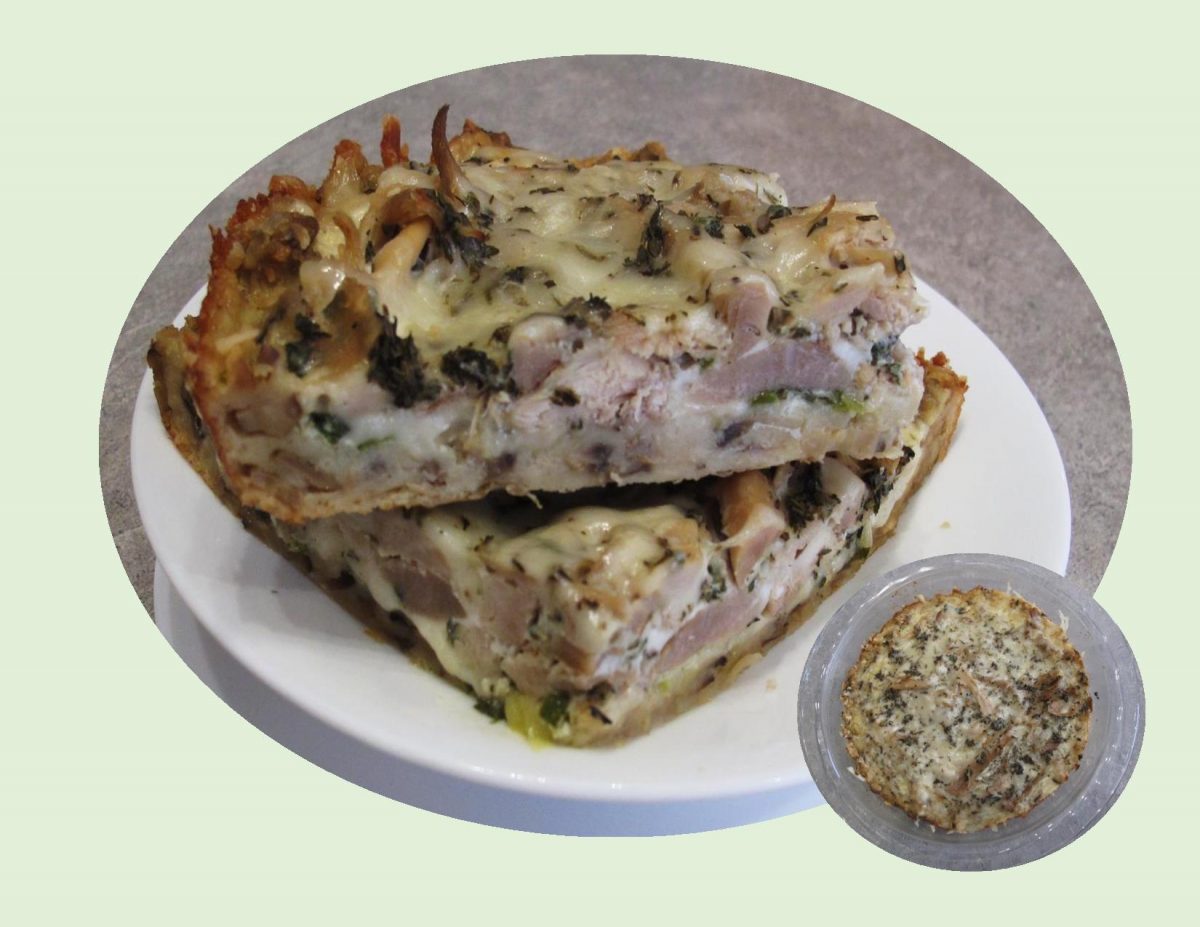
Quiche, the great savory dish that originated in Germany, was perfected by French cooks who went on to create one of the most popular quiche in the world called the quiche Lorraine. Since then, many new variants of the quiche have been added. But all of those creative modifications involved mainly the filling, and the crust had that same nice and familiar, but plain taste. For that reason, many cooks didn’t bother with the crust dough preparation; instead they would buy good frozen puff pastry and concentrate on the filling.
Enter the unique mushroom crust quiche! To my knowledge, the first publication of the recipe was in the mid 1970’s in ‘Sunset’s Favorite Recipes’ cookbook magazine. The main advantage of this recipe is that the mushroom crust is nice and light as well as it goes with almost any quiche filling.
For a crunchier crust, use wheat thins instead of saltines, regular onions instead of green or change up the spices. Use your choice of cheese, instead of Swiss go with Monterey Jack, gruyere, Jarlsberg or cheddar. Add bacon, sausage or some pulled turkey as I did. Of course, nothing wrong with just using veggies and cheese …. endless possibilities!
Print Recipe
Mushroom Crust Quiche
Votes: 2
Rating: 5
You:
Rate this recipe!
|
|
Votes: 2
Rating: 5
You:
Rate this recipe!
|
Instructions
In a skillet, melt 3 Tbsp butter over medium heat. Add mushrooms & garlic; cook until soft. Stir in crushed crackers. Remove from heat & press the mushroom mixture evenly over the bottom of a well-greased 8-9-inch pie pan.
In the skillet, melt 2 Tbsp butter. Add green onions & cook until soft; spread over mushroom crust.
-
Sprinkle about 3/4 of the grated Swiss cheese over the onion then top with the cooked, pulled turkey.
In a small container, whisk together eggs, milk, spices, salt & pepper. Combine the remaining Swiss cheese with the parmesan & sprinkle it over the turkey. Pour egg mixture over all & bake for about 30 minutes or until set. Allow to stand for a few minutes before serving.

We tend to believe that if something takes more work, it automatically means that it has more value. Of course, anyone that follows this blog knows that I, being a ‘food industry’ person, quick isn’t generally what I’m all about. But in a world that thrives on making things complicated, dare to be simple some times. Enter the Stove Top Stuffing universe….
These chicken leg ‘quarters’ make such a nice meal when paired with stuffing. The smoky bacon flavor, the earthiness of the mushrooms as well as the slight sweetness of the cornbread stuffing complement each other well.
In a society that gravitates towards labels stamped with terms like organic or GMO-free, sometimes the simplicity of quick fix food can be a treat.
Print Recipe
Chicken Legs w/ Mushroom Cornbread Stuffing
Votes: 1
Rating: 5
You:
Rate this recipe!
|
|
Votes: 1
Rating: 5
You:
Rate this recipe!
|
Instructions
In a skillet, cook bacon until crisp; remove with a slotted spoon to paper towel. Drain, reserving 2 Tbsp of drippings.
Sauté celery & onion in drippings until tender. Add mushrooms, herbs & seasoning; cook & stir for 5 minutes. Remove from heat; stir in stuffing mix, celery leaves, parsley & bacon. Add broth & gently combine. Set aside.
Preheat oven to 350 F. Grease a 13" x 9" baking pan or line with greased foil paper.
Wash & trim any excess fat from chicken leg quarters. Loosen skin over thighs to form pockets for the stuffing.
Fill thigh 'pockets' with stuffing & place in baking pan. Place any remaining stuffing around the 2 leg quarters to bake at the same time. Cover with foil for about 30 minutes then uncover & finish roasting until chicken is cooked through & stuffing is lightly browned.

The exact origin of the classic ‘macaroni and cheese‘ is unknown, though it likely hails from northern Europe. Although there were French dishes with pasta and cheese as early as the 14th century, it was an English writer and business woman called Elizabeth Raffald who first wrote the recipe for what we would recognize as macaroni and cheese in 1769. Elizabeth’s recipe was for macaroni, cooked in a béchamel sauce with cheddar cheese added and sprinkled with parmesan.
Many countries have a profound love and deep historical connection to a version of this dish including the USA, Canada, the United Kingdom, France and of course Italy where pasta was first popularized in Europe. It is also possible that some of its origins may trace back to the Alps of Switzerland.
Pasta itself is neither Swiss nor European in origin; it dates to at least 3500 BC in Japan and China, likely spreading to the Middle East and northern Africa via the Silk Road. Some studies believe that the 7th century nomadic Arabs then likely brought it with them while travelling from Libya to Sicily, from where it spread north along the Italian peninsula.
Whatever the truth, this humble pasta w/ cheese dish has become an ultimate comfort food in a plethora of cultures and countries around the world. There have been many inventive twists put on this classic. The 1953 edition of the Better Homes & Gardens cookbook, calls for a sauce made from Velveeta, onion and cream of mushroom soup. Other variations sub in Brie, figs, rosemary and mushrooms for the traditional cheddar based sauce. Adding applesauce might sound like a weird addition, but it works. Just like cheddar melted over a piece of apple pie is an unexpectedly delicious treat.
I used some orecchiette pasta, which cups the sauce well and amped up the flavor with smoked turkey chicken sausage. Comfort food at its best!
Print Recipe
Apple Sauce Pasta & Cheese w/ Turkey Chicken Sausage
Votes: 1
Rating: 5
You:
Rate this recipe!
|
|
Votes: 1
Rating: 5
You:
Rate this recipe!
|
Instructions
-
Dice onion & slice smoked sausage. Heat 1 Tbsp of olive oil in a saucepan; sauté onion until almost tender-crisp then add sliced sausage & continue to cook for a few more minutes.
Bring a pot of water to a boil & prepare the orecchiette pasta according to package directions. When it is cooked, drain it well, drizzle it with the remaining Tbsp of olive oil. Shake it around a bit in the strainer to keep pieces from getting stuck together.
Heat the milk & applesauce in pot that was used to cook pasta, stirring constantly. Do not bring to a boil.
In a Dutch oven over medium heat, melt butter & whisk in the flour. Cook mixture for two minutes, whisking all the while then whisk in the hot milk/applesauce mixture. Cook for 2 more minutes continuing to whisk while the mixture is thickening.
Remove the Dutch oven from the heat & stir in salt, pepper, sage, gruyere (save a bit for garnish if you wish), cheddar, onion & sausage slices. Combine evenly then add cooked pasta & stir until pasta is evenly covered with sauce.
Place the Dutch oven in the oven, uncovered & bake for 30-40 minutes or until the orecchiette on top just begins to turn golden brown at the tips.
Recipe Notes
- Alternately, you can skip the oven time as the ingredients are already cooked. I thought some sautéed leeks made a nice garnish along with the gruyere.
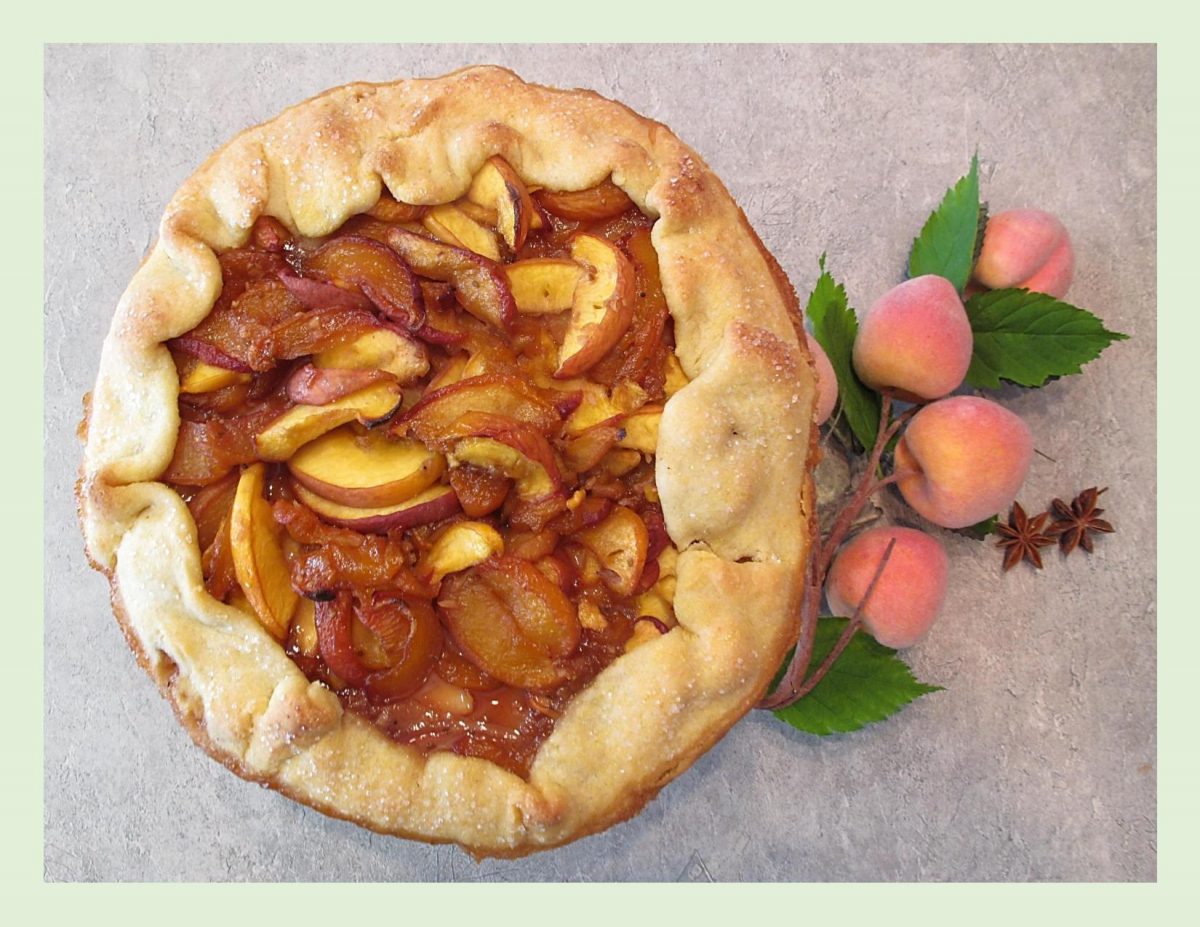
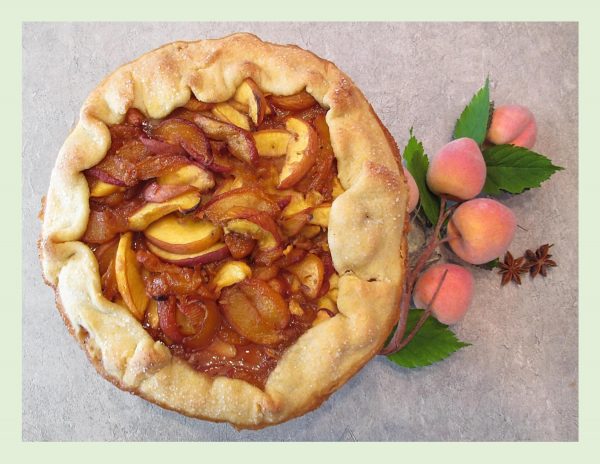
This peach chutney galette has all the flavors of a classic peach pie, plus the pop of fresh ginger, apple cider vinegar and spice.
I love chutneys and find that just about any fruit can be made into one. Each chutney is a balance of sweet, sour, savory and spice with endless variations. When it comes to the ways you can eat or serve it, a few that come to mind are:
- Add it to a chicken sandwich
- Serve with cured meats & cheese
- Serve on the side with empanadas or meat pies
- Eat it with any cooked pork meal
- Serve with grilled sausages or roasted poultry
- Serve it with pate
- As a topping for warm Brie cheese
- Mixed into Greek yogurt
- Puree it & use as a dipping sauce
- Served on a burger
Peaches are one of those fruits that make their way into summer chutneys so why not put some in a galette and see what develops?!
Print Recipe
Peach Chutney Galette
Votes: 2
Rating: 4.5
You:
Rate this recipe!
|
|
Votes: 2
Rating: 4.5
You:
Rate this recipe!
|
Instructions
Pastry
In a small bowl, combine sour cream & ice water; set aside. In a large bowl, whisk together flour, cornmeal, sugar & salt. Using a pastry blender or fingertips, cut in the butter until mixture resembles BOTH coarse crumbs & small peas. Sprinkle the cold sour cream mixture over dough, 1 Tbsp at a time, tossing with a fork to evenly distribute it. After you have added all the sour cream mixture, dough should be moist enough to stick together when pressed; if not, add additional cold water, 1 tsp at a time. Do not overwork dough.
Press dough into a disk shape & wrap in plastic wrap. Refrigerate for at least 2 hours. The dough can be kept in the refrigerator for a day or two or it can be wrapped airtight & frozen for a month. Thaw, still wrapped in refrigerator.
Filling
In a saucepan over medium heat, add apple cider vinegar, brown sugar, ginger, star anise, cloves, pepper, cardamom & sea salt. When mixture starts to bubble, fold in about 2 cups sliced peaches. Bring the mixture to a boil; turn down heat to a lively simmer. Cook, stirring often, 20-30 minutes, or until mixture has thickened enough to easily coat a spoon. Set aside to cool.
Assembly
When chutney is cooled, preheat oven to 350 F. On a large sheet of parchment paper, roll or press out chilled pastry into a 12-inch circle.
In a large bowl, stir to combine remaining peaches, cooled chutney, 1/4 cup sugar & cornstarch.
Spread mixture evenly over dough, leaving a 1 1/2-inch border. Gently fold pastry over peach chutney filling, pleating to hold it in. Brush with egg wash (if using); sprinkle with sugar.
Bake 35-45 minutes until filling bubbles up & crust is golden. Chill at least 2 hours to prevent the filling from running out. Serve as is or with a scoop of vanilla ice cream.
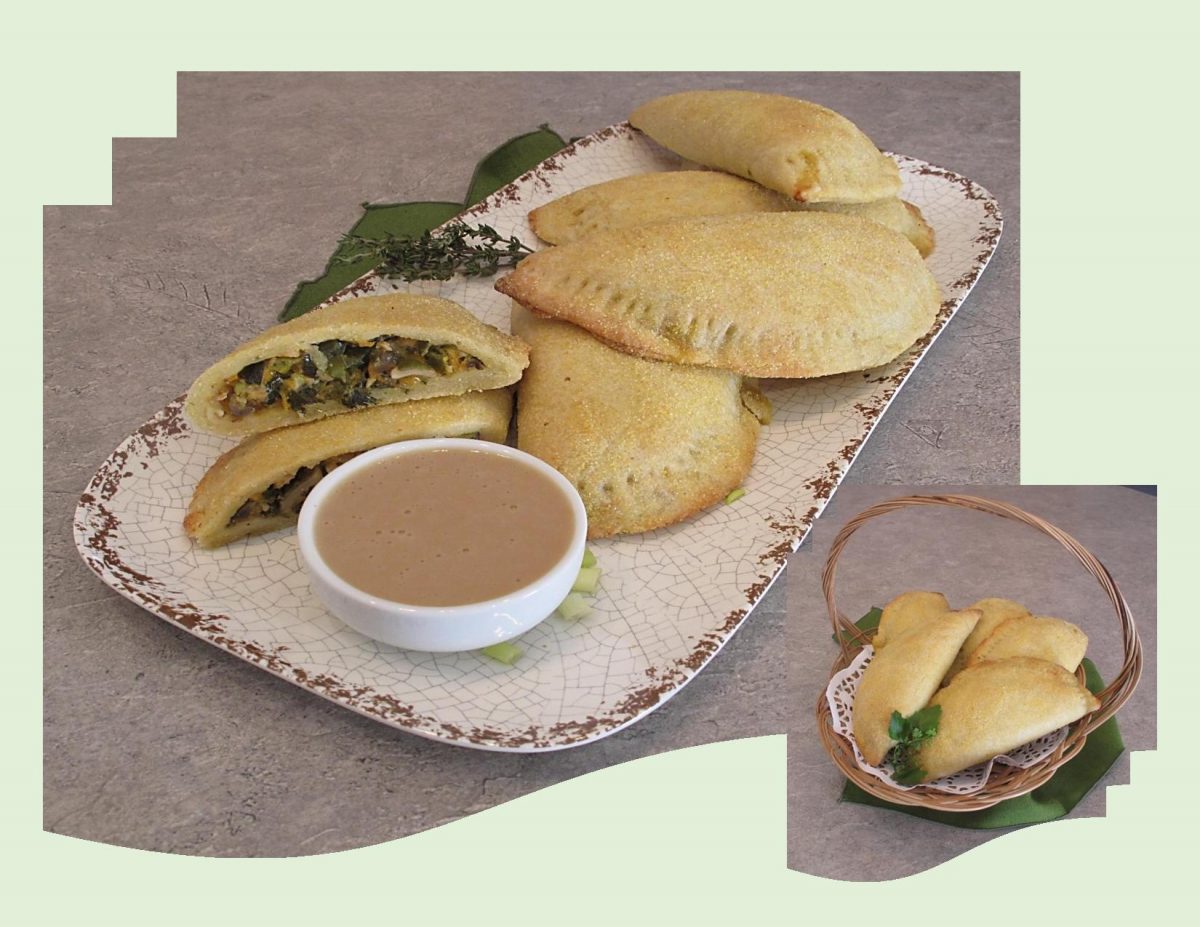
No matter what the stuffing or style is, love for the empanada is not a difficult one to understand. They are cheap, easy to eat, transportable, and versatile.
Empanadas look as good as they taste; perfect food for a picnic. Eating outdoors, spaced apart is probably one of the safest ways to gather during the ongoing pandemic crisis. The great thing about picnicking is that you can do it practically anywhere you can throw a blanket down. If you can’t make it to a park or field, your yard, porch or any flat surface with a little grass (or sand), some sun (& shade) will do.
Empanadas can be eaten for breakfast, lunch and dinner. They can be served as appetizers or snacks (hot or cold), but they can easily make a full and satisfying main course.
The very basics for an empanada are a combination of three things; dough, filling and a cooking method. The dough can be made from wheat flour, cornmeal, mashed plantains, potatoes, yuca, sweet potatoes etc. and the fillings can consist of meat, fish or vegetables. The cooking method is usually to be baked or fried although some can be cooked on a griddle or grill.
According to food historians, empanadas with seafood filling first appeared in a 1520 cookbook, published during the Moorish invasions.
I was real interested to see what I could do to make some salmon empanadas taste special. We found they were good as a hot meal served with the remaining ‘sauce’ or eaten COLD for a picnic lunch.
Print Recipe
Salmon Picnic Empanadas
Votes: 1
Rating: 5
You:
Rate this recipe!
|
|
Votes: 1
Rating: 5
You:
Rate this recipe!
|
Instructions
Cornmeal Pastry
In a small bowl, combine sour cream & ice water; set aside. In a large bowl, whisk together flour, 1/2 cup cornmeal, sugar & salt. Using a pastry blender or finger tips, cut in butter until mixture resembles both coarse crumbs & small peas. Sprinkle the cold sour cream mixture over dough, tossing with a fork to evenly distribute it. Do NOT overwork dough.
Cover bowl with plastic wrap & refrigerate for at least an hour.
Soy Sauce
In a skillet, melt butter & sprinkle with flour. Allow to cook for a few minutes. In a bowl, whisk together broth, milk & soy sauce. Slowly add to flour/butter mixture, stirring constantly until sauce thickens. Remove from skillet & set aside.
Filling
In the skillet, sauté salmon filet in 1 Tbsp oil until JUST cooked. Remove to a dish. With a fork, 'shred' salmon; set aside.
In the skillet, sauté vegetables in remaining Tbsp of oil for a couple of minutes. Add seasonings, shredded salmon, 1/3 cup prepared soy sauce & grated cheddar. Toss to combine; set aside to cool.
Assembly & Baking
Divide chilled pastry into 10 balls. Roll each one in cornmeal. Place a ball between 2 sheets of plastic wrap & roll into a 6-inch circle.
Divide filling into 10 portions. Place a portion on one side of the pastry circle, leaving about a 1/2-inch border (on filled side). With your fingertips, moisten edge of pastry with a bit of milk or water. Flip opposite side over filling & press edges together to enclose it well. Use a fork to make the classic look.
-
Repeat with remaining pastry & filling. Lay empanadas on a baking sheet lined with parchment paper. Bake for about 20 minutes or until pastry is baked & slightly browned.

In a dream world, desserts would be low in calories and fat and eating one cookie wouldn’t tempt us to eat five more.
By now, everyone knows what a molten chocolate cake is (also known as chocolate lava cake). Practically every restaurant has a version of the recipe on its dessert menu. Its basically the richest chocolate cake imaginable, in miniature form. The key is to purposely under bake it so it will reveal the thick, hot fudge-like center that oozes out when you spoon into it.
But, there’s one way to achieve healthier baked goods and that’s to add legumes. Yes, the very same beans that we put in soups, chili, dips and countless savory recipes make surprisingly tasty desserts.
If you’re using beans as a flour substitute, its typically a 1:1 ratio. When it comes to replacing fat ingredients with beans, a little caution is needed. Fats are not only used for flavor but also texture and mouthfeel for dishes. For brownies, you can replace oil with 3/4 as much black bean puree. For cookies, you can replace up to half the butter or shortening with the bean puree. For quick breads and muffins, replace butter or shortening with half as much bean puree. This is only a general guide as other ingredients may need to be altered too. Always good to experiment first.
The end result, of course, with any substitution should not just improve the nutrition content but leave you feeling satisfied and not still craving the decadent variety. We found these black bean lava cakes certainly did that!
Print Recipe
Black Bean Lava Cakes
Votes: 1
Rating: 5
You:
Rate this recipe!
|
|
Votes: 1
Rating: 5
You:
Rate this recipe!
|
Instructions
-
Make flax egg & set aside.
In a food processor, combine black beans, sugar, applesauce, apple cider vinegar & sea salt. Pulse to combine for about 1 minute.
Add rice flour, cocoa powder & flax egg. Process until combined about 30 seconds.
Add baking powder & continue processing for another 30 seconds.
Grease (4) 5-oz. ramekins with oil. Make sure to grease well. Add 1/4 cup batter to each ramekin.
Place a piece of chocolate in center of each & divide remaining batter between the 4 ramekins, spreading evenly.
Place on a baking sheet & bake for 25 minutes. Remove from oven & cool for 10 minutes.
Use a knife to loosen edges, then flip ramekins over on to serving plates (they should come loose easily).
If you wish, sprinkle with powdered sugar & serve warm.

Stuffed pork tenderloin is an amazing way to amp up a simple cut of meat. Pork tenderloin is incredibly tender since it is essentially the ‘filet’. Because there is very little fat in a tenderloin, its perfect to stuff with all sorts of tasty things to bring in both moisture and flavor.
The ‘old-fashioned’ idea of surf & turf seems to still retain an odd appeal. Having seafood and meat on the same plate lets you alternate bites and flavors from two realms, but there is a better way of mixing ‘sea & land’. Actually, combining seafood and pork so they cook together produces something quite amazing. Pork with its mild but rich taste complements the clean, delicate flavor of seafood.
This seafood stuffing uses a blend of rice and barley along with crab, shrimp and some veggies. The seasoning brings it all together into a real special meal.
Print Recipe
Pork Rolls w/ Seafood Stuffing
Votes: 1
Rating: 5
You:
Rate this recipe!
|
|
Votes: 1
Rating: 5
You:
Rate this recipe!
|
Instructions
Seafood Stuffing
In a saucepan, cook rice & barley in vegetable broth until tender; transfer to a large bowl. Sauté onion, celery & mushrooms in 2 Tbsp butter until tender-crisp.
Combine sautéed vegetables with rice/barley mixture in large bowl. Stir in shrimp & crab meat; sprinkle with seasonings & toss to combine.
Pork Rolls
Using a meat mallet, pound out the tenderloin strips very thinly, then divide stuffing between them. Roll tightly, encasing the filling inside. If necessary tie with kitchen twine.
Roll the pork rolls in seasoned flour to coat lightly. Heat the butter & oil in a large skillet & brown the rolls well on each side. Remove rolls to a plate.
-
Add veg (or seafood) broth to skillet, bring to a boil, reduce to a simmer making sure to stir in all browning bits from pork rolls; cook for 5 minutes. Season the broth with salt & pepper to taste, then pour into a casserole & place stuffed rolls on top.
Bake for about 45 minutes. Serve.

If you are not familiar with ‘Herbs de Provence‘, it is a mixture of dried herbs considered typical of the Provence region in Southeastern France. This region is known for endless vineyards, olive groves and its vibrant, purple lavender fields. Lavender is the herb that adds a distinctive scent as well as working beautifully with the rest of the herbs (thyme, marjoram, savory, oregano & rosemary) that make up this blend.
Prior to the commercialization of the product in the 1970’s, the person responsible for bringing the French phrase into the vocabulary of cooks around the world was non other than Julia Child (American-turned-French chef), who included it in a recipe in her classic cookbook ‘Mastering the Art of French Cooking‘.
This iconic French spice blend can easily elevate any number of meals. Like most spice blends, there is no set formula for the ideal Herbs de Provence. While it uses ingredients that are found in the North American creation known as ‘Italian Spice‘ (with the exception of basil), it also includes lavender flowers and has a strong floral taste.
Although I am using the individual herbs in this recipe, you can easily substitute with bottled, dried Herbs de Provence with no problem. They are readily available in the larger grocery stores. This makes such a great tasting meal …. well worth your time.
Print Recipe
Herbs de Provence Shrimp
Votes: 3
Rating: 4.33
You:
Rate this recipe!
Ingredients
- 100 gm bacon
- 250 gm mushroom, quartered or sliced
- 1/2 medium onion, minced
- 1 clove garlic, minced
- 3/4 cup frozen peas, thawed
- 3 Tbsp fresh basil, chopped
- 3/4 tsp lemon zest
- 2 Tbsp olive oil, divided
- 1 tsp sea salt
- pepper to taste
- 340 gm Wild, raw jumbo shrimp, peeled & deveined
- 1 1/2 tsp fresh thyme
- 1 1/2 tsp fresh marjoram, oregano OR savory, chopped
- 3/4 tsp rosemary, chopped
- 1/4 tsp dried lavender
- 1 1/2 cups vegetable broth
- 1 cup Israeli couscous (plain Or turmeric)
- 1 1/2 Tbsp lemon juice
- 2 tsp fresh tarragon, chopped
|
Votes: 3
Rating: 4.33
You:
Rate this recipe!
|
Instructions
In a medium saucepan, fry chopped bacon until crisp, about 3 minutes; remove from pan & blot on a paper towel. Saute mushrooms, onion & garlic in bacon drippings until softened.
Add peas, basil, lemon zest & 1 Tbsp oil. Season with salt & pepper.
In a bowl, combine shrimp, thyme, marjoram, rosemary, lavender & remaining tablespoon of oil. Add shrimp mixture to saucepan; cook, turning once, until opaque throughout, about 2-3 minutes. Place in a dish & set aside to keep warm.
In the saucepan, bring vegetable broth to a boil & add couscous. Cover saucepan & remove from heat; set aside until liquid has been absorbed, about 10 minutes.
Add shrimp mixture along with cooked bacon, lemon juice & tarragon. Gently stir together with a fork. Serve immediately.