Roasted Cornish Hens w/ Mushroom Barley Pilaf

EASTER GREETINGS!

Easter is synonymous with spring; it represents a time of renewal. The winter months are now in our rear-view mirrors, and we can look forward to those wonderful summer days. Fresh new buds are on the trees, just waiting to burst out as the season unfolds. Everything speaks of new life and fresh hope. Spring is so unique (even if we still have snow on the ground in our part of the country).

Whether or not you’re religious, Easter has some pretty magical facets to it. I remember as a kid the ‘secret bunny’ leaving colorful eggs and little baskets filled with a few goodies. My sisters and I always got a new Easter dress and ‘straw bonnet’ to wear to the church service. Then of course, the wonderful Easter meal itself.

According to legend, the Cornish game hen was actually ‘invented’. The original breeder was a woman by the name of ‘Tea’ Makowsky.  At the age of 15, she moved to Paris, France finding work at both a milliner’s shop and a cheese shop. It was here she met her husband, and they married in 1933. Fleeing from the Nazis, they settled in the USA. After a fire destroyed their farm in 1949, the Makowskis, began experimenting and came up with a cross breed of Cornish game cocks and Plymouth Rock hens. The result was a plump little bird that matured quickly with all-white meat. In less than 5 weeks, the chicken was ready to be sold.

By the 1950’s, the Cornish Game Hen was fabulously popular. The usual weight is about 500-700 grams, which makes it ample for an individual serving. I remember in the 1970’s, Cornish game hens were considered to be a very upscale or exotic dinner and quite expensive.

I haven’t made any of these little ‘birds’ for a long time so I though they would make a nice Easter meal for Brion & I this year.

Print Recipe
Roasted Cornish Hens w/ Mushroom Barley Pilaf
Instructions
  1. Remove the giblet packet (if present) from the cavity of the game hens. Carefully rinse the game hens under cold water. Thoroughly pat dry with paper toweling. Let sit at room temperature for 30 minutes.
  2. Preheat oven to 375 F.
  3. Make sure that the hens are completely dry: if not, pat dry again with paper toweling. Cover each hen with garlic mayo. Combine spice mixture in a small cup then sprinkle over hens. Set hens aside.
  4. Set a large, heavy-bottomed, oven-safe skillet or Dutch oven over medium heat & add the olive oil. Add the shallots, fresh mushrooms, barley, salt, & pepper. Sauté until the vegetables have softened slightly & the barley begins to give off a nutty, toasted fragrance, 5–7 minutes. Bring the heat to high while stirring & add the wine. Continue stirring until about half of the wine has been absorbed/reduced. Stir in the vegetable broth & rehydrated mushrooms. Remove from the heat.
  5. Set a small rack into the bottom of the pot. Place the hens on top of the rack (balance them against the sides of the pot, if necessary).
  6. Place the pot on the oven's middle rack & roast for 50 minutes, turning the pot a half turn once during the roast.
  7. Check the temperature of the hens by inserting an instant-read thermometer into the meatiest part of the thigh: the final temperature must reach 165 F. Continue roasting as needed. Also take note of the degree of browning: if the hens are browning too much, cover them with a piece of foil. If they are not browning enough, turn the broiler on high for the last ~5 minutes of cooking (estimate based on the temperature of the thigh meat). Watch carefully to prevent burning and give the pot a half-turn once during the broil.
  8. Remove the hens to a cutting board & rest for 10 minutes. Remove the rack from the pot & fluff the mushroom-barley pilaf with a fork. Before serving pilaf, sprinkle with finely grated parmesan if you wish.
Recipe Notes
  • To rehydrate the mushrooms, bring 3 ½ cups of water to a boil in a saucepan. Add the mushrooms, turn off the heat, and lid the saucepan. Let sit for 45 minutes. Remove the rehydrated mushrooms (reserve the liquid in the saucepan!). Rinse well, then pat dry with paper toweling before mincing. Strain the rehydrating liquid through a strainer lined with a layer of paper toweling. Keep this liquid to use for the vegetable broth.
  • The game hens should be sitting slightly above the level of the liquid. The rack insert from a pressure cooker/instant pot will work well to set the hens on top, balanced against the sides of the pot. 

Avocado & Smoked Salmon Pizza

CELEBRATING CANADA DAY!

In Canada, July 1st marks the day for Canadians to show pride in their nations history, culture and achievements. From coast to coast the country’s birthday is marked with various events.

On July 1st, from coast to coast, the country’s birthday is highlighted with colorful parades, concerts, carnivals, festivals and firework displays.

Food and drink are almost as synonymous with Canada Day as the colors of red and white. More importantly this date celebrates the historical event in which Canada gained its independence from Great Britain in 1867.

Pizza is one of those foods that works for just about everyone. From meat eaters to vegetarians, kids, adults and everyone in between. Year-round, it’s the perfect entree for family or party events.

Although avocado on pizza may sound weird, to me it’s glorious. When you think about it, tomato or tomato sauce is a big part of pizza most of the time. Often guacamole is made with tomato, so that avocado flavor compliments pizza well.

Pizza is one of the easiest meals you can make at home. I most always prefer to make my own crust but nothing wrong with a purchased one or some naan or focaccia bread for the crust. Once that crust part has been taken care of, it’s really just a matter of topping the pie with all your favorite ingredients and waiting for it to come out of the oven.

It’s always interesting to me what develops when you ‘step out of the box’ so today our Canada Day meal is a smoked salmon & avocado pizza.

Print Recipe
Avocado & Smoked Salmon Pizza
Votes: 1
Rating: 5
You:
Rate this recipe!
Servings
NAAN PIZZAS
Ingredients
Pizza Spread
Caramelized Red Onions
Pizza
Servings
NAAN PIZZAS
Ingredients
Pizza Spread
Caramelized Red Onions
Pizza
Votes: 1
Rating: 5
You:
Rate this recipe!
Instructions
Pizza Spread
  1. In a small bowl, combine the cream cheese with the dill & minced garlic. Mix well.
Caramelized Onion
  1. Heat oil in a skillet until hot. Add sliced onion & sprinkle with salt. Cook & stir about 15 minutes or until moisture is evaporated & onion is soft. Reduce heat; sprinkle with cider vinegar & brown sugar. Cook & stir until caramel brown in color. Remove from skillet & set aside.
Toppings
  1. Grate cheese. Flake smoked salmon. Peel avocado & remove pit. Slice in 1/8-inch slices.
Assembly/Baking
  1. Preheat oven to 350 F.
  2. Drizzle garlic olive oil onto the Naan breads & spread with cream cheese mixture. Divide onion evenly between the 6 Naan breads. Top with 1/2 of the grated cheese. Evenly distribute the smoked salmon then top with remaining cheese.
  3. Bake for about 10-15 minutes or until hot & bubbly.
  4. Remove from oven & divide avocado slices between the pizzas. Garnish with chopped sprigs of fresh dill & sprinkle with lemon pepper if you wish.
Recipe Notes
  • Alternately, you can omit the garlic olive oil & the cream cheese mixture & use bottled tartar sauce for the base of the pizzas. Brion & I really enjoyed this alternative.

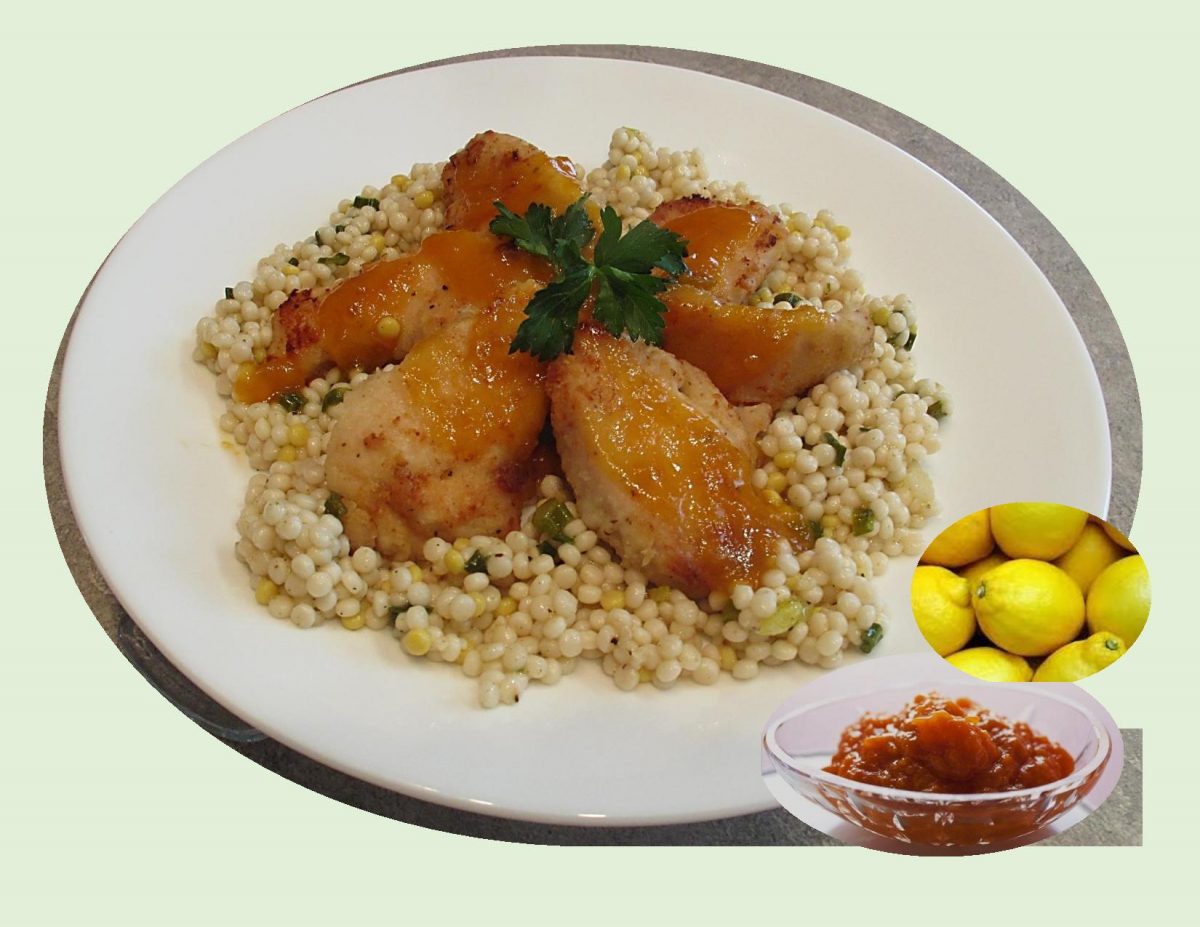
Apricot Lemon Chicken Breast w/ Couscous

The flavors of the meal hint of Moroccan cuisine to me. It wasn’t until Brion & I visited Morocco on a holiday one year, that I realized how many of their spices appealed to me.

Moroccan cuisine is very refined because of its interactions and exchanges with other cultures and nations over the centuries. Its dishes are layered with sweet and spicy, earthy and bright flavors that reflect the vast array of spices available in their local markets.

Often referred to as the national dish of Morocco, couscous is made of tiny balls of wheat semolina, steamed so they’re are soft and fluffy. Subtle cumin and ginger spices add an exotic flavor to it.

Pairing apricot and lemon flavors with the chicken breast and serving it over couscous makes this simple meal quite special.

Print Recipe
Apricot Lemon Chicken Breast w/ Couscous
Votes: 1
Rating: 5
You:
Rate this recipe!
Servings
Votes: 1
Rating: 5
You:
Rate this recipe!
Instructions
Chicken
  1. Preheat oven to 425 F. Spray a baking sheet with cooking spray.
  2. Beat egg & water slightly. Stir together baking mix, lemon pepper & garlic powder. Pound chicken breasts gently to achieve uniform thickness. Dip chicken into egg mixture, then coat with baking mix mixture. Place on baking sheet & drizzle with melted butter.
  3. Bake uncovered 20 minutes; turn chicken. Bake about 10 minutes longer until no longer pink inside. While chicken is baking prepare couscous & sauce.
Couscous
  1. In a saucepan, heat 1 tsp oil; add green onion, cumin, ginger & garlic. Cook & stir for about 3 minutes until green onion is softened.
  2. Add honey. Heat & stir for about 30 seconds until green onion is coated. Add broth. Bring to a boil. Add couscous & second amount of oil. Stir. Cover & remove from heat. Allow to stand for 5 minutes without lifting lid. Fluff with a fork & stir in remaining 3 ingredients.
Apricot Lemon Sauce
  1. In a small saucepan over low heat, combine sauce ingredients, stirring occasionally, until warm.
To Serve
  1. Place couscous on a serving platter. Top with chicken breasts & drizzle with apricot lemon sauce. Serve.