Pairing beets with chocolate might seem unusual at first glance, but it works beautifully in a cake. It gives an extra bit of complexity to something that’s already amazing. The beets add earthiness and make the cake dense and moist.
This idea is particularly associated with wartime rationing, when sugar and flour were scarce. While historically a frugal option, chocolate beet cake has become more of a novelty or trend in recent years, with modern bakers experimenting with the flavor profile and incorporating it into more elaborate recipes.
It’s impossible to pinpoint exactly who ‘first’ paired saskatoons with beet cake, as such recipes are often developed over time and evolve through various culinary traditions.
Saskatoon berries, or serviceberries, are a staple ingredient in Canadian baking, particularly in pies, cakes, and jams. They are known for their sweet and nutty flavor. Given the historical context, it’s likely that the pairing of saskatoon berries with chocolate beet cake emerged organically in regions where both ingredients were readily available and used in baking. Bakers in these areas may have naturally incorporated saskatoon berries into their beet cake recipes, either as a topping, filling, or as part of the batter.
These little Bundt cakes with their saskatoon berry topping make a very special summertime dessert when those precious berries arrive.
Print Recipe
Chocolate Beet Bundt Cakes w/ Saskatoon Berry Sauce
Votes: 2
Rating: 3.5
You:
Rate this recipe!
|
|
Votes: 2
Rating: 3.5
You:
Rate this recipe!
|
Instructions
Beet Puree
Remove beet stems & peel. Rinse beets & chop into small cubes. Place beets in a small saucepan & add water. Cook for about 10 minutes or until fork tender. Remove from heat & allow to cool. Once cool, puree beets with a small amount of the cooking water in a blender or food processor.
Cake
-
In a large bowl, place first 6 liquid ingredients & combine well. Add remaining ingredients & mix well.
Scoop into 8 mini Bundt pans (or large cupcake pan), filling about 3/4 full. You can butter the pans or use silicon cups.
For mini Bundt cakes bake only about 9 minutes or until they test done with a toothpick.
Remove from oven & allow to cool slightly.
Saskatoon Berry Sauce
In a small saucepan, combine cornstarch, sugar & salt. Add water & saskatoons. Stir while cooking until 'clear' & bubbling. Add margarine & lemon juice, stir then remove from heat.
Serving
Place individual little Bundt cakes on dessert plates. Top with whipped topping & saskatoon berry sauce. Serve.

Chicken thighs are my personal favorite for several reasons: They’re flavorful, tender, cheaper, and cook quicker than other cuts. It might sound like an unusual combo, but fresh, tangy mango brightens up savory chicken in the most delightfully unexpected way. Adding mango to chicken is any easy way to bring summer flavor to an otherwise ordinary chicken dinner.
The origins of mango chicken can be traced back to the Indian state of Punjab, where it was originally created by a chef named Kundan Lal Gujral, the owner of a restaurant called Moti Mahal. According to the legend, Kundan Lal Gujral created the dish in the early 20th century when he mixed leftover tandoori chicken with a creamy mango sauce. The dish became popular with customers and soon became a menu staple at Moti Mahal. From there, mango chicken spread throughout India and eventually became famous worldwide.
Mango chicken is typically served with rice or bread and is known for its unique blend of sweet and spicy flavors.
Print Recipe
Mango Chicken Thighs
Votes: 1
Rating: 5
You:
Rate this recipe!
|
|
Votes: 1
Rating: 5
You:
Rate this recipe!
|
Instructions
Sauce
Peel, pit & dice mango into small pieces & set aside. In a small bowl, whisk together honey, soy sauce, chicken stock, lime juice, ginger, garlic & red pepper flakes. Set aside as well.
Chicken
Slice chicken thighs about 1/2 - 3/4-inch thickness. Place chicken in a bowl & add cornstarch. Mix well until chicken is evenly coated with cornstarch.
Cooking
Preheat a large cooking pan over medium to medium-high heat & add oil. Add dredged chicken & sear it on all sides until almost done. Take chicken out & set aside.
Lower heat to medium. Melt butter in the pan; add diced mango & cook, stirring for a couple of minutes until softened.
Whisk the sauce again & pour it into the pan with mango. Gently stir & let it simmer for a couple of minutes.
Add chicken back to the pan, stir & let cook another 2-3 minutes, until chicken is completely done & sauce is a little bit thicker.
Serve mango chicken with sauce over rice.

The name of today’s pastry was inspired by the round shape of the ‘taler’, a silver coin used throughout Europe for almost four hundred years. Its name lives on in the currency called ‘dollar’.
Taler is a German word for ‘coin’, so the name of the dessert literally translates to ‘streusel coin’. Basically, a free form tart made with a yeast dough topped with a huge amount of streusel, sometimes filled with custard and often with a sugar glaze.
A traditional German streusel (streusel meaning something ‘strewn or scattered’ in German) bakes up into shortbread balls. It makes a crunchy, cookie-like top but is soft on the bottom where it meets the bread/cake or fruit.
Streusel was first popularized in Germany. In its simplest form, it consists of flour, sugar and butter but gets even better with the addition of oatmeal, cinnamon and nuts …. just my opinion of course!
While the origins of the black forest cake aren’t all that clear, some historians believe that its origins can be traced back to the Black Forest Region of Germany. This part of Germany is well known for its sour cherries and ‘Kirschwasser‘ … a clear cherry brandy.
This iconic creation is a layered confection of a liqueur ‘soaked’ chocolate cake with rich whipped cream and sour cherries between its layers. The liqueur and cherries give the cake an intense and unique fruity flavor. It’s these sour cherries which gave it its German name: Schwarzwald Kirsch Kuchen or Black Forest Cherry Cake.
There are many origin stories about the cake. Some sources claim that the name of the cake is inspired by the traditional custom of the women of the Black Forest region, with a characteristic hat with big red pom-poms on top called a ‘Bollenhut’. The earliest published written record of black forest cake was in 1934, by a German confectioner. Today, the cake is well known worldwide and probably one of the most popular cakes in Germany.
This black forest streuseltaler is a fusion recipe I developed combining a chocolate yeast bun with some sour cherries and streusel topping. Since we just happen to have a nice little sour cherry tree growing in our garden, why not put some of them to good use in a German dessert?!
Print Recipe
Black Forest Streuseltaler
Votes: 1
Rating: 5
You:
Rate this recipe!
|
|
Votes: 1
Rating: 5
You:
Rate this recipe!
|
Instructions
Sour Cherry Filling
In a saucepan, place & stir together sugar, cornstarch & salt. Add the water mixture & stir to thoroughly combine. Bring to a boil over medium-high heat, Stirring frequently, & simmer until thickened, about 2 minutes. Gradually fold in cherries. Set aside to cool.
Streusel
In a bowl, place COLD butter. Add flour, sugar & Kirsch if using. With your finger tips work streusel until crumbles form. Spread out on a large tray & set aside in freezer until ready to use.
Dough
In a small dish, combine yeast with lukewarm water & 1 teaspoon of the sugar. Allow to sit for a few minutes until frothy.
In a large bowl, slightly melt butter; cool a couple of minutes then whisk in egg. In another bowl, whisk together flour, cocoa, salt & remaining sugar. Add yeast mixture to butter mixture, whisking together. Add flour mixture, combine then turn on a floured work surface & knead for about 5 minutes. Dough will be soft but not sticky.
Lightly grease bowl, place dough ball in it & cover with a towel. Place in a draft-free place & allow to rise for about 20 minutes.
Line a baking sheet with parchment paper.
Place dough on a work surface, & divide into 12 pieces. Form each piece into a ball & allow to rest for about 5 minutes.
Space out the balls on parchment lined baking sheet. With fingertips, press out each ball to about 3-4-inch diameter. Add about 1 Tbsp of cherry filling to the center of each dough piece, leaving a border around the outside.
Divide streusel topping evenly between the pastries & allow to rise for about 15-20 minutes.
-
Bake for about 10-15 minutes. Allow to cool completely on a wire rack. In the meantime, you can prepare the glaze.
Glaze
In a small dish, whisk powdered sugar & Kirsch into a thick glaze. When streuseltaler are cooled, drizzle with glaze.
Recipe Notes
- Kirschwasser is German for 'Cherry Water', and while it may be as clear as water, it packs quite a punch. This double distilled brandy made from the sour Morello cherries is, more often than not, simply referred to as Kirsch. This 'not too sweet with a subtle cherry/almond flavored' liqueur is a vitally necessary ingredient to make a traditional Black Forest Cake; for that is where both the cake and Kirschwasser hail from... The Black Forest, or Schwarzwald, in southwestern Germany.
- Pomegranate juice: A rich and slightly tangy juice can act as a kirsch substitute, particularly in recipes requiring a deep red color. It offers a unique flavor that can add complexity to your dish.

HAPPY MOTHER’S DAY!
Today as we celebrate Mother’s Day, many special memories come to mind. My mother passed away in 1978 but even after 47 years, time has changed nothing. I still miss the sound of her voice, the wisdom in her advice, the stories of her life and just being in her presence. I miss her today as much as the day she left us, and I always will.
It is also with very loving thoughts, Brion & I celebrate my mother-in-law, Dolores, for her loving and kind ways and for raising that ‘special’ man I love sharing my life with. Love to my sisters, who gave so much of themselves to be the great mom’s they are.
In honor of these two precious women who prepared so many wonderful meals for us years ago, I like to post something special on this day. My choice this year are these unique looking raspberry curd tart cases.
I think tart rings give these little tarts more of an upscale look, fitting for the occasion. Using rings instead of tart pans gives such a clean look. Being perforated allows for the ring to heat up quicker (along with it being very thin), which allows for better baking. This also allows steam to escape from the crust, which keeps your crust nice and crispy.
I became interested in making curds a number of years ago. Curds differ from pie fillings or custards in that they contain a higher proportion of juice and zest, which gives them a bolder, fruitier taste. Also, curds containing butter have a smoother and creamier texture than both pie fillings and custards, which contain little or no butter and use cornstarch or flour for thickening. Additionally, unlike custards, curds are not usually eaten on their own. It seems fruit curds continue to gain popularity as evidenced by the wide array of recipes available today.
I think these should taste as good as they look.
LOVE TO ALL THE MOM’S OUT THERE READING MY BLOG TODAY!
Print Recipe
Raspberry Curd Tart Cases
Votes: 1
Rating: 5
You:
Rate this recipe!
|
|
Votes: 1
Rating: 5
You:
Rate this recipe!
|
Instructions
Pastry
Combine the flour, powdered sugar, cornstarch, salt, & vanilla in a large bowl. Add the butter & mix with your hands until the butter is broken down into pieces the size of peas & the ingredients are well combined. Add the beaten egg & mix with a spatula until the dough is smooth & the egg is fully incorporated. Don’t overmix.
Turn the dough out onto a large piece of plastic wrap & gently shape it into a ball. Wrap the dough in the plastic wrap & flatten it into a disc. Refrigerate for at least 30 minutes or overnight, until cold but still pliable. It should have the texture of clay. While the dough chills is a good time to make the filling.
When the dough has chilled, unwrap the dough and place it on a silicone baking mat (or parchment paper) on your work surface. Roll it out into a rectangle about 1⁄8 inch thick, using a second silicone sheet on top. The silicone mat makes it easier to lift the rolled-out dough onto the sheet pan later. Make sure to work quickly so the dough doesn’t get too warm.
Place the silicone mat with the dough on a baking sheet.
Using the tart rings, cut out 12 circles of dough. Remove the rest of the dough from around the rings.
Reroll remaining dough between 2 sheets of parchment. Using a sharp knife, slice strips about 10 inches long & 3/4- inch thick (or the thickness of your pastry rings). These strips will make the sides of each tartlet. At this point you may want to place the sheet of strips in the freezer for about 5-10 minutes so they will be easier to work with.
Working with one at a time, transfer a strip of dough to one of the tart rings and press it to the sides. Use your fingers to slightly push the bottom of the sides to the dough circle (to seal it). Repeat with the remaining strips of dough.
On another sheet of silicone or parchment, roll out any leftover dough & cut 12 tartlet case tops. Cut round holes in various sizes in them for decoration. Remove excess dough from around & in tops. Place on a separate baking sheet as they will bake faster than the tartlet cases.
Transfer the baking sheets containing the tartlet shells & tops to the freezer & freeze for at least 20 minutes.
-
Bake tart rings for about 20 minutes or until golden. Bake tops until they are just slightly golden (they bake fast so you need to keep a close eye on them). Remove from oven.
Raspberry Curd
Combine raspberries, sugar, lemon zest, lemon juice & water in a saucepan over medium-high heat. Bring mixture to a boil (about 5 minutes); reduce heat & simmer 5 minutes. Remove mixture from heat & let stand 5 minutes. Place in a food processor or blender; process until smooth. Strain mixture through a fine-mesh sieve into a bowl & discard solids.
Wipe pan clean & return strained mixture to pan. Whisk together egg yolks & cornstarch in a small bowl until smooth. Stir yolk mixture into raspberry mixture; bring to a boil over medium-low heat (about 5 minutes). Cook for 1 minute, stirring constantly, then remove from heat (the mixture should coat the back of a spoon). Add salt & butter, stirring until smooth. You may need to return the mixture to processor at this point if your curd doesn't seem smooth enough.
Place curd into a bowl; cover with plastic wrap, pressing it directly onto the surface of the curd to prevent a skin from forming. Chill curd in the refrigerator at least 2 hours, or up to 1 week if making in advance.
Assembly
Place tartlet tops on a wire rack & dust with powdered sugar. Spoon raspberry curd into cooled tart shell & spread into an even layer with an offset spatula. Arrange pastry lid on top of each filled tartlet. Decorate with fresh raspberries. Best eaten when they have chilled OVERNIGHT or a minimum of 2 hours.
Recipe Notes
If you find the dough is to soft to work with just add a small amount of flour, just enough to make it easier to handle.
This is a real nice crispy pastry dough. When its baked it would give the impression of being real hard but instead its crisp and so nice to bite into.

What is the difference between crumble and streusel? It seems there is no clear, distinct difference, at least in present-day North America. Streusel originated in Germany and was made by cutting butter into a mixture of flour and (white) sugar. Over the years, many people have made subtle variations to improve upon the base recipe to their taste preferences and is often referred to as ‘crumb topping’.
When it comes to baked fruit-and-pastry desserts, the classic pie isn’t the only game in town. Crumbles work with whatever fruit is in season or available and in any shape pan.
Bright, juicy mangoes make a delicious winter or summer dessert. A crumble gives you all the wonderful flavor of a fruit pie, but with much less prep work. The easy crust/crumble topping takes the place of a more time-consuming pastry crust. There’s no rolling or chilling; all you have to do is combine the ingredients, place some under the fruit and sprinkle the rest of the crumbs over the top. It’s that easy!
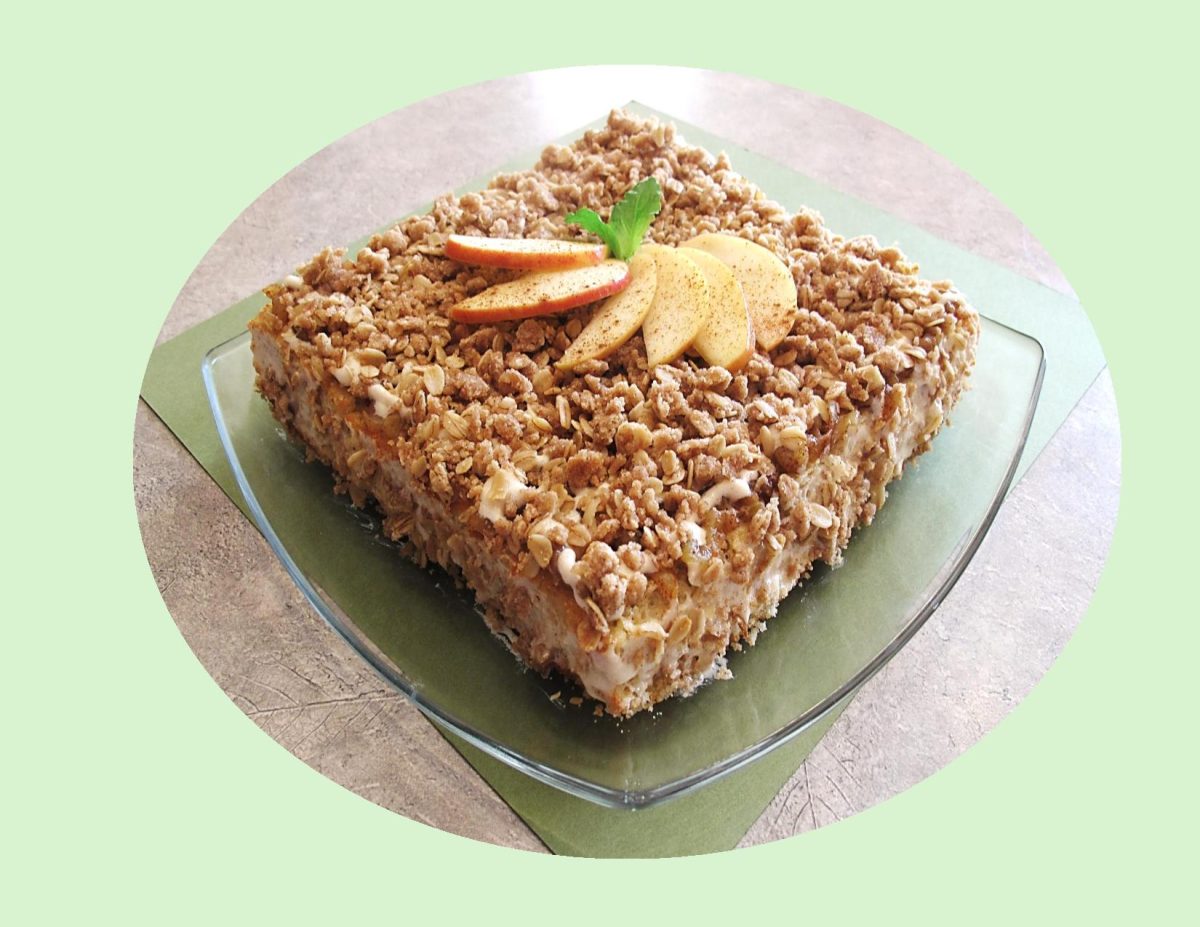
These mango crumble squares aren’t overly sweet as they get lots of their sweetness from the natural sweetness of the mangos with the mango flavor coming through in every bite. I added a cheesecake layer to make these squares just a bit fancier but it can be easily left out if you wish.
Print Recipe
Mango Cream Crumble Squares
Votes: 1
Rating: 5
You:
Rate this recipe!
|
|
Votes: 1
Rating: 5
You:
Rate this recipe!
|
Instructions
Preheat oven to 350 F. Line an 8-inch square pan with foil & spray with cooking spray; set aside.
Crust & Topping
In a large, microwave-safe bowl melt butter. Add flour, oats, sugars salt & stir to combine. Mixture will be dry & sandy with some larger, well formed crumble pieces. Reserve 1 heaping cup of the mixture to be sprinkled on later as topping. Transfer remaining mixture to prepared pan. Using a spatula, press down lightly to create an even, smooth, flat crust; set aside.
Cheesecake Layer
In a small bowl, beat together cream cheese, milk, lemon juice & egg. Add egg beating only until it is incorporated.
Mango Layer
In the mixing bowl that you used for the crumble, add all mango layer ingredients & toss to combine.
Assembly / Baking
Evenly distribute cheesecake mixture over the crust. Top with mango mixture then evenly sprinkle the reserved crumble topping mixture over all. Bake for about 45 minutes or until cheesecake is set & crumble is lightly browned. Squares may take longer if the mangoes are very juicy.
Place pan on a wire rack & allow squares to cool for at least 1 hour (preferably more) before slicing & serving. If sliced before completely cooled they tend to fall apart.

Cheese might not be the first thing that comes to mind if you’re looking for a satisfying, easy, elegant way to end your meal, but it makes for a fabulous dessert. Europeans have long served dessert cheese, either after the salad or after the main course.
While a sweet cheesecake can be a thing of great joy and incredibly versatile; there are various regional styles, easy no-bake versions for when you don’t want to turn on the oven, and many ways to make it suited to all seasons by switching up the flavor. But there’s a whole other avenue to explore too: savory cheesecakes, a great appetizer option for any party, or even weekday dinner for your family. If it sounds a little weird, think of it like a cheesier, less eggy version of quiche.
As with sweet cheesecakes, there are both baked and no-bake versions of savory cheesecake, some with crusts and some without, but crusted and baked seems to be the most prevalent sort, and the vast majority of those follow a similar formula.
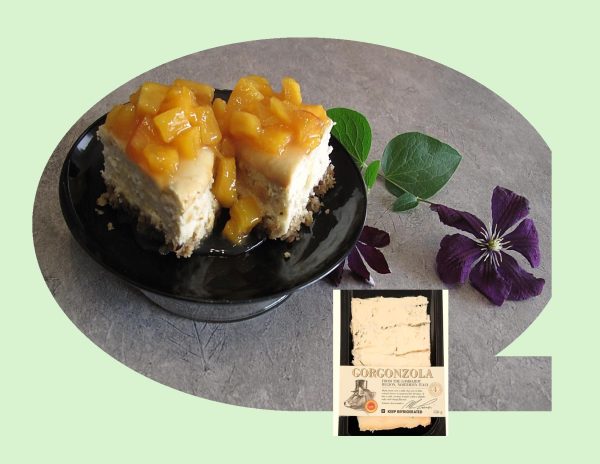
Brion & I have never been much for ‘blue cheese’ but when it comes to Gorgonzola, that’s a whole different story. Gorgonzola is a type of blue cheese produced in Northern Italy. It’s creamy and crumbly and has streaks of blue mold that give it a strong, piquant flavor. This savory Gorgonzola cheesecake could be served as a cheese or dessert course with fresh fruit to end a nice summer evening meal. A simple recipe with a taste that lingers long in the memory.
Print Recipe
Savory Gorgonzola Cheesecake w/ Peaches & Hemp Heart Granola Crust
Votes: 1
Rating: 5
You:
Rate this recipe!
|
|
Votes: 1
Rating: 5
You:
Rate this recipe!
|
Instructions
Base
Line 2 - 5-inch springform pans with parchment paper. Place granola in a food processor; process until fine crumbs form.
In a bowl, mix crumbs & melted butter until well combined. Divide crumb mixture between the two lined pans; press into the bottom to form the crust. Set aside.
Peach Topping
Add peaches to a medium saucepan over medium-high heat; stir in lemon juice, water & cornstarch. Bring mixture to a rolling boil. Stir in sugar. Return to a gentle boil for 1-2 minutes, stirring frequently, until peaches thicken slightly. Remove from heat & cool completely. This can be prepared after you bake the cheesecake if you wish.
Cheesecake
-
Using an electric mixer, beat cream cheese & Gorgonzola in a bowl until light & fluffy, about 5 minutes. Add sour cream, honey, salt & pepper; beat until blended. Add eggs one at a time, mixing well after each addition. Divide cheesecake batter, pouring over the granola base in each of the springform pans.
Bake for 1 hour & 20 minutes or until set & lightly browned.
Remove cheesecake from oven & cool to room temperature. Cover with plastic wrap & refrigerate for 4 hours or overnight. Spoon peach topping over cheesecake, slice & serve.
Recipe Notes
- If you wish to make one 9-inch cheesecake, double ingredients but only use 3 large eggs. You should have enough peach topping for a 9-inch without having to double that recipe.
- For this recipe I chose not to prebake the hemp heart base but If you wish to do so there is no problem in with that.