Austrian Apricot Dumplings

Although there are many variations of this dish, Austria’s apricot growing tradition has made apricot dumplings (marillenknodel) an emblematic dish of Austrian cuisine. Each spring, some 100,000 apricot trees transform Wachau Valley into a fragrant pink-white sea of blossoms.

There are two types of dough that can be used to make apricot dumplings …. potato dough (made with cooked & mashed potatoes) and cheese dough. Topfen is the Austrian cheese traditionally used as its ‘sour’ taste gives the dough a nice ‘tang’. Other alternatives would be either Quark or cream cheese.

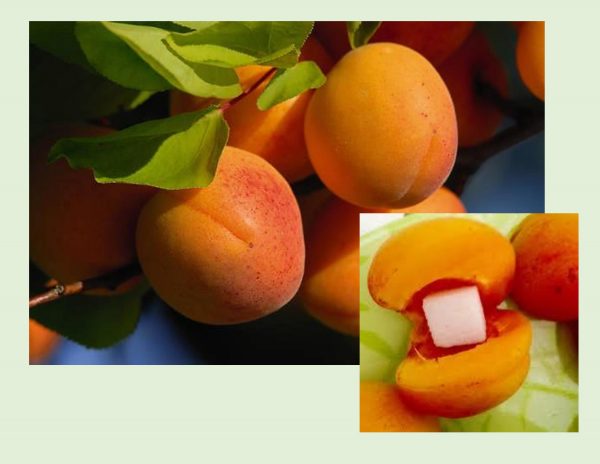
To prepare the apricots you need to slice them in half and remove the pit, then place a cube of sugar in the cavity. A few other alternatives for the centers of the apricots would be chocolate or a nougat cube.

Once the dough has been chilled, it is divided into balls and stuffed with the filled apricots. These dumplings are then boiled in salted water and while they are still hot, coated in cinnamon-flavored, buttered breadcrumbs.

Apricot dumplings are most often served just sprinkled with powdered sugar. Soft apricots provide enough liquid so they don’t taste too dry. If you wish, you could serve them with: vanilla ice cream, apricot coulis, whipped cream, vanilla or chocolate sauce.

Print Recipe
Austrian Apricot Dumplings
Votes: 1
Rating: 5
You:
Rate this recipe!
Servings
DUMPLINGS
Ingredients
Apricots
Breadcrumb Topping
Vanilla Sauce (optional)
Servings
DUMPLINGS
Ingredients
Apricots
Breadcrumb Topping
Vanilla Sauce (optional)
Votes: 1
Rating: 5
You:
Rate this recipe!
Instructions
Cheese Dough
  1. In a bowl, whisk together butter, sugar, vanilla & salt; add the egg & cheese & whisk until combined. Add flour; stir until combined. Don't overmix, the dough should be slightly sticky but not dry. Form into a disk & wrap in plastic wrap. Refrigerate for at least 30 minutes.
Apricots
  1. Slice each apricot in half & remove the pit. Place a sugar cube in the cavity & press the two apricot halves together until the apricot closes. Set aside.
Breadcrumb Topping
  1. In a saucepan, heat the butter until bubbling; add breadcrumbs. Cook over medium-low heat, stirring very frequently, until the breadcrumbs are golden brown. Remove from heat & stir in sugar & cinnamon. Set aside.
Vanilla Sauce
  1. In a small saucepan, combine milk, sugar, salt, cornstarch & vanilla; stir well until combined. Cook over medium heat stirring constantly. Lower heat & continue to cook, stirring constantly until mixture thickens & coats the back of a spoon. Remove from heat; cover with plastic wrap & chill. When sauce is cool, whisk it until it becomes smooth.
Cook & Coat Dumplings
  1. Cook dumplings in a large amount of salted water, half of them at a time. Cook for about 12 minutes from the moment you've put them in the water. Reduce the heat to medium-low as the water should only simmer. Do not allow the dumplings to stick to the bottom. Take cooked dumplings out of the water with a slotted spoon, drain well.
  2. Place the hot dumplings in the breadcrumb topping. Roll the dumplings around to coat completely, the place on a platter.
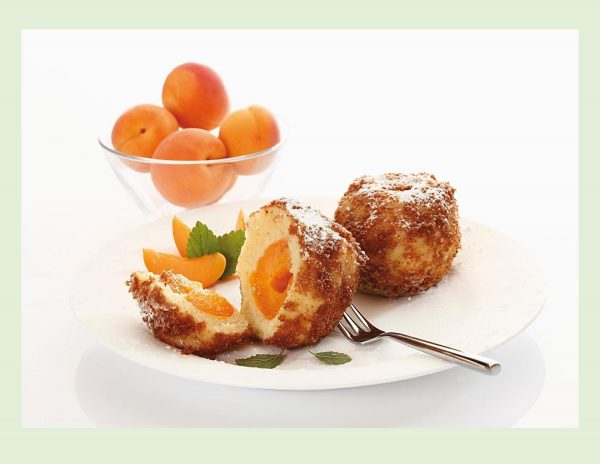
  3. At serving time you can place them atop some vanilla sauce or just simply sprinkle with powdered sugar (or any of the other suggestions listed in the main article).
Recipe Notes
  • Other fruit alternatives for the dumplings would be: plums, cherries or strawberries.

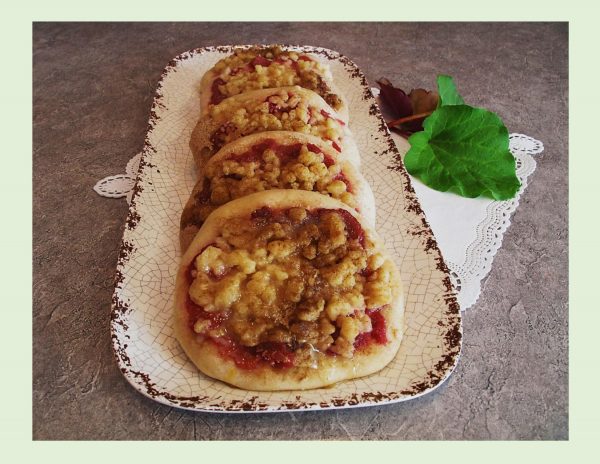
Rhubarb Streuseltaler

If you follow the blog, its no surprise to see rhubarb recipes frequently at this time of year. Its probably due to a childhood memory or maybe because its just so versatile and good.

The name of today’s pastry was inspired by the round shape of the ‘taler‘, a silver coin used throughout Europe for almost four hundred years. Its name lives on in the currency called ‘dollar‘.

Taler is a German word for ‘coin’, so the name of the dessert literally translates to ‘streusel coin’. Basically, a free form tart made with a yeast dough topped with a huge amount of streusel, sometimes filled with custard and often with a sugar glaze.

A traditional German streusel (streusel meaning something ‘strewn or scattered’ in German) bakes up into shortbread balls. It makes a crunchy, cookie-like top but is soft on the bottom where it meets the cake or fruit.

Streusel was first popularized in Germany. In its simplest form, it consists of flour, sugar and butter but gets even better with the addition of oatmeal, cinnamon and nuts …. just my opinion of course!

Print Recipe
Rhubarb Streuseltaler
Votes: 1
Rating: 5
You:
Rate this recipe!
Course Brunch, dessert
Cuisine German
Servings
ROLLS
Ingredients
Rhubarb Compote
Course Brunch, dessert
Cuisine German
Servings
ROLLS
Ingredients
Rhubarb Compote
Votes: 1
Rating: 5
You:
Rate this recipe!
Instructions
Rhubarb Compote
  1. In a saucepan, combine all ingredients except vanilla. Heat to medium high & stir occasionally until rhubarb begins to break down completely. Remove from heat, stir in vanilla & allow to cool to room temperature.
Streusel Topping
  1. In a bowl, place COLD, cubed butter, add flour, cinnamon, sugar & vanilla. With your finger tips work streusel until crumbles form. Spread out on a large tray & set aside in freezer until ready to use.
Dough
  1. In a small dish, combine yeast with lukewarm water & 1 teaspoon of the sugar. Allow to sit for a few minutes until frothy.
  2. In a large bowl, slightly melt butter; cool a couple of minutes then whisk in egg. In another bowl, whisk together flour, salt & remaining sugar. Add yeast mixture to butter mixture, whisking together. Add flour mixture, combine then turn on a floured work surface & knead for about 5 minutes. Dough will be very soft but not sticky.
  3. Lightly grease bowl, place dough ball in it & cover with a towel. Place in a draft-free place & allow to rise for about 20 minutes.
  4. Line a baking sheet with parchment paper.
  5. Place dough on a lightly floured work surface, & divide into 12 pieces. Form each piece into a ball & allow to rest for about 5 minutes.
  6. Space out the balls on parchment lined baking sheet. With fingertips, press out each ball to about 4-inch diameter. Add about 1 Tbsp of rhubarb compote to each dough piece & spread leaving a border around the outside.
  7. Divide streusel topping evenly between the pastries & allow to rise for about 15-20 minutes.
  8. Preheat oven to 350 F.
  9. Bake for about 10-12 minutes. Allow to cool completely on a wire rack. In the meantime, you can prepare the glaze.
  10. In a small dish, whisk powdered sugar & lemon juice to a thick glaze. When streuseltaler are cooled, drizzle with glaze.
Recipe Notes
  • Being lovers of the cardamom spice, I dusted our streuseltaler with it using a wire mess strainer.
  • You will probably have a little bit of rhubarb compote left over but its never too hard to find a use for at our house.
  • I should mention, making the compote the day before needed will speed up your baking process.
  • These streuseltaler are incredibly soft & so good!

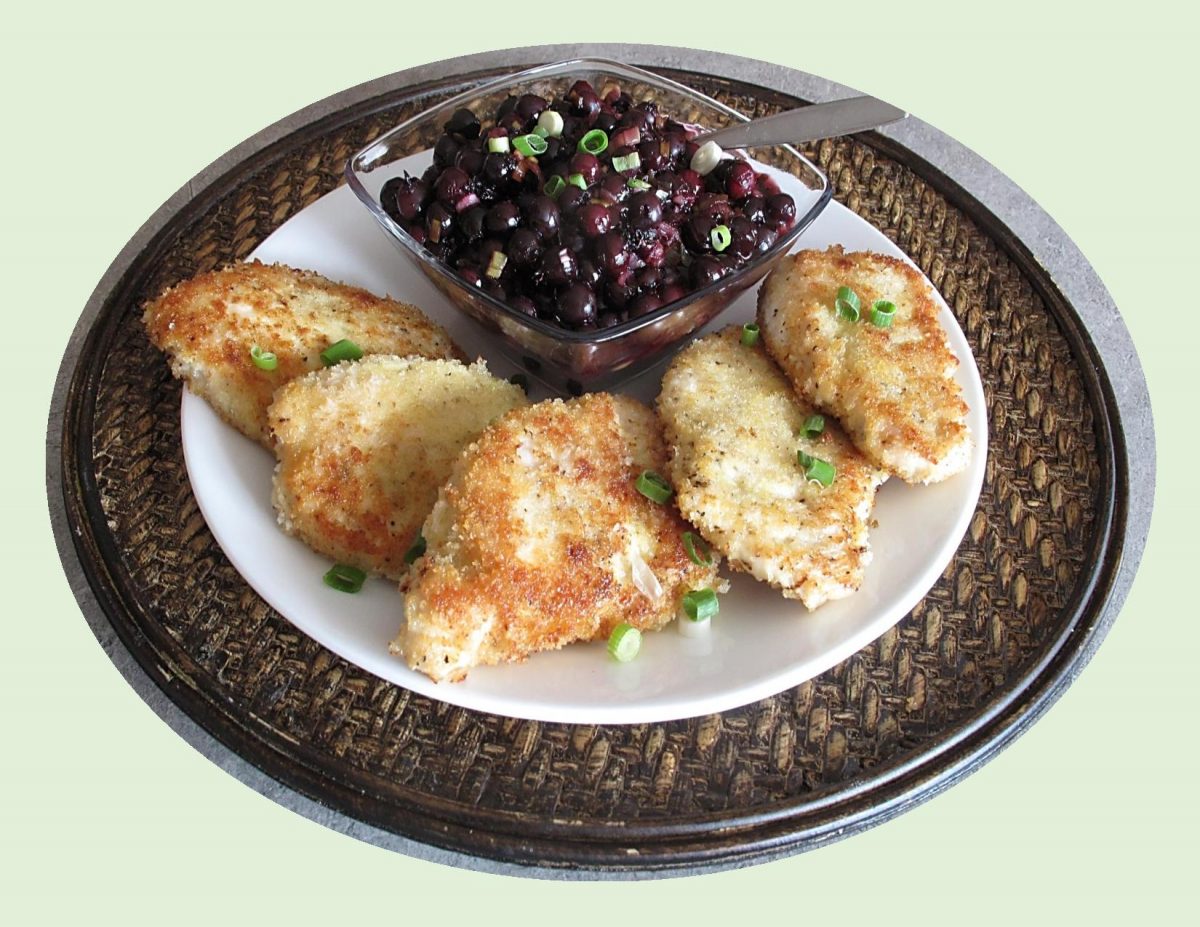
Chicken Katsu w/ Saskatoon Chutney

Chicken Katsu is simply a Japanese version of chicken cutlets. While it is great to enjoy a good dish, its worth knowing where the idea originated.

Katsu was first created in the late 1800’s by a restaurant in Tokyo that wanted to offer a European style meat cutlet. Now, katsu can be found everywhere from convenience store takeaway bento boxes to Western style Japanese food restaurants. The name ‘katsu’ comes from the English word ‘cutlet’. It is typically made from either chicken breasts or thighs coated in panko breadcrumbs.

Frying or baking chicken cutlets is simple, but its like cooking pasta, when you get it right, it changes everything. Breading helps to seal in moisture during the cooking time. Its a basic process that’s used for making everything from chicken to onion rings. Japanese panko crumbs are lighter and crispier, the secret to ultra-crunchiness which yields to the kind of crust that you can actually hear when you bite into it.

Since its ‘Saskatoon Berry‘ time here on the prairies, I wanted to make some saskatoon chutney to have with these crispy cutlets.

Print Recipe
Chicken Katsu w/ Saskatoon Chutney
Votes: 1
Rating: 5
You:
Rate this recipe!
Servings
Votes: 1
Rating: 5
You:
Rate this recipe!
Instructions
Saskatoon Chutney
  1. Combine all chutney ingredients in a large saucepan.
  2. Bring to a boil over medium heat, stirring frequently, cook until mixture is the consistency of runny jam, about 3-5 minutes. Remove from heat & cool completely.
Chicken Cutlets
  1. Place chicken breasts between plastic wrap & carefully pound to 1/4-inch thickness. Season with salt & pepper. Coat with flour then dip in beaten eggs & lastly coat with Panko crumbs. Cover with plastic wrap & place in fridge for 15 minutes to chill before cooking.
  2. In a large skillet, over medium heat, melt butter & add oil. Place cutlets in a single layer in skillet & fry on both sides. When no longer pink inside & golden on the outside remove from skillet & blot on paper towel.
  3. Serve immediately with Saskatoon Chutney.
Recipe Notes
  • The standard breading technique includes three steps: dredging in flour, moistening in egg wash, then coating in crispy panko crumbs. The flour helps the egg wash adhere & the egg helps the breadcrumbs adhere. 
  • Once you have all the food coated, you will want to place it in the refrigerator for about 15 minutes. This will ensure the breading actually sticks to the food instead of falling off in the hot oil.
  • If baking, put breaded food on a rack set over a baking sheet, drizzle with a little oil & place in the oven. Bake until golden brown & cooked through.

‘Twisted’ Mango Pie Bread

Bread shaping as an art form has a long history. Some types of dough lend themselves well to particular shapes. For instance, a high fat mixture like a brioche can be shaped or braided easily, while a sticky variety is better suited to something simpler.

Apart from braiding bread into a variety of shapes you can simply use the twisted method. No different than making a cinnamon twist but with a bit more prep work involved.

The filling is where you can let your personal imagination and creativity take over. I chose to make some mango filling for ours but any choice that appeals to you works. A note worth mentioning about filling though is that filled strands need more care during handling and twisting as they are prone to tearing.

The question to egg wash or not to egg wash? The main purpose of it is to enhance the top crust with a shine and crispiness. Even though I’m going to brush my bread with cream cheese glaze, I think its still a good idea.

Print Recipe
'Twisted' Mango Pie Bread
Votes: 1
Rating: 5
You:
Rate this recipe!
Course Brunch, dessert
Cuisine American
Keyword mango pie bread
Servings
WEDGES
Ingredients
Bread Dough
Mango Filling
Cream Cheese Glaze
Course Brunch, dessert
Cuisine American
Keyword mango pie bread
Servings
WEDGES
Ingredients
Bread Dough
Mango Filling
Cream Cheese Glaze
Votes: 1
Rating: 5
You:
Rate this recipe!
Instructions
Bread Dough
  1. In a small bowl, whisk together yeast, 1 tsp sugar & lukewarm milk. Set aside until yeast mixture begins to form a frothy foam, about 5 minutes.
  2. In a large bowl, whisk together flour, 1/4 cup sugar & salt. Add yeast mixture, melted butter & beaten egg. Knead until dough comes together in a ball & no longer sticks to the sides of the bowl. Transfer dough to a greased bowl & cover with a damp towel. Set aside to rise for about 20-30 minutes.
Mango Filling
  1. While the bread dough is rising, place all ingredients for the mango filling (except cream cheese), in a heatproof bowl. Combine & microwave for 1-2 minutes until it resembles puree. Allow to cool. With a handheld mixer, mix mango puree & cream cheese to make the filling for bread.
Assembly & Baking
  1. Deflate dough slightly & divide into 4 equal parts & form into balls. On a lightly floured work surface, roll each ball into roughly 12-inch circles.
  2. Divide the filling into thirds. Spread 3 of the dough circles with mango filling. Layer them, ending with the circle that was left without filling. Using a pizza cutter, divide the layered dough into 10 equal strips.
  3. Line a 12-inch round pie dish with parchment paper. Carefully twist strips & place in pie dish, side by side. Cover with a greased piece of plastic wrap & allow to rise in a draft free place for about 10-15 minutes.
  4. Preheat oven to 350 F.
  5. Brush with egg wash & bake for about 20 minutes or until golden brown. Remove from oven & allow to cool for about 10 minutes. While the bread is cooling make the cream cheese glaze.
Glaze
  1. In a small bowl, Beat together cream cheese,, butter & vanilla. Add sifted powdered sugar & beat to a smooth consistency. When bread is still warm brush with glaze.

Vintage Chocolate Potato Cake

The vegetable cake idea is really not so strange if you consider that most of these dense moist cakes are either spice or chocolate. Who would guess that ‘vegetables’ would be lurking within?

When you think of how many veggies we have incorporated into our desserts, its amazing. Carrot cake is hardly novel having been around for decades but there is also beet torte, zucchini chocolate cake, sweet potato cake or the delicious chocolate sauerkraut cake just to name a few.

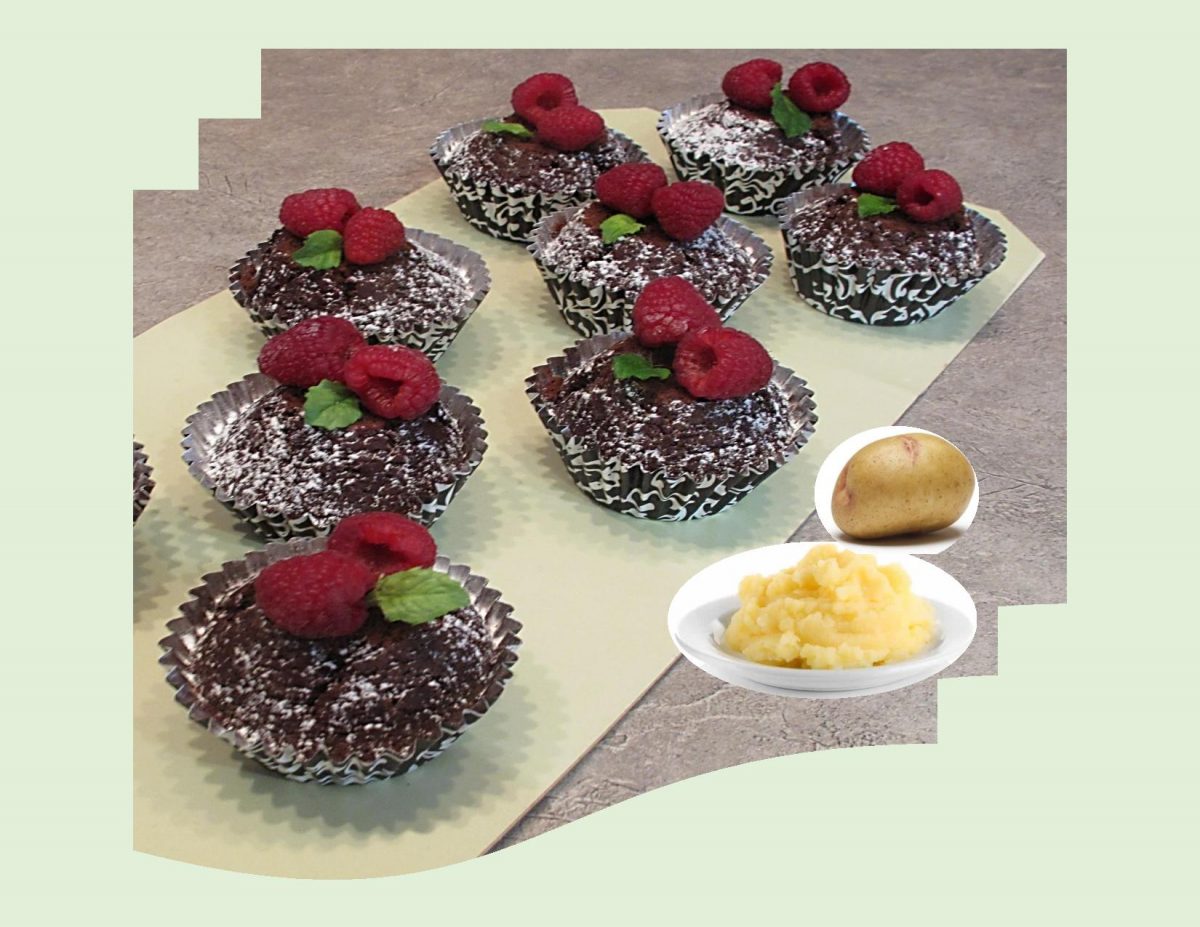
The popular chocolate potato cake recipe goes back to the early 1800’s, so its likely the oldest of them all. Like buttermilk, mashed potatoes make baked goods taste better, perhaps because both have the effect of making the cake crumb more tender.

It seems the humble potato is like a blank canvas and wears every role its put in with equal flair. This is a moist, rich cake so icing is purely optional.

Print Recipe
Vintage Chocolate Potato Cake
Votes: 1
Rating: 5
You:
Rate this recipe!
Servings
Servings
Votes: 1
Rating: 5
You:
Rate this recipe!
Instructions
  1. Preheat oven to 350 F. Lightly oil a 9-inch round cake pan or a 12 cup muffin pan & line the base with parchment paper or paper cups.
  2. In a large mixing bowl, whisk together sugar, oil & eggs then potatoes.
  3. In another bowl, combine flour, cocoa, baking powder, baking soda, cinnamon, cardamom & salt. Alternately add dry ingredients & the buttermilk to the egg mixture, beginning & ending with the dry ingredients; stirring with a spoon or rubber spatula.
  4. Spoon the batter into the prepared pan. Bake until the top springs back when touched lightly, 30-35 minutes.
  5. Invert the cake onto a rack & allow to cool thoroughly. Transfer to a plate & dust with powdered sugar if you wish.
Recipe Notes
  • Don't hesitate to add either some nuts or raisins for some extra flavor.

‘Cinnamon Roll’ Cherry Pie

This cinnamon roll cherry pie is a unique take on the classic cherry pie. Mini cinnamon rolls line the pie pan to form the ‘crust’ makes it look so special.

After I saw a photo of a similar idea on Pinterest, some of our sour cherries came to mind and my recipe development came into play once again.

Taking that classic cinnamon roll flavor and making the base of a fruit pie seems perfect. You would probably not want to use it with a key lime pie, but anything that already uses cinnamon such as pumpkin or sweet potato should work great with this type of ‘crust’.

After I made a small amount of sour cherry filling it seemed only logical to make a bit of cream cheese filling to go with it.

While my little culinary creation was baking, I mixed up a bit of lemon glaze for drizzling on it when it had cooled slightly. This turned out to be a seriously good cherry cream pie!

Print Recipe
'Cinnamon Roll' Cherry Pie
Votes: 2
Rating: 5
You:
Rate this recipe!
Course dessert
Cuisine American, Ecuador, German
Servings
Votes: 2
Rating: 5
You:
Rate this recipe!
Instructions
Sour Cherry Filling
  1. In a saucepan, whisk together sugar, cornstarch & salt. Add juice/water mixture & stir to thoroughly combine. Bring to a boil over medium-high heat, stirring frequently. Simmer until thickened, about 2 minutes. Immediately remove from heat. Fold in cherries & cool to room temperature.
Cream Cheese Filling
  1. In a bowl, beat together cream cheese, egg, sugar & vanilla with an electric mixer until smooth. In a separate dish, combine cinnamon & cardamom spices.
Assembly
  1. On a sheet of parchment paper, roll puff pastry into a 12 X 16-inch (35 cm X 45 cm) rectangle. Brush on a thin layer of the cream cheese filling. Sprinkle with spice mixture. Roll it up tightly, starting from one of the long sides. Refrigerate for about 10 minutes or until firm enough to slice easily.
  2. When pastry has chilled, slice roll into 18 pieces. Line a greased 9-inch pie dish with half of the mini spiced rolls. Lay them in the center first & work your way outwards. Press them down in the dish so they stick together & form a base for the pie. Top the pastry first with remaining cream cheese filling, then the sour cherry filling.
  3. Preheat oven to 350 F. On a sheet of parchment paper, lay out the remaining 9 pastry rolls in a circular shape. Place a second sheet of parchment on top. Using a rolling pin, flatten the rolls slightly so they stick together to form the top crust. Pull off the top parchment & flip pastry over the filled pie; gently press it to conform to the pie edges.
  4. Bake for 40 minutes. If top crust is browning too fast, cover outside edges with foil.
  5. In a small dish, combine powdered sugar with lemon juice. After the pie has cooled, drizzle with lemon glaze.

Apple ‘Aumoniere’ w/ Salted Caramel Sauce

Almost every country has its own version of crepes, but it was France’s Brittany region where the tools and techniques were first created and perfected.

The French tend to be a proud people and they hold dear the things that make them unique. In France, creperies are common everywhere and although the French are legendary for their disdain for le fast food, they have their own version of cuisine a la minute.

Crepes are the French answer to fast food. Nearly every street corner in the heart of Paris, has a stand de crepes. These crepes, eaten in the street, on the go, leaving you with a mouthful of sugar and sticky hands, are absolutely memorable. In less time than it takes to fry a burger, a competent crepier can cook a thin, eggy crepe, flip it, fill it, fold it and present it ready to eat.

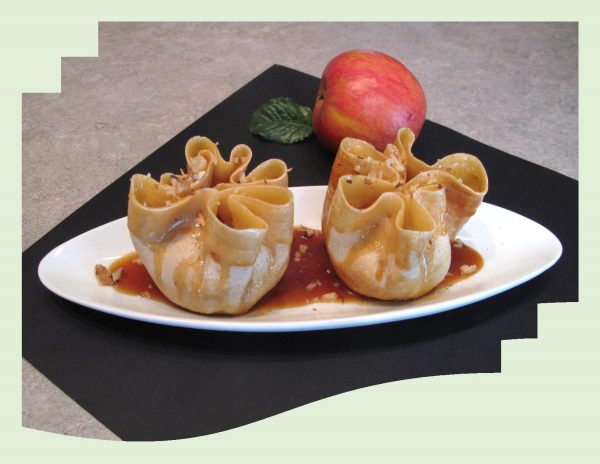
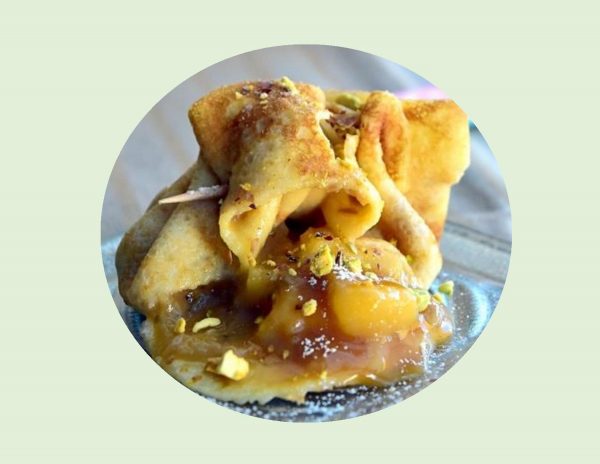
In French, the word aumoniere is derived from the word aumone, which means, ‘giving money to someone in need’. An aumoniere represents a small purse (the pastry) with coins inside (the filling).

In July (2020), I posted a blog that featured Seafood Aumoniere. Today, I thought it would be nice to use that same technique in a dessert presentation. I find the contrast of the sweet & salty essence of caramel is delicious when combined with the tangy taste of apple.

As many trends in North America do, the salted caramel flavor started in high-end restaurants and gourmet shops. Then it appeared in top chain restaurants and premium supermarkets before finally ending up at superstores like Walmart.

The combination of sweet & salty foods makes for an appealing treat that creates a flavor which is both unique and appetizing. The trick to getting salted caramel right lies in the ratios. Too much salt and the balance is completely off, too much sweetness and it becomes sickeningly sweet. Its that sprinkle, that just barely there dash of salt in the sweet that awakens your taste buds and sends that pleasure to your brain.

It seems the earliest roots of salted caramel can be traced, once again, to Brittany, France where a chocolatier named Henri Le Roux pioneered the art form.

Print Recipe
Apple Aumoniere w/ Salted Caramel Sauce
Votes: 1
Rating: 5
You:
Rate this recipe!
Servings
Ingredients
Crepe Batter
Salted Butter Caramel Sauce
Servings
Ingredients
Crepe Batter
Salted Butter Caramel Sauce
Votes: 1
Rating: 5
You:
Rate this recipe!
Instructions
Crepes
  1. In a bowl, combine flour & cornstarch; pour in milk slowly while stirring constantly. Add eggs, oil, salt & vanilla. Whisk until smooth. Refrigerate for a minimum of 2 hours.
  2. When batter is ready; heat oil or cooking spray in a crepe pan or skillet. Give the container of batter a quick tap on the counter. Place 1/4 cup of batter into the pan & swirl to even it out & form a circle. When edges start to pull away & the crepe looks cooked in the middle, give it a quick flip & cook for just 10-20 seconds on the other side. Repeat with remaining batter. Should yield 6-8 crepes.
Salted Caramel Sauce
  1. In a saucepan, heat sugar, stirring constantly. The sugar will form clumps & eventually melt into a thick brown, amber colored liquid as you continue to stir. Be careful not to burn.
  2. Once sugar is completely melted, immediately add the butter. Be careful in this step because the caramel will bubble rapidly when the butter is added. Stir the butter into the caramel until it is completely melted, about 2 minutes. If you notice the butter separating, remove from heat & vigorously whisk to combine it again.
  3. Very slowly, drizzle in the heavy cream while stirring. Since the heavy cream is colder than the caramel, the mixture will rapidly bubble when added. Allow the mixture to boil for 1 minute. It will rise in the pan as it boils. Remove from heat & stir in 1 teaspoon of salt. Allow to slightly cool down before using. Caramel thickens as it cools.
Apples
  1. In a large, heavy skillet melt butter. Add prepared apples & sprinkle with lemon juice to prevent browning; add brown sugar & cinnamon. Cook, covered over medium-high heat, until apples begin to soften, about 8 minutes. Remove from heat & drain off any liquid. This juice can be used for something else as it will make the caramel sauce too runny if not drained off.
Assembly
  1. Divide the apple filling between the 6 crepes, placing each portion in the center of the crepe. Drizzle a bit of the salted caramel sauce over top of the apples. Gather the sides up to enclose the filling, secure with a toothpick.
  2. On serving plates, either pour a small amount of salted caramel sauce in center of plate or create a design with it. Set the apple 'aumoniere' in the center of the plate & sprinkle with chopped walnuts.

Rhubarb Pastries

Here we are at that time of year when rhubarb makes an appearance once again. As always, if you read my blog, you know I can’t resist featuring numerous rhubarb recipes during its growing season. The question is … do you love it or hate it? It demands an opinion. Is it fruit or a vegetable? Is it red or is it green? Doesn’t matter …. rhubarb is rhubarb. It is what it is and doesn’t care if we love it or leave it.

Today, I have made some rhubarb pastries. The tartness is there, as it should be, but is mellowed a bit by the velvety cream cheese so the sharpness is balanced. The night before just put the frozen puff pastry in the fridge to defrost. Make up the rhubarb compote and cream cheese mixture so they can chill overnight. The next morning its nothing more than a quick assembly job before you are ready to bake them.

Great little ‘upscale’ breakfast pastry!

Print Recipe
Rhubarb Pastries
Votes: 1
Rating: 5
You:
Rate this recipe!
Course Brunch, dessert
Cuisine American, European
Keyword rhubarb danish
Servings
Ingredients
Course Brunch, dessert
Cuisine American, European
Keyword rhubarb danish
Servings
Ingredients
Votes: 1
Rating: 5
You:
Rate this recipe!
Instructions
Rhubarb Compote
  1. In a small pot, place rhubarb, orange juice, sugar, cinnamon, anise, vanilla & ginger. Bring to a boil then reduce heat to low; simmering for about 10 minutes. Rhubarb should be tender but still hold its shape. Set aside to cool completely.
Cream Cheese Filling
  1. In a bowl, beat cream cheese, powdered sugar, egg yolk, salt & vanilla together until well combined. Store in fridge until chilled. As with the compote, the cream cheese bakes better in these when it is chilled.
Assembly
  1. Preheat oven to 400 F. Line a baking sheet with parchment paper.
  2. Lay puff pastry sheet on a lightly floured surface & use a pizza cutter to create 16 small triangles (first cutting eight rectangles & then splitting them into 2 triangles each). Spread each triangle with a thin layer of cream cheese mixture & top with some rhubarb compote. Starting at the long end, roll each triangle into a crescent shape. Transfer pastries to a parchment lined baking sheet with space in between each one.
  3. Refrigerate pastries for 10 minutes then beat together egg white & water. Brush the surface of pastry with egg wash & bake 12-15 minutes or until golden. Allow to rest on baking tray for 5 minutes, then move to a cooling rack.
Topping
  1. In a bowl, whisk together powdered sugar, extract & milk. Drizzle over danish & garnish with toasted almond slices. Serve warm.
Recipe Notes
  • Usually puff pastry is packaged containing 2 sheets. I only wanted to make one but you will definitely have enough of the cream cheese & rhubarb fillings to make both sheets if you wish.

Mini Dutch Apple Waffle Pies

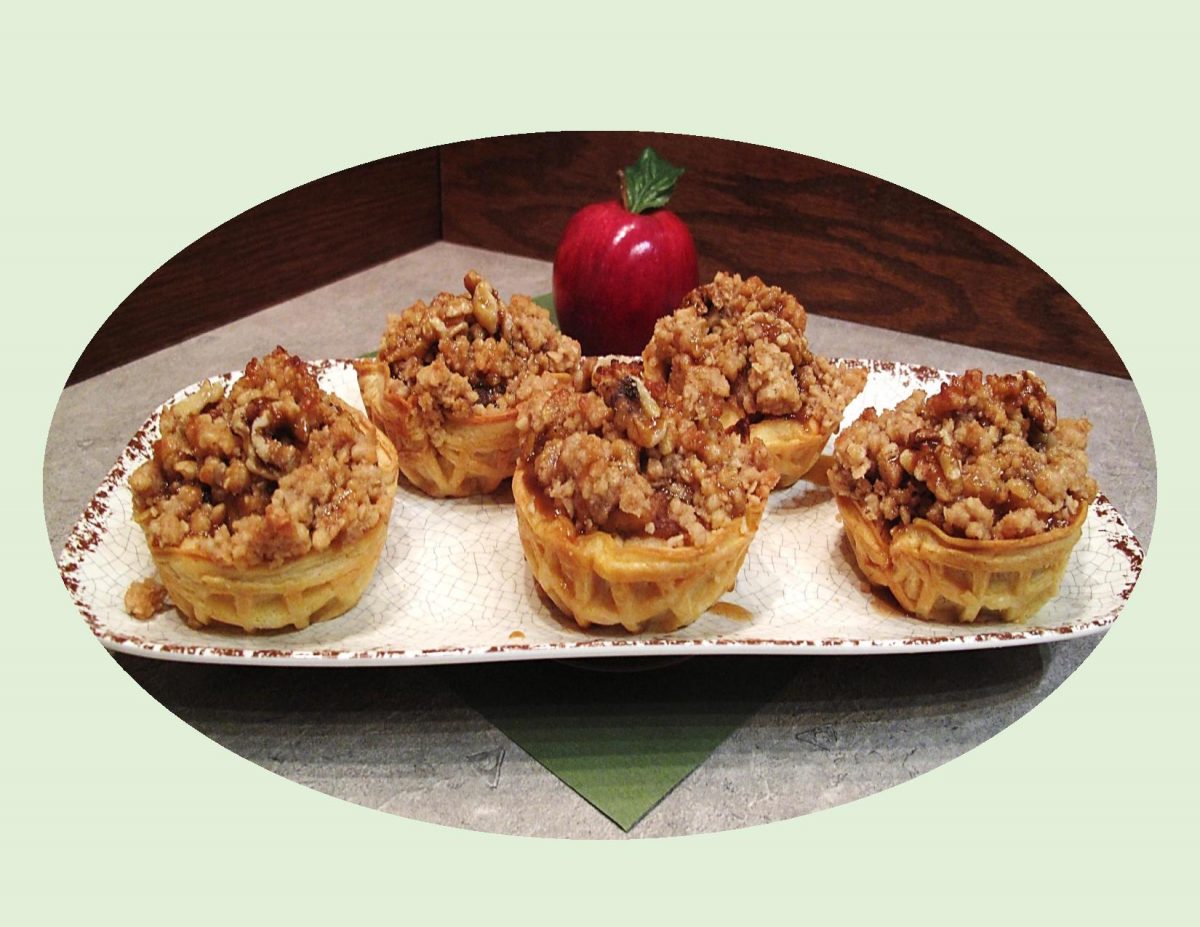
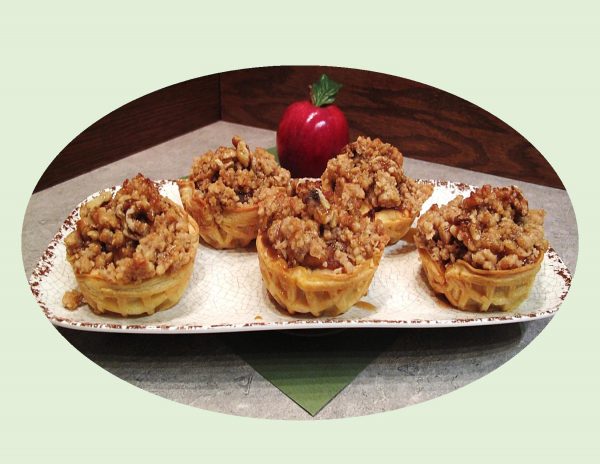
Frozen waffles are like having a blank canvas begging for you to add your personal touch to create something unique.

The little toaster waffles called Eggo’s popped up on the market in 1953. They were created by three brothers, Anthony, Sam & Frank Dorsa, who had previously been known for their mayo business that had took off in the 1930’s.

When Eggo’s first appeared on the freezer shelves in grocery stores, they had a totally different name … Froffles! It was meant to be a combination of frozen and waffles but it didn’t last long. The name was swapped out for Eggo waffles by 1955. This unique frozen breakfast item didn’t become truly popular until about 1968.

So if you like waffles and apple pie, this dessert should interest you.

Print Recipe
Mini Dutch Apple Waffle Pies w/ Caramel Sauce
Votes: 1
Rating: 5
You:
Rate this recipe!
Servings
Ingredients
Waffle Pies
Streusel Topping
Caramel Sauce
Servings
Ingredients
Waffle Pies
Streusel Topping
Caramel Sauce
Votes: 1
Rating: 5
You:
Rate this recipe!
Instructions
Waffle Pies
  1. Preheat oven to 425 F.
  2. In a small bowl, whisk together water & cornstarch. Pour into a medium pot over medium-high heat with both sugars, spices & salt. Once sauce begins to thicken up, add the diced apples & reduce heat. Cook for 10-12 minutes to soften the apples, stirring occasionally.
  3. While apples are cooking, press waffle shells into 12 custard cups & then divide apple filling between them.
Streusel Topping
  1. In a bowl, combine streusel ingredients; using your fingertips, work to make very coarse crumbs. Divide evenly between 'pies'. Bake for 16-17 minutes. Remove from oven & cool slightly.
Caramel Sauce
  1. In a small saucepan over medium-high heat, combine sauce ingredients. Cook until bubbly & thickened, whisking constantly, about 5-7 minutes. Drizzle over apple desserts when serving.
Recipe Notes
  • Adjust sugar amounts in any part of the recipe if you wish.

Blueberry Babka Rolls

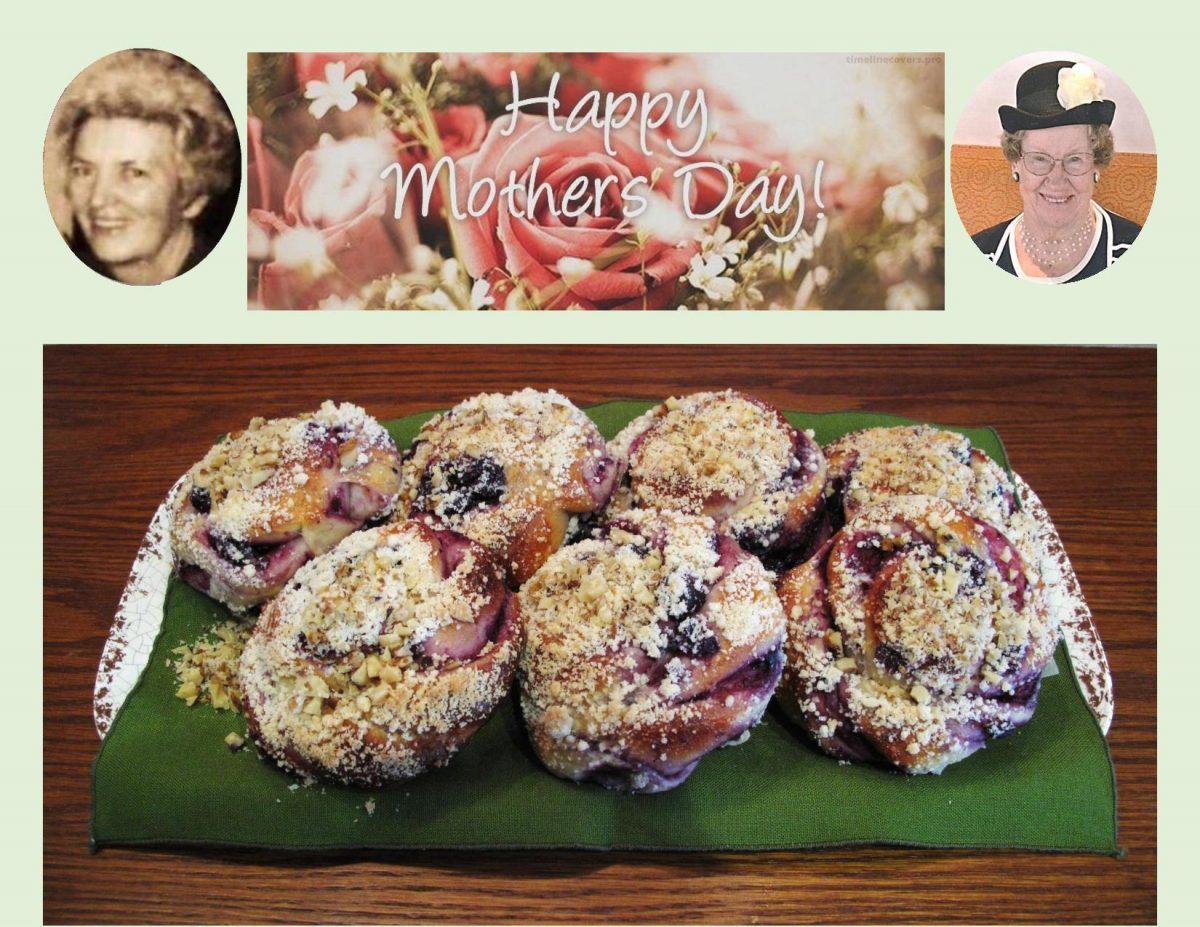
HAPPY MOTHER’S DAY!

Today as we celebrate Mother’s Day, many special memories come to mind. My mother passed away in 1978 but even after 42 years, time has changed nothing. I still miss the sound of her voice, the wisdom in her advice, the stories of her life and just being in her presence. I miss her today as much as the day she left us and I always will.

It is also with very loving thoughts, I celebrate my mother-in-law, Dolores, for her loving and kind ways and for raising that ‘special’ man I love sharing my life with. Love to my sisters, who gave so much of themselves to be the great mom’s they are.

Babka ….. an old world beauty with roots in both the Jewish and Eastern European communities. A cake like, sweet yeast bread, richer than that of a cinnamon bun but not as rich as a Danish pastry. The name Babka means ‘little grandmother’ in many European languages.

Traditionally, babka was filled with seeds, nuts and sometimes even honey or filled with layers of cinnamon sugar or chocolate. This classic baked good has been making its way into every corner of the food world. A great babka dough is a blank canvas for almost any filling. Many other flavors have been developed and have become equally popular.

Fruit lovers can now indulge in apple-cinnamon or raspberry and apricot cream cheese babkas. There is also a Middle Eastern favorite using halva (sesame candy) or a completely savory version with sun-dried tomatoes.

This bread seems very fitting on our Mother’s Day blog.

Print Recipe
Blueberry Babka Rolls
Votes: 1
Rating: 5
You:
Rate this recipe!
Servings
ROLLS
Ingredients
Babka Dough
Blueberry Filling
Streusel Topping
Servings
ROLLS
Ingredients
Babka Dough
Blueberry Filling
Streusel Topping
Votes: 1
Rating: 5
You:
Rate this recipe!
Instructions
Babka Dough
  1. In a small bowl, place water & sprinkle with the yeast & a pinch of sugar; stir to combine. Allow to stand until frothy, about 5-10 minutes.
  2. In a large bowl, whisk together 4 cups of the flour, sugar & salt. Make a well in the center of the flour & add eggs, yolk & oil. Whisk to form a slurry, pulling in a little flour from the sides of the bowl.
  3. Pour the yeast mixture over the egg slurry. Mix the yeast, eggs & flour with a wooden spoon until a shaggy dough that is difficult to mix forms. Turn dough out onto a floured work surface & knead for about 10 minutes. If the dough seems very sticky, add flour a teaspoon at a time until it feels tacky. The dough has finished kneading when it is soft, smooth & holds a ball-shape.
  4. Place the dough in an oiled bowl, cover with plastic wrap & place in a draft-free area. Allow to rise until doubled in bulk, about 1 1/2 - 2 hours.
Blueberry Filling
  1. In a small saucepan, combine cornstarch, sugars & salt. Add water & blueberries; cook until clear & bubbling. Remove from heat & add lemon juice; cool completely.
Streusel Topping
  1. In a bowl, whisk together flour, powdered sugar, salt & baking powdered. Cut butter into small chunks & add the flour mixture. Using your fingertips, work the butter into the flour mixture until it forms LARGE, coarse crumbs. Place in refrigerator until ready to use.
Assembly
  1. Line a large baking sheet with parchment paper; set aside. On a lightly floured work surface, roll out dough into a rectangle, roughly 40 X 60 cm (15" X 24"). Spread half of the filling on center third of the dough. Fold one of the sides over the center & spread the remaining filling on top. Next, put opposite side of the dough over all & gently press together.
  2. Using a sharp knife or a pizza cutter, cut 15 strips, between 2 - 2.5 cm (3/4"-1") thick. Twist each strand of dough a few times then, holding one end between you thumb & forefinger, coil the dough to form a circle. Finish by pinching the outer end to the ring, so it holds the circular shape when baking. Repeat with remaining strips. Place rolls on lined baking sheet as you make them. Cover baking sheet with plastic wrap & set in a draft-free place until rolls have doubled in size.
Baking
  1. Preheat oven to 350 F. Brush rolls with egg wash. Sprinkle streusel & chopped nuts evenly over the tops, pressing lightly so the crumbs adhere to the rolls. Bake for about 20 minutes or until golden brown. Remove from oven & place on a cooling rack.