Roasted Turkey Breast Roulade Baked in Squash

Whether you celebrate Christmas culturally, religiously or not at all, it seems a good time to evaluate your priorities to make sure you are truly doing what matters to you most. Christmas comes and goes each year during which the ‘Christmas Spirit’ is alive and well. Wouldn’t it be nice if that same spirit was applied to our daily lives all year long.

Today, December 25th, we celebrate my sister Rita’s birthday as well as Christmas Day. Our family’s Christmas eve birthday ‘parties’ hold many fond memories for me. After attending Christmas eve church service, upon returning home, we would be joined by family friends to have birthday cake and some homemade root beer. It was very important to my parents that a special birthday acknowledgement was made to Rita apart from the Christmas festivities.

Christmas is a nostalgic time of year for many of us — recalling simple family traditions. When it comes to holiday decorations, the thing I remember most were the ‘multitudes’ of Christmas cards that our family received in the mail. My mother would fasten string between doorways and windows to hang them all on each time we would receive another one. There was a limited amount of other Christmas decorations. We used the same ones year after year and that was what made them so special. They all had their own special place where they belonged, and once they were out, it truly felt like Christmas.

Probably, the most cherished item was a Christmas Manger set. This cardboard tabletop Nativity was published by Concordia Publishing House in early 1940’s from illustrations first produced by artist George Hinke. A base was provided with special tabs to hold the 17 lithographed figures upright; each tab being carefully labeled making it easy to assemble.

George Hinke was born in 1883 in Berlin, Germany where he studied as a painter. He immigrated to the United States in 1923.

I remember this Nativity scene vividly as the cardboard figures were so beautiful and accurately painted. It was sold in a cardboard box that contained assembly instructions. One of the trips Brion and I made to Italy was just after Christmas one year in early January. Thanks to the European mindset, the outdoor Christmas decor had not been tucked away for the season. The detail in some of the Nativity scenes was incredible. They brought back memories of that little ‘Christmas Manger’ set from many years ago.

For our Christmas dinner this year we are having something a little different from the traditional roast turkey. Turkey roulade lets you have all the traditional flavors of Christmas without having to go through the whole turkey cooking episode. Not only is it mouthwatering and tender, it’s easy to make, cooks quicker, a breeze to carve and looks super elegant. Now, there’s the matter of the stuffing. Equally essential to the holiday table, it’s a far more expressive medium than the turkey itself. You could say, it is the personality with countless options. 

Today’s recipe is a turkey breast that has been flattened and stuffed with herbs, cranberries and hazelnuts. The roulade is wrapped with bacon to keep it moist and tucked into a half of a spaghetti squash. The drippings from the bacon and turkey flavor the squash perfectly as it bakes giving a tasty, earthy, vegetable side dish. Brion and I preferred some cranberry sauce and a traditional gravy with this meal but if you want to kick it up a notch you could serve a thin apple cider gravy instead.

                                         HAPPY BIRTHDAY, RITA!                                                                              ENJOY YOUR DAY AS WE CELEBRATE YOU WITH LOVE

        SEASON’S GREETINGS TO EVERYONE FOLLOWING MY BLOG

Print Recipe
Roasted Turkey Breast Roulade Baked in Squash
Votes: 1
Rating: 5
You:
Rate this recipe!
Servings
Ingredients
Turkey, Stuffing & Squash
Servings
Ingredients
Turkey, Stuffing & Squash
Votes: 1
Rating: 5
You:
Rate this recipe!
Instructions
Stuffing
  1. In a medium saucepan, heat 2 T. butter. Saute onion, garlic & sage leaves, stirring occasionally, for about 8 minutes. Add bread crumbs, toasted hazelnuts, cranberries, chicken broth, Italian seasoning, salt & pepper; cook for another minute or so. Remove from heat & cool completely.
Turkey Breasts
  1. Using a sharp knife, 'butterfly' turkey breasts. Cover with plastic wrap, flatten them slightly with a meat tenderizer. Divide stuffing between the two breasts & spread it out evenly. Roll breasts up, place cut side down onto work surface. Wrap each roulade with 6 slices of bacon, tucking the ends under the turkey rolls.
Squash
  1. Preheat oven to 400 F. Slice the spaghetti squash in half & scoop out the seeds. Place both haves on a large roasting pan & drizzle with olive oil. Roast 30 minutes. Remove squash from oven & place the bacon wrapped roulades into the cavity of the squash. Return turkey/squash roulade to oven, lower oven temperature to 350 F. & roast until the internal temperature of the turkey roulade is 155 F., ABOUT 1 1/2 hours. Remove from oven & allow to stand about 10 minutes. Slice & place on serving platter.
Apple Cider Gravy
  1. In a medium saucepan, combine turkey stock, apple cider & sage leaves; bring to a boil. Gently boil, stirring occasionally, for about 15 minutes until sauce is reduced & thickened slightly. Remove sage leaves & discard. Drop in butter cubes; whisk to incorporate, add pepper & remove from heat. Serve hot over turkey roulade.

Cream Puffs with Raspberry Chambord Sauce

Cream puffs are unusual pastries. Flour is added to a boiled mixture of butter and water, then baked at a high temperature until the mixture becomes a smooth ball of dough with a hollow center. This fairly tasteless mixture is known as choux pastry. When served as a sweet dessert they are called cream puffs — when served with a brown gravy & roast beef, Yorkshire pudding.

Although a very basic shell, these puffs can be made into some pretty elegant desserts. One idea that I had originally developed for a company Christmas party, used Chambord (raspberry) liqueur.

Chambord, France’s Liqueur Royale is a magnificent liqueur created using all natural ingredients. The finest black and red raspberries are blended before being steeped in Cognac to achieve a highly concentrated base. The mixture is then extracted and a second infusion captures the remaining flavors from the berries. The final step marries the berry infusion with Cognac and extracts of Madagascan vanilla, Moroccan citrus peel, honey and hints of fragrant herbs. The result is an unprecedented level of all natural complexities, flavor and aroma.

To fill the puffs, I made a simple pastry cream using instant vanilla pudding mix, spices, whipped cream and some rum flavor to give it an eggnog taste. Once the puffs were filled and placed on a serving dish, I drizzled them with the sauce. Any remaining sauce was served in a dish in the center of the cream puff ‘wreath’. It definitely brought the spirit of Christmas to the dessert buffet table!

Print Recipe
Cream Puffs with Raspberry Chambord Sauce
Votes: 1
Rating: 5
You:
Rate this recipe!
Servings
Ingredients
Cream Puffs
Eggnog Fluff Filling
Raspberry Chambord Sauce
Servings
Ingredients
Cream Puffs
Eggnog Fluff Filling
Raspberry Chambord Sauce
Votes: 1
Rating: 5
You:
Rate this recipe!
Instructions
Cream Puffs
  1. Preheat oven to 400 F. In a saucepan, heat water & butter to a rolling boil. Whisk in flour & salt. Stir vigorously over low heat until mixture forms a ball, about 1 minute; remove from heat. Beat in eggs, all at once; continue beating until smooth.
  2. Drop dough by scant 1/4 cupfuls about 3 inches apart onto an ungreased or parchment lined baking sheet. Combine 2 Tbsp milk & egg yolk; brush over tops. Bake until puffed & golden. about 35-40 minutes. Cool away from drafts. Cut off tops; pull out any filaments of soft dough.
Eggnog Fluff Filling
  1. In a large bowl, combine DRY pudding mix, milk, rum extract, nutmeg & ginger. With a mixer blend on low speed; Add whip cream, beating on high speed until soft peaks form, about 1-2 minutes.
Raspberry Chambord Sauce
  1. In a food processor, puree raspberries with water until smooth. Strain into a small saucepan, pressing puree through a mesh. Whisk sugar, cornstarch & liqueur into sauce. Cook all ingredients together over medium high heat until thickened & clear. Remove from heat & add remaining sugar IF DESIRED. Transfer to a non-metalic container, cover & chill until ready to use.
  2. Fill puffs; arrange on serving platter & drizzle with fresh raspberry Chambord sauce. Place remaining sauce in center of cream puff wreath. Serve immediately or cover & refrigerate no longer than 3 hours.

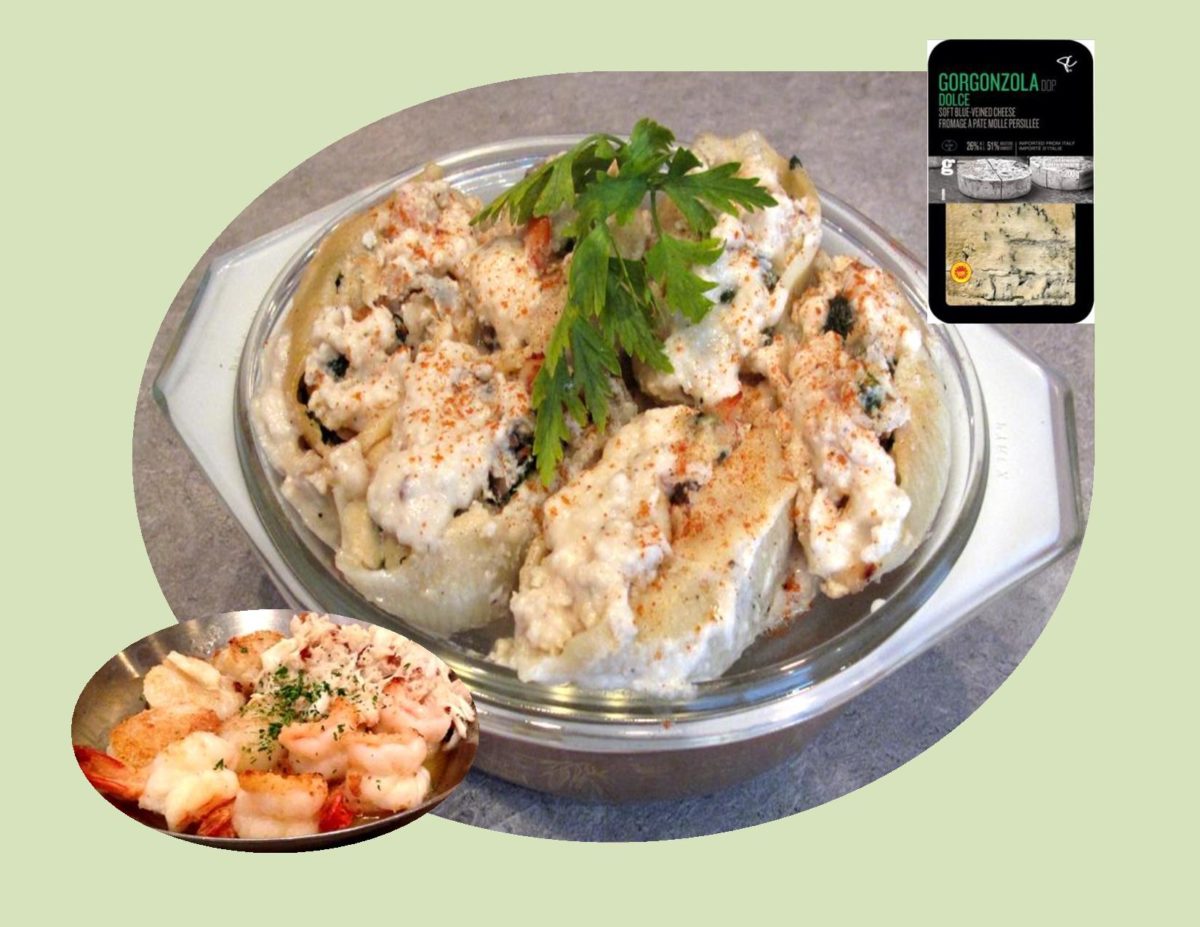
Seafood-Gorgonzola Pasta Shells

One of my all time favorite pasta dishes to make are jumbo stuffed pasta shells. They are easy to prepare and are perfectly portioned for individuals and groups alike.The best part is the multitude of different fillings you can make them with.

Some years ago, Brion and I had the pleasure of eating lunch at Gayles Bakery & Rosticceria in the little seaside town of Capitola, California (see my blog article from July 2016 for Fig & Gorgonzola Chicken Breast). It was there I tasted Spinach-Gorgonzola Pasta. Until then I had never even tasted this kind of cheese. With a strong dislike for Blue Cheese, it looked suspiciously similar. Long story short, it seemed everyone was ordering this pasta so I decided to try it. It was just incredible! The combination of Gorgonzola, ricotta and parmesan make this dish especially decadent and delicious.

Info I found on Gorgonzola Dolce reads like this — Imported from Italy, this sweet or ‘dolce’ Gorgonzola has the characteristically creamy texture and nutty aroma Gorgonzola is known for, yet is milder due to a shorter aging period. A great option for those who normally shy away from blue cheese.

The fact that Brion and I are both seafood lovers, I decided to incorporate this kind of pasta with a little seafood medley. The end result did not disappoint, bringing back that ‘taste of a memory’ once again.

Print Recipe
Seafood-Gorgonzola Pasta Shells
Votes: 2
Rating: 3
You:
Rate this recipe!
Course Main Dish
Cuisine American, Italian
Servings
Ingredients
Bechamel Sauce
Course Main Dish
Cuisine American, Italian
Servings
Ingredients
Bechamel Sauce
Votes: 2
Rating: 3
You:
Rate this recipe!
Instructions
Bechamel Sauce
  1. In a heavy saucepan over medium heat, heat milk until hot but not boiling. Meanwhile, combine flour & butter in another heavy saucepan. Stir over medium heat with a wooden spoon or whisk until the mixture has gently bubbled for 2 minutes, being careful not to brown flour.
  2. Begin to add the hot milk to the flour mixture a little at a time while whisking vigorously. Continue to add the milk until it is fully incorporated. Bring the mixture to a boil, reduce heat to low; simmer, stirring constantly, until the mixture thickens, about 6-8 minutes. It should resemble heavy cream. Crumble the cheese & add to hot bechamel sauce, whisking continuously until smooth. Add nutmeg & pepper & stir. Remove from heat to cool.
Pasta & Filling
  1. Cook the pasta shells in salted boiling water to which a small amount of oil has been added for 8-10 minutes. Drain & set aside.
  2. In a large skillet, melt butter. Saute spinach & mushrooms until spinach is wilted. Remove to paper towels. Add shrimp & scallops to skillet; saute for 3-4 minutes until opaque & just barley cooked; set aside. Preheat oven to 350 F.
  3. In a large bowl, combine spinach, shrimp, scallops, crab meat, ricotta cheese, garlic & salt & pepper. Fill pasta shells. Spread some sauce in the bottom of a 9 x 13-inch baking pan. Lay filled shells single file in pan. Pour remaining sauce over all & top with a sprinkling of parmesan. Bake 20-30 minutes, until the cheese becomes a little brown.

Sour Cream Oatmeal Cookies

Sour cream is often thought of as topping for potatoes or an addition to sauces. Due to its creamy texture, sour cream can be added to a variety of baked goods and recipes in order to yield moister results. The use of sour cream has been associated with the cooking traditions of Eastern Europe, Germany, Ukraine and Russia since the first half of the 20th century. Originally made by allowing cream to sour naturally, today’s commercial version can contain the addition of lactic acid, gelatin or guar gum.

Probably one of the first recipes I ever used sour cream in was coffeecake. I just couldn’t believe how tender and moist it was and the heavenly smell when it came out of the oven. Looking through my mother’s recipe files, I see there were many recipes that contained sour cream that she had used.

I saw this recipe on a site called love2cooksweets.ca  It was posted back in 2010. Nothing fancy but makes a wonderful sour cream oatmeal cookie. These can be filed under ‘comfort food’ I’m sure.

Print Recipe
Sour Cream Oatmeal Cookies
Votes: 4
Rating: 4.25
You:
Rate this recipe!
Course Brunch, dessert
Servings
Course Brunch, dessert
Servings
Votes: 4
Rating: 4.25
You:
Rate this recipe!
Instructions
  1. Line a baking sheet with parchment paper. In a small bowl, whisk together flour, baking soda & salt. In a medium bowl, cream butter with sugars; beat in egg & vanilla. Add flour mixture alternately with sour cream. Stir in raisins & oats.
  2. Preheat oven to 375 F. Scoop dough onto cookie sheet a few inches apart. Bake 12-15 minutes. Allow to cool on pan about 30 seconds then remove to wire racks.

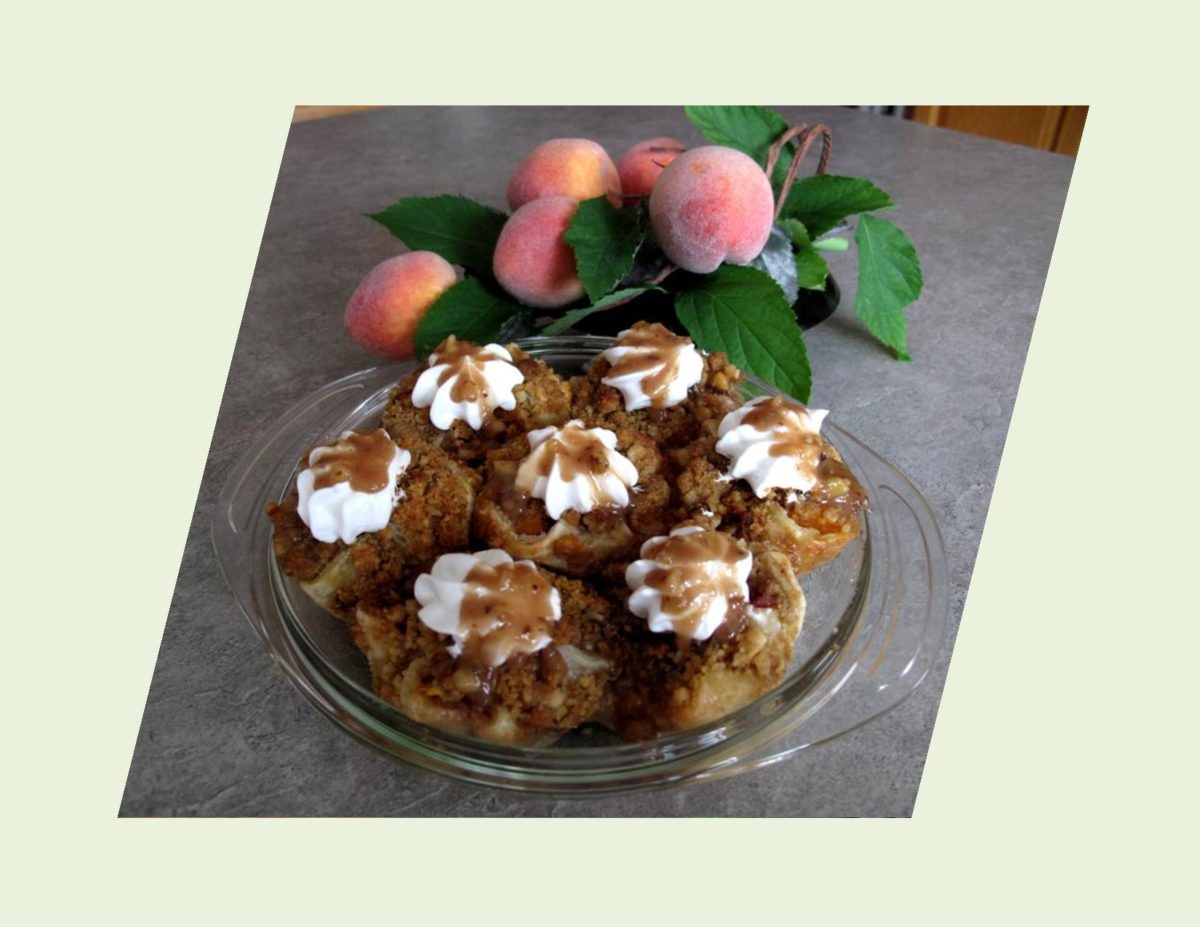
Baked Stone Fruit Dumplings

Part of the enjoyment of writing these blog stories and recipes is the research process. I find it fascinating to learn about the different cultures through their recipes. With some, you have to dig deep to retrieve the authentic recipe or process. Many recipes, as I know from my own family heritage, only exist in memory. These recipes are priceless pieces of family traditions. Each having a history and story of it’s own making them unique and special.

Whenever I feel inspired to create a new recipe, I try to learn everything I can about it’s history and the way it is traditionally made, then I set out on my own. It’s not that I think I can do it better, but rather just personalizing it to our taste.

Fruit dumplings were most popular in England and Central Europe. As people crossed the ocean, they carried with them the recipes for the foods they knew and loved. As time passed they experimented more with the flavors of fruit dumplings. The dough evolved from flour and potatoes to the pastry dough we know today.

I have made this BAKED STONE FRUIT DUMPLING  recipe with either my own homemade pastry or frozen puff pastry. We found them real good either way.

Print Recipe
Baked Fruit Dumplings
Adding a scoop of ice cream makes this an irresistible dessert.
Votes: 2
Rating: 3
You:
Rate this recipe!
Course dessert
Servings
Dumplings
Ingredients
Dumpling
Streusel
Caramel Sauce
Course dessert
Servings
Dumplings
Ingredients
Dumpling
Streusel
Caramel Sauce
Votes: 2
Rating: 3
You:
Rate this recipe!
Instructions
Dumplings
  1. In a small bowl, combine sugar, bread crumbs, cinnamon & nutmeg. On a lightly floured surface, roll pastry into two 12-inch squares. Cut each sheet into nine 4-inch squares. Brush squares with egg. Place 1 tsp sugar mixture in the center of each square; top with 2 Tbsp chopped fruit of your choice & 1 more tsp sugar mixture. Gently bring up corners of pastry to center; pinch edges to seal. Place on greased baking sheets.
Streusel
  1. In a small bowl, combine streusel ingredients. Brush remaining egg over dumplings; press streusel over tops. Bake at 375 F. for 14-18 minutes or until golden brown. Place pans on wire racks & allow to cool about 10 minutes before serving.
Caramel Sauce
  1. While dumplings are baking, combine flour & water in a small saucepan beating until smooth. Add the sugars, butter & salt. Bring to a boil; cook & stir until smooth & blended. If serving immediately, place dumpling on serving plate & pour sauce over top.
Recipe Notes
  • These versatile dumplings can also be made with tart apples or mixed berries.

Corned Beef & Cabbage Quiche

CELEBRATING OKTOBERFEST!

Nothing says fall better than Oktoberfest, a tradition dating back to 1810 in Munich, Germany. Originally a celebration of the marriage of the King of Bavaria and Princess Therese. Everybody had so much fun that it was resolved to repeat the celebration, which has been done, every year since. 

Beer enthusiasts from all over the world flock to Munich for Oktoberfest, where they feast on everything from steins of beer to plates of sauerkraut, bratwurst, cabbage rolls, sausage and wiener schnitzel. Bavarian music fills the air to promote the fun atmosphere of Oktoberfest.

While the true celebration has to be experienced in Munich, there are actually some great Canadian events that try to duplicate the festivities without having to travel abroad. In different parts of the country this is a fun and social sampling event featuring many local craft and authentic Bavarian breweries as well as authentic food, Oktoberfest music, dancers, games, etc..

Even if it is a little hard to admit summer has ended and fall is officially here, Oktoberfest seems like a great little celebration to ease into the coming winter months.

I came across this recipe for CORNED BEEF AND CABBAGE QUICHE.  From the reviews I read it sounded pretty good so I thought it was worth a try. It seems to fit the occasion I think.

Print Recipe
Corned Beef & Cabbage Quiche
Votes: 1
Rating: 5
You:
Rate this recipe!
Course Main Dish
Servings
Ingredients
Course Main Dish
Servings
Ingredients
Votes: 1
Rating: 5
You:
Rate this recipe!
Instructions
  1. In a large skillet, melt butter; add onion, cabbage & garlic. Cook, stirring frequently, until vegetables are crisp-tender, about 5-7 minutes. Add water, cover & cook for 5 minutes. Remove cover & cook until liquid evaporates & cabbage begins to brown, about 8-10 minutes longer. It is important to get the liquid out of the cabbage or it will cause quiche to become watery.
  2. Stir in corned beef; remove pan from heat & allow to cool for 15 minutes. Preheat oven to 375 F. In a medium bowl, whisk together eggs, milk, flour, caraway seeds, salt & pepper until blended.
  3. Spread half of cabbage mixture in pie crust. Top with half of the Swiss cheese; repeat layers. Slowly pour egg mixture over ingredients in pie shell. Sprinkle with Parmesan cheese. Bake for 30-40 minutes or until quiche is puffed & golden. Let cool 5 minutes before slicing to serve.
Recipe Notes
  • This quiche is nice baked 'galette' style or using a springform pan instead of a regular pie pan.
  • Recipe inspired by busycooks.about.com

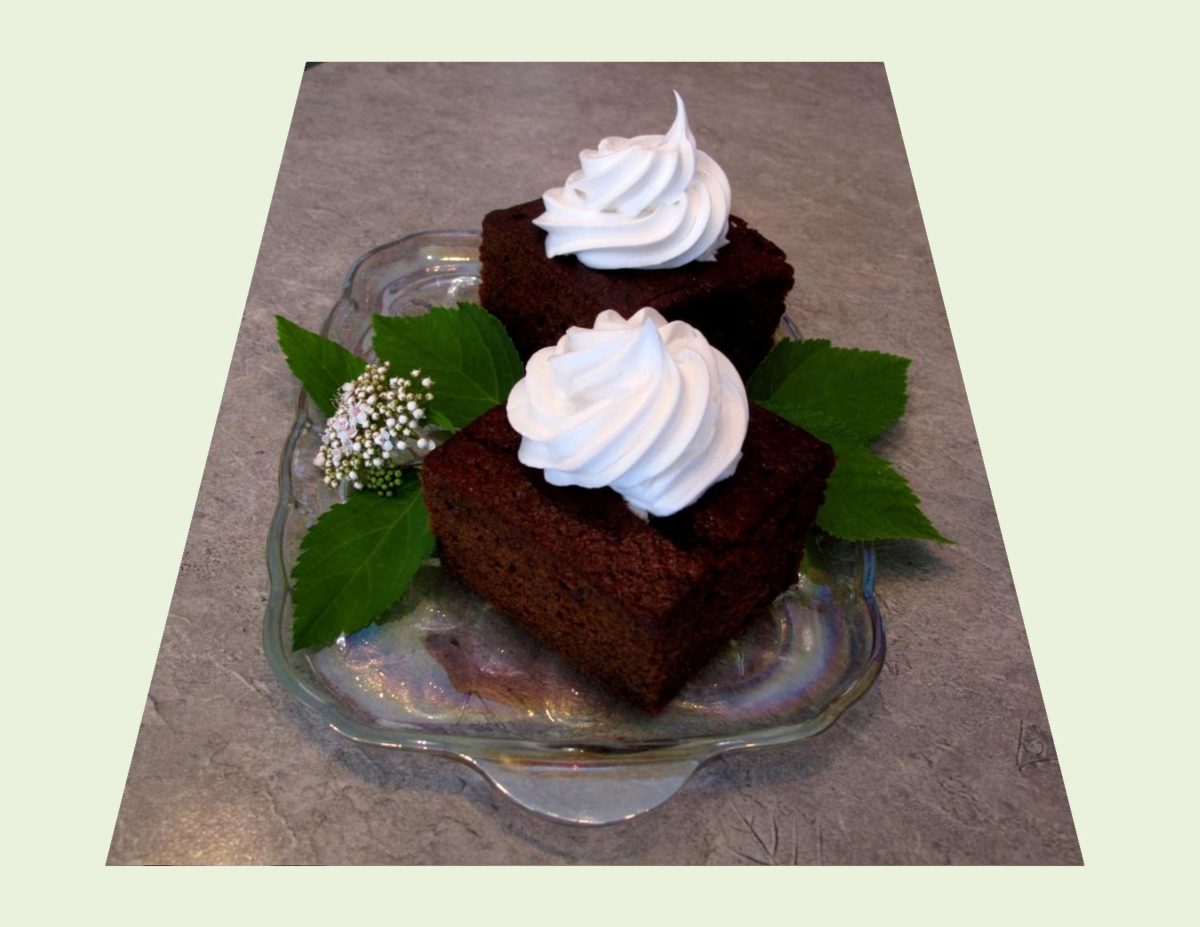
Classic Gingerbread Cake

Gingerbread (cake) is the perfect sweet/spicy dessert for fall and winter, flavored by a ‘strange lumpy little root’. I recall my mother baking gingerbread cake for our supper dessert. She would serve it warm with farm fresh whipped cream. For lack of a better expression, ‘it was to die for’. Strangely enough, I was never fond of molasses but certainly enjoyed that warm gingerbread cake!?

Gingerbread has been baked in Europe for centuries. In some places it was soft, delicately spiced cake, in others, a crisp, flat cookie. Then in other places, warm, thick, dark squares of bread served with lemon sauce or whipped cream.

At first, gingerbread was made with breadcrumbs and sweetened with honey, but as it made its way throughout the world it has been adapted to meet the taste of different cultures. In North America, along with the ground ginger we usually like to add cinnamon, and cloves. Molasses is usually labeled as ‘sulphured’ or ‘unsulphured’ depending on whether sulphur was used in the processing. The unsulphured molasses is lighter in color and tends to have a nicer flavor.

Brion does not remember ever eating gingerbread cake?? I’m going to try to bring back the taste of a memory  with this classic little cake and see what he thinks.

Print Recipe
Classic Gingerbread Cake
Applesauce is such a great addition in that it adds to the cake moistness.
Votes: 1
Rating: 5
You:
Rate this recipe!
Course Brunch, dessert
Servings
Ingredients
Course Brunch, dessert
Servings
Ingredients
Votes: 1
Rating: 5
You:
Rate this recipe!
Instructions
  1. Preheat oven to 350 F. Line a 9-inch square baking dish with parchment paper.
  2. In a medium bowl, cream together sugar & butter until lightened in color & fluffy. Beat in egg, molasses, applesauce & hot water until fully combined.
  3. In a small bowl, whisk together flour, baking soda, salt, cinnamon, ginger & cloves. Whisk into wet ingredients, mixing ONLY until blended.
  4. Bake for 30-35 minutes until cake springs back when touched or a knife inserted comes our clean.
Recipe Notes

Rhubarb Tartlets

I never seem to get enough of making use of my rhubarb plants, since this is probably my 4th ‘rhubarb’ blog so far this year. I’m sure any of you that are following my blog stories are tired of hearing about rhubarb but ……… At the risk of boring you with this subject, I still want to share a few other ideas for this seasonal plant.


 Spiced Rhubarb Relish : Place 8 cups chopped rhubarb, 2 cups chopped onion,       1 tsp allspice, 1/2 cup vinegar, 2 cups sugar & 1 1/2 tsp salt in a large pot; bring to a boil. Reduce heat; simmer & cook uncovered on low heat, stirring frequently. Cook until onion becomes tender & mixture thickens. Pour into hot sterilized jars & seal. Nice to serve with red meats.                                                                                        Stewed Rhubarb: In a medium saucepan, heat 4 cups sliced rhubarb with 2/3 cup sugar over medium heat until tender, about 15 minutes. Stir often.                      Rhubarb Smoothie: To cold stewed rhubarb add your choice of frozen berries, low-fat yogurt, orange juice & a banana. Mix in a blender & add honey to taste.  Rhubarb Muffins/Scones: Add 1 cup of finely chopped rhubarb & zest of 1 orange to your favorite batter.                                                                                                                   Rhubarb Applesauce: Heat 3 cups of peeled, sliced apples, 1/3 cup sugar, 1 cup chopped rhubarb over medium heat until apples are soft, about 15 minutes. Stir often. To enhance flavor, add raisins, cinnamon or ginger to taste.                              Rhubarb Cherry Pie: Stir 1 cup coarsely chopped rhubarb with 1 – 540 ml can of cherry pie filling. Bake the same as you would for a cherry pie.                                     Savory Rhubarb Pork Sauce: In a medium saucepan, combine 2 cups sliced rhubarb with 1/3 cup brown sugar, 1 Tbsp cider vinegar & 3/4 tsp fresh, grated ginger. Simmer until soft.

Hopefully you will find one of these ideas useful. Enjoy!

Print Recipe
Rhubarb Mini Flans
Votes: 1
Rating: 5
You:
Rate this recipe!
Servings
Ingredients
Cornmeal Tart Crust
Servings
Ingredients
Cornmeal Tart Crust
Votes: 1
Rating: 5
You:
Rate this recipe!
Instructions
Cornmeal Tart Crust
  1. In a food processor, place flour, cornmeal, salt & sugar; pulse several times to combine. Add butter; process until mixture resembles coarse meal, about 10 seconds. While machine is running, pour the ice water through the feed tube in a slow, steady stream, until the dough just holds together (do not process for more than 30 seconds). Turn the dough out on work surface. Place dough on plastic wrap. Flatten to form disk; wrap & refrigerate at least 1 hour.
Rhubarb Filling
  1. In a medium saucepan, combine rhubarb, both sugars, cornstarch & salt. Cook stirring occasionally, until the rhubarb releases its liquid & begins to breakdown, creating a thick, chunky sauce, about 10 minutes. Remove from the heat & stir in vanilla. Set aside to cool to room temperature.
  2. On a lightly floured work surface, Divide dough into 16 pieces. Line 8 mini flan pans with bottom crusts; rolling the remaining 8 balls into circles for top crusts. Pace circles on parchment paper. Refrigerate bottom & top crusts again for 1 hour.
  3. Preheat oven to 375 F. Divide rhubarb filling among the 8 tarts. Cut a design of choice in the top crusts & fit to mini tarts. Brush with egg wash & sprinkle with sugar. Bake until crust is golden & filling bubbles a little bit, about 20-25 minutes. Serve warm or at room temperature, topped with whipped cream or ice cream.
Recipe Notes
  • These little minis would also be nice made as fruit galettes for something a bit rustic looking.

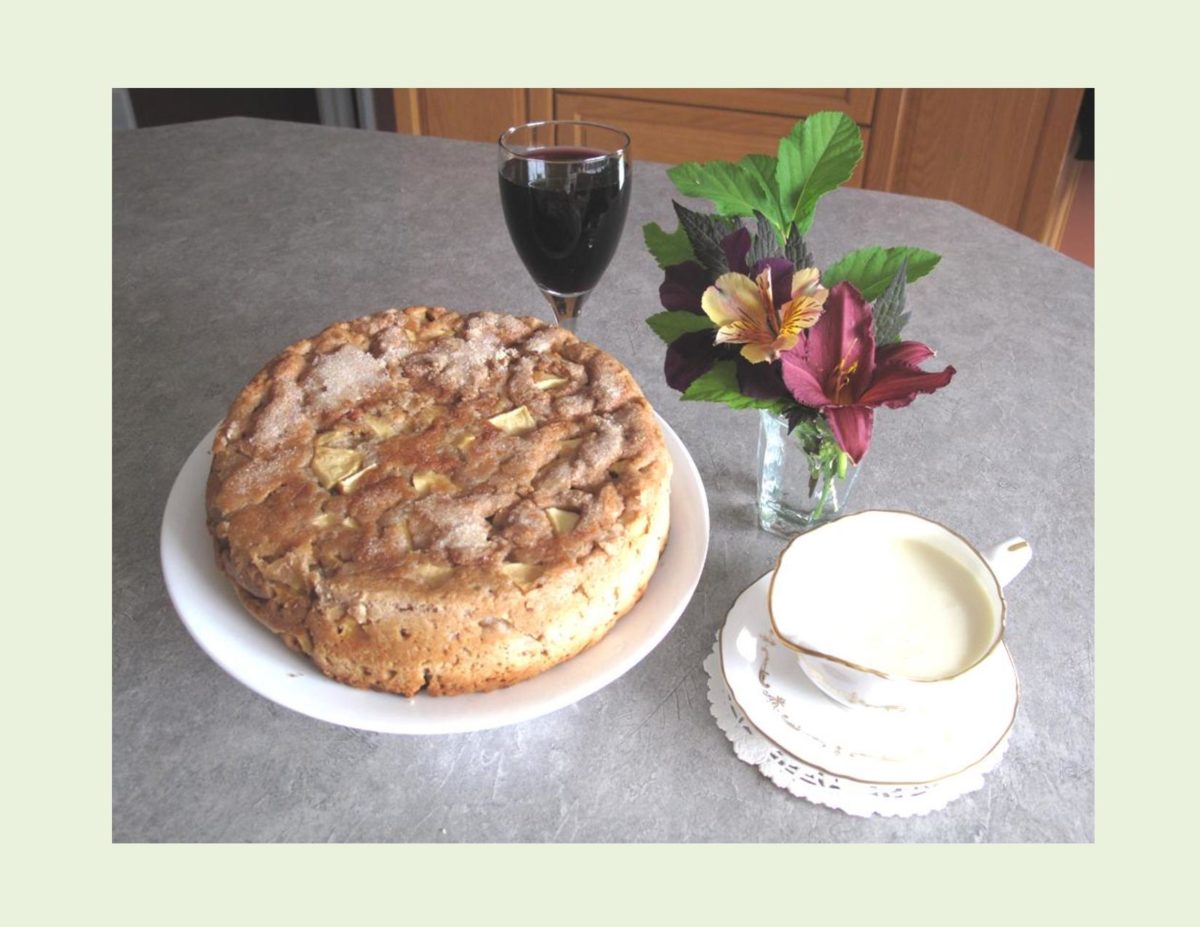
German Apple Custard Cake

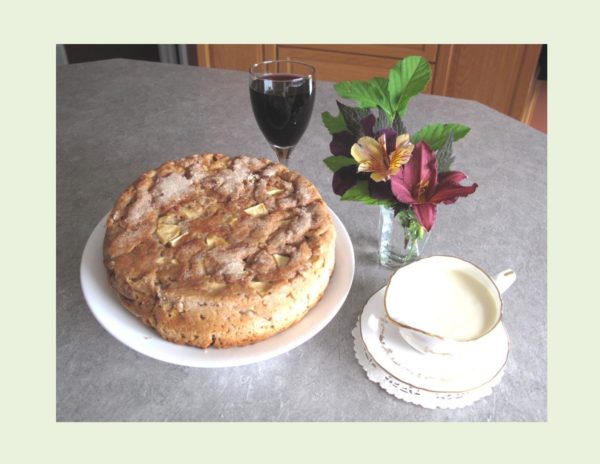
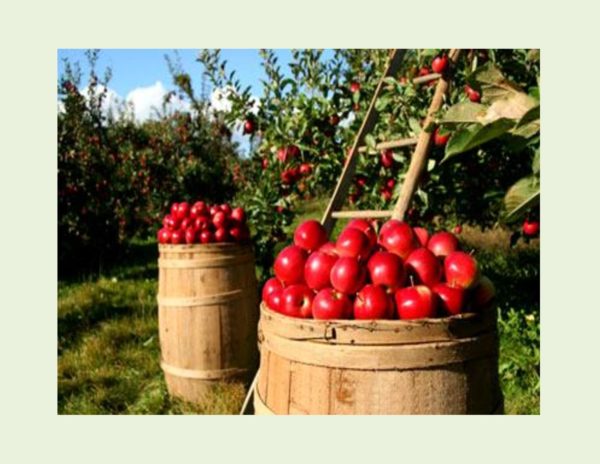
We will soon be heading into fall. For apple lovers, the cool mornings and clear days of Autumn mean one thing; its time for some of the season’s crisp, juicy apple harvest. Apples are available year round thanks to controlled-atmosphere, cold storage chambers that keep them fresh for months. Some varieties even develop better flavor overtime. After 30 plus years in the food service industry, I retired and spent some wonderful years as tree and shrub buyer for a garden center. On this property there were many apple trees. One of the varieties was called Westland. These particular apples don’t taste like much until the first frost had touched them. Apples are a very common fruit but shouldn’t be overlooked due to their versatility.

When you take notice of how many ways apples are used in German baking, cooking, etc. its very clear that Germany loves its apples. For example there’s fresh apples, apple sauce, apple pancakes, apple juice, apple schnapps, apfelschorle (apple juice and carbonated water) and of course the many versions of apple cake …..

This German Apple Cake is served with a nice vanilla custard sauce making it quite special.


Print Recipe
German Apple Custard Cake
Votes: 6
Rating: 4.17
You:
Rate this recipe!
Course Brunch, dessert
Servings
Ingredients
Cake
Custard
Course Brunch, dessert
Servings
Ingredients
Cake
Custard
Votes: 6
Rating: 4.17
You:
Rate this recipe!
Instructions
Cake
  1. Preheat oven to 375 F. Grease & flour or line with parchment paper an 8 or 9-inch spring form pan.
  2. In a large bowl, whisk together flour, baking powder, salt, cinnamon & cardamom. Using a pastry blender or your fingers, cut in butter until mixture resembles fine crumbs. Add 3/4 cup sugar & mix. Peel apples; slice & cut as suggested. Toss apples with flour mixture to coat.
  3. In a separate bowl, beat eggs & milk together. Add to the apples & flour; mix in with a large spatula until just combined. Batter should look thick & dough-like. Transfer the dough to prepared cake pan & flatten the top using the back of spatula. Sprinkle 2 Tbsp sugar over the cake top. Bake for 45-50 minutes or when cake tests done.
Custard
  1. In a bowl, whisk egg yolks & sugar until pale yellow about 2-3 minutes. In a medium saucepan, bring the milk just to a boil. Slowly whisk the hot milk into the egg/sugar mixture. Transfer the mixture back to the saucepan & stir over medium heat until custard thickens, about 4 minutes. Custard should be thick enough to coat the back of a spoon. Stir in vanilla & transfer to serving pitcher. This custard is not a thick, pudding like consistency; it needs to be a pour able.
  2. Serve custard warm or cold over apple cake.

Vintage Pineapple Pie

This week we celebrate my husband, Brion’s birthday. Family birthdays forever bring me back to my childhood days. My mother always made the birthday person’s favorite meal on their day along with a cake. Although she excelled at cooking in general, her creative talent was put to good use when she decorated our birthday cakes.

Brion has always loved pineapple pie. I’m not sure where it came from but could possibly have been from time spent in the Cook Islands years ago.

In 1950, the Pillsbury company (General Mills) came out with a pie crust mix. Their promotion read that ‘the quality was assured by the finest ingredients, scientifically blended and perfectly balanced’. All you had to do was add water and mix. To further promote their product they included a recipe for Pineapple Pie supposedly having been written by ‘Ann Pillsbury’. This was a fictitious home economist created for marketing purposes. She essentially represented the members of the Pillsbury Home Service department. Unlike Betty Crocker, Ann Pillsbury did not catch on and was replaced in 1965 by the Pillsbury Doughboy who we still see in their current advertising.

My blog recipe is a bit different from the vintage one but is one of Brion’s favorites. Over the last six months, Brion’s love and support have helped me recover from shoulder replacement surgery for which I’m very grateful.

                                               BIRTHDAY WISHES WITH LOVE!

Print Recipe
Vintage Pineapple Pie
Votes: 2
Rating: 3.5
You:
Rate this recipe!
Servings
Ingredients
Pineapple Filling
Crumb Crust
Meringue Topping
Servings
Ingredients
Pineapple Filling
Crumb Crust
Meringue Topping
Votes: 2
Rating: 3.5
You:
Rate this recipe!
Instructions
Pineapple Filling
  1. In a saucepan, combine cornstarch & sugar. Gradually stir in water until mixture is smooth. Add lemon zest & undrained crushed pineapple. Stir constantly over medium heat until mixture starts to boils; reduce heat slightly & continue to boil 2 minutes. Remove from heat; quickly stir in butter & beaten egg yolks, mixing well. Allow mixture to cool to room temperature.
Crumb Crust
  1. In a food processor or with a rolling pin, crush biscuits finely & evenly. Melt butter; add to crumbs, mixing well with fork. Press evenly over bottom & up sides of a 9-inch flan or pie pan. Refrigerate crust while filling is cooling.
Meringue Topping
  1. Preheat oven to 375 F. In a small bowl, beat egg whites until soft peaks form, gradually add sugar. Beat until sugar is dissolved. Spread filling evenly into crust; top with meringue making sure to spread it to the edge of crust to form a seal.
  2. Bake for about 5-10 minutes or until surface of meringue is evenly golden brown.