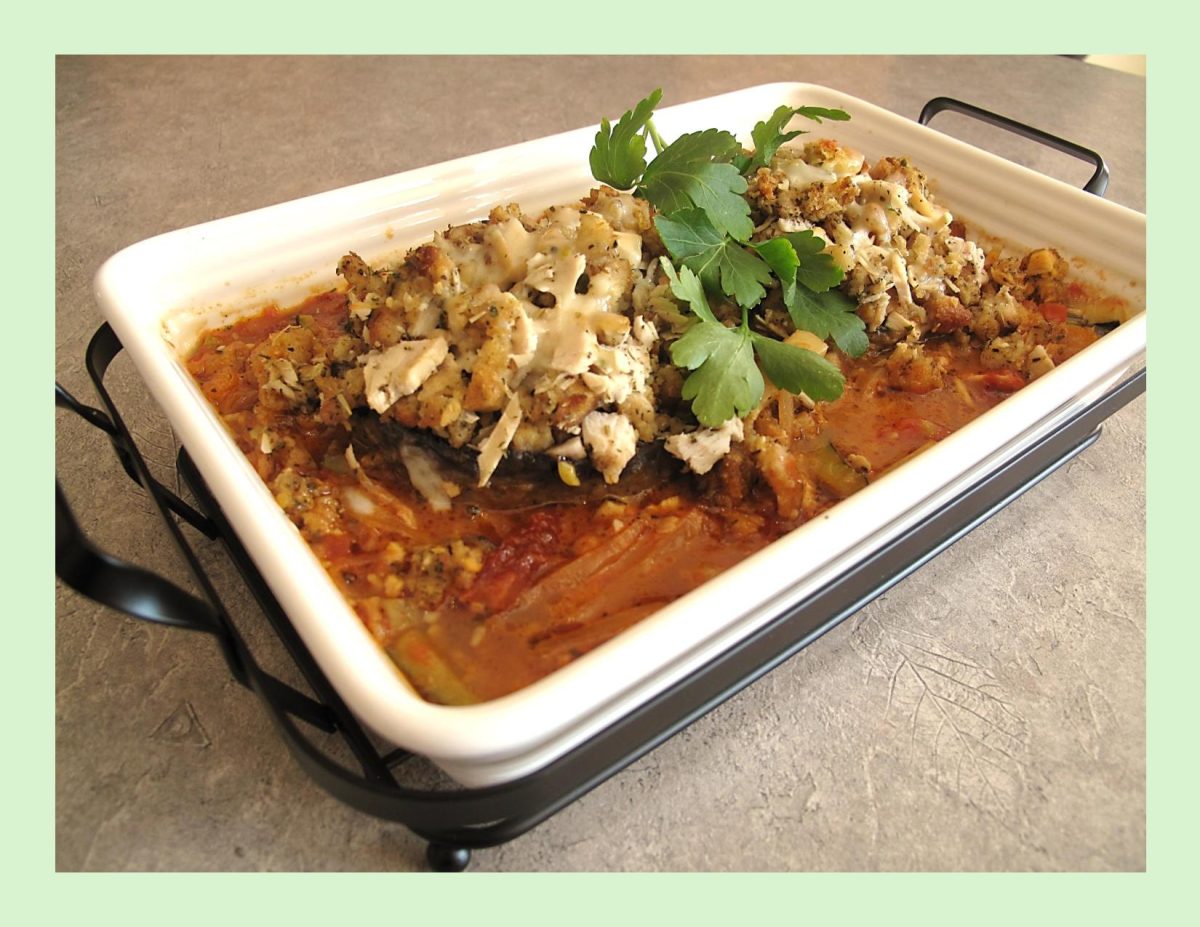
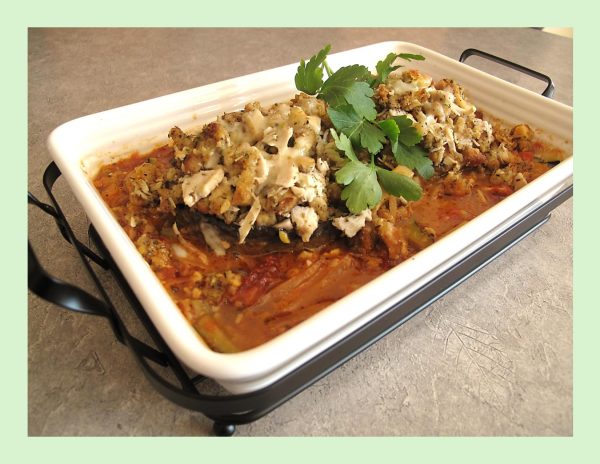
Cheesy Chicken & Stuffing Stuffed Portabella Mushrooms

How is it spelled? Portobello or Portabella – from what I understand there is no ‘right’ spelling. Both versions are accepted, but the Mushroom Council  decided to go with Portabella to provide some consistency across the market.

Have you ever stopped and thought about how many vegetables are fantastic when stuffed? Any vegetable with a fairly sturdy shape can become an edible vessel for dinner. All we need to do is fill the inside with a stuffing of our choice, a little time in the oven until everything is heated through and dinner is ready!

I find the versatility of the portabella mushroom is endless. They have a rich, meaty texture and flavor which is retained even after cooking. You can use them in soups, stews, baked pasta, rice dishes or as a meat substitute in salads. Portabellas are excellent paired with fresh herbs, cheese, tomato or cream-based sauces, leafy greens, garlic and onions.

I’m sure the appeal of mushrooms isn’t for everyone. For Brion & I, we love that earthy taste. There is hardly anything you can’t use mushrooms in from appetizers to main course.

For our stuffed mushrooms today, I made a sun-dried tomato sauce then stuffed the Portabella caps with some chicken & stuffing and baked them in it for a supper entrée. Tasty and filling!
Print Recipe
Cheesy Chicken & Stuffing Stuffed Portobello Mushrooms
Votes: 1
Rating: 5
You:
Rate this recipe!
Servings
Votes: 1
Rating: 5
You:
Rate this recipe!
Instructions
Chicken & Stuffing
  1. In a small bowl, create a seasoning blend by mixing together garlic powder, dried basil, onion salt, dried parsley, salt, black pepper, & celery salt. Rub the seasoning blend evenly on both sides of the chicken breasts.
  2. Preheat oven to 375 F.
  3. Place the seasoned chicken breasts in a baking dish & add the chicken broth to the dish. Cover the baking dish with foil & bake for approximately 25-30 minutes, or until the chicken is cooked through. Remove the chicken from the oven, dice it & set it aside.
  4. Prepare the chicken stuffing mix according to the package directions. Toss with cooked chicken. Grate cheddar cheese.
Sauce
  1. In a skillet, heat oil. Add onion & cook for 2 minutes until it starts to soften. Add reserved mushroom stems, garlic, oregano, paprika, sun-dried tomatoes & zucchini. Cook for 2 minutes while stirring with a spatula. Add wine & allow to bubble for 2 minutes then add vegetable broth, salt & pepper. Bring to a boil & simmer for 5 minutes.
  2. Stir the cream & Parmesan cheese into the sauce. Place in a 9 x 13-inch baking dish.
Mushrooms
  1. Whisk the egg lightly in a shallow bowl. In a separate shallow bowl, combine flour, salt, pepper, oregano, thyme, paprika & garlic salt. In a large skillet, heat olive oil on medium-high. Dip the mushrooms in the egg then in the flour mixture. Coat the outside of the mushrooms, trying not to get too much flour inside the ‘cap’. In the skillet, fry mushrooms on both sides until lightly golden. Use a tong to help fry the sides as well. Remove mushrooms to a plate. 4. Set aside, keep warm.
Assembly & Baking
  1. Preheat oven to 350F.
  2. Pack each Portobello mushroom cap with the chicken & stuffing mixture, ensuring it's firmly packed to stay in place during baking. Nestle the stuffed mushrooms on top of the sauce in the baking dish. Cover the baking dish with foil.
  3. Bake for about 20-25 minutes or until the mushrooms are tender & the stuffing is heated through. For the last 5 minutes of baking, remove the foil & sprinkle with cheese. When cheese is melted, remove the stuffed mushrooms from the oven.
  4. Nice to serve with pasta or potatoes.
Recipe Notes
  • Since their is just two of us, I only made half the recipe as you will notice in the picture.

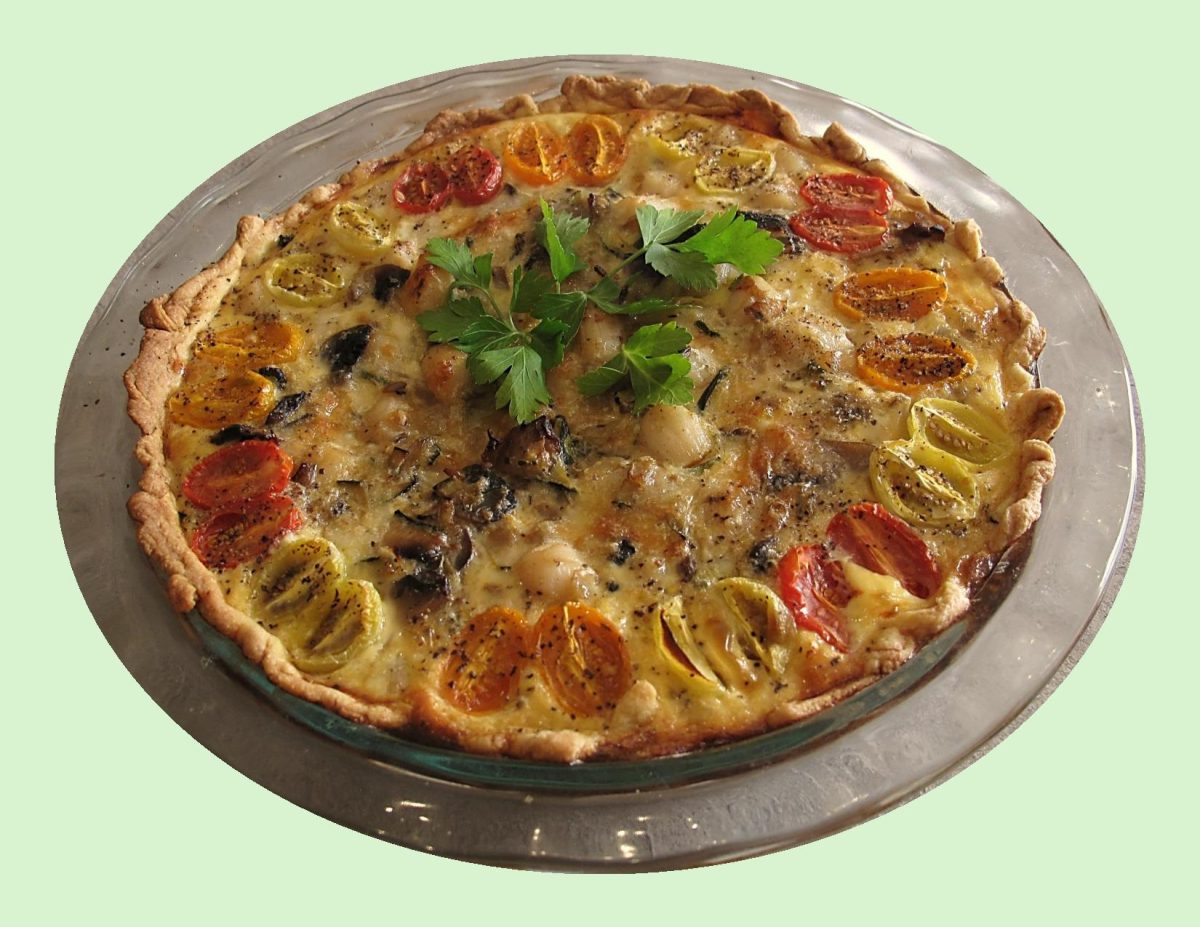
Scallop & Zucchini Quiche

While there’s still time to enjoy summer, it’s definitely prime time for eating some satisfying summer squash.

Zucchini, also known as courgetti, belongs to the same family as pumpkin. The most widely known version is green, though golden varieties exist too, which are yellow or orange.

While zucchini is treated as a vegetable in the culinary sphere, it’s technically the fruit of the zucchini flower (which can also be consumed).

Scallops are buttery, delicious, and easily likeable. This special kind of seafood has won our hearts in the casual and fine dining setting. We continue to ask ourselves how we can enhance the flavor of this seafood treat even more. Since scallops are briny and sweet with a relatively subtle flavor profile, they’ll complement everything from crunchy sweet corn to zippy citrus salads and summer or winter squash.

They’re one of the more sustainably sourced seafood because they are typically harvested from places, they are endemic to. This means that scallops don’t feed off other marine life unnaturally and they’re not placed in areas foreign to them.

I think you will find this scallop and zucchini quiche is nice served as a hot or cold summer entrée.

Print Recipe
Scallop & Zucchini Quiche
Votes: 1
Rating: 5
You:
Rate this recipe!
Servings
Ingredients
Cornmeal Pastry
Servings
Ingredients
Cornmeal Pastry
Votes: 1
Rating: 5
You:
Rate this recipe!
Instructions
Pastry
  1. In a small bowl, combine sour cream & ice water; set aside. In a large bowl, whisk together flour, cornmeal, sugar & salt. Using a pastry blender or fingertips, cut in butter until mixture resembles both coarse crumbs & small peas. Sprinkle the cold sour cream mixture over dough, 1 Tbsp at a time, tossing with a fork to evenly distribute it.
  2. After you have added all the sour cream mixture, dough should be moist enough to stick together when pressed; if not add additional cold water, 1 tsp at a time. DO NOT overwork dough. Press dough into a disk & wrap in plastic wrap. Refrigerate for at least 2 hours.
Filling
  1. In a saucepan, fry bacon until cooked but not real crisp. Remove bacon & place on paper towel to drain. In the same saucepan, sauté onions, zucchini mushrooms & garlic in remaining bacon drippings until tender but not over cooked. Add scallops during the last few minutes of sautéing. Remove from pan & combine with bacon; cool slightly.
  2. Preheat oven to 350 F.
  3. Grate cheese. Whisk together eggs, milk, Old Bay seasoning, salt & pepper. Halve the cherry tomatoes.
  4. Roll out pastry to fit a 9-inche quiche pan. Line the crust with parchment paper and fill with uncooked beans or rice. Bake for 10 minutes, then remove from the oven, remove the beans (or rice) & paper. Sprinkle half of the grated cheddar on the quiche shell. Place filling mixture on top; form a ring of tomato halves around the outside edge. Sprinkle with remaining cheese then pour milk mixture over the quiche.
  5. Sprinkle half of the grated cheddar on the quiche shell. Place filling mixture on top; form a ring of tomato halves around the outside edge. Sprinkle with remaining cheese then pour milk mixture over the quiche.
  6. Bake for about 45 minutes or until set.

Pork Vegetable Orzo

Oblong and common in Mediterranean cooking, orzo has a look of rice and the texture of pasta. Orzo, also named risoni, is an extremely versatile pasta shape used in a multitude of recipes and cuisines. Translating to mean ‘barley’ in Italian due to its resemblance to the grains of unprocessed barely, it is categorized as a ‘pastina’ meaning ‘little pasta’.

The most common variety of orzo is made from semolina flour, which in turn is made from durum wheat. Because the wheat base gives it a heartier texture, it is better able to absorb the flavors of the ingredients around it as well as providing the pasta with a firmness needed to ensure it maintains its shape while remaining soft and light in texture.

Like most pasta, orzo is boiled in a pot of water to prepare. From there, it can be used in multiple applications. Traditionally it is used in soups and sometimes as a side dish, both hot and chilled, with herbs, olive oil or butter, and parmesan cheese.

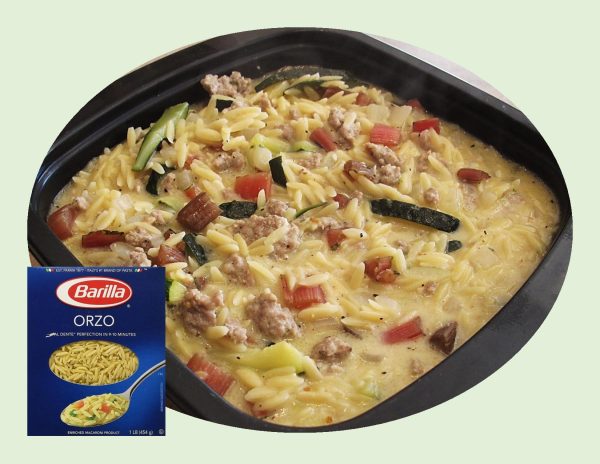
Today, I’m incorporating orzo in a ground pork & vegetable, one-pot meal …. pasta, meat & veggies, what more is needed!

Print Recipe
Pork Vegetable Orzo
Votes: 1
Rating: 5
You:
Rate this recipe!
Course Main Dish
Cuisine American
Servings
Ingredients
Course Main Dish
Cuisine American
Servings
Ingredients
Votes: 1
Rating: 5
You:
Rate this recipe!
Instructions
  1. In a large saucepan, crumble fry ground pork until cooked. Steam chard stalks in a microwave dish until almost tender-crisp. Add onions, zucchini & chard to saucepan with pork. Sauté until onion has softened & veggies are tender-crisp.
  2. Stir in garlic, Montreal steak spice & orzo, cook for about 30 seconds. Stir in chicken broth & milk. Once it starts to bubble, continue cooking for 10 minutes, uncovered, stirring often. Turn heat to a medium low temperature. It should gently bubble vs. boil as you don't want the liquid to reduce too much before the pasta has cooked.
  3. Remove from heat, stir in parmesan. Cover & gently cook 3-5 minutes until the mixture has slightly thickened. Remove from heat & serve.

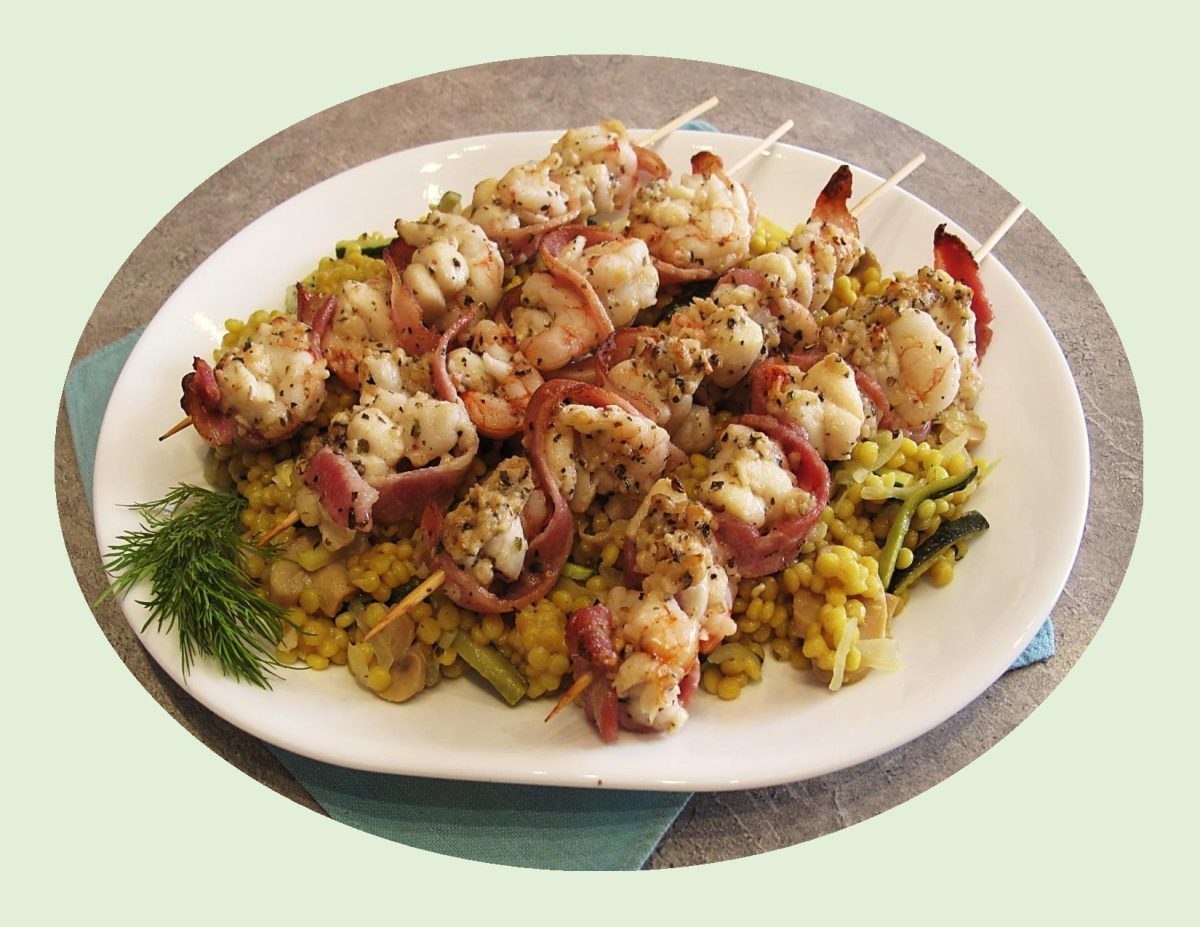
Bacon Wrapped Shrimp & Scallop Skewers

Bacon-wrapped shrimp and scallops may sound like an appetizer only served at fancy cocktail parties. But tossed in parmesan and spices then wrapped in bacon makes for some incredible skewers to serve with some vegetable couscous as a main dish.

There are all kinds of tasty add-ins to couscous, such as mushrooms and zucchini. Mushrooms add an earthy, savory flavor to couscous that makes it a good complement to main dishes like roast chicken, pork, beef or seafood.

Couscous has become one of my favorite pantry staples. It’s quick, convenient, versatile and makes a good alternative to ‘traditional’ rice or pasta.

Couscous used to be hand rolled into tiny pasta. It is now available in instant- cook packages or bulk, where couscous has already been pre-cooked by steaming and then dried. This leaves us with the simple task of re-hydrating in water or broth, which typically takes something like 5-10 minutes!

Print Recipe
Bacon Wrapped Shrimp & Scallop Skewers
Votes: 1
Rating: 5
You:
Rate this recipe!
Servings
Ingredients
Vegetable Couscous
Servings
Ingredients
Vegetable Couscous
Votes: 1
Rating: 5
You:
Rate this recipe!
Instructions
Vegetable Couscous
  1. In a saucepan, slightly pre-cook bacon strips. Remove from saucepan onto a paper towel. To saucepan containing bacon drippings, add zucchini, mushrooms, onion, garlic & cilantro paste; sauté until tender crisp. Place in a bowl.
  2. To the saucepan, add broth & salt (if using) & bring to a boil; add couscous. Cover & remove from heat; set aside until liquid has been absorbed, about 5-10 minutes.
  3. Add bowl of vegetables & gently toss with a fork. Keep warm while you cook seafood.
Shrimp & Scallops
  1. Preheat oven to 400 F.
  2. In a bowl, combine oil, garlic, basil, oregano & Parmesan. Add shrimp & scallops; toss gently until well coated then tread on wooden skewers along with bacon strips.
  3. Line 9 x 13-inch baking pan with foil. Place skewers with tip ends resting on pan edges.
  4. Place in oven & roast JUST until seafood is slightly firm & cooked through & bacon is cooked. Serve immediately with vegetable couscous.

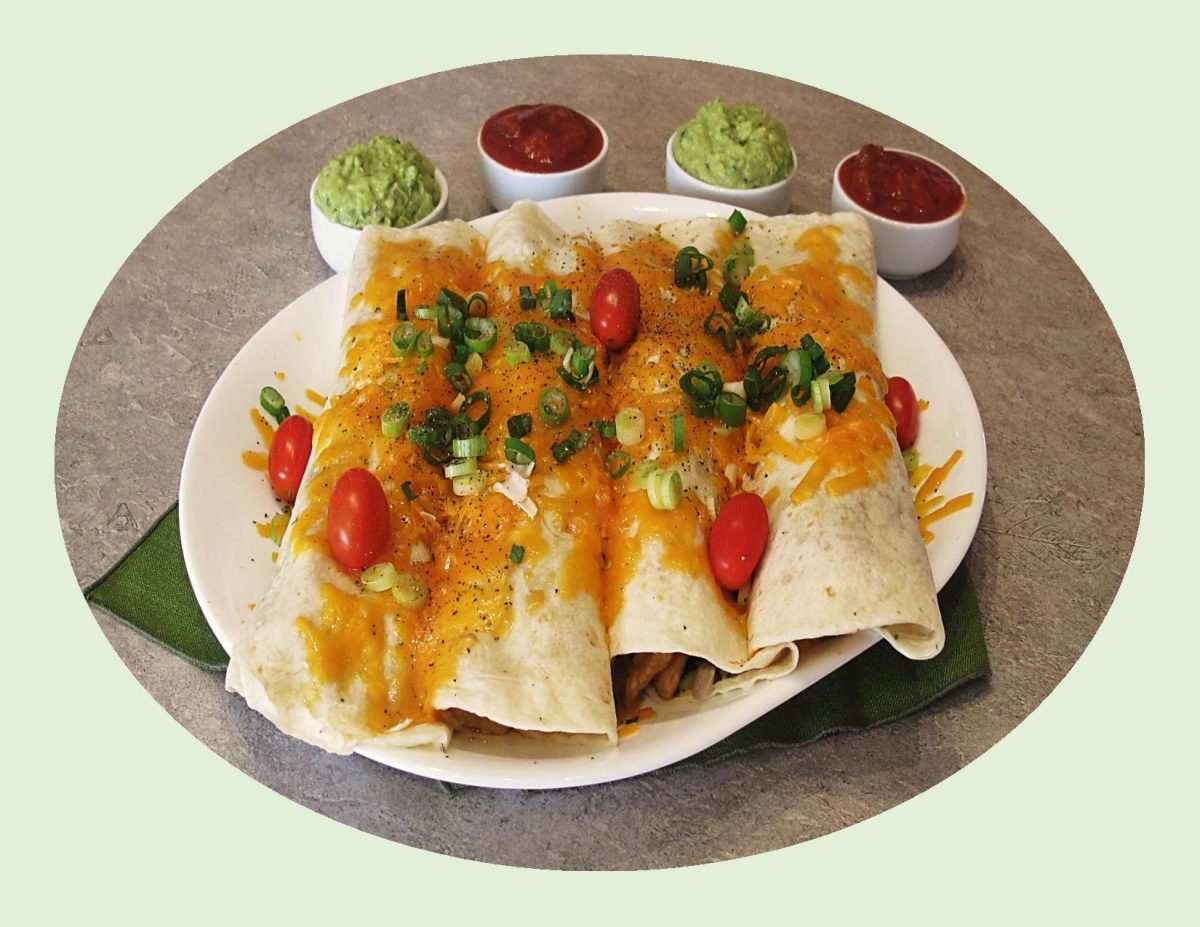
Zesty Chicken Wraps

People in Mexico, the Mediterranean, and South Asia  have been eating wraps since around the 1900’s. The wrap in its Western form probably comes from California, as a generalization of the Mexican/Tex-Mex burrito and became popular in the 1990’s.

Wraps have become a popular option in sandwich shops and restaurants, and for good reason. Like all sandwiches, wraps are an outlet for culinary creativity. A wrap can be anything you want it to be – breakfast, lunch, dinner, even a snack!

Wraps offer the same flexibility and creative options as a sandwich, but in a more convenient format all rolled up in a tasty tortilla or flatbread. The usual flatbreads are wheat tortillas, lavash or pita; the filling may include cold sliced meat, poultry, or fish, shredded lettuce, diced tomato, guacamole, sautéed mushrooms, bacon, grilled onions, cheese, and a sauce, such as Ranch dressing or honey mustard.

They are the perfect on-the-go meal. Most wraps can be eaten one-handed, leaving the rest of you free to continue about your day. They’re the perfect meal solution for a busy schedule.

It is remarkably easy to create your own personalized wrap: choose a bread, pick your condiments, layer your fillings, decide whether you want to grill it or not and enjoy. Does it get any better than that!

I have to admit, I absolutely love wraps so I like to fit them in to our meals whenever I can. These zesty chicken wraps are so good !

Print Recipe
Zesty Chicken Wraps
Votes: 1
Rating: 5
You:
Rate this recipe!
Course Lunch
Cuisine Mexican
Servings
Course Lunch
Cuisine Mexican
Servings
Votes: 1
Rating: 5
You:
Rate this recipe!
Instructions
Chicken
  1. In a large bowl, combine 2 Tbsp oil, lemon juice & seasonings; add chicken & turn to coat. Cover & refrigerate for 1-4 hours.
Filling
  1. In a heavy skillet, heat 2 Tbsp oil & sauté zucchini & onions until tender crisp. Remove & keep warm. Drain marinade from chicken & cook in the same skillet until no longer pink, about 5-6 minutes. Return zucchini/onion to pan, heat through.
Assembly
  1. Lightly spread 4 tortillas with a bit of guacamole or sour cream. Spoon filling down the center of tortillas. Add toppings saving a good bit of the cheese for sprinkling over them after they are rolled.
  2. Roll up & place on a microwave safe dish. Sprinkle with remaining cheese & microwave only until cheese is melted. Top with sliced green onions & tiny grape tomatoes. Serve extra toppings on the side if you like.

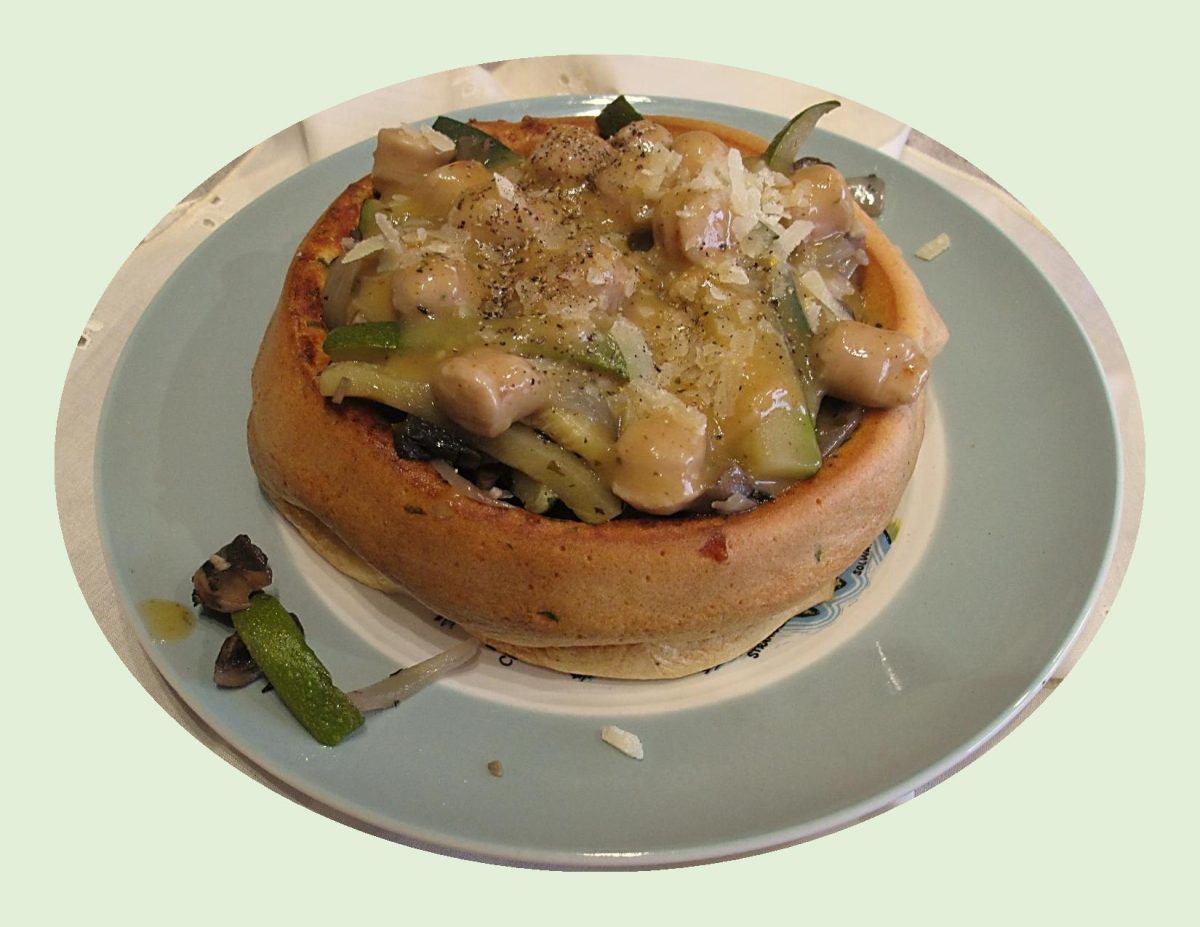
Savory Dutch Baby Pancakes

I’m sure you are probably quite familiar with the Dutch Baby or German pancake. I have featured them on the blog numerous times over the years.

A cross between a pancake and a crepe, a Dutch baby begins with the thin pancake-like batter which is poured into an oven proof dish. When it cooks it starts to rise and puff up. When the edges of the pancake are brown, it is ready to come out of the oven. The center is perfect for adding either sweet or savory ingredients.

The recipe is a basic, universal one that can be adapted in a number of different ways. For example, you could add berries or other fruit to the batter or omit the sugar and vanilla and make a savory version with veggies and different spices.

We haven’t had a Dutch baby meal for a long time so I’m making a savory ones with zucchini, mushrooms & some Italian chicken sausage. Should be good!

Print Recipe
Savory Dutch Baby Pancakes
Votes: 1
Rating: 5
You:
Rate this recipe!
Servings
Votes: 1
Rating: 5
You:
Rate this recipe!
Instructions
Dutch Baby Pancakes for 2
  1. Preheat oven to 425 F.
  2. In a bowl, whisk eggs & milk. Add flour & whisk until incorporated. Whisk in parmesan cheese, sliced scallions, parsley, thyme, salt & pepper. Set aside.
Filling
  1. Heat oil in a skillet. Add onions & sauté until translucent. Add zucchini & sauté for 3-5 minutes until zucchini is tender. Season with salt & pepper. Transfer to a bowl. Add another 2 teaspoons of oil to skillet. Add mushrooms & sauté for 5-7 minutes. Cook until mushrooms are tender & most of the moisture has cooked off. Season with salt & pepper; transfer to another bowl. Keep filling ingredients warm will you bake the Dutch Baby pancake,
  2. Add 1 tsp of oil to skillet. Add sliced chicken sausage. Cook until browned. Transfer to another bowl. Add vegetable broth to skillet; whisk in flour & seasoning. Bring to a simmer while whisking until mixture thickens. Remove from heat & keep warm.
Bake /Serve
  1. Preheat oven to 425 F.
  2. Melt 4 Tbsp butter in a 10-inch cast iron skillet over medium heat. Once the butter is melted & the skillet is hot, pour in the batter. Carefully transfer the skillet to preheated oven & bake 25 minutes, The Dutch Baby will puff up during cooking, but once it's removed from the oven & starts to cool it will deflate slightly.
  3. When Dutch Baby is cooked, remove from oven & place some of the chicken sausage in it then top with the veggies & the remainder of chicken sausage. Ladle sauce over top & sprinkle with grated cheese & fresh thyme. Serve immediately.

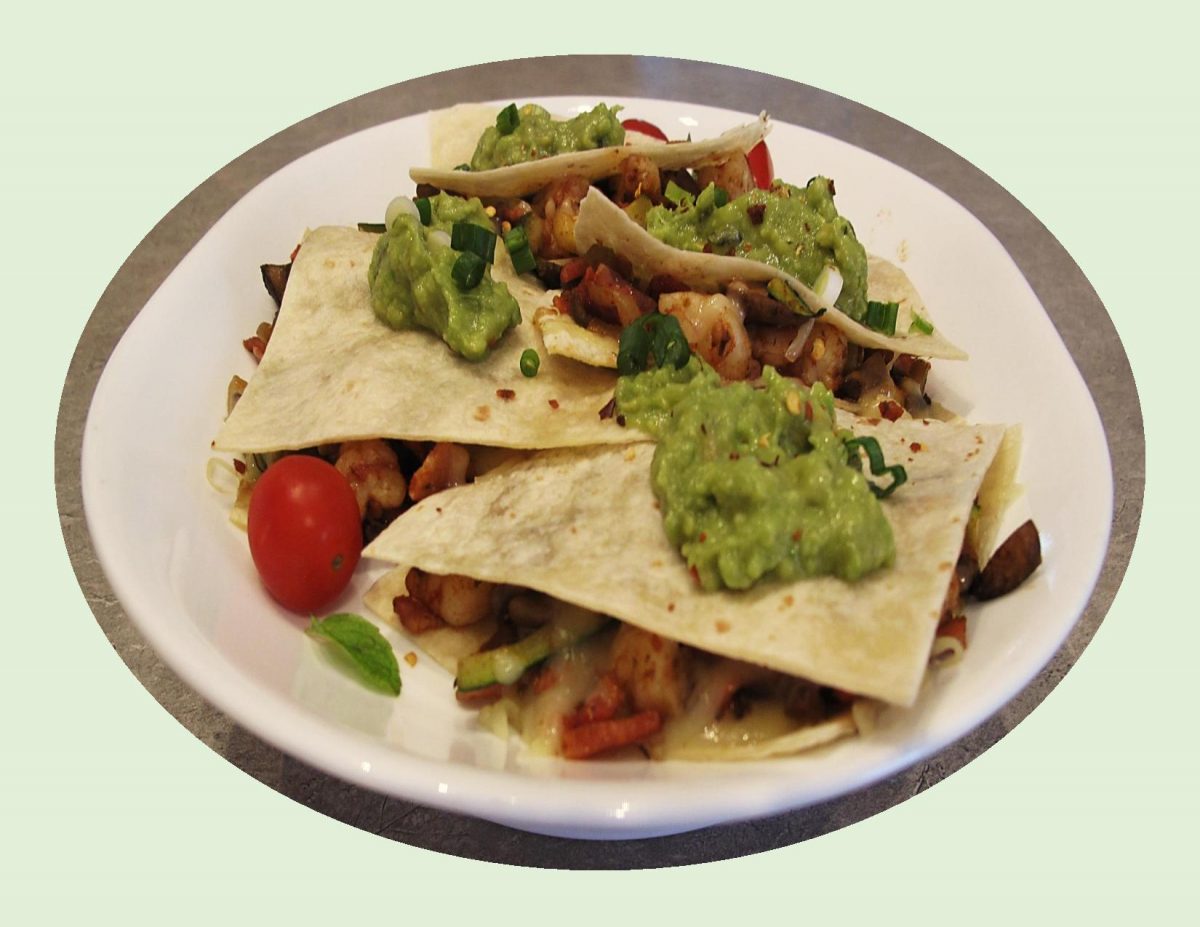
Shrimp Quesadillas w/ Guacamole

Quesadillas are basically toasted tortillas with cheese inside. The name in Spanish literally means ‘little cheesy thing’. What constitutes a quesadilla varies greatly between Mexico and its neighboring countries. They agree that the quesadilla and taco or burrito are different; the former being cooked after being filled or stuffed while the later two are filled with pre-cooked ingredients. Also they may be made with flour, corn or wheat tortillas as well as Mexican Masa (tamale version).

The quesadilla originated in central and southern colonial Mexico, beginning as a corn tortilla gently heated until soft enough to fold, then filled with cheese and toasted on both sides until golden and crispy on the outside and gooey with cheese on the inside. Over time, chopped, cooked vegetables and bits of roasted, shredded meat also found their way into these cheesy tortillas.

Influenced by the many micro-cultures of Mexico and Latin America, the quesadilla has been adopted and adapted by chefs and home cooks around the world, especially since the little cheesy things make it so easy to feed vegetarians and meat-eaters at the same table. A vegetarian quesadilla can be as simple as cheese folded into a tortilla. For the meat or seafood lovers, just add some shredded chicken, pulled pork or ‘roasted’ shrimp.

Speaking of shrimp …. to maximize the flavor, don’t sauté them – roast them! Much like roasting meat on the bone, roasting shrimp in their shells gives them a more intense flavor and keeps them from drying out as easily. The flavor from the shells penetrates the flesh, making them even tastier.

Something else I wanted to mention is a suggestion to help make your quesadillas nice and crunchy. Don’t use butter or oil to cook them in, use mayo instead. The fact that mayo contains a bit of sugar will promote browning and also give some extra crispiness.

Print Recipe
Shrimp Quesadillas w/ Guacamole
Instructions
  1. In a skillet, fry bacon to a cooked but not real crisp stage. Remove from pan to paper towel. Sauté mushrooms, zucchini & garlic until most of the moisture evaporates. Cut each shrimp in thirds & add to skillet with seasonings. Cook for another minute or until shrimp begins to turn pink. Remove from heat & add cooked bacon & combine.
  2. Grate cheese. Lightly butter one side each of 4 tortillas. Place on a griddle, & cook until warm & browned slightly. Remove 2 of them & keep warm. To each of the remaining 2, sprinkle with 1/4 of the cheese, top each one with 1/2 of the filling then sprinkle with remaining cheese over filling. Place the 2 warm tortillas on top of the filled ones.
  3. Place a lid (or a baking pan) over the griddle for a few minutes to give the cheese a chance to melt.
  4. Remove quesadillas to a cutting board & cut each one into 4 pieces. Serve hot with your choice of toppings.
Recipe Notes
  • As I mentioned in the blog article, roasting the shrimp really intensifies the flavor. If you have the time, try it instead of just sautéing them.
  • Preheat the oven to 400 F.
  • Place the shrimp (shells-on) on a lightly greased baking sheet and toss with 1 tablespoon olive oil and minced garlic.
  • Sprinkle evenly with the seasoning (such as Old Bay) and arrange the shrimp in a single layer. 
  • Bake the shrimp for 8-10 minutes or until just pink and opaque throughout.
  • Remove from oven.

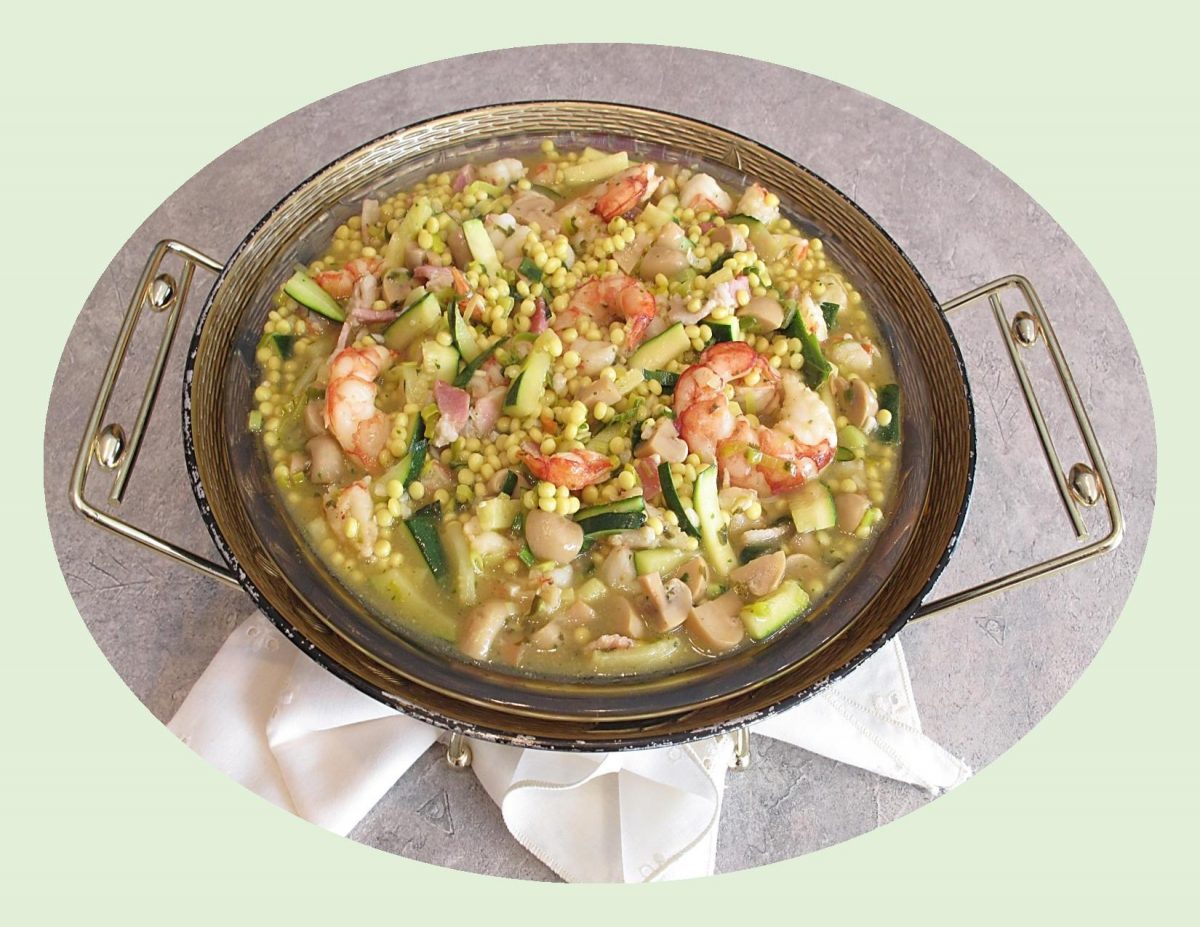
Israeli Couscous w/ Shrimp & Zucchini

This shrimp vegetable couscous not only makes a fabulous midweek meal for four but can be easily multiplied to accommodate more. The quick cooking couscous turns this simple recipe into a one pot wonder with a fusion of flavors.

Couscous has become one of my favorite pantry staples. It’s quick, convenient, versatile and makes a good alternative to traditional rice or pasta.

There are actually three different kinds of couscous:

Pearl (Israeli) couscous, which resembles tiny pasta shaped like pearls.

Lebanese couscous, which is a bit larger, the size of peas.

Then, there is the smallest size couscous made of fine granules of durum wheat. This one is associated more with Moroccan cooking.

Couscous used to be hand rolled into tiny pasta. It is now available in instant- cook packages or bulk, where couscous has already been pre-cooked by steaming and then dried. This leaves us with the simple task of re-hydrating in water, which typically takes something like 5 minutes!

Print Recipe
Israeli Couscous w/ Shrimp & Zucchini
Votes: 1
Rating: 5
You:
Rate this recipe!
Servings
Ingredients
Servings
Ingredients
Votes: 1
Rating: 5
You:
Rate this recipe!
Instructions
  1. In a medium saucepan, fry chopped bacon until crisp, about 3 minutes; add shrimp during last few minutes of sautéing. Remove bacon & shrimp to a bowl & set aside.
  2. To saucepan containing bacon drippings, add zucchini, mushrooms, leek, garlic & cilantro; sauté until tender crisp. Add to bacon & shrimp bowl.
  3. To the saucepan, add broth & salt & bring to a boil; add couscous. Cover saucepan & remove from heat; set aside until liquid has been absorbed, about 5-10 minutes.
  4. Add bowl of bacon, vegetables & shrimp; gently stir together with a fork. Serve immediately.

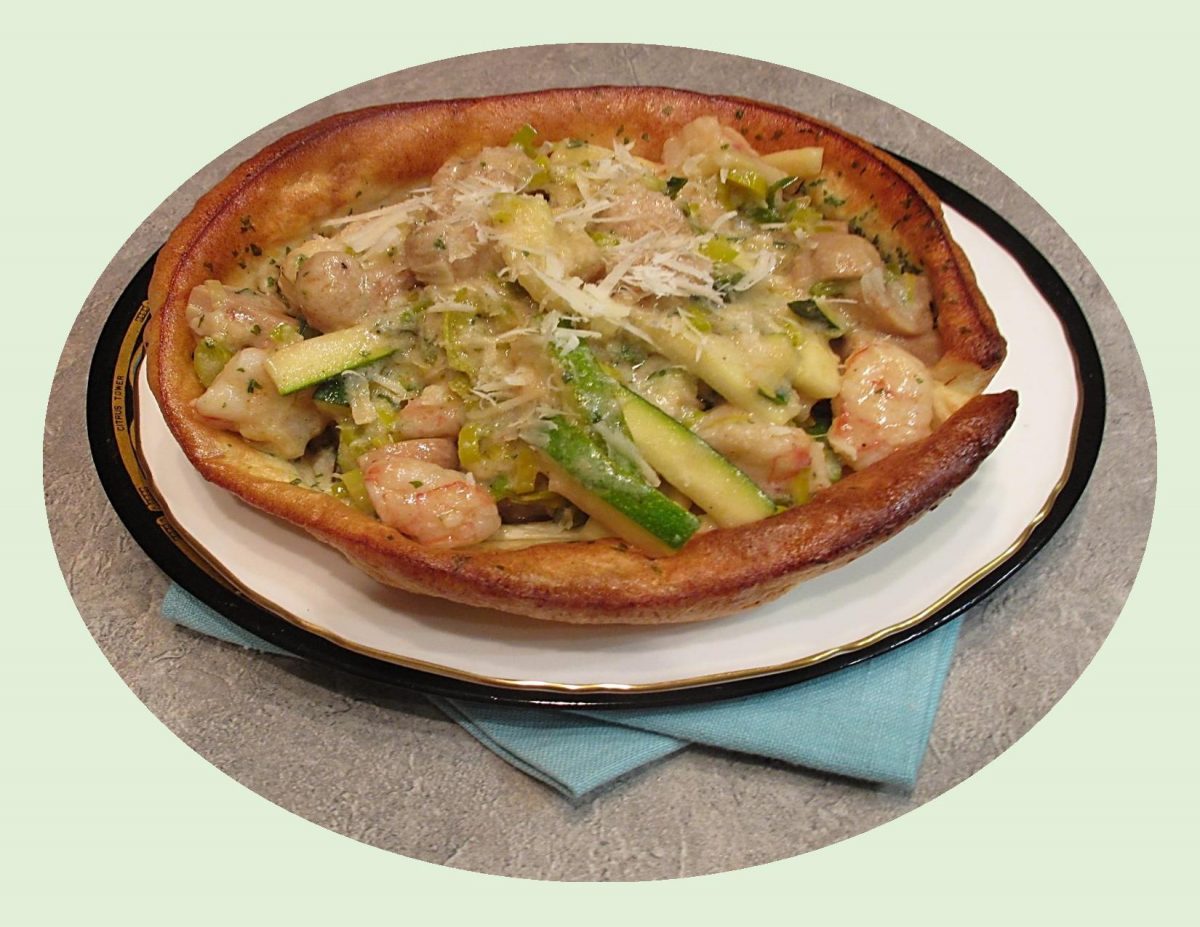
Shrimp Dutch Baby Pancake

A Dutch baby pancake is a cross between a fluffy style pancake and a soufflé. Its less work than standard pancakes and less complicated than a soufflé.

If you follow our blog, you probably have seen other versions, both sweet & savory featured on it. Dutch baby’s are such an easy meal to make, they are a regular in our meal rotation, not to mention how delicious they are.

Dutch baby recipes work best in cast iron pans because they retain heat and cook evenly. If you don’t have cast iron cook-ware, I find pyrex bowls will work as a substitute.

Because of the delicate nature of the batter, you can only add your toppings once the batter has baked. For some toppings, this will require cooking these ingredients on the stove top while the eggy batter bakes.

Be careful with recipes that instruct you to mix chopped veggies and meat directly into the batter. The combination of weight and moisture will prevent the batter from cooking and puffing up as it should. One exception to this would be finely grated Parmesan cheese. To help create height, bring the eggs to room temperature before mixing into the batter.

Being seafood lovers, this meal really works for us.

Print Recipe
Shrimp Dutch Baby Pancake
Votes: 3
Rating: 5
You:
Rate this recipe!
Servings
SERVINGS
Votes: 3
Rating: 5
You:
Rate this recipe!
Instructions
Dutch Baby Pancakes
  1. In a bowl, whisk together eggs & milk. Add flour & whisk until incorporated then whisk in parmesan cheese, scallions, parsley, thyme, salt & pepper. Set aside in refrigerator until sauce & filling are made.
Gouda Sauce
  1. In a small saucepan, melt butter; sprinkle with flour & seasonings. Mix well; add milk & broth, stirring until sauce becomes thickened. Blend in cheese; set aside
Shrimp Filling / Baking
  1. Peel & devein shrimp (you can chop into pieces if you prefer). Prepare filling veggies for cooking.
  2. Preheat oven to 425 F.
  3. Place 2 Tbsp butter in each of TWO 7-inch pyrex baking bowls (alternately you can use one 10-inch cast iron skillet). Place bowls in hot oven to melt butter (and heat the bowls for baking pancakes in). Once the butter is melted & the bowls are hot, divide the batter between them. Bake for 25 minutes.
  4. The Dutch Baby will puff up during cooking, but once its removed from the oven & starts to cool it will deflate slightly. At this point its nice to do the final sautéing of your filling so that when the pancakes come out of the oven you are ready to fill & serve.
  5. In a large skillet, sauté zucchini, onion, mushrooms & garlic in oil until tender-crisp. Combine soy sauce with water in a cup; add to vegetable mixture along with shrimp. Gently stir fry ONLY until shrimp is cooked, then fold in Gouda sauce.
  6. When Dutch Baby pancakes are finished baking, remove from oven & transfer to 2 serving dishes. Divide filling between the 2 pancakes & serve hot.

Creamy Mushroom & Sausage Orecchiette

Orecchiette pasta originates in the sunny, southern province of Puglia, Italy. This pasta’s round concave shape led to its name, which means ‘little ears’ in Italian. The rigid exterior and cup-like interior captures chunky sauces and scoops up small vegetables, making orecchiette perfect to serve with sautes. I should mention that I didn’t find orecchiette on the regular supermarket shelves. We are lucky to have some real good Italian grocery stores in our area which definitely have them available.

You will notice, another ingredient I used in this meal is Italian sausage. Sausage is so common that people rarely stop and think about how and why they are made the way they are. Every country has a unique sausage tradition and puts their own twist on the classic meat.

Italian sausage is one of the more popular sausage varieties available, but its origins in Italy are actually different from what we are accustomed to in North America. The true Italian sausage or ‘salsiccia’ (sahl-SEE-tchay) is made of meats that have been seasoned heavily with chili and other hot ingredients and allowed to marinate and change the flavor of the meat overnight.

The more common Italian sausage that North Americans know, is a pork sausage with a fennel and anise mixture as a base seasoning. It is packaged as either HOT or MILD, the difference being in the amount of red pepper flakes that are used.

If you choose to try this meal, I think you will find it real tasty. We just loved it and I have to say it was actually the first time we had ever tried Italian sausage. I have always thought it would be too spicy hot for our liking. Needless to say, I went with the mild version.

Print Recipe
Creamy Mushroom & Sausage Orecchiette
Votes: 1
Rating: 5
You:
Rate this recipe!
Servings
Servings
Votes: 1
Rating: 5
You:
Rate this recipe!
Instructions
  1. In a saucepan, cook sausage with a splash of olive oil, until browned & cooked through. Set aside.
  2. Add butter to saucepan & saute onions until softened, about 3-4 minutes. Mix in garlic, cook another 2 minutes. Add mushrooms & zucchini, sauteing until tender-crisp, about 5-6 minutes. Return sausage meat to pan & keep warm.
  3. Bring a large pot of water to a boil; add salt. Cook orecchiette pasta according to package directions. Drain pasta & return to pot. Fold in cheese, sausage/vegetable mixture, fresh parsley & pepper to taste. Slowly add chicken broth until preferred consistency is reached. Serve garnished with red pepper flakes & Parmesan cheese.