Whether you prefer a sweet or spicy variety, there’s no denying the delicious versatility of Italian sausage.
The predominant flavor in ‘mild’ Italian sausage is fennel, or actual anise, a licorice like flavor with a little more earthiness. This emulates the style of sausages in Northern Italy, known for milder flavors with a noticeable presence of both fennel and garlic. It will also typically have a small amount of red pepper flakes to open up the flavors.
The ‘hot’ designation means a higher content of pepper flakes, or the addition of cayenne, giving you that spicier flavor that is more common in the southern regions of Italy.
‘Sweet’ is pretty straightforward, little bit of sugar, milder flavors around that, sometimes some mild herbs, typically a lot of basil and such to round it out.
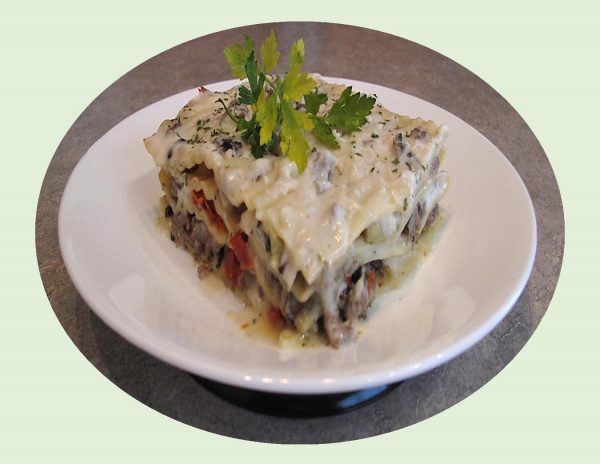
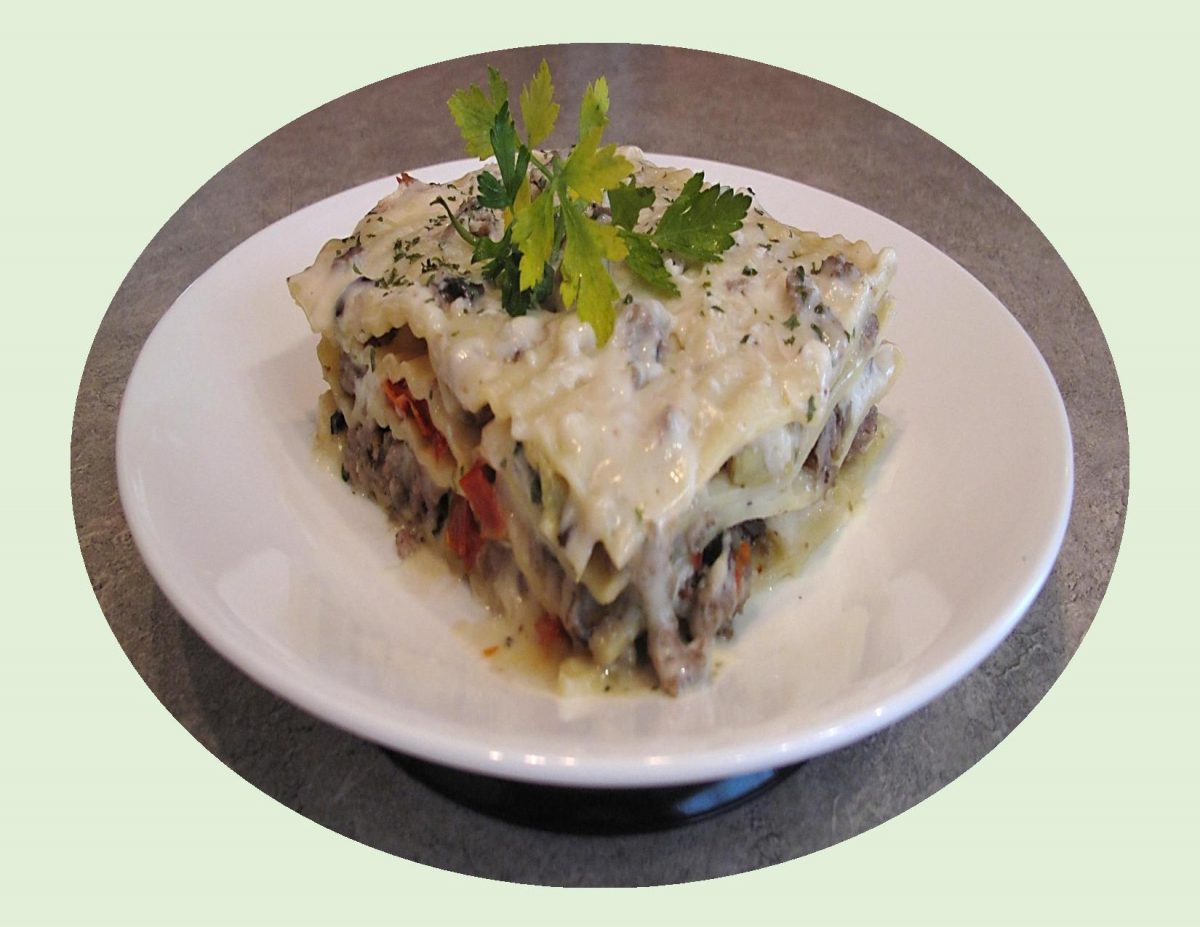
In this meal, the layers of lasagna noodles blanket a creamy béchamel sauce and a filling with a savory ‘Italian sausage’ flavor and tender artichokes. Truly a comfort food meal.
Print Recipe
Italian Sausage Lasagna
Votes: 1
Rating: 5
You:
Rate this recipe!
|
|
Votes: 1
Rating: 5
You:
Rate this recipe!
|
Instructions
Filling
Drain artichokes (reserving oil) & slice in halves; set aside. In a heavy skillet, heat artichoke marinade oil; sauté garlic, onions & mushrooms for a few minutes.
Add ground pork, sun-dried tomatoes & spices. Cook over medium heat until meat is no longer pink; add artichokes. Remove from skillet & set aside until ready to assemble lasagna.
Béchamel Sauce
In the skillet, melt butter over low heat. Once the butter is completely melted and bubbling, add the flour & mix well. Cook for a couple of minutes until flour just begins to take on some color.
Slowly start adding the milk, whisking continuously to prevent lumps from forming. Continue to simmer until the sauce begins to thicken, stirring often. Season with a pinch of salt, white pepper & nutmeg.
Set aside until you are ready to use, by pouring the sauce into a glass bowl & covering with a buttered sheet of plastic wrap.
Cook lasagna noodles. Grate cheeses.
Assembly
-
In a 13 x 9 x 2-inch baking dish, spread 1/2 cup of the béchamel sauce on the bottom. (Set aside 1 cup of the béchamel sauce for the top.) Arrange a single layer of lasagna noodles over sauce; spread some of the filling over noodles, top with a sprinkling of the grated cheeses. (Make sure to reserve a bit of cheese for the topping.) Repeat layers, ending with noodles.
Spread the reserved 1 cup of béchamel sauce over the noodles & top withy the remaining grated cheese. Cover with foil, bake for 35 minutes, remove foil & bake until bubbly & lightly browned on top, about another 15-20 minutes.
Allow to stand 10 minutes before serving.

Classic pelmeni are dumplings of Russian cuisine that consist of a filling wrapped in thin, unleavened dough. There is debate about the exact place of origin with Ural and Siberia both maintaining strong claims. This Russian comfort food is part of the group of Eastern European dumplings like ‘vareniki, pierogis and uszka’. The word “pelmeni” describes the ear-shaped appearance of these dumplings. Fillings generally consist of ground meat such as pork, lamb, beef or mushrooms as well as salt, pepper and sometimes herbs and onions.
In Russia’s Far East the locals replace meats with salmon to make a native version of this common national dish. This is an exotic region with a unique climate, landscape, flora and fauna. Basic fruits and vegetables that grow in most Russian home gardens must be shipped to this region because of its harsh climate does not allow much to grow. Dairy products are also imported at high cost so they rarely are found in the local diet.
Fish and seafood are the basic staples in the Far Eastern diet and are not delicacies for special occasions as is the case in Russia’s European and Siberian regions. Fish is often used instead of meat in cooking common Russian dishes such as cutlets, cabbage rolls and pelmeni.
Back in March of this year (2021), I had posted a blog about traditional pelmeni containing beef filling. We enjoyed that meal a lot and have since had it numerous times with various fillings. After doing some research, I realized that fish pelmeni was a ‘real thing’. I had also seen an idea from the internet about using salmon and pastry to form a ‘salmon rose’. I thought, why couldn’t that tender pelmeni dough be used along with fresh salmon & leeks to make something special? I realize I have strayed a long way from the classic ear shaped pelmeni but the flavor is just as wonderful.
Print Recipe
Salmon Leek Pelmeni 'Rose'
Votes: 1
Rating: 5
You:
Rate this recipe!
|
|
Votes: 1
Rating: 5
You:
Rate this recipe!
|
Instructions
Dough
In a bowl, combine all dough ingredients & knead until a smooth dough ball forms, about 10 minutes. Wrap in plastic wrap & set aside to allow dough to rest until the filling is prepared.
Leek & Salmon Fillings
In a sauce pan, sauté garlic, leeks & mushrooms in 1 Tbsp olive oil until tender. Remove from heat & place in a dish to cool until needed later.
Prepare fresh salmon (skin, debone & slice thinly); refrigerate until ready to assemble. In a small bowl, combine all remaining filling ingredients. Set aside
Soya Broth & Veggies
In a non-stick skillet over medium heat, add 1 Tbsp olive oil. Sauté onion until it starts to soften. Add mushrooms, garlic, sun-dried tomatoes, zucchini & oregano. Cook for about 2 minutes; remove veggies to a dish & set aside.
In the NON-STICK saucepan, bring all broth ingredients to a boil. Simmer for a few minutes; turn off heat.
Assembly & Cooking
On a LIGHTLY oiled work surface, roll out dough as thin as possible. Cut (20) 4-inch discs from pastry with a fluted, circular pastry cutter. Align the discs in 2 lines, making them overlap slightly. One line should consist of 12 circles & other other line the remaining 8. With your rolling pin, slightly roll over each line to help press the circles together a bit.
On the shorter line of dough, distribute cooled leek/mushroom filling. Roll up to form the center of the salmon 'rose'. The roll should hold together but not be tightly rolled so it will steam properly. On the longer line of dough circles, distribute the thinly sliced salmon. Top salmon with Panko crumb 'filling' & press with a spatula to flatten slightly.
Carefully place the rolled leek/mushroom 'center' at one end of the salmon 'line'. Roll up to form the outside rings of the 'rose'. Using a large heavy spatula, gently lift the 'rose' pastry into the center of the broth in the saucepan.
Turn on heat & bring soya broth to a gentle simmer. Cover & steam salmon/leek 'pelmeni' for about 35 minutes or until both salmon & dough are cooked. Remove to a serving plate & keep warm.
To the remaining broth in saucepan, add 1/4 cup milk & the previously sautéed veggies. Gently stir together then drizzle sauce & veggies over salmon/leek pelmeni 'rose'. Serve.
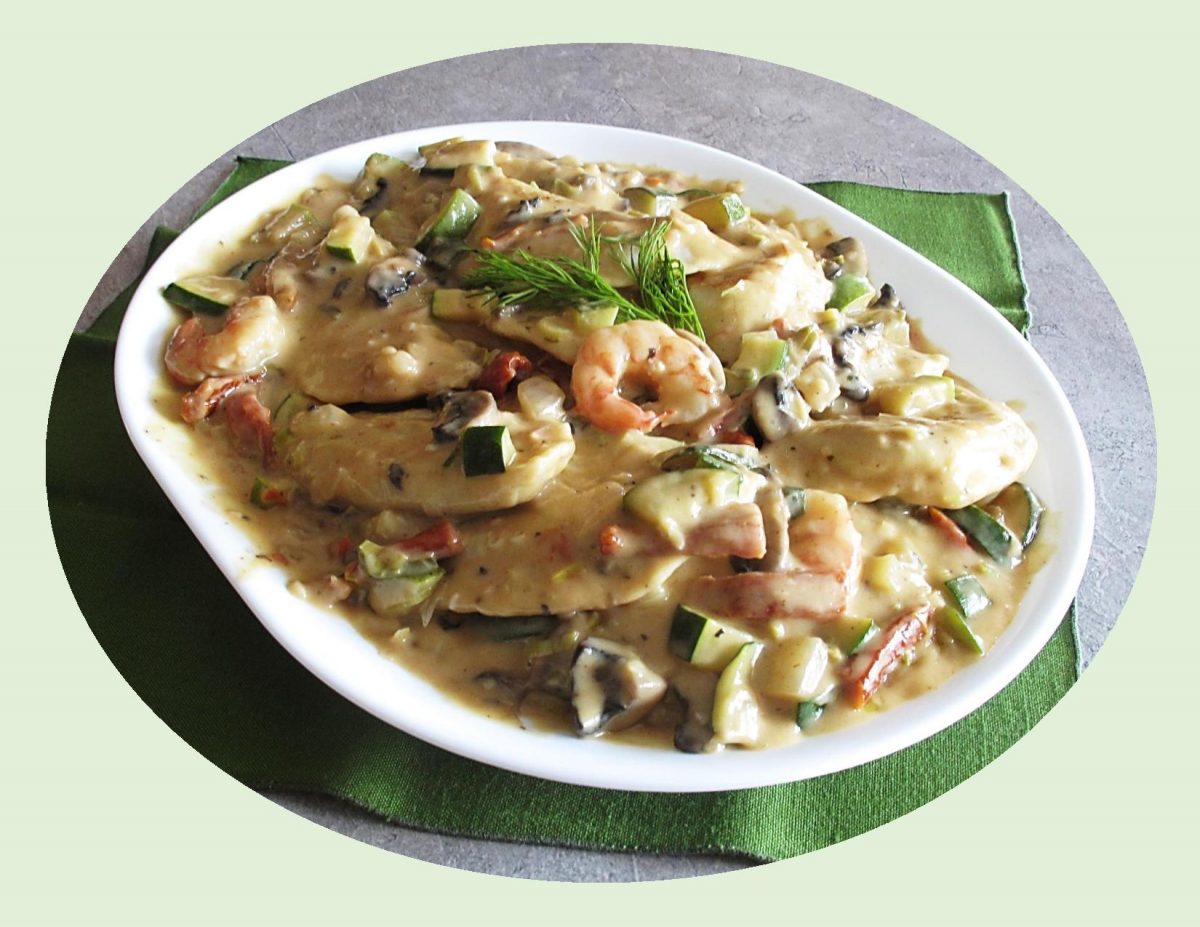
Like many recipes with folk origins, pierogi dough can be made in a variety of ways with some people using eggs & sour cream & others don’t. Making your own pierogis is actually an easier job than you might expect (just a little time consuming).
Like all ‘dumplings’, pierogis can pretty much do no wrong. They’re great as a side, as the main event or you guessed it ….. in a casserole or even dessert.
What makes it even better is that the filling possibilities are endless ….. the pierogi knows no boundaries!
Brion & I always enjoy a seafood meal. On a quest to come up with something different it occurred to me I had never put shrimp in a pierogi filling before. If it works in seafood lasagna why not a pierogis?!
Last summer I had posted a meal using a sun-dried tomato sauce. The once, incredibly popular, sun-dried tomatoes have become an underrated, ingredient that few people stock in their pantries anymore.
Sun-dried tomatoes are very versatile & can be used in unlimited ways, Because they’re dried, the flavors of the tomatoes are intensified. This sauce, with its bold & rich garlic & herb flavors was the perfect accompaniment for these shrimp pierogis. Definitely a keeper!
Print Recipe
Shrimp Pierogis w/ Sun-Dried Tomato Sauce
Votes: 1
Rating: 5
You:
Rate this recipe!
Ingredients
Shrimp Filling
- 1 leek, washed & thinly sliced then chopped USE ALL of the leek, discarding only discolored stalk ends
- 200 gm Crimini mushrooms, chopped
- 1 clove garlic, minced
- 1 Tbsp olive oil
- 1/4 cup + 1 Tbsp butter, divided
- 1/4 cup chicken broth
- 236 ml clam juice, bottled DIVIDED
- 300 gm WILD shrimp, peeled, deveined, rinsed & slightly chopped
- 1/4 cup flour
- 3/4 cup milk
- 1/4 tsp sea salt
- 1/4 tsp pepper, divided
- 1/2 cup heavy cream
- 30 gm Parmesan, grated
|
Votes: 1
Rating: 5
You:
Rate this recipe!
|
Instructions
Pierogi Dough ( Yield = 18)
In a large bowl, combine flour, salt, beaten egg, butter & sour cream. Mix until dough comes together. On a work surface, knead dough for 3-4 minutes until elastic. Place in a plastic container with a lid & refrigerate for at least an hour or overnight.
Shrimp Filling
In a large skillet over medium heat melt 1 Tbsp each, oil & butter. Saute leeks, mushrooms & garlic until tender.
Stir in half of the bottle of clam juice & the 1/4 cup chicken broth; bring mixture to a boil. Once boiling, add shrimp & 1/8 tsp pepper. Return to a boil, then reduce heat & let simmer for 4-5 minutes. Drain the filling, reserving liquid. Set aside.
In a large saucepan over medium-low heat, melt the remaining 1/4 cup butter. Stir in flour & mix until smooth. Gradually add in the milk & reserved liquid (from filling), while stirring constantly. Sprinkle in the rest of the salt & pepper. Bring sauce to a boil & cook for about 2 minutes until thickened, continuing to stir.
Remove the sauce from heat & mix in the heavy cream & Parmesan cheese. Take about 1/3 cup of the sauce & mix it with the shrimp filling. Place remaining sauce in a bowl & set aside to be added to the SUN-DRIED TOMATO SAUCE later.
Sun-Dried Tomato Sauce
Add oil to skillet & heat on a medium heat. Add onion & saute until it starts to soften. Add mushrooms, garlic, sun-dried tomatoes, zucchini, oregano & smoked paprika.
Cook for 2 minutes, while stirring, then add remaining clam juice, sea salt & RESERVED sauce. Gently combine. Set aside until pierogis are cooked & ready to serve.
Roll & Fill Pierogis
Remove pierogi dough from refrigerator & cut into 18 equal pieces (about 30 gm each). Roll each piece into about a 3 1/2-inch round. Place a heaping Tbsp of shrimp filling (about 30 gm) in the middle of pierogi. Dip your finger in a bowl of water & run it along the edge of the dough. Fold pierogi in half, carefully pinching together edges to seal it completely.
Cook & Serve
Bring a large pot of salted water to a boil. Carefully drop pierogis in & boil until all the pierogis float to the surface & dough becomes somewhat translucent, about 3-5 minutes. Remove pierogis with a slotted spoon, making sure to let as much of the excess water drip off as possible.
In a large skillet, heat a Tbsp of butter. Place drained pierogis in skillet. Do not over-crowd so that they can all lightly brown on both sides. Reheat sun-dried tomato sauce & place in a serving dish. When pierogis have fried a bit, (blot on paper towel if you wish), then add to sauce on serving dish.
Recipe Notes
- When making the pierogis, nothing wrong with rolling out all the dough at the same time & cutting your circles with a cookie cutter. I just personally like dividing the dough so I don't have to do any re-rolling with the scraps. Just personal preference.
- If you happened to have any filling leftover, just add it to you sun-dried tomato sauce.
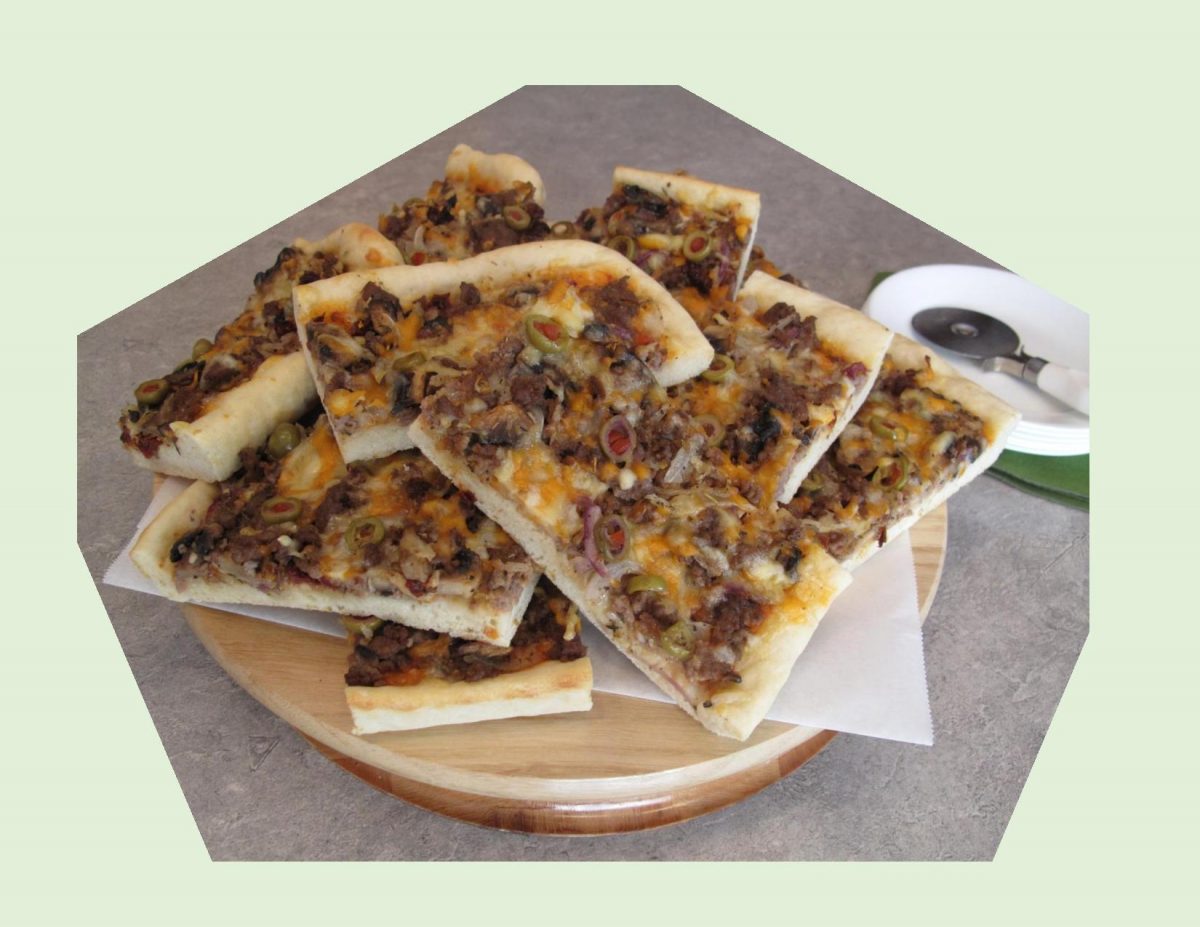
Pizza is one of those foods that works for just about everyone. From meat eaters to vegetarians, kids, adults and everyone in between. Year-round, its the perfect entree for family or party events.
Brion & I always enjoy pizza, preferably homemade. Usually my go-to toppings would be veggies, chicken or seafood, but nothing says it can’t be ground meat.
One of the things that seemed to improve on the flavor of this pizza was the caramelized onions. It takes only a few extra minutes but is worth it. For the sauce, I tried a blend of prepared lite Alfredo & marinara and then used a combo of cheeses instead of just one. Its always interesting to me what develops when you ‘step out of the box’.
Of course, if you have time to make a full fledged pizza crust it will take it all to the next level. But, I never hesitate, when I’m too busy, to use a purchased, refrigerated pizza crust. Pizza is just good, so do what works for you!
Print Recipe
Hamburger & Caramelized Onion Pizza
Votes: 1
Rating: 5
You:
Rate this recipe!
Ingredients
- 3 Tbsp butter, divided
- 1 large sweet onion, sliced
- 200 grams fresh mushrooms, sliced
- 454 grams lean ground beef
- 2 cloves garlic, minced
- 1 tsp Italian seasoning
- 1/2 tsp salt
- 1/4 tsp pepper
- Homemade OR purchased PIZZA CRUST
- 1/4 cup EACH prepared Alfredo sauce & marinara sauce
- 1/2 cup red bell pepper, coarsely chopped
- 4 pieces sun-dried tomatoes, sliced
- 15-20 green olives, sliced
- 80 grams cheddar, shredded OR use 200 gm of your choice of cheese instead of the ones listed here
- 55 grams Gouda cheese, shredded
- 65 grams mozzarella chese, shredded
|
Votes: 1
Rating: 5
You:
Rate this recipe!
|
Instructions
Pizza Crust
For my PIZZA CRUST RECIPE, you can find it in either JULY or AUGUST 2019 blog entries on this site. It is a yeast dough so it will take a bit of time to prepare (but worth it).
Pizza Toppings
-
In a skillet, melt 2 Tbsp butter & add onion. Cook over medium heat, stirring occasionally, 20-25 minutes or until onion is browned & caramelized. Remove onion mixture from skillet; set aside.
Add 1 Tbsp butter to skillet & saute mushrooms until tender & moisture has evaporated. Remove from skillet; add to onion mixture. Place ground beef & garlic in skillet; cook over medium heat, stirring occasionally, 5-6 minutes or until browned. Drain off fat. Stir in caramelized onions, mushrooms, Italian seasoning, salt & pepper.
Assembly
Spread Alfredo/marinara sauce blend over either homemade or purchased PIZZA CRUST. Sprinkle with a small portion of your cheese blend. Top with ground beef mixture, red pepper, sun-dried tomatoes, sliced green olives & remaining grated cheese. Bake 15-20 minutes or until crust is nicely golden brown.
Recipe Notes
- To grill pizza, heat one side of gas grill on medium or charcoal grill until coals are ash white. Place coals to one side in charcoal grill. Place pizza onto grill opposite coals. Close lid; grill, rotating once 12-15 minutes or until heated through & cheese is melted.
