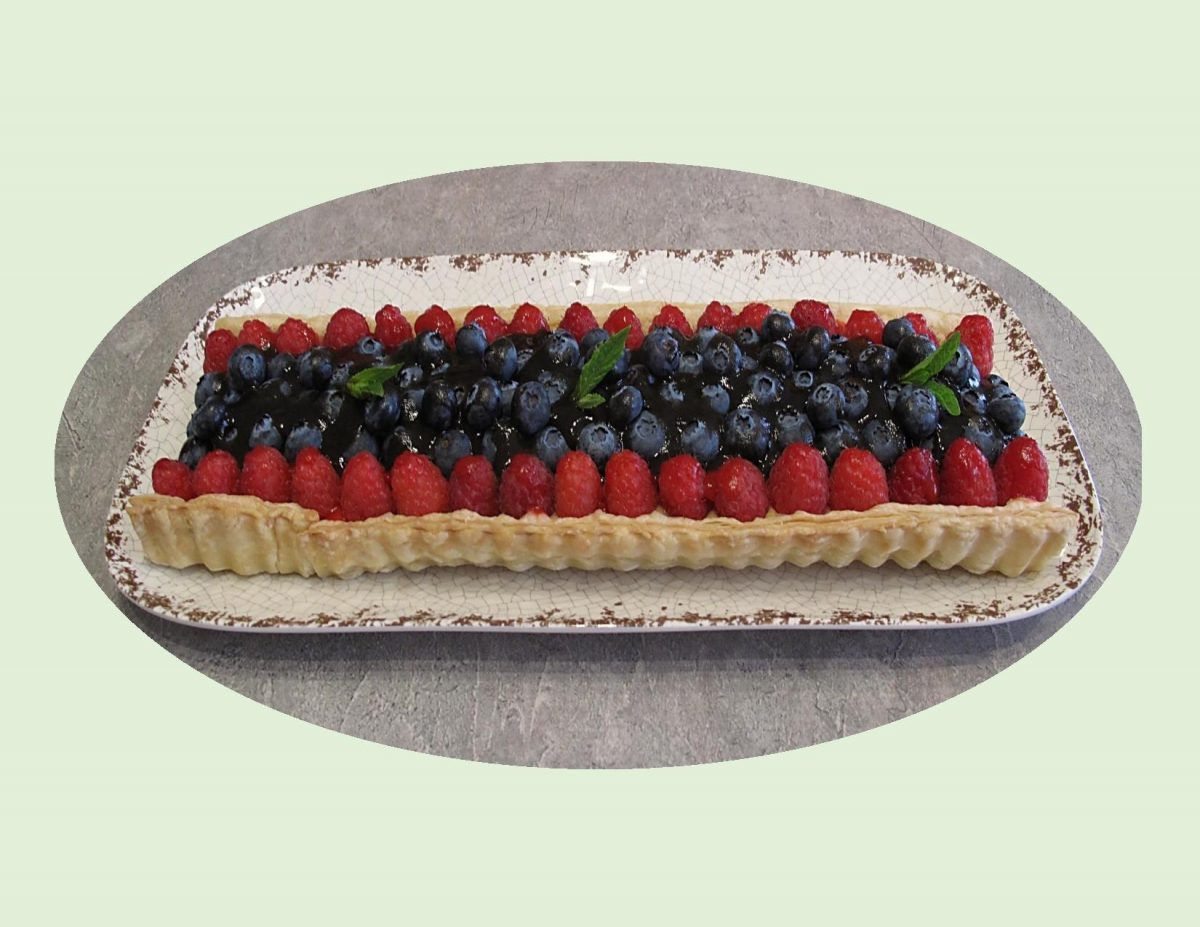
Glazed fresh fruit tart looks so elegant and summer-ish. They are the perfect dessert, whether your meal is casual or formal. In some ways, I guess its a version of a fruit pizza.
Apart from the fresh fruit and glaze, pastry cream adds a nice base to the tart. A custard pudding hybrid, pastry cream is used for ‘filling’, in the cold form, not as a pudding. Widely used to fill desserts like napoleons, cakes, cream puffs, tarts, etc.
To define, pastry cream is basically custard thickened with cornstarch and has a higher stability as compared to custard puddings which use just eggs to achieve their creamy texture. Vanilla is the classic flavor because it has to complete other flavors of the dessert. Pure vanilla is always best as the artificial flavorings add bitter taste profiles. In addition, some alcoholic desserts use pastry cream mixed with rum.
This tart has a layer of vanilla pastry cream, topped with raspberries and blueberries then brushed with an apricot glaze.
Print Recipe
Berry Custard Tart
Votes: 1
Rating: 5
You:
Rate this recipe!
|
|
Votes: 1
Rating: 5
You:
Rate this recipe!
|
Instructions
Pastry Cream
In a heavy saucepan, stir together the milk & 1/4 cup sugar. Bring to a boil over medium heat.
In a medium bowl, whisk together the egg yolks & egg. Stir together the remaining sugar & cornstarch; then stir them into the egg until smooth. When the milk comes to a boil, drizzle it into the bowl in a thin stream while mixing so that you don't cook the eggs. Return the mixture to the saucepan; slowly bring to a boil, stirring constantly so the eggs don't curdle or scorch on the bottom.
When the mixture comes to a boil & thickens, remove from the heat. Stir the butter & vanilla, mixing until the butter is completely blended in. Pour into a heat proof container & place a piece of plastic wrap directly on the surface to prevent a skin from forming. Refrigerate until chilled then beat until smooth with an electric mixer before using.
Other Prep Work
-
Line an oblong tart pan with thawed puff pastry. The short ends of the pastry should be even with the bottom of the pan but the long sides should come up to the top of pan sides. With a sharp knife, score the long sides where the sides meet the bottom of pan. Do not cut all the way through. Pierce the center of the pastry with a fork. Whisk together the egg and milk. Brush the edges of the pastry shell with the egg wash.
Bake the pastry shell for 15-20 minutes or until puffed and golden brown. Remove to a rack to cool completely. If needed, press the center down lightly to create an indentation. Cool while preparing filling.
Rinse & carefully dry fruit on paper towels. In a small blender, puree apricot preserves with water or liqueur until smooth.
Assembly
Place smooth pastry cream in a piping bag with a large flat tip. Carefully pipe pastry cream in long strips to cover the bottom ONLY of the puff pastry shell.
Arrange a row of raspberries down both sides of the tart; close to the edge & close to each other. Using a long straight edge helps to place the fruit in an even line.
To 1/3 of the apricot glaze add some red food coloring to help accent the natural color of the raspberries. Apply a couple of light coats of the glaze carefully to the raspberries.
Fill the center of the area with blueberries, being careful to distribute evenly in rows. Using the remainder of the un-colored apricot glaze, give several light coats to blueberries. Chill until ready to serve.
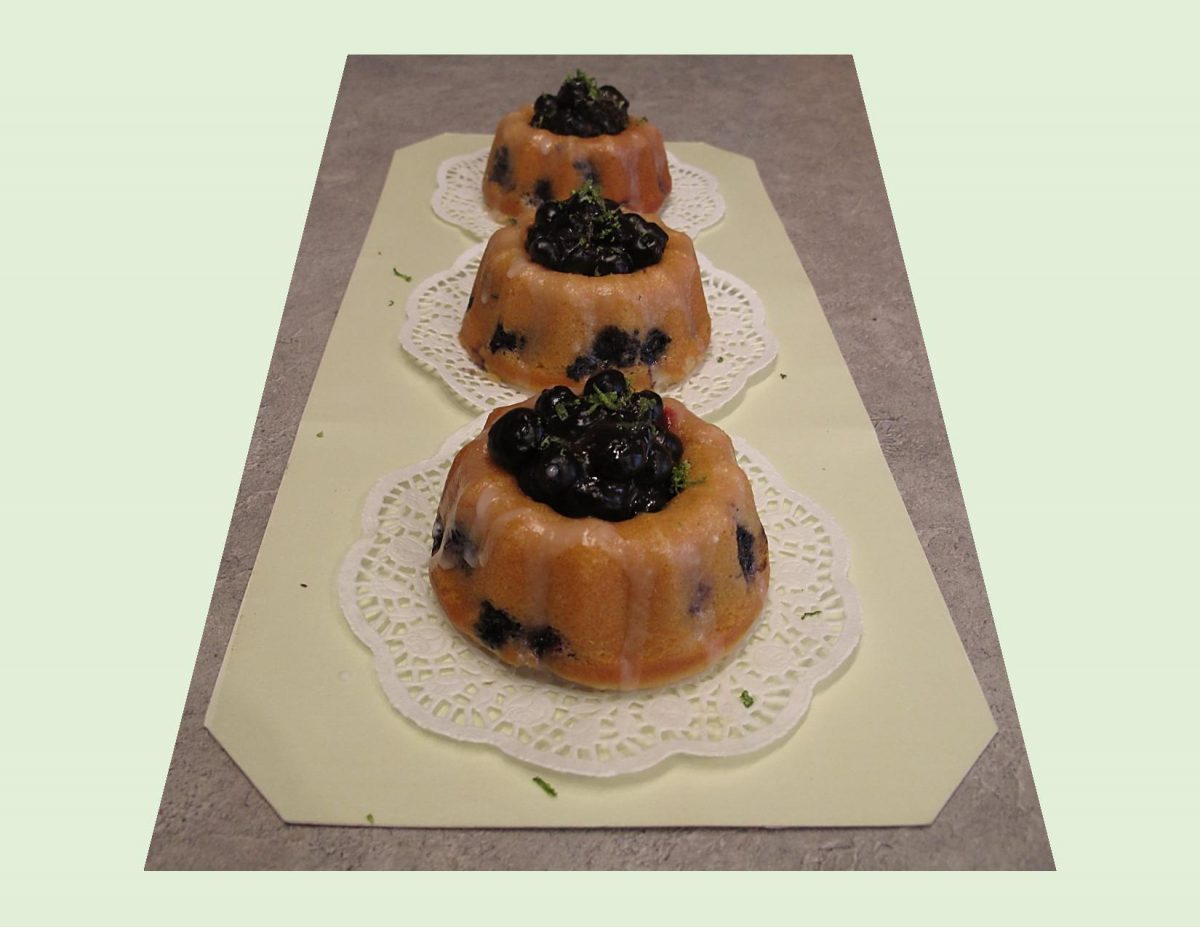
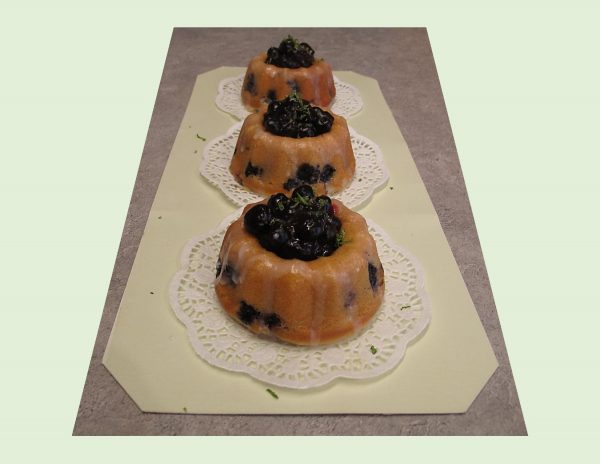
Shortcake is such a classic dessert that is perfect for spring and summer. True shortcake has history, even pedigree, but there is some confusion as to its name. ‘Short’ is an English word that means crisp. Or, more specifically, something made crisp with the addition of either butter or shortening.
Another issue with shortcake is whether it should be cake-like or biscuit-like. Some culinary researchers claim that’s a regional preference. Even though the name has English origins, most sources agree that shortcake was a North American invention. Being so versatile, this simple, elegant dessert can be made with any number of fruits and served warm or cold.
I am using some of the LorAnn company’s Blueberry Emulsion today, to add a real pop of flavor to the glazed blueberries. These should be so good!
Print Recipe
Glazed Blueberry Shortcakes
Votes: 1
Rating: 5
You:
Rate this recipe!
|
|
Votes: 1
Rating: 5
You:
Rate this recipe!
|
Instructions
Shortcakes
-
Spray mini Bundt pans with baking spray. Then, add some all-purpose flour to each cavity, shake it around, and discard the excess.
Whisk together the flour, sugar, baking powder, and salt in a large bowl. Then add the vanilla, softened butter, milk, and egg. With an electric mixer, beat on medium speed for about two minutes. Gently fold in the fresh blueberries.
Divide the batter evenly among the prepared cavities in mini Bundt pans. Each cavity should be about 3/4 full.
Bake for 18-20 minutes. Allow the cakes to cool completely in the pan before attempting to remove them. Gently loosen each cake with your fingers then invert the pan to release the cakes onto a wire cooling rack.
Glazed Blueberry Topping
Place 1 cup of the blueberries in a saucepan with 1/4 cup water, sugar & cornstarch. Bring to a boil & simmer until juicy & thick. Place the remaining berries & blueberry emulsion in a bowl; add glaze mixture & toss to coat.
Lemon Drizzle
In a bowl, whisk together 1 cup powdered sugar, 1 tablespoon fresh lemon juice, and 2-3 tablespoons milk. Add the milk 1 tablespoon at a time to achieve the desired consistency.
To Serve
Place shortcakes on individual serving plates. Drizzle with lemon glaze & top each cake with some glazed blueberries. Garnish with lemon zest.
Recipe Notes
- LorAnn's Blueberry Emulsion tastes like fresh ripe berries.
- Add instead of using blueberries or in addition to the fruit to add a punch of blueberry flavor and color. Use in any recipe as you would an extract - and experience better results. 1 teaspoon baking extract = 1 teaspoon emulsion
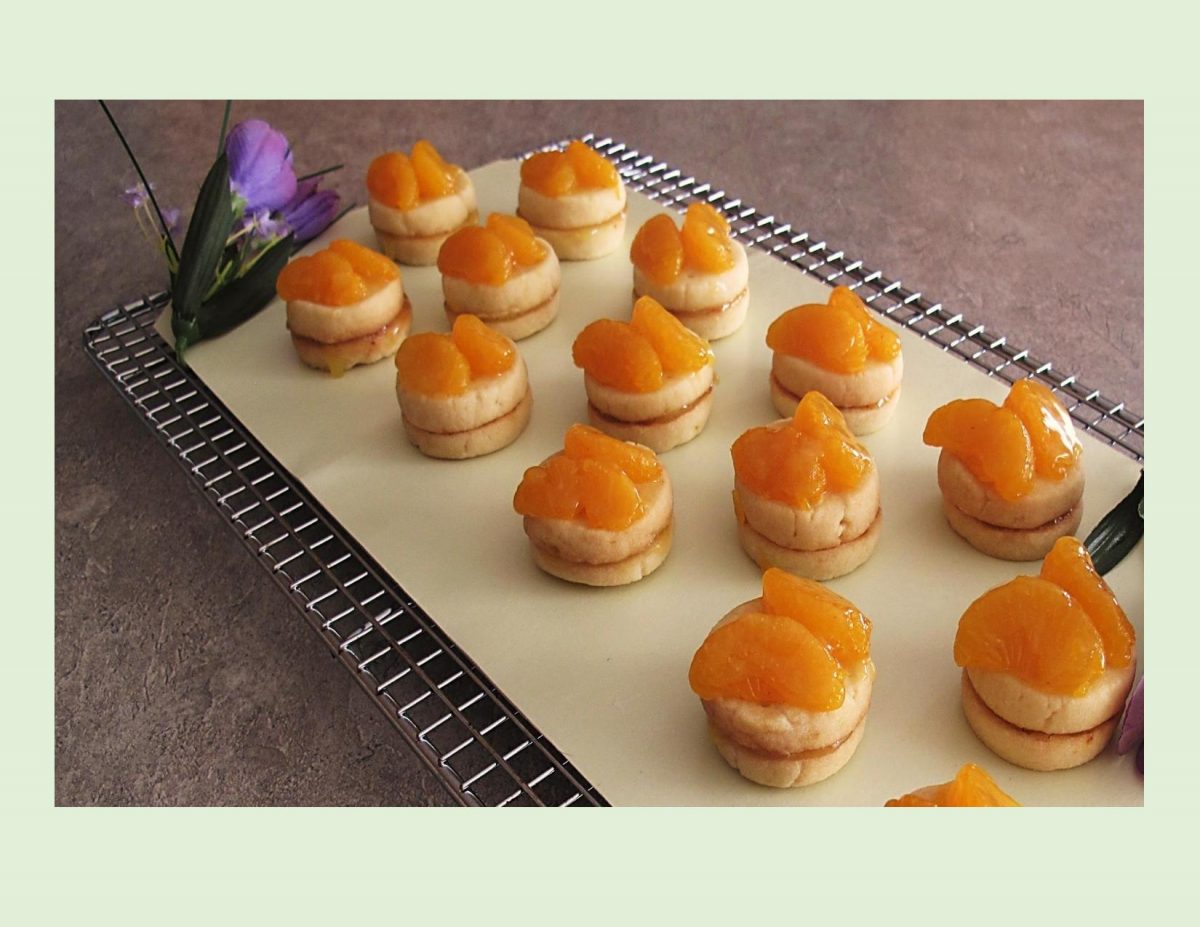
Its probably a bit too early for butterflies in our part of the country but these spring cookies are so special. Who could resist them when they’re naturally flavored with orange juice and zest and decorated with mandarin orange segments?
I have always loved cookies of all shapes, sizes and flavors. Today there are hundreds of cookie recipes throughout the world. Often geographic development was reflected in popular cookie recipes. It gave homemakers access to items not available previously. Around the turn of the century, the Kellogg brothers in the USA, invented cornflakes and cookies were made with cereal products. In the 1930’s, with the advent of electric refrigerators, icebox cookie recipes reached new heights of popularity. I’m sure that no one book could ever hold the recipes for all the various types of cookies that have been created.
These little filled cookies might seem quite basic but the flavor is amazing!
Print Recipe
Mandarin Butterfly Cookie Bites
Votes: 1
Rating: 5
You:
Rate this recipe!
|
|
Votes: 1
Rating: 5
You:
Rate this recipe!
|
Instructions
Filling
In a saucepan, combine filling ingredients. Cook over medium heat for 5-7 minutes, or until thickened and translucent, stirring constantly. Remove from heat. Cool completely. Set aside.
Cookies
In a large bowl, combine butter & powdered sugar. Beat until light & fluffy. Add flour, orange zest & salt. Beat on low until a soft dough forms. Cover with plastic wrap. Chill 1-2 hours or until firm.
Baking
Preheat oven to 350 F. Line a baking sheet with parchment paper.
Shape dough into 1-inch balls & place on lined baking sheet 2-inches apart. Flatten balls with the bottom of a glass; dipping glass in granulated sugar to prevent sticking. Using a fork, prick top of each cookie making 3 rows.
Bake for 10-12 minutes or until edges are light golden brown. Cool completely.
Fill & Decorate
Spread about 1/2 tsp filling on bottoms of half of the cookies. Gently press bottoms of remaining cookies against filling to for 'sandwiches'. On the top of each sandwich put a drop of remaining filling. Carefully lay two (towel dried) mandarin orange segments on it to form a butterfly.
Recipe Notes
- We found these just got better after a few days.
The ‘poke cake‘ is an advertising invention of the late 1970s, when Jell-O created it to increase sluggish sales. The Jell-O salads of the ‘50s and ‘60s were outmoded and on the wane so this was a way to bring it back. These cakes were colorful and easy to make. A fork, chopstick or the handle of a wooden spoon is used to poke deep holes all over the top of the baked cake. Next, it is topped with a colorful Jell-O syrup, which trickles into the cake looking like brightly colored streamers.
But, like all successful desserts, even the poke cake has undergone numerous reinterpretations over time. Starting from the base no longer cooked only in vanilla flavor but also made with coconut, lemon, chocolate, with fruit & yogurt, arriving at the holes that are filled in other choices such as chocolate, cream, jams, etc. etc.
Although it would seem like poke cakes are a phenomenon born in corporate American kitchens, drenching cake in flavorful liquids is not new, or an entirely an American creation. England’s sticky toffee pudding, a single layer date cake, is poked all over while still warm from the oven with a fork or skewer and drenched in sticky butterscotch sauce. Genoise, the classic French sponge cake, is almost always soaked in sugar syrups spiked with liqueur, not just for flavor, but to keep the cake fresh and prevent it from drying out. Pastel de tres leches, or ‘three-milks cake’, is a beloved Latin American classic. Made from sponge cake soaked in a milky syrup combining evaporated milk, sweetened condensed milk and heavy cream. All three called for this hole-poking action long before the 1970’s.
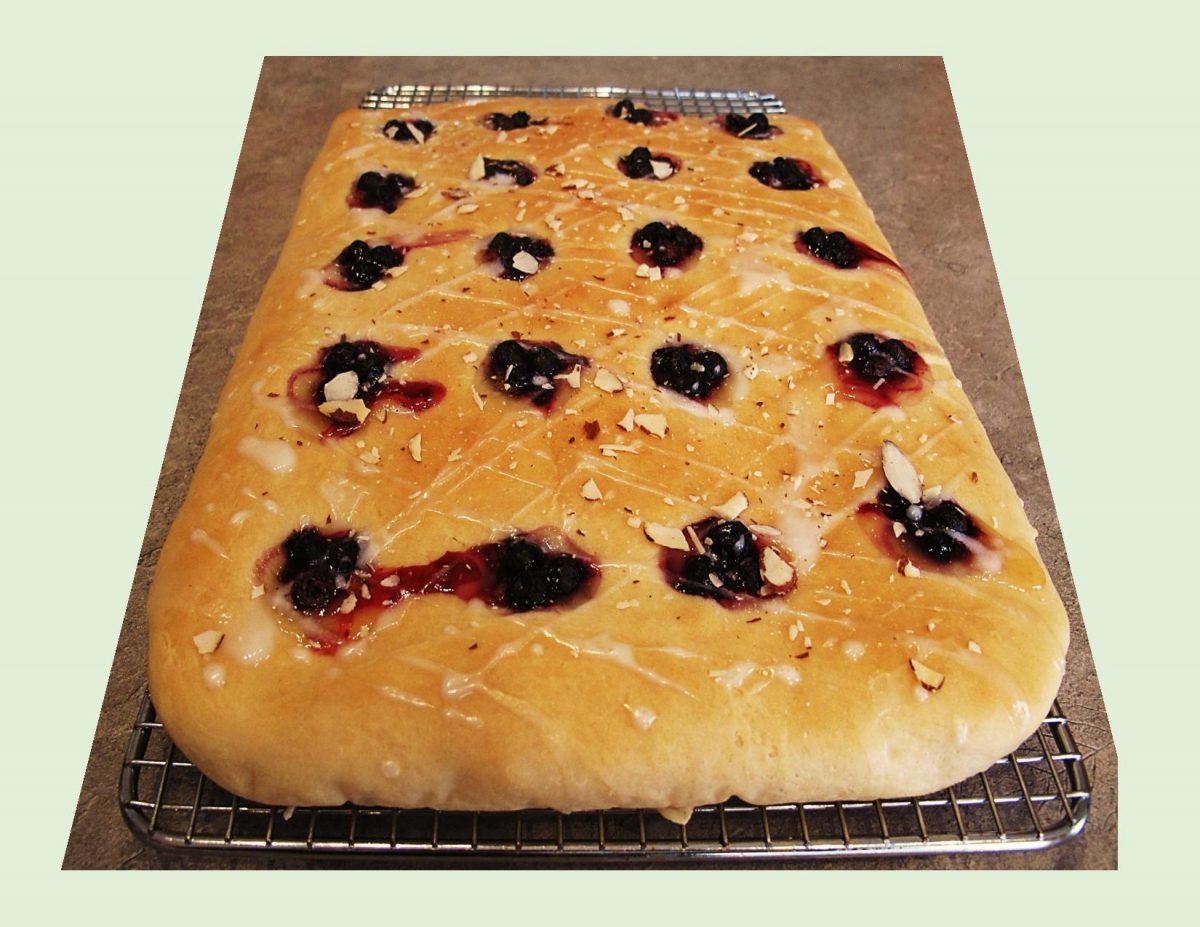
Of course, getting back to my German heritage, brings to mind a German butter cake or butter kuchen. This classic yeasted cake (actually more like bread), seems to be very closely aligned with the poke cake idea. After the dough has risen and been rolled out, deep impressions are made for the filling to nestle in. I think some blueberries and lemon curd will work nicely here.
Print Recipe
Blueberry Lemon Poke 'Bread'
Votes: 1
Rating: 5
You:
Rate this recipe!
|
|
Votes: 1
Rating: 5
You:
Rate this recipe!
|
Instructions
Dough
In a small dish, heat milk to lukewarm. Add yeast & 1 tsp sugar; let sit for 5 minutes to allow yeast to activate. In a large bowl, whisk together remaining 1/4 cup sugar, melted butter, sour cream & egg. Add yeast mixture & stir to combine.
In another bowl, whisk flour & salt. Add flour mixture to yeast mixture 1 cup at a time, combining after each addition. Once all flour has been added, knead on a lightly floured surface for about 2 minutes.
Lightly grease the large bowl, place dough in it & cover with plastic wrap & a tea towel. Allow to rest for at least one hour, in a draft free place until dough has doubled in volume.
Assembly & Bake
Line a 15" X 10"-inch jellyroll pan with parchment paper. Place dough on paper & press out evenly in pan. Make about 20 deep impressions in dough with your fingertips. Fill each one with a spoonful of lemon curd & top with a couple of large blueberries. Allow cake to rise 10 minutes.
-
Bake bread/cake for about 20 minutes or until golden. Meanwhile, combine glaze ingredients. Remove from oven: cool for just a few minutes then drizzle with glaze. Sprinkle with sliced almonds. Cut into 15 serving pieces.
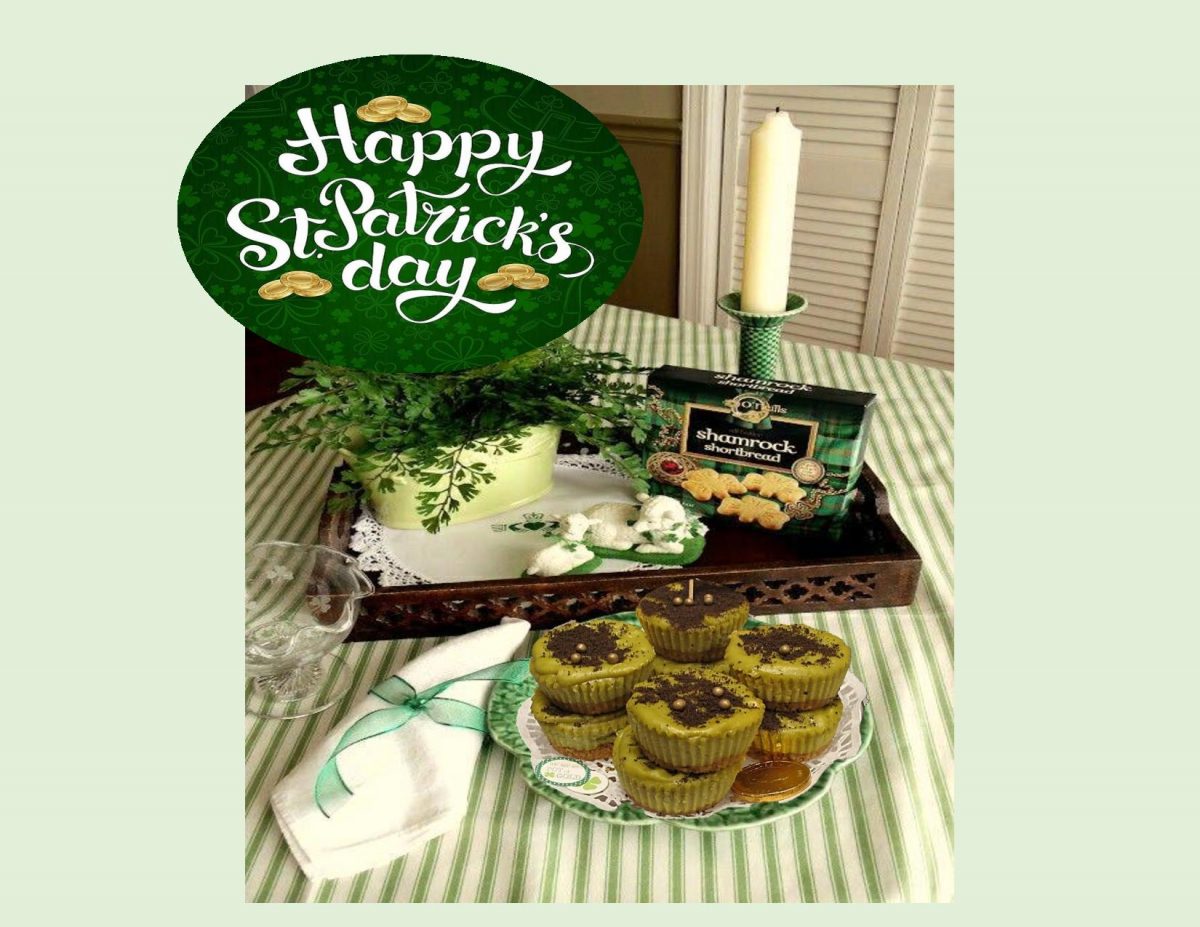
CELEBRATING ST. PATRICK’S DAY!
The term ‘green food’ can mean several things. More and more households are ‘going green’ with their menus, buying food from sustainable local sources. People who are ‘eating greener’ include those who grow their own food and compost all their waste to those who simply take a re-useable bag to the supermarket. Most of us are interested in making decisions that are better for the environment.
Others make immediately think ‘green vegetables’. Then of course there are those who , especially at this time of year, may think of the color green and foods with which to celebrate St Patrick’s Day. There is so much you could do with this holiday in terms of food such as rainbows, leprechauns, shamrocks, pot of gold ………
In North America, St. Patrick’s Day is pretty much just a fun day here. We wear green and we eat green. For the most part, its an excuse to party and drink some green beer. Brion & I aren’t into green beer exactly, so here’s our salute to this Irish day … Avocado Cheesecakes.
Print Recipe
Avocado Cheesecakes
Votes: 1
Rating: 5
You:
Rate this recipe!
|
|
Votes: 1
Rating: 5
You:
Rate this recipe!
|
Instructions
Preheat oven to 350 F. Line a mini cheesecake pan with paper liners or just use without if the cup bottoms are removable.
In a bowl, combine wafer crumbs & butter until completely moistened. Press crumb mixture into the bottom of each mini cup & set aside.
Beat cream cheese & brown sugar until blended. In a separate bowl, beat eggs. Add remainder of ingredients to the eggs & mix until combined.
Beat egg mixture into cream cheese mixture until well blended. Spoon over crusts, filling to the top of each mini cup.
Bake 15 minutes or until edges are golden & centers are set. Cool completely, then refrigerate for several hours.
Salmon croquettes are basically a version of a salmon cake, salmon balls or patties and can be fried or baked. They were originally made of beef, probably leftovers that needed to be used up. Croquettes originated in France in about 1898 by the founder of classical French cuisine, Escoffier. As Escoffier’s chefs started to travel throughout the world, they took the recipe with them to other cultures where it was transformed based on local cuisines. From the original beef croquette, it branched out into salmon croquettes, chicken, vegetarian, and many other versions.
There are many variations of ‘croquettes‘ on the market, and just about every culture has developed their own recipe. Constantly, new recipes are formulated and something new is invented and created. With the input of different cultures, the original recipe has taken itself into many directions, different applications and ingredients. Very often salmon croquettes (cakes, balls or patties) are made with canned salmon though there are quite a few newer recipes that use fresh salmon that has been either chopped finely or ground to mold into the various shapes.
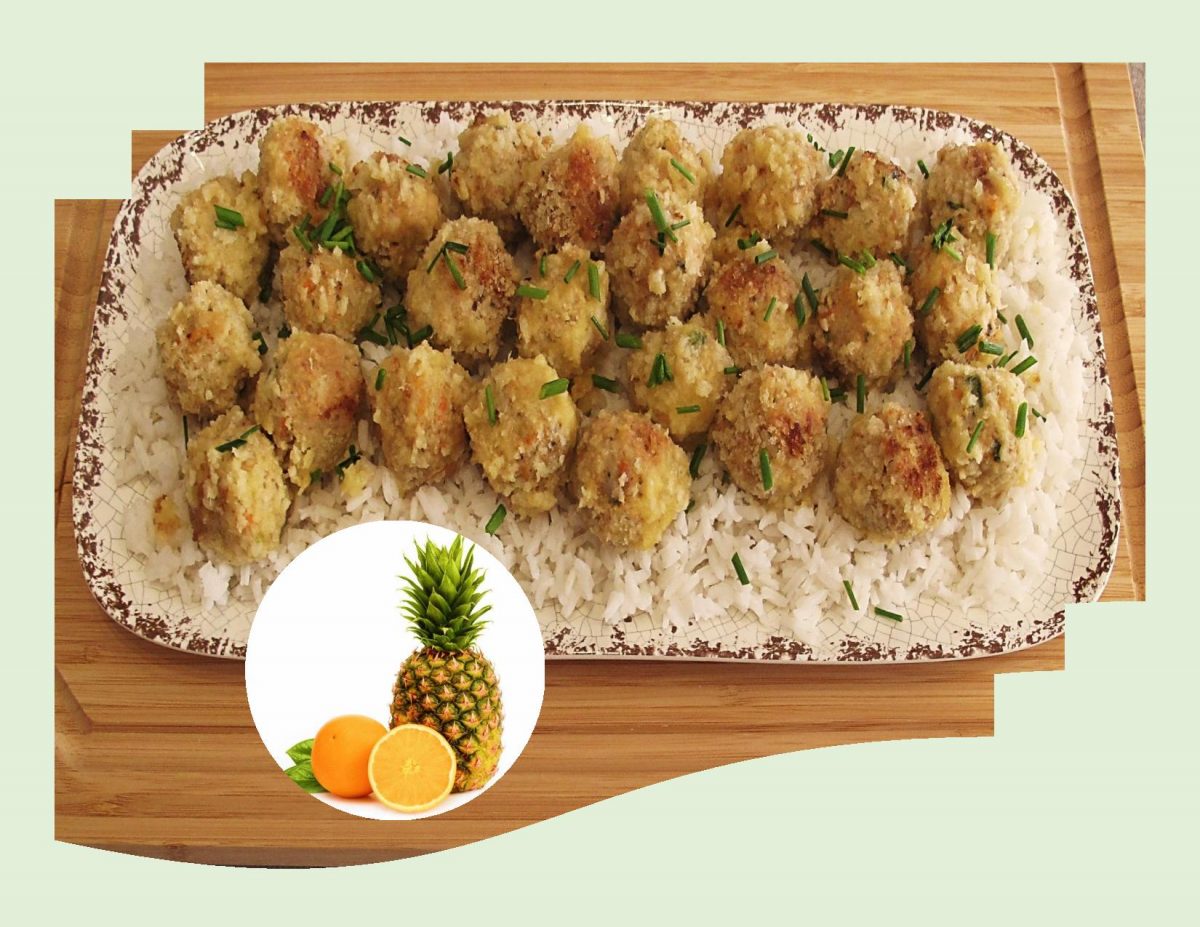
I think, using a zesty orange-pineapple glaze is the perfect compliment to these baked salmon balls.
Print Recipe
Baked Salmon Balls w/ Orange Pineapple Glaze
Votes: 1
Rating: 5
You:
Rate this recipe!
|
|
Votes: 1
Rating: 5
You:
Rate this recipe!
|
Instructions
Salmon Balls
-
If using canned salmon, drain & flake well. If using fresh salmon, brush with olive oil and season lightly with salt and pepper. Grill for about 6 minutes or bake wrapped in foil at 350 F. for approximately 10 minutes. When cool, flake salmon. Add carrot, green onion, potatoes, tartar sauce, egg, lemon juice, Worcestershire sauce, cilantro paste, Old Bay Seasoning, salt & pepper. Combine well.
Using a small scoop (about 1/2 oz size), measure salmon mixture out into palm of your hand & gently roll into balls. Mixture should make about 32 balls.
Roll salmon balls in Panko crumbs & place on a well buttered or sprayed baking sheet. Lightly spray tops with spray as well.
Bake about 30-40 minutes, turning halfway through. Remove from oven.
Glaze
Place all glaze ingredients into a small saucepan over medium heat. Stir gently & simmer for 15-20 minutes or until liquid begins to thicken slightly & reduces by half.
Drizzle over salmon balls or serve on the side. These salmon balls are nice served with rice & a steamed veggie.
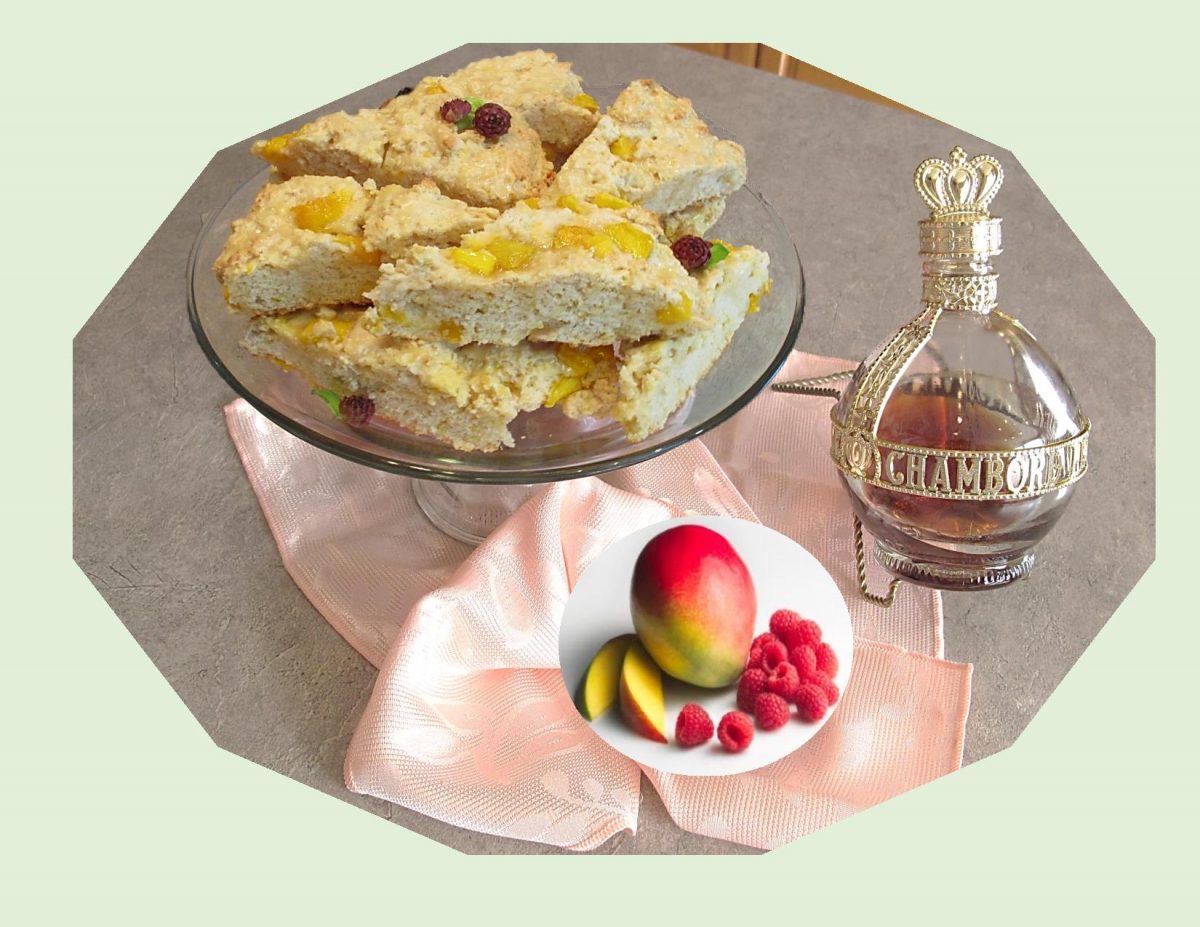
Scones are the quintessential, must be baked at home and eaten immediately foodstuff. Good scones are all about lightness and texture …. crumbly but a little moist, slightly dense but not grainy, flaky but not powdery.
The secret to a good moist scone that is also light, is in the proportion of rising agent to flour. Use too much leaving and your scone will definitely rise but be overpowered by baking powder chemicals. It is also important to keep the mixing to an absolute minimum or the gluten in the flour gets overworked, which makes the dough elastic and consequently the baked scones hard.
Many recipes call for self-rising flour as a staple ingredient. Often times, we find ourselves passing these recipes by because we don’t have it on hand, or because we don’t use it enough to actually want to buy it. Luckily, self-rising flour is easy to make at home. It requires only three ingredients and can be used in both recipes that call for it as an ingredient, and as a substitute for regular flour in quick-rise recipes to cut down on separate leavening agents.
The glaze is definitely the ‘icing on the cake’ when it comes to these scones. Chambord Liqueur is created using all natural ingredients. Black and red raspberries are blended before being steeped in Cognac to achieve a highly concentrated base. The mixture is then extracted and a second infusion captures the remaining flavors from the berries. The final step marries the berry infusion with Cognac and extracts of Madagascan vanilla, Moroccan citrus peel, honey and hints of fragrant herbs.
The total combination of scone and glaze is absolutely awesome!
Print Recipe
Mango Scones w/ Chambord Glaze
Votes: 1
Rating: 5
You:
Rate this recipe!
|
|
Votes: 1
Rating: 5
You:
Rate this recipe!
|
Instructions
Scones
Preheat oven to 375 F. Line a baking sheet with parchment paper.
In a large bowl, whisk together flour, sugar, baking soda, cardamom & lemon zest. With fingertips, cut in grated butter until mixture resembles coarse crumbs.
In a small bowl, whisk together buttermilk, egg & vanilla; add to flour mixture. Fold in JUST until incorporated then carefully fold in mangos.
Place dough on parchment paper lined baking sheet. With lightly floured hands, pat dough into an 8-inch circle. Score into 8 or 12 wedges.
Bake 20 minutes or until golden & test done. Cover lightly with foil if over browning before finished baking. Remove from oven to a cooling rack. cool slightly before glazing.
Glaze
In a small dish, combine glaze ingredients & drizzle over cooled scones. Decorate with raspberries & mango if desired.
Recipe Notes
Self-rising flour contains baking powder in a proportion that is perfect for most sponge cakes, cupcakes and scones. Some recipes may ask for a little additional baking powder to be added, particularly if the cake is made with an all-in-one method as omitting the creaming stage in the cake making means less air is incorporated into the batter during the mixing stage. Other times a small amount of baking soda is added if the ingredients include cocoa powder, yogurt or buttermilk.
- For 1 cup of self-rising flour use: 1 cup all-purpose flour, 1 1/2 tsp baking powder & 1/4 tsp salt. Multiply the amount as needed to create a larger amount.
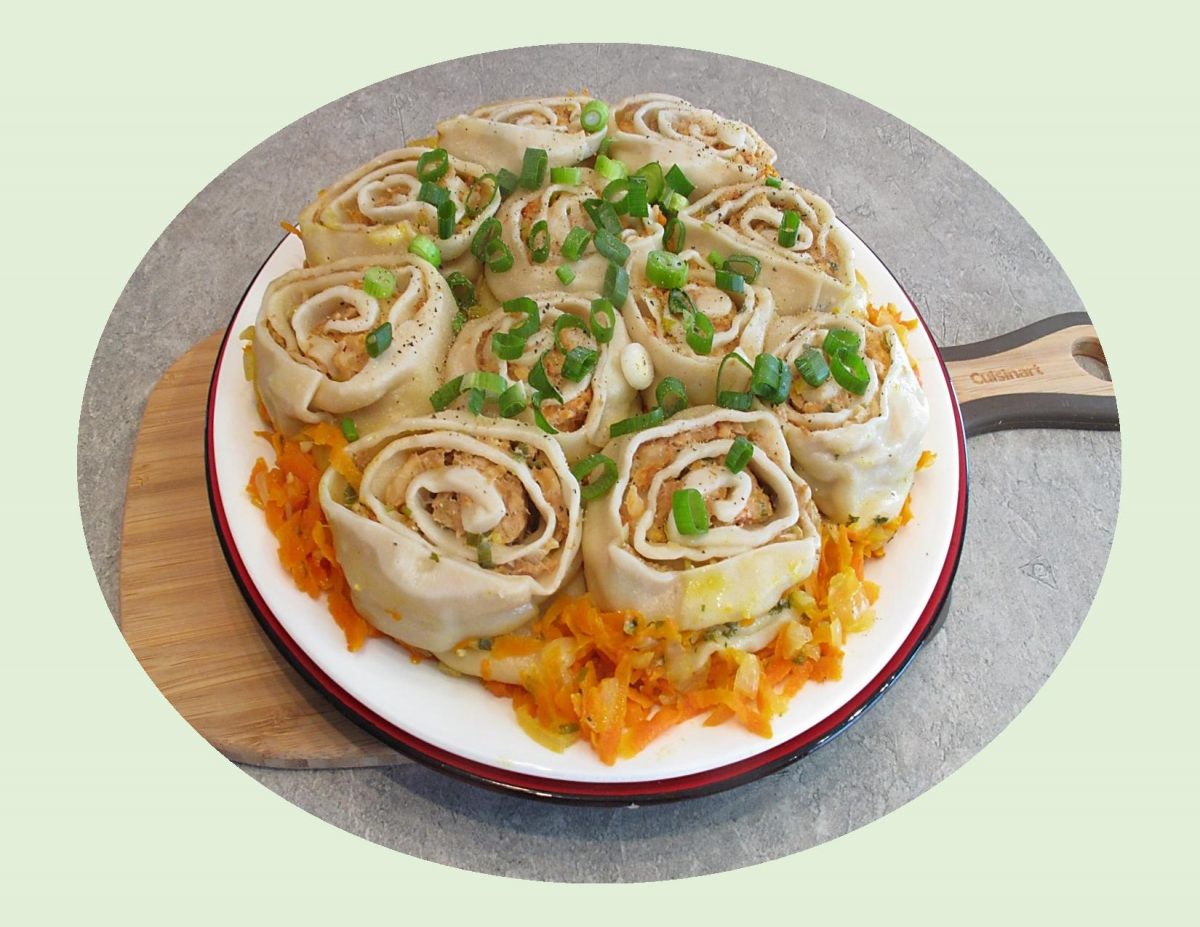
Though they come in all shapes and sizes, dumplings are a near-universal culinary constant as almost every culture has one. So naturally, dumpling recipes are incredibly versatile, coming with a wide array of fillings, wrappers, shapes and sizes. Eaten as an appetizer, dessert, side dish or for the main meal, they might just be the ultimate comfort food.
Chicken and shrimp go together surprisingly well, and this dish is no exception. In March of this year (2021), I posted a blog about Russian Pelmeni. Since then, Brion & I have had ‘pelmeni’ numerous times in which I’ve experimented with various fillings. In case you’re not familiar with these dumplings, traditional Russian pelmeni consist of a filling wrapped in thin, unleavened dough. The word “pelmeni” describes the ear-shaped appearance of these dumplings.
When I made them for the March blog, I used a different technique for preparing them. Instead of making them into the traditional ear shape, I rolled the dough out into a large rectangle. I then spread the raw meat filling over it very thinly and rolled it up in a jelly roll fashion. After slicing the roll into 2-inch pieces, they were steam cooked in broth in a skillet. It’s a quick and easy take on authentic pelmeni.
Since Brion & I eat a lot of chicken and shrimp, I could see no reason to ‘develop’ a new version with an almost oriental twist on it.
Print Recipe
Shrimp & Chicken Pelmeni
Votes: 1
Rating: 5
You:
Rate this recipe!
Ingredients
Broth for Steaming Pelmeni
Ingredients
Broth for Steaming Pelmeni
|
Votes: 1
Rating: 5
You:
Rate this recipe!
|
Instructions
Dough
In a bowl, combine all dough ingredients & knead until a smooth dough ball forms, about 10 minutes. Cover with plastic wrap & set aside to rest until your filling is prepared.
Filling
Chop mushrooms & mince garlic. In a skillet, heat butter & add garlic. When aromatic & light golden, add mushrooms & a light sprinkle of salt. Cook for about 2 minutes, until fragrant, soft & roughly a third of the original volume. Set aside in a bowl to cool.
Chop shrimp into pieces the size of large peas. Add to the mushrooms with the chicken, green onion, water chestnuts & ginger. Combine with a fork.
Stir together salt & white pepper, sugar, soy sauce & water. Pour over the filling; stir to mix & firm up. Cover & set aside to rest for 30 minutes.
Assembly
Once dough has rested, transfer to a floured surface. Roll out the dough into a large, THIN rectangle. Spread filling over the dough, leaving a 1/4-inch at the far side of the dough.
Tightly roll dough up, starting from the wider side, forming a log. Put seam side down to seal the edges. Seal ends of the dough as well. Using a very sharp knife, cut the dough log into 2-inch sections.
In a large skillet that will accommodate all pelmeni, heat oil & cook onion until translucent. Add garlic & continue cooking until fragrant. Add grated carrot; cook about 1-2 minutes more.
Place pelmeni rolls on top of veggies, add vegetable broth, salt & pepper. Cover with a lid & simmer for 30 minutes on a low heat. Check pelmeni from time to time, to make sure there is still some broth in the skillet. Add more broth if it evaporates too fast. Garnish with extra sliced green onions if desired. Serve.
Recipe Notes
- A nice condiment for these dumplings would be a sweet chili sauce.

Just for a change of pace, I decided to make a nutty tasting bulgur wheat stuffing instead of the traditional bread version for our tenderloin today.
Bulgur is more than just something to make tabbouleh with. Its nutty taste and hearty texture work in so many dishes or you can just use it as a substitute for other grains like brown rice, couscous or quinoa.
This kind of wheat should not be confused with its less-tricky-to-harvest cousin, cracked wheat. While they are similar, cracked wheat is completely raw while bulgur is pre-cooked and has a much shorter prep time.
For me, if the recipe involves grain, I’m in! I guess you can take the farmer’s daughter off the farm but you can never take away her love for food with grain in it.
Print Recipe
Pork Tenderloin w/ Bulgur Apricot Stuffing
Votes: 1
Rating: 5
You:
Rate this recipe!
|
|
Votes: 1
Rating: 5
You:
Rate this recipe!
|
Instructions
In a saucepan, place bulgur & vegetable broth. Bring to a simmer over medium high heat. Cover, reduce heat to medium low & simmer until tender, about 10-12 minutes. Add chopped apricots during the last 5 minutes. Remove from heat & drain any excess liquid. Set aside.
In a large bowl, whisk together egg & spices. Add almonds, scallions & reserved bulgur & apricots; mix to combine.
-
Butterfly pork tenderloin & pound with a meat mallet to an even thickness. Place on an oiled piece of foil paper on a baking sheet. Cover one half of the tenderloin with stuffing; press to flatten a bit. Fold other half of tenderloin over top stuffing. Secure with kitchen twine to keep stuffing from falling out during roasting.
Brush with olive oil & season with salt & pepper. Roast about 45 minutes or until tenderloin has a slight pink color remaining. Remove from oven & allow to sit for a few minutes before untying & slicing.
For the blog picture, I opened our whole tenderloin before slicing to show how nice this filling is. These flavors are so good!


