Sweet Red Bean Buns/ Anpan

Many people are often surprised to hear that beans can be enjoyed as dessert. But ‘anko’, a paste made from red beans called ‘azuki’, is a staple in traditional Japanese confectionery, and has been enjoyed by Japanese people for centuries. Anko, or sweet red bean paste, is the equivalent of chocolate in the western world. 

The origin of red bean paste dates back to the Heian period when Chinese travelers visited Japan with recipes for steamed buns. Japan adopted the recipe and incorporated meat and vegetables; however, Buddhist priests were unable to eat the meat-filled buns, so they opted for a substitute of boiled azuki beans. The beans only began to be sweetened during the Muromachi period when Dutch traders started importing sugar to Japan.

Anpan is a sweet roll that was first made in 1874 by a samurai named Mr. Kimura. He lost his job due to the dissolution of the samurai as a social class back in Meiji period. During that time, Japan was becoming more westernized, and bakeries started to appear. His new job was as a baker.

Soon after Mr. Kimura founded the well-known bakery called ‘Kimuraya’, which still exists today. Kimura created a bread that was more suited to Japanese tastes. He replaced the traditional Japanese red bean mochi (a Japanese rice cake made from short-grain glutinous rice) with western bread instead of mochi and it is here where anpan, the traditional soft Japanese bread roll filled with red bean paste, was first invented.  

Anpan, derived from anko red bean paste, and pan, taken from the French word for bread (pain), is undoubtedly one of Kimuraya’s most famous products, and one of the most popular types of bread in Japan. Like true artisans, their original recipe has not changed since their first conception. Kimuraya have also not patented their recipe, allowing other bakers to make the same product as they please.

You can find anpan in bakeries and convenience stores all throughout Japan. Anpan is almost always filled with azuki bean paste in varying textures. Some are smooth, and others are chunky. Zunda beans (green beans) and white soybeans are common fillings. Other non-azuki bean paste flavors are pumpkin, chocolate, and cream, to name a few.

Red Bean paste comes in many shapes and forms, but one thing is constant: the ingredient is a special and meaningful component of different East Asian cultures. With its creamy texture, red bean paste is suitable for a multitude of desserts. Its flavor is sweet and savory at the same time, with notes of chocolate and walnuts.

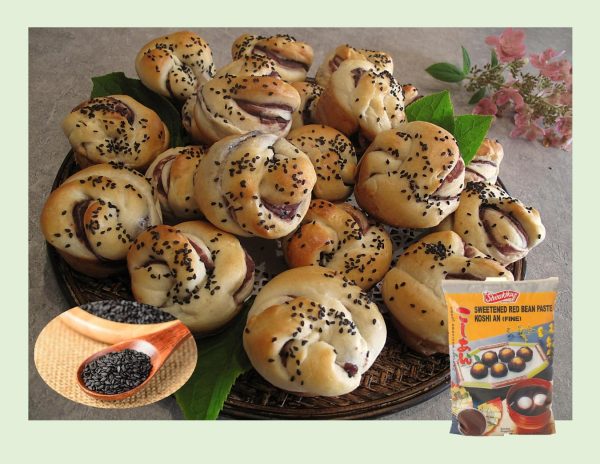
Just for fun, I thought I would try making some anpan buns to see if we would like them. Of course, what’s not to like …. there sweet and soft!!
Print Recipe
Sweet Red Bean Buns
Votes: 1
Rating: 5
You:
Rate this recipe!
Servings
Ingredients
Sweet Red Bean Filling
Servings
Ingredients
Sweet Red Bean Filling
Votes: 1
Rating: 5
You:
Rate this recipe!
Instructions
  1. In a small bowl, dissolve yeast & 1 tsp sugar in lukewarm milk. Let stand for 5 minutes to allow yeast to activate. In a large bowl, whisk together 1/4 cup sugar, melted butter, sour cream & egg. Add yeast mixture, stirring to combine.
  2. In another bowl, combine flour & salt. Add flour mixture, 1 cup at a time, combining with wet mixture. Once all flour has been added, knead dough for about 2 minutes until smooth & elastic consistency, Place dough in a greased bowl & cover with a towel or plastic wrap. Allow to rise in a warm place until doubled in bulk, about an hour.
  3. Lightly butter 2 muffin pans using only 20 cups total.
  4. Punch the risen dough down & transfer to a lightly buttered work surface. Divide the dough into 20 equal portions with about 50 grams each. Take one portion of the dough, shape it round, flatten it with a rolling pin, put a ball of red bean paste and seal it properly. Shape the ball, use a rolling pin to flatten (not too forceful or it will break the dough) it into a rectangular shape, use a sharp knife to cut 4 lines in the middle of the dough about ½-inches apart.
  5. Roll up, starting at the longest side of dough, twist & attach ends together. Place each bun in a muffin cup.
  6. Brush egg wash over tops of buns & sprinkle with sesame seeds. Cover buns with a tea towel & allow to rise for about 30 minutes or until doubled in size.
  7. Preheat oven to 350 F.
  8. Bake for 20 minutes or until golden in color. Remove from oven. Take buns out of pans & cool on wire racks.
Recipe Notes
  • If you prefer your bun dough a bit sweeter use 1/4 cup as opposed to 2 Tbsp as I did.

Fig & Flax Swirl Cookies

Ideal for fall, fig & flax swirl cookies have beautiful warm flavors from the fig preserves and spices and a little crunch from the flax seeds. Figs flavor has been described as kind of a honey-taste with hints of berry. And of course, they give a crunchy-crisp texture from the seeds.

Figs are a distinctive and vibrant fruit that work with sweet and savory dishes. There are so many ways to use them in autumnal bakes, salads, meat dishes and more. Then there’s an added dimension to take it a bit further by using figs in preserve form such as:

  • Homemade Fig Newtons.
  • Swirl into a cheesecake batter for a fig cheesecake.
  • Spread on melted baked brie fresh from the oven.
  • Spread it on toast, English muffins, or biscuits instead of jelly.
  • Spread on crostini with goat cheese, prosciutto & balsamic vinegar for an appetizer.
  • Combine with rosemary and balsamic vinegar & use as a glaze for chicken, pork, or kebabs.
  • Mix with softened cream cheese as a crepe filling.
  • Mix with oil, balsamic vinegar, salt & pepper to make a vinaigrette.
  • Use it in grilled ham & cheese sandwiches.
  • Swirl it into ice cream.
  • Use in lieu of syrup for a topping for pancakes.

If you like fig preserves, you will love these cookies.

Print Recipe
Fig & Flax Swirl Cookies
Votes: 1
Rating: 5
You:
Rate this recipe!
Course dessert
Cuisine American
Servings
COOKIES
Ingredients
Course dessert
Cuisine American
Servings
COOKIES
Ingredients
Votes: 1
Rating: 5
You:
Rate this recipe!
Instructions
  1. Combine flour, baking soda & salt in a small mixing bowl. Set aside.
  2. In a large bowl, using a hand mixer, cream the butter with the brown & white sugar. Mix on medium speed for a minute or two. Add the egg & vanilla and continue mixing until well incorporated.
  3. Add dry ingredients to the butter mixture & stir with a spoon until combined & forms a ball. Wrap the ball of dough in plastic wrap & refrigerate for an hour.
  4. Roll chilled dough out on a lightly floured piece of waxed paper to a 16 x 10-inch rectangle. Spread smooth fig preserves on the dough to within about 1/2-inch of the edges. Starting at one of the long ends, begin to carefully roll the dough into a log.
  5. Place egg white in a small bowl. Combine 2 Tbsp each brown sugar & ground flax seeds in a shallow dish. Brush log with egg white then roll in the flax/sugar mixture. Wrap the rolled dough in the wax paper & refrigerate for at least an hour or overnight.
  6. When ready to bake, preheat oven to 375 F.
  7. Slice roll, (using a piece of floss for easier slicing), into 1/4-inch slices. Place on a parchment lined baking sheets & bake for 10-12 minutes. Remove from oven & allow to cool on baking sheets for a minute or two before transferring to a wire rack to cool completely. Store in airtight container.

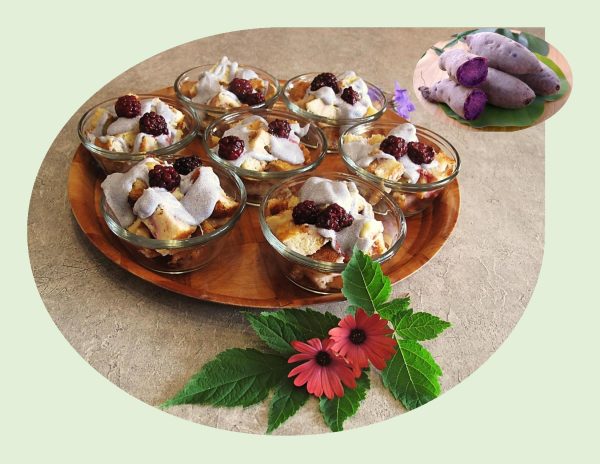
Ube Bread Pudding w/ Ube Cream Cheese Drizzle

Ube (pronounced OO-bay), is a purple yam native to the Philippines and other areas of Southeast Asia. Ube is a very versatile ingredient. It is not a purple sweet potato or taro, it is a purple yam. Its special taste reminds one of vanilla, pistachios or chestnuts. The vibrant purple color inside and out is uniquely photogenic.

Ube has been used for decades in Filipino cuisine and has now caught on in North America, especially in the form of desserts.

When I first tried using it sometime back, it was in some sweet rolls that were filled with ube ‘halaya’ or jam and topped with Edam cheese. We absolutely loved them. My next adventure was some ube cheesecake for Easter (2019). Both of these recipes have been published here on the blog.

Now, I’m taking it another step further and making an Ube Bread Pudding. This dessert is best made over two days due to that fact that you are making the ube bread from scratch. Should be interesting!

Print Recipe
Ube Bread Pudding w/ Ube Cream Cheese Drizzle
Votes: 1
Rating: 5
You:
Rate this recipe!
Servings
Ingredients
Ube Halaya (jam) Filling for Bread
Ube Bread Pudding
Ube Cream Cheese Drizzle
Servings
Ingredients
Ube Halaya (jam) Filling for Bread
Ube Bread Pudding
Ube Cream Cheese Drizzle
Votes: 1
Rating: 5
You:
Rate this recipe!
Instructions
Ube Halaya
  1. In a medium, heavy saucepan, melt butter. Add coconut & condensed milks; stir until heated. Add thawed, grated ube & stir everything together. This process takes about 40-50 minutes until the ube is cooked. The mixture will be thick & sticky. It is important to stir the mixture often during cooking to prevent it from forming a crust. Transfer the ube halaya to a container & set aside.
Ube Bread
  1. In a small dish, heat milk to lukewarm. Add yeast & 1 tsp sugar; let sit for 5 minutes to allow yeast to activate. In a large bowl, whisk together remaining 1/4 cup sugar, melted butter, sour cream & egg. Add yeast mixture & stir to combine.
  2. In another bowl, whisk flour & salt. Add flour mixture to yeast mixture 1 cup at a time, combining after each addition. Once all the flour has been added, knead on a lightly floured surface for about 2 minutes.
  3. Lightly grease the large bowl, place dough in it & cover with plastic wrap & a tea towel. Allow to rest for at least one hour, in a draft-free place until dough has doubled in volume. Grate cheese & set aside in refrigerator until needed.
  4. Grease 2 loaf pans. Punch dough down & divide in half. Roll each piece out to about 7x7-inch (18x18 cm) square. Spread ube halaya over each one leaving about 1/2-inch border all the way around. Sprinkle each square with Edam cheese then roll up in jelly-roll style. Pinch to seal seams & place seam side down in loaf pans. Cover with plastic wrap & a tea towel. Allow to rise for an hour or until doubled in size.
  5. Preheat oven to 350 F. Bake bread for about 50 minutes until golden brown. Remove from oven; cool for just a few minutes then pat with butter. Sprinkle with more grated cheese.
Ube Bread Pudding (ON THE FOLLOWING DAY)
  1. Preheat oven to 350 F. Butter a 8 x 8-inch baking dish. Cut thick slices of ube bread into 1-inch cubes & spread out in baking dish. In a saucepan, melt butter into milk on medium-high; do not let it boil. Remove from heat when butter is melted.
  2. In a small bowl, whisk eggs & coconut extract together. Slowly pour egg mixture into butter/milk mixture & begin whisking immediately to avoid scrambling the egg mixture. Pour custard over the ube bread pieces; use a spoon to work liquid between the pieces.
  3. Bake for about 30-45 minutes or until the top is springy. While the bread pudding is baking, make the ube drizzle.
Ube Drizzle
  1. In a bowl, using a mixer, beat butter for 2 minutes then add cream cheese & beat for another minute. Add powdered sugar slowly then beat thoroughly; add vanilla. Mix in ube halaya until well combined. Add enough milk to make a drizzle consistency. Either drizzle bread pudding before or after cutting into serving pieces.
Recipe Notes
  • You will have extra Ube Bread & Ube Halaya but it will no doubt be eaten before you have a chance to freeze it. Other than just enjoying it by the slice, it makes great French toast as well.

Garlic Bread Meatball Bombs

HAPPY LABOR DAY!

Although, we have not officially reached the first day of fall (Sept. 23), this part of the year often begins with a tinge of melancholy. Even so, there are many ways to appreciate Canada’s most sentimental season.

Part of our country’s appeal is its four season’s: Winter, Spring, Summer & Fall. We are entering the season of the fall harvest and the leaves on the trees begin their transformation to stunning shades of orange, red and yellow.

Labor day week-end gives us an opportunity to enjoy family and friends before summer is officially over. I remember as a kid, once we arrived at the Labor Day week-end all those ‘lazy, hazy, crazy days of summer were gone’. Back to school for another year. So, whatever your choice of relaxation is, you know good food will play a big part in the week-end gatherings.

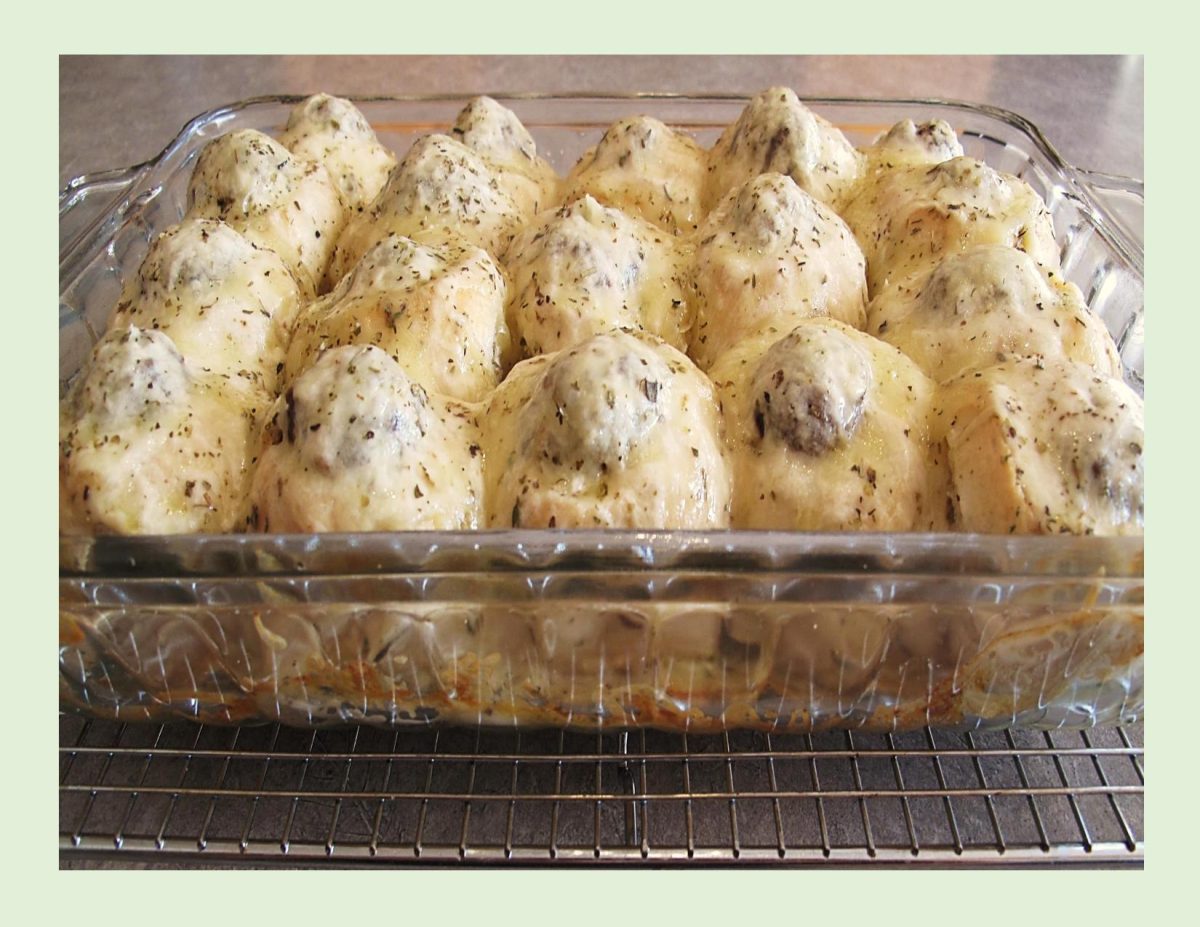
Meatball bombs are a round homemade ‘hot pocket’. They have everything in them you need to make a great tasting meal. Serve two bombs per person. That means each person gets two meatballs, two dinner rolls, lots of sauce, and some gooey, cheesy goodness. Serve these with a simple side salad to round out the entire meal.

Speaking of Hot Pockets, I’m sure most everyone has tried them at some time since they have been around for over 40 years.

Probably the one lasting memory if you have,  is you know that the first bite of the microwavable, molten-in-the-middle meal will burn at least three layers clean off the roof of your mouth.

The frozen creations known as Hot Pockets were created by two Jewish Iranian brothers Paul and David Merage, who immigrated to the United States from Tehran. In 1977, the Merage brothers founded Chef America Inc. and set out to create a portable sandwich whose dough would actually retain its crispness after a few minutes in the microwave. Their creation, which debuted in 1980, was called the Tastywich, but it didn’t last long with its original name. By 1983, after some recipe tweaking, the Tastywich had a new name and Hot Pockets officially hit the market.

History aside, if you’re looking for some flavorful garlic bread meatball bombs, this is just the dish for you! And, you have the choice to use a lot of prepared ingredients from your grocery store, or you can make them all from scratch. There are options for both types in this recipe.

Print Recipe
Garlic Bread Meatball Bombs
Votes: 1
Rating: 5
You:
Rate this recipe!
Servings
Ingredients
Dinner Rolls
Garlic Butter
White Sauce
Servings
Ingredients
Dinner Rolls
Garlic Butter
White Sauce
Votes: 1
Rating: 5
You:
Rate this recipe!
Instructions
Dinner Rolls
  1. Dissolve yeast & sugar in lukewarm water & allow to sit a few minutes until frothy. Add oil, salt, & 2 1/2 cups flour, beat until smooth. Stir in enough remaining 1/2 cup flour to form a stiff dough..
  2. Turn onto a floured surface; knead until smooth and elastic, 6-8 minutes. Place in a greased bowl, turning to grease the top. Cover: let rise in a warm place until doubled, about an hour.
  3. Punch down the dough. Divide the dough into 18 pieces. Pinch the ends of each dough piece together in the center. Place seam side down. Use the palm of your hand to gently roll each dough ball until smooth and round.
  4. Place the dough balls in a parchment lined baking dish. Cover & allow rise until doubled in size, about 30 minutes.
  5. Preheat the oven to 350F.
  6. Lightly brush with egg wash. Bake until golden brown, 20-25 minutes. Remove rolls to a wire rack.
Meatballs
  1. Preheat oven to 350 F.
  2. In a large bowl, combine all ingredients for the meatballs & mix well. Divide mixture into 18 meatballs & place on a foil lined baking tray. Bake 35 minutes or until meatballs are cooked through. Remove from oven & set aside.
White Sauce
  1. In a saucepan, cook butter & flour until bubbly. Slowly add broth & cream; boil for a FEW minutes, add soy, salt & pepper. Set aside.
Assemble & Bake
  1. Hollow out the top of each roll with a sharp knife. The hole will need to be slightly bigger than the meatballs, but not so deep that you puncture the bottom.
  2. Set the rolls into a 9×13" baking pan which has been coated with non-stick cooking spray. Set aside.
  3. Whisk together garlic butter ingredients. Using the back of a teaspoon, liberally smear the holes of the dinner rolls with the garlic butter. Use all of the butter evenly into each dinner roll.
  4. Spoon about a tablespoon of the prepared sauce into each of the hollowed out dinner rolls. Place a cooked meatball into each hole. Top each meatball with the remaining sauce mixture. Evenly distribute the cheese over each of the dinner rolls. Sprinkle on the Italian seasoning.
  5. Bake for 10-12 minutes, or until the cheese is melted and bubbly. Remove from oven.
  6. Using a sharp knife, slice between each dinner roll. Garnish with parsley if you wish.
Recipe Notes
  • For a QUICK & EASY meal use:
  • 12 (store bought) dinner rolls
  • 12 frozen meatballs, cooked
  • FOR SAUCE: 
  • 1/2 cup dried tomato paste
  • 2 cups marinara sauce
  • 1 Tbsp olive oil
  • NOTE: I found for the original recipe it was easier to make the meatballs & sauce first, then the rolls. Just a suggestion!

Late Summer Plum Tart

As peach season wanes and the late summer sun shines brightest, plums arrive in their multicolored splendor. They come in vibrant red, yellow, orange, green, and pink-purple colors.

Plums belong to the same family as peaches, nectarines and apricots. Over 2,000 varieties of plums exist, each with a diverse set of shapes and colors, and they are divided into the following six categories – Japanese, American, Ornamental, Damson, Wild, and European.

One of the best things about plums is how versatile they are. Both sweet and spicy recipes work well with them. Brown sugar, cardamom, nutmeg, and cinnamon are plums’ best friends.

Plums aren’t the summer darling of fruits and are underutilized. But that means you can easily use them to add an unexpected twist to traditional recipes.

Gently spiced, this plum tart celebrates the summer-into-fall season. Quartered and nestled into the batter, the plums soften into mulberry-colored pockets as they bake.

While a slice of this seasonal fruit tart needs no embellishment, a scoop of vanilla ice cream or some whipped cream doesn’t hurt.

Print Recipe
Late Summer Plum Tart
Votes: 1
Rating: 5
You:
Rate this recipe!
Course dessert
Cuisine American
Servings
Ingredients
Course dessert
Cuisine American
Servings
Ingredients
Votes: 1
Rating: 5
You:
Rate this recipe!
Instructions
  1. Preheat oven to 350 F. Line the sides of a 9-inch springform pan with parchment paper.
  2. In a bowl, whisk together flour, baking powder, salt, cinnamon & cardamom.
  3. In a large bowl, using an electric mixer, cream butter & 1 cup sugar until pale & fluffy, about 3 minutes. Add egg & vanilla; beat on low speed until well combined. Gradually add the flour mixture alternating with the milk. Beat on low speed until smooth & thick.
  4. Transfer the batter to prepared baking pan & smooth the top with a spoon or offset spatula. Arrange plums on top, skin side up, in circular patterns. Sprinkle the remaining 2 Tbsp of sugar over plums.
  5. Bake for 60 minutes or until golden on top & set in the center.
  6. Remove from oven then remove sides from springform pan leaving the base in place. Cool completely on a wire rack. Slice & serve with ice cream or whipped cream if desired.

Summer Fruit Tart

PRECIOUS MEMORIES OF LORETTA

Over the years I have shared many experiences on the blog that I had enjoyed with my sister Loretta. She was an avid follower of the blog and always encouraged me to keep writing. In February, Loretta’s time on this earth ended. Her passing has left such an empty place in my heart. There is something very special about having an older sibling. For me, I just wanted to be with her and do everything and anything she could think of. For her, it was probably not quite as much fun having this ‘brat’ tagging along all the time asking questions.

Something Loretta and I always had in common was being adventurous. Whenever we got the chance to explore something mysterious that was right up our alley. One such occasion arose one day when we decided to investigate an old empty farmhouse. This house was 3-4 kilometers from our farm. The land itself was being farmed by a neighboring farmer and was posted ‘No Trespassing’. Nevertheless, this intriguing old  ‘haunted house’  was like a magnet for us. If I remember correctly, it took a little bit of doing to get in, but we managed it. For being such an old house, I recall the inside being quite unique in its design. It had one of those staircases that you see in the movies. We went upstairs and snooped around. Of course, to add to the intrigue, one room was locked. When we listened, we could hear a distinct buzzing or humming sound. After figuring out how to get in, to our surprise wasps had made it their home. The floor was covered with a huge pile of dead wasps but there were still lots of live ones buzzing around. At this point we decided we had best call it a day and leave. Just when we were about to go the farmer came and was working in the fields close to the buildings. Not to be caught ‘trespassing’ we hid by a granary, then high-tailed it out of there as soon as the coast was clear.

Another such memory was that of the ‘clam race’ we invented. About 6 kilometers or so from our farm, the Willow Creek ran through the farmlands. Starting up at the Chain Lakes in the foothills of the Rocky Mountains, it snaked its way through southern Alberta eventually emptying into the Old Man River. On occasion, during summer vacation, Loretta and I would either walk or ride our bike down to the creek. This was fun because we could roll up our pant legs and walk in the water when it was so hot. We came to realize that there were some ‘clam beds’ as we explored different areas of the creek. Just for fun one day we decided to line up some of the clams across the width of the creek. On our next trip we would check to see how far they had gone. There are endless memories that replay over and over in my mind. Life in the fifties had a such a gentle rhythm to it …. what a pleasure it was to be a kid at that time and be a part of it all.

Later in our adult years, Loretta and I had the opportunity to spend a vacation travelling the California coast. It was an amazing experience with memories to last a lifetime. Although our lives took us in many different directions, we always seemed to gravitate back to our sibling bond.

In 2001, Loretta had joined my husband, Brion and I on a French vacation. After we had left Paris, we drove 613 km (380 miles) south to the sleepy village of St. Thibery. This little medieval village, population of 2481, can be traced back more than 4000 years of known history. For this segment of the trip, we had rented an apartment in St Thibery to use as ‘home base’ during our time there. Many of these houses are from the 14th, 15th and 17th century. The apartment was quaint but adequate, even having a roof top patio. We spent about a week in St Thibery and it was there that the three of us made some special memories enjoying our leisure French brunches.

Loretta lived in many places during her life, including California and Vancouver Island, but was particularly drawn to the Peace Country in Northern Alberta. She worked as an LPN for 25 years north of Grand Prairie for Central Peace Hospital in Spirit River and Fairview General Hospital.

Loretta had a love for music, gardening, crafting, and reading. She cared for all animals big and small which included one little precious Dachshund dog named Amigo.

Loretta & Amigo spent a lot of time after she retired with Brion & I. For many years they would come and look after our home while we were away on vacation. Of course, that always included some time after we came home so we could enjoy their company. The three of us loved Amigo so it was great being together.

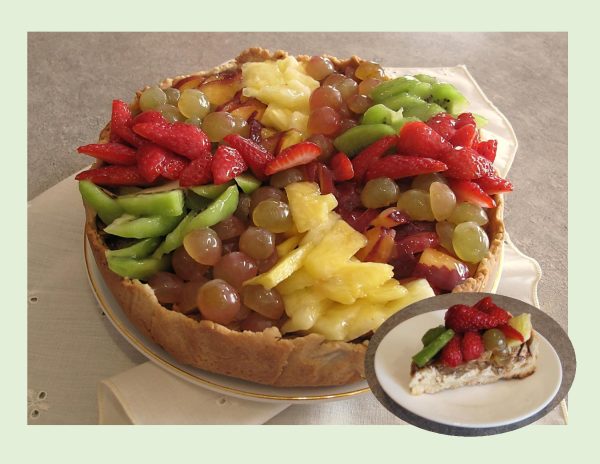
Today, July 25, would have been Loretta’s 80th birthday. I wanted to make something special on the blog to honor her memory. This fruit tart was what developed.

Loretta was a very kind, gentle soul. She was a sister, mother, grandmother, great grandmother, friend and professional health care worker as well as many other things she did with such love and compassion.

Wishing you where here today, for even just a while so I could say happy birthday and see your loving smile.

The only gifts today will be the sweet memories you left behind of laughter, joy and happiness that echo in my mind.

I’ll gaze upon your pictures, I’ll think of you with love and hope you’re doing fine in heaven up above.

May our friends and family in heaven hold you closely and sing you a song. I’ll be sending a million hugs and kisses to today and all year long.

As we remember Loretta today, we hold on to those precious memories she left with us that will never fade from our minds.

Print Recipe
Summer Fruit Tart
Apple cream cheese filling with a wonderful blend of 'Dutch' spices, baked in a shortbread cookie crust and topped with fresh fruit!
Votes: 1
Rating: 5
You:
Rate this recipe!
Course dessert
Cuisine American
Servings
Ingredients
Shortbread Crust
Filling
Glaze
Course dessert
Cuisine American
Servings
Ingredients
Shortbread Crust
Filling
Glaze
Votes: 1
Rating: 5
You:
Rate this recipe!
Instructions
Crust
  1. Preheat oven to 375 F.
  2. In a food processor, combine flour, powdered sugar & cornstarch. Cover & process until combined; add butter. Pulse with on/off turns until mixture forms fine crumbs. Press mixture onto the bottom & 1 1/2" up the sides of a 9" spring form pan.
Filling
  1. Beat cream cheese & 1/4 cup sugar with mixer until well blended. Add egg & vanilla; mix well. Spread onto bottom of crust. Mix remaining sugar, 2 Tbsp flour & spice blend. Add to apples in a large bowl; toss to coat. Spoon over cream cheese layer.
  2. Bake, cover with foil for about 20 minutes. Uncover & continue to bake for another 30 minutes or until apples are tender. Remove from ove & cool completely on a wire rack.
Glaze/Fruit
  1. Place sugar, cornstarch & water into a saucepan and bring a boil while constantly stirring with a hand whisk or a spoon.
  2. Once boiled, remove the glaze from the heat and let it cool a bit. Stir every 3-5 minutes to prevent a film from forming on the surface of the glaze.
  3. Prepare fruit for topping. Place in 12 'wedges' on top of cooled tart. With a silicone brush, gently apply the glaze on top of the fruit to keep the made pattern. Refrigerate the pastry for at least 1 hour before serving.
Recipe Notes
  • SPICE BLEND MIX
  • 4 tsp cinnamon
  • 1 tsp cloves
  • 1 tsp nutmeg
  • 1/4 tsp white pepper
  • 1 tsp anise seed
  • 1/2 tsp ginger
  • 1/4 tsp cardamom
  • 1/4 tsp mace
  • Grind the spices together in a coffee grinder or blender; place in a screw-top jar in the refrigerator.
  • Any extra spice mix can be used in recipes calling for 'apple or pumpkin pie spice'.

Cheesy Corn Fritters

Corn fritters can be sweet or savory, consisting of a batter or dough made with corn kernels (often whole canned corn), flour, milk, eggs, and melted butter. They are often served with fruit, jam, cream, or honey. Sometimes they are also made with creamed corn, and then baked and served with maple syrup. They originated in Native American cuisine and are a traditional snack that’s eaten in the Southern United States. Europeans adopted the recipe of corn fritters from native Americans and modified the ingredients to fit their continent.

These bright crispy morsels make great additions to summer barbecues and backyard gatherings as they will go with just about anything. While they may have originated in the south, corn fritters can easily be changed up with peppers, onions, or herbs to give them regional and seasonal flair.

When paired with other vegetables and a pan-fried fish filet, corn fritters create a unique fish sandwich. Don’t look at corn fritters as just a side dish, but a functional part of a complete meal.

They’re also a popular fried food that has been given their own ‘holiday’ in the USA. A holiday that always falls on July 16th and is known as National Corn Fritters Day. Origination and the history of the National Corn Fritters Day remain anonymous.

Corn has always appealed to me. I could eat corn anytime, for any meal. Today, I’m making some savory, cheesy corn fritters to go with our fish fillets for a supper meal.

Print Recipe
Cheesy Corn Fritters
Votes: 1
Rating: 5
You:
Rate this recipe!
Course Main Dish
Cuisine American
Servings
Course Main Dish
Cuisine American
Servings
Votes: 1
Rating: 5
You:
Rate this recipe!
Instructions
  1. In a bowl, combine corn, cornmeal, flour, paprika, salt & pepper, egg, parmesan, green onion, cilantro & lime juice. Add a splash of water if mixture is too dry.
  2. Heat 1 Tbsp oil in a skillet. Divide corn mixture into 4 large or 8 small portions in pan to form patties. Cook until golden brown on both sides, about 4 minutes per side. Garnish with a dollop of sour cream if desired. If you are making them into a fish burger, we used tartar sauce instead.

Stuffed Onion Rings

Onion rings first made their appearance in an ad for Crisco in a New York Times magazine that was published in 1933. The advertisement included a recipe for onions that are sliced, dipped in milk, dredged in flour, and then deep-fried.

With the expansion of fast-food restaurants in the 1950s and 1960s came the inclusion of the onion ring. As our society has evolved, and so has the onion ring.

Onion rings in their most basic form are cross-sectioned onions cut into ‘rings’ that are then coated in a batter, then fried. Simple, but within this, there are variations such as beer batter, tempura batter, pancake batter, onion strings, or even the ‘onion bloom’ where the whole onion is cut into ‘petals’ battered and fried whole. All of which are usually accompanied by a dipping sauce or rémoulade.

But the thing is, not all ‘alliums’ are created equal. Leeks may be delicious in a soup or braise, but good luck trying to turn them into onion rings. Shallots make a beautiful crunchy topping when fried, but their tiny frame and shape will make it nearly impossible to yield a ring suitable for dredging and battering. If you want onion rings, bigger tends to be better. White and yellow varieties are decent picks, but for optimal onion rings, go for sweet onions. These kinds don’t have as strong of a sulfuric taste and frying them brings out their caramelly aromas. If you’re short on sweet onions, you can tamp down the potency of other types by soaking the sliced rings in ice water. 

Onion rings aren’t just sides for hamburgers—they pair well with beef, chicken, and seafood. There are many takes on onion rings nowadays, including variations of ‘stuffed’ onion rings. Today I’m making a pork/shrimp filling to place inside the rings then frying them. Served with rice they make an interesting entrée for our supper.

Print Recipe
Stuffed Onion Rings
Votes: 1
Rating: 5
You:
Rate this recipe!
Course Main Dish
Cuisine American
Servings
Course Main Dish
Cuisine American
Servings
Votes: 1
Rating: 5
You:
Rate this recipe!
Instructions
  1. Combine all stuffing ingredients & set aside for 15 minutes.
  2. Lightly dust onion rings with flour. Place the onion rings on a flat surface & divide filling evenly between them, filling the inside of the rings. Smooth out filling.
  3. Heat a non-stick skillet; add some oil for shallow frying the rings. Brush sides of the rings with beaten eggs. Carefully place rings in skillet & fry until filling is cooked & golden brown.
  4. Top with grated cheese of choice & serve on a bed of rice.

Blackberry Dampfbuchteln

When I was growing up, I remember my mother making something she called ‘dampfnudeln’. The taste was wonderful and as I recall, these were sweet yeast dumplings in a vanilla custard sauce. I’m not sure if they had anything in the center or not.

Dampfnudels have been a pretty big deal in Germany since the 1600s. As legend has it, during the war, a hungry Swedish army arrived in Freckenfeld, a small town in Germany. The army had threatened to murder everyone there and destroy the town, however, they agree to leave in peace if they were fed. That was the moment town baker, Johanes Muck, rose to the occasion and along with his wife and apprentice, made 1,286 dampfnudels. To honor his heroic efforts, Johanes’ grandson, built a gate known as Dampfnudeltor, made with 1,286 little stone bumps.

The people of Freckenfeld still celebrate the origins of the dumpling and the heroic baker 400 years on with an annual festival. The Dampfnudeltor is even featured in the town’s coat of arms. And if that isn’t enough not only is there a song about them, but a film too – the Dampfnudel Blues!

Traditionally, cooks steam dampfnudel dough as it bakes. Once these ingredients are mixed, they are formed into tight balls of dough and placed close together in an iron pan. The pan is covered with a lid and placed in the oven to cook. The lid is required to create the soft, noodle-like texture associated with this dish. By the time the dish is done, all the liquid will have evaporated from the dish.

Depending on whether the dish is served as a meal or a dessert, dampfnudel may have a sweet flavor. As a dessert, this dish is typically topped with a sweet vanilla sauce, or served with a rich custard. It can also be eaten with stewed fruit. As a main dish, this dough is typically served with vegetables or sauerkraut. It can also be used as side to dip in stews or soup and may even be steamed in chicken broth when served in this manner.

It seems there are endless recipes and preparations, variations on recipes and variations on variations …. ROHRNUDELN, HEFENUDELN, GERMKNODEL, DAMPFNUDELN, BUCHTELN and on and on. Basically, they are all yeast dumplings, sweet (or savory) but the preparation varies somewhat. Some are poached in a milk/sugar liquid, whereas others are baked. Some are filled, some not. Most seem to be served with a vanilla custard.

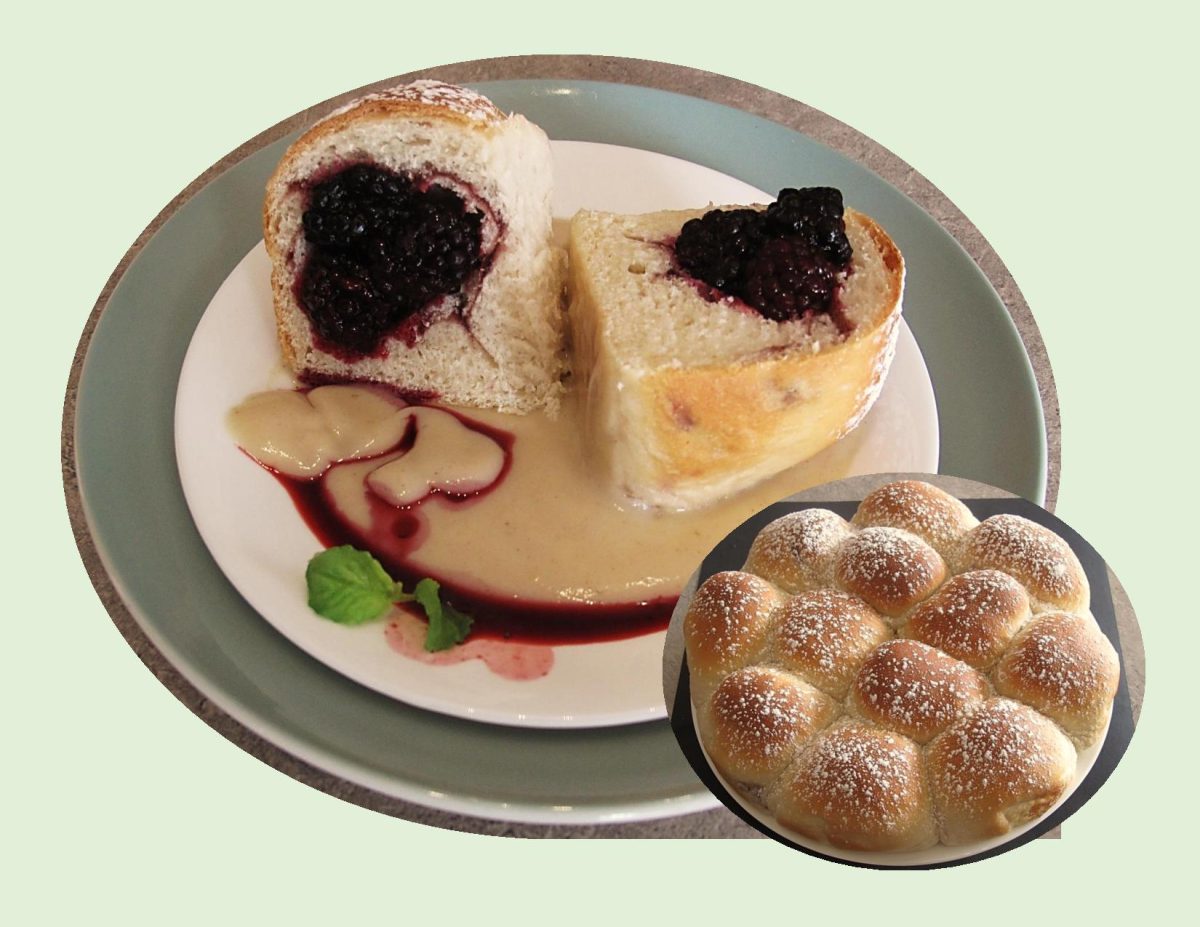
For mine, I’m trying to incorporate some blackberry compote in a soft, sweet yeast bun with some vanilla custard. I think I’ll call them ‘dampfbuchteln’. Buchteln are a typical Bohemian dish from the region in the middle of Europe that was formerly German. It was from there, that recipes like this made their way into German and Austrian kitchens. That name seems fitting, having the characteristics of both kinds of buns.

Print Recipe
Blackberry Dampfbuchteln
Votes: 1
Rating: 5
You:
Rate this recipe!
Course dessert
Cuisine German
Servings
Ingredients
Blackberry Compote
Sweet Roll Dough
Vanilla Cardamom Sauce
Course dessert
Cuisine German
Servings
Ingredients
Blackberry Compote
Sweet Roll Dough
Vanilla Cardamom Sauce
Votes: 1
Rating: 5
You:
Rate this recipe!
Instructions
Blackberry Compote
  1. In a saucepan, combine sugar, cornstarch & salt; add juice & stir to combine. Bring to a boil over medium-high heat, stirring frequently, simmer until thickened, about 1-2 minutes. Immediately remove from heat. Gradually fold in blackberries. Cool to room temperature, stirring occasionally. I found it easier to make the compote a day ahead of the buns.
Dough
  1. In a small dish, heat milk to lukewarm. Add yeast & 1 tsp sugar; let sit for 5 minutes to allow yeast to activate. In a large bowl, whisk together remaining 1/4 cup sugar, melted butter, sour cream & egg. Add yeast mixture & stir to combine.
  2. In another bowl, whisk together flour & salt. Add flour mixture to yeast mixture, 1 cup at a time combining well after each addition. Once the flour has all been added, knead on a lightly floured surface for about 2 minutes.
  3. Lightly grease the large bowl, place dough in it & cover with plastic & a tea towel. Allow to rise for at least 1 hour in a draft free place until dough has doubled in volume.
  4. Punch dough down & turn out onto a lightly floured work surface. Divide the dough into 12 equal sized pieces & roll each into a ball. Place under a tea towel so they won't dry out. Take one ball & shape it into a flat circle large enough to hold a spoonful of compote.
  5. Fold over & pinch the edges, then carefully shape into a ball again. Place in a buttered 12-inch spring form pan, seam side down. Repeat with remaining dough balls. Cover with tea towel & let rise for another 30 minutes.
  6. Preheat oven to 350 F. Bake buns for about 20-25 minutes or until golden. Remove from oven; cool for just a few minutes then pat with butter. When completely cooled, sprinkle with powdered sugar if you wish.
Vanilla Cardamom Custard
  1. Sift together cornstarch, flour & cardamom. Using a whisk, combine the beaten eggs & the flour mixture until powders are dissolved. In a saucepan over medium heat, stir together milk, sugar & salt. Once sugar & salt are dissolved, add in the egg mixture & keep stirring everything until the mixture is thickened. Remove from heat & stir in butter & vanilla. Nice to serve warm under the blackberry dampfbuchteln.

Apricot Raisin Five-Spice Oatmeal Cookies

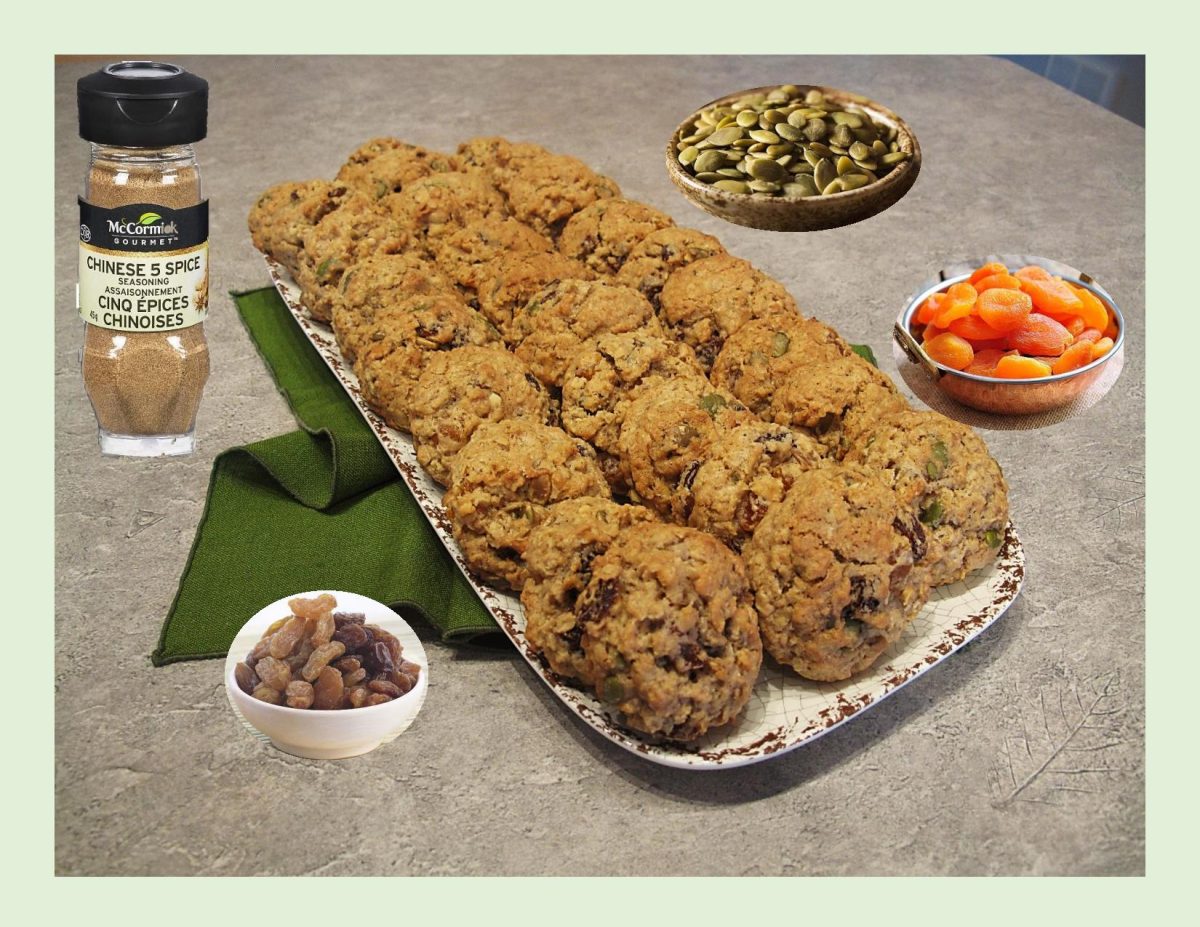
I’ve always been a huge fan of Chinese 5-spice. The aroma and flavor are just pure magic. This peppery-sweet mixture provides endless options for its use. 

Perhaps the most amazing thing about this spice blend is how well it compliments both sweet and savory dishes.

In this recipe, the apricots offer a subtle sweetness to these cookies, while the Chinese 5- spice adds a spicy perspective and chopped pepitas add a nutty crunch. Blend that all together with oatmeal & raisins and you get a nice range of flavors.

Print Recipe
Apricot Raisin Five-Spice Oatmeal Cookies
Votes: 1
Rating: 5
You:
Rate this recipe!
Servings
Ingredients
Servings
Ingredients
Votes: 1
Rating: 5
You:
Rate this recipe!
Instructions
  1. Cream butter & sugars together well. Add egg & vanilla; beat until light & fluffy.
  2. Sift together flour, five-spice powder, nutmeg, salt & baking soda.
  3. Fold the dry ingredients into the creamed mixture. When the dry ingredients are almost incorporated, add the oatmeal, raisins, apricots & seeds.
  4. Chill the dough for about an hour before baking for best results.
  5. Preheat oven to 375 F.
  6. Scoop onto parchment lined cookie sheet about 2 1/2 inches apart. Bake for about 10 minutes. Do not over bake or the cookies will lose their chewy texture.
  7. Yield: 28 cookies