CELEBRATING CANADA DAY!
In Canada, July 1st marks the day for Canadians to show pride in their nations history, culture and achievements. From coast to coast the country’s birthday is marked with various events.
This is the date of the historical event in which Canada gained its independence from Great Britain in 1867.
Barbecues are definitely the preferred choice of food event for the day. Although we are experiencing some rainy conditions this Canada Day, nothing says you can’t modify the traditional barbecue with cooking indoors. For something different, I decided to try making some portobello ‘fries’ to accompany our chicken cheese burgers. Technically, they are not really fries at all, but they’re crispy and dip able and that is all anyone expects from a fry.. right? Sliced and breaded with crumbs and cheese then baked makes these portobello fries super tasty.
Of course, the staple at most barbecues, tailgates and picnics is the classic burger. But a burger doesn’t have to be just a burger and cheese isn’t just cheese. For ours, I’m making chicken burgers ‘infused’ with shredded Gruyere cheese. Then taking it to the next level and adding caramelized onions and guacamole.
What a nice ‘Canada Day’ meal it makes!
Print Recipe
Chicken Cheese Burgers w/ Portobello Fries
Votes: 1
Rating: 5
You:
Rate this recipe!
|
|
Votes: 1
Rating: 5
You:
Rate this recipe!
|
Instructions
Chicken Cheese Burgers
In a large bowl, combine chicken, Gruyere, bread crumbs, parsley, egg & garlic. Season with salt & pepper. Form into 4 patties & place in refrigerator until ready to grill.
Caramelized Onions
Heat oil in skillet until hot. Add onion & sprinkle with salt. Cook & stir about 15 minutes or until moisture is evaporated & onion is soft. Reduce heat; sprinkle with vinegar. Cook & stir until golden. Stir in brown sugar; cook & stir until caramel brown in color. Place in a dish; set aside.
Guacamole
In a bowl, coarsely mash avocados with lime juice & salt. Stir in garlic, onion & cilantro; blend well. Cover with plastic wrap & place in fridge until needed.
Portobello Fries
Preheat oven to 425 F. Place a wire rack on a large baking sheet lined with foil.
In a shallow dish, whisk together the flour, spices, salt & pepper. In another shallow dish, lightly beat eggs with 1 Tbsp water. In the third shallow dish, combine panko/butter mixture with the Parmesan cheese.
Gently toss mushroom slices in the flour mixture. Coat evenly & shake off any excess flour. Then, dip the floured fries into the eggs, drip off any excess eggs & then place them into the panko mixture. Gently press the panko mixture onto the mushrooms.
Place the fries onto the wire rack, leaving an 1/8-inch space between each. Bake for 15 minutes or until golden brown & crispy. If you wish, you could serve fries with marinara sauce, ketchup or a roasted garlic mayo.
Assembly
Once you have all the various components to this meal this far all that is left is to barbecue the chicken burgers over a medium heat for about 5-6 minutes per side or until cooked thru. Instead of baking the mushroom fries you can alternately grill them on the BBQ as well.
Slice & lightly grill Ciabatta buns. Top each bottom half with a chicken burger, a slice of cheese, some guacamole, caramelized onions & a tomato slice, ending with the other half of the bun. The big question is, how to get your mouth around it!
Recipe Notes
- Whether you bake or grill, either way its all good!

EASTER GREETINGS!
Easter is synonymous with spring, it represents a time of renewal. The winter months are now in our rear view mirrors and we can look forward to those wonderful summer days. Fresh new buds are on the trees, just waiting to burst out as the season unfolds. Everything speaks of new life and fresh hope. Spring is so unique (even if we still have snow on the ground in our part of the country).
Though ham is traditional in many homes, there are just as many people who would prefer something different for dinner on Easter Sunday. Holiday cooking is all about making a meal that feels more special than what you would cook on a regular basis.
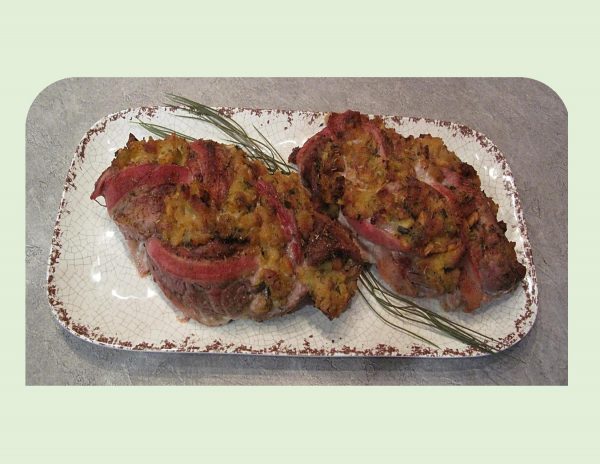
Pork tenderloin is one of my favorite meats due to its tenderness and versatility. This meal started out with an idea to stuff a tenderloin and developed into so much more. I must say, I was even more pleased with the final results when we both enjoyed it.
Print Recipe
Braided Pork Tenderloin w/ Pineapple Stuffing
Votes: 1
Rating: 5
You:
Rate this recipe!
|
|
Votes: 1
Rating: 5
You:
Rate this recipe!
|
Instructions
Pineapple Stuffing
Drain pineapple; reserving 1/3 cup juice. In a large saucepan, melt margarine. Add walnuts, celery & sage; cook stirring until celery is tender-crisp. Stir in green onions, pineapple & reserved juice. Remove from heat; toss in cornbread stuffing mix & set aside.
Tenderloin
Using a sharp knife starting 3-inches from end, slice tenderloin lengthwise twice; making 3 equal strips. Carefully take the knife & cut pockets lengthwise every 3-inches in the center of each of the tenderloin strips. Spread the combined rub ingredients over meat & allow to stand at room temperature for about 20 minutes before continuing with preparation.
When meat is marinated, stuff each pocket with pineapple stuffing. Place a strip of bacon along each tenderloin strip. Braid the stuffed tenderloin/bacon by crossing the right section over the middle section then the left section over the new middle section. Continue until you run out of tenderloin.
Insert a wooden or metal skewer into the end of braided tenderloin to keep it together. Tuck in the remaining stuffing mixture in the folds of the braid.
Preheat oven to 425 F. Bake, uncovered for 25-30 minutes or until meat thermometer reads 160 F. Remove from oven & loosely cover with foil. Allow to rest for 3-5 minutes before slicing. Serve with pineapple salsa.
Pineapple Salsa
In a large skillet, combine pineapple, sugar, vinegar, lime juice, red onion, cumin, salt & pepper. Bring to a boil & cook over medium-high heat until thickened, 7-10 minutes. If there is still a lot of liquid left, use a slotted spoon to transfer the pineapple to a bowl & continue to cook the liquid over high heat for 5 minutes more, then pour the liquid over the pineapple. Mix in the onions & cilantro. Season with salt to taste.
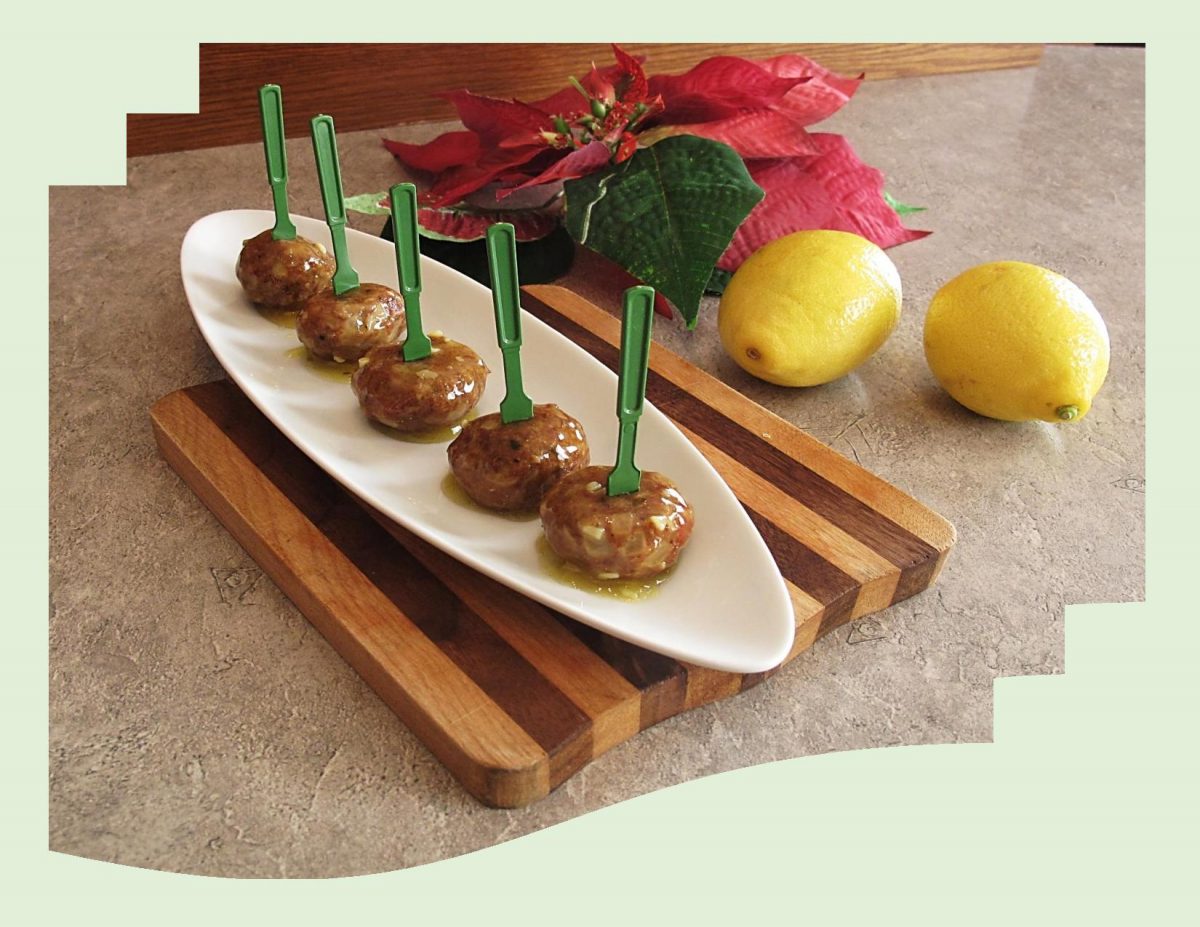
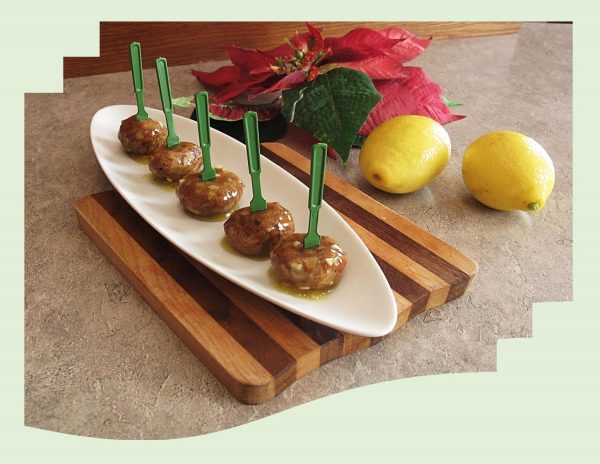
As I mentioned in the previous blog, new year’s eve food = finger food. I thought I’d post one other recipe for the occasion. Meatballs seem to check all the right boxes. Crispy, savory, spicy and can be eaten in a single bite. These lemon chicken meatballs are kind of an interesting blend of chicken and bacon. The lemon sauce is a bit unusual in that it uses lemon jelly powder but rounds out nicely with some garlic and ginger spice.
The idea of being able to do some of the prep work ahead of time always appeals to me. These meatballs can be made anytime and frozen raw or cooked. Just perfect when you are ready to serve them.
I’ve probably said this before, but deep fried food never appeals to me. Baking these little morsels still achieve’s a great taste. Hope you give them a try!
Print Recipe
Lemon Chicken Meatballs
Votes: 1
Rating: 5
You:
Rate this recipe!
|
|
Votes: 1
Rating: 5
You:
Rate this recipe!
|
Instructions
Meatballs
Preheat oven to 350 F. Fry bacon until crisp & drain on paper towel. Crumble & set aside.
To skillet, add onions & garlic. Saute & remove with a slotted spoon. In a large bowl, combine bacon, onions & garlic with remaining ingredients; mix well.
Form into 1-inch size meatballs & place on a parchment lined baking sheet. Bake for 15-20 minutes.
Lemon Sauce
In a small saucepan, combine dry jelly powder & cornstarch. Add broth, dressing, garlic & ginger; stir until jelly powder is dissolved.
Cook over medium heat for 3 minutes or until sauce is thickened, stirring frequently. Pour over meatballs & stir to coat. Serve with picks.
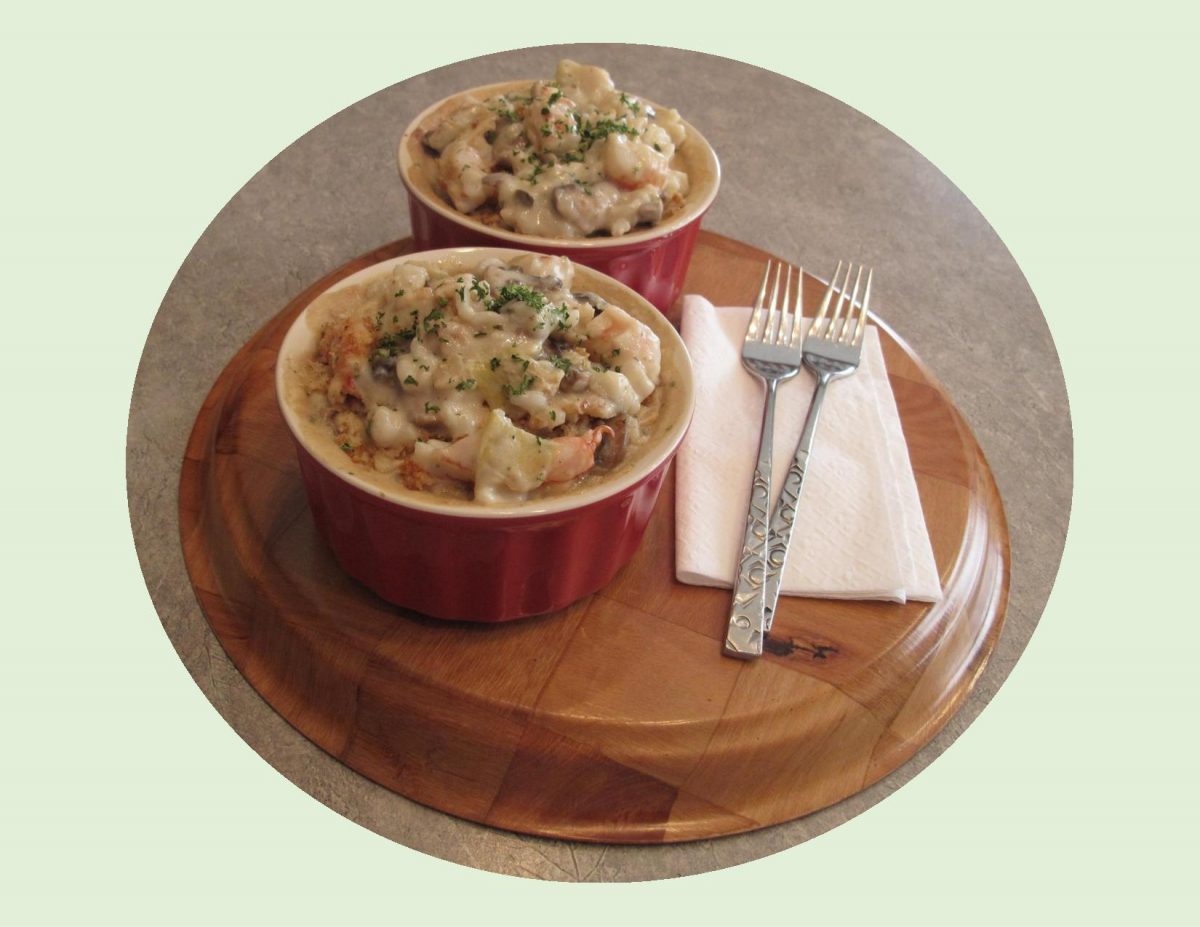
The art of casserole creation is a blend of inspiration and what’s on hand. The word casserole is used to refer both to an ovenproof baking dish as well as the baked, savory food item baked in it.
In North America, the Campbell’s Soup Company started publishing casserole recipes in the 1940’s as a way to promote sales for their cream soups. Casserole cooking goes back to slow-cooking dishes in earthenware containers. The ingredients are usually bound with some kind of sauce and often they are leftovers from a previous meal. It can be layered or all ingredients might be mixed together.
The height of the casserole era was during the 1950’s & 1960’s. This style of cooking was popular because it didn’t require a lot of constant watching and was hailed as the way forward for busy, efficient homemakers. By the 1970’s, quiche came to look down on the humble casserole.
Nevertheless, Brion and I really enjoy a casserole and this one ticks all the boxes for us.
Print Recipe
Shrimp, Mushroom & Artichoke Casseroles
Votes: 1
Rating: 5
You:
Rate this recipe!
Ingredients
- 1 cup water, salted
- 1/2 cup Arborio rice, uncooked
- 1 Tbsp butter,
- 200 gm fresh mushrooms, sliced
- 284 ml cream of mushroom soup
- 205 ml Lite Alfredo sauce
- 1 Tbsp Worcestershire sauce
- 1/2 tsp sea salt
- 1/8 tsp black pepper
- 170 ml marinated artichoke hearts, drained & halved Reserve 2 Tbsp marinate for sauce
- 300 gm WILD jumbo shrimp, peeled, deveined & rinsed
- 1/2 cup fresh parsley, chopped (optional)
- 1/2 cup Parmesan cheese, grated
- 1/2 cup bread crumbs, buttered
|
Votes: 1
Rating: 5
You:
Rate this recipe!
|
Instructions
In a saucepan, combine 1 cup salted water with 1/2 cup rice; cover & bring to a boil. Reduce heat & simmer gently for 12-15 minutes or until liquid is absorbed & rice is tender. Fluff with fork & remove to a dish; set aside. Add 1 Tbsp butter to saucepan & saute sliced mushrooms.
Preheat oven to 400 F. Butter either 2-3 individual casserole dishes or a 9 x 9-inch baking dish. Set aside. Drain marinated artichoke hearts (reserving 2 Tbsp) & halve each piece. In a large bowl, whisk together soup, Alfredo sauce, Worcestershire, artichoke marinade, salt & pepper until combined. Gently stir in cooked rice, mushrooms, artichokes, shrimp (cut each in thirds) & parsley.
Spoon mixture into prepared dishes. Combine Parmesan with buttered crumbs & sprinkle over casseroles. Bake until shrimp are cooked through, approximately 25 minutes.

It goes without saying, eggplant is beloved in many cuisines. It has been considered the ‘queen of the garden’ with it’s almost purple-black, glossy skin and cap-like crown.
Eggplants are bitter when raw but develop a savory and complex flavor when cooked. The texture of the flesh is meaty and easily absorbs sauces and cooking liquids.
Native to the Indian subcontinent and the Himalayan area, they have been cultivated in Southeast Asia since prehistoric times. Cultivars in the 18th century were white to pale yellow in color and resembled hen’s eggs which explains the reason this fruit is called ‘eggplant’. There are dozens of eggplant subspecies grown throughout the world in many shapes and sizes.
The most popular one we see here in North America is the dark purple ‘globe’ eggplant which ranges in weight from 1-5 pounds. When buying them, look for ones with smooth, firm, unwrinkled skin and a fresh looking green stalk or cap. Eggplant is commonly used in ratatouille, pasta dishes, spreads, dips, moussaka or stuffed and roasted.
Today, I’m making a stuffed version with an interesting fresh basil-chicken filling.
Print Recipe
Basil Chicken Stuffed Eggplant
Votes: 1
Rating: 5
You:
Rate this recipe!
|
|
Votes: 1
Rating: 5
You:
Rate this recipe!
|
Instructions
-
Preheat oven to 375 F. Cut eggplant in half lengthwise; carefully hollow out each half. Roughly chop the removed flesh.
-
In a large skillet, heat 2 Tbsp. olive oil & saute onion until tender, about 5-6 minutes. Add the chopped eggplant, mushrooms & garlic. Cook until eggplant is tender, about 7-8 minutes. Add ground chicken, oregano, salt & pepper. Cook until chicken is no longer pink, about 10 minutes.
-
Stir in in roasted red peppers, cooked rice & fresh basil; remove skillet from the heat. Place eggplant halves in a baking dish & fill with chicken/rice mixture. Sprinkle with sunflower seeds; drizzle with remaining olive oil & bake 30-35 minutes until tender.
-
Remove eggplant from oven & top with grated cheeses.
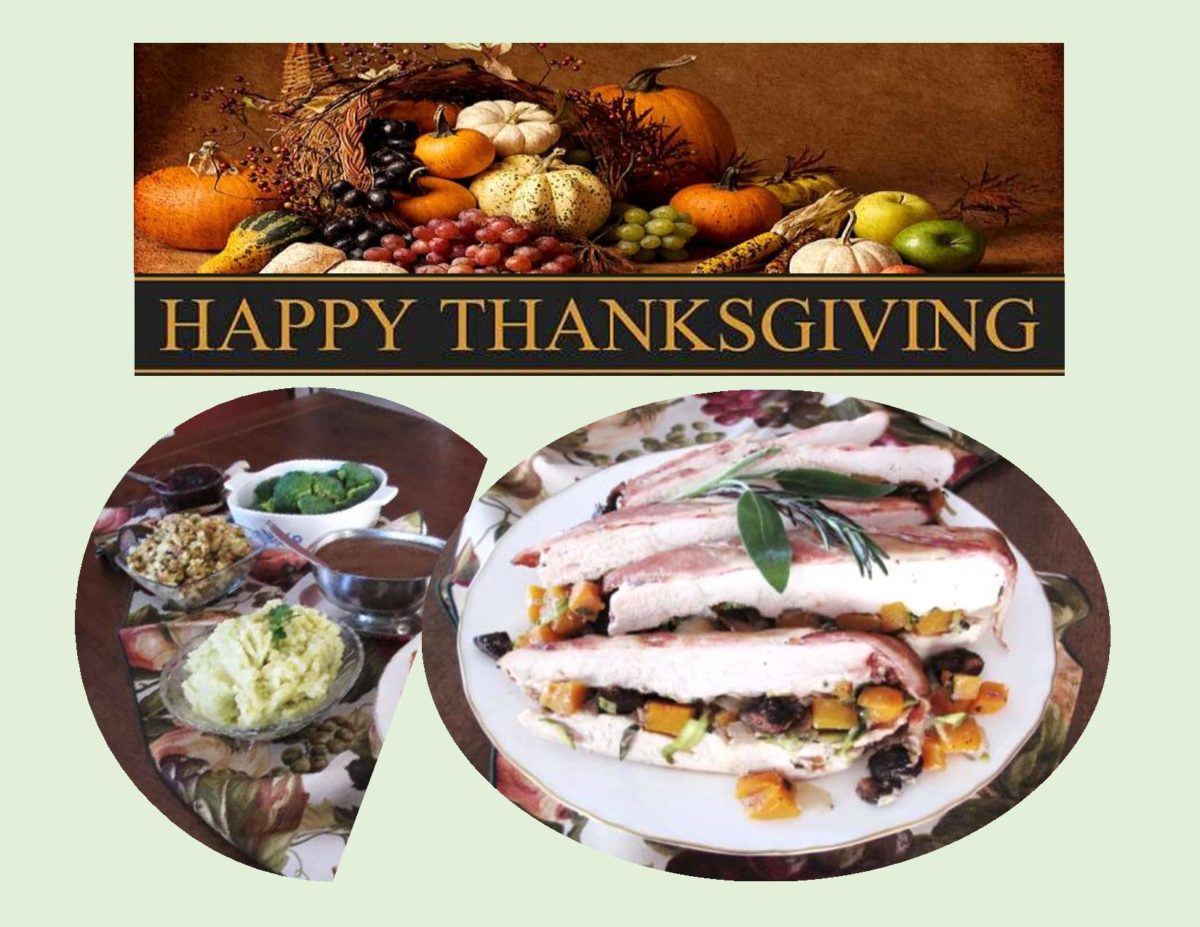
HAPPY THANKSGIVING DAY!
In Canada, we celebrate Thanksgiving Day on the second Monday in October. Although, we seem to be more connected digitally than emotionally, it is a day meant to bring us together with our families and friends sharing in a thanksgiving meal.
Thanksgiving is about being grateful for having a roof over our heads, safety and security as we move about in our daily lives, clothes to keep us warm and for the family and friends we love and cherish.
Gratitude is not something that we talk about or think about but more about humanity. It is not just about what we do, but about who we are.
Most of us here in Canada, have far more things to be grateful for than not. I have fond memories of my wonderful parents, carefree childhood days with my siblings, having enjoyed a successful career, a loving husband, our home, the many wonderful world travels we have been able to enjoy together, but above all we are both in relatively good health. It is so important to just take the time and appreciate the blessings in our lives and make every day count.
Print Recipe
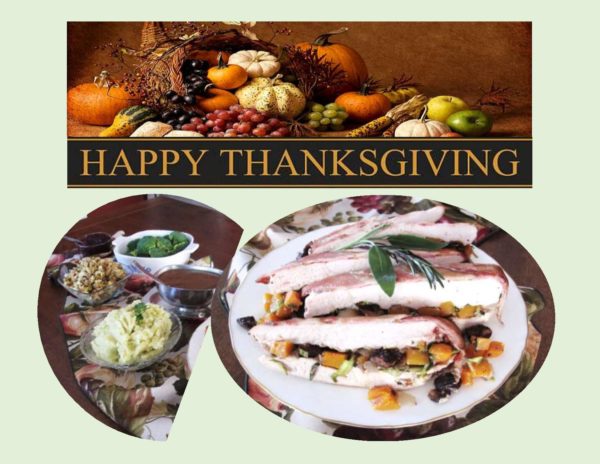
Stuffed Turkey Breast with Butternut Squash & Figs
Votes: 1
Rating: 5
You:
Rate this recipe!
|
|
Votes: 1
Rating: 5
You:
Rate this recipe!
|
Instructions
In a large skillet, heat olive oil. Add onions & saute for 2 minutes, until golden. Add butternut squash & 2 Tbsp water to cover; cook on low heat for 10 minutes. Remove lid & add figs, garlic, zucchini, salt , sage & pepper; cook for another 3-4 minutes. Set aside to cool.
Cut a pocket into the sides of the turkey breast tenderloins, do not cut all the way though. Season the inside of the turkey with salt. Stuff breasts with squash mixture. Wrap each breast with bacon slices.
Preheat oven to 325 F. Place turkey in a roasting pan fitted with a wire rack in the bottom. Roast for about 1 hour until meat thermometer reads 170 F. Remove from oven & allow to sit for 20 minutes, covered loosely with foil. Slice & serve.
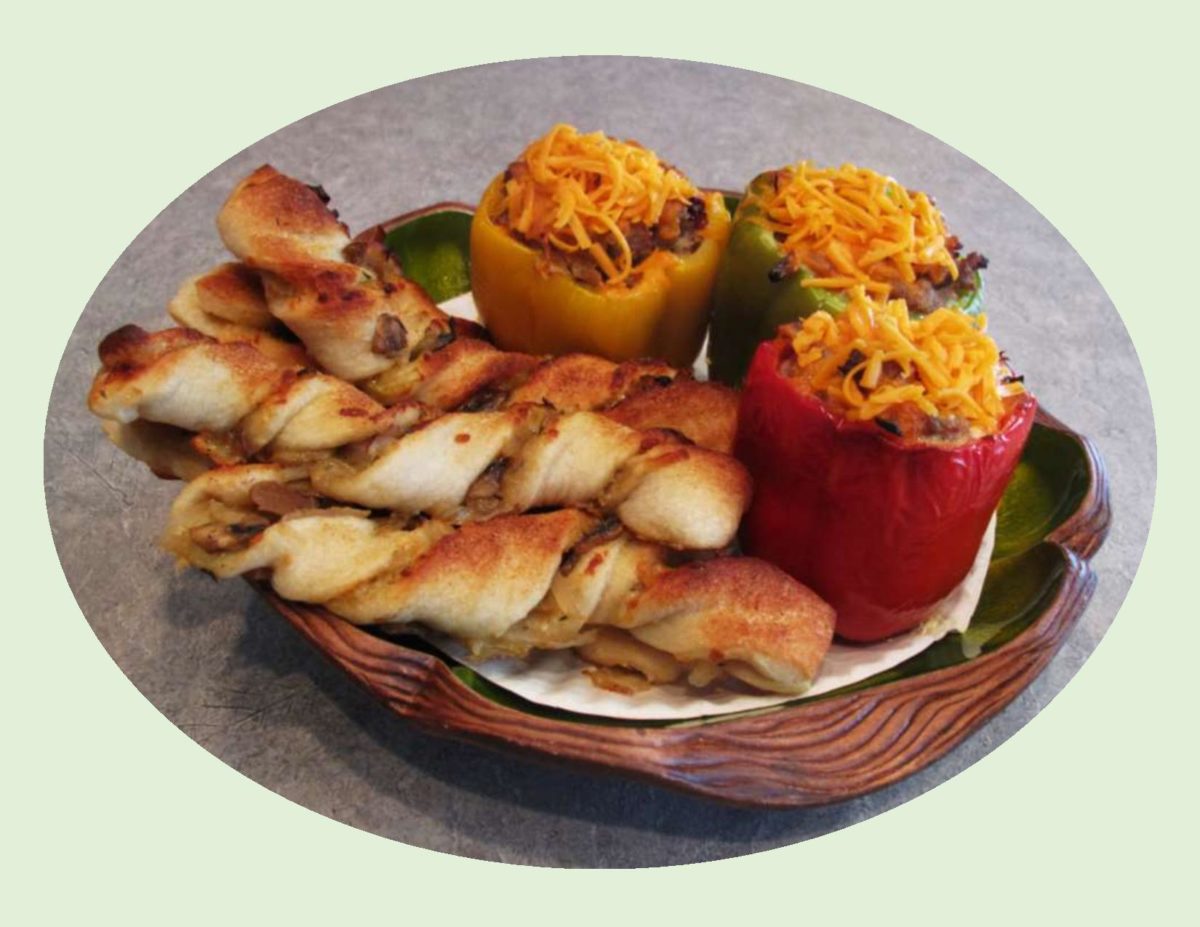
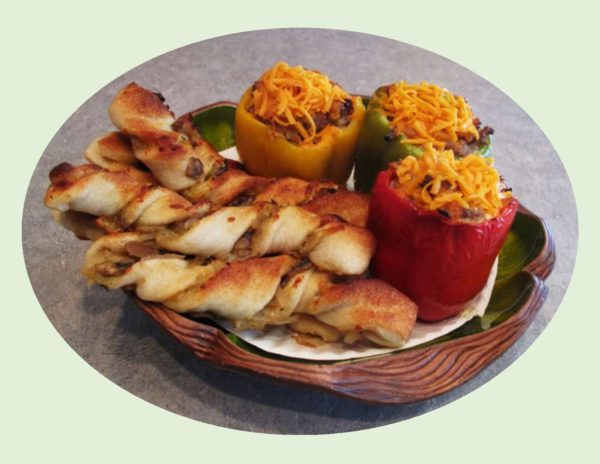
When I think of stuffed peppers, quiche never ever came to mind. I have always enjoyed quiche anytime of day, with or without crust. The idea of using a pepper as your ‘crust’ certainly puts a new twist on the traditional quiche.
I wanted to make these pepper cups for a supper meal and since there was no pastry involved here, bread sticks seemed like a good accompaniment.
Quiche is like making pizza– there are no limits to what the filling can consist of. For our meal today, I just put together a variety of items I had on hand for both the quiche and bread stick twists. It turned out to be real enjoyable and so easy.
Print Recipe
Pork & Pepper Quiche Cups w/ Onion Mushroom Twists
Votes: 1
Rating: 5
You:
Rate this recipe!
|
|
Votes: 1
Rating: 5
You:
Rate this recipe!
|
Instructions
Onion-Mushroom Twists
In a skillet, saute mushrooms & onion in butter until tender. Add thyme & salt; cook 1 minute longer or until blended. Remove from heat & cool slightly. Roll pizza dough into a 16 X 8-inch rectangle. Sprinkle cheese on half of the dough, then top cheese with HALF of the mushroom/onion mixture. Fold un-topped half of dough over topped side; slice into 8 strips to form twists.
Preheat oven to 375 F. Line a baking sheet with parchment paper. Carefully lift & twist each strip before placing on baking sheet. Sprinkle with garlic powder & salt to taste. Bake 12-15 minutes or until golden brown.
Pepper Quiche Cups
In a skillet, place ground pork, water, salt, rubbed sage, black pepper, red pepper flakes & ground ginger. Stir-fry until no longer pink. Remove from heat & drain on paper towel. Chop sun-dried tomato pieces & shred cheese.
In a large measuring cup with a spout, place 1/2 & 1/2 milk, salt & pepper. Add eggs & beat well. Remove stems, seeds & membrane from peppers & stand in a roasting dish that will hold them upright & level. Divide cooked pork, remaining mushroom/onion mixture & sun-dried tomatoes.
Top each pepper with some grated cheddar, then carefully pour in the milk/egg mixture. Bake until eggs are set. If you prefer, 'float' a piece of foil over peppers for the first part of the baking time. It will help the cheese not to over bake.
CELEBRATING CANADA DAY!
In Canada, July 1st marks the day for Canadians to show pride in their nations history, culture and achievements. From coast to coast, the country’s birthday is marked with colorful parades, firework displays and singing of the national anthem, O Canada!
This is the date of the historical event in which Canada gained its independence from Great Britain in 1867.
Canada Day has been called a few names in the past. It used to be known as Dominion Day, the First of July, Confederation Day and July the First.
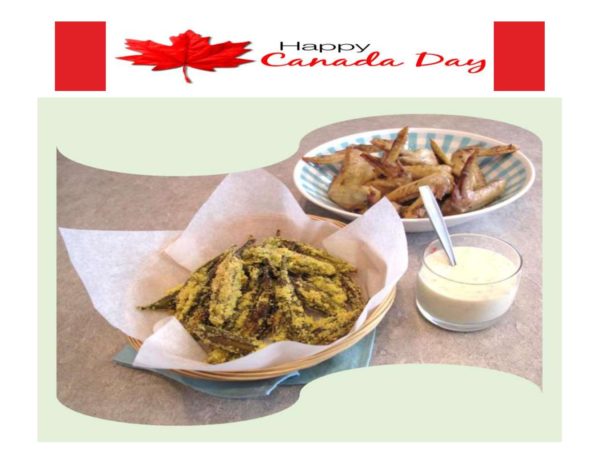
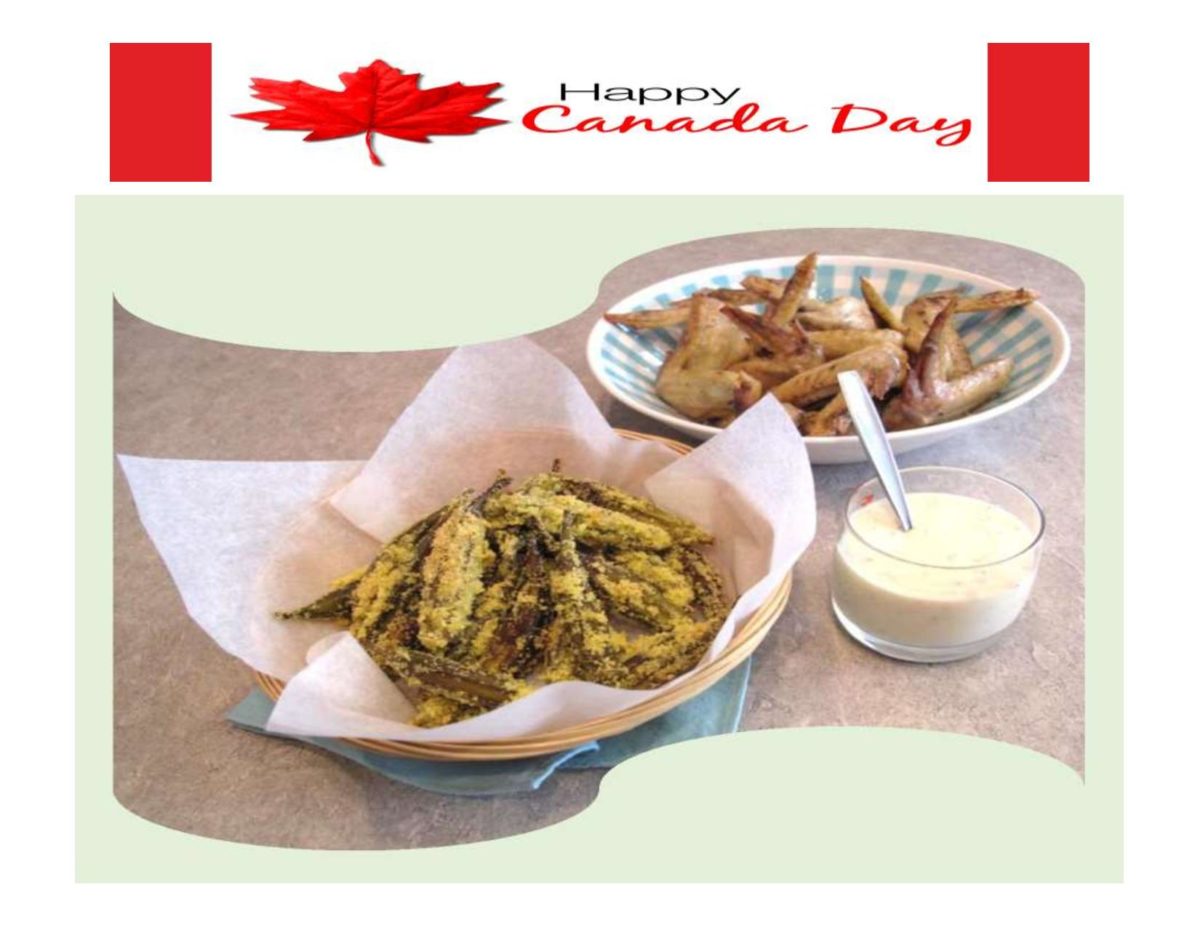
Food and drink are almost as synonymous with Canada Day as the colors of red and white. Barbecues are definitely the preferred choice of food event for the day. For us it will be chicken wings with some tasty little roasted okra fries.
Print Recipe
Roasted Okra Fries with Chicken Wings
Votes: 1
Rating: 5
You:
Rate this recipe!
|
|
Votes: 1
Rating: 5
You:
Rate this recipe!
|
Instructions
Chicken Wings
Preheat oven to 375 F. Line a baking sheet with foil & spray with cooking spray.
In a large, resealable plastic bag, combine oil & spices. Add chicken wings; toss to coat evenly. Place wings on prepared pan & bake for 30-35 minutes or until chicken is no longer pink inside. Remove from oven, wrap in foil to keep warm until served.
Okra Fries
Adjust heat to 400 F. Line a baking sheet with parchment paper. Place okra on baking sheet; drizzle with olive oil & massage into each piece. Sprinkle with salt & pepper. Roast for 20-25 minutes, turning once or twice, until lightly browned & softened.
Recipe Notes
- If you prefer, okra fries can be breaded with cornmeal as well before roasting.
- Both chicken wings & okra fries can easily be done on the BBQ if you prefer, rather than turning on the oven.
Kumquats are believed to have originated in China with their earliest historical mention being around the 12th century. Orange in color, this small bite-sized fruit can be eaten skin and all. The peel is the sweetest part of the fruit and the sourness comes from the pulp, seeds and juice.
Unlike it’s citrus kin, kumquats are able to withstand low temperatures and frost. A small evergreen shrub that can also be hydrophytic, which means they can grow in aquatic environments, and the fruits will drift towards the shore during harvest season. Kumquats are in season January thru April.
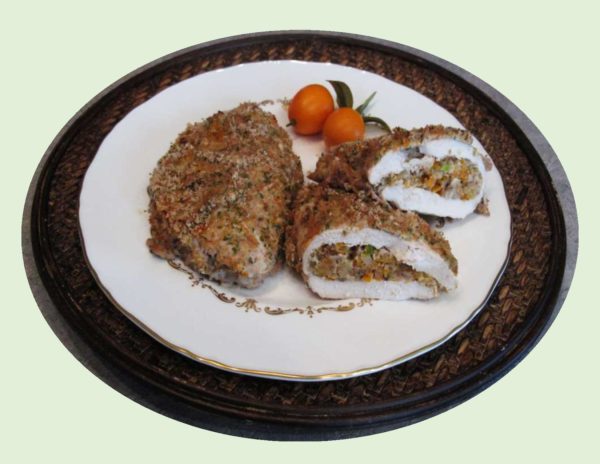
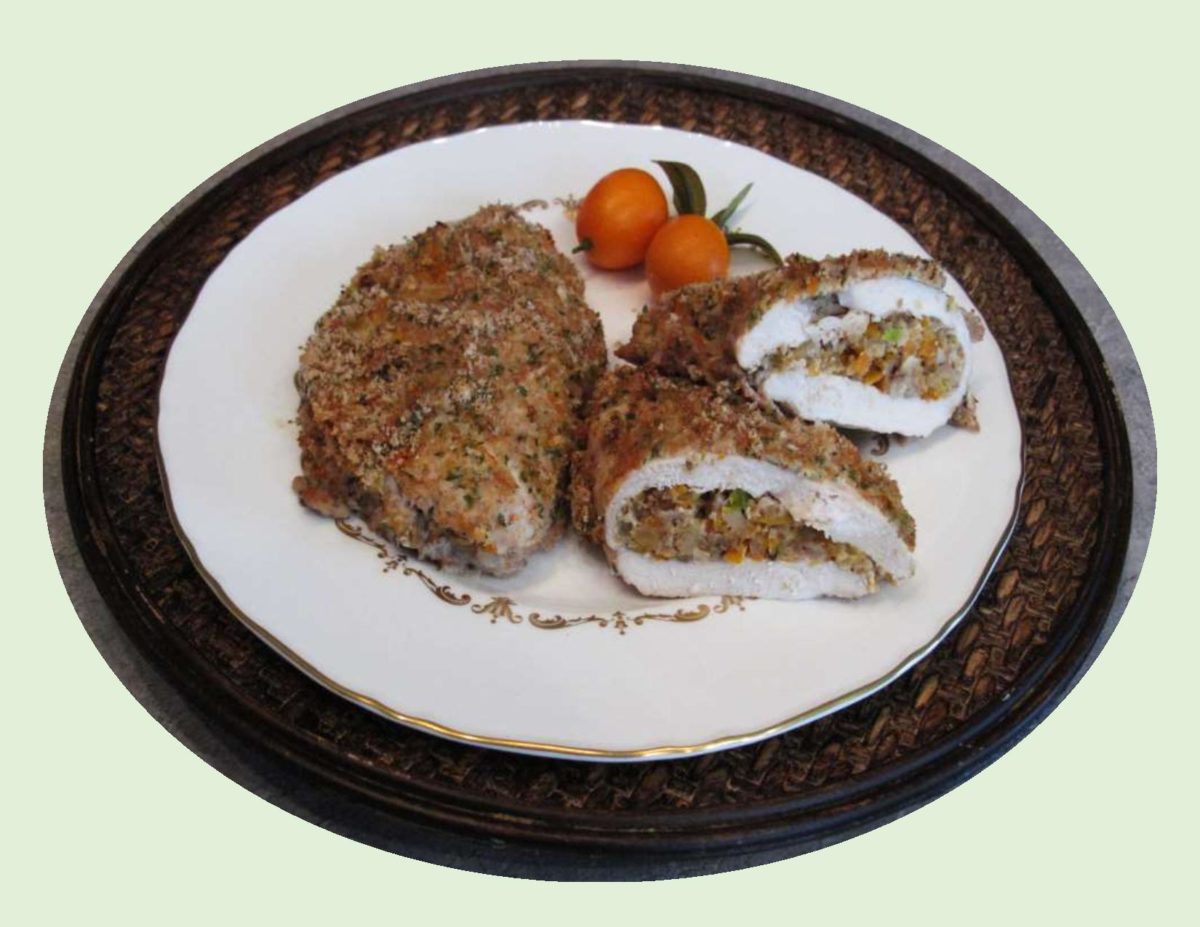
Commonly cultivated in Asia, the Middle East, parts of Europe and the southern United States. They can be used in every imaginable combination including pies, cookies, smoothies, ice cream, marmalade, marinades, salsa and vinaigrette. My choice today is in a stuffing for chicken breast. The combination of kumquats and orange tastes very unique.
Print Recipe
Kumquat & Walnut Stuffed Chicken Breast
Votes: 1
Rating: 5
You:
Rate this recipe!
|
|
Votes: 1
Rating: 5
You:
Rate this recipe!
|
Instructions
Wash & chop kumquats (do not peel). In a small bowl, combine with walnuts, onion & pepper.
Between two pieces of plastic wrap, pound chicken breasts to an even thickness. Spoon half of the filling on each breast. Fold over to encase filling; secure with picks if necessary. Preheat oven to 350 F.
Set out 3 shallow dishes. In one combine bread crumbs, orange zest & parsley; fill another with orange juice & in third beat the egg with water. Dip each stuffed breast carefully in orange juice, then in bread crumb mixture to coat, then in beaten egg & again in bread crumbs. Place coated breasts, seam side down, on a lightly buttered baking pan. Drizzle with melted butter.
Bake, covered, 30 minutes. Uncover & bake 10 more minutes or until chicken is cooked through.
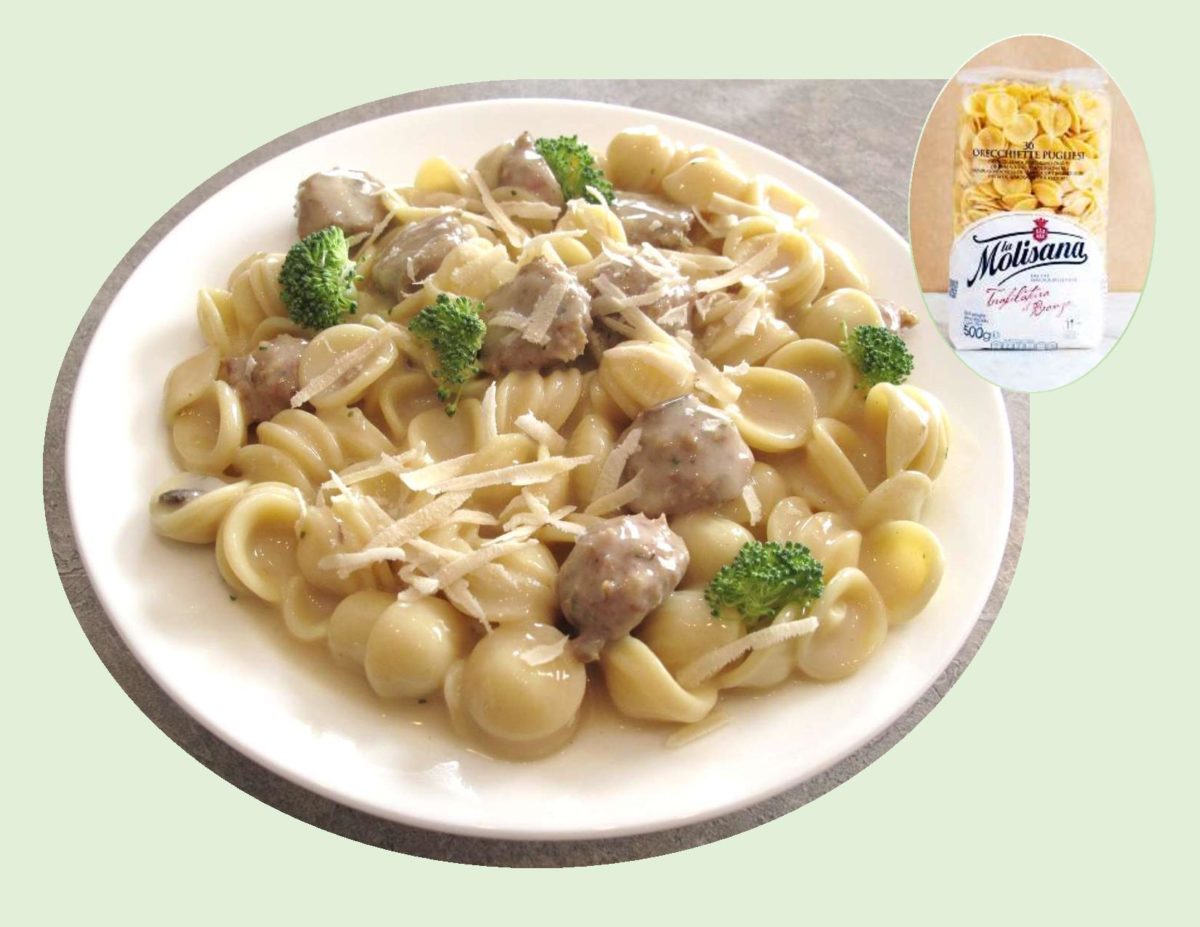
Italians have been making and eating orecchiette pasta ‘forever’ and the way it is made has changed very little over time. Orecchiette means ‘small ears’, a name derived from the shape. They are a bit less than an inch across, slightly dome-shaped and their centers are thinner than their rims. This characteristic gives them an interesting, variable texture, soft in the middle and somewhat chewier around the edges. A very distinctive type of pasta that originates from the Italian region of Puglia, the southeastern region that forms the high heel on the ‘boot’ of Italy.
Orecchiette require only four ingredients: hard wheat, flour, water and salt. Their particular shape, combined with the rough surface, makes it perfect for any type of sauce. Although they are best in the fresh version, dried certainly are a good second choice.
As ordinary as this meal seems, the flavor is really good and the orecchiette does a great job of cupping the sauce. For a little extra flavor, I added a few bacon slices to the turkey meatballs.
Print Recipe
Orecchiette Pasta with Turkey Meatballs
Votes: 1
Rating: 5
You:
Rate this recipe!
Ingredients
Orecchiette Pasta / Vegetables & Sauce
Ingredients
Orecchiette Pasta / Vegetables & Sauce
|
Votes: 1
Rating: 5
You:
Rate this recipe!
|
Instructions
Turkey Meatballs
In a saucepan, fry bacon until crisp. Remove, drain on paper towels, & chop finely. In a large bowl, combine ground turkey, bacon crumbles, seasonings, egg & breadcrumbs. Mix & form into 20 balls. Brown meatballs in bacon drippings until cooked through, about 5-6 minutes. Drain on paper towel.
Orecchiette, Vegetables & Sauce
Bring a large pot of salted water to a boil. Add pasta & cook as label directs adding broccoli during the last 2 minutes of cooking. Reserve 1 cup cooking water, then drain the pasta & broccoli.
Pour off any bacon drippings from skillet, then add 3 Tbsp olive oil, garlic, red pepper flakes & 1/2 tsp salt. Cook over medium heat, stirring 1 minute. Add the pasta, broccoli florets & meatballs. Whisk egg with reserved cooking water in a small bowl, then add to the skillet & stir until the sauce thickens slightly. Season with salt & pepper. Serve with fresh grated Parmigiano-Reggiano.


