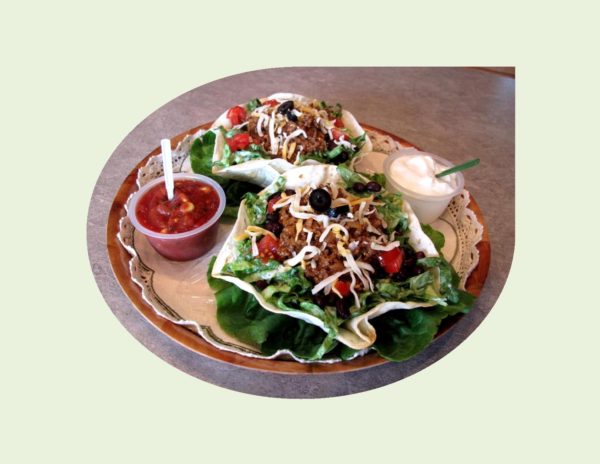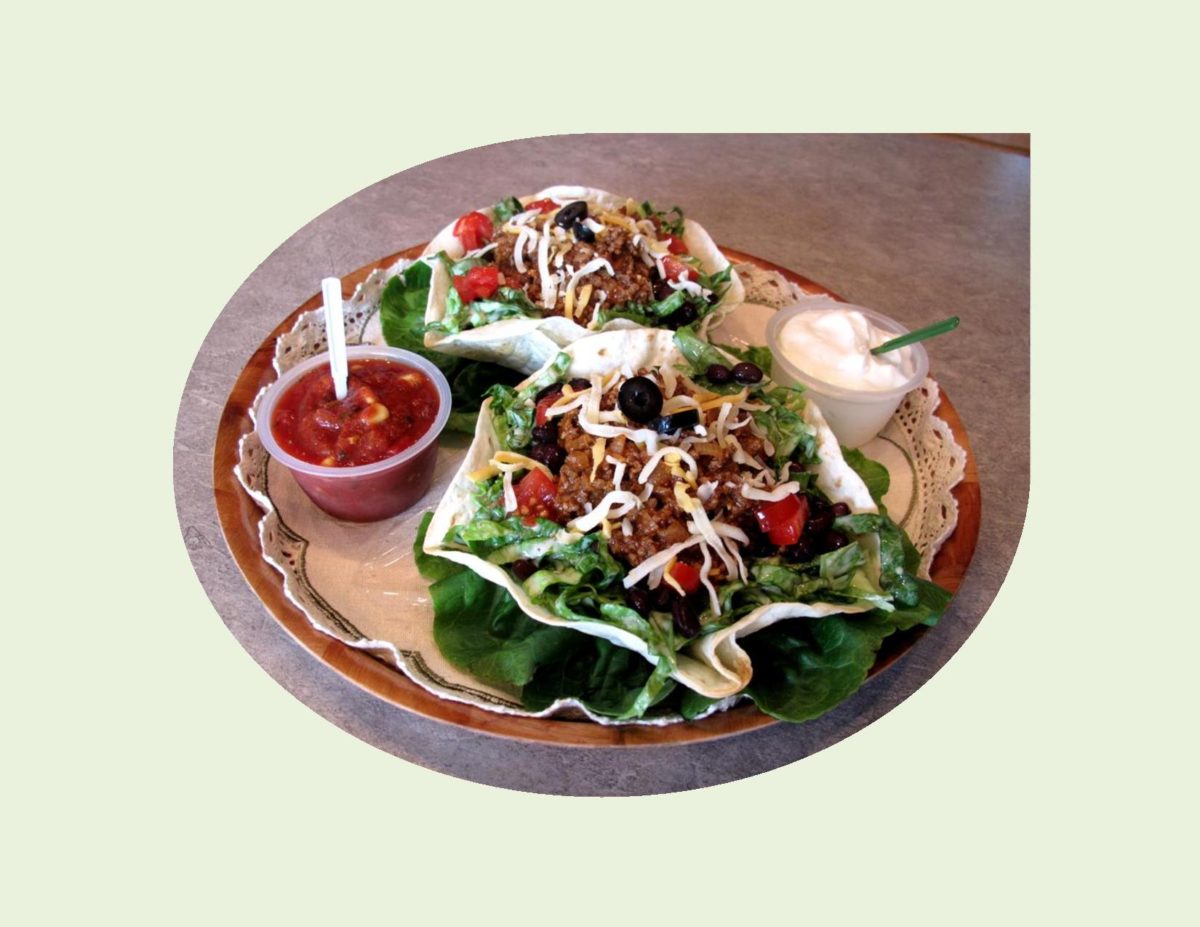
Summer time is salad time! Taco Salad is the full meal deal, infinitely customizable, inviting experimentation and creativity. Being so versatile, it can be enjoyed in almost any setting.
This Texas-Mexican inspired salad was very popular in the late 1960’s. It’s name comes from the Texas-Mexican Railway. Pioneers brought Anglo influences to Texas, where the Texas-born Mexicans lived. As a result, the ingredients from their different cultures blended together. Tex-Mex combines elements of Anglo, Spanish and Mexican.
The taco salad is unique in that it can be served in an edible tortilla bowl. I recall in the food industry, this meal had huge visual appeal for the customer. How could you resist ordering one after seeing it’s impressive presentation? The ingredients in a taco salad can vary according to preference and can be made to fit into any type of cuisine with different seasonings and modifications.
Typically the taco salad includes lettuce, beans, tomatoes, green onion, meat, cheese and sour cream. Other condiments might include guacamole, salsa, garlic and cumin.
The salad featured in today’s blog picture is the beef version but I have included similar recipes for chicken and vegetarian ideas as well. Tortilla bowls are easily made by baking them in the oven. No need to add those calories by deep frying them. I love the full meal salad idea — be it a Chef’s salad, Cobb, Taco you name it! I hope you will enjoy one to this summer.
Taco Salad doesn't have to be 'old school' and boring --- customizing it to your personal tastes makes a huge difference.
Votes: 1
Rating: 5
You:
Rate this recipe!
Ingredients
Salad Ingredients
- 6 cups romaine, shredded
- 230 grams cherry tomatoes, quartered
- 398 ml black beans, rinsed & drained
- 5 green onions, chopped
- 1/4 cup fresh cilantro, chopped, optional
- 2 Tbsp sliced ripe olives, drained
- sliced jalapeno peppers, optional
- 60 grams Mexican cheese blend, shredded
- 1 avocado, sliced for topping, optional
Ingredients
Salad Ingredients
- 6 cups romaine, shredded
- 230 grams cherry tomatoes, quartered
- 398 ml black beans, rinsed & drained
- 5 green onions, chopped
- 1/4 cup fresh cilantro, chopped, optional
- 2 Tbsp sliced ripe olives, drained
- sliced jalapeno peppers, optional
- 60 grams Mexican cheese blend, shredded
- 1 avocado, sliced for topping, optional
|
Votes: 1
Rating: 5
You:
Rate this recipe!
|
Instructions
Tortilla Bowls
Preheat oven to 425 F. Warm tortillas slightly until pliable. Spray or butter both sides of tortilla lightly, then drape over oven proof bowls, pinching sides to form bowl shape. Bake 5-7 minutes, watching carefully as not to burn. Remove from oven & cool on wire rack.
Beef Taco Meat
In a skillet, heat oil over medium-high heat. Add onion & cook until softened, about 5 minutes.Stir in chili powder & garlic & cook until fragrant, about 30 seconds. Add ground beef & cook, breaking up meat with a wooden spoon, until almost cooked through but still slightly pink, about 2 minutes. Stir in tomato sauce, broth, vinegar & sugar; simmer until slightly thickened but still saucy, about 5 minutes. Remove from heat & season with salt & pepper.
Chicken Taco Meat
Place chicken breasts between 2 sheets of plastic wrap & pound to flatten to uniform thickness, about 1/2-inch. In a small dish, combine spices. Sprinkle over chicken breasts. In a skillet, heat oil over medium-high heat. Add chicken breasts to pan & cook until juices run clear & the center is no longer pink. Remove from pan & allow to rest 5 minutes. Slice into bite size strips.
Salad Dressing
In a small bowl, whisk dressing ingredients.
To assemble salads: In a large bowl, combine romaine, beans, green onions, cilantro, olives, jalapeno peppers. Toss with salad dressing. Place tortilla bowls on serving plates. Divide salad among bowls. Top with taco meat choice; sprinkle with tomatoes & cheese. Top with avocado slices if desired.
Recipe Notes
- Sour cream & salsa are also nice as extra condiments or in place of the salad dressing.
- If you prefer a Vegetarian Taco Salad, just eliminate the meat part, equally as good.
- Be adventurous, customize to your preference so you get the most enjoyment out of 'your' salad.
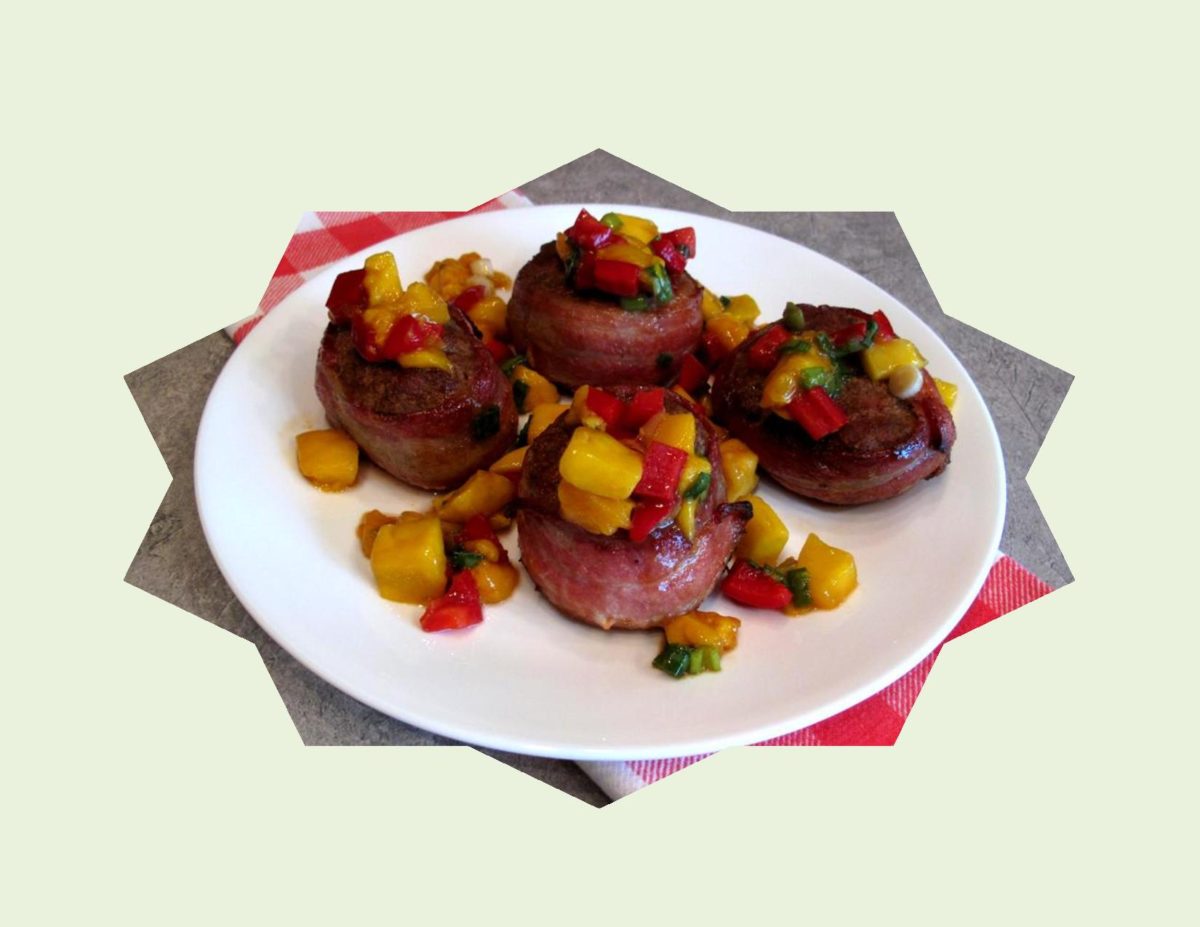
Today’s pork is leaner and more tender due to breeding and feeding changes over the last number of decades. Ounce for ounce, pork tenderloin is almost as lean as boneless, skinless chicken breast as well as being economical. Its one of those meats that can be an elegant company meal or used in a stir fry for a weekday supper. Pork tenderloin’s mild flavor partners well with sweet and savory ingredients. Unbelievable in its versatility, you can cook it whole, slice into medallions, butterfly and stuff it, or use it in stir fry. It’s great grilled, roasted or simply seared.
When I was growing up on the farm, pigs were a part of the ‘mixed farming’ my parents did. At that time, there wasn’t much about the animal I cared for. They squealed, smelled and were not much fun to feed. My parents cured their own bacon, which always seemed to be so salty to my liking. To this day, bacon is not something that has a big draw for me for that reason.
My dad was not a man that did any cooking. With my mother being such a fabulous ‘cook’, there certainly was no need. For some reason, every once in a while, dad thought he would show us the way he thought bacon should be cooked. The cast iron frying pan was made ‘smoking’ hot to which he would then put the bacon in to fry it. That little episode was definitely cause to have to ‘air’ out the house for the next couple of hours!
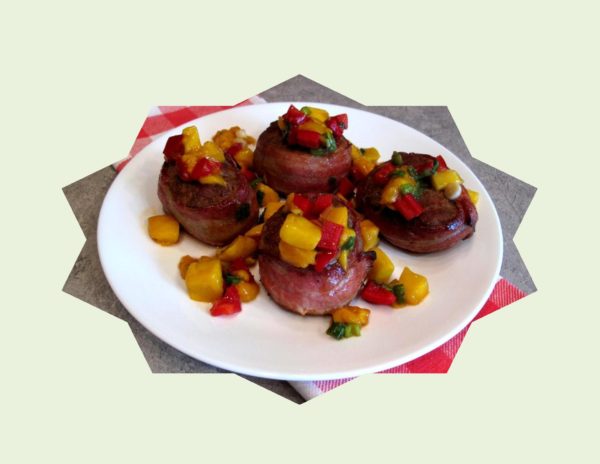
Years later I have come to enjoy today’s lean pork tenderloin as a staple in my rotating household menu choices. With mangoes being quite plentiful right now, it seemed fitting to feature some Spiced Pork Medallions with Mango Salsa.
Print Recipe
Spiced Pork Medallions with Mango Salsa
Seasoned tenderloin wrapped in bacon and served with a fruity mango salsa
Votes: 1
Rating: 5
You:
Rate this recipe!
|
|
Votes: 1
Rating: 5
You:
Rate this recipe!
|
Instructions
Mango Salsa
Mix together cubed mangoes & red pepper, green onions & sauce. Set aside.
Tenderloin
Cut tenderloin into 4 equal pieces. Flatten cut side down into about a 3 1/2" circumference. In a small bowl, mix together all SPICE RUB ingredients. In a resealable plastic bag, combine medallions & spice rub, seal bag & shake well. Refrigerate for several hours.
When ready to cook, wrap bacon slice around edge of each medallion; secure with wooden toothpicks. Heat BBQ to medium-high heat. Grill 8-10 minutes on each side or until done (160 F.)
OR
Heat a large skillet sprayed with cooking spray medium-high heat. Add medallions; cook, partially covered 25 minutes or until done (160 F.) , turning after 15 minutes.
Serve topped with Mango Salsa.
Recipe Notes
- Mango Salsa can be marinated with other choices of 'sauces' or salad dressing marinades if you prefer something less sweet.

The quintessential summer BBQ dessert! Fruit pizza is like a giant cookie, covered with luscious cream, layered with colorful fresh fruit, topped with glaze and a drizzle of chocolate, if you please.
If you have been following my blogs, you have probably already noticed, choice is something I’m big on. Fruit pizza is a classic dessert with so many possibilities. I have always enjoyed to start with the original idea of a recipe and see how many ways I can vary it without getting too involved or requiring a lot of extra ingredients and time.
Since CANADA DAY celebrations are right around the corner I thought it was a good time to enjoy Fruit Pizza ‘personalized’. Here are some ideas to mix and match to your liking.
Print Recipe
Fresh Fruit Pizza
Personalize not only with ingredient choices but the design as well
Votes: 1
Rating: 5
You:
Rate this recipe!
Ingredients
Classic Shortbread or Pecan Shortbread Crust
Frozen Puff Pastry OR Crescent Roll Dough
Cool Whip / Custard Topping
Fresh Fruit (use whatever fruit you prefer)
Chocolate Drizzle (optional)
Ingredients
Classic Shortbread or Pecan Shortbread Crust
Frozen Puff Pastry OR Crescent Roll Dough
Cool Whip / Custard Topping
Fresh Fruit (use whatever fruit you prefer)
Chocolate Drizzle (optional)
|
Votes: 1
Rating: 5
You:
Rate this recipe!
|
Instructions
For Shortbread & Oatmeal Crusts
Preheat oven to 350 F. Lightly grease a 12-inch pizza pan or cookie sheet. In a large bowl, cream butter & sugar until light. Add any flavorings. In another bowl, combine dry ingredients; gradually add to creamed mixture. Mix with a wooden spoon or hand mixer until well blended. Press dough into pan & prick with a fork. Bake 10-15 minutes until golden. Allow to cool completely.
Frozen Puff Pastry
Follow package directions. Cool completely & place on serving tray.
Crescent Roll Dough
Preheat oven to 350 F. Pinch together crescent roll dough as you press into a 12-inch pizza pan. Sprinkle with 1 Tbsp sugar. Bake 10-12 minutes or until golden. Cool completely.
Cream Cheese Topping
In a small bowl, beat cream cheese, lime juice concentrate & sugar until smooth.
Cool Whip/Custard Topping
In a large bowl, whisk together dry pudding mix & milk for 2 minutes. Fold in Cool Whip.
Honey - Yogurt Topping
In a small bowl, whisk together yogurt & honey.
Citrus & Pineapple Glaze
In a small saucepan, combine ingredients. Cook over medium heat until thickens. Remove from heat & cool slightly. Using a pastry brush, gently brush the fruit with glaze. FOR PRESERVE GLAZE: mix preserves with water & brush onto fruit.
TO ASSEMBLE FRUIT PIZZA
Spread topping of choice onto cooled crust & arrange fruit onto. Brush with glaze of choice. Melt chocolate in a bowl over boiling water. Dip a large spoon into chocolate; drizzle, quickly letting the chocolate fall in thin ribbons from the end of the spoon. If chocolate seems to stiff, add a drop of vegetable oil. Let pizza stand until chocolate is firm.
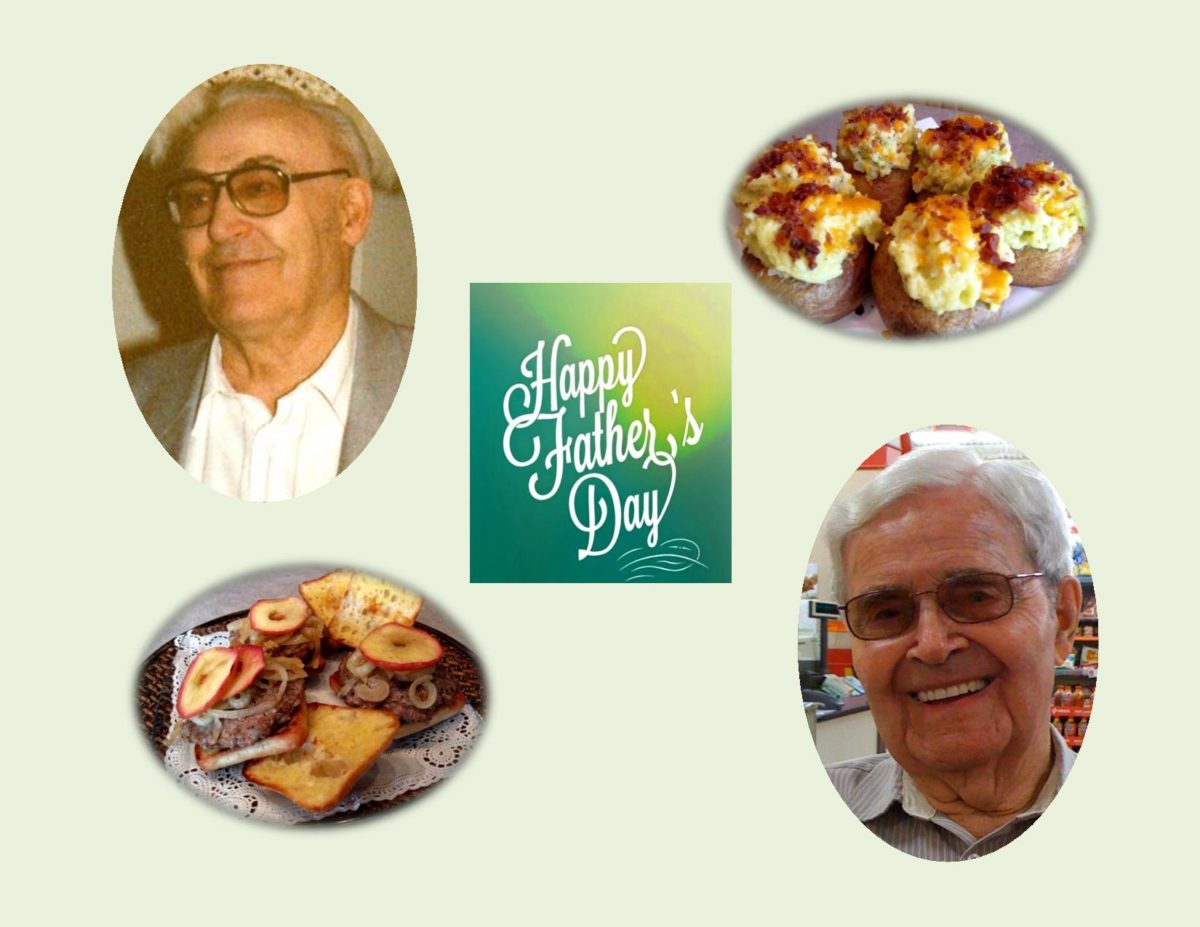
CELEBRATING FATHER’S DAY!
Father’s Day, a time to honor our fathers and father figures who have influenced our lives. Honoring your father on Father’s Day doesn’t require his physical presence. I feel what is more important is the just act of doing it
….. ‘Remembering you is easy, we do it every day. Missing you is the heartache that never goes away’.
My father passed away in 2005 and Brion’s in 2011. The passage of time will never dim those precious memories we have of them. They followed very different paths in their life’s journey; my father was a farmer and Brion’s an army soldier. Both of them gave so much of themselves to their life’s work as well as to their families.
Since both of our Dad’s were ‘meat & potatoes’ kind of men, it seems fitting that my Father’s Day blog recipes would center around just that. When I made the Caramelized Onion-Apple Burger combination for us, I made it with ground pork but I’m sure it would taste great with either ground beef or chicken. The Gourmet Stuffed Potatoes are definitely a tried & true recipe that has been around forever but are always enjoyed.
Print Recipe
Caramelized Onion-Apple Burgers with Stuffed Potatoes
Votes: 1
Rating: 5
You:
Rate this recipe!
Ingredients
Caramelized Onion-Apple Burgers
Onion-Apple Burger Filling
Ingredients
Caramelized Onion-Apple Burgers
Onion-Apple Burger Filling
|
Votes: 1
Rating: 5
You:
Rate this recipe!
|
Instructions
Caramelized Onion-Apple Burgers
To Caramelize Onions/Apples: Heat oil in a large skillet. Add onions & apples; sprinkle with salt. Cook & stir about 15 minutes or until both are tender. Reduce heat; sprinkle with vinegar. Cook, stirring until golden. Stir in brown sugar; cook & stir until caramel brown in color.
To Make Stuffed Burgers: Place ground meat in a large bowl & combine with spices. Mix well. Shape into 8 thin patties. Divide onion/apple mixture into 8 portions. Place one portion on each of 4 patties ( reserve other 4 portions for later use). Top with remaining 4 patties & press gently to seal enclosing filling completely. Place burgers on preheated, greased barbecue grill over medium heat, close lid & grill, turning once. Cook approximately 14 minutes total. Top with remaining onion/apple mixture. Serve on buttered, lightly grilled Ciabatta buns.
Gourmet Stuffed Potatoes
Pierce potatoes with a fork; rub with oil if desired. Bake at 400 F. for 1 hour or until tender. Let stand until cool enough to handle. Cut a slice off the top of each potato lengthwise. Scoop out pulp, leaving a thin shell. Place pulp in a large bowl & mash.
In a small skillet, saute onions in 1/4 cup butter until tender. Stir Ranch salad dressing mix into sour cream & add to potato pulp along with cream, salt & pepper. Fold in cheese & bacon bits. Spoon into potato shells. Place on a wire rack in a foil baking pan. Melt remaining butter; drizzle over the potatoes. Sprinkle with paprika. Place pan on barbecue to heat through while meat is cooking. If you prefer, you can always put them in the oven at 350 F. for about 20 minutes instead.
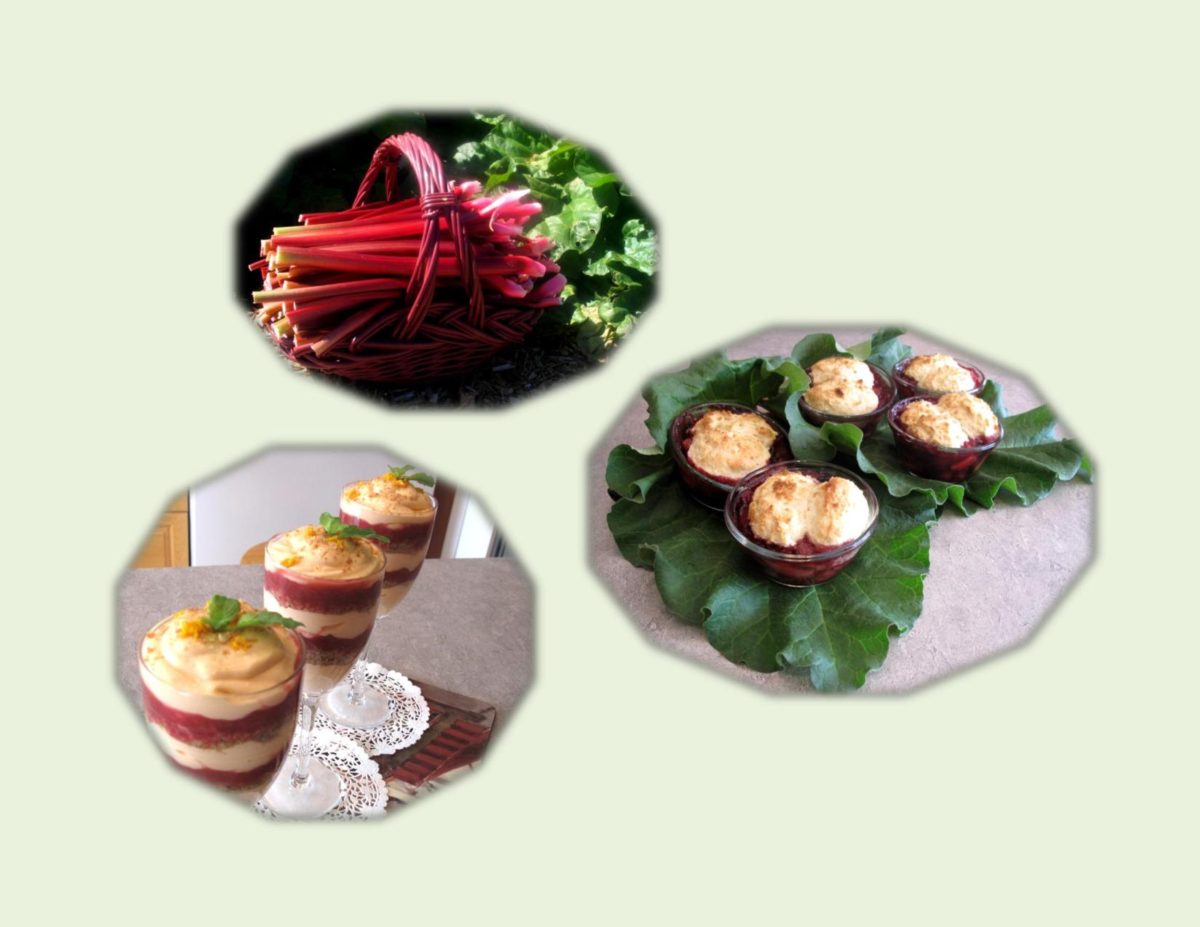
I can not remember ever being able to pick fresh rhubarb in the middle of May here in northern Alberta, Canada. We are definitely seeing some serious changes in the weather.
I love everything about the plant — how good it tastes, the beautiful huge foliage in the garden and how it can keep on producing all season long. The uses of rhubarb are endless. For most part, I think it is usually thought of as a dessert ingredient. I tried making it into a spicy chutney with pork tenderloin for supper one night and it was real nice.
Bordering one side of my mother’s large country garden grew six or eight rhubarb plants. I can’t even imagine how much they would produce. I recall that special taste of her Saskatoon-Rhubarb Pie. Saskatoon berries grew wild in the foothills of the Rocky Mountains. This was a good reason for our family to pack a picnic lunch and make the drive on a Sunday afternoon to pick saskatoon berries. Not only did it make for quality family time but those fresh berries were soooo– good!.
Here are a couple of dessert recipes I made with some of my first rhubarb stalks of this season. One is Rhubarb-Blueberry Cobbler, an old fashioned baked dessert with a tender biscuit crust sprinkled with sugar. The other one is Rhubarb-Orange Cheesecake Parfait. If a rhubarb plant isn’t growing somewhere in your back yard you can usually locate some at a neighborhood Farmer’s Market throughout the summer.
Print Recipe
Rhubarb Desserts
Enjoy a little rhubarb nostalgia in two different presentations.
Votes: 1
Rating: 5
You:
Rate this recipe!
Ingredients
Rhubarb-Blueberry Cobbler
Rhubarb-Orange Cheesecake Parfaits
Ingredients
Rhubarb-Blueberry Cobbler
Rhubarb-Orange Cheesecake Parfaits
|
Votes: 1
Rating: 5
You:
Rate this recipe!
|
Instructions
Rhubarb-Blueberry Cobbler
-
Mix chopped rhubarb & blueberries together in a large saucepan. Blend sugar & cornstarch together & stir into the fruit mixture. Stir in 1/4 cup cold water.
Place on medium heat & bring to a boil, then reduce heat to low & cook until juices flow & fruit is soft. Pour into an 8-cup casserole dish.
In a large bowl, combine flour, baking powder, 1 Tbsp sugar & salt. Blend well. Cut in margarine with a pastry cutter until mixture is a coarse texture. In another bowl blend milk & egg.
Make a well in center of flour mixture; add milk/egg mixture & stir until flour is moistened. Drop dough by spoonfuls onto the fruit mixture. Sprinkle with brown sugar evenly. Bake about 25-30 minutes. Serve plain or with a dollop of yogurt or whipped cream.
Rhubarb-Orange Cheesecake Parfaits
In a plastic bag, coarsely crush gingersnap cookies; set aside.
Chop rhubarb stalks & place in saucepan with water. Cook over low heat until soft. Remove rhubarb from heat. Add sugar, Cointreau & cornstarch; mix well. Return to heat & stir until thickened; cool completely.
In a large glass bowl, dissolve jelly powder & boiling water, making sure it is completely dissolved before adding to cream cheese. Blend in cream cheese with a hand mixer on low speed. Whisk in juice & zest of orange as well as the Cool Whip.
In parfait glasses, spoon a layer of cream cheese mixture; sprinkle lightly with gingersnap crumbs then add a layer of rhubarb sauce. Repeat layers one more time making sure to divide cheesecake, rhubarb sauce & crumbs evenly between parfaits ending with cheesecake mixture.
Refrigerate about 4 hours; garnish a bit more orange zest & a fresh mint leaf if desired.

In 2015, my husband Brion and I spent three months in Ecuador. Other than a holiday, we were wanting to check out this country as a possible ‘winter haven’, away from the cold ‘Alberta’ winters. It didn’t quite make the list but it was another adventure in our travels that is valuable in the big picture.
Cuenca is Ecuador’s third-largest city and the economic center of the southern sierra. The city sits on a plateau surrounded by mountains which explains the name Cuenca which means ‘basin’ in Spanish. Four rivers are found in the Cuenca basin and one, the Tomebamba, runs right through the center of the city.
An artistic mecca of southern Ecuador, artisans produce fine leather goods, custom made guitars, filigree jewelry, ceramics as well as the famous Panama hats, which originated in Ecuador not Panama.
Although near the equator, Cuenca sits high in the southern Andes at an altitude of 8300 feet and its residents enjoy year round spring-like weather. Temperatures rarely go beyond highs in the 70’s F.(21 Celsius) and lows in the 50’s F.(10 Celsius), so a sweater or light jacket is sufficient all year long. Rainfall averages around three inches per month.
Cuenca’s two ‘seasons’ are rainy and dry. The rainy season, roughly from January through May, features warm sunny mornings and frequent afternoon showers. During the middle of the dry season (June through December), you can expect long periods of chilly weather and overcast skies.
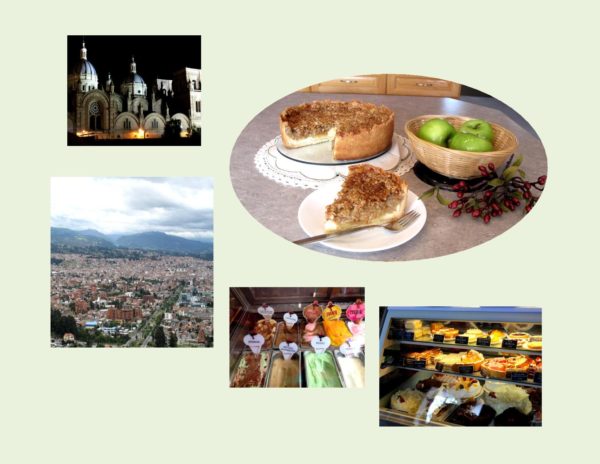
The apartment we had rented was in central Cuenca where we discovered a nice little place called ‘Tutto Freddos’. It was a unique spot where you could enjoy having a variety of things to eat such as pizza, sandwiches, ice cream treats, cakes and pastries with your coffee. It was like a bistro in appearance with its small tables as well as a mezzanine floor. While you enjoyed your coffee and treats you could watch the activity in the streets. Of course being the nature of the country, it never failed to be interesting! One of the treats we had numerous times was what seemed to me like a version of ‘Dutch Apple Pie’. I tried to find out anything I could about it in hopes of duplicating the ‘Taste of a Memory’. Here is my interpretation of this special ‘pie’.
Print Recipe
Dutch Apple Pie
Apple-cream cheese filling with a wonderful blend of 'Dutch' spices, baked in a shortbread cookie crust.
Votes: 1
Rating: 5
You:
Rate this recipe!
|
|
Votes: 1
Rating: 5
You:
Rate this recipe!
|
Instructions
Preheat oven to 375 F. In a food processor, combine flour, powdered sugar & cornstarch. Cover & process until combined; add butter. Pulse with on/off turns until mixture forms fine crumbs. Press mixture onto the bottom & 1 1/2" up the sides of a 9" spring form pan.
Beat cream cheese & 1/4 cup sugar with mixer until well blended. Add egg & vanilla; mix well. Spread onto bottom of crust. Mix remaining sugar, 2 Tbsp flour, & spice blend. Add to apples in a large bowl; toss to coat. Spoon over cream cheese layer.
Mix remaining flour, brown sugar & rolled oats in a medium bowl. Cut in butter until mixture resembles coarse crumbs; sprinkle over apple mixture. Lay a piece of foil loosely over pie to prevent over browning. Bake in bottom third of oven for 20 minutes, uncover & continue to bake for another 30 minutes or until apples are tender.
Recipe Notes
Spice Blend Mix: 4 tsp cinnamon, 1 tsp cloves, 1 tsp nutmeg, 1/4 tsp white pepper, 1 tsp anise seed, 1/2 tsp ginger, 1/4 tsp cardamom, 1/4 tsp mace
- Grind the spices together in a coffee grinder or blender; place in a screw-top jar in the refrigerator.
- Any extra spice mix can be used in recipes calling for 'apple or pumpkin pie spice'.
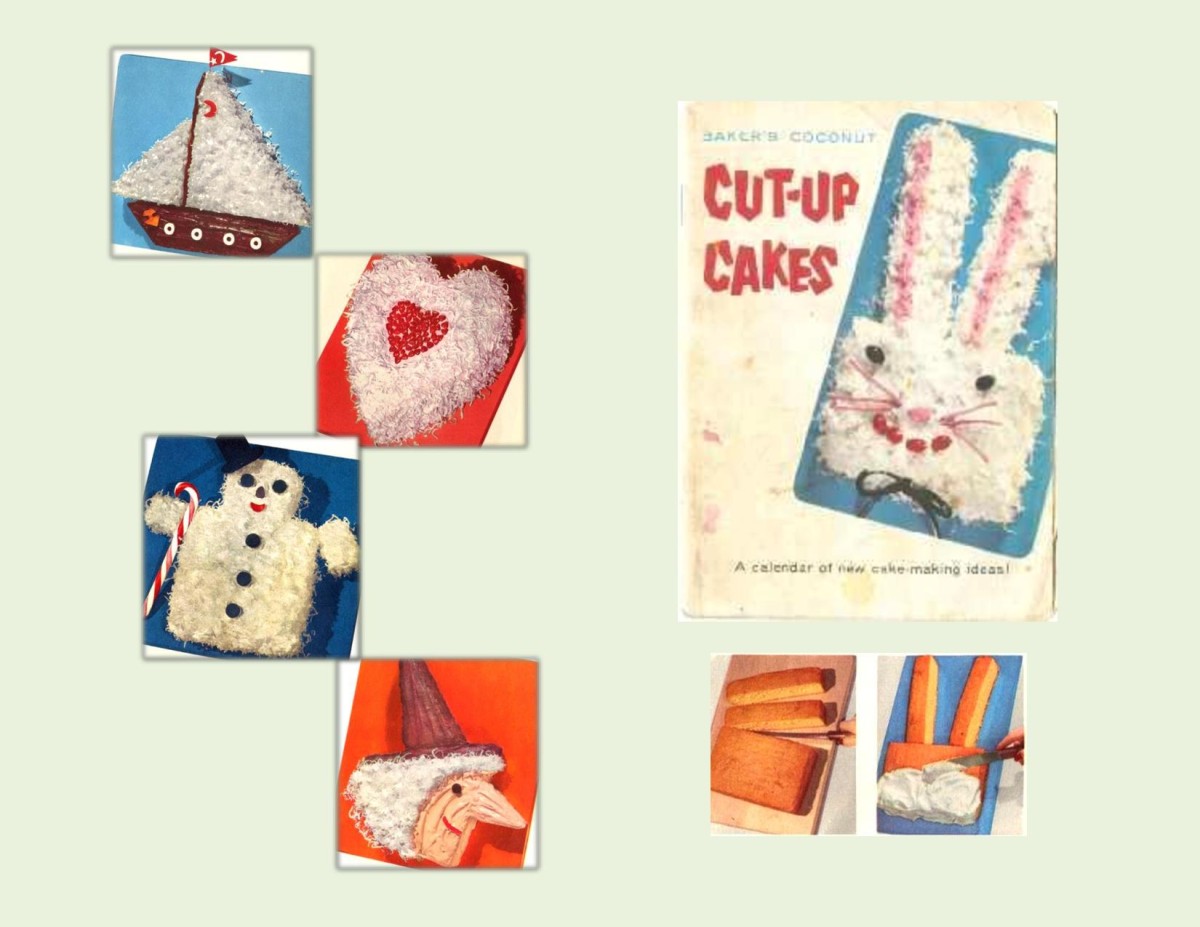
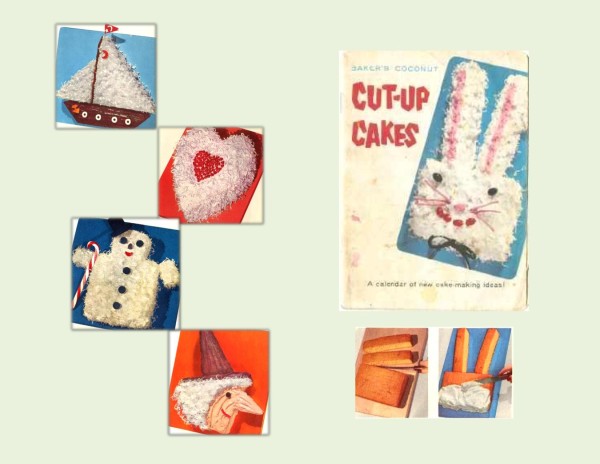
In about 1956, Baker’s Angel Flake Coconut (General Mills) came up with the idea of ‘cut-up cakes’. My mother always had a love for cake decorating and this idea just added a whole new dimension. The company printed a little booklet with a year’s worth of cut-up cake directions.
The cakes were popular because no special tools or pans were needed. Cakes were baked from your own recipe or from cake mixes, usually in either a 13 x 9″ pan or two 8 or 9″ layers. After the cake was cooled, you followed a pattern given in the recipe booklet and cut the cake as directed with a knife, then put the pieces together to form the desired shape. The cake pieces were then covered with frosting, making it appear as one solid cake.
Most of the designs usually incorporated coconut into the decoration. It looked great and of course we loved it. This was the forerunner to the baking industry developing ‘character’ cake pans in shapes of anything imaginable.
Although this old fashioned oatmeal cake came from that time period, it was not used for one of these cut-up cakes. I just thought it would be nice to include it in this blog since it had that wonderful tasting broiled topping made with the well known ‘Angel Flake‘ coconut. This cake was so good but one minute too long under that broiler could destroy it!
Print Recipe
Oatmeal Spice Cake with Broiled Topping
A dense, moist, classic oatmeal cake that has stood the test of time.
Votes: 2
Rating: 4.5
You:
Rate this recipe!
|
|
Votes: 2
Rating: 4.5
You:
Rate this recipe!
|
Instructions
In a small bowl, pour boiling water over oatmeal & margarine; let stand for 10 minutes.
Preheat oven to 350 F. Grease a 9 x 9" baking dish.
In a large bowl, beat eggs with sugar until fluffy. Add vanilla & oat mixture, blend well.
Sift together flour, baking powder, salt, nutmeg & cinnamon.
Combine flour mixture to creamed mixture, blending carefully.
Pour into prepared baking pan; bake 35 minutes or until tests done. Cool for 10 minutes. Do not remove from pan.
For Frosting: Combine all ingredients. Spread evenly over cake. Broil until frosting becomes bubbly. WATCH CAREFULLY!
Let cake cool enough for the topping to be absorbed into the cake.

Little did I realize many years ago, during those easy carefree childhood days, how many of those memories and glorious food smells that would be indelibly etched in my mind for the rest of my life. I have been very introspective these days as I get older and hopefully wiser. I would say that much of my success and happy moments in life are attributed to my upbringing. I was blessed with wonderful parents who taught me good moral values and a desire to bring out my best in all that I do.
I am very grateful to my Mom and Dad to have felt loved, nurtured and always safe under their watchful eyes throughout my childhood and into my adulthood. There are many memories that have stayed with me and when I relive them I feel like that little girl who sat at the dining room table with either my Mom or Dad by my side helping me do my homework. My mother had the patience of a saint, always putting my siblings and I up front and center, living her life with courage and compassion. She was strong willed and had a sense of self confidence in all that she did. She was very loyal to my Dad and a very devoted mother. Our Dad was a man of discipline; love was closely associated with duty and commitment for him. He was very confident in who he was and didn’t demonstrate any need to conform to what we might have wanted him to do. Everything he undertook was driven by his commitment to honor and provide for the family that he loved.
Being of German ancestry, we grew up eating all those ‘comfort food’ meals. My Dad was a meat and potatoes man and of course dessert. Over the years, my siblings and I have tried to replicate some of those wonderful dishes, always striving for something that exists only in our memories.
In today’s post, I would like to share a recipe my mother called ‘Bake Day Surprises’. I remember this dessert being so incredibly good. Since she baked bread once a week, an extra treat stemming from that bread dough was something we could count on. If you bake your own bread this one is for you!
These are very tasty caramel buns
Votes: 2
Rating: 5
You:
Rate this recipe!
|
|
Votes: 2
Rating: 5
You:
Rate this recipe!
|
Instructions
When your usual recipe for bread dough has risen, and is ready to be shaped, form some into little balls and set them in a greased pan.
Mix above ingredients together; let buns rise.
Pour the combined sauce ingredients over them.
Bake at 350 F for about 30 minutes