Cheesy Chicken & Stuffing Stuffed Portabella Mushrooms

How is it spelled? Portobello or Portabella – from what I understand there is no ‘right’ spelling. Both versions are accepted, but the Mushroom Council  decided to go with Portabella to provide some consistency across the market.

Have you ever stopped and thought about how many vegetables are fantastic when stuffed? Any vegetable with a fairly sturdy shape can become an edible vessel for dinner. All we need to do is fill the inside with a stuffing of our choice, a little time in the oven until everything is heated through and dinner is ready!

I find the versatility of the portabella mushroom is endless. They have a rich, meaty texture and flavor which is retained even after cooking. You can use them in soups, stews, baked pasta, rice dishes or as a meat substitute in salads. Portabellas are excellent paired with fresh herbs, cheese, tomato or cream-based sauces, leafy greens, garlic and onions.

I’m sure the appeal of mushrooms isn’t for everyone. For Brion & I, we love that earthy taste. There is hardly anything you can’t use mushrooms in from appetizers to main course.

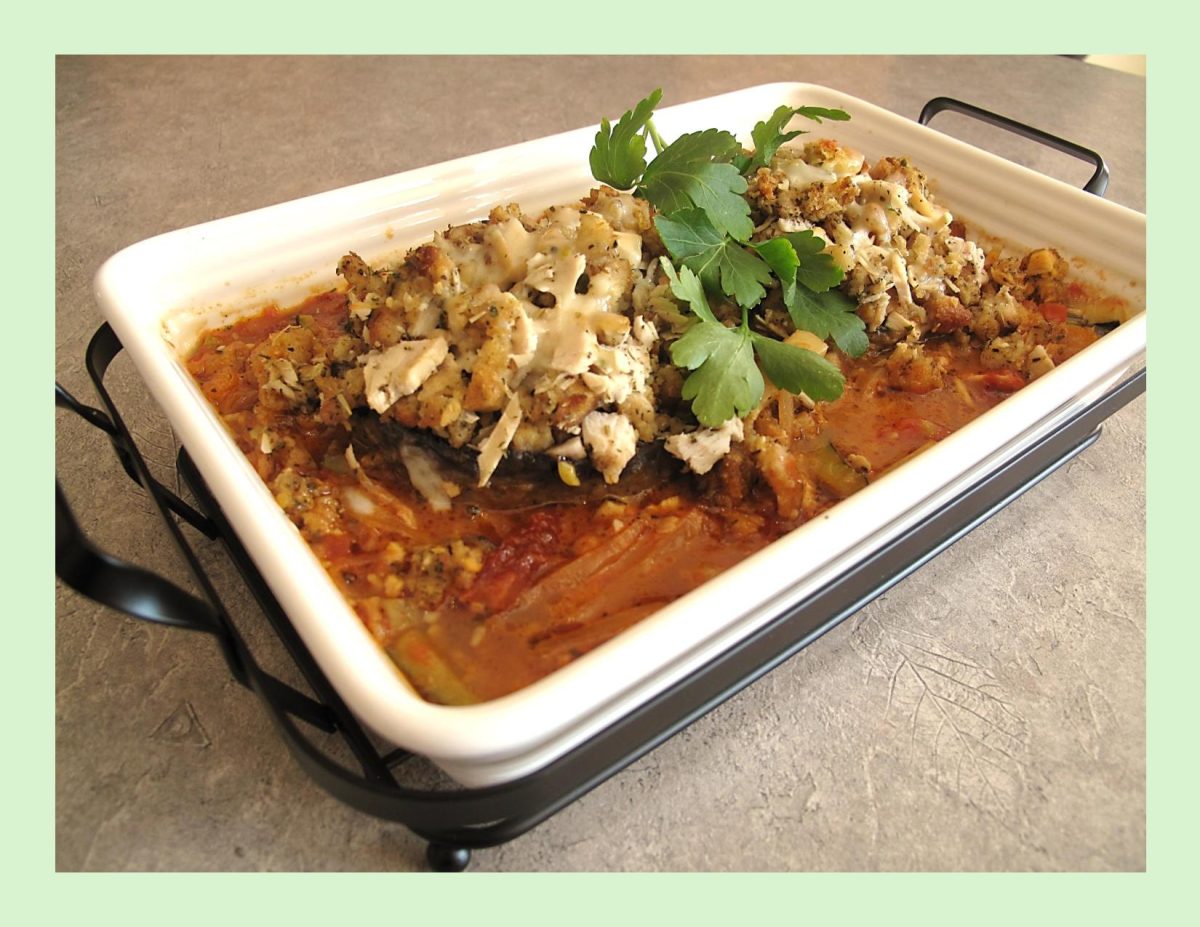
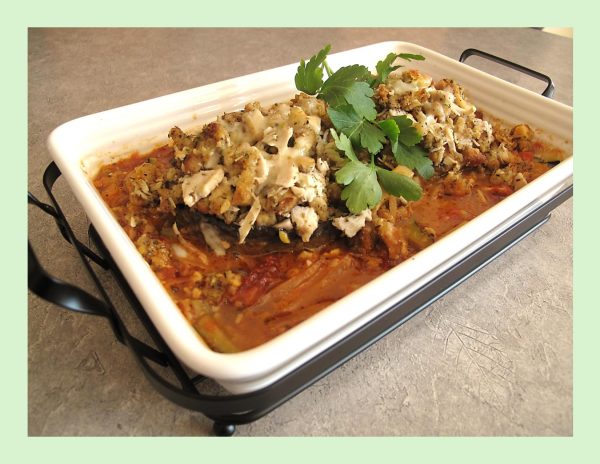
For our stuffed mushrooms today, I made a sun-dried tomato sauce then stuffed the Portabella caps with some chicken & stuffing and baked them in it for a supper entrée. Tasty and filling!
Print Recipe
Cheesy Chicken & Stuffing Stuffed Portobello Mushrooms
Votes: 1
Rating: 5
You:
Rate this recipe!
Servings
Votes: 1
Rating: 5
You:
Rate this recipe!
Instructions
Chicken & Stuffing
  1. In a small bowl, create a seasoning blend by mixing together garlic powder, dried basil, onion salt, dried parsley, salt, black pepper, & celery salt. Rub the seasoning blend evenly on both sides of the chicken breasts.
  2. Preheat oven to 375 F.
  3. Place the seasoned chicken breasts in a baking dish & add the chicken broth to the dish. Cover the baking dish with foil & bake for approximately 25-30 minutes, or until the chicken is cooked through. Remove the chicken from the oven, dice it & set it aside.
  4. Prepare the chicken stuffing mix according to the package directions. Toss with cooked chicken. Grate cheddar cheese.
Sauce
  1. In a skillet, heat oil. Add onion & cook for 2 minutes until it starts to soften. Add reserved mushroom stems, garlic, oregano, paprika, sun-dried tomatoes & zucchini. Cook for 2 minutes while stirring with a spatula. Add wine & allow to bubble for 2 minutes then add vegetable broth, salt & pepper. Bring to a boil & simmer for 5 minutes.
  2. Stir the cream & Parmesan cheese into the sauce. Place in a 9 x 13-inch baking dish.
Mushrooms
  1. Whisk the egg lightly in a shallow bowl. In a separate shallow bowl, combine flour, salt, pepper, oregano, thyme, paprika & garlic salt. In a large skillet, heat olive oil on medium-high. Dip the mushrooms in the egg then in the flour mixture. Coat the outside of the mushrooms, trying not to get too much flour inside the ‘cap’. In the skillet, fry mushrooms on both sides until lightly golden. Use a tong to help fry the sides as well. Remove mushrooms to a plate. 4. Set aside, keep warm.
Assembly & Baking
  1. Preheat oven to 350F.
  2. Pack each Portobello mushroom cap with the chicken & stuffing mixture, ensuring it's firmly packed to stay in place during baking. Nestle the stuffed mushrooms on top of the sauce in the baking dish. Cover the baking dish with foil.
  3. Bake for about 20-25 minutes or until the mushrooms are tender & the stuffing is heated through. For the last 5 minutes of baking, remove the foil & sprinkle with cheese. When cheese is melted, remove the stuffed mushrooms from the oven.
  4. Nice to serve with pasta or potatoes.
Recipe Notes
  • Since their is just two of us, I only made half the recipe as you will notice in the picture.

Shrimp Orzotto in Creamy Wine Sauce

Cooking with wine is a bit of a misunderstood area. It’s not quite as simple as many people believe it to be with such a wide range of wines available to cook with and a variety of ways in which to use them.

Wine is used in a similar fashion to seasoning. You’re not pouring it in to change the taste of the entire dish, but more to enhance and complement the flavors already there. The alcohol present in wine actually triggers the release of flavor molecules in the sauce, making every ingredient the wine contacts taste even better.

White wines can be wonderful in a whole host of dishes, which is why you’ll often find them in chicken, fish and seafood recipes, as well as vegetarian.  Seafood such as lobster and shellfish are considered full-bodied, so are better partnered with creamier, full-bodied whites like Chardonnay. White wine sauce has been described as ‘a classic sauce for fish’.

A common misconception when cooking with wine is that all alcohol content is burned off during the cooking process. This isn’t completely true. Typically, the majority of the alcohol will evaporate, but in order to eliminate all traces you would need to cook something for a good three hours or more.

It’s not just alcohol content that is evaporated either. All wines contain a small amount of sulphites, a natural result of the winemaking process. These evaporate along with the alcohol, while the flavors are concentrated. The undesirable stuff comes out, the good stuff is enhanced!

This shrimp orzo is nicely complimented with the creamy wine sauce.

Print Recipe
Shrimp Orzotto in Creamy Wine Sauce
Votes: 1
Rating: 5
You:
Rate this recipe!
Servings
Votes: 1
Rating: 5
You:
Rate this recipe!
Instructions
  1. In a large bowl pat the shrimps dry with paper towel, & mix them with salt, 1 teaspoon Italian seasoning & crushed red pepper flakes.
  2. Melt 1 tbsp. of butter in a large, non-stick skillet on medium heat. Add shrimp & fry for 1-2 minutes on each side, just until it cooks through.
  3. Meanwhile bring 2 1/2 cups vegetable broth to a boil & cook orzo pasta until all the broth is absorbed & orzo is tender. Set aside.
  4. Remove the shrimps from the skillet & set aside. In the same skillet, add the remaining 1 tbsp. of butter & melt until it just starts to brown. Add onion & garlic and cook until translucent & fragrant.
  5. Once the garlic is cooked, add wine & cook for a couple of minutes. Next add heavy cream & once the liquid is simmering, add salt & 1 teaspoon of Italian seasoning. Add orzo & crumbled gorgonzola cheese.
  6. Add shrimp back into the skillet & reheat. Serve with chopped parsley.

Shrimp & Chicken Sausage Pasta Shells

With Christmas right around the corner, pasta meals are an easy quick fix on those busy days leading up to the big day. Stuffed Shells are truly the perfect meal to make ahead of time since you can prepare everything but hold off on baking them until you’re ready to eat.

Stuffed shells are a tasty dish that is usually made with ricotta cheese or other types of cheese inside the pasta shells. Tomato sauce is another common ingredient in the dish. However, there are so many ways to jazz it up and one might be surprised just how many unique ingredients one can put into a shell.

I have always loved stuffed pasta shells and over the years I have stuffed them in every way I could imagine. There are endless variations such as using different cheeses and herbs or making some homemade marinara or sun-dried tomato sauce.

There’s a reason surf and turf is often one of the most desired items on a restaurant menu — it’s because meat and fish are the perfect complement to each other! The light flavor of fish and shellfish is a great addition to the richer, heartier flavor of meat.

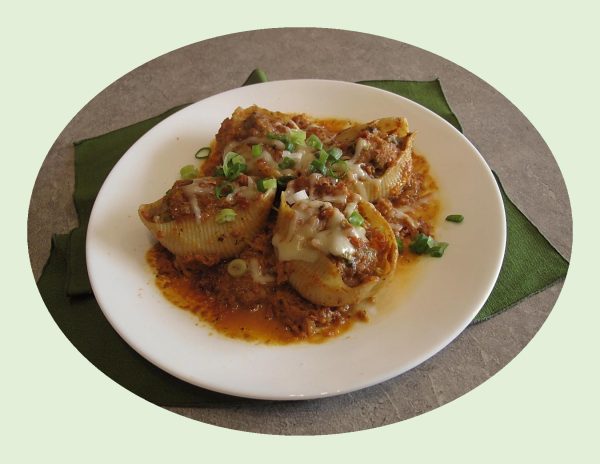
Today, I’m combining some shrimp and chicken sausage in my filling and topping it with a nice smoky sun-dried tomato parmesan sauce. Should be good!

Print Recipe
Shrimp & Chicken Sausage Pasta Shells
Instructions
Pasta / Filling
  1. Cook pasta shells in a pot of salted boiling water for about 10-12 minutes. Drain well & lay on a wire rack to keep them from sticking together until ready to fill.
  2. In a large skillet, heat 1 Tbsp oil over medium heat. Add onion & mushrooms; sauté until tender & moisture has evaporated from mushrooms. Add chicken sausage & minced garlic. Cook for 3 minutes, stirring frequently. Add wine & cook until sausage is no longer pink about 4-5 minutes more. Drain well & transfer to a large bowl.
  3. Peel & devein shrimp; chop into 1/2-inch pieces. In a small bowl, whisk together broth & flour. Set aside.
  4. In the same skillet, heat remaining 1 Tbsp oil over medium heat. Add shrimp; cook, stirring constantly, until shrimp begins to turn pink. Stir in flour mixture. Add cream, Old Bay seasoning, garlic powder & Italian seasoning; stir until thickened. Remove from heat & stir in sausage mixture. Set aside until ready to use.
Sun-Dried Tomato Sauce
  1. In a skillet, heat oil. Add onion & cook for 2 minutes until it starts to soften. Add garlic, oregano, thyme, paprika & sun-dried tomatoes. Cook for 2 minutes while stirring. Add vegetable broth; bring to a boil & simmer for 5 minutes.
  2. Stir in cream & parmesan cheese into the sauce. Remove from heat & cool for a few minutes. Pour sauce into food processor & process to a fairly smooth consistency. It will not be completely smooth but that is fine.
Assembly / Baking
  1. Preheat oven to 350 F.
  2. Spread half of the sauce over the bottom of a 13 x 9-inch baking dish. Divide filling between cooked shells. Lay in rows over sauce. Pour remaining sauce over top carefully covering all the shells.
  3. Loosely lay a piece of foil paper over baking dish and bake for 45 minutes or until bubbling nicely.

White Wine Sangria/ Strawberry Lemonade

CELEBRATING THE LONG WEEK-END!

The Victoria Day weekend is upon us. There was a point in the slushy, frigid, not-so-distant depths of February when Canada’s unofficial but unequivocal start of summer simply could not be visualized. And yet here we are, hanging flower baskets on the front porch. While many Canadians familiarly know it as May two-four weekend (often used in reference to the size of a case of beer), a few of us will be looking to bring back a little ‘Victorian-era’ glamour to this much anticipated holiday with some white wine sangria or a non-alcoholic strawberry lemonade.

No doubt, no shortage of beer will wash over the lips of Canadians as we open up our cottages, take overdue road trips — albeit with lighter wallets thanks to recent hikes in gas prices — or simply a well-deserved break from work.

Wherever you live across Canada, this May long weekend – typically marks the start of grilling season. It’s time to get outside in the sunshine, fire up the BBQ, and enjoy savory grilled food with family and friends. All you need are the barbecue essentials and some great marinated meat or veggies.

I thought it would be nice to post a white wine sangria, I’ve made many times over the years, along with a non-alcoholic strawberry lemonade to enjoy with your BBQ today.

Print Recipe
White Wine Sangria/ Strawberry Lemonade
Instructions
White Wine Sangria
  1. In a pitcher, combine sugar, lemon & lime juice; stir until sugar dissolves. Add white wine & orange flavored liqueur. Just before serving, add club soda, fruit & ice. Makes 8 cups.
Strawberry Lemonade
  1. In a blender, combine strawberries & lemon juice. Cover & blend until smooth. In a pitcher, combine strawberry mixture & sugar; stir until sugar dissolves. Add club soda. Serve over ice; garnish with strawberries & mint if desired. Makes about 8 cups.

Asiago Shrimp Risotto

Risotto is one of those dishes that’s purely Italian in nature. Most traditionally made with Parmesan cheese, which is stirred in right at the very end of cooking to not only boost the rice’s creaminess but also lend its signature salty, nutty flavor to the dish. Don’t get caught up in tradition though, because risotto is one of the most flexible meals you can make.

While there is nothing wrong with Parmesan, the cheese possibilities for risotto are nearly endless and you quickly discover that the world of this comfort-food staple really has no boundaries.

Risotto is one of those gourmet meals that is really not difficult to make, and it doesn’t take long either. You can have it on the table in 30 minutes or less. It takes some work stirring — not the kind of stirring where you must stand at the stove and stir constantly. You can step away for brief moments, but you do want to do lots and lots of stirring. It’s the stirring that breaks up the starches in the rice and makes the risotto so incredibly wonderfully amazingly creamy.

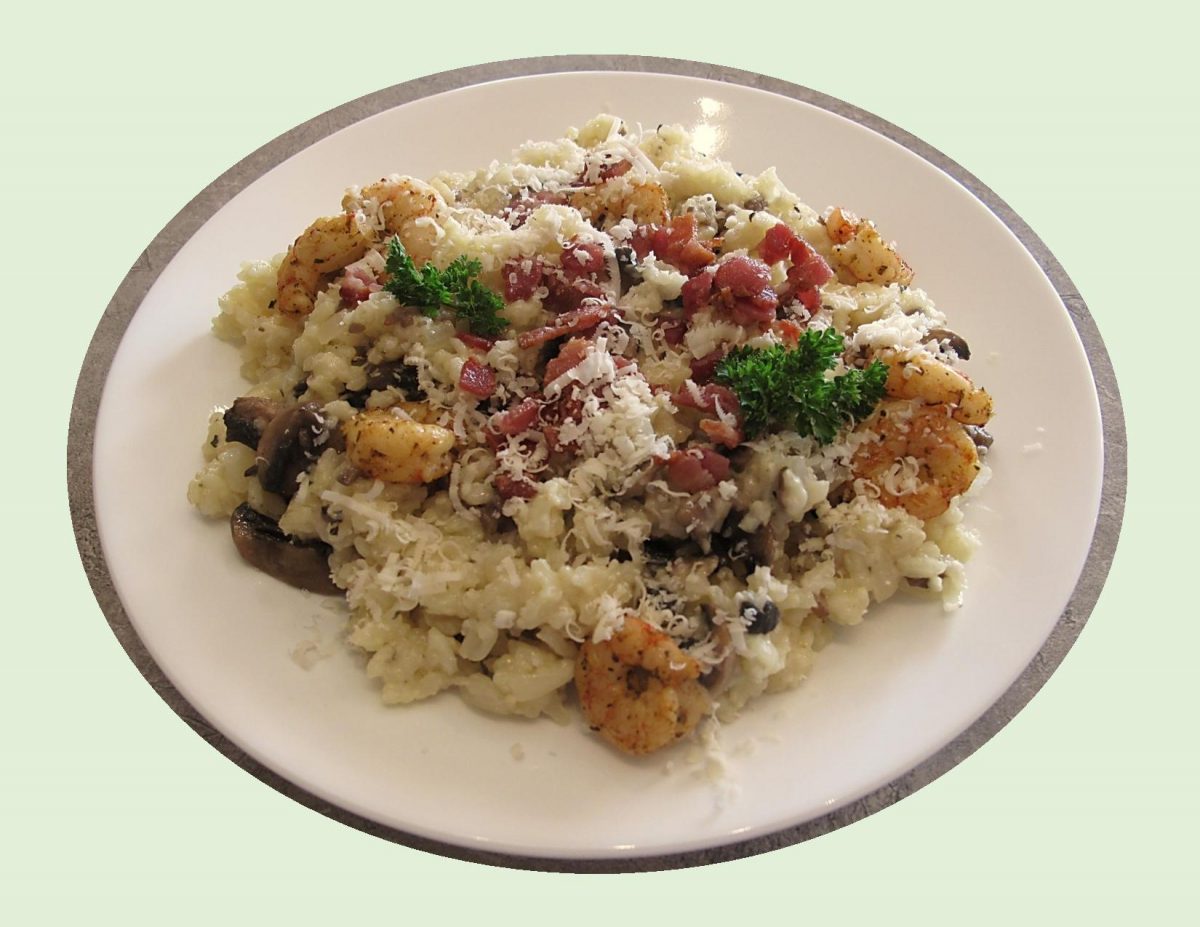
This rich and creamy risotto with tender shrimp, uses Asiago over Parmesan cheese for a semisweet touch, plus tarragon and flat leaf parsley to give the dish some freshness.

Asiago is a whole milk cheese that originated in Northern Italy, around the Po River Valley where Italy borders Austria. Coming from the mountains, Asiago is similar to other mountain cheeses, such as Switzerland’s Gruyere or France’s Beaufort. Asiago is made in large wheels designed for long-term aging to get through tough winters. Dense and flavorful, Asiago’s flavor profile changes as time polishes the wheels over the course of several months or years. Taken from the milk of cows grazing on the grasses and wildflowers of the mountains, Asiago can have a fresh, fruity flavor or a savory, zesty taste on the palate.

Print Recipe
Asiago Shrimp Risotto
Votes: 1
Rating: 5
You:
Rate this recipe!
Course Main Dish
Cuisine Italian
Servings
Ingredients
Course Main Dish
Cuisine Italian
Servings
Ingredients
Votes: 1
Rating: 5
You:
Rate this recipe!
Instructions
Risotto
  1. Heat 1 tsp oil in a LARGE POT or DEEP SKILLET over high heat. Add bacon & cook until fairly crisp. Blot on paper towel & crumble. Transfer to a small microwave-proof bowl. Leave about 1 Tbsp bacon drippings in pot & discard the rest. Add mushrooms & cook until browned. Remove to a dish, set aside.
  2. Turn heat down to medium & return pot to the stove. Add butter & melt; then add garlic & onion. Sauté for 3 minutes or until softened. Turn up heat, add rice & stir until grains become partially translucent, about 1 minute (do NOT overcook).
  3. Add wine & cook, scraping the bottom of the pot to get any brown bits, about 2 minutes. Turn down heat to medium-low; add about 3 cups of chicken stock. Leave, uncovered, stirring just once or twice, until most of the liquid has been absorbed.
  4. Check firmness of rice & add 1/2 cup of broth at a time, stirring in between until absorbed & rice is cooked to YOUR taste.
Spicy Shrimp
  1. While the risotto is cooking, combine spice mix in a plastic bag. Add shrimp & shake to coat well. In a skillet, heat butter & olive oil; add shrimp & sauté for 2-3 minutes, just until cooked. Keep warm.
  2. Add the mushrooms back into the risotto towards the end, just to heat through. Right at the end when the risotto is ready, add a 'splash' more chicken broth to make the risotto slightly soupy, then take it off the stove.
  3. Add butter & Asiago cheese, then stir vigorously (this will activate the starch & make it super creamy). Add shrimp & gently stir to incorporate them into the risotto.
  4. Serve immediately. Garnish with reheated bacon & extra Asiago if you wish.

French Baked Brie Ideas

Appetizers, starters, hors d’oeuvers or whatever you want to call them, are such an important part of any gathering. They provide the ‘welcome’ and set the stage for what comes next.

A comfort food and party food all in one, Christmas and New years celebrations would not be complete without cheese. Brie, one of the world’s best known soft cheeses, originated in northeast France, but is now produced all over the world. A decadent cheese that evokes thoughts of sophistication and elegance.

Brie, a soft, creamy, off-white or yellow cheese with an edible rind is produced from whole or semi-skimmed cow’s milk. Typically described as tasting earthy, nutty, fruity, grassy and even mushroomy.

In France, Brie is very different from the cheese that is exported. ‘Real’ French Brie is unstabilized and the flavor is complex when the surface turns slightly brown. When the cheese is still pure-white, it is not matured. If the cheese is cut before the maturing process, it will never develop properly. 

Possibly, the most incredible way to serve brie, is to bake it, but of course that’s just a personal opinion. However, it can be difficult to find the perfect balance between under and over baking. If you remove brie from the oven too soon, it will only stay melted for a few minutes. On the other hand, if it is left in the oven to long it will lose it’s shape and be difficult to handle.

There are a variety of brie options on the market and any of them technically work. ‘Double Cream’ (227 gm) is an excellent choice, whereas ‘Triple Cream’ will become too runny when melted. 

After all these years, our memories of France, it’s food, culture, beauty and not to be forgotten — the wine (and Brion’s favorite goat cheese) have not lessened. My sister, Loretta joined us on that first trip any of us had ever made to Europe, which added to those memories of a lifetime. 

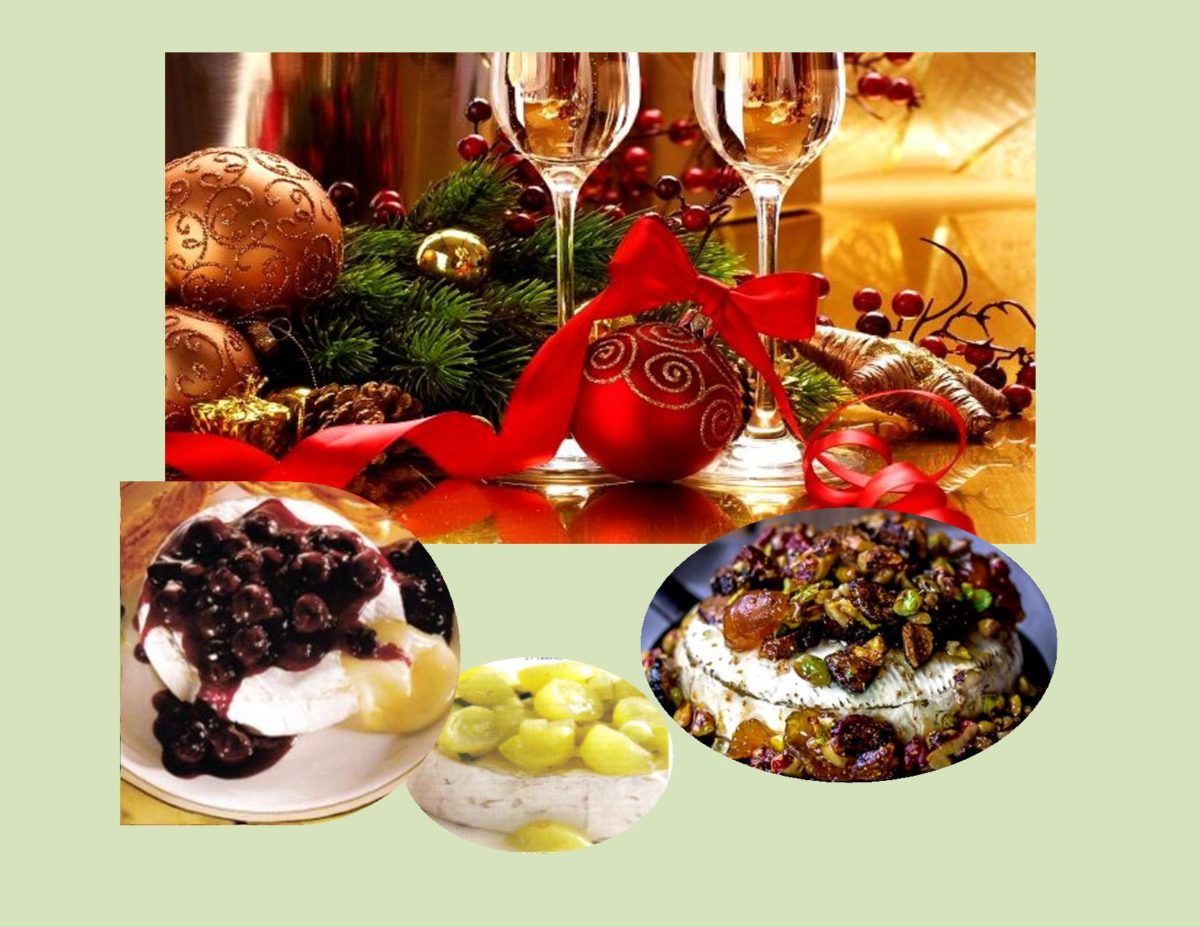
I wanted to share a few BAKED BRIE  recipes today that have been favorites of mine to use at this time of the year. Hope you will enjoy.


Print Recipe


Baked Brie - Blueberry * Gingered Grape * Fig & Nuts

Nothing short of impressive!

Votes: 1
Rating: 5
You:
Rate this recipe!

Servings


Ingredients
Blueberry Chutney

Brie Cheese
  • 227 - 375 gram wheel of Brie cheese If you plan to make all 3 kinds you will need 1 wheel of brie for each.

Servings


Ingredients
Blueberry Chutney

Brie Cheese
  • 227 - 375 gram wheel of Brie cheese If you plan to make all 3 kinds you will need 1 wheel of brie for each.

Votes: 1
Rating: 5
You:
Rate this recipe!


Instructions
Blueberry Chutney
  1. In a large saucepan, combine all chutney ingredients; mix well. Bring to a boil over medium heat, stirring frequently. Boil 1 minute. Remove cinnamon stick. Cover & cool.

Gingered Grape Chutney
  1. Slice grapes in half. In a saucepan, stir wine with cornstarch until dissolved. Add sugar, candied ginger & grapes. Stir over high heat until it comes to a boil, then reduce heat to medium-low. Simmer, uncovered, stirring often until liquid thickens, 4-6 minutes. Remove from heat & stir in green onion. Cover & cool.

Fig & Nuts RECIPE SOURCE: https://www.themediterraneandish.com
  1. Place fig jam/preserves in a microwave-safe dish. Microwave for 30 seconds to soften. In a small bowl, combine the sliced, dried figs with chopped pistachios & walnuts. Add half of the fig jam & mix well to coat the nut mixture.

Baking Brie
  1. Preheat oven to 350 F. Line a baking pan with parchment paper. Set the brie on prepared baking sheet.

  2. For the Blueberry or Grape Chutney: You can either bake the cheese FIRST & then add the topping or TOP it & then bake it.

  3. For the Fig & Nuts: Before baking, coat the brie with the remainder of the jam. Top the brie with the fig & nut mixture.

  4. Bake the brie for 12-13 minutes. At this point it should be starting to bubble on top. The trick is to leave it in the oven for as long as possible before the wheel begins to lose it's shape. You may have to leave it a bit longer. Serve the brie warm with crackers.


Recipe Notes
  • For best results, allow the brie to sit at room temperature for 20 minutes before baking as it will ensure that the cheese melts evenly all the way through.
  • Brie tastes equally wonderful with a mix of both savory and sweet toppings.