The holiday season always seems to creep up on us each year. You’ve probably got the mains and desserts figured out for your big Christmas dinner. Now, it’s time to nail down the appetizers or hors d’oeuvres, aka the real reason everyone loves the holidays. Hors d’ oeuvres are part of the holiday party tradition. I think that the best appetizers are ‘finger foods’ where you can eat them easily and with very little mess. Each culture has its own collection of favorite appetizer recipes which have evolved over the years.
If you’re looking for a sophisticated, bite-sized appetizer for Christmas or New Year’s Eve, look no further than mini appetizer tarts. Tartlets can be sweet or savory, hot or cold, and are a perfect choice if you’re looking for a vegetarian option. Think of your favorite flavor combination and you can find a way to serve it in these tiny pastry cups — try brie and raspberry, chicken cordon bleu, cranberry and goat cheese, pear and blue cheese, buffalo chicken and ranch or roast beef and gruyere.
Not only do mini tarts make for a chic presentation, but they also make it easy to time your guests’ arrival with taking the tarts out of the oven if you are serving them hot. Most recipes require a short cooking time, which allows you to pop the tartlets in the oven half an hour before your guests arrive and serve a warm appetizer as soon as they walk through the door.
These mini tarts are filled with roast beef, shallot-sautéed mushrooms, cream cheese, horseradish and Gruyère. You will love the nutty aroma when the tarts come out of the oven. I think they are the perfect Christmas appetizer or party food idea.
Print Recipe
Mini Tarts w/ Roast Beef & Gruyere
Votes: 1
Rating: 5
You:
Rate this recipe!
|
|
Votes: 1
Rating: 5
You:
Rate this recipe!
|
Instructions
Pastry
In a large bowl, whisk together flour, baking powder, baking soda & salt. With fingertips, cut in cold butter until mixture resembles small peas. In a measuring cup, whisk together water, egg & vinegar. Make a well in dry mixture & pour wet mixture into it all at once. With hands, mix until JUST combined. Roll out pastry & cut 24 squares with a pastry cutter. Fit squares into 24 mini tart pan cups. Set aside in refrigerator until ready to fill.
Filling
In a skillet, over medium heat, melt butter, then add shallots & mushrooms. Add thyme, salt & pepper; sauté until browned. Remove from heat. Divide roast beef between the 24 pastry shells. Spoon mushrooms onto the mounds of roast beef followed by a tiny dollop of horseradish.
Place cream cheese & eggs into a small bowl & whisk until smooth. Season with salt & pepper. Spoon into tart shells, allowing the mixture to settle down into them.
Sprinkle each cup with some grated cheese before transferring to the oven & bake for 20 minutes. Cool 5 minutes before serving.
Recipe Notes
- If you prefer, you can always use frozen prepared mini tart shells instead of homemade for a quick shortcut.

There’s something fundamentally satisfying about the textural contrast of biting through a crisp savory shell into a juicy turkey burger. It’s not like burgers needed to be reinvented, but I’m all about trying new things to see if there’s something novel and delicious to be discovered.
Breakfast can be many things to many people. Hash browns come in many shapes and sizes. They can be prepared in various ways. Some consider it the ultimate breakfast food that needs to be served with eggs.
Brion has always enjoyed hashbrowns, not the diced, fried to a crisp in a deep fryer kind, but the nice shredded, golden kind. My inventions for new culinary techniques that revolutionize the way we eat usually happen in the middle of the night during a bout of insomnia. But all it takes is a quick Internet search to reveal that I’m far from the first person to have invented the cookery method, and hundreds of recipes already exist. Nevertheless, this idea for an interesting breakfast is a good example of that.
I crusted the turkey burgers with some shredded potatoes, so when they cook and get crispy, they act as a barrier that locks in all the juices. The roasted tomatoes add a nice little garnish to the burgers. I topped the burgers with poached eggs, because when you cut into it, the velvety, creamy yolk pours out onto the burger and acts as a sauce…and what goes better with potatoes than eggs, right? So, there you have it …. crispy, golden hashbrowns, meat, eggs & tomatoes …. what a breakfast!
Print Recipe
Breakfast Turkey Hashbrown Burgers
Votes: 1
Rating: 5
You:
Rate this recipe!
|
|
Votes: 1
Rating: 5
You:
Rate this recipe!
|
Instructions
Hashbrowns
Thaw shredded hashbrowns on paper towel. In a bowl, place the flour, cheese, egg, onion, garlic, coriander, smoked paprika, salt & pepper. Add 'dried' shredded hashbrowns. Using a fork, mix everything until combined being careful not to break up the hashbrowns. Set aside until burgers are ready to be coated with the mixture.
Turkey Burgers
In a bowl, combine burger ingredients & divide into 4 equal portions. Form into burger patties. Coat burgers with hashbrown mixture, gently pressing coating down to make sure it adheres well.
Roasted Cherry Tomatoes
In a small bowl, place cherry tomatoes & add some Italian dressing to coat. Place on a foil lined baking dish.
Cooking
-
In a skillet, heat 1 Tbsp EACH butter & olive oil. Carefully place hashbrown burgers in skillet & cook burgers on each side only until they are a golden brown. Remove to a baking pan & place in the oven to continue the cooking process until the meat is fully cooked. Roast the cherry tomatoes at the same time.
While the burgers are in the oven, prepare the poached eggs. Heat a small pot of water until it is almost at a boil. Add 1 Tbsp vinegar to help the eggs to congeal. Crack the eggs gently right above the surface of the water. Turn off the heat & cover the pot for about 3-4 minutes or until the whites of the eggs are fully cooked but the yolks are still runny. Remove the eggs with a slotted spoon.
When the burgers & tomatoes are cooked, remove them from the oven. Place them on serving plates & top each burger with a poached egg. Garnish with sprigs of fresh thyme if you wish.

No sooner is Christmas behind us than the next ‘special’ event is coming up fast, Valentine’s Day. It isn’t a true holiday, but it sure gets treated like one. Most every mainstream holiday has some candy or treat representing it. Christmas has candy canes, Halloween has candy corn, and Valentine’s Day has chocolate and strawberries.
There’s also a lot more romantic history to strawberries than meets the eye. Our favorite red berry dates back to Ancient Rome where it was considered the symbol of Venus, the goddess of love, because of its bright red color and intoxicating taste. The fruit looks so alluring in fact, that strawberries were carved into church altars and cathedral pillars in medieval times to represent perfection. Legend has it that when two people split a strawberry, they’ll fall in love.
Strawberries are one of nature’s true pleasures; they do not contain much sugar, but they have a sweet and wonderful taste, so they can be enjoyed without any guilt!
Brion & I have never felt the need to give gifts on ‘occasions’ but rather just a card with a loving and sincere verse. As we grow older, it comes clearer every day, the special privilege it is to simply have each other to share life with. I thought these little strawberry love notes were fitting for a Valentine blog.
Print Recipe
Strawberry Love Notes
Votes: 1
Rating: 5
You:
Rate this recipe!
|
|
Votes: 1
Rating: 5
You:
Rate this recipe!
|
Instructions
Pastry
In a bowl, combine flour, baking soda, baking powder & salt. Cut in shortening with a pastry blender or your finger tips. In a 1/2 cup measure, place the beaten egg & vinegar then add enough ice water to fill measuring cup. Make a well in flour mixture & add wet ingredients. Mix with a fork until combined into a pastry dough. Chill until filling is ready.
Filling
In a bowl, combine strawberries, sugar, cornstarch & vanilla. Set aside.
Assembly
On a lightly floured surface, roll out the dough until it is about 1/8-inch thick. Open a 4 x 51/2-inch paper envelope & use as a pattern. Reduce the pattern to make a smaller envelope if desired. Cut pastry into 6 envelopes & 12 small heart shaped cut outs.
Fill pastry with strawberry filling, but not on the back flap. Following the folds of the paper envelope, fold the cut out pastry, leaving the upper flap open.
-
Place a couple of heart shaped cut outs on folded edges of the pastry envelope. Place pastries on parchment lined baking sheet. Brush with egg wash then sprinkle with sanding sugar.
Bake pastries for 15-20 minutes or until lightly browned. Do not remove from baking sheet until completely cooled.
Recipe Notes
- I used an AIR-BAKE pan so the tops would not overbake by the time the bottom was browned.

When I think back to my childhood days, I have a very fond memory of my mother’s potato salad. This is probably the case with many people, but one has to be careful. Trying to create the taste of childhood is a slippery slope filled with our adult expectations. Time and distance change many things such as memory, experiences and knowledge.
Potato salad is widely believed to have originated in Germany and was brought to America by German immigrants. The thing I remember most about my mother’s potato salad was that it consisted of only a small ingredient list and had a nice slightly sweet but tart dressing. If I’m not wrong, I believe she used a bit of juice from her bread & butter pickles in the dressing. The other magic ingredient was some of her new potatoes from the garden. As the saying goes, it was ‘to die for’.
I’m not sure how popular potato salad is anymore but since its the season, I wanted to share a couple of salad recipes.
Print Recipe
German Potato & Cauliflower Salads
Votes: 1
Rating: 5
You:
Rate this recipe!
|
|
Votes: 1
Rating: 5
You:
Rate this recipe!
|
Instructions
Potato Salad
In a large pot, cook potatoes in salted boiling water. Cool, peel & cube. Boil eggs & coarsely chop. In a saucepan, fry bacon until crisp. Remove from pan & blot on paper towel reserving bacon drippings for dressing. Crumble bacon. Slice green onion & radishes. Place everything EXCEPT the radishes in a large bowl.
In a bowl, whisk together reserved bacon drippings, light salad dressing, vinegar, sugar, mustard, salt, celery seed & dill weed. Blend well. Pour over potato mixture & carefully combine well. Cover & refrigerate for several hours or overnight.
Just prior to serving, add radishes & add more salt if necessary. Carefully combine & serve.
Cauliflower Salad
In a saucepan, fry bacon until crisp, Remove from pan, reserving bacon drippings.
Preheat oven to 400 F. Line a baking sheet with foil & coat with cooking spray. Spread cauliflower florets on foil; sprinkle with salt & pepper to taste. Bake for 10-15 minutes or until cauliflower begins to brown slightly. Remove from oven & cool slightly.
While the cauliflower bakes, saute the onion in bacon drippings until tender. Set aside. Cook, peel & cube potatoes.
In a small dish, combine salad dressing, cider vinegar, sugar, mustard & garlic salt. In a large bowl, combine potatoes, cauliflower, sauteed onion & dressing. Fold together & taste to see if more salt is needed. Serve as is or chilled.
Recipe Notes
- I found, if you add the radishes just before serving keeps them crisp & prevents them from 'bleeding' their color into the salad.
- In regards to the cauliflower salad, I have also made it leaving the cauliflower RAW & substituting the white onion for green. I liked that added bit of 'crunch'.
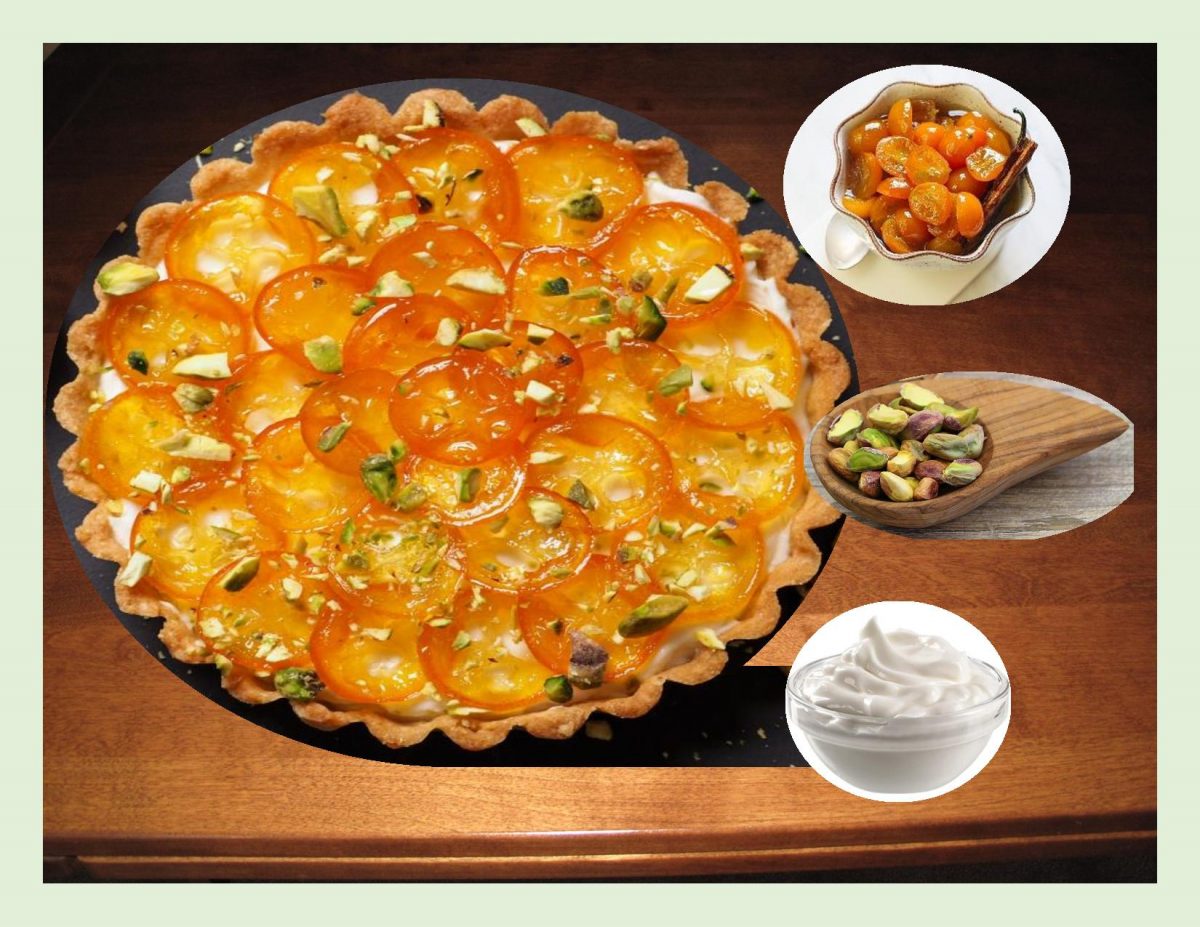
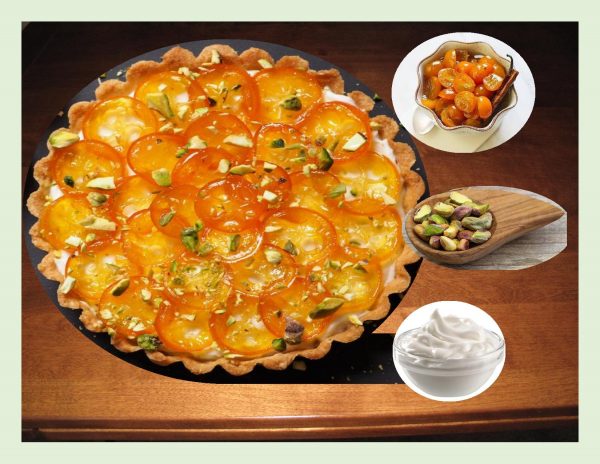
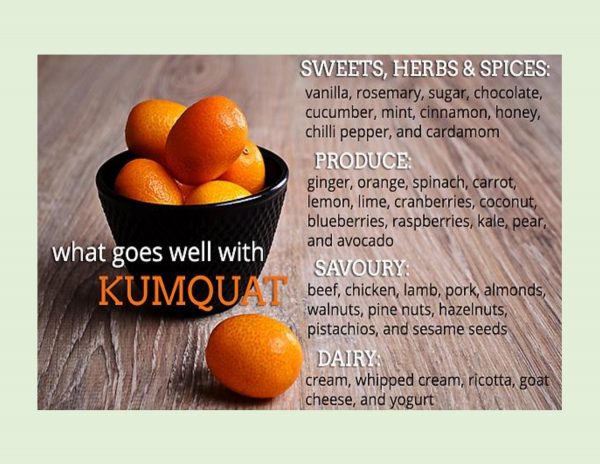
It’s that time of year when in our part of the country we start seeing kumquats in the grocery stores. If you have never tasted them, they are a little deceptive. Like many things in life, its all about expectations. Their diminutive size makes them seem harmless, but they have an intensely tart flavor. Kumquats have a sweet skin with a very tart flesh and are filled with a lot of seeds. The skin is often times more appetizing than the flesh itself making them perfect for candying.
This kumquat tart is such a beautiful presentation at Christmas gatherings. Thick Greek yogurt is an ideal filling to mellow the intensity of the candied citrus.
Yogurt often surpasses whipped cream as a topping for all kinds of sweet and spicy desserts. Greek yogurt has a smooth, rich and thick consistency. Part of what makes it different from regular yogurt is that it is strained to remove the whey. When whey is removed, so is water, which creates a thicker, more substantial yogurt product.
I blame it on inheritance, but I’ve always been one of those people who need something sweet after dinner. Doesn’t need to be fancy, just something to satisfy the craving. Of course, anything that seriously satisfies that craving isn’t going to be the epitome of a ‘healthy meal’. That being said, enjoy the tart.
Print Recipe
Spiced Kumquat & Greek Yogurt Tart
Votes: 2
Rating: 4
You:
Rate this recipe!
|
|
Votes: 2
Rating: 4
You:
Rate this recipe!
|
Instructions
Tart Pastry
In a large bowl, whisk together flour, baking powder, baking soda & salt. With fingertips, cut in cold butter until mixture resembles small peas. In a measuring cup, whisk together water, egg & vinegar. Make a well in dry mixture & pour wet mixture into it all at once. With hands, mix until JUST combined. Roll out pastry to about 1/8-1/4" thickness Cut out 8 - 6-inch circles with a pastry cutter. Press into tart forms. Refrigerate for at least 30 minutes.
Preheat oven to 375 F. Pierce the tarts with a fork across the bottom, line with parchment paper (paper should overflow the edges) & fill with pie weights to prevent dough from rising. Bake for 10 minutes, remove weights & paper & bake another 5 minutes more. Cool completely.
Tart Filling
Make sure the yogurt has any extra liquid strained from it by using a cheesecloth if necessary Do this before making the candied fruit.
In a small, heavy bottomed pot, place sliced kumquats, Grand Marnier, sugar, honey, water, star anise, cinnamon stick & vanilla extract. Bring to a boil.
Reduce heat slightly & cook for 15-20 minutes, stirring often, until the syrup thickens & the kumquats are very soft. Remove from heat & discard the anise stars & cinnamon stick.
Arrange a sheet of parchment paper over a cooling rack. Using tongs, remove fruit from sugar solution & lay flat on the parchment paper to cool.
When ready to assemble dessert, add a tsp of sugar solution per 1/2 cup of strained yogurt. Divide yogurt between the tart shells, spreading evenly. Arrange the candied kumquats on top & sprinkle with chopped pistachios.
-
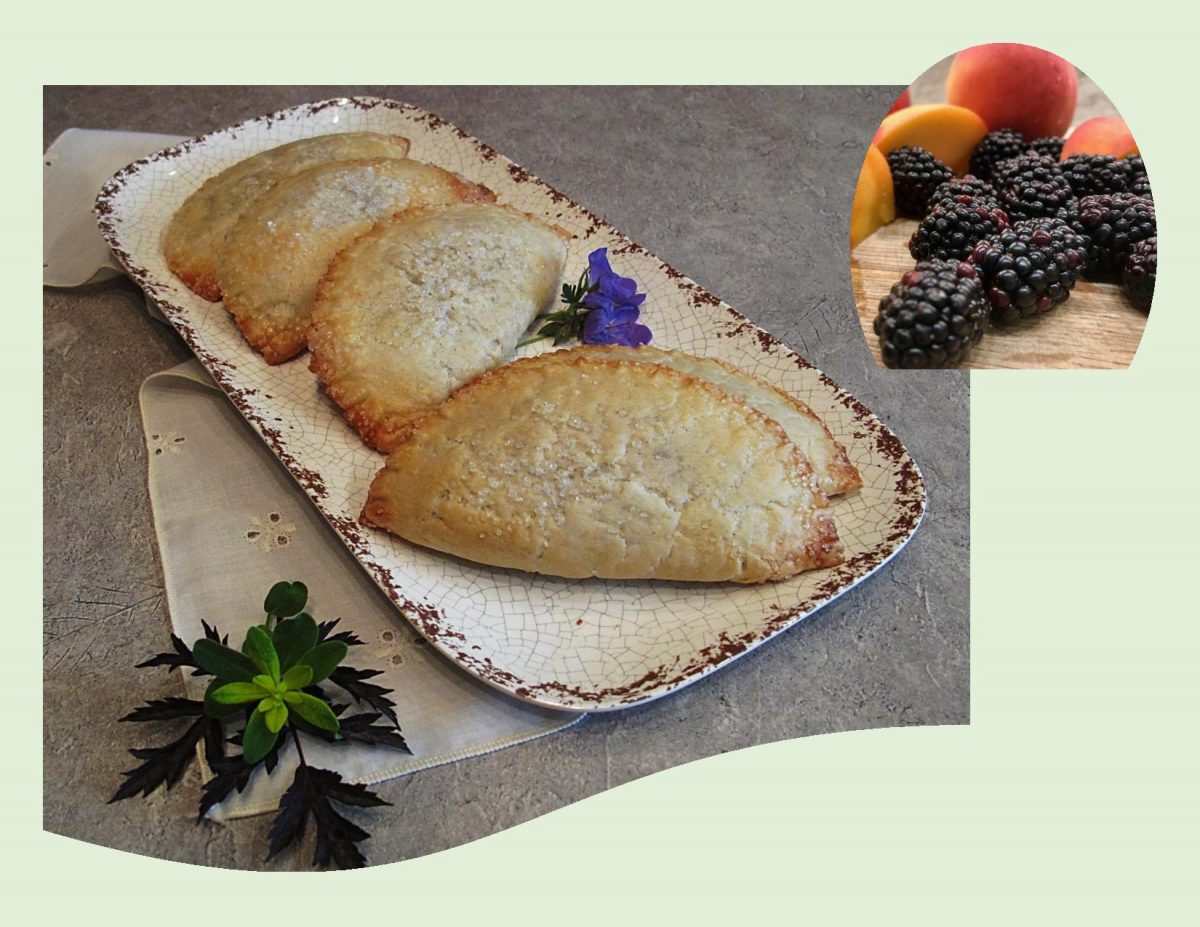
Hand pies are just perfect for this time of year. No fork or plate required —a variety of fresh seasonal fruit available — picnics and barbecues happening. Another great thing is that you can make up a big bunch on a cooler day and freeze them. Personally, I would bake them before freezing so they are ready on short notice but nothing says you have to.
Years ago, hand pies were primarily made with reconstituted dried fruit since fresh fruit is often to juicy to encase it with delicate pastry. Now, a blend of dried and fresh fruit with the help of thickeners can yield a balanced mixture of flavors and textures.
There seems to be various successful ways to go with your pastry from the traditional pie crust to a more biscuit-type pastry. One thing I found that helps to avoid having a ‘gummy’ inside is rolling your dough fairly thin.
When it comes to the filling, I always have the urge to overfill pies, be it full or hand size. Getting it right sure helps to keep them from splitting and leaking.
Hand pies have primarily been deep fried in past but my preference is to bake them. I guess I’ll just never be a deep fried lover of anything. These makes such a nice seasonal combo!
Print Recipe
Blackberry-Peach Hand Pies
Votes: 1
Rating: 5
You:
Rate this recipe!
|
|
Votes: 1
Rating: 5
You:
Rate this recipe!
|
Instructions
Pastry
In a large bowl, whisk together flour, baking powder, baking soda & salt. With fingertips, cut in cold butter until mixture resembles small peas. In a measuring cup, whisk together water, egg & vinegar. Make a well in dry mixture & pour wet mixture into it all at once. With hands, mix until JUST combined. Roll out pastry & cut 8 - 6-inch circles with a pastry cutter. Lay pastry circles on parchment paper lined baking sheet. Refrigerate until ready to fill.
Filling
In a small saucepan, whisk together sugar, cornstarch, cinnamon & salt. Stir in blackberries & peaches. Cook over medium heat until mixture has thicken, about 6-8 minutes. Add vanilla & allow to cool COMPLETELY. In a cup, beat egg with water for the egg wash topping. Set aside
Assembly
Preheat oven to 375 F. When fruit has cooled, remove pastry from fridge & divide filling between pastry circles. Try to keep the filling in the center, away from the outer edges. Brush a line of egg wash over pastry edge then fold hand pie in half. Use a fork to press the pastry layers together forming a seal to keep fruit from leaking. With a sharp knife, cut 3 vents in each pie.
Brush the tops with egg wash & sprinkle with sanding sugar. Bake for 15 minutes or until golden.
Recipe Notes
- Frozen puff pastry can easily be substituted for regular pastry if you wish.
- If you wish, use a hand pie cutter for easy assembly.
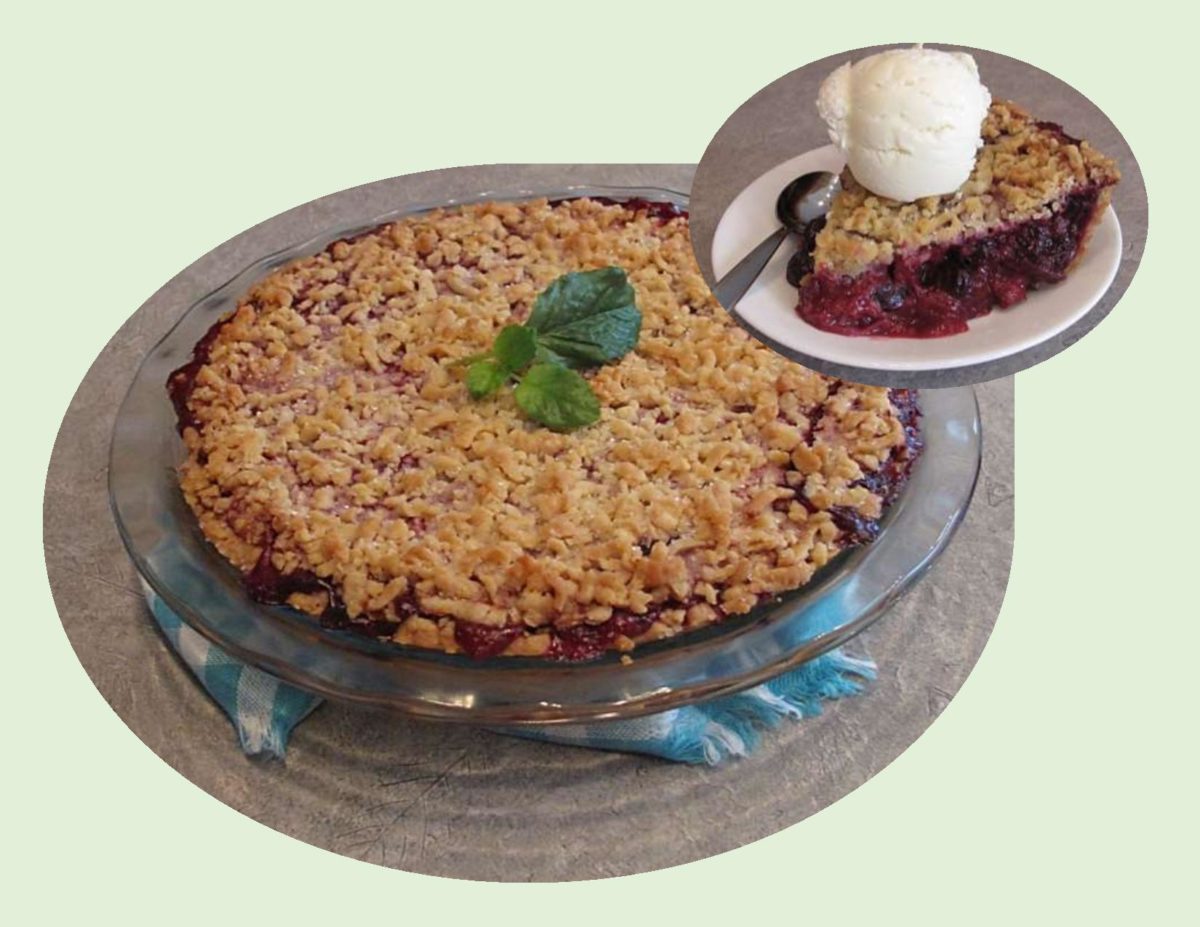
This is a Canadian berry pie, originating from the Maritime provinces that is made up of at least three kinds of berries. Since there is no such thing as a ‘bumble berry’, as the name suggests, its a mixture of berries that are in season (ones that you might bumble upon).
Berries commonly used in this pie may include blueberries, raspberries, strawberries and blackberries. Other choices often used are apples, rhubarb, cherries, plums or fresh cranberries.
Most often the pie is made with a top crust of pastry or designs cut out and laid over the fruit. Other ideas would be to use a nice streusal topping or as I have done on mine, grated pastry sprinkled with coarse sugar.
This is such a great summer dessert served, of course, with ice cream!
Print Recipe
Bumble Berry Pie
Votes: 1
Rating: 5
You:
Rate this recipe!
|
|
Votes: 1
Rating: 5
You:
Rate this recipe!
|
Instructions
Pastry
In a large bowl, whisk together flour, baking soda, baking powder & salt. With a pastry blender or finger tips, cut in white & yellow Crisco shortening. In a measuring cup, place the egg & vinegar then add enough COLD water to make 1 cup; whisk together. Make a well in center of flour & pour ALL liquid in. With hands combine quickly but do NOT over mix. This recipe will should give you enough for about 3 - double crust 10-inch pies. Whatever you don't use, freeze for later use. This is so handy when time is short & dessert is needed. At this time, roll out a 10-inch bottom pie shell, place in pie pan & refrigerate until ready to fill. Take the same amount of pastry, form it into a ball, wrap in plastic wrap & place it in the freezer. When you are ready for the top pastry on your bumble berry pie, remove the ball from the freezer & GRATE it over the top of the fruit.
Filling
In a large bowl, combine fruit. In another dish, whisk together sugar, flour, cornstarch & cinnamon. Gently toss into fruit mixture along with lemon juice.
Assembly
Preheat oven to 400 F. Place filling into chilled pie shell, using the large holes on a box grater, grate the ball of pastry (from freezer) directly over the fruit, as you would a block of cheese. Using a fork, gently move the gratings here & there for an even covering. Sprinkle with coarse sugar.
Bake pie on center rack for 30 minutes. Reduce heat to 375 F. rotating pie for even baking. Bake about 25-30 minutes more or until to is golden brown & juices are bubbly & thick around the edge. Remove from oven. Serve warm with ice cream.
Recipe Notes
- Never hesitate to vary the fruit you choose for this pie. Remember, its whatever you 'bumble' upon!
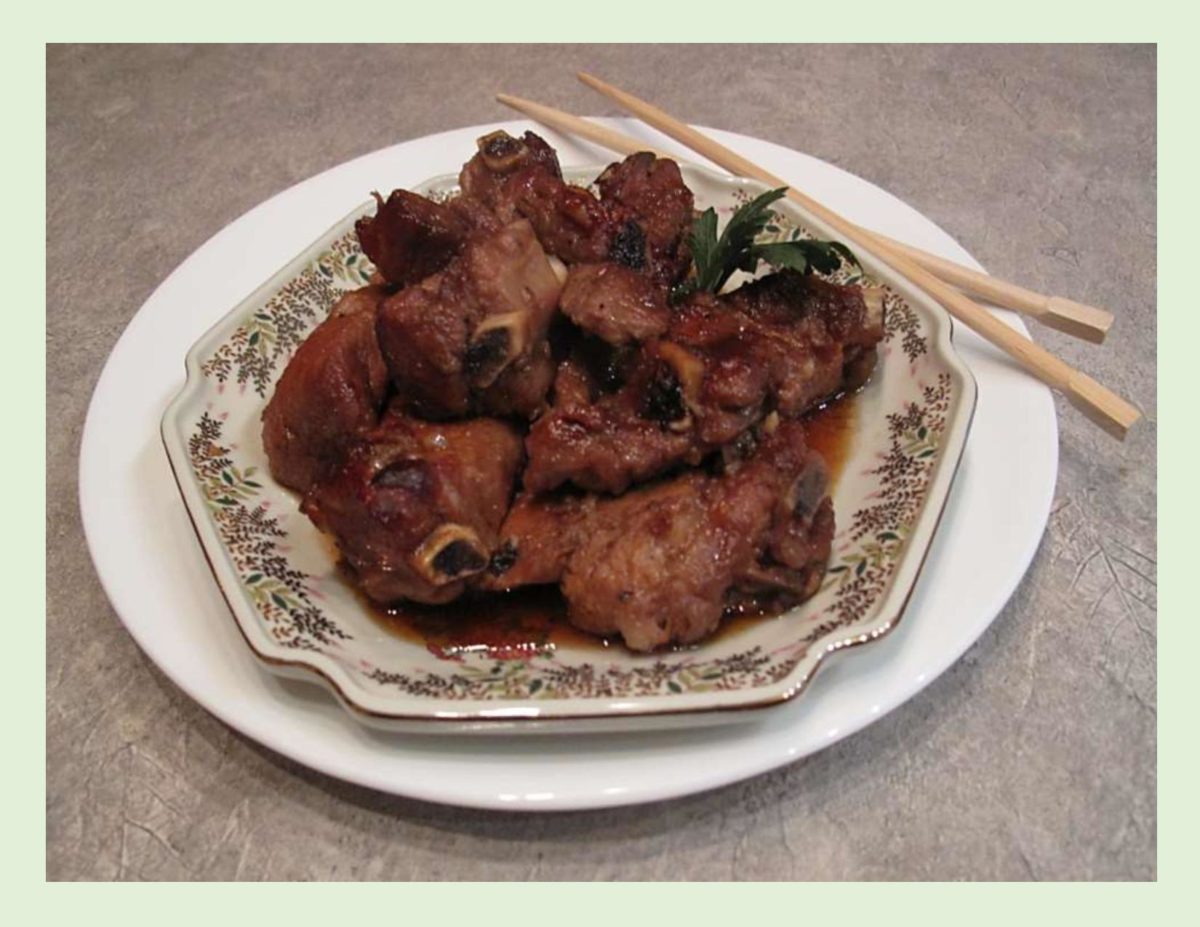
Ginger Beef appears to have its origins in a Northern Chinese dish called Geung Ngao Yuk. It is traditionally drier and less sweet than the popular restaurant version that we are familiar with here in Canada. Ginger beef epitomizes the evolution of Chinese-Western cuisine and while its status as an iconic Canadian dish may be under the radar, its the perfect springboard to jump off into the murky waters of Canadian Chinese food and its origins.
In 1975, a newly arrived family in Canada, from Hong Kong, decided to open a Chinese restaurant outside of Calgary, Alberta’s Chinatown. Two sisters, Louise Tsang and Lily Wong found an old cafe with a sign that said ‘Silver Inn’. The building was worn out but the sign was still in excellent condition. They started serving both Canadian and Chinese dishes which was the norm for many restaurant owners of Chinese decent during this period. But they found in order to suit the tastes of the North American palate, they initially had to serve a lot of grilled cheese sandwiches. With the help of Lily’s husband, George Wong (who was also the restaurants’ chef), they began to adapt certain recipes. Because George Wong had experience cooking in England, he was used to the typical Western palate. Ginger beef was born, also known on their menu as ‘No. 65 – deep fried shredded beef in chili sauce’. Ironically, the dish has very little ginger in it and its actually the sweet chilies that are mistaken for ginger.
Although ginger beef is indigenous to Alberta, I think its safe to say, it can be found on pretty much any Chinese take-out menu in Canada. You would be hard pressed though to find anything resembling it in China, I’m sure. It is neither Chinese nor Canadian and yet it is both.
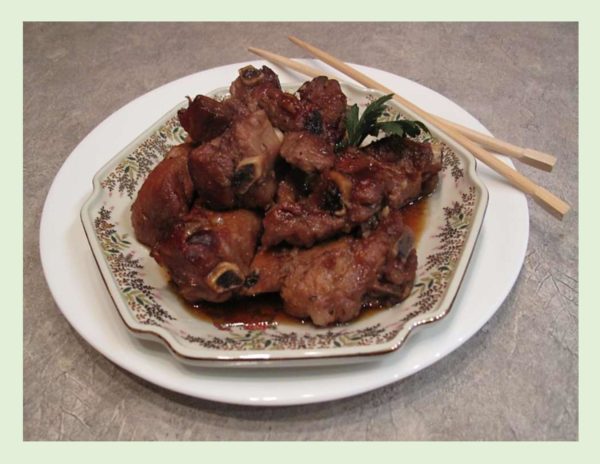
Today’s blog recipe moves away from the traditional deep fried beef to a marinated version using (of all things) ginger ale. Not only is ginger ale a great meat tenderizer but you get a bold ginger flavor without grating fresh ginger. Just a little side note… the term marinade, originally came from the use of seawater to preserve meat. The roots of the word are derived from the Latin word for sea (mare). This marinade works well with pork as well as beef.
Print Recipe
Gingered Braised Beef
Votes: 1
Rating: 5
You:
Rate this recipe!
|
|
Votes: 1
Rating: 5
You:
Rate this recipe!
|
Instructions
-
In a large resealable bag, combine all marinade ingredients with ribs. Marinate, refrigerated, for at least 2-3 hours.
-
Preheat oven to 250 F. Line a baking dish with foil paper & place ribs in a single layer. Pour enough marinade over the ribs to come almost to the top of them but not covering the ribs. Place in oven & bake at this slow heat for about 2 hours. You end up with some real flavorful TENDER ribs & the marinade tastes so good over steamed rice.

Okra, that seasonal summer vegetable that many love to hate. But, cooked properly it is definitely worth eating. While the origin of okra is often disputed, it grows well in a wide variety of warm climates. It is adaptable to both humid & dry conditions and is largely unaffected by pests and disease.
Okra is a member of the Mallow family, related to cotton, hibiscus and hollyhocks. An upright plant with hibiscus-like flowers gives okra an ornamental value as well.
Probably the most unusual feature that this vegetable has is the gummy, gelatinous substance released from its pods when cooked. The thickening agent makes it a popular ingredient in gumbos and soups. But, there’s much more to okra than soups and stews. Roasting at a high temperature will turn it into crispy, flavorful okra fries.
Since it pairs well with most any meat or seafood, I decided to make some braised beef short ribs with stir-fried okra and Jasmine rice.
Print Recipe
Braised Beef with Stir-Fried Okra
Votes: 1
Rating: 5
You:
Rate this recipe!
|
|
Votes: 1
Rating: 5
You:
Rate this recipe!
|
Instructions
Short Ribs
Preheat oven to 300 F. In a Dutch oven, place all short rib ingredients. Bring to a boil, cover & place in oven for at least 1 1/2 hours or until meat is VERY tender. Stir periodically, adding more water if needed. If preferred, skim off excess oil before serving.
Okra
In a large saucepan, add oil; when oil is hot add okra & stir-fry for about 8-10 minutes. Okra should be tender but NOT mushy.
If you are not accustomed to using chutneys it is well worth revisiting the idea. Chutney is similar to salsa or a sweet ‘relish’. The perfect balance of sweet, sour and spicy are critical elements for most chutneys. The sweetness coming from fresh or dried fruits, the sour element from vinegar, lemon or lime and the spiciness from a variety of whole spices.
There is no right or wrong recipe, just a preferred flavor or two. They can be cooked or fresh and are made from a wide variety of ingredient combinations of fruits and/ or vegetables and spices. Ground spices tend to make chutney cloudy so it is best to use whole ones.
In the majority of chutney recipes one ingredient tends to dominate the flavor. The sweet and sour ones work well with beef, pork and chicken, whereas sweeter versions are great on cheese and crackers, bagels and toast.
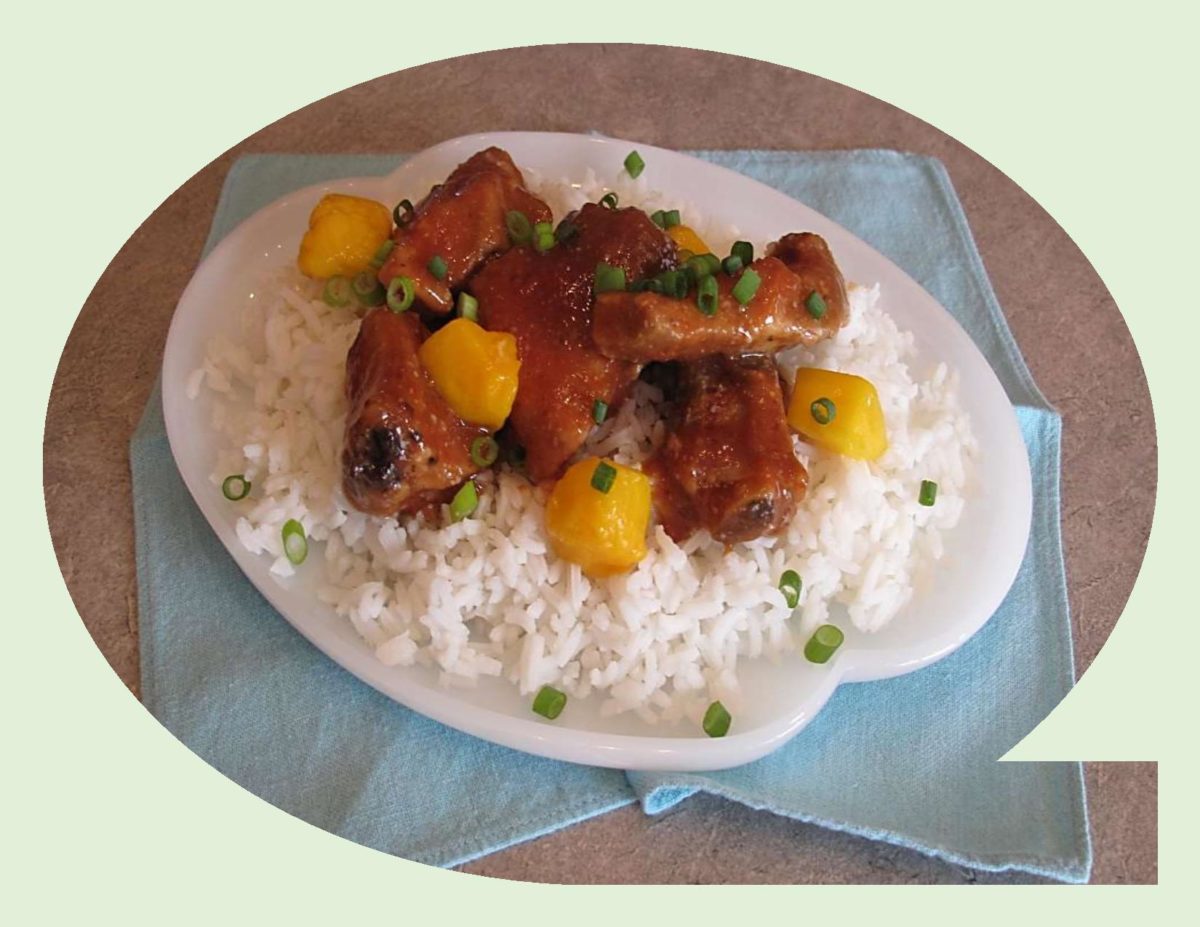
I have made numerous chutneys over the years. Some were served with warm Brie cheese but very often I’ve used mango chutney when cooking pork. This particular recipe can be made with either purchased chutney or just make a recipe of your own. It creates a unique flavor along with nice tender ribs.
Print Recipe
Mango Chutney Country Style Ribs
Votes: 1
Rating: 5
You:
Rate this recipe!
|
|
Votes: 1
Rating: 5
You:
Rate this recipe!
|
Instructions
Mango Chutney
In a saucepan, combine honey & vinegar, Bring to a boil & simmer until honey dissolves. Add remaining ingredients & simmer, uncovered until mixture becomes slightly thickened. Pour into a glass dish & set aside until needed. Refrigerate any remaining chutney that you don't use in making ribs.
Ribs / Sauce
In a saucepan, Brown ribs & set aside on a paper towel-lined plate. Add all 'sauce' ingredients to saucepan except for the 1 fresh mango. Bring to a boil, cooking for about 15 minutes, gently mashing tomatoes with a fork, until sauce is reduced to about 1 1/4 cups.
Preheat oven to 300 F. Place ribs in a baking dish; pour sauce over ribs, cover & bake for about 1-1 1/2 hours until ribs are very tender. Serve with sauce & top with remaining diced fresh mango.


