Rhubarb Custard Cream Puffs w/ Craquelin Topping

Rhubarb elicits so many childhood memories. I love growing this so-called fruit that’s actually a vegetable. A perennial, rhubarb really grows itself.  It’s the first to poke through the soil in early spring, starting with little red bumps and furled, neon green leaves that stretch out dramatically in a few weeks. The Chinese were perhaps the first to use rhubarb for its medicinal purposes. In fact, it was one of the first Chinese medicines to be exported to Europe, sometime in the fourteenth century. The European colonists brought rhubarb seeds to the New World, and records show that it was grown and cultivated as early as the eighteenth century.

The popularity of rhubarb increased considerably in the twentieth century between the two world wars. Perhaps the fact that it grew anywhere and with little fuss, made it a good crop for the Depression years.

Call it my renewed passion for all things old-fashioned, to me, rhubarb is delicious and interesting. It’s known as ‘the pie plant’ but you can use it in so many applications sweet or savory. One such example are these rhubarb cream puffs with craquelin topping.

Cream puffs start with choux pastry, a heady mixture of butter, milk, water, eggs & flour. When you combine these ingredients, they become so dense and sticky that it seems impossible they’ll come together as soft, puffy, light, tender. Heat is what initiates the expansion of the dense paste. Steam from the milk and water expands the pastry’s edges, puffing up its capacity until the oven heat provides just enough crispness and structure to hold the puffs’ boundaries. A cream puff expands so dramatically in the oven that it creates a cavern inside to hold any number of things—whipped cream, pastry cream, ice cream or savory fillings.

Cream puff pastry (or choux pastry) is the base for profiteroles (smaller puffs filled with ice cream), éclairs (elongated puffs filled with pastry cream and glazed), croquembouche (a tower of cream puffs held together and drizzled with caramel) and savory appetizer puffs called gougeres with cheese and herbs.

Craquelin (pronounced kra-ke-lan) is a thin biscuit layer that can be added over choux pastries before baking them. It is used to create a crackly appearance, crunchy texture and a buttery sweet taste as well as helping the choux pastry bake evenly to form hollow rounds. This topping reminded me of a similar cookie-like topping used on Mexican sweet bread called ‘conchas’. It certainly dresses up ordinary cream puffs.

Print Recipe
Rhubarb Custard Cream Puffs w/ Craquelin Topping
Votes: 1
Rating: 5
You:
Rate this recipe!
Servings
Minis
Ingredients
Thick Custard
Choux Pastry
Servings
Minis
Ingredients
Thick Custard
Choux Pastry
Votes: 1
Rating: 5
You:
Rate this recipe!
Instructions
Stewed Rhubarb
  1. In a small saucepan, combine the chopped rhubarb, sugar & water. Cook over medium-low heat for 5-8 minutes until rhubarb is soft, jammy & holds its shape. Remove from heat to cool.
Thick Custard
  1. In a small bowl, mix the custard powder & sugar with a splash of the cold milk to form a smooth paste. In a saucepan, heat the remaining milk & vanilla until just starting to simmer. Whisk the hot milk into the custard paste, then pour everything back into the saucepan.
  2. Cook over a medium-low heat, whisking continuously, until the mixture becomes very thick & glossy. Remove from heat & beat in the butter until melted. Press a piece of clingfilm directly onto the surface to prevent skin from forming.
  3. Allow to cool then place it in a food processor with the stewed rhubarb & blend to a smooth pudding-like consistency. Set aside to cool further until ready to use.
Craquelin
  1. In a food processor, process sugar, red gel coloring (if using) & butter until they form large crumbs. Add flour, salt & vanilla; process until a dough forms. Bring dough together to form a disk.
  2. Roll the dough between 2 pieces of parchment paper until it is 1/16-inch thickness. Place in the freezer for about an hour then cut into (18) 2-inch circles & keep in the freezer until ready to use.
Choux Pastry
  1. Preheat oven to 350 F. Line a couple of cookie sheets with parchment paper.
  2. In a saucepot, combine milk, water, butter & salt; bring to boiling. Add flour, all at once, stirring vigorously. Cook & stir until mixture forms a ball. Remove from heat & add eggs, one at a time, beating well with a wooden spoon after each addition.
  3. Place dough in a piping bag fitted with a large round tip. Pipe (18) 1 1/2-inch circles. Cover each with a frozen craquelin round circle of dough. Bake for 30-35 minutes or until slightly golden, puffed & firm. Transfer to a wire rack & allow to cool.
Assembly
  1. Poke a hole in each cream puff. Fill a pastry bag with rhubarb custard & gently pipe filling into each cream puff. Serve.

Rice Krispie & Ricotta Strawberry Tart

Crunchy and soft, tasty and light: sweets with rice krispies are easy and quick to make. Rice krispie cereal is an extremely versatile ingredient but it’s in snack and dessert recipes that its taste and texture is most successfully enhanced. There is something about those original crispy, buttery bars that is almost irresistible – especially when they’re freshly made and still slightly warm – and I can see the appeal of trying to translate it into other dishes. That is exactly what I tried to do when I came up with this Rice Krispie & Ricotta Strawberry Tart. The base includes mini marshmallows and rice krispie cereal for a cereal treat-like flavor.

Whether you spell it as rice krispie treats, rice krispy treats, or rice crispy treats, one thing is for sure, whatever you chose to create with them, it will be good.

This dessert is a real winner when it comes to something special that’s easy to prepare, tastes great and has eye appeal all in one.

Print Recipe
Rice Krispie & Ricotta Strawberry Tart
Votes: 1
Rating: 5
You:
Rate this recipe!
Servings
Ingredients
Glaze
Rice Krispie Base
Servings
Ingredients
Glaze
Rice Krispie Base
Votes: 1
Rating: 5
You:
Rate this recipe!
Instructions
Glaze
  1. Place the crushed strawberries, sugar & gel coloring (if using) in a small saucepan. Dissolve the cornstarch in the cold water & stir in as well. Bring to a boil over medium-high heat, stirring frequently. Once boiling, cook 3 minutes more, stirring, then remove to a glass measuring cup to cool completely.
Base
  1. Generously spray a 9-inch pie or springform pan with non-stick cooking spray.
  2. In a saucepan over low heat, melt the butter, marshmallows, vanilla extract & salt, stirring frequently until completely smooth. Remove the saucepan from the heat & gently fold in the crispy rice cereal until the pieces are evenly coated.
  3. Let the mixture cool for 2–3 minutes so it's safe to handle. Lightly butter your hands or a rubber spatula & press the mixture firmly but GENTLY into the bottom of the springform pan. DO NOT OVER-COMPACT THE CRUST, or it will become too hard to slice later.
  4. Place the crust in the refrigerator for about 15 minutes to fully set.
Filling
  1. In a food processor, pulse ricotta to become more of a creamy texture, add powdered sugar. Add vanilla extract & blend well. Set aside.
Fruit
  1. Hull then wash & dry strawberries. Slice about 1/8" thick. Add strawberries to cooled glaze & gently stir with a rubber spatula to completely coat berries.
Assembly
  1. Evenly top crispy rice base with ricotta filling the carefully spoon glazed strawberries over all. Garnish with a few fresh strawberry leaves. Slice & serve.

Cinnamon Roll Rhubarb Bread

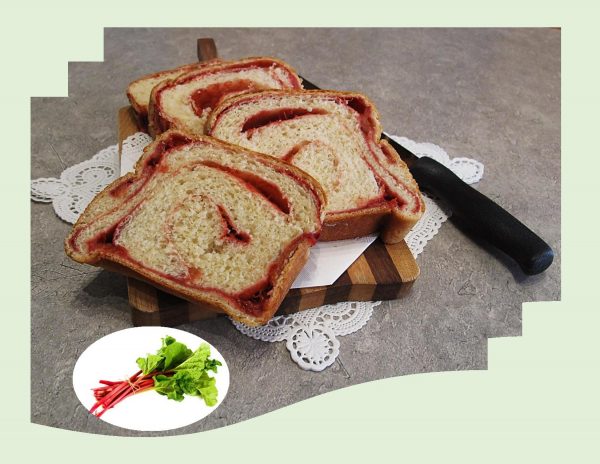
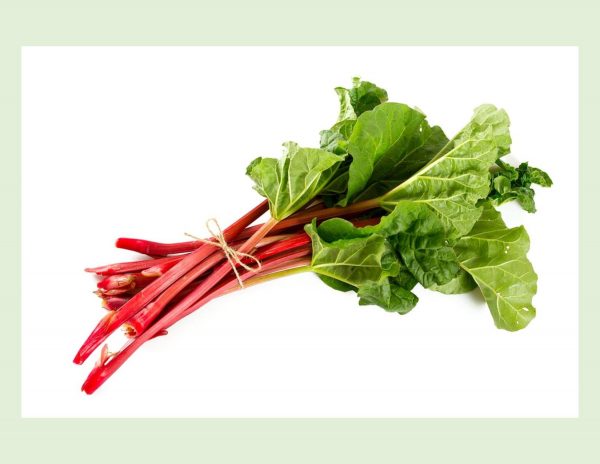
Rhubarb is the rebel of the vegetable world. It looks like celery, tastes like sour candy, its leaves are poisonous and unlike most spring and summer produce, its barely edible raw. With such a feisty personality, its no wonder some are intimidated to cook it.

More than any other fruit or vegetable, rhubarb to me is the sign of the changing season. It is the signal that summer is arriving in those ruby red or speckled green & pink stalks. I snap up what I can in the garden and when I see it at the supermarket. I take all I can and more, slicing and freezing the excess for rhubarb cravings that come in winter.

Year-round, I save rhubarb recipe ideas I hope to make once I get my hands on the first stalks of the season. No summer would be complete without cinnamon rhubarb bread …. still warm from the oven and the heavenly smell of cinnamon in the air!

Print Recipe
Cinnamon Roll Rhubarb Bread
Votes: 2
Rating: 4.5
You:
Rate this recipe!
Servings
Ingredients
Rhubarb/Cinnamon Filling
Glaze - Optional
Servings
Ingredients
Rhubarb/Cinnamon Filling
Glaze - Optional
Votes: 2
Rating: 4.5
You:
Rate this recipe!
Instructions
Rhubarb Filling
  1. In a saucepan, combine all ingredients except vanilla & food color. Heat to medium high & stir occasionally until rhubarb begins to break down completely. Remove from heat, stir in vanilla & food coloring; allow to cool to room temperature.
Dough
  1. In a small dish, combine yeast with lukewarm water & 1 teaspoon of the sugar. Allow to sit for a few minutes until frothy.
  2. In a large bowl, slightly melt butter; cool a couple of minutes then whisk in egg. In another bowl, whisk together flour, salt & remaining sugar. Add yeast mixture to butter mixture, whisking together. Add flour mixture, combine then turn on a floured work surface & knead for about 5 minutes. Dough will be very soft but not sticky.
  3. Lightly grease bowl, place dough ball in it & cover with a towel. Place in a draft-free place & allow to rise for about 20 minutes. Butter a 9 x 5-inch loaf pan; set aside
  4. Turn the dough onto a lightly floured work surface & press down to deflate it. Fold in the two opposite sides to meet in the middle, then fold in the remaining two sides to meet, so that you've formed the dough into a square. Press down to flatten it slightly, then cover loosely and let stand for 10 minutes
  5. With a floured rolling pin, rolling the dough to form a rectangle that's 12 by 22 inches. Make the corners as square as possible. If you're having trouble with the dough shrinking back, pause briefly before trying again.
  6. Spread rhubarb/cinnamon filling over the dough, leaving a 1-inch border around the edges. Now fold the two long sides of the dough in one at a time, so that the meet each other in the middle. Pinch them together gently to seal the seam. Gently roll over the surface with a rolling pin to flatten the folded dough to about 7 by 25 inches.
  7. Starting at the narrow end, roll up the dough, making a thick spiral. When you get to the end, brush a little egg wash on the loaf at the spot where the end will hit. Pinch the end a bit to seal it.
  8. Carefully & gently place the roll, seam side-down in the buttered pan. The roll of dough should nearly fill it. Cover it loosely with plastic wrap & place in a warm, draft-free place to rise for about 25-30 minutes, until almost doubled & about 2 inches above the top of the pan. Meanwhile, adjust the oven racks so that you have one rack one-third up from the bottom of the oven.
  9. Preheat to 350 F.
  10. Lightly brush remaining egg wash over loaf & bake for about 20 minutes. You may need to cover the top loosely with aluminum foil towards the end of baking to prevent over-browning. Bake until the loaf, when removed from the pan, sounds hollow when tapped with your fingertips. Cool on a rack.
Glaze
  1. Make glaze by whisking together 2 Tbsp rhubarb filling, 1 cup powdered sugar, and enough lemon juice to make the glaze pourable (1-2 tbsp should do it). When bread has slightly cooled, drizzle with glaze if desired.

White Chocolate Strawberry Lava Cakes

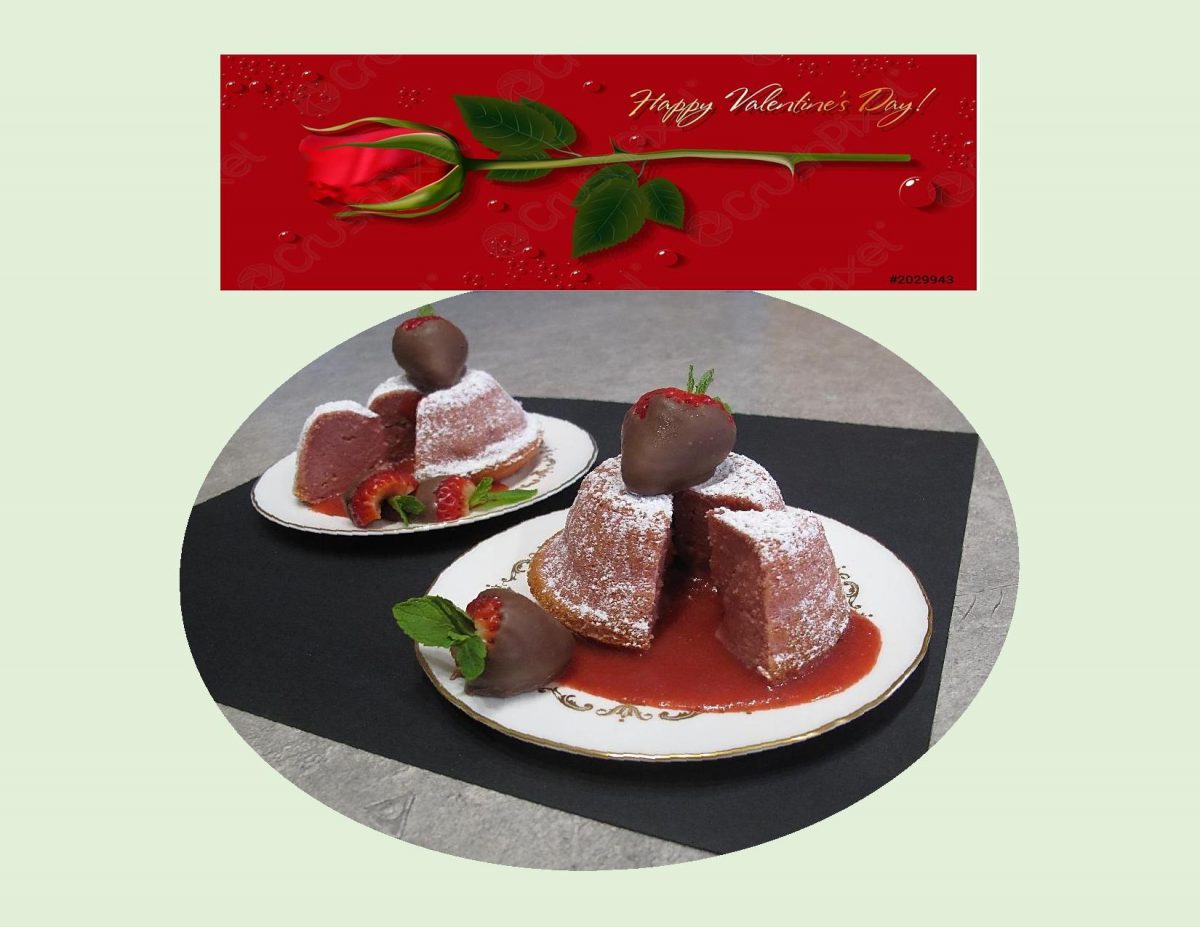
HAPPY VALENTINES DAY!

Chocolate & strawberries not only add a touch of decadence but are the quintessential Valentine treat. These little chocolate lava cakes not only look and taste great, but they’re pretty quick and easy to make. You don’t need any special equipment, just a couple of bowls and a whisk and the recipe only makes two.

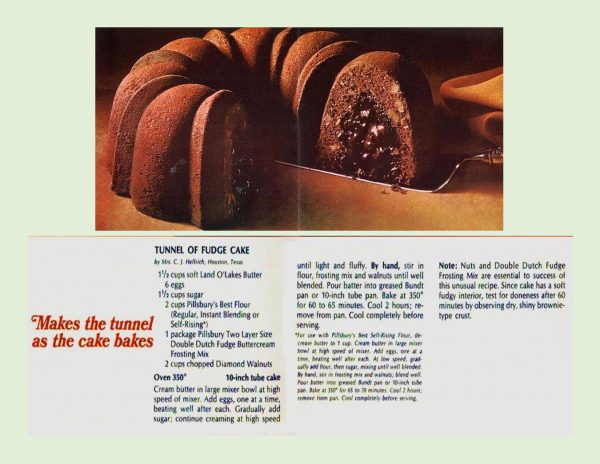
As always, I wondered about where the idea had originated. It seems the first known cake with a deliberately runny center is the ‘Tunnel of Fudge Cake’… the second place winner of a Pillsbury bake-off contest in 1966. Invented by Texan homemaker, Ella Helfrich, the cake is a walnut-flecked Bundt cake with a wet fudge center, which Ella achieved by the pretty ingenious inclusion of powdered frosting. The original recipe called for Pillsbury’s Double Dutch Dry Frosting Mix, which would, in the oven, cook into a runny, pudding like tunnel. The cake recipe became a cultural icon and put Bundt pans, (which had been created in the ’50s but were never particularly popular) in mass demand.

In 1987, a chef in New York city, Jean-Georges Vongerichten, was credited with ‘inventing’ the lava cake but this has been disputed as Jacques Torres, a French chef & chocolatier, says that the lava cake already existed in France before that time. As time has passed there have been many versions adapted to the original idea which mostly include the variations on the fillings. Instead of the chocolate fillings, other flavors like lemon, caramel, strawberry and orange can be found.

I think these White Chocolate Strawberry Lava Cakes will make the perfect ending for our Valentines supper.

Print Recipe
White Chocolate Strawberry Lava Cakes
Votes: 2
Rating: 5
You:
Rate this recipe!
Servings
Ingredients
Strawberry Puree
Servings
Ingredients
Strawberry Puree
Votes: 2
Rating: 5
You:
Rate this recipe!
Instructions
Strawberry Puree
  1. In a blender, process strawberries then press mixture through a fine mesh sieve over a bowl; discard seeds. In a saucepan, melt butter over medium heat. Pour in strained strawberry puree. Allow mixture to come to a boil & bubble until slightly thickened, about 6 minutes.
Cake
  1. Melt white chocolate with butter. You can do it in the microwave with 30 second breaks or over a double boiler. Blend well.
  2. Preheat oven to 375 F. Butter & flour 2 - 6 oz ramekins; set aside.
  3. In a bowl, whisk together eggs, egg white, sugar, salt, vanilla, lemon juice & zest.
  4. Add chocolate/butter mixture then flour; combine. Add strawberry puree & coloring (if using); blend.
  5. Divide batter between the 2 ramekins & bake for about 15-20 minutes. Make sure not to OVERBAKE or you won't have the lava effect.
  6. Sprinkle with powdered sugar & serve with any extra puree if you wish. For an extra treat, top with some dipped strawberries.